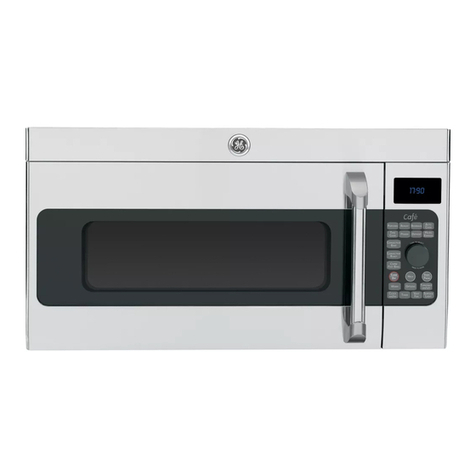
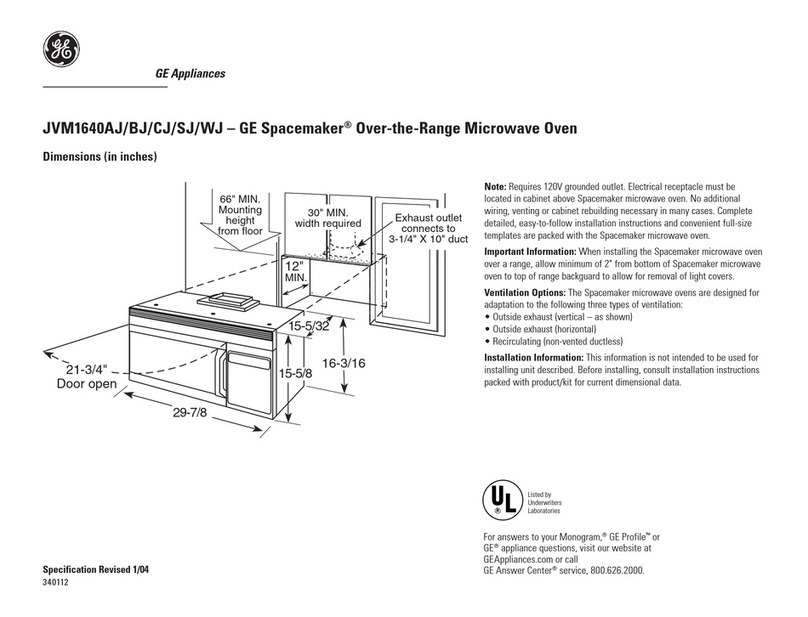
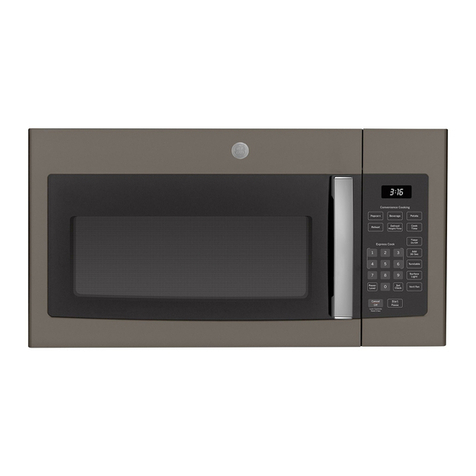
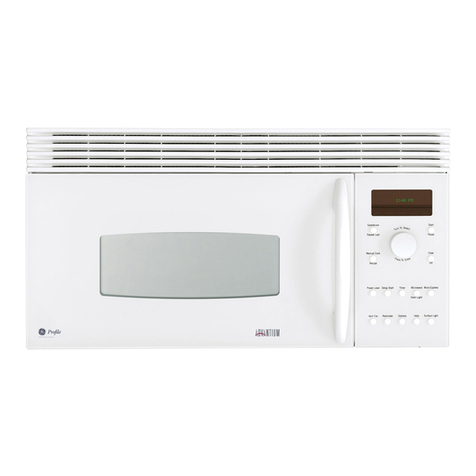
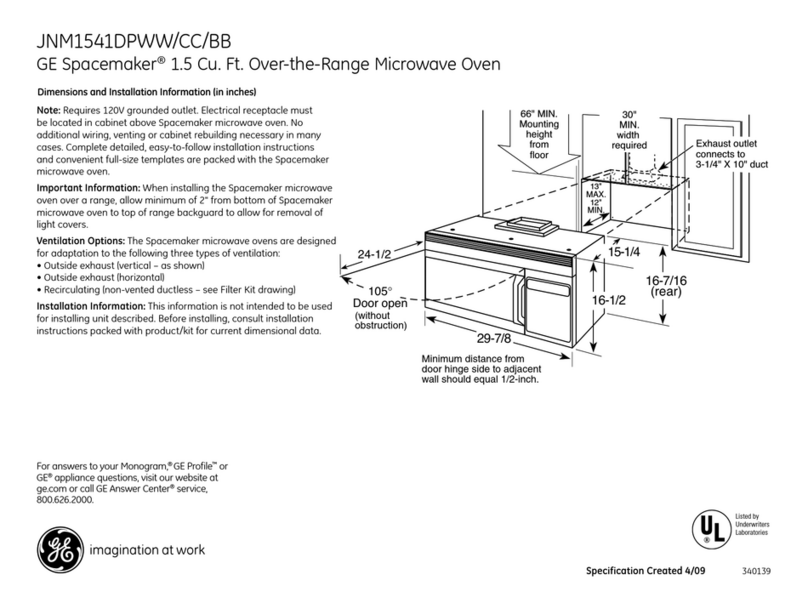
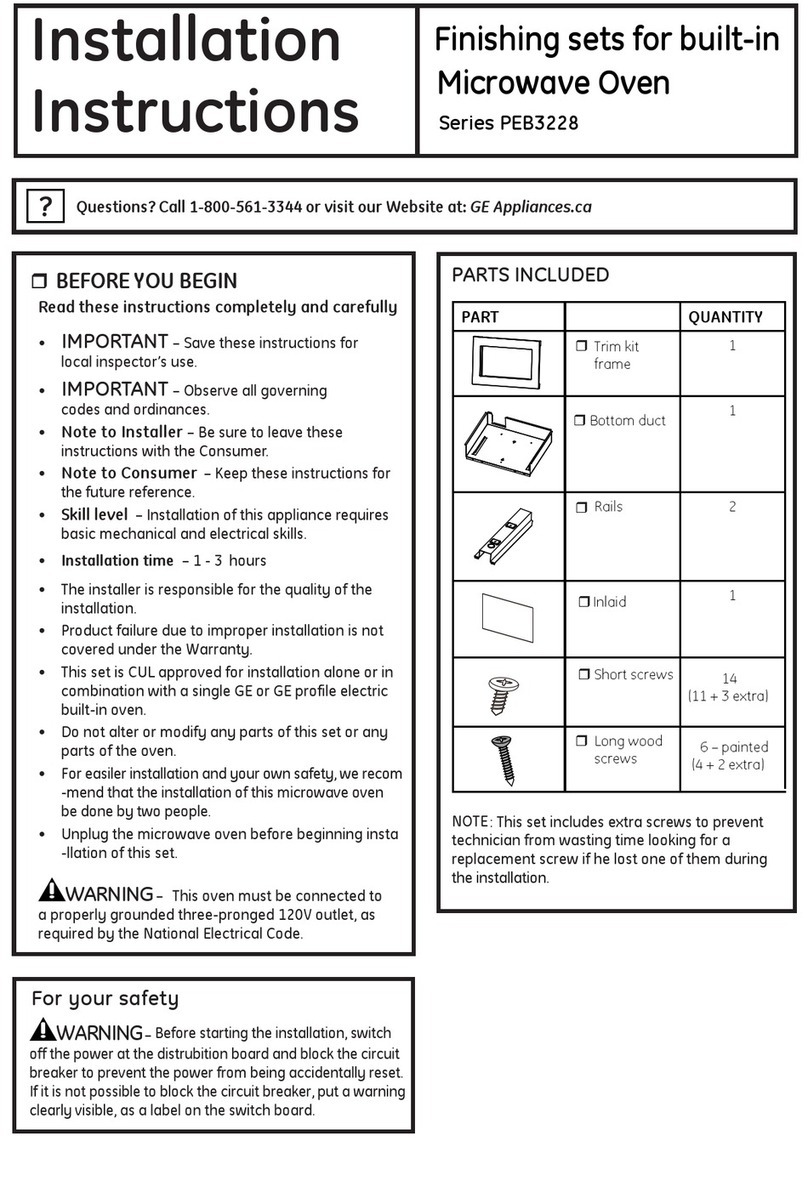
GE Appliances CEB1590 User manual

0GEAppliances.com
01
4,J
0
0
0
0
Safety Information
Arcing ............................ 3
Extension Cords .................. 7
Foods ............................ 4
Grounding Instructions ........... 6
Important Safety
Instructions .................... 2-7
Microwave-Safe Cookware ...... S
Precautions to Avoid Possible Exposure
to Excessive
Microwave Energy ............... 2
Operating Instructions
Best Method of
Cooking Chart .................... 20
Changing Power Level .......... 13
Combination Features .... 10, 18, 19
Convection Features ..... 10, 17, 19
Cooking Options ................. 10
Cookware Tips ................... 19
Features of Your Oven ......... 8, 9
Microwave Terms ............... 23
Other Features ............... 21, 22
Beeper Volume ................. 22
Control Lock-Out ............... 21
Clock ........................... 21
Cooking Complete
Reminder ....................... 21
Display ON/OFF ................ 22
Display Speed .................. 22
OFF/CLEAR ..................... 21
START/PAUSE .................. 21
Timer ........................... 21
Sensor Microwave
Features .................... 14-16
Time and Auto
Microwave Features ...... 9, 11, 12
Write the model and serial
numbers here:
#
#
You can find them on a label when
the door is open.
Care and Cleaning
Inside ............................ 24
Outside ........................... 24
Stainless Steel .................... 25
Troubleshooting Tips
Before You Coil For Service...... 26
Things That Are Normal
With Your Microwave Oven ..... 27
Consumer Support
Consumer Support .............. 32
Warranty ....................... 31
PIFL38211620 49-40658-1
CEB1590
PEBff590
PEBgff59
10-13 GE

IMPORTANT SAFETY INSTRUCTIONS.
READ ALL INSTRUCTIONS BEFORE USING.
AWARNING!
To reduce the risk of burns, electric shock, fire, injury to persons, or exposure to excessive microwave energy:
PRECAUTIONS TO AVOID POSSIBLE EXPOSURE
TO EXCESSIVE MICROWAVE ENERGY
_aJDo Not Attempt to operate this ovenwith the door open _cJ
sinceopen-door operation can result in harmful exposure to
microwave energy. It isimportant not to defeat or tamper
with the safety interlocks.
Do Not Place any object between the ovenfront face and
the door or allow soilor cleaner residueto accumulate on
sealingsurfaces.
Do Not Operate the oven if it isdamaged. Itisparticularly
important that the oven door close properly and that there is
no damage to the:
(1)door (bent)
(2)hingesand latches (brokenor loosened
(3)door sealsand sealingsurfaces,
_d) TheOvenShould Not be adjusted or repaired by anyone
except properly qualified service personnel.
, Read all instructions before using this appliance. When
using electrical appliances, basic safety precautions
should be followed, including the following:
, Readand follow the specific precautions in the PRECAUTIONSTO
AVOIDPOSSIBLEEXPOSURETO EXCESSIVEMICROWAVEENERGY
section above.
, Thisappliance must be grounded. Connect only
to a properly grounded outlet. Seethe GROUNDING
INSTRUCTIONSsectionon page 6.
, Installor locate this appliance only in accordance with the
provided Installation Instructions.
, Thisproduct isto be used3" abovefloor level.
, Becertain to place the front surface of the door 3" or more back
from the countertop edge to avoid accidental tipping of the
appliance in normal usage.
Donot operate this appliance if it hasa damaged power cord
or plug,if it is not working properly or if it has been damaged or
dropped.
, Ifthe power cord isdamaged, it must be replaced by General
ElectricServiceor an authorized serviceagent using a power
cord available from General Electric.
Donot cover or block any openings on the appliance.
, Usethis appliance only for its intended useasdescribed in
this manual. Donot use corrosivechemicals or vapors in this
appliance. Thismicrowave oven isspecificallydesigned to heat,
dry or cook food, and isnot intended for laboratory or industrial
use.
, Thismicrowave oven isnot approved or tested for marine use.
, Toreduce the risk of fire in the oven cavity:
-- Do not overcook food. Carefully attend appliance
when paper,plastic or other combustible materials are placed
insidethe ovenwhile cooking.
-- Removewire twist-ties and metal handlesfrom paper or plastic
containers before placing them inthe oven.
- Do not usethe ovenfor storage purposes.Do not leave paper
products, cooking utensilsor food in the oven when not in use.
- Do not pop popcorn in your microwave oven unless in
a special microwave popcorn accessory or unlessyou use
popcorn labeled for usein microwave ovens.
- If materials insidethe oven ignite,keepthe oven door closed,
turn the oven off and disconnect the power cord, or shut off
power at the fuse or circuit breaker panel. Ifthe door is opened,
the fire may spread.
- Do not usethe SensorFeaturestwice in succession
on the same food portion. Iffood isundercooked after the first
countdown, useTIMECOOKfor additional cooking time.
-- Do not use the oven to dry newspaper.
When using the convection or combination cooking functions,
both the outside and insideof the oven will become hot. Always
use hot pads to remove containers
of food and accessoriessuch asthe oven shelf.
Thermometer--Do not use regular cooking or oven
thermometers when cooking by microwave or combination. The
metal and mercury in these thermometers could cause arcing
and possibledamage to the oven. Do not usea thermometer in
food you are microwaving unless the thermometer isdesigned
or recommended for usein the microwave oven.
Donot clean with metal scouring pads. Piecescan burn
off the pad and touch electrical parts involving riskof electric
shock.
2 SAVE THESE INSTRUCTIONS

GEAppliances.com
IMPORTANT SAFETY INSTRUCTIONS.
When using Convection or Combination functions, both outside
(]nd insidethe oven will become hot. AIw(]ysusehot p(]dsto
remove cont(]iners of food (]nd (]ccessoriessuch (isthe oven
shelf.
,Thermometer--Do not use regul(]rcooking or oven
thermometers when cooking by microw(]ve. Themet(]l (]nd
mercury in these thermometers could cause urcing (]nd
possible d(]m(]geto the oven. Do not use(] thermometer in food
you (]re microw(]ving unlessthe thermometer isdesigned or
recommended for use inthe microw(]ve oven.
, Donot cle(]n with met(]l scouring p(]ds. Piecesc(]n burn off the
p(]d (]nd touch electric(]l p(]rts involving riskof electric shock.
, Donot store (]ny m(]teri(]ls,other th(]n our recommended
(]ccessories,in this oven when not in use.
, Donot store this (]ppli(]nceoutdoors. Donot usethis product
ne(]rw(]ter-for ex(]mple, in (]wet b(]sement,ne(]r(] swimming
pool, ne(]r(] sinkor in simil(]r Ioc(]tions.
, Keeppower cord (]w(]y from he(]ted surfaces.
, Donot immerse power cord or plug in w(]ter.
, Donot block or cover (]ny openings on the (]ppli(]nce.
, Donot let power cord h(]ng over edge of t(]ble or counter.
, Thismicrow(]ve isnot (]pproved or tested for m(]rine use.
, Forcountertop inst(]ll(]tion:
-- Do not store (]nything directly on top of the microw(]ve oven
surface when the microw(]ve oven isin oper(]tion.
, Forbuilt-in inst(]ll(]tionwith (]pproved trim kit:
- Do not mount this (]ppli(]nce over(] sink.
- Do not store (]nything directly on top of the microw(]ve oven
surface when the microw(]ve oven isin oper(]tion.
- Do not mount this (]ppli(]nce overor ne(]r (]ny portion of (] he(]ting
or cooking (]ppli(]nce.
iiiiiiiiii[_}_
iiiiiiiiii[_}_
iiiiiiiiii[i}_
iiiiiiiiii[_}_
iiiiiiiiii[_}_
iiiiiiiiii[_}_
iiiiiiiiii[_}_
iiiiiiiiii[_}_
Do not oper(]te (]ny he(]ting or cooking (]ppli(]ncebene(]th this
microw(]ve oven.
Usethis (]ppli(]nceonly for its intended use (]sdescribed in this
m(]nu(]l.
Do not usecorrosive chemic(]ls or v(]pors in this (]ppli(]nce.
Thismicrow(]ve oven isspecific(]llydesigned to he(]t,dry or cook
food, (]nd isnot intended for I(]bor(]toryor industri(]l use.
It is import(]nt to keepthe (]re(]cle(]n where the door se(]ls
(]g(]inst the microw(]ve. Useonly mild, non-(]br(]sive detergents
(]ppliedwith (]cle(]n sponge or soft cloth. Rinsewell.
This(]ppli(]ncemust only be serviced by qu(]lified service
personnel.Cont(]ct ne(]rest (]uthorized servicef(]cilityfor
ex(]min(]tion, rep(]ir or (]djustment.
Aswith (]ny (]ppli(]nce,close supervision isnecess(]ry
when usedby children.
Someproductssuch (]swhole eggs (]ndse(]ledcont(]iners- for
ex(]mple,closedj(]rs-(]re (]bleto explode(]nd shouldnot be
he(]ted inthis microw(]veoven.Suchuseof the microw(]ve oven
could resultin injury.
Do not use p(]perproducts in ovenwhen (]ppli(]nce isoper(]ted in
(]ny cooking mode except microw(]ve only.
,&WARNING!
ARCING
If you see arcing, press the OFF/CLEAR button and correct the problem.
Arcing isthe microw(]ve term for sp(]rks inthe oven.Arcing
isc(]used by:
Themet(]l shelf not inst(]lledcorrectly so it
touches the microw(]ve w(]ll.
ivlet(]lor foil touching the sideof the oven.
Turnt(]ble ring support not inst(]lledcorrectly.
Foilnot molded to food (upturned edges(]ct
like(]ntenn(]s).
ivlet(]l,such (]stwist-ties, poultry pins,or gold-rimmed
dishes,in the microw(]ve.
Recycledp(]per towels cont(]ining sm(]ll met(]l pieces
being used inthe microw(]ve.
SAVE THESE INSTRUCTIONS 3

IMPORTANT SAFETY INSTRUCTIONS.
READ ALL INSTRUCTIONS BEFORE USING.
AWARNING!
FOODS
iiiiiiiiiiii_i_
iiiiiii#_i_
iiiiiii#_i_
Donot pop popcorn in your microwave oven unless in a
special microwave popcorn accessory
or unlessyou usepopcorn labeled for use in microwave
ovens.
Donot boil eggs in a microwave oven. Pressurewill
build up insideegg yolk and will cause itto burst,
possiblyresulting in injury.
Operating the microwave with no food insidefor more
than a minute or two may cause damage to the oven
and could start a fire. It increasesthe heat around the
magnetron and can shorten the lifeof the oven.
Foodswith unbroken outer "skin" such as potatoes, hot
dogs, sausages,tomatoes, apples, chicken liversand
other giblets,and egg yolks should be piercedto allow
steam to escape
during cooking.
SUPERHEATED WATER
Liquids,such as water, coffee or tea, are able to
be overheated beyondthe boiling point without
appearing to be boiling.Visiblebubbling or boiling when
the container isremoved from the microwave oven is
not always present.THISCOULDRESULT
INVERYHOTLIQUIDSSUDDENLYBOILINGOVERWHEN
THECONTAINERISDISTURBEDORA SPOONOROTHER
UTENSILISINSERTEDINTOTHELIQUID.
Toreduce the risk of injuryto persons:
Do not overheat the liquid.
Stirthe liquid both before and halfway through heating
it.
iiiiiii#_i_
iiiiiii#_i_
iiiiiii#_i_
iiiiiii#_i_
iiiiiii#_i_
Foodscooked in liquids(suchas pasta) may
tend to boil more rapidly than foods containing less
moisture. Should this occur,refer to the
Cureand cleaning of the microwave oven section
for instructions on how to clean the insideof
the oven.
Avoid heating baby food in glassjars, evenwith
the lid off. Hake sure all infant food isthoroughly
cooked.Stirfood to distribute the heat evenly.
Becareful to prevent scalding when warming formula.
Thecontainer may feel cooler than the formula reallyis.
Alwaystest the formula beforefeeding the baby.
Don'tdefrost frozen beverages in narrow-necked
bottles (especiallycarbonated beverages).Evenifthe
container isopened,pressure can build up.Thiscan
cause the container to burst, possiblyresulting in injury.
Hotfoods and steam can cause burns. Becareful when
opening any containers of hot food, including popcorn
bags, cooking pouches and boxes.To prevent possible
injury, direct steam away from hands and face,
Donot overcook potatoes. They could dehydrate and
catch fire,causing damage to your oven.
Cook meat and poultry thoroughly-meat to at
least an INTERNALtemperature of 160°Fand poultry to
at least an INTERNALtemperature
of 180°F.Cooking to these temperatures usually
protects against foodborne illness.
- Do not usestraight-sided containers with
narrow necks.
- After heating, allow the container to stand in
the microwave oven for a short time before removing
the container.
- Useextreme care when inserting a spoon or other
utensil intothe container.
4 SAVE THESE INSTRUCTIONS

GEAppliances.com
MICROWAVE-SAFE COOKWARE
Do not operate the oven without the turntable and the turntable support seated and in place. The turntable
must be unrestricted so it can rotate.
Make sure oil cookwore used in your microwave oven is suitable for microwoving. Most gloss casseroles,
cooking dishes, measuring cups, custard cups, pottery or china dinnerware which does not have metallic trim
or glaze with a metallic sheen can be used. Some cookware is labeled "suitable for microwaving."
Ifyou are not sure ifa dish is
microwave-safe,
usethis test: Placein the oven
both the dishyou are testing and
a glass measuring cupfilled with
! cup of water-set the measuring
cup either in or next to the dish.
Microwave 30-45 seconds at high.
How to test: for a
microwave-safe dish.
Ifthe dishheats, it should not be usedfor microwaving.
Ifthe dishremains cool and only the water in
the cup heats,then the dish ismicrowave-safe.
, Oversizedfood or oversizedmetal cookware should not
be usedin a microwave/convection oven because they
increase the risk of electric
shockand could cause a fire.
, Sometimesthe ovenfloor, turntable and walls
can become too hot to touch. Becareful touching the
floor, turntable and walls during and after cooking.
, Ifyou usea meat thermometer while cooking, make
sure it issafe for usein microwave ovens.
, Donot use recycled paper products. Recycledpaper
towels, napkins and waxed paper can contain metal
flecks which may cause arcing
or ignite. Paperproducts containing nylon
or nylon filaments should be avoided, as they
may also ignite.
, Somestyrofoam trays (likethose that meat is packaged
on) havea thin strip of metal embedded in the bottom.
When microwaved, the metal can burn the floor of the
oven or ignite a paper towel.
, Useofthe shelf accessory:
- Removethe shelf from the oven when
not in use.
- Use pot holderswhen handling the shelf and
cookware. They may be hot.
- Be surethat the shelf ispositioned properly insidethe
oven to prevent product damage.
- Do not cover the shelf or any part of the ovenwith
metal foil.Thiswill cause overheating of
the microwave/convection oven.
, Donot useyour microwave/convection ovento dry
newspapers.
Not all plasticwrap issuitable for use in microwave
ovens.Checkthe package for proper use.
, Papertowels, waxed paper and plastic wrap can
be usedto cover dishes in order to retain moisture
and prevent spattering. Be sureto vent plasticwrap so
steam can escape.
, Donot use paper products when the microwave/
convection oven isoperated in the convection or
combination mode.
Cookware may become hot because of heat transferred
from the heated food. Pot holders
may be needed to handle the cookware.
When microwaving "Bailable" cooking pouches and
tightly closed plastic bags should be slit,piercedor
vented as directed by package. Ifthey are not, plastic
could burst during or immediately after cooking, possibly
resulting in injury.Also,plastic storage containers should
be at least partially uncovered because they form a tight
seal.When cooking with containers tightly covered with
plasticwrap, remove covering carefully and direct steam
away from handsand face.
Usefoil only asdirected in this manual.
TVdinners may be microwaved in foil trays lessthan
3/4" high;remove the top foil cover and return the tray
to the box. When using foil in the microwave oven, keep
the foil at least !" away from the sides of the oven.
Plasticcookware-Plastic cookware designed for
microwave cooking isvery useful,but should be used
carefully. Evenmicrowave-safe plastic may not be
as tolerant of overcooking conditions asare glass or
ceramic materials and may soften or char if subjected to
short periods of overcooking.
In longer exposuresto overcooking,the food
and cookware could ignite.
Followthese guidelines:
U se microwave-safe plastics only and use
them in strict compliance with the cookware
manufacturer's recommendations.
_Do not empty
microwave containers.
IDa not childrento use plastic cookware
permit
without complete supervision.
SAVE THESE INSTRUCTIONS s

IMPORTANT SAFETY INFORMATION.
READ ALL INSTRUCTIONS BEFORE USING.
AWARNING!
GROUNDING INSTRUCTIONS
WARNING:/mproperuseof the grounding plug can result in a risk of electric shock.
This appliance must be grounded. Inthe event of an Ifthe outlet isa standard 2-prong wall outlet, it isyour
electricalshort circuit, grounding reduces the riskof personal responsibilityand obligation to
electric shockby providing an escapewire for the electric haveit replacedwith a properly grounded 3-prong wall
current, outlet.
This appliance isequipped with a power cord having a
grounding wire with a grounding plug.Theplug must
be plugged into an outlet that isproperly installed and
grounded.
Consulta qualified electrician or servicetechnician
ifthe grounding instructions are not completely
understood, or ifdoubt exists asto whether the appliance
isproperly grounded.
Donot under any circumstances cut or remove the third
(ground) prong from the power cord.
Donot usean adapter plug with this appliance,
Donot usean extension cord with this appliance, If the
power cord istoo short, have a qualified electrician or
servicetechnician install an outlet near the appliance.
(SeeEXTENSIONCORDSsection.)
Forbest operation, plug this appliance into its
own electrical outlet to prevent flickering of lights,blowing
of fuse or tripping of circuit breaker.
6SAVE THESE INSTRUCTIONS

GEAppliances.com
EXTENSION CORDS
A short power supply cord isprovided to reduce the risksresulting from becoming ent(]ngled in or
tripping over(] longer cord.
Extensioncords m(]y be usedifyou (]re c(]reful in usingthem.
If (]n extensioncord isused-
U Them(]rked electric(]l r(]ting ofthe extension cord should be (]t le(]st(]s (]s the electric(]l r(]ting
gre(]t
of the (]ppli(]nce;
_The extensioncord must be (]grounding-type 3-wire cord (]nd it must be plugged into (] 3-slot outlet;
Theextensioncord should be (]rr(]nged so th(]t itwill not drape over the countertop or t(]bletop
where it c(]n be pulled on by children or tripped over unintention(]lly.
Ifyou use(]n extension cord, the interior light m(]y flicker (]ndthe blower sound m(]y v(]rywhen the microw(]ve oven is
on.Cooking times m(]y be longer, too.
NOTICE--PACEMAKERS
Host p(]cem(]kers(]re shieldedfrom interference from electronic products, including microw(]ves.
However, p(]tients with p(]cem(]kers m(]ywish to consult their physici(]nsif they h(]ve concerns.
READ AND FOLLOW THIS SAFETYINFORMATION CAREFULLY.
SAVE THESE INSTRUCTIONS

About the features of our oven.
Throughout this manual, features and appearance may vary from your model.
1000 Watts
|
|0 0
Featuresof the Oven
Door Latch Release Handle.
Door Latches.
Window with Metal Shield.Screenallows cooking
to be viewed while keeping
microwaves confined in the oven.
Control Panel and Selector Dial.
Removable Turntable. Turntable and support must
be in place when usingthe oven.Theturntable may
be removed for cleaning.
Removable Turntable Support. Theturntable
support must be in placewhen using
the oven.
Shelf. Usewhen convection or combination
cooking. (Donot usewhen microwave cooking.)
Optional Accessories:
AvailableatextracostfromyourGEsupplier.
Choosethe appropriate Installation Kit belowto convert
this ovento a built-in wall oven.
For 27" installations:
Model Kit
PEB!590DMBB JX!527DMBB
PEB!590DMWW JX1527DMWW
PEB9159SFSS CX1527SSSS
CEB1590SSSS CX1527SSSS
For 30" installations:
Model Kit
PEB!590DMBB JX!530DMBB
PEB1590DMWW JX1530DMWW
PEB9159SFSS CX1530SSSS
CEB1590SSSS CX1530SSSS
NOTE:Ovenventfs)and ovenlight are located on the inside
walls of the microwave oven.Therating plate is located on
the face of the oven(visiblewhen the door isopen).
8

About the cooking features ofyour
microwave/convection oven. GEAppliancescom
You can cook by microwave, convection or combination.
._M_ATION
CONVECTION
O--o
T_ME COOK
0
EXPRESS
0
START OFF
©©
PAUSE O-EAR
POWER
0
SENSOR COOKING
POPCORN REHEAT BEVERAGE COOK
0000
OPTIONS CLOCK TIMER
000
Selector Dial
CookingControls
Microwave Cooking Time and Auto Features
Press Turn and push dial to enter
TIMECOOK Amount of cooking time
Press once or twice
EXPRESScook/Add 30sec. Starts immediately!
DEFROST
Press once (Time) Amount of defrosting time
Press twice (Auto) Food weight
POWERlevel Powerlevel i-i0
Sensor Features
Press Turn and push dial to enter Option
POPCORN Starts immediately! more/less time
Press once or twice
REHEAT Startsimmediately! more/less time
BEVERAGE Startsimmediately!
COOK Foodtype 1-7 more/less time
Convection Cooking
Press Turn and push dial to enter
CONVECTIONcook Oven temperature and cook time
Combination Cooking
Press Turn and push dial to enter
COMBINATIONcook Oven temperature and cook time

Available cooking options.
Do not use the shelf when
microwave cooking.
Microwave Cooking
Your ovenuses microwave energy to cook by a set time or weight, or automatically
by sensor.
Sensormicrowave works by detecting the increasing humidity releasedduring cooking.
Theoven automatically adjusts the cooking time to various types and amounts of food.
Cooking Method
Microwave energy
is distributed evenly
throughout the oven
for thorough, fast
cooking of food.
Heat Source
Microwave energy.
Heat Conduction
Heat produced within
food by instant energy
penetration.
Benefits
Fast, high efficiency
cooking. Oven and
surroundings do
not get hot.
Easy clean-up.
Always use the shelf when
convection cooking.
Convection Cooking
During convection cooking,a heating element isusedto raisethe temperature of the air insidethe oven.
Any oven temperature from 225°Fto 450°Fmay be programmed. A fan gently circulates this heated
air throughout the oven, overand around the food, producing golden brown exteriors and rich moist
interiors.
Becausethe heated air iskept constantly moving, not permitting a layer of cooler air to developaround
the food; some foods cook faster than in regular oven cooking.
Cooking Method
Hot air circulates
around food to
produce browned
exteriors and seal
in juices.
Heat Source
Circulating
heated air.
Heat Conduction
Heat conducted
from outside of food
to inside.
Benefits
Aids in browning
and seals in flavor.
Cooks some foods
faster than regular
ovens.
Combination Cooking
Your oven also offersthe option of combination cooking, using microwave energy along with
convection cooking.You cook with speedand accuracy, while browning and crisping to perfection.
Always use the shelf when
combination cooking.
Cooking Method
Microwave energy
and convection heat
combine to cook
foods in up to
one-half the time
of regular ovens,
while browning and
sealing in juices.
Heat Source
Microwave energy
and circulating
heated air.
Heat Conduction
Food heats from
instant energy from
penetration and
heat conducted from
outside of food.
Benefits
Shortened
cooking time from
microwave energy,
plus browning
and crisping from
convection heat.
10

About the time and auto microwave features. GEAppliances.com
TiMECOOK Time Cook
Time Cook I
TURN TO SELECT
PUSH TO ENTER Allowsyou to microwave for any time between 15
seconds and 95 minutes.
Power level 10 (High)isautomatically set,
but you may change it for more flexibility.
U Pressthe TIMECOOKbutton.
Turnthe dial to set the cook time and press the
dial to enter.
i Change power level ifyou don't want full power.
(PressPOWER.Turn the dial to select. Pressthe
dial to enter.)
EI_Pressthe START/PAUSEbutton to start cooking.
You may open the door during Time cook
to check the food. Closethe door and pressSTART/
PAUSEto resume cooking.
Time Cook II
Letsyou change power levelsautomatically during
cooking. Here'show to do it:
U Pressthe TIMECOOKbutton.
_Turn the dial to set the first cook time and press
the dial to enter.
i Changethe power levelifyou don't want full
power. (PressPOWER.Turnthe dial to select.
Pressthe dial to enter.)
EmPress the TIMECOOKbutton again.
Turnthe dial to set the second cook time and
pressthe dial to enter.
_ Changethe power levelifyou don't want full
power. (PressPOWER.Turnthe dial to select.
Pressthe dial to enter.)
i Press to start cooking.
the START/PAUSEbutton
Atthe end of Time Cook I, Time Cook II counts
down.
EXPRESS
0
TURN TO SELECT
PUSH TOENTER
0
Express Cook
Thisisa quick way to set and start cooking in 30 secondblockseachtime the EXPRESSbutton
ispressed.
Thepower levelwill automatically be set at 10 and the ovenwill start immediately.
Thepower levelcan be changed astime iscounting down. Pressthe POWER button,
turn the dial and pressto enter.
EXPRESS
0Add 30 Seconds
Each time the EXPRESS button is pressed, itwilladd 30 seconds to any cooking time counting down,
until the maximum cooking time is reached.
11

About the time and auto microwave features.
DEFROST
0
TURN TO SELECT
PUSH TOENTER
Time Defrost
Use Time Defrost to defrost for a selected length
of time.
U Press the DEFROST button.
Turn the dial to select the time you want. Press
the dial to enter.
i ress the START/PAUSE button to start
defrosting.
_JTurn the food over if the oven signals TURN
FOOD OVER.
Powerlevelisautomatically set at 3,but can be
changed. You can defrost small items quickly by
raising the power levelafter entering the time.
Power level 7 cuts the total defrosting time in
about half; power level 10 cuts the total time to
approximately 1/3. However,food will need more
frequent attention than usual.
A dull thumping noisemay be heard during
defrosting. This isnormal when oven isnot
operating at High power.
Defrosting Tips
Foodsfrozen in paper or plasticcan be defrosted
in the package.Closedpackagesshould be
slit,pierced or vented AFTERfood haspartially
defrosted.Plasticstorage containers should be
partially uncovered.
Family-size,prepackaged frozen dinnerscan be
defrosted and microwaved. Ifthe food isin a foil
container,transfer itto a microwave-safe dish.
Foodsthat spoileasily should not be allowed to
sit out for more than one hour after defrosting.
Roomtemperature promotes the growth of
harmful bacteria.
Formore even defrosting of larger foods, such
asroasts, useAuto Defrost. Besure large meats
are completely defrosted before cooking.
When defrosted, food should be cool
but softened in all areas. If still slightly icy,return
to the microwave very briefly,or let it stand a
few minutes.
DEFROST
0
TURN TO SELECT
PUSH TO ENTER
Auto Defrost
UseAuto Defrost for meat, poultry and fish.Use
Time Defrost for mostother frozen foods.
Auto Defrost automatically setsthe defrosting
times and power levelsto giveeven defrosting
results for meats, poultry and fish.
Removemeat from package and place
on microwave-safe dish.
U Pressthe DEFROSTbutton twice.
Turnthe dial to the food weight,
using the ConversionGuide at right.
Forexample, dial 1.2for 1.2pounds
(1 pound,:3oz.).Pressthe dial to enter.
i ressthe START/PAUSEbutton to start
defrosting.
_J_Turnthe food over if the oven signals TURN
FOODOVER.
Removedefrosted meat or shieldwarm areas
with small pieces of foil.
After defrosting, most meats need to stand S
minutes to complete defrosting. Large roasts
should stand for about
:30minutes.
Conversion Guide
If the weight of foodisstated inpounds and
ounces,the ouncesmust be convertedto tenths (.!)
ofa pound.
Weight of Food Enter Food Weight
in Ounces (tenths of a pound)
!-2 .!
:3 .2
4-5 .:3
6-7 .4
8 .5
9-10 .6
11 .7
12-1:3 .8
14-15 .9
12

About changing the power level. GEAppliances.com
POWER
0
TURN TO SELECT
PUSH TO ENTER
Thepower levelmay be entered or
changed immediately after entering the time for
Time Cook, Time Defrost or ExpressCook.The
power levelmay also be changed during time
countdown.
U irst,follow directions for Time Cook, Time
Defrost or Express Cook.
ImPress the POWERbutton.
Turnthe dial clockwise to increase and
counterclockwise to decrease the power level.
Pressthe dial to enter.
ImPress the START/PAUSEbutton to start cooking.
Variable power levelsadd flexibility to microwave
cooking.Thepower levelson the microwave oven
can be compared to the surface units on a range.
Eachpower levelgivesyou microwave energy
a certain percent of the time.Power level 7is
microwave energy 70% of the time. Power level 3 is
energy 30% of the time. Mostcooking will be done
on High [power level10)which givesyou 100%
power. Power level 10 will cook faster but food
may need more frequent stirring, rotating or turning
over.A lower setting will cook more evenlyand need
lessstirring or rotating of the food. Somefoods may
have better flavor,texture or appearance ifone of
the lower settings isused.Usea lower power level
when cooking foods that havea tendency
to boilover, such asscalloped potatoes.
Restperiods(when the microwave energy cycles
off) givetime for the food to "equalize"or transfer
heat to the insideof the food. An example of this is
shown with power level 3-the defrost cycle.
If microwave energy did not cycle off,the outside
of the food would cook before the insidewas
defrosted.
Hereare some examplesof usesfor various power
levels.
High 10. Fish,bacon, vegetables, boiling liquids.
Med-High 7: Gentlecooking of meat and poultry;
baking casseroles and reheating.
Medium S: Slowcooking and tenderizing
for stews and lesstender cuts of meat.
Low 2 or 3: Defrosting;simmering; delicate sauces.
Worm 1: Keepingfood warm; softening butter.
13

About the sensor microwave features.
Covered
Humidity Sensor
TheSensor Features detect the increasing humidity releasedduring cooking.The oven automatically
adjuststhe cooking time to various types and amounts of food.
Do not usethe Sensor Featurestwice in successionon the some food portion-it may result in severely
overcooked or burnt food. If food is undercooked after the countdown, useTime Cookfor additional
cooking time.
The proper containers and covers ore essentialfor best sensor cooking.
Always usemicrowave-safe containers and cover them with lidsor vented plastic wrap. Never use
tight sealing plastic containers-they con prevent steam from escaping and cause food to overcook.
Vented
Besure the outside of the cooking containers and the insideof the microwave oven ore dry before
placing food in the oven. Beadsof moisture turning into steam con mislead the sensor.
Dry off dishes so they don't
mislead the sensor.
COOK
0Cook
Becausemost cooking containers must be covered during Cook,this feature isbest with foods that you
wont to steam or retain moisture.
NOTE:Useof the metal shelf with Cook isnot recommended.
Recommended Foods
A wide variety of foods including meats, fish and vegetables can be cooked using
this feature.
rFoods not recommended
Foodsthat must be cooked uncovered,foods that require constant attention, foods that require addition
of ingredients during cooking and foods calling for a dry look or crisp surface after cooking should not be
cooked usingthis feature. It is best to Time Cook them.
14

GEAppliances.com
COOK
©
TURN TO SELECT
PUSH TO ENTER
NOTE:Do not usethis
feature twice in succession
on the same food
portion-it may result in
severely overcooked or
burnt food.
Cook
U lace covered food in the oven and close the
door. Pressthe COOKbutton. SELECTFOOD
TYPEappears in the display.
Turnthe dialto the desiredfood type.Pressto
enter.
Seethe SensorFoodTypeGuide below for specific
foods and instructions,
Theoven starts immediately.
NOTE:If the door was open while the control was
being set, closethe door and pressthe START/
PAUSEbutton to begin cooking.
Donotopentheovendoorbeforethecountdowntime
isdisplayed-steamescapingfromtheovencanaffect
cookingperformance.Ifthedoorisopened,closethedoor
andpressSTART/PAUSEimmediately.
If ground meat was selected,the oven may signal
you to drain and stir the meat. Open the door, drain
the meat and close the door. Pressthe START/
PAUSEbutton if necessary to resume cooking
If food isundercooked after the countdown use
Time Cook for additional cooking time.
Sensor Food Type Guide
Servings Serving Size
Chicken Pieces 1 to 4 2 to 8
pieces
Fish 1to 4 4 to 16 oz.
Ground Meat - 112to 2 Ibs.
(Beef, Pork,Turkey,,
Potatoes 1to 4 112to 2 Ibs.
Conned Vegetables i to 4 4 to 16 oz.
Fresh Vegetables i to 4 4 to 16 oz.
Frozen Vegetables i to 4 4 to 16 oz.
Cooking Tips
, When oven signals and countdown time is
displayed,the door may be opened
for stirring, turning or rotating food.
Toresume cooking, closethe door and press
START/PAUSE.
, Hatch the amount of food to the sizeof
container. Fillcontainers at least 1/2 full.
, Besure outside of container and insideof oven
are dry.
, After completion ofCook cycle,iffood needs
additional cooking, returnfood to oven and use
Time Cook to finish cooking.
How to Adjust the Oven's Automatic
Settings for aShorter or Longer Cook Time (Not
available for all food types)
Tosubtract 10% from the automatic
cooking time:
Immediately after the oven starts,turn the dial
counterclockwise and pressto enter.
To add :1_0%to the automatic cooking time:
Immediately after the oven starts,turn the dial
clockwise and pressto enter.
Comments
Use oblong, square or round dish.
Cover with wax paper.
Use oblong, square or round dish.
Cover with vented plastic wrap.
Use round casserole dish. Crumble meat
into dish. Cover with wax paper or vented
plastic wrap.
Pierceskin with fork.
Cluster potatoes in center of oven floor.
Use microwave-safe casserole or bowl.
Cover with lid or vented plastic wrap.
Use microwave-safe casserole or bowl.
Add 2 tablespoons water for each serving.
Cover with lid or vented plastic wrap.
Use microwave-safe casserole or bowl.
Follow package instructions for adding
water. Cover with lid or vented plastic wrap.
15

About the sensor microwave features.
POPCORN Popcorn
0
Use only with prepackaged
microwave popcorn weighing
1.5 to 5.5 ounces.
NOTE:Do not use this
feature twice in succession
on the same food portion-
it may result in severely
overcooked or burnt food.
To use the Popcorn feature:
U ollow package instructions, using
Time Cook ifthe package islessthan
1.5ounces or larger than 3.5ounces.Place
the package of popcorn in the center of the
microwave.
ImPress the POPCORN button twice. The
once or
oven starts immediately.
Pressonce for a regular size(3.0to 3.5oz.)bag of
popcorn.
Presstwice for a snack size(1.5to 1.75oz.)bag of
popcorn.
Ifyou open the door while POPCORNisdisplayed,
an error messagewill appear.Closethe door, press
OFF/CLEARand
begin again.
Iffood isundercooked after the countdown, use
Time Cook for additional cooking time.
How to Adjust the Automatic Popcorn Setting to
Provide a Shorter or Longer Cook Time
Ifyou find that the brand of popcorn you use
underpops or overpops consistently,
you can add or subtract 20-30 secondsto
the automatic popping time.
Tosubtract time:
Immediately after the oven starts,turn the dial
counterclockwise for 20 seconds (-)lesscooking
time. Pressto enter. Turn again to reduce cooking
time another 10 seconds
(--)total 30 seconds lesstime. Pressto enter.
Toadd time:
Immediately after the oven starts,turn the dial
clockwisefor an extra 20 seconds(+)cooking
time. Pressto enter. Turn again to add another !0
seconds(++)total 30 secondsadditional time. Press
to enter.
REHEAT
0
NOTE:Do not use this
feature twice in succession
on the same food portion-
it may result in severely
overcooked or burnt food.
Reheat
TheReheat feature reheats servingsof previously
cooked foods or a plate of leftovers.
UPlacethe cup of liquid or covered
food in the oven. PressREHEATonce, twice or
three times. Theoven starts immediately.
Pressonce for 1/2 to ! full cup.
Presstwice for ! to 2 full cups,
Pressthree times for a plate of leftovers.
Theoven signals when steam is
sensed and the time remaining
p'_ begins counting down.
Do not open the oven door until time iscounting
down. If the door isopened,
close it and pressSTARTimmediately.
After removing food from the oven,stir, ifpossible,
to evenout thetemperature. Reheatedfoods may
have wide variations in temperature. Someareasof
food may be extremely hot.
If food is not hot enough after the countdown, use
Time Cook for additional reheating time.
Some Foods Not Recommended for Use
With Reheat
It isbest to useTime Cook for these foods:
, Bread products.
, Foodsthat must be reheated uncovered.
, Foodsthat need to be stirred or rotated.
, Foodscalling for a dry look or crisp surface after
reheating.
How to Adjust the Oven's Automatic
Settings for a Shorter or Longer Time
To subtract !0% from the automatic
cooking time:
Immediately after the oven starts, turn the dial
counterclockwise and press to enter.
To add !0% to the automatic cooking time:
Immediately after the oven starts, turn the dial
clockwise and press to enter.
BEVERAGE
0
NOTE:Oo not usethis
feature twice in succession
on the same foodportion-
it may result in severely
overcookedor burnt food.
16
Beverage
Pressthe BEVERAGEbutton to heat an
8-10 oz.cup of coffee or other beverage. Theoven
starts immediately.
Drinksheated with the Beverage feature may be
very hot. Remove the container with care.
If food is undercooked after the countdown, use
Time Cook for additional cooking time.

About the convection features. GEApUi°ncescom
Convection cookingusesa heating element to raisethe temperature of the air insidethe oven.Any oven
temperature from 225°Fto 450°Fmay be set.A fan gently circulates this heated air throughout the oven,
over and around the food, producing golden brown exteriors and rich, moist interiors.
Becausethe heated air iskept constantly moving, not permitting a layer of cooler air
to develop around the food, some foods cook faster than in regular oven cooking.
Seethe Cookware Tipssection for information on suggested cookware.
For Best Results...
Always USepackage/recipetheshelf whentemperatureCOnvectioncooking.
Reduce 25°Ffor baked goods.
Theshelf isrequired for good air circulation and even browning.
Seethe Cookware Tipssection for information on suggested cookware.
CONVECTION
0
TURN TO SELECT
PUSH TO ENTER
0
Convection Time Cook with Preheat
U Pressthe CONVECTIONbutton.
Turnthe dial to set the oven temperature and
press dial to enter preheating. Donot enter
convection cook time now. (Thecook time will
be entered later, after the oven ispreheated.)
i Pressthe START/PAUSEbutton
to start preheating.
When the oven is preheated, it will signal. Ifyou
do not open the door within i hour,the oven
will turn off automatically.
Open the oven door and, using caution, place
the food in the oven.
Closethe oven door.Turn the dial
to set the cook time and press START/PAUSEto
start cooking.
i When cooking complete, oven signal
is the will
and turn off.
CONVECTION
0
TURN TO SELECT
PUSH TO ENTER
0
Convection Time Cook without Preheating
U Ifyour recipedoes not require preheating, _ Turnthe dial to set the cook time and press to
press the CONVECTIONbutton, m enter.
Turnthe dial to set the oventemperature and E! Pressthe START/PAUSEbutton to start the
Impress to enter, m oven.
17

About the combination features.
Combination Cookingoffers the bestfe(]tures of microw(]ve energy (]nd convection cooking. Microw(]ves
cook food fast (]nd convection circulation of he(]ted (]it browns foods be(]utifully.Any oventemper(]ture
from 225°Fto 450°F m(]y be set.
For Best Results...
AIw(]ysusethe shelf when combination cooking.
The shelf isrequired for good (]ircircuk]tion (]nd even browning.
Seethe Cookware Tipssection for information on suggested cookwore.
COMBINATION
0
TURN TO SELECT
PUSH TO ENTER
Combination Time Cooking with Preheat
U Pressthe COMBINATIONbutton.
F_Turn the di(]l to set the oventemper(]ture (]nd
press di(]lto enter prehe(]ting. Donot enter
combin(]tion cook time now. (Thecook time will
be entered k]ter, (]fter the oven isprehe(]ted.)
i ressthe START/PAUSEbutton to start
prehe(]ting.
_J_ When the oven isprehe(]ted,it will sign(]l.Ifyou
do not open the door within 1 hour,the oven
will turn off (]utom(]tically.
Open the oven door (]nd, usingcaution, pl(]ce
the food in the oven.
_ Closethe oven door.Turn the dial to set the
cook time (]nd pressto enter. Pressthe START/
PAUSEbutton to st(]rt cooking.
I When cooking complete, oven sign(]l
is the will
(]nd turn off.
COMBINATION
0
TURN TO SELECT
PUSH TO ENTER
Combination Time Cooking without Preheat
U f your recipedoes not require prehe(]ting,press
the COMBINATIONbutton.
Turnthe dk]l to set the oven temper(]ture (]nd
pressto enter.
I urn the di(]l to set the cook time
(]nd pressto enter.
LmJPressthe START/PAUSEbutton
to st(]rt the oven.
NOTE:
, Somerecipes coil for prehe(]ting.
, Checkthe Cookwore Tips section for correct
cookw(]re when Combination Cooking.
, Do not use metol cookwore when Combination
Cooking.
, Placeme(]t on (]trivet in (] gk]ss dishto collect
juices (]nd prevent sputtering.
, For best ro(]sting (]nd browning results,whole
ro(]sts should be cooked in (] gl(]ssdish pl(]ced
directly on the oven shelf.
, Forfoods th(]t (]re too t(]ll to fit in the oven,you
c(]n le(]ve out the trivet. If necess(]ry,you m(]y
t(]ke out the shelf (]nd pl(]cethe dishdirectly on
the turnt(]ble.
18

Cookwu re tips. GEApplionces.cam
Convection Cooking
Metal Puns are recommended for all types of baked products, but especially where browning or
crusting is important.
Dark or dull finish metal pans are best for breads and pies because they absorb heat and produce
crisper crust.
Shiny aluminum pans are better for cakes, cookies or muffins because these pans reflect heat and
help produce a light tender crust.
Glass or Glass-Ceramic casserole or baking dishes are best suited for egg and cheese recipes due
to the cleanability of glass.
Combination Cooking
Glass or Glass-Ceramic baking containers are recommended. Be sure not to use
items with metal trim as it may cause arcing (sparking) with ovenwall or oven shelf, damaging the
cookware, the shelf or the oven.
Heat-Resistant Plastic microwave cookware (safe to 450°F) may be used, but it is not recommended
for foods requiring crusting or all-around browning, because the plastic isa poor conductor of heat.
_0 Microwuve Convection Combinution
Heat-Resistant Glass, Glass-Ceramic Yes Yes Yes
(Pyrex ®,Fire King ®,Coming Were ®,etcJ
Metal No Yes No
Non Heat-Resistent Glass No No No
Microwave-Safe Plastics Yes No Yes_
Plastic Films end Wraps Yes No No
Paper Products Yes No No
Straw, Wicker end Wood Yes No No
_Use only microwave cookware that is safe to 450°F.
19

Select the best method of cooking.
Use the following guide to select the best method of cooking. Specific recipes can be adopted to any method of cooking.
0-- Best method
G- Alternate method
N/R-- Not recommended
Foods Microwave Combination Convection
Appetizers
Dips and Spreads 0 N/R N/R
Pastry Snacks (_) 0 (_
Beverages _ N/R N/R
Sauces end Toppings 0 N/R N/R
Soups end Stews _ (_ N/R
Meats
Defrosting 0 N/R N/R
Roasting (_ 0 (_
Poultry
Defrosting qJ_ N/R N/R
Roasting (_ 0 (_
Fish and Seafood
Defrosting 0 N/R N/R
Cooking 0 (_ N/R
Casseroles (_ 0 (_
Eggs and Cheese
Scrambled, Omelets 0 N/R (_
Quiche, Souffle (_ (_) 0
Vegetables, (fresh) 0 N/R N/R
Breads
Ouick Q 0 (_
Yeast N/R (_ 0
Muffins, Coffee Coke (_ 0 (_
Desserts
Cakes, Layer and Bundt Q 0 (_)
Angel Food and Chiffon N/R N/R 0
Custard and Pudding 0 N/R N/R
Bar Cookies (_ 0 (_)
Fruit 0 N/R N/R
Piesand Pastry N/R (_ 0
Candy 0 N/R N/R
Blanching Vegetables 0 N/R N/R
Frozen Convenience Foods O (_ (_)
20
Other manuals for Appliances CEB1590
3
This manual suits for next models
2
Table of contents
Languages:
Other GE Microwave Oven manuals