GE JGSP32 User manual

Useand&m
Wide
Gas
Stiatylnstru~ions
. . . . . . . . . . . . . . . . . .
.
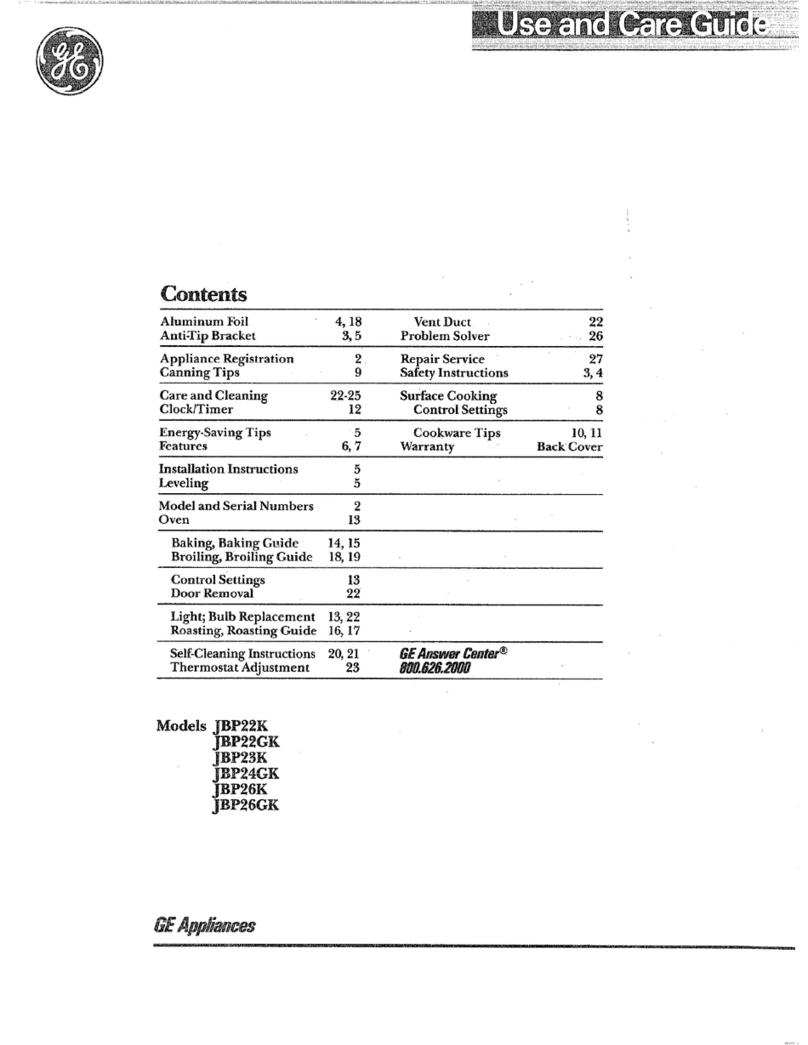
2-6
Anti-Tip Device . . . . . . . . . . . . . . . . . . . . . . . . . . . . . . . . . . . 2,3,35
Operating
lnstru@ions,
~ps
Aluminum Foil. . . . . . . . . . . . . . . . . . . 5, 19, 22–24, 26
Features . . . . . . . . . . . . . . . . . . . . . . . . . . . . . . . . . . . . . . . . . . . . . . . . . . . . . .
.
8,9
Oven . . . . . . . . . . . . . . . . . . . . . . . . . . . . . . . . . . . . . . . . . . . . . . . . . . . . . .
.
15-29
Baking . . . . . . . . . . . . . . . . . . . . . . . . . . . . . . . . . . . . . . . . . . . . . . . .
.
17–20
Broiling, Broiling Guide . . . . . . . . . . . . . . . . . . . 24,25
Control, Clock and Timer . . . . . . . . . . . . . . . . 13, 14
Fan..... 6,15,17, 19,20,22,24,27,28,38
Light; Bulb Replacement . . . . . . . . . . . . . . . . 16,34
Oven Vent. . . . . . . . . . . . . . . . . . . . . . . . . . . . . . . . . . . . . . 4, 16,33
Preheating . . . . . . . . . . . . . . . . . . . . . . . . . . . . . . . . . . 17,23,25
Roasting, Roasting Guide . . . . . . . . . . . . . . . 22,23
Self< leaning Instructions . . . . . . . . . . . . . 26–29
Shelves . . . . . . . . . . . . .
5, 16-19,22,24-27,29
Timed Baking . . . . . . . . . . . . . . . . . . . . . . . . . . . . . . . . . . . . 19,20
Using Your Oven . . . . . . . . . . . . . . . . . . . . . . . . . . . . . . 15, 16
Surface Cooking . . . . . . . . . . . . . . . . . . . . . . . . . . . . . . . . . . 11, 12
Control Settings . . . . . . . . . . . . . . . . . . . . . . . . . . . . . . . . 11, 12
Cooktop
Comparison . . . . . . . . . . . . . . . . . . . . . . . . . . . . . 10
Cookware Tips . . . . . . . . . . . . . . . . . . . . . . . . . . . . . . . . . . . . . . . . . 12
Range
Problem solver . . . . . . . . . . . . . . . . . . . . . .
36,37
Thermostat Adjustment
Do It
Youmefi........
. . . . . . . . . . . . . . . . . . . . . . . . . . . . . . . . . . .
.
21
More questions
?...call
GEhwrbntiP
80~62&2000
Cam
and cleaning . . . . . . . . . . . . . . . . . . .
26-34
Burner
kwmb~..........
. . . . . . . . . . . . . . . . . . . . . . . . . . . . . . . . . . . . .
.
30
Door
Removel
. . . . . . . . . . . . . . . . . . . . . . . . . . . . . . . . . . . . . . . . . . . . . . 32
Glass
Cooktop........
. . . . . . . . . . . . . . . . . . . . . . . . . . . . . . . . . . . . .
.
31
Removable Oven Bottom . . . . . . . . . . . . . . . . . . . . . . . . . . 34
Self<leaning Instructions ..................26-29
Shelves . . . . . . . . . . . . . . . . . . . . . . . . . . . . . . . . . . . . . . . . . . . . . . . . . . . . . . . . .
.
33
Preparation . . . . . . . . . . . . . . . . . . . . . . . . . . . . . . . . . . .
7,35
Anti-Tip Device . . . . . . . . . . . . . . . . . . . . . . . . . . . . . . . . . . . . . . . . . . . . 35
Flooring Under the Range . . . . . . . . . . . . . . . . . . . . . . . . . . . 7
Leveling . . . . . . . . . . . . . . . . . . . . . . . . . . . . . . . . . . . . . . . . . . . . . . . . . . . . . . . . . . .
.
7
Removal of Packaging Tape . . . . . . . . . . . . . . . . . . . . . . . 7
Consumer Services . . . . . . . . . . . . . . . . . .
39
Appliance Registration . . . . . . . . . . . . . . . . . . . . . . . . . . . . . . . . . 2
lmpo~nt
Phone Numbers . . . . . . . . . . . . . . . . . . . . . . . 39
Model and Serial Number Location ..........2
Warran~
. . . . . . . . . . . . . . . . . . . . . . . . . . . . . . . . . . . . . . . Back Cover
GE@phances
Models:
JGSP32
JGSP33
JGSP@
1MD2966P120

~LP
US
~LP
YOU...
Before
using your range,
read
tiis
guide
arefdly.
It
is
intended
to help you operate
and
maintain your
new range properly.
Keep it handy for answers
to
your questions.
If you don’t understand
wmething
ornd
mom
help,
dl:
GE
Answer Center
m
W.626.2~
24 hours a day, 7 days a week
Write
dom
tie
model and
WM
numbers.
Youqll
tind
the
model
and
serial
numbers on
a
label
on
the
range
frunt
fr~me
behind the
storage
drawer.
These numbers
are
alst)
on
the Consumer
Prduct
Ownership Registration Card that
came
with your “
range.
Before
sending in this
card,
please write
these
numbers here:
Model Number
Serial Number
Usc
these numbers in
any
c(]rrespt~ndence
ur
service
calls
concerning your
range.
If you received a damaged range...
Immediately
contact
the
dealer
(or builder)
that
sold
you
the
mnge.
Save time and money. Before you
request service...
Check the
P~]blem
Sf)lver
in the back
of
this
guide.
it lists
causes
of
minor
operating
problems
th~t
you
can
correct
yuurself.
A WARNING
●
ALL
RANGES
CAN TIP
“
INJURY TO PERSONS
COULD RESULT
3
s
INSTALL ANTI-TIP
DEVICES PACKED
t
A
WITH RANGE
“
SEE
INSTALLATION
INSTRUCTIONS
I
WARNING: If the
information in
this
guide is not followed exactly, a fire or
explosion may result causing property
damage, personal injury or death.
— Do not store or use gasoline or other
flammable vapors and liquids in the
vicinity of this or any other appliance.
— WHAT TO DO IF YOU
SMEI.I.
GAS
●
Do not try to light any appliance.
s
Do not touch any electrical switch; do
not use any phone in your building.
●
Immediately call your gas supplier from
a neighbor’s phone. Follow the gas
supplier’s instructions.
c
If you cannot reach your gas
supplier~
call the fire department.
— Installation and service must be
performed by a qualified installer, service
agency or the gas supplier.
W
YOU
~ED
SERVICE
To
obtain
service.
sce
the
consumer
se~i~es
Page
in the
back
of this guide.
We’re
prt]ud
uf
uur
service
and
want
yuu
to be
pleased. If
ft)r
some
reason
you
are
not
happy
with
the service
you
receive. here
arc
th~e
stePs
to
f(Ill~)w
for
further help.
FIRST,
c(]ntact
the people who serviced your
appliance. Explain why you are not pleased.
In
most
cases, this will solve the problem.
NEXT, if you
are
still not pleased. write
all
the
details—including your
phune
number-to:
Manager, Consumer
Relations
GE Appliances
Appliance
Park
Louisville, KY 40225
FINALLY, if your problem is still
not
resolved. write:
Major
Appliance Consumer Action Panel
20 North
Wacker
Drive
Chicago, IL 60606
2

~lvlPORTANT
SAFETY NOTICE
c
The California Safe Drinking Water and Toxic
Enforcement Act
requires
the
Governor of
California to publish a list of substances known to
the state
to
cause cancer, birth
defects
or other
reproductive
harm,
and
quires
businesses to warn
customers
of
ptential exposure
to
such substances.
●
Gas
appliances can cause minor exposure to
four
of
these substances,
namely benzene, carbon
monoxide,
formaldehyde and
s~t,
caused
primarily by the incomplete combustion of natural
gtis
or
LP
fuels. Properly adjusted burners,
indicated by
o
bluish
rather
than a yellow
flame,
will
minimize incomplete combustion, Exposure to
these substances
can
be minimized by venting with
an open window
or
using a ventilation fan or hood.
When You Get Your
~nge
c
Have the installer show you the location of the
range gas cut-off valve and how to shut it off
if
n~~~~.
~ve
your range installed and properly
grounded by a qualifid installer,
in accordance
with the Installation Instructions. Any adjustment
and
service should be performed only by qualified
gas
range installers or service technicians.
●
Do
not
attempt to repair or replace any
part of your range unless it is specifically
recommended in this guide. All other service
should be referred to a qualified technician.
c
Plug
your range into a 120-volt grounded
outlet only.
Do not
rcmove
the round grounding
prong
from
the
plug. If in doubt about the
grounding
of
the home electrical system, it is your
personal responsibility
and
obligation to
have
an
ungrounded outlet replaced with a properly
grounded,
three-prong outlet in accordance with
the National Electrical Code. Do not use an
extension cord with this appliance.
c
Be sure all packaging materials
are
removed
from the range
before operating it to prevent
fire or smoke damage
should
the packaging
material ignite.
qcate
the range out of kitchen
tra~c
path
.~ld
out of drafty locations to prevent
pilot
outage and poor air circulation.
●
Be sure your range is
correctfy
a~usted
by a
qualified service technician or installer for the
type of gas (natural or
LP)
that is to be used.
Your range can be converted for use with either
type of gas. Seethe Installation Instructions.
WA~ING: These
adjustments must be made
by a qualified service technician in accordance
with the manufacturer’s instructions and all codes
and requirements of the authority having
jurisdiction. Failure to follow these instructions
could result in serious injury or property damage.
The qualified agency performing this work
assumes responsibility for
the
conversion.
c
After prolonged use of a range, high floor
temperatu~ may result and many floor
coverings
will
not
withstid
tis
kind of use.
Never
install the range over vinyl tile or linoleum
that cannot withstand such type of use. Never
install it directly over interior kitchen carpeting.
Using Your
Mnge
WARNINGA]]
ranges
can
tip and
i@ury
codd
result
@
.4
To prevent
accidenti
tipping of
the range,
attach it to the wall or
floor by installing the Anti-Tip
device-supplied. Make sure the chain
fits securely into the bracket.
If you pull the range out from the
w
wall for any reason, make sure the
Anti-Tip device is engaged before you push
the
mnge
back against
the
wall. If it is not, there
is a possible risk of the range tipping over and
causing injury if you or a
child
stand, sit or lean
on an open door.
Please refer to the Anti-Tip device information in
this guide. Failure to take this precaution could
result in tipping of the range and injury.
Do not allow the chain or bracket to damage the
gas plumbing in any way.
●
Let the burner gram and other
surfacm
cool
before touching them or leaving them where
children can reach
hem.
(continue[ltle.rl Ixtgc)
3
-RTANT
SA~~
~STRUCmONS
(continued)
●
Do not leave
chtidren
alone or unattended
where a range is hot or in operation. They
could
be seriously burnd.
.
Do
not allow anyone
b
climb, stand or hang
on the oven door,
stirage
drawer or
cooktop.
They
could damage the range and even tip it over,
causing severe personal injury.
c
CAU~ON:
~MS
OF
~EREST
TO
CHILDREN SHOULD NOT BE STORED IN
CABINETS ABOVE A RANGE OR ON THE
BACKSPLASH OF A RANGMHILDREN
CLIMBING ON THE RANGE TO REACH
ITEMS COULD BE SERIOUSLY ~JURED.
c
Never wear loose fitting or hanging garments
while using
tie
appliance.
Be careful when
reaching for items stored in cabinets over the
range. Flammable material could be ignited
if
brought in contact with flame or hot oven surfaces
and may cause severe bums.
●
Teach children not to
play
with the controls
or any other part of the range.
●
Never leave
tie
oven door open
when you are
not watching the range.
c
Always
keep combustible
wall
coverings,
curtains or drapes a safe distance from
your range.
●
For your safety, never use your appliance
for warming or heating the room.
s
Always keep dish towels, dishcloths, pot
holders and other
tinens
a safe distance
from your range.
●
Always keep wooden and plastic utensils
and canned food a safe distance away from
your range.
s
Do not leave paper produti, cooking utensils
or food in the oven when not in use.
●
Do not
stire
fimmable
mahrials
in an oven,
a range storage drawer or near a
cooktop.
c
Do not store or use combustible materials,
gasobe
or other flammable vapors and liquids
in the vicinity of this or any other
apptiance.
●
Do
not
let
cooking grease or other flammable
mateti
accumulate in or near the range.
e
● Do not use water on grease
fires.
Never pick up a
fiming
pan.
Turn the controls off. Smother a
flaming pan on a surface burner by
covering the pan completely with
a
well-fitting
lid, cookie sheet or
tlat
tray.
Use
a
multi-purpose
dry chemical or foam-type fire extinguisher.
Flaming grease outside a pan can be put out by
covering it with baking soda or, if available, by
using a multi-purpose dry chemical or foam-type
fire extinguisher.
Flame
in the oven can be smothered
completely
by closing the oven door and turning the oven
off or
by
using a multi-purpose dry chemical or
foam-type fire extinguisher.
●
When cooking pork,
follow
the directions
exactly
and
always
cook the
meat
to
an
internal
temperature of at
least
170°F.
This assures
that,
in the remote possibility that trichina may be
present in the meat, it will be killed and the meat
will be safe to eat.
Sufiace
CwMg
c
Always
use
tie
LITE
position when
igniting the top burners and make sure the
burners have ignited.
●
Never
leave
the surface burners unattended
at
high flame settings.
Boilovers
cause
smoking
and
greasy
spillovers
that may catch on fire.
s
Adjust the top burner flame size so it does not
extend beyond the edge of the cookware.
Excessive flame is hazardous.
. Use only dry pot
holdexmoist
or damp pot holders on hot surfaces
may result in burns from steam.
Do not
let
pot holders come near open flames
when lifting cookware. Do not use a towel
or other bulky cloth in place of a pot holder.
Such cloths can catch fire on
a
hot burner.
s
When using
@ass
cookware, make sure it
is designed for top-of-range cooking.
c
To minimize the possibility of
bums9
ignition of flammable materials and
spillage, turn cookware handles toward the
side or back of the range without extending
over adjacent burners.
4

ways turn the surface burner controls off
before removing cookware.
c
Carefully watch foods being fried at a high
flame setting.
s
Never block the
venk
(air openings) of the
range.
They provide the air inlet and outlet that
are necessary for the range to operate properly
with correct combustion. Air openings are located
at the rear of
the
cooktop,
at the top of the oven
door,
and under the storage drawer.
c
Do not use a wok on the cooking surface if the
wok has a round metal ring that is placed over
the burner grate to support the wok.
This ring
acts
as a heat trap, which may damage the burner
grate and burner head. Also, it may cause the
burner to work improperly. This may cause a
carbon
monoxide
level
above that allowed by
current standards, resulting in
a
health hazard.
s
Foods for frying should be as dry as possible.
Frost on frozen foods or moisture on fresh foods
can cause hot fat to bubble up and over the sides
of
the pan.
x
the least possible amount of fat for effective
shallow or deep-fat frying.
Filling the pan too
full of fat can cause
spillovers
when food is added.
●
If a combination of
oils
or fats will be used
in frying,
stir together before heating or as fats
melt slowly.
c
Always heat fat slowly,
and watch as it heats.
.
Use a deep fat thermometer whenever
possible
to prevent overheating fat beyond
the smoking point.
c
Never try to move a pan of hot fat, especially
a deep fat fryer.
Wait until the fat is
cool.
c
Use proper pan
si>Avoid
pans that are
unstable or easily tipped. Select cookware having
flat
bottoms large enough to cover burner grates.
T()
avoid
spillovers,
make sure cookware is large
enough to contain the food properly. This will both
save
cleaning time
md
prevent hazardous
accumulations of food, since heavy spattering or
spillovers
left on range can ignite. Use pans with
handles that can be
easily
grasped and remain cool.
‘Vhen
flaming foods are under the hood, turn
,e
fan off. The fan, if operating, may spread
the flames.
c
Do not leave plastic items on the
cookto~
they may melt if
left
too close to the vent.
s
Keep
dl
pktim
away
fmm
the surface burners.
c
Do not leave any items on
tie
cooktop.
The hot
air from the vent may ignite flammable items and
will
increase pressure in closed containers, which
may cause them to burst.
●
Myou
smell gas,
turn off the gas to the range and
call a qualified service technician. Never use an
open flame to locate a leak,
●
To avoid the possibility of a bum, always be
certain that the controls for
dl
burners are at
the off position and
W
grates are
cool
before
attempting to remove them.
●
Never clean the
cooktop
surface when it is hot.
Some cleaners produce noxious fumes and
wet cloths could cause steam bums if used on
a hot surface.
●
Never leave
jam
or cans of fat drippings
on or near your range.
Oven
c
Do
not use the oven for a storage area. Items
stored in the oven can ignite.
●
Stand away from the range when opening the
door of a hot oven.
The hot air and steam that
escape
cm
cause burns to hands, face and eyes.
●
Keep the oven free from grease buildup,
c
Place
the oven
sheti
in the desired position
while the oven is cool.
. Pulling out the shelf
h
the shelf-stop is a
convenience in
~ng
heavy foods. It is dso
a precaution against bums from touching hot
surfaces of the door or oven
walk.
●
Do
not heat
unopend
f~
containers.
Pressure could build up and the container could
burst, causing minjury.
c
Do not use aluminum
fofl
anywhere in the oven
except as
descri~
in this guide.
Misuse could
result
in a
fire
hazard or damage to the range.
c
When using cooking or roasting bags in the
oven,
follow the package directions.
(ct~nlinnetitte.rt jnt,~e)
51

-RTANT
SA~~
~STRUCTIONS
(continued)
c
Do not use your oven
h
dry newspapers.
If overheated, they can catch
fire.
c
Use
ody
@ss
mkware
that is recommended
for
use in ovens.
●
When broiling, if meat is too
dose
to
the flame, .
the fat may
ignik.
Trim excess fat to prevent
excessive flare-ups.
c
After broting, always take the broiler pan out of
the range and clean it. Leftover
grease
in the broiler
pan can catch fire next time you use the pan.
●
If you should have a grease
fire
in
tie
broiler
pan, turn the oven off and keep the oven door
closed to contain
fire
until it bums out.
●
Keep the range
dean
and free of
accumtiations
of grease or
spillovers,
which may ignite.
Self-Cleaning Oven
●
Be sure to wipe up excess spillage before
self-cleaning operation.
s
Clean
only
parts
Iisti
in the Use and
Care Guide.
s
Before self-cleaning the oven, remove the
broiler pan, rack and other cookware.
Q
Do not clean the door gasket. The
door gasket
is essential for a good seal. Be careful not to rub,
damage or move it.
●
M
the
se~-deaning
mode malfunctions,
turn
the oven off and disconnect the power supply.
Have it serviced by a qualified
tmhnician.
●
Do
not use oven cleaners. No
commercial oven
cleaner or oven liner of any kind should be used
in or around any part of the oven. Residue from
oven cleaners will damage the inside of the oven
when the self-clean cycle is
usd.
●
Listen for a
fan+
fan noise should be heard
sometime during the cleaning cycle. If not,
call
for service before self-cleaning again.
L.P.
Convemion
Your range is shipped from the factory set to
operate only with Natural Gas. If you wish to use
your range with Liquefied Petroleum Gas, have the
installer check the Installation Instructions that
came with your range.
WA~ING: These
adjustments must be made by a
qualified service technician in accordance with the
manufacturer’s instructions and all codes and
requirements of the authority having jurisdiction.
Failure to follow these instructions could result in
serious injury or property damage. The qualified
agency performing this work assumes responsibility
for the conversion.
SAVE
T~SE
~STRUCTIONS
.
.-
6

PMPAMTION
~oring
Under the Range
Your range, like so many other household items,
is heavy
and
can
settle into
sofi
floor coverings
such as cushioned vinyl or car~ting.
When moving
the range
on
this type
of
Il(]oring,
it should
bc
installed
on
a
l/4-inch-thick sheet of plywood (or
similar material)
as
follows:
When
thefior
coven.ng
ends at the front of the range,
the
area
that
the
range
will rest
on
should be built up with plywood
to
the
sume
level
f)r
higher
than
the
floor
covering.
This will
allow
the
range
to be moved
for
cleaning or servicing.
Leveling the Range
Usc
a
1
X“
open-end
or
adjustable wrench to equally
back
(Jut
the four
legs.
The
tlanges
(rims)
belf)w
the
sides
of
the
c{)oktop
must be
raised
above
the
top of
the
countertop.
Carefully slide the
r~nge
into its
installation
space.
Observe
tha~
it is clearing the
countertop.
Then
place
a spirit level or
a
glass
measuring cup partially
filled
with water on one of
the
oven shelves to check for levelness. If using
a
spirit level,
take
two readings. with the level
placed
diagonally
first in
one
direction
and then the other.
just the four legs
curefully.
Uvcl
the range
f~)nt
to
,,~ck
and
side to side. The
range
legs must rest
on
the
Iloor.
The
range
must not hang
f~)m
the countertop.
How
to Remove Packaging Tape
T()
assure
no
damage
is done to the finish of the
pruduct.
the
safest
way
to
remove adhesive left
from
packaging
tape
on
new
appliances is
an
application of
;l
household liquid
dishwashing
detergent. mineral
uil
or
c(x)king
oil. Apply with
a
soft cloth and
allow
to
soak.
Wipe
dry
and
then
apply
an
appliance polish to
thoroughly clean
and
protect
the surface.
NOTE:
The plastic tape must be
removed
from
the chrome trim on
range
parts.
It
cannot
bc
removed
if it is
baked
(In.
Removing Packing Materials
Check
yf)ur
range
to
insure
all
packaging
,materials
and
protective
tape
covering
are
removed
frurn
areas
such
as
the
dour
trim,
cooktop
frame,
under burner
caps,
end
caps,
etc.
before
using.
7
—.

—
-———
FEATUmS OF YOUR RANGE
Q
.
I
\
.
.
v
JGSP32
JGSP33
JGSP#
8

Explained
Feature Index on page
1
Model and Serial Numbers
I
2
2
Oven
Door Gasket
6,25,31
3
Removable Oven Bottom
33
4
Oven Shelves with Stop-Locks
5, 1418,21
23-26,28
5 Automatic Oven Door Latch
25-28
6 Surface Burner Controls 10,30
7
Glass
Cooktop
I
30
8
oven Vent
I
4,15,32
9 Anti-Tip Device
2,3,34
Sec
the Installation Instructions.
10 Surface Burners and Grates
I
29,30
I I oven Light Switch
15
1
“ ~
oven
~ont~]s
12,
13
Aut~)matic
Oven Timer
13
Oven
Thermostat
20
Clock
13
Timer
13
13
Automatic Oven
I.ight
Switch
15
1
14
Oven Interior Light 15.33
I
15
Broil Burner
23
16
oven Shelf Supports
5, 1~18,
21
Shelf
p(]sitions
for
cof)king
are
suggested
23-26,28
in the Baking, Roasting
and
Broiling
sectif)ns.
17 Lift-Off Oven Door
I
3,4,6,25,31
18
Sure Grip Handle
32
,
19
Broiler Pan and
Mck
5,6,21,24
Do
nf)t
clean
in the self-cleaning
oven.
20 Storage Drawer
I
3,4,31

HOW DOES
T~
COOKTOP
COmARE
m
YOUR OLD ONE?
Your new
cooktop
has
gas
burners. If you are used The best types
of
c(x)kwtire
LU
USC
. plus heat-up
and
to
cmking with
induction
or
other electric surface
c(~ol-down”
times,
depend
up(~n
the
Iype
of
burner
or
units, you will notice some differences when you
U.SC
surface unit
y(>u
have.
gas
burners.
~pe
of
Cooktop
(;as
Burners
a
.d
Radiant
((;lass
Ceramic)
Cooktop
Electric Coil
r\
Solid
Disk
o
Description
Regular
or scaled
~ils
bum~rs
us~
ci[hcr
LP
~iis
or natural
gas.
Electric coils
under
a
glass-
ccramic
cooklop.
High frequency
induction
coils
under
a
~lilSS
surface.
Flatlcncd
metal
tubing containing
electric resistance
wim
sus~’ndcd
over
a
drip
pan.
Solid
cast
iron
disk
scaled
to
the
cooktop”
surface.
The
folluwing
chart
will help you
10
understand
the
dit~erences
between
gas
burner
cooktnps
and
any
.
other
type
ufcooktop
you
may
have used in the
past.
How It Works
Fliuncs
heat
the
puns
directly.
PiuI
Ilatncss
is
not
crhiciil
to
col)king
results.
but
pans should
b~
WCII
hilliln~~d.
C;ils
bumcrs
h~ilt
[h~
Piill
right
ilwti~
aIld
change
h~iit
scllings
right
il~’il~.
Wh~I)
~I)U
IUM
IhC
~(JIIII-ol
off.
cooking”
stops
right
il~il}.
Heat
trilv~ls
[()
the
glass
surface
and
then
to
the cookware.”
s()
pans
Inus[
he
Ila[
on
lhc
bottotn”
ll?r
g(N)d
cooking” results. The
gloss
col)ktop”
sItiys
hot
enough to
coniinuc
cooking” after it is
tumcd
off.
Rcnlovc
the
piln
fn)tn
Ihc
surfticc
unit
if
you
want
cooking
to
stop.
Pans
must
hC
made
of
f~rrous
]nctals
(tll~[ill
that
illtr~~ls
a
magnet).
HCaI
is
produced by
a
magnetic
ci~ui[
bctwccn
the coil
and
the
piln.
Ilcats
up
right
ilw~y
und
changes heat
sct[ings
right
tiwily.
Iikc
a
~ils
cooktop.
After
turning
[he
control
011..
the
glass
c(x)ktop
is
hot
fn)m
[hc
heat of the
piul.
hut
cuuking
stops
right
awuy.
Heats by
direct
conttict
with the
Piltl
and
by heating the
air
under the pan.
For
hcst
cooking” results. usc
good”
quality
pans.
Eicc[ric
coils
are
more fo~iving of
wa~~d
pans
than
radiant
l)r
solid
disks. Heats up quickly hut
docs
not
chiulgc
h~at
settings
as
quickly
ils
~ils or induction. Electric
coils
stay
hot
cnl)ugh
to “-
continue cooking” for
a
short time
tiftcr
they
arc
tumcd
off.
Heats by direct contact with the
pan.
so
puns
tnust
bc
Ilat
on the
bo[tl)tn
I\)r
good”
cuoking
rcsu]ts.
Heats up
and
cools”
dl)wn
more slowly
than
electric coils. The
disk stays
hot
enough to continue cooking”
allcr
it
is
tumcd
off.
Rcml)vc
Ihc
pan
fruln
the
solid
disk
if you
Wiltlt
the cooking” I() stop.
10

SU~ACE
COOmG
ctric
Ignition
Sufiace
Burner Controls
Your
surface burners
arc
III
by electric
ignition. Knobs
that
turn the
sudhce
burners
on
and
off
are
eliminating the
need
for
standing
pilot
lights with
marked
as
to
which burners they
control.
The two
constantly burning
names.
knobs
on the left control the left front and left
rear
In
case
of
a
power failure, you
can
light
the surface burners. The
two
knobs on the right control the right
hurncrs
on
your
range
with
a
match.
Hold
a
lit
match
front
and
right
rear
burners.
to
the
humir,
then push in
and
turn the control knob
to
the
LITE
position.
Use
extreme caution when
lighting burners this way.
Surface
burners in use when
an
electrical power
f~lilure
occurs will
continue
10
operate normally.
To
I.ight
a
Sutiace
Burner
Push
the
c(~nt~~l
kn(]b
in
and
turn it
counterclockwise
to
LITE.
After
the
burner ignites. turn the knob
to
udjust
the
tlamc
size.
To turn
the
burner off. turn the
knob clockwise
us
far
as
it will
go.
to
the OFF
pusiti~)n.
●
The
rear
and
left
fn)nt
hurncrs
arc
best
fur
smaller
pans
and
cooking”
(~pcrations
requiring carefully
contmllcd
simmering
conditions.”
The
front
right
hurncr
is
a
high power burner for
larger
pans
and
f;lsl
h)iling
operations.”
●
Dt)
not
operate
the burner for
an
extended period
of
time
without
cookware on the
grate.
The finish on the
grate
may
chip
witht)ut
cookware
to
absf)rb
the
heat.
●
Check
tt]
be sure the burner
you
turn
on
is the
one
you
want
to
use.
●
Bc
sure the burners
and
grates are cool before you
place
your
hand.
a
pot holder, cleaning cloths
or
other
materials on them.
Simmer Burner
The
smidlcr
burner (right
reiu.
positit)n)
will give the
best simmer
resulls.
I’hc
Iowcst
setting of the burner
has
u
small
flame
to
provide simmering capability.
T()
simrncr
foods.”
set
the
cookt(~p”
con[rol”
knob
t(]
the lower setting
that
wil
maintain the desired simmer. If simmering on one
humcr
ilnd
the other burners
are
turned on. the
gas
Super Burner
On some
m(~dels,
the right
f~)nt
burner is
cone-
shaped with
a
circular opening
through
the center
of
the burner.
This burner
can
provide
30%
more
pt]wer
than
any
onc
of the other three. Use it
for
conning
or
large
pans.
Ilt)w
of
[he
simmering burner
may
have
to
he
a~usted.
11

SUmACE
COOmG
(continued)
How to
Sel~t
~ame
Size
Watch the flame, not the knob, as you
Muce
heat.
The
flame
size on
a
gas burner should
match
the cookware you
are
using.
FOR SAFE HANDLING OF COOKWARE,
NEVER LET THE FLAME EXTEND UP THE
SIDES OF THE COOKWARE. Any
tlame
larger
than the
bottom
of
the cookware is wasted
and
only
serves
to
heat the handle.
Cookware
Aluminum:
Medium-weight cookware is
recumrnended
because it
heats
quickly
and
evenly.
Most
foods
brown evenly in
an
aluminum skillet. .
Use saucepans with tight-fitting lids when
cooking”
with minimum amounts
of
water.
Cast Iron:
If
heated
slt)wly,
most skillets will give
hulisfactory
results.
Enamelware:
Under some conditions. the
enamel
of
some
cookware
may melt.
Follf)w
cookware
manufactu~r’s
~commendations
for
cfx)king
meth(fls.
Glass: There are two types of glass
cookwa~th(]se
for
oven
use
only
and
those
for
top-of-range cooking
(siiucep~ns,
coffee and
teapots).
Glass
conducts
heat
very slowly.
Heatpmf
Glass
Ceramic:
Can
be used for either
surface
ur
oven
cuoking.
It
conducts
heat very
sluwly
and
COOIS
very
slowly.
Check
~()()kwil~
manufacturer’s
directions
to
be sure it
can
be used on
gas
riinges.
Stainless Steel:
This Inctal
alone
hiis
poor
heating
properties
and
is usually
combined
with
copper.
aluminum
or
other metals
fur
improved
heat
distribution.
Combinatit)n
metal
skilicts
usually
work
satisfactorily
if
they
are
used with medium
heat
as
the
manufacturer
recommends.
Wok Cooking
We recommend that you
use
only
a
flat-bottomed
wok. They are available
at
your
local
retail
store.
Do
not use
woks
that
have
e
support
ring%.
Use of these
types of woks, with or
without
..:.::
,::
,:i:
“
Ihe
ring in
place,
can
be . .
::a~;’’:””
,,:
<
~.~~,
dangerous.
Placing the ring
,
:
::.
!:!,
.
.
.
eve; the burner grate may
cause
“”
the burner to work
imp~)perly
resulting in
carbon
monoxide levels above
idh)wable
current standards.
This could be dangerous
to
yt)ur
health.
Do
not
try
to
use such woks without the ring.
You
could be
seriously burned if the wok tipped over.
12

FEATURES OF YOUR
OWN
CONTROL
1.
CI.EAWOFF.
Press this
pad
tt)
cancel
all
oven
opcrati(]ns
except
clock
and
timer.
2.
DISPLAY.
Shows
the
operations
you have
selected, the time
of
day
and
the cooking
or
cleaning
status.
.NCREASE.
Short
taps
to
this
pad
increase the
Lime
(Jr
temperature by
small
amounts.
Press
and
hold
the
pad
to
increase the time or temperature by
larger
amounts.
4.
DECREASE. Short
taps
to
this
pad
decrease
the time
(]r
temperature by small amounts. Press
and
h[~ld
the
pad
to decrease the time
or
temperature by larger
amounts.
5.
BAKE.
Press this
pad
to
select the bake function.
6.
BROIL. Press this
pad
to
select the broil function.
7.
AUTO
SEI.F
CLEAN.
Press this
pad
to select the
self-cleaning function. See
the
Operating the Self-
Cleaning Oven section.
8. COOK
TIME.
Press this
pad
for
Timed
Baking
operations.
9.
STOP TIME.
Use
this
pad
along
with the COOK
TIME or
AUTO SELF CLEAN pad to stop
automatically
at
a
time you select.
10. CLOCK.
To set clock, first press the CLOCK
pti.
Then press
the INCREASE or DECREASE
pad
to
change
the time
of
day. Press the clock
pud
to
sm.
11. TIMER ON/OFF. Press this pad to select the
timer function.
To set the timer, first press the TIMER
ON/OFF
pad. Then press the INCREASE or
DECREASE
pad
to change the time.
To cancel the timer, press
and
hold the TIMER
ON/OFF pad until the word “TIMER” disappears
fmm
the display.
If “F-and a
numbe~’
flash in the
disphy
and the oven control
si~als,
this indicates
function error code.
Press the
CLEAWOFF
pad.
Allow the oven to cool for
one
hour. Put the oven
back
into operation. If the function error code
repeats, disconnect the power to the range and call
for
service.
13
—

OWN
CONTROL, CLOCK
Am
T~ER
Clock
To Set
tie
Clink
The clock must
be
set
for
the automatic oven timing
1.
Press the CLOCK
pad.
functions to
work properly. The time of
day
cannot
be
chunged
during a Timed Baking or Self-Cleaning cycle.
n
CLOCK
A
A
2. Press the INCREASE
or
DECREASE
pad
[()
set the time of
day.
@
Timer To Set
tie
Timer
The timer is
a
minute timer: it
❑
1.
Press
the
TIMER
does
not
c[)ntm)l
oven
operati{)ns.
~l~o$p
ON/OFF
pad.
The maximum setting
on
the timer
is
9
hours
and
55 minutes.
A
A
2. Press
the
INCREASE
Q
or DECREASE
pad
to set
the
amount
of
time
on
the [imcr.
v
e
The timer will
start
automatically
within
a
fcw
seconds
of
releasing
the
INCREASE or DECREASE pad. The
timer,
as
you
m
.setiing
it, will display
seconds until
one
minute is
re:~chcd.
Then it will display minutes
and
seconds until
H)
minutes
is
reached.
Atir
ti)
minutes, it will display
hours
(“HR”
now
appears
in display)
and
minutes until the maximum time
of
9
hours
and
55 minutes is reached.
To Reset
tie
Timer To Cancel
tie
Timer
If
‘TIMER”
is displayed,
press the
INCREASE
or
Press
and
hold
the
TIMER
ON/OFF
pad
until
the
DECREASE
pad
until desired time is reached. word ‘.TIMER”’ disappears from the display.
If “TIMER” is not displayed,
press the TIMER
ON/OFF
pad
first, then
f(~llow
the instructions
akve
tf)
set the timer.
End of Cycle Tone
Display Messages
The
end
of
cycle tone is a series of three beeps
●
If “clean”
appeam
in the display,
DOOR
Ilashcs
followed by one beep every six
seconds. If
you
would and
the oven control
signals,
yt)u
set the self-clean
like to
remove
the
signal
that
beeps every six seconds, cycle
and
did
not
shut the door.
press and hold the
CLEAWOFF
pad for 10
seconds.
s
If
“~~’
ody
ap~
in
tie
dispky,
the
oven door
To return the
signal
that beeps every six seconds, is in the locked position. BAKE, BROIL
and
COOK
press
and
hold the
CLEAWOFF
pad
for 10 seconds.
TIME cannot be set if the door is in the locked
positiun.
Power Outage
After a power outage, when power is restored, the
The display flashes until the clock is reset.
All
other
display will flash and time shown
will
no
longer
be functions that were in operation when the
p)wer
went
correct-for example, after a 5-minute power
out will have to be programmed again.
interruption the
clock
will be 5 minutes
slow.
14

USmG
YOUR
OWN
,
ire
Using Your Oven
1.
I.nuk
at
the
c(]ntrols.
Be
sure you understand
how
tu
set
[hem
properly.
2.
Check the oven
interiur.
b)(]k
at
the shelves.
Take
a
practice run
at
removing
and
replacing them
properly
to
give
sure, sturdy support.
3.
Read
(~ver
inf(~rmati(~n
and
tips
that
folluw.
4.
Keep this guide
handy
so
you can refer
to
it,
especially during
the
tirst
w~ks
of using your
new
range.
NOTE:
●
You
may
notice a “burning” or “oily” smell the
first few times you turn
your oven on. This is normal
in a
ncw
oven and will disappear in a short time.
To speed the process, set a self-clean cycle
ff)r
a
minimum
of
3
hours.
See the Operating the Self-
Cleaning Oven section.
●
A
fan may automatically turn
on
and off to cool
internal parts. This is normal and the fan may
continue
tu
run even after the oven is turned off.
Electric Ignition
The oven burner and broil burner are lit by
electric ignition.
T()
light
either burner. touch
the
pad
ft)r
the
desi~d
function
and
press
the
INCREASE or DECREASE
pad until
the
desired
tcmpcratum is displayed. The
burner should
ignite
within
3(L90
secf)nds.
After the
{)vcn
reaches the selected temperature, the
burner
cycle=)tl.
complctcly,
then
on
with a
full
tltimc-to
keep
the
oven temperature
c[)ntrol]ed.
Power
Outige
CAUTION: DO NOT MAKE ANY
A~EMPT
TO
OPERATE THE ELECTRIC IGNITION OVEN
DURING AN ELECTRICAL
~WER
OUTAGE.
Neither the oven nor the broiler can be lit during an
electrical
~)wer
outage. Gas will not flow unless the
glow
bar is hot.
If
the
oven is in use when
a
power
outage
occurs,
the oven burner shuts
off
and cannot be
re-lit
until
pt)wer
is restored.
Oven Shelves
The shelves are designed with stop-locks so
that
when placed correctly on the shelf supports, they
will stop before coming out completely from the
oven, and will not tilt when removing food from or
placing food on them.
When placing
coukwarc
on
a shelf, pull the shelf out
to
the
bump on the shelf
support.
Place the
cookware
on the shelf. then slide the shelf back
into
the oven.
This will eliminate reaching into the
hot
oven.
To remove the shelves
fmrn
the oven, pull them
t(~wtird
you,
tilt
f~)nt
end upward and pull them out.
To replace,
place the shelf on the shelf support with
the
stop-locks (curved extension
of
the
shel~
facing up
toward the rear of the oven. Tilt up the front and push
the shelf toward the back of the oven
until
it goes past
the bump
on
the shelf support. Then lower the
f~)nt
of
the shelf and push it all the way back.
(1’f~lilillfll~li
IIIB.rt
pIgrj
15

USmG
YOUR OVEN
(continued)
SheKPositions
The oven has four shelf supports, identified in this
illustration as
A
(bottom), B, C and D (top).
Shelf positions for cooking are suggested in the
Baking, Roasting and Broiling sections.
Oven Light
The light
comes
on
automatically when the oven
door-is”
opened.
Use
the switch on the control
panel
to
turn the light
on
and off when the
door
is closed.
Oven Vent
Your
oven is vented through ducts
at
the rear
●
Do not leave any items on the
cooktop.
The
hot
air
of
the
range.
Do
not
block these ducts when cooking
from
the vent may ignite flammable items
and
will
in the oven—it is important
that
the
flow
of
hot
air increase pressure in closed
ct)ntaincrs,
which
may
from
the oven
and
fresh
air
to
the oven burner be
cause
thcm
L(J
burst.
uninterrupted. Avoid
t{)uching
the vent
f)penings
ur
.-
●
Metal items will become very hot if they are
Iefi
nearby
surfaces during oven or broiler
operation—
they may become hot.
on the
cooktop,
and could cause burns.
●
Vent openings and nearby surfaces may become
hot. Do not touch them.
c
Handles of pots and pans on the
cooktop
may
become hot if left too close to the vent.
● Do not leave plastic
;
;“
=
i
;
;:
,
items on the
cookto~
?’
they may melt if
lefi
too close to the vent.
w.
Oven Moisture
As your oven
heats
up, the temperature change
of
the air in the oven may
cause water droplets to form
on
the door glass. These droplets
are
hwmless
and will
evapordte
as
the oven continues to heat up.
16

BA~G
.
oven
tcmpertiture
is
controlled
very accurately
If.
you think an adjustment is necessary, see the Adjust
using
an
oven
control”
system. It is recommended
that
the Oven Thermostat section. It lists
easy
D(J
It
you
upemte
the
range
for
a number of weeks using the
H~ur,~e~instructions
on
how
to adjust the thermostat.
time given
on
recipes
as
a
guide
to
become
familiar
NOTE:
When the oven gets hot, the top
and
outside
with
your
new oven’s performance.
surfaces of the
range
get hot too.
How to Set Your
Mnge
for Baking
To
avoid
possible burns,
place shelves in the correct
position before
you
turn the oven on.
1.
Press the BAKE pad.
2. Press the INCREASE or DECREASE pad until the
desired temperature is displayed.
The oven will start
autf)mtitically.
The word
‘“ON’.
iu]d
“I(N)””
will he displayed. As the
uven
heats up,
the display will
show
the changing temperature.
When
the
oven
rcachcs
the temperature
you
set,
a
t(]ne
will sound.
3.
Press the
CLEAWOFF
pad
when baking is finished
and
then remove the food from the oven.
NOTE:
A
fan
may
automatically turn on and off to
cool
internal parts. This is normal, and the fan may
continue
to run after the oven is turned off.
To
cbnge
the oven
timpemture
during BAKE
qcle,
press the BAKE pad and then the INCREASE
or DECREASE
pad
to get the new temperature.
Oven Shelves
Arrange the oven
-
‘If
t)r
shelves in
desired
locations
while
the
oven
is
CUU1.
The correct
shelf
positi(m
depends
on
the kind
of
food
and
the
browning
desired.
As
ii
general rule.
place
most foods
in
~hc
middle of
the
oven.
on
either
shelf
positions
B
or
C.
See
the
chart for suggested shelf
positions.
Qpe
of Food Shelf Position
Angel
foti
cake
A
Biscuits or muffins B or C
Cookies
or
cupcakes
B or C
Brownies B or C
Layer
cakes
B or C
Bundt
or
pound
cakes
A or B
Pies or pie shells B or C
Frozen pies A (on cookie sheet)
Casseroles B or C
Roasting A
or
B
%heating
Preheating is necessary
for
good results when baking
Preheat the
oven
if the recipe calls for it. Preheat
cakes,
ct)okies,
pastry and breads.
Ft)r
most casseroles
means bringing the oven up to the specified
and masts, preheating is not necessary. For ovens temperature before putting the food in the oven.
without a preheat indicator light or tone, preheat
To preheat, set the
oven
at the correct
tempcraturc—
10
minutes. After the
oven
is preheated, place the selecting a higher temperature does
not
shorten
‘.”’od
in the oven as quickly as
possible
to prevent
preheat time.
It
from escaping.
(t.[>fttitflfe(l
)Ie.vt
]xi~~~)
17
.-

BA~G
(continued)
Baking Pans
Use the proper baking pan. The type of finish
on
the
pan
determines the amount of browning that will occur.
c
Dark,
rough or dull
pans
absorb
heat
resulting in a
browner, crisper crust. Use this type for pies.
●
Shiny, bright
and
smooth pans reflect heat, resulting
in a lighter, more delicate browning.
Cakes
and
ct)okies
require this type of pan.
●
Glass
baking
dishes
absorb
heat.
When
baking
in
glass
baking
dishes. the temperature
may
need to be
reduced by
25°F.
●
If
you
are
using
dmk
non-stick pans, you may find
that
you
need
to reduce the oven temperature
25°F.
to
prevent
overbrowning.”
Pan Placement
For
even
cmking
and
proper browning. there must
bc
enough
room
for
air
circulation
in the
oven.
Baking
results
will
be better if
baking
pans
are
centered
as
much
as
possible
rather
than being
placed
to
the front
or to the back
t]f
the oven.
Pans should not touch
each
other
or the walls of the
oven.
Allow 1-
to
I
K-inch
space
between
pans
as
well
as
from the
back
of
the
oven,
the
dot)r
and
the sides.
If you need to use
twn
shelves, stagger the
pans
so
(]ne
is
not
directly
above
the
other.
Baking Guides
When using prepared
baking
mixes, follow
package
recipe or
instructi(]ns
for the best baking results.
Cookies
When
baking
cookies,
tlat
cookie sheets
(withf)ut
sides)
prtiuce
better-looking cookies. Cookies
baked
in
a
jelly
roll
pan (short sides all around) may
have
darker
edges
and
pale
or light browning
may
occur.
D()
not use
a
cookie sheet
so
large
that
it
tou$hes
the
walls
{)r
the door
of
the oven. Never entirely cover
a
shelf with
a
large
cookie sheet.
For best results, use only one cookie sheet in the oven
at
a
time.
Pies Cakes
For best results,
bake
pies in
dmk,
rough or dull
pans
When
baking
cakes,
warped
or bent
pans
will
cause
to
produce
a
browner, crisper crust. Frozen pies in
foil
uneven
baking
results
and
p(mrly
shaped
p~~ducts.
pans should be placed on an aluminum cookie sheet
A cake
baked
in
a
pan
larger
than
the recipe
for
baking
since the shiny foil pan reflects heat
away
recommends will usually be crisper, thinner
and
drier
from the pie crust; the cookie sheet helps
retain
it. than it should be. If baked in
a
pan
smaller than
recommended, it may be undercooked
and
batter
may
ovefflow.
Check the recipe to
make
sure the
pan
size
used is the one recommended.
18

uminum
Foil
Never
cntirciy
cnvcr
a
shelf with aluminum
ft)ii.
This will disturb the heat
circulaliun
and
result in
poor”
bilking.
A smaller
sheet of
foil
may
be used
to
catch
a
spillover
by
placing it
on
a
lower
shelf
several
inches
beh]w
the
f(X)d.
Don’t Peek
Set the timer
tbr
the estimated cooking time
and
do
not
open the door
t(]
hJt)k
at
y{)ur
food.
Most recipes
provide minimum and maximum
b~ing
times such
as
“bake
30-~ minutes.’.
DO NOT open the door
to
check until the minimum
time. Opening the oven door frequently during
ct)oking
idlf)ws
heat to
escape
and
makes
baking
times longer. Your
b~ing
results
may
also
be
afiected.
TMD
BA~G
How to Time Bake
The
contrul
alh~ws
you
to turn the oven on or
off
NOTE:
Before beginning
make
sum
the
clock
shows
ilutom~lticidly
at
specific times that
you
set.
Examples the
correct
time
{If
day.
of
Immcdiutc
Start
(uvcn
turns
on
now
~lnd
you set it
To set the clock, first press the
CLOCK
pad.
Press
It)
[urn
off
automatically)
and
Delay
Start
and
Stop
the INCREASE or DECREASE
pad
until the correct
(sc[ting
the oven to turn on automatically
at
u
later
time
time
of
day
is displayed.
and
turn
oft.
at
a
preset Stop Time) will be described.
Aow
to Set Immediate
Stati
and Automatic Stop
To avoid possible burns, place the shelves in the
correct
~)sition
before
you turn the
(]ven
on.
The oven will turn
on
immediately
and
c(]ok
f(]r
a
sclcctcd
Icngth
of time. At the
end
of Cook Time.
the oven will turn off
automatically.
D
1.
Press the COOK TIME
pad.
$?$:
NOTI;:
If
your recipe requires preheating.
A
you
may
need
tt~
add
additi{)nid
time
to
the
Icngth
of the
C(]ok
Time.
2. Press the INCREASE
pad
until the desired
length
(Jf
buking
time
~p~miirs
in
the
display.
3.
Press the BAKE
pad.
A
4. Press the INCREASE
or
DECREASE
@
pad
until
the
desired temperature is
displayed. An attention tone will
sound
if step
3
is
not
done.
v
e
The words
●
’TIME
BAKE’.
and
“COOK
TIME’.
will be displayed
along
with the
oven
temperature
that
you set and the
C()()k
Time
that
you
entered.
The oven will
start
automatically. The
word
.’ON”’
imd
” 100”’’” will be displayed. The
Ct](]k
Time will
~~gin
to
ct)unt
d(]wn.
As the
(~vcn
heats
up. the
display will
show
the changing temperature. When
the
oven
reaches the temperature you set,
a
tone
will
s(]und.
The
[~vcn
will continue
to
cook”
ft)r
the
pmgr~nmed
umount
oflirnc,
then shut
ofl-uutomtiicdly.
At
the end
of
Timed
Btie,
the display will show
“OHR:(N
COOK TIME”’
and
the oven will turn off.
The end
of
cycle tone will sound.
5. Press the
CLEAWOFF
pad
to
clear
the display
if necessary. Remove the food from the oven.
Remember, even though the oven shuts
ot~
automatically,
foods
continue
cooking
after
the
controls
tire
off.
NOTE:
●
Foods
that
spoil easily, such
as
milk, eggs,
fish.
stutlings,
~)ultry
and
pork, should
not
be
allowed
to
sit
for
more
than
(me
ht)ur
before or
after
ctwking.
Rtx)m
temperature promotes the growth of
hmful
bwteria.
Be sure
that
the oven light is off because
heat
fmm
the bulb will
sped
hmful
b~.teriit
g~)wth.
●
A
fan
may
automatically turn
{~n
and
t~ff
to
cool
internal
parts.
This is normal, and the
fan
may
cf)ntinue
tf)
run
after
the oven is turned
ot~.
(t.(ltttitlltt~cl
IIr.rt
Imgr)
19

TMD
BAmG
(continued)
How to Set
Delay
Stiti
and Automatic Stop
Quick Reminder:
1. Press
the COOK TIME pad.
2. Press the
INCREASWDECREASE
pad
to
set
the length of baking time.
3. Press
the STOP TIME
pad.
4. Press the
INCREASWDECREASE
pad until
the desired Stop Time appears in the display.
5. P~ss the BAKE pad.
6. Press the
INCREASHDECREASE
pad
to
select
an
oven
temperature.
To avoid possible burns,
place
the shelves in the
correct position
before
you turn the
oven
t)n.
You
can
set the
oven
control”
to
delay-start the oven,
cnok
for
a
specific length of time
and
then turn off
uutomtitically.
❑
1. Press the COOK TIME pad.
\?{EK
NOTE: If your recipe requires
A
preheating,
you may need
to
add
additional time to the Cook Time.
2. Press the INCREASE
pad
until the desired length
of
baking
time appears in the display.
❑
3. Press the
STOP
TIME
pad.
“STOP
{~:[
TIME” and the earliest
Stop
Time
you
A
can set
appear
in the display.
The control automatically sets the Stop Time by
adding
the
Cfx~k
Time to the time
of
day.
Ft~r
example,
the time of day is
2:(M
and the Cook
Time-is
3
hours. Adding
3
hours to the time
of
day
equals
5:(N).
4.
Chage
the
Stop
Time by pressing the
INCREASE pad until the desired Stop Time
appears in the display. The words “DELAY TIMED
BAKE”
and
“STOP TIME”
appear
in the display.
1
5.
Press the BAKE
pad.
BAKE
A
A
6. Press the INCREASE
t)r
a
DECREASE
pad
until
the desired
o
temperature is displayed.
v
The oven will turn on
automatically.
The
e
wf)rd
“ON”
and
“l(M)”” will be displayed.
The
C(x)k
Time will
kgin
to
count
down.
As the
~)vcn
heats
up,
the
display will
sht)w
the changing temperature. The
oven
will
continue to
conk
for
the
pn)grammcd
time
and
shut
t)ty
automatically.
At
the
end
01.
Timed
Bake,
the display
will
show
●
’OHR:(M) COOK
TIME’”
and
the oven will turn
otl..
The
cnd
nf
cycle
tone will sound.
o
7. Press the
CLEAWOFF
pad
to
clear
CLEAR
the display
if
necessary.
Remove
the
OFF
food from the oven. Remember,
even
tht~ugh
the
oven
shuts
off
automatically,
foOds
continue
cuoking
after
the
controls
are
off.
NOTk;:
●
The
1(JW
temperature zone
uf
this
range
(between
1700F.
and
2000F.)”
is available
to
keep
ht)t
cooked
foods
warm.
F()()d
kept in the
oven
longer
than
2
h(]urs
at
these
low
temperatures
may
sp(]il.
●
Foods
that
spoil
easily, such
as
milk,
eggs,
Iish.
stuffings.
poultry
and
purk.
should
nut
be allowed
to
sit
for
tnt)re
than
t)ne
hour
before
or
after
c(x)king.
Room
temperature
pr(xnotes
the
growth
nf harmful
bacteria. Be sure the oven light is
off
because heat
frnrn
the bulb will speed harmful bacteria
grt)wth.
●
A
fan
may
automatically turn
un
and
oi~
to
cnol
internal parts. This is normal,
and
the
fan
may
continue
to
run
after
the oven is turned
otl”.
20
This manual suits for next models
2
Table of contents
Other GE Range manuals

GE
GE JB870DR2BB User manual

GE
GE Profile PGB916SEMSS Manual

GE
GE Profile PB905DT Manual

GE
GE JGBP26GEN Training manual

GE
GE Profile JD968KFCC Manual

GE
GE JGBP35WEV3WW Training manual

GE
GE Profile JSP47WFWW User guide

GE
GE Appliances PGB910 User manual

GE
GE Monogram ZDP48N6DHSS User manual

GE
GE 164D2966P238 Training manual