GE P2B912 Original instructions

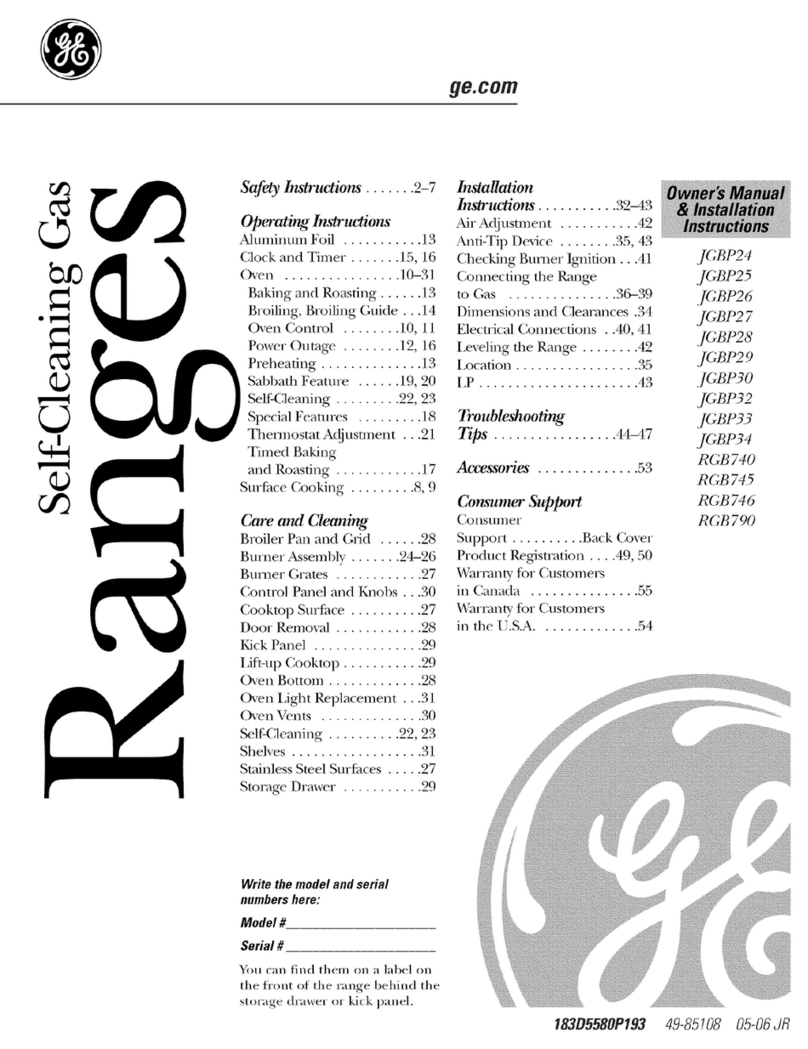
Safety Instructions . . . .2–7
Operating Instructions
Aluminum Foil . . . . . . . . . . . . . . . .13
Clock and Timer . . . . . . . . . . .16, 17
Oven . . . . . . . . . . . . . . . . . . . . .11–28
Baking and Roa ting . . . . .13, 14
Broiling, Broiling Guide . . . . . . .15
Oven Control . . . . . . . . . . . . . . .11
Power Outage . . . . . . . . . . . . . .12
Preheating . . . . . . . . . . . . . . . . .13
Sabbath Feature . . . . . . . . .22, 23
Self-Cleaning . . . . . . . . . . . .27, 28
Shelve . . . . . . . . . . . . . . . . . . . . .13
Special Feature . . . . . . . . .19–21
Thermo tat Adju tment . . . . . .24
Timed Baking
and Roa ting . . . . . . . . . . . . . . .18
Surface Cooking . . . . . . . . . . .8–10
Griddle . . . . . . . . . . . . . . . . . . . . .10
Warming Drawer . . . . . . . . . .25, 26
Care and Cleaning
Sealed Burner
A emblie . . . . . . . . . . . . . . .29, 30
Burner Grate . . . . . . . . . . . . . . . .31
Control Panel and Knob . . . . . .32
Cooktop Surface . . . . . . . . . . . . .31
Door Removal . . . . . . . . . . . . . . . .33
Drawer . . . . . . . . . . . . . . . . . . . . . .35
Griddle . . . . . . . . . . . . . . . . . . . . . .29
Oven Bottom . . . . . . . . . . . . . . . . .33
Oven Light Replacement . . . . . .34
Oven Vent . . . . . . . . . . . . . . . . . .32
Self-Cleaning . . . . . . . . . . . . .27, 28
Shelve . . . . . . . . . . . . . . . . . . . . . .34
Stainle Steel Surface . . . . . . .31
Installation
Instructions . . . . . . . . . .36–47
Air Adju tment . . . . . . . . . . . . . . .46
Anti-Tip Device . . . . . . . . . . . .39, 47
A emble Surface Burner . . . .44
Checking Burner
Ignition . . . . . . . . . . . . . . . . . . . . . .45
Connecting the Range
to Ga . . . . . . . . . . . . . . . . . . .40–42
Dimen ion and Clearance . . .38
Electrical Connection . . . . .43, 44
Leveling the Range . . . . . . . . . . .46
LP . . . . . . . . . . . . . . . . . . . . . . . . . . .47
Troubleshooting
Tips . . . . . . . . . . . . . . . . . . . .48–51
Accessories . . . . . . . . . . . . . .52
Consumer Support
Con umer Support . . .Back Cover
Product Regi tration . . . . . . .53, 54
Warranty for Cu tomer
in Canada . . . . . . . . . . . . . . . . . . .59
Warranty for Cu tomer
in the U.S.A. . . . . . . . . . . . . . . . . .58
Range
183D558 P221 49-85137 05-07 JR
P2B912
Owner’s Manual
& Installation
Instructions
ge.com
Self-Cleaning Gas
Write the model and serial
numbers here:
Model # ____________________
Serial #______________________
You can find them on a label
on the front of the range behind
the warming drawer.
In Canada contact us at:
www.GEA liances.ca

2
IMPORTANT SAFETY INFORMATION.
READ ALL INSTRUCTIONS BEFORE USING.
— Do not store or use gasoline or other
flammable vapors and liquids in the
vicinity of this or any other appliance.
—WHAT TO DO IF YOU
SMELL GAS
■Do not try to light any appliance.
■ Do not touch any electrical switch
do not use any phone in your building.
■ Immediately call your gas supplier
from a neighbor’s phone. Follow the
gas supplier’s instructions.
■ If you cannot reach your gas supplier,
call the fire department.
— Installation and service must be
performed by a qualified installer,
service agency or the gas supplier.
WARNING: If the information
in this manual is not followed exactly,
a fire or explosion may result causing
property damage, personal injury
or death.
WARNING!
ANTI-TIP DEVICE
■ALL RANGES CAN TIP
■INJURY TO PERSONS
COULD RESULT
■INSTALL ANTI-TIP
DEVICES PACKED WITH
RANGE
■SEE INSTALLATION
INSTRUCTIONS
WARNING!
For your safety, the information in this manual must be followed to minimize the risk of fire or
ex losion, electric shock, or to revent ro erty damage, ersonal injury, or loss of life.
All ranges can tip and injury could result.
To revent accidental ti ing of the range, attach it to the wall by installing the Anti-Ti device su lied.
If the Anti-Ti device su lied with the range does not fit this a lication, use the universal Anti-Ti
device WB2X7909.
To check if the device is installed and engaged ro erly, carefully ti the range forward. The Anti-Ti
device should engage and revent the range from ti ing over.
If you pull the range out from the wall for any rea on, make ure the device i properly engaged
when you pu h the range back again t the wall. If it i not, there i a po ible ri k of the range tipping
over and cau ing injury if you or a child tand, it or lean on an open door.
Plea e refer to the Anti-Tip device information in thi manual. Failure to take thi precaution could
re ult in tipping of the range and injury.
ANTI-TIP DEVICE
®
Operating
Instructions Safety InstructionsCare and Cleaning
Installation
Instructions
Troubleshooting
Tips
Consumer Support
3
ge.com
WARNING!
Have the installer show you the location of the range gas shut-off valve and how to shut it off if
necessary.
■Have your range in talled and properly
grounded by a qualified in taller, in
accordance with the In tallation In truction .
Any adju tment and ervice hould be
performed only by qualified ga range
in taller or ervice technician .
■Do not attempt to repair or replace any
part of your range unle it i pecifically
recommended in thi manual. All other ervice
hould be referred to a qualified technician.
■Plug your range into a 120-volt grounded
outlet only. Do not remove the round
grounding prong from the plug. If in doubt
about the grounding of the home electrical
y tem, it i your per onal re pon ibility and
obligation to have an ungrounded outlet
replaced with a properly grounded,
three-prong outlet in accordance with
the National Electrical Code. Do not u e
an exten ion cord with thi appliance.
SAFETY PRECAUTIONS
IMPORTANT SAFETY NOTICE
The California Safe Drinking Water and Toxic Enforcement Act requires the Governor of California to
ublish a list of substances known to the state to cause birth defects or other re roductive harm, and
requires businesses to warn customers of otential ex osure to such substances.
Gas a liances can cause minor ex osure to four of these substances, namely benzene, carbon
monoxide, formaldehyde and soot, caused rimarily by the incom lete combustion of natural gas
or LP fuels. Pro erly adjusted burners, indicated by a bluish rather than a yellow flame, will minimize
incom lete combustion. Ex osure to these substances can be minimized by venting with an o en
window or using a ventilation fan or hood.
Operating
Instructions Care and Cleaning Installation
Instructions
Troubleshooting
Tips
Safety Instructions Consumer Support

■Locate the range out of kitchen traffic path
and out of drafty location to prevent poor air
circulation.
■Be ure all packaging material are removed
from the range before operating it to prevent
fire or moke damage hould the packaging
material ignite.
■Be ure your range i correctly adju ted by
a qualified ervice technician or in taller for
the type of ga (natural or LP) that i to be
u ed. Your range can be converted for u e
with either type of ga . See the Installation
of the range ection.
■WARNING: The e adju tment mu t
be made by a qualified ervice technician
in accordance with the manufacturer’
in truction and all code and requirement
of the authority having juri diction. Failure
to follow the e in truction could re ult in
eriou injury or property damage. The
qualified agency performing thi work
a ume re pon ibility for the conver ion.
■After prolonged u e of a range, high floor
temperature may re ult and many floor
covering will not with tand thi kind of u e.
Never in tall the range over vinyl tile or
linoleum that cannot with tand uch type
of u e. Never in tall it directly over interior
kitchen carpeting.
■Do not leave children alone or unattended
where a range i hot or in operation.
They could be eriou ly burned.
■Do not allow anyone to climb, tand or
hang on the oven door, warming drawer
or cooktop. They could damage the range and
even tip it over, cau ing evere per onal injury.
■ CAUTION: Item of intere t to children
hould not be tored in cabinet above a
range or on the back pla h of a range—
children climbing on the range to reach
item could be eriou ly injured.
■Never wear loo e fitting or hanging garment
while u ing the appliance. Be careful when
reaching for item tored in cabinet over the
range. Flammable material could be ignited
if brought in contact with flame or hot oven
urface and may cau e evere burn .
■Do not tore flammable material in an oven,
a range drawer or near a cooktop.
■Do not tore or u e combu tible material ,
ga oline or other flammable vapor and
liquid in the vicinity of thi or any other
appliance.
■Do not let cooking grea e or other flammable
material accumulate in or near the range.
■Do not u e water on grea e fire . Never
pick up a flaming pan. Turn the control off.
Smother a flaming pan on a urface burner
by covering the pan completely with a
well-fitting lid, cookie heet or flat tray.
U e a multi-purpo e dry chemical or
foam-type fire extingui her.
■Flaming grea e out ide a pan can be put
out by covering it with baking oda or,
if available, by u ing a multi-purpo e dry
chemical or foam-type fire extingui her.
■Flame in the oven or warming drawer can
be mothered completely by clo ing the oven
door or drawer and turning the control to off
or by u ing a multi-purpo e dry chemical or
foam-type fire extingui her.
■Let the burner grate and other urface cool
before touching them or leaving them where
children can reach them.
■Never block the vent (air opening ) of the
range. They provide the air inlet and outlet
that are nece ary for the range to operate
properly with correct combu tion. Air opening
are located at the rear of the cooktop, at the
top and bottom of the oven door, and at the
bottom of the range under the warming
drawer.
■Large cratche or impact to gla door
can lead to broken or hattered gla .
SAFETY PRECAUTIONS
4
IMPORTANT SAFETY INFORMATION.
READ ALL INSTRUCTIONS BEFORE USING.
WARNING: NEVER u e thi
appliance a a pace heater to heat or
warm the room. Doing o may re ult
in carbon monoxide poi oning and
overheating of the oven.
Operating
Instructions Safety InstructionsCare and Cleaning
Installation
Instructions
Troubleshooting
Tips
Consumer Support
5
ge.com
SURFACE BURNERS
Use ro er an size—avoid ans that are unstable or easily ti ed. Select cookware having flat
bottoms large enough to cover burner grates. To avoid s illovers, make sure cookware is large enough
to contain the food ro erly. This will both save cleaning time and revent hazardous accumulations of
food, since heavy s attering or s illovers left on range can ignite. Use ans with handles that can be
easily gras ed and remain cool.
■Alway u e the LITE po ition when igniting the
top burner and make ure the burner have
ignited.
■Never leave the urface burner unattended
at high flame etting . Boilover cau e moking
and grea y pillover that may catch on fire.
■Adju t the top burner flame ize o it
doe not extend beyond the edge of the
cookware. Exce ive flame i hazardou .
■U e only dry pot holder — moi t or damp pot
holder on hot urface may re ult in burn
from team. Do not let pot holder come near
open flame when lifting cookware. Do not u e
a towel or other bulky cloth in place of a pot
holder.
■When u ing gla cookware, make ure it
i de igned for top-of-range cooking.
■To minimize the po ibility of burn , ignition
of flammable material and pillage, turn
cookware handle toward the ide or back
of the range without extending over adjacent
burner .
■Carefully watch food being fried at a high
flame etting.
■Alway heat fat lowly, and watch a it heat .
■Do not leave any item on the cooktop. The
hot air from the vent may ignite flammable
item and will increa e pre ure in clo ed
container , which may cau e them to bur t.
■If a combination of oil or fat will be u ed
in frying, tir together before heating or
a fat melt lowly.
■U e a deep fat thermometer whenever
po ible to prevent overheating fat beyond
the moking point.
■U e the lea t po ible amount of fat for
effective hallow or deep-fat frying. Filling the
pan too full of fat can cau e pillover when
food i added.
■Do not flame food on the cooktop. If you do
flame food under the hood, turn the fan on.
■Do not u e a wok on the cooking urface
if the wok ha a round metal ring that i
placed over the burner grate to upport the
wok. Thi ring act a a heat trap, which may
damage the burner grate and burner head.
Al o, it may cau e the burner to work
improperly. Thi may cau e a carbon
monoxide level above that allowed by current
tandard , re ulting in a health hazard.
■Food for frying hould be a dry a po ible.
Fro t on frozen food or moi ture on fre h
food can cau e hot fat to bubble up and
over the ide of the pan.
■Never try to move a pan of hot fat, e pecially
a deep fat fryer. Wait until the fat i cool.
■Do not leave pla tic item on the cooktop—
they may melt if left too clo e to the vent.
■Keep all pla tic away from the urface
burner .
■To avoid the po ibility of a burn, alway be
certain that the control for all burner are
at the OFF po ition and all grate are cool
before attempting to remove them.
■ If range i located near a window, do not hang
long curtain that could blow over the urface
burner and create a fire hazard.
■If you mell ga , turn off the ga to the range
and call a qualified ervice technician. Never
u e an open flame to locate a leak.
■Alway turn the urface burner control off
before removing cookware.
■Do not lift the cooktop. Lifting the cooktop
can lead to damage and improper operation
of the range.
WARNING!
Operating
Instructions Care and Cleaning Installation
Instructions
Troubleshooting
Tips
Safety Instructions Consumer Support

IMPORTANT SAFETY INFORMATION.
READ ALL INSTRUCTIONS BEFORE USING.
6
■Be ure to wipe off exce pillage before
elf-cleaning operation.
■Before elf-cleaning the oven, remove any
broiler pan, broiler grid, all cookware and any
aluminum foil.
■Oven helve hould be removed from the
oven before beginning the elf-clean cycle.
■Clean only part li ted in thi Owner’ Manual.
■Do not clean the door ga ket. The door ga ket
i e ential for a good eal. Care hould be
taken not to rub, damage or move the ga ket.
■If the elf-cleaning mode malfunction ,
turn the oven off and di connect the power
upply. Have it erviced by a qualified
technician.
■Do not u e oven cleaner . No commercial
oven cleaner or oven liner of any kind hould
be u ed in or around any part of the oven.
Re idue from oven cleaner will damage the
in ide of the oven when the elf-clean cycle
i u ed.
SELF-CLEANING THE OVEN
COOK MEAT AND POULTRY THOROUGHLY…
Cook meat and oultry thoroughly—meat to at least an INTERNAL tem erature of 160°F and oultry
to at least an INTERNAL tem erature of 180°F. Cooking to these tem eratures usually rotects against
foodborne illness.
■The purpo e of the warming drawer
i to hold hot cooked food at erving
temperature. Alway tart with hot food;
cold food cannot be heated or cooked
in the warming drawer.
■Do not u e the drawer to dry new paper .
If overheated, they can catch on fire.
■Do not leave paper product , pla tic , canned
food, or combu tible material in the drawer.
■Never leave jar or can of fat dripping in or
near your drawer.
■Do not warm food in the drawer for more
than two hour .
■Do not touch the heating element or
the interior surface of the drawer. The e
urface may be hot enough to burn.
REMEMBER: The in ide urface of the drawer
may be hot when the drawer i opened.
■U e care when opening the drawer. Open
the drawer a crack and let hot air or team
e cape before removing or replacing food.
Hot air or team which e cape can cau e
burn to hand , face and/or eye .
■Do not u e aluminum foil to line the drawer.
Foil i an excellent heat in ulator and will
trap heat beneath it. Thi will up et the
performance of the drawer and it could
damage the interior fini h.
ELECTRIC WARMING DRAWER
Operating
Instructions Safety InstructionsCare and Cleaning
Installation
Instructions
Troubleshooting
Tips
Consumer Support
READ AND FOLLOW THIS SAFETY INFORMATION
CAREFULLY.
SAVE THESE INSTRUCTIONS
7
ge.com
■Do not u e the oven for a torage area.
Item tored in the oven can ignite.
■Keep the oven free from grea e buildup.
■Place the oven helve in the de ired po ition
while the oven i cool.
■Pulling out the helf to the top-lock i a
convenience in lifting heavy food . It i al o
a precaution again t burn from touching hot
urface of the door or oven wall . The lowe t
po ition i not de igned to lide.
■Do not heat unopened food container .
Pre ure could build up and the container
could bur t, cau ing an injury.
■Do not u e aluminum foil anywhere in the
oven except a de cribed in thi manual.
Mi u e could re ult in a fire hazard or
damage to the range.
■When u ing cooking or roa ting bag in the
oven, follow the manufacturer’ direction .
■Do not u e your oven to dry new paper .
If overheated, they can catch fire.
■U e only gla cookware that i recommended
for u e in ga oven .
■Alway remove any broiler pan from range a
oon a you fini h broiling. Grea e left in the
pan can catch fire if oven i u ed without
removing the grea e from the broiler pan.
■When broiling, if meat i too clo e to the flame,
the fat may ignite. Trim exce fat to prevent
exce ive flare-up .
■Make ure any broiler pan i in place correctly
to reduce the po ibility of grea e fire .
■If you hould have a grea e fire in a broiler
pan, touch the Clear/Off pad, and keep
the oven door clo ed to contain fire until
it burn out.
■For afety and proper cooking performance,
alway bake and broil with the oven door
clo ed.
■The unit hould not be operated in any mode
with the bake element removed.
Stand away from the range when o ening the door of a hot oven. The hot air and steam that esca e
can cause burns to hands, face and eyes.
OVEN
WARNING: NEVER cover any
lot , hole or pa age in the oven bottom
or cover an entire rack with material uch
a aluminum foil. Doing o block air flow
through the oven and may cau e carbon
monoxide poi oning. Aluminum foil lining
may al o trap heat, cau ing a fire hazard.
Operating
Instructions Care and Cleaning Installation
Instructions
Troubleshooting
Tips
Safety Instructions Consumer Support

8
Operating
Instructions Safety InstructionsCare and Cleaning
Installation
Instructions
Troubleshooting
Tips
Consumer Support
Throughout this manual, features and appearance may vary from your model.
How to Light a Gas Surface Burner
Make sure all the surface burners are placed
in their respective positions.
Push the control knob in and turn it to
the LITE position.
You will hear a little clic ing noise—
the sound of the electric spark igniting
the burner.
Turn the knob to adjust the flame size.
f the knob stays at LITE, it will continue
to click.
When one burner is turned to LITE, all
the burners spark. Do not attempt to
disassemble or clean around any burner
while another burner is on. An electric shock
may result, which could cause you
to knock over hot cookware.
Push the control knob in and turn
it to the LITE position.
How to Select Flame Size
For safe handling of cookware, never let the
flames extend up the sides of the cookware.
Watch the flame, not the knob, as you reduce
heat. When fast heating is desired, the flame
size on a gas burner should match the
cookware you are using.
Flames larger than the bottom of the
cookware will not result in faster heating
of the cookware and could be hazardous.
Before Lighting a Gas Burner
■Make sure all burners are in place.
■Make sure all grates on the range are
properly placed before using any burner.
After Lighting a Gas Burner
■Do not operate the burner for an extended
period of time without cookware on the
grate. The finish on the grate may chip
without cookware to absorb the heat.
■Be sure the burners and grates are cool
before you place your hand, a pot holder,
cleaning cloths or other materials on them.
Sealed Gas Burners
Your gas range cooktop has five sealed
gas burners. They offer convenience,
cleanability and flexibility to be used in
a wide range of cooking applications.
The smallest burner in the right rear position is
the simmer burner. This burner can be turned
down to LO for a very low simmer setting. t
provides precise cooking performance for
delicate foods such as sauces or foods that
require low heat for a long cooking time.
The medium (left rear) and the large
(left front) burners are the primary burners for
most cooking. These general-purpose burners
can be turned down from HI to LO to suit a
wide range of cooking needs.
The extra large burner (right front) is the
maximum output burner. Like the other four
burners, it can be turned down from HI to LO
for a wide range of cooking applications;
however, this burner is designed to quickly
bring large amounts of liquid to a boil. t has
a special POWER BOIL™setting designed to
be used with cookware 10 inches or larger
in diameter.
The center oval burner (on some models) is
for large pots/pans or for use with the griddle.
Using the gas surface burners.
Small
Center oval)
on some
models)
Extra Large
Medium
Large
Extra-large burner only

9
Operating
Instructions Care and Cleaning Installation
Instructions
Troubleshooting
Tips
Safety Instructions Consumer Support
In Case of Power Failure
In ca e of a power failure, you can light the
ga urface burner on your range with a
match. Hold a lit match to the burner, then
pu h in and turn the control knob to the LITE
po ition. U e extreme caution when lighting
burner thi way.
Surface burner in u e when an electrical
power failure occur will continue to operate
normally.
ge.com
Wok This Way
We recommend that you use a 14-inch or
smaller flat-bottomed wok. Make sure the
wok bottom sits flat on the grate. They are
available at your local retail store.
Only a flat-bottomed wok hould be u ed.
Do not u e a wok upport ring. Placing the
ring over the burner or grate may cau e
the burner to work improperly, re ulting
in carbon monoxide level above allowable
tandard . Thi could be dangerou to your
health.
Use a flat-bottomed wok.
Stove Top Grills
Do not u e tove top grill on your ealed
ga burner . If you u e the tove top grill on
the ealed ga burner, it will cau e incomplete
combu tion and can re ult in expo ure to
carbon monoxide level above allowable
current tandard .
This can be hazardous to your health.
Top-of-Range Cookware
Aluminum: Medium-weight cookware i
recommended becau e it heat quickly
and evenly. Mo t food brown evenly
in an aluminum killet. U e aucepan with
tight-fitting lid when cooking with minimum
amount of water.
Cast-Iron: If heated lowly, mo t killet
will give ati factory re ult .
Enamelware: Under ome condition ,
the enamel of ome cookware may melt.
Follow cookware manufacturer’
recommendation for cooking method .
Glass: There are two type of gla
cookware—tho e for oven u e only and
tho e for top-of-range cooking ( aucepan ,
coffee and teapot ). Gla conduct heat
very lowly.
Heatproof Glass Ceramic: Can be u ed for
either urface or oven cooking. It conduct
heat very lowly and cool very lowly. Check
cookware manufacturer’ direction to be
ure it can be u ed on ga range .
Stainless Steel: Thi metal alone ha poor
heating propertie and i u ually combined
with copper, aluminum or other metal for
improved heat di tribution. Combination
metal killet u ually work ati factorily if
they are u ed with medium heat a the
manufacturer recommend .

10
Operating
Instructions Safety InstructionsCare and Cleaning
Installation
Instructions
Troubleshooting
Tips
Consumer Support
Mo t griddled food require cooking
on a preheated urface. Preheat griddle
according to the guide below, then witch
to the de ired cook etting.
IMPORTANT NOTES:
■Avoid cooking extremely greasy foods and
be careful of grease s ill-over while cooking.
■Do not use oil on the griddle for extended
lengths of time. Permanent staining and/or
craze lines on the surface could result.
■Never lace or store any items on the
griddle, even when it is not in use. The
griddle can become heated when using
the surrounding burners.
■Do not overheat the griddle. Leaving the
griddle burner on at HI for an extended
amount of time without food can damage
the non-stick coating.
■Avoid using metal utensils with shar oints
or rough shar edges which might damage
the griddle surface.
■Do not cut foods on the griddle.
Your non- tick coated griddle provide
an extra-large cooking urface for meat ,
pancake or other food u ually prepared
in a frying pan or killet.
NOTE: Your griddle will discolor over time
as it becomes seasoned with use.
How to Insert the Griddle
Using the griddle. (on some models)
CAUTION: Place and remove
the griddle only when all grates and
griddle are cool and all surface units
are turned OFF.
The griddle can only be u ed with the center
burner. To in ert the griddle, remove the
center grate and replace with the griddle.
Using the Griddle
Type of Food Preheat Cook
Conditions Setting
Warming none 3 (MED-LOW)
Tortilla
Pancake 7 (MED-HI) 7 (MED-HI)
3 min.
Hamburger 7 (MED-HI) 7 (MED-HI)
5 min.
Fried Egg HI 4 (MED)
5 min.
Bacon none 5 (MED)
Breakfa t HI 5 (MED)
Sau age Link 5 min.
Hot Sandwiche HI HI
( uch a 4 min.
Grilled Chee e)
NOTE: Griddle settings may need to
be adjusted if the griddle is used for an
extended time.

Self Clean Pad
Touch to elect elf-cleaning function.
See the Using the self-cleaning oven ection.
Bake Pad
Touch to elect the bake function.
Broil Hi/Lo Pad
Touch to elect the broil function.
Oven Light On/Off Pad
Touch to turn the oven light on or off.
Dis lay
Show the time of day, oven temperature,
whether the oven i in the bake, broil or
elf-cleaning mode, the time et for
the timer or automatic oven operation ,
and if the range i locked.
If “F– and a number or letter” flash in the display
and the oven control signals, this indicates a function
error code. Touch the Clear/Off ad. Allow the oven to
cool for one hour. Put the oven back into o eration. If the
function error code re eats, disconnect the ower to the
oven and call for service.
If your oven was set for a timed oven operation and a
power outage occurred, the clock and all rogrammed
functions must be reset.
The time of day will flash in the display when there
has been a power outage.
Cooking Time Pad
Touch and then touch the number pad to et
the amount of time you want your food to cook.
The oven will hut off when the cooking time
ha run out.
Clock Pad
Touch before etting the clock.
Kitchen Timer On/Off Pad
Touch to elect the timer feature.
Delay Start Pad
U e along with Cooking Time or Self Clean
pad to et the oven to tart and top
automatically at a time you et.
Control Lockout Pad
Touch and hold the Control Lockout pad for
3 econd to lock/unlock the control panel o
it cannot be activated.
Clear/Off Pad
Touch to cancel ALL oven operation except
the clock, timer and Control Lockout.
Start Pad
Mu t be touched to tart any cooking or
cleaning function.
Number Pads
U e to et any function requiring number ,
uch a the time of day on the clock, the timer,
the oven temperature, the internal food
temperature, the tart time and length of
operation for timed baking and elf-cleaning.
Warming Drawer Set/Off Pad
Touch thi pad and then touch number pad 1–3
to u e the warming drawer. See the Using the
electric warming drawer ection.
Using the oven controls.
(Throughout this manual, features and a earance may vary from your model.) ge.com
Oven Control, Clock, Timer and Features (on some models)
Features, a earance
and ad locations
may vary.
NOTE: For gas-only
baking, hold the
BAKE ad for
3 seconds.
11
Operating
Instructions Care and Cleaning Installation
Instructions
Troubleshooting
Tips
Safety Instructions Consumer Support

12
Operating
Instructions Safety InstructionsCare and Cleaning
Installation
Instructions
Troubleshooting
Tips
Consumer Support
Using the upper oven.
To avoid ossible burns, lace the shelves in the desired osition before you turn the oven on.
Before you begin…
The helve have top-lock , o that when
placed correctly on the helf upport
(A through E), they will top before coming
completely out, and will not tilt.
When placing and removing cookware,
pull the helf out to the bump on the helf
upport.
To remove a shelf, pull it toward you,
tilt the front end up and pull it out.
To replace, place the end of the helf
( top-lock ) on the upport, tilt up the front
and pu h the helf in.
NOTE: The shelf is not designed to slide out
at the s ecial low shelf (R) osition.
The oven has 5 shelf ositions.
It also has a s ecial low shelf
osition (R) for extra large items,
such as a large turkey.
Power Outage
CAUTION: Do not make any attem t to
o erate the electric ignition oven during an
electrical ower failure.
The oven or broiler cannot be lit during a
power failure. Ga will not flow unle the
glow bar i hot.
If the oven i in u e when a power failure
occur , the oven burner hut off and cannot
be re-lit until power i re tored. Thi i
becau e the flow of ga i automatically
topped and will not re ume when power
i re tored until the glow bar ha reached
operating temperature.
Upper Oven Light
Touch the Oven Light pad on the upper
control panel to turn the light on or off.
On ome model , the Oven Light witch
i on the lower front control panel.
Upper Oven Vent
Your oven i vented through duct at the rear
of the range. Do not block the e duct when
cooking in the oven—it i important that the
flow of hot air from the oven and fre h air
to the oven burner be uninterrupted. Avoid
touching the vent opening or nearby
urface during oven or broiler operation—
they may become hot.
■Handles of ots and ans on the cookto
may become hot if left too close to the vent.
■Do not leave lastic or flammable items on
the cookto —they may melt or ignite if left
too close to the vent.
■Do not leave closed containers on the
cookto . The ressure in closed containers
may increase, which may cause them
to burst.
■Metal items will become very hot if they are
left on the cookto , and could cause burns.
Plastic items on the cookto may
melt if left too close to the vent.
Vent a earance and location vary.

Operating
Instructions Care and Cleaning Installation
Instructions
Troubleshooting
Tips
Safety Instructions Consumer Support
How to Set the Upper Oven for Baking or Roasting
Your oven is not designed for o en-door
cooking.
Touch the Bake pad.
Touch the number pad to et the
de ired temperature.
Touch the Start pad.
The word ON and 1 ° will be di played.
A the oven heat up, the di play will how
the changing temperature. When the oven
reache the temperature you et, a tone
will ound.
To change the oven tem erature during BAKE
cycle, ress the Bake ad and then the
number ads to get the new tem erature.
Check food for donene at minimum
time on recipe. Cook longer if nece ary.
Touch the Clear/Off pad when cooking
i complete.
Type of Food Shelf Position
Frozen pie (on cookie heet) B or C
Angel food cake, A
bundt or pound cake
Bi cuit , muffin , brownie , C
cookie , cupcake ,
layer cake , pie
Ca erole B or C
Roa ting R or A
Preheating and Pan Placement
Preheat the oven if the recipe call for it.
To preheat, et the oven at the correct
temperature. Preheating i nece ary for
good re ult when baking cake , cookie ,
pa try and bread .
For ovens without a reheat indicator light
or tone, reheat 10 minutes.
Baking re ult will be better if baking pan
are centered in the oven a much a po ible.
Pan hould not touch each other or the wall
of the oven. If you need to u e two helve ,
tagger the pan o one i not directly above
the other, and leave approximately 11⁄2″
between pan , from the front, back and
ide of the wall.
Oven Moisture
A your oven heat up, the temperature
change of the air in the oven may cau e
water droplet to form on the door gla .
The e droplet are harmle and will
evaporate a the oven continue to
heat up.
The oven has a s ecial low shelf (R)
osition just above the oven
bottom. Use it when extra cooking
s ace is needed, for exam le,
when cooking a large turkey. The
shelf is not designed to slide out
at this osition.
Using the upper oven. ge.com
Aluminum Foil
Do not use aluminum foil on the bottom of
the oven.
Never entirely cover a helf with aluminum
foil. Thi will di turb the heat circulation and
re ult in poor baking.
A maller heet of foil may be u ed to catch a
pillover by placing it on a lower helf everal
inche below the food.
13

14
How to Set the Upper Oven for Gas Only Baking or Roasting
Your oven is not designed for o en-door
cooking.
Hold the Bake pad for 3 econd .
Touch the number pad to et the
de ired temperature.
Touch the Start pad.
The word ON and 1 ° will be di played.
A the oven heat up, the di play will how
the changing temperature. When the oven
reache the temperature you et, a tone
will ound.
To change the oven tem erature during BAKE
cycle, touch the Bake ad and then the
number ads to get the new tem erature.
Check food for donene at minimum
time on recipe. Cook longer if nece ary.
Touch the Clear/Off pad when cooking
i complete.
Type of Food Shelf Position
Frozen pie (on cookie heet) B or C
Angel food cake, A
Bundt or pound cake
Bi cuit , muffin , brownie , C
cookie , cupcake ,
layer cake , pie
Ca erole B or C
Roa ting A
The oven has a s ecial low shelf (R)
osition just above the oven
bottom. Use it when extra cooking
s ace is needed, for exam le,
when cooking a large turkey.
The shelf is not designed to slide
out at this osition.
Using the oven.
Operating
Instructions Safety InstructionsCare and Cleaning
Installation
Instructions
Troubleshooting
Tips
Consumer Support
*See illustration for descri tion of shelf ositions.
15
ge.com
Broiling Guide
Quantity and/ Shelf* First Side Second Side
Food or Thickness Position Time (min.) Time (min.) Comments
Bacon 1/2 lb. C 4 3 Arrange in ingle layer.
(about 8 thin lice )
Ground Beef 1 lb. (4 pattie ) C 10 7–10 Space evenly. Up to
Well Done 1/2 to 3/4″thick 8 pattie take about
the ame time.
Beef Steaks
Rare†1″thick D 8 6–7 Steak le than 1″thick
Medium 1 to 11⁄2lb . D 11 5–6 cook through before
Well Done D 12 8–9 browning. Pan frying
i recommended.
Sla h fat.
Rare†11⁄2″thick D 12 8–9
Medium 2 to 21⁄2lb . D 15 12–15
Well Done D 25 16–19
Chicken 1 whole C 30–35 15–20 Bru h each ide with
2 to 21⁄2lb ., melted butter. Broil
plit lengthwi e kin- ide-down fir t.
4 bone-in brea t D 25–30 10–15
Lobster Tails 2–4 C 13–16 Do not Cut through back of
6 to 8 oz. each turn hell. Spread open. Bru h
12 to 32 oz. over. with melted butter
before broiling and after
half of broiling time.
Fish Fillets 1 to 11⁄2 lb . D 5–6 4–6 Handle and turn very
carefully. Bru h with
lemon butter before
and during cooking, if
de ired. Preheat broiler
to increa e browning.
Ham Slices 1″thick C 8 8–9
(precooked)
1/2″thick D 6 5–6
Pork Chops 2 (1/2″thick) D 10 7–8 Sla h fat.
Well Done 2 (1″thick) about 1 lb. D 15 8–9
Lamb Chops
Medium 2 (1″thick) about 10 D 8 4–7 Sla h fat.
Well Done to 12 oz. D 10 8–10
Medium 2 (11⁄2″thick) about 1 lb. D 10 5–8
Well Done D 17 13–15
How to Set the Oven for Broiling
Place the meat or fi h on a broiler grid
in a broiler pan.
Follow ugge ted helf po ition in the
Broiling Guide.
The oven door must be clo ed during
broiling.
Touch the Broil Hi/Lo pad once for
Hi Broil.
To change to Lo Broil, touch the Broil
Hi/Lo pad again.
Touch the Start pad.
Broil Preheat – After touching Start,
the di play will how preheat for
approximately 10 minute . The ga bake
element will cycle on during preheat.
Place your food in the oven after the
preheat cycle ha completed.
When broiling i fini hed, touch the
Clear/Off pad.
Serve the food immediately, and leave the
pan out ide the oven to cool during the meal
for ea ie t cleaning.
U e LO Broil to cook food uch a poultry
or thick cut of meat thoroughly without
over-browning them.
The ize, weight, thickne ,
tarting temperature and
your preference of donene
will affect broiling time . Thi
guide i ba ed on meat at
refrigerator temperature.
†The U.S. De artment of
Agriculture says “Rare beef is
o ular, but you should know that
cooking it to only 140°F. means
some food oisoning organisms
may survive.” (Source: Safe Food
Book, Your Kitchen Guide, USDA
Rev. June 1985.)
The oven has 5 shelf ositions.
Close the door. Always broil with
the door closed.
Operating
Instructions Care and Cleaning Installation
Instructions
Troubleshooting
Tips
Safety Instructions Consumer Support

16
Operating
Instructions Safety InstructionsCare and Cleaning
Installation
Instructions
Troubleshooting
Tips
Consumer Support
Not all features are on all models.
To Set the Clock
The clock mu t be et to the correct
time of day for the automatic oven timing
function to work properly. The time of day
cannot be changed during a timed baking
or elf-cleaning cycle.
Touch the Clock pad.
Touch the number pad .
Touch the number pad the ame way you
read them. For example, to et 12:34, touch
the number pad 1, 2, 3 and 4in that order.
If number pad are not touched within one
minute after you touch the Clock pad, the
di play revert to the original etting. If thi
happen , touch the Clock pad and reenter
the time of day.
Touch the Start pad until the time of
day how in the di play. Thi enter
the time and tart the clock.
To check the time of day when the dis lay
is showing other information, sim ly touch
the Clock ad. The time of day shows until
another ad is touched.
To Set the Timer
The timer does not control oven o erations.
The maximum setting on the timer is 9 hours
and 59 minutes.
Touch the Kitchen Timer On/Off pad.
Touch the number pad until the
amount of time you want how in the
di play. The maximum time that can be
entered in minute i 59. Time more
than 59 minute hould be changed to
hour and minute . For example, to
enter 90 minute a 1 hour 30 minute ,
touch 1, 3 and in that order.
If you make a mistake, ress the Kitchen
Timer On/Off ad and begin again.
Touch the Start pad. After pre ing the
Start pad, Set di appear ; thi tell you
the time i counting down, although the
di play doe not change until one
minute ha pa ed.
When the timer reache : , the control
will beep 3 time followed by one beep
every 6 econd until the Kitchen Timer
On/Off pad i touched.
The 6 second tone can be canceled by
following the ste s in the S ecial features
of your oven control section under Tones
at the End of a Timed Cycle.
Using the clock and timer.
Make sure the clock is set to the
correct time of day.
The timer is a minute timer only.
The Clear/Off ad does not affect
the timer.

17
Operating
Instructions Care and Cleaning Installation
Instructions
Troubleshooting
Tips
Safety Instructions Consumer Support
Power Outage
If a flashing time is in the dis lay, you have
ex erienced a ower failure. Reset the clock.
Touch the Clock pad once to re et. Enter
the correct time of day by touching the
appropriate number pad . Touch the
Start pad.
To Reset the Timer
If the di play i till howing the time
remaining, you may change it by touching
the Kitchen Timer On/Off pad, then touch
the number pad until the time you want
appear in the di play.
If the remaining time i not in the di play
(clock, delay tart or cooking time are in
the di play), recall the remaining time by
touching the Kitchen Timer On/Off pad
and then touching the number pad to
enter the new time you want.
To Cancel the Timer
Touch the Kitchen Timer On/Off pad twice.
ge.com

18
Operating
Instructions Safety InstructionsCare and Cleaning
Installation
Instructions
Troubleshooting
Tips
Consumer Support
Using the timed baking and roasting features. (u er oven only)
NOTE: Foods that s oil easily—such as milk, eggs, fish, stuffings, oultry and ork—should not be allowed to sit for
more than 1 hour before or after cooking. Room tem erature romotes the growth of harmful bacteria. Be sure that
the oven light is off because heat from the bulb will s eed harmful bacteria growth.
How to Set an Immediate Start and Automatic Stop
The u er oven will turn on immediately and
cook for a selected length of time. At the end of the
cooking time, the oven will turn off automatically.
Touch the Bake pad.
Touch the number pad to et the de ired
oven temperature.
Touch the Cooking Time pad.
NOTE: If your reci e requires reheating, you may
need to add additional time to the length of the
cooking time.
Touch the number pad to et the de ired
length of cooking time. The minimum
cooking time you can et i 1 minute.
The oven temperature that you et and the
cooking time that you entered will be in the
di play.
Touch the Start pad.
The oven will turn ON, and the di play will how
the cooking time countdown and the changing
temperature tarting at 100°F. (The temperature
di play will tart to change once the oven
temperature reache 100°F.) When the oven
reache the temperature you et, 3 beep
will ound.
The oven will continue to cook for the et amount
of time, then turn off automatically, unle the
Cook and Hold feature wa et. See the S ecial
features of your oven control ection.
After the oven turn off, the end-of-cycle tone will
ound.
Touch the Clear/Off pad to clear the di play
if nece ary. Remove the food from the
oven. Remember, even though the oven
turn off automatically, food left in the oven
will continue cooking after the oven turn off.
How to Set a Delayed Start and Automatic Stop
The u er oven will turn on at the time of day you
set, cook for a s ecific length of time and then turn
off automatically.
Make ure the clock how the correct time of day.
Touch the Bake pad.
Touch the number pad to et the de ired
oven temperature.
Touch the Cooking Time pad.
NOTE: If your reci e requires reheating, you may
need to add additional time to the length of the
cooking time.
Touch the number pad to et the de ired
length of cooking time. The minimum
cooking time you can et i 1 minute.
The oven temperature that you et and the
cooking time that you entered will be in the
di play.
Touch the Delay Start pad.
Touch the number pad to et the time of
day you want the oven to turn on and tart
cooking.
Touch the Start pad.
NOTE: An attention tone will sound if you are using
timed baking and do not touch the Start ad.
NOTE: If you would like to check the times you
have set, touch the Delay Start ad to check the
start time you have set or touch the Cooking Time
ad to check the length of cooking time you have
set.
When the oven turn ON at the time of day
you et, the di play will how the cooking time
countdown and the changing temperature
tarting at 100°F. (The temperature di play
will tart to change once the oven temperature
reache 100°F.) When the oven reache the
temperature you et, beep will ound.
The oven will continue to cook for the et amount
of time, then turn off automatically, unle the
Cook and Hold feature wa et. See the S ecial
features of your oven control ection.
After the oven turn off, the end-of-cycle tone
will ound.
Touch the Clear/Off pad to clear the di play
if nece ary. Remove the food from the
oven. Remember, even though the oven
turn off automatically, food left in the oven
will continue cooking after the oven turn off.

19
Operating
Instructions Care and Cleaning Installation
Instructions
Troubleshooting
Tips
Safety Instructions Consumer Support
Your new touch ad control has additional features that you may choose to use. The following are the features and
how you may activate them.
The s ecial feature modes can only be activated while the dis lay is showing the time of day. They remain in the
control’s memory until the ste s are re eated.
When the dis lay shows your choice, touch the Start ad. The s ecial features will remain in memory after
a ower failure.
12 Hour Shut-Off
With this feature, should you forget and leave
the oven on, the control will automatically turn
off the oven after 12 hours during baking
functions or after 3 hours during a broil function.
If you wi h to turn OFF thi feature, follow
the tep below.
Touch the Bake and Broil Hi/Lo pad
at the ame time for 3 econd until the
di play how SF.
Touch the Delay Start pad. The di play
will how 12 shdn (12 hour hut-off).
Touch the Delay Start pad again
and the di play will how no shdn
(no hut-off).
Touch the Start pad to activate the no
hut-off and leave the control et in thi
pecial feature mode.
Fahrenheit or Celsius Temperature Selection
Your oven control is set to use the Fahrenheit
tem erature selections, but you may change
this to use the Celsius selections.
Touch the Bake and Broil Hi/Lo pad
at the ame time for 3 econd until the
di play how SF.
Touch the Broil Hi/Lo and Cooking
Time pad at the ame time. The di play
will how F(Fahrenheit).
Touch the Broil Hi/Lo and Cooking
Time pad again at the ame time.
The di play will how C(Cel iu ).
Touch the Start pad.
At the end of a timed cycle, 3 short bee s will
sound followed by one bee every 6 seconds
until the Clear/Off ad is touched. This
continual 6-second bee may be canceled.
To cancel the 6- econd beep:
Touch the Bake and Broil Hi/Lo pad
at the ame time for 3 econd until the
di play how SF.
Touch the Kitchen Timer On/Off
pad. The di play how CON BEEP
(continual beep) and BEEP. Touch the
Kitchen Timer On/Off pad again. The
di play how BEEP. (Thi cancel the
one beep every 6 econd .)
Touch the Start pad.
Special features of your upper oven control. ge.com
Tones at the End of a Timed Cycle

20
Special features of your oven control.
Primary Bake Mode Select
The oven control is set to use the electric bake
and broil elements while baking. It can be
changed to use only the gas bake burner.
If you wi h to witch to ga only, follow the
tep below.
Touch the Bake and Broil Hi/Lo pad
at the ame time for 3 econd until the
di play how SF.
Touch the Bake and Self Clean pad
at the ame time. The di play will how
BAKE 2.
Touch the 9pad and the di play will
change to BAKE 1.
Touch the Start pad.
Broil Preheat
The oven is set to use Broil Preheat during
Broiling.
If you wi h to turn ON thi feature, follow the
tep below.
Touch the Delay Start and Broil Hi/Lo
pad at the ame time for 3 econd
until the di play how SF.
Touch the Broil Hi/Lo and Delay Start
pad at the ame time. The di play will
how PrE ON.
Touch the 9pad and the di play will
change to PrE OFF.
Touch the Start pad.
Operating
Instructions Safety InstructionsCare and Cleaning
Installation
Instructions
Troubleshooting
Tips
Consumer Support
Other manuals for P2B912
1
This manual suits for next models
4
Table of contents
Other GE Range manuals
Popular Range manuals by other brands

Whirlpool
Whirlpool WFG505M0BS Use & care guide

King Kooker
King Kooker 10560HC Assembly instructions and use and care manual

Rohnson
Rohnson R-200 instruction manual

Verona
Verona VEFSGG 304 Series User operating instructions

Sienna
Sienna ESM90TSX Installation - use - maintenance

Kenmore
Kenmore 911.36665 Use & care guide