GE XL44 JGBS02EN Training manual

.
~afe~ instructions ....................2-5
Anti-TipDevice .................................3,30,40
operatingInstructions, mps
Aluminum Foil............................5, 16, 19,23
Features........................................................6,7
Oven.....................................................12-20
Baking..................................................15, 16
Broiling,BroilingGuide....................19,20
Clockand Timer .................................11,12
ControlSettings...................12, 15, 17, 19
Light;BulbReplacement.................14,24
Preheating...........................................15, 18
Roasting,RoastingGuide................17. 18
Shelves.........................................13-15,23
SurfaceCooking......................................8-10
ControlSettings ..........................................8
ElectricIgnition............................................8
Standing PilotModels................................8
Care and Cleaning ....................2l-28
AirAdjustmentShutter.....................................28
ContinuousClean...............................................26
BroilerDrawer......................................................27
BroilerPanandRack..................................19,23
BurnerAssembly..........................................21,22
Door Removal...............................................25
Lift-upCooktop.............................................28
Oven Bottom.................................................23
OvenVents....................................4,5, 13,28
Storage Drawer ............................................27
Problem Solver...............................46
More questions?...call
GEAnswerCenterm80~626.2000
Preparation .................................29-45
Flame Size................................10,34,35,46
FlooringUnderthe Range..........................31
InstallationInstructions.......................29-45
Leveling..........................................................40
Thermostat Adjustment .............................14
~o~~~m~~ ~~~w~c~s ...................47
Appliance Registration..................................2
Model and Serial Number Location...........2
Warranty ........................................BackCover
Standard-CleanModels:
JGBS02EN JGBS06PR
JGBS02PN JGBS12GER
JGBS04ER JGBS15GER
JGBS04PR JGBS16GEP
JGBS04GER JGBS17GER
JGBS04GPR JGBS19GEP
JGBS06ER JGSS05GER
Continuous-CleanModels:
JGBC75GER JGBC16GEP
JGBC17GER
—
All manuals and user guides at all-guides.com
all-guides.com

m~pusmLP You
s
It is intendedtohelpyouoperate
andmaintainyournewrange
properly.
Keepit handyfor answersto your
questions.
If youdon’tunderstandsomething
or needmorehelp,write(include
yourphonenumber):
ConsumerAffairs
GEAppliances
ApplianceP&k
Louisville,KY40225
Wtitedown the model
and Setid nmbers.
Dependingonyourrange,you’ll
findthemodelandserialnumbers
on alabelon thefrontof therange,
behindthekickpanel,storage
draweror broilerdrawer.
Thesenumbersarealsoonthe
ConsumerProductOwnership
RegistrationCardthatcame
withyourrange.Beforesending
in thiscard,pleasewritethese
numbershere:
ModelNumber
SefialNumber
Usethesenumbersinany
correspondenceor servicecalls
concerningyourrange.
If Ou received
1aamaged range.* e
Immediatelycontactthedealer(or
builder)thatsoldyoutherange.
Save the and money.
Before you request
service.. s
ChecktheProblemSolverin the
backofthisbook.It listscausesof
minoroperatingproblemsthatyou
cancorrectyourself.
@oAPPROVEO
mYou rdEEDSERWCE*..
Toobtainservice,seetheConsumer
Servicespagein thebackof this
book.
Toobtainreplacementparts,contact
G~otpoint ServiceCenters.
We’reproudof ourserviceand
wantyouto be pleased.If for some
reasonyouare nothappywiththe
serviceyoureceive,herearethree
stepsto followfor furtherhelp.
~ST, contactthepeoplewho
servicedyourappliance.Explain
whyyou are notpleased.Inmost
cases,thiswillsolvetheproblem.
NEXT,if youarestillnotpleased,
writeallthedetails-including
yourphonenumber-to:
Manager,ConsumerRelations
GEAppliances
AppliancePark
Louisville,KY40225
~ALLY, if yourproblemis still
notresolved,write:
MajorApplianceConsumer
ActionPanel
20NorthWackerDrive
Chicago,~60606
—Donotstem or wgmtine or other ~bdately dyourgwsupplierfmma
flmable vapm mdIiqti* inthevicitity nei@bor9sphone.FoUowtie gassuppMer9s
of$Mormy otherapptimce, htmctiom.
—mT To m m You smLLGAS eHyoumnnotreachyowgasSupptier,w
e
—
All manuals and user guides at all-guides.com

—
—
—
—
e–
WORTANT SAFETY NOTICE ~Besureyourrangeiscorrectlyadjusti bya‘
TheCtifornia SafeDrinkingWaterandToxic qualifiedservicetecMcianorinstilerforthe
Enfo~cementActrequirestheGovernorof typeofgas(na@rdorLP).thatistobe@d.
Californiatopublishalistofsubstancesknown Yourrangecanbeconvertedforusewitheither
typeofgas,Seehstallationk5tructi0ris0
tothestatetocausecancer,birthdefectsorother
reproductiveharm,andrequiresbusinessestowarn oAfterprolongeduse-ofarange9ti@,,flwi
customersofpotentialexposuretosuchsubstances. temperaturesmayresdt’ah~ti*yf100k -.-
Gasappliancescankauseminorexposureto coveringstil notwithstid this~”~-oftiea..
Neverinstalltherangeovervinyltileoi”.~noleum
fourofthesesubstances,namelybenzene,carbon
monoxide,formaldehydearidsoot,causedprimarily thatcannotwithstandsuch~@--tifkse:Never
bytheincompletecombustionofnaturalgasor installitdirectlyoverinteriorkitchen,-c~ting,
.l. ,:---
LPfuels:Roperlyadjustedburners,indicatedby .. -,;., -..
,. .,.. . . . -“..,..-,--
.,.
abluishratherthanayellowflame,willminifize .,:,
~~~g ~~~ ~~~g~, ‘ ‘-’.:.,‘‘“::::,““~-,..,,.
incomplete
combustion.Exp,osuretothese ,. .-,
,., ., ,,-..f,>,>-.
substancescanbeminimizedbyventingwithan ~Do”n9t,leavec~dre~done6r*Wh~~wh.6fi ~.
openwindoworusingaventilationfanorhood. ~arangeishotorinoperati6~iTheyeQuId ~“
seriouslybtied. -, ~~;,:-.:. ~,::.::.,.;~..:-.,>,....:: I
., .7“, ,:.-.~.‘.,).‘~.
~H*v6the instilershowyouthelocationofthe
rmgegascut-offvalveandhowtoshutitoff
Mnee=ary.
~Wve”yourrange‘inStaMedandproperly
&omdd byaqualifiedinsti~er,
inaccordance
withthe‘hstallationkstructions.Anyadjustment
andserviceshouldbeperformedonlybyqualified
gasrangeinstallersorservicetechnicians.
*P#ugyo~r rmge kto a120=voItgrounded
outletady,Donotremovetheroundgrounding
prongtim theplug.fiin doubtaboutthegrounding
ofthehime electrical’system,itisyourpersonal
msp~ibility mdobligationtohavean~grounded
outletreplacedwithaproperlygrounded,three-
prongoutletinaccordancewiththeNational
ElectricalCode.hCanada,theappliancemust
beelectrica~ygroundedinaccordancewiththe
CanadianElectricalCode.Donotusean
extensioncordwiththisappliance.
s*m*pachg materialsareremovedfrO~
ther-e beforeoperatingit topreventfireor
smokedamageshouldthepackingmaterialignite.
whenyoupushthe“rangebae~agtist’ke ~di. ~
.2, .
.,-.
eNeverwearloosefitig otih~n@nggamenk
whtieusingtheapptiance.Becaretil‘when
reachingforitemsstoredincabinetsoverthe
cooktop.Nammablematerialcouldbeignitedif
broughtincontactwithflameorhotovensurfaces
andmaycauseseverebums. (cotiitiuedhextpage)
3
All manuals and user guides at all-guides.com

~For ~ow ~afe~,~~~~~US~yoar appiiancefor s~~~ays~rn surfaceburnerto0~ before
wartingorheatingthemom* removingCookwaree
. .
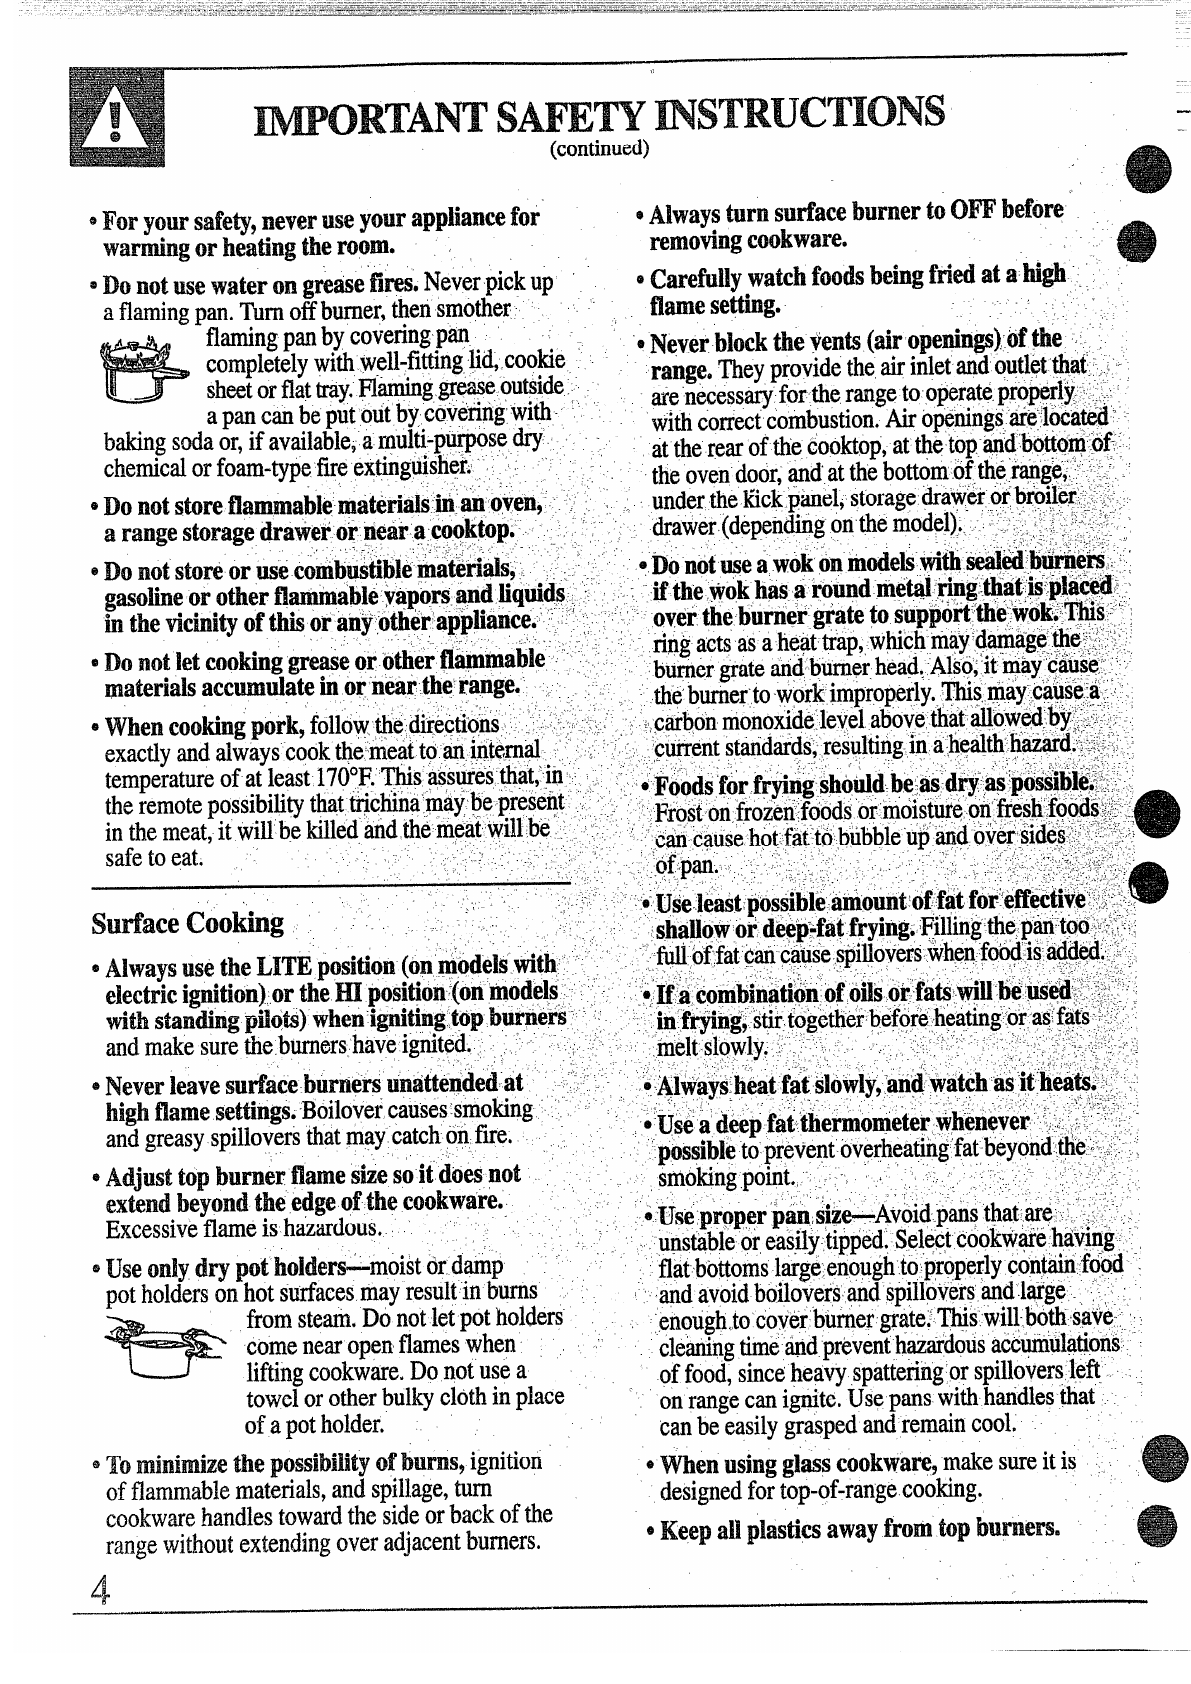
sDOnotusewater on greasefi~o ~~verpickUP ‘~~~efi~]y w~~c~food$ beh~ ftid at ~M@ ,
aflamingpan.Turnoff burner,thensrno~er “,flme setting. .,
flamingpan
bycoveringpan ..
e~e~er~~~~kt~~f~nts (airopetings)Ofthe -~,
completelywithwell-fittingEd,cookie
sh~t orflattray.H-tig,grease outside range,Theyprovidetheairinletandoutletth~i .-
apancanbeputoutbyc@v&ringwith~‘menecessaryfortherangetooperate.propbrl~-:”~
bakingsodaor,ifavailable,amulti-purposedry -withcorrectcombustion.Airopenings,ti~l*aM”
attherearofthecooktop>at~e toPWd:bOttO@OfZ~
chemicalorfoam-typefireexting~sh?ro’” ~:theovendoor,,wd’atthebottomofthei~gb? ~~...-.
.:
@Donotstoreflammabiemtit6iE*-k”an oven9; ~;, . underthetick panel,storagedraweror,br?~ler}~,.;
arangestoragedrawerokneara:coq~$op~-_-”, ,‘ drawer(depetidingonthemode]). r”.,:... ~~~~s
.,
,,-,_- ....” .:>-.,,-----
,“ --,.,
~DonotstoreorusecotibtitiblematGrids9.~.:,.:. ~~-~not~ ~~o~‘On~tiels tith ~~ ~~s~- :‘
iftheWokhas.~round~g~ .$pg:~~t~~’P~~@-:
gasoheorotherflmtitibl~Yapors.~nd~~tiqs~~~-,~~
htheticbityofttiisorak~ti!hirapp~ancee‘.”-.~OVerthebkrnir@atetosuP@o~’~e’Jwo%o.@$‘,’;~
,- -ringactsasaheattrap,w~chmay’d~tige~q;:.’~,.
~Do~~t~~t
CooMg gretie oroier flti~ab~~ ,burnergratetid’burnerhead,Alibi:itmaydauie
materialsaccmulateinorneartherange. ti&
burnerto-workimproperly.This,@ay.cause.[ai~
,, :,, !-. ,
~Whentooting pork9followtie directions -,,..:.” ,~carbon monoxid~.levelabovethat-
~owd-by(;;~..:
‘currentstandardsresulting-inahealt~~~~d.~<~~t.‘
exactlyandalwayscookthe:fieattoqi.nte.m~‘L,“~~-~,,.
temperatureofatleast170°F.’tis @surGsthat,’ih’. ,e~~od~‘firfrfi~gs~~~d.be:~-dfy- ~:!po#;~~~~-~,;:
theremotepossibilitythatxc~na:wajbe ~reseS$“~~‘Fiost-on,froienfoods‘ormoisture,o~’’tie$h’food~;~..
in the meat,it wiHbeWledaridtie m~atwillbe .6. ., , .
.. ~.’,.... ,
‘‘,cticausehot.fatto,bubbleup’tid 6ver$id~~{:~~,“.:.:
safetoeat, ,,. .
.4,’ -. ,. ”’. -,.
.. ,. .....,,:~
,, .~f
pm.~~‘,-:. , , -‘“.‘;::’}:-:,.’::.;:,;:::
)’.
,. .-
,.
Stiace Cooting .., ~:.Use..leaitpos&blimount‘of “fitfOr:+ffiC@Ve~’.;:;;::-
,. . . ShaNOWor deep-fatfryifig.~i~g thep“ti:tod”::,:f’~
,’ ~ti,bffat cancatiies~i!over~when.fo@-is@d~O _-
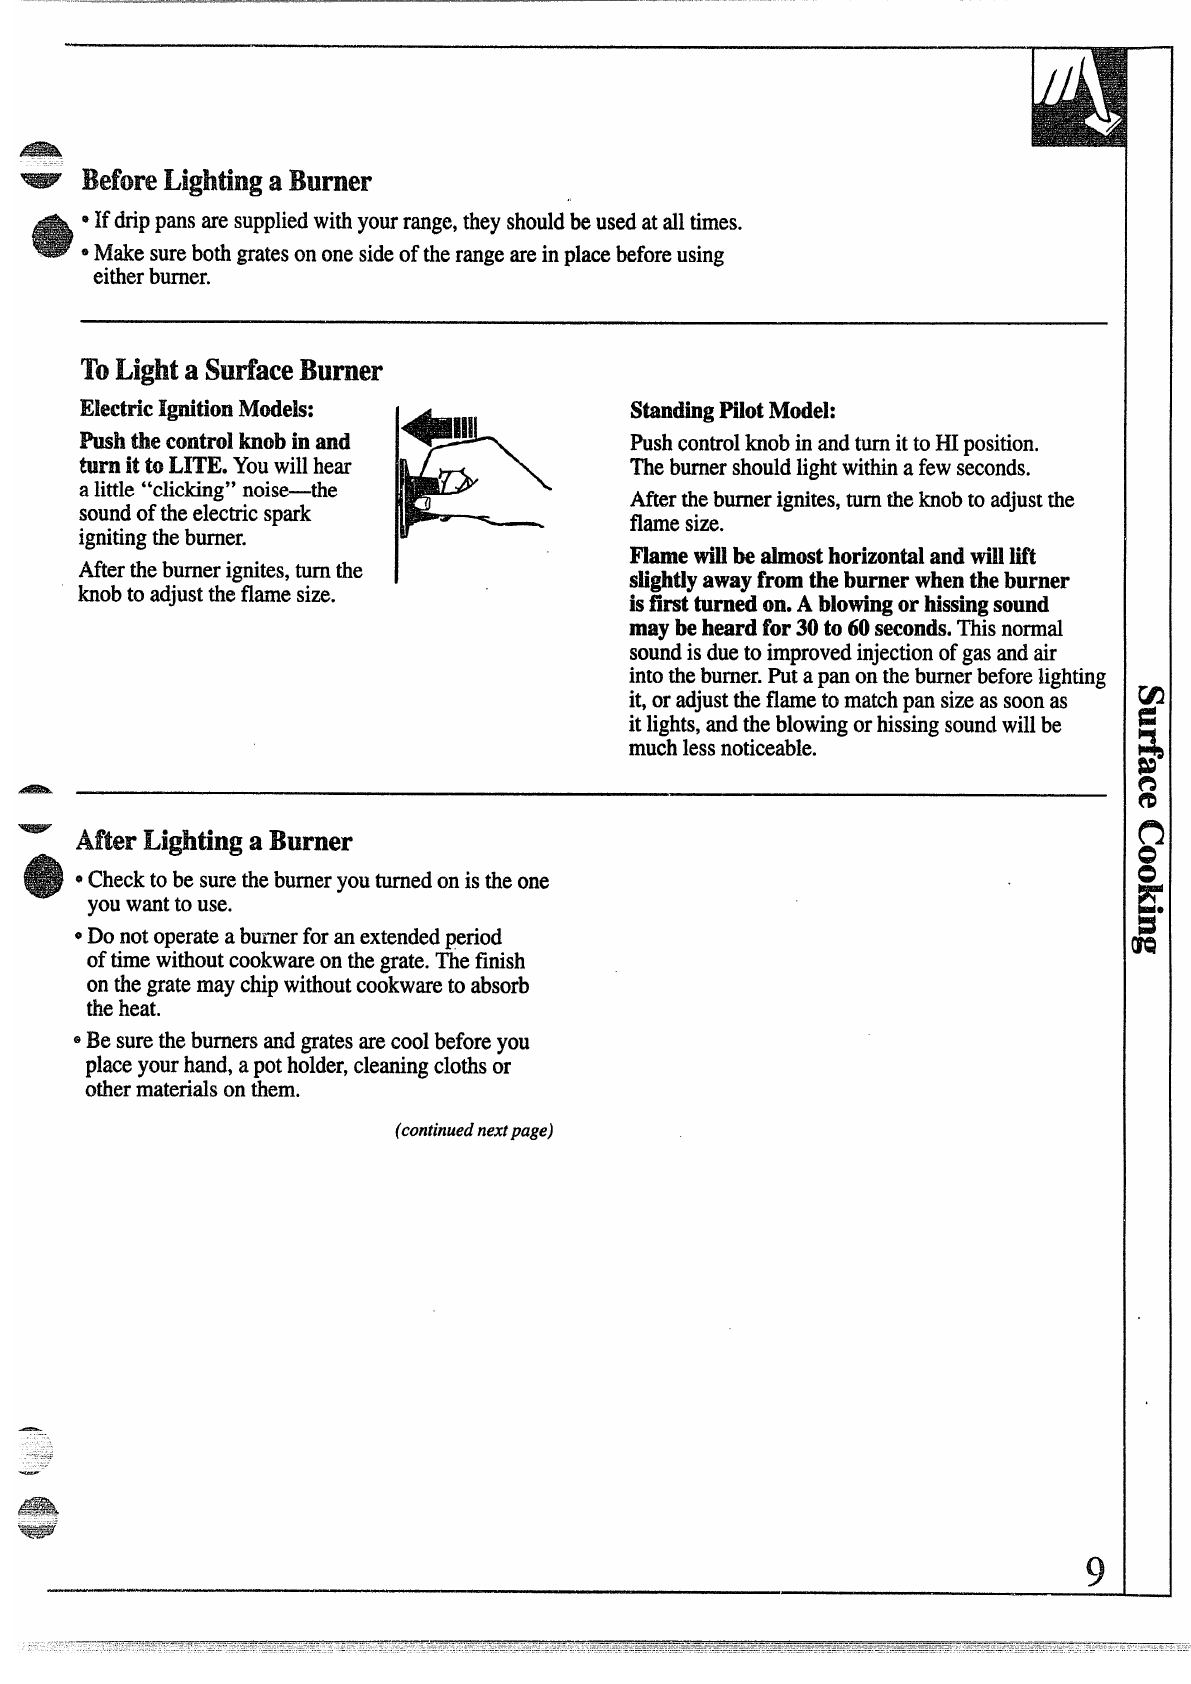
eAIwaysusetheLITEposition(o~;~ode~stith, ..,.
electricignition)orthe~posi~on(onmodels”--~ ::ii coibiniiiQnif Qils6k:’fap’”wiub@’bd::#::;-:::;_
withs~ntig ~flOt$) when i@ti~g ~~p ~~~e~~ -‘.. ,:-:.sn-f~itig; stirto~etherb~foreheating.tir-asfats;~;~‘~
.,. ,.\--
,. ...’
.~elt SIOWlyj: --- ,~~,,-”-, .’”- “‘ -‘:, -; -, ;,;; i::,~: ~
and makesurethe.burnershaveig@ted. ‘ -- ~,, ~,
. . !’
*Neverleave~~~’~eb~~~ersuna~tefided
it’ ~‘-- - ~‘Altiays.”iiatiii ~lowly~-am~”~at$hWjthm~ j::,:.-
~~g~flame
set~ings.Boilovercausessmok.ing -”, ~~.-.. .-.i.. >,- ,...,... ,
*‘~~eadeepfa~,~~er&o@e~~ry,b~neve~‘:,i‘~I‘::“,’.,-,“
andgreasyspilloverkthatm?ycatch0~fire. ~-
,, ‘possible
topreventoverheating’fat-beyond.~e~;-:’..,
e~~j~s~topb~~er fl~e ske soit ~OeS not
extendbeyondtheedgeofthecookw~ri. .}.
Excessiveflameishtiardous. ~‘~~eProP~r‘P~”,
$ize-Avoid p-ms th~t.ti&:.“j:~,--.,
u~stableoreas.fiy-tipptid.Selectcookwyehav~qg
~~$e~n~Ydv pot holders-moist or d~p ‘flatbottomslargeenoughtoproperlycontti.fdod”.
potholdersonhotsurfacesmayresultin burns md avoidbdiloversWdspi~ld~ers’‘wdl~g? -~‘,-.
fromsteam.DQnotletpotholders enough,to’coverburnergrqte;~s will-boths?ve; 1,
comenearopenflameswhen ~ ~ ‘
liftingcookware.Donotuseacletig timewd preventh~tidous accmtil?ions.”
-offood,sinceheavyspatteri~g’or
SPi~OVerSlefi -.
towelorotherbulkyclothinplace onrangecanignite.Usepanswithharidlesthat
ofapotholder. canbeeasilygraspedandremaincool.
8Tominimizethe p~~sib~ii~yofburns9ignition ~When~s~~gg~~sc~okwam9make sure itis .,
offlammablematerials,andspillage,turn designedfortop-of-rangecooking.
cookwarehandlestowardthesideorbackofthe
rangewithoutextendingoveradjacentburners. e~e~p a~~p~~sticsaway fromtO~bU~~a~S.
—
All manuals and user guides at all-guides.com

—*Donotleavepkastic
itemsonthe
cooktop theymay
meltiflefttoocloseto
thevent.
.
3
~Don$theatunopenedfood containersinthe
oven. Pressure codd buildup andthe
contatierco~dburst,causinganinjury.
eDon9twealwhum foflanywhereintheoven
Ventappearanceandlocationvary exceptas describedin thisbook.Msusecould
resultmafire hazardordamagetotherange.
itemsonthecoiktop.me hotairfromthevent $Whenusingcookingorroastingbagsinoven9
mayigniteflammableitemsandwillincrease followthemanufacturer’sdirections.
pressureinclosedcontainers,whichmaycause
themtoburste @Useody @asscookwarethatisrecommended
foruseingasovens..-.
eTI avoidthepossibilityofaburn,alwaysbe
certainthat-thecontrohforWburnersareat.” 0Alwaysremove-brotie~pan~romovenassoon
the0~ poiitionpndallgratesarecoolbefore asyoufiih broilifi~.
Gr~aseleftinthepancan
atiemptig to removethem. .“
,. catchfneifovenisusedwitioutremovingthe
,.. ,, grease.fromti~ broilerpan. ~ ~,
~men flfig foodsareunderthehood,tu~-n- ‘ ,7
., ,.,
thefanoH.Thefan,ifoperating,mayspread ,~.-O,Whenbroilkg,if&&t,iqtooclosetotheflame,
theflames. ~i‘thefatmtiyigriiti.Ttirnexeess
fattoprevent
,, excessivefl~e-up$l~‘‘ ‘- ~
@
Ifr~~geislocatednearawindow,donothang ~~ ‘j:. , . . ~.;~
longcurtainsthatcouldblowoverthetopburners ~~~ ..~-
@--Makesurebroilerpan-winplaceco~rwfi~to
and
createaf~ehazard; ,.
‘‘’-r~qucetheposs~bilityofg~ease.fwes.
!$ ,-
~-men ~pilotgoesout(on amodelwithstanding‘,.. A~~Uyoushotid-~aveagreasefireinthebrofler
pilots),youwilldetectafaintodorofgasasyour’ .~~”
~~an~ti ofi.oven9-fidkeepovendoorclosedto
signal.torelightthepilot.Whenrelightingthe ~.‘“ ‘ ‘--,., -.,,. , -., , ,containfire,untilit.bu~sout.
pilot,m~e sureburnercontrolsareintheOW~~-‘ - - ~~” ...,
position,andfollowinstructionsintheSurface~, ~-~~~ ““ ‘~‘c~“’‘‘: ‘“
CooKngsectiontorelight. ,CleaningYOurRange
\$-”.,, ..~.~-~
.’ 0.~~~”~~~~.pfi tis~@iuthisUseand
eHyousmellgas,andyouhavealreadymades~e ‘G$$&----... ;-~ .
pilotsarelit(onsomemodels),turnoffthegas to ;~.:,. ,,-, -’ ~~:.r
therangeandcallaqualifiedservicetechnician,,~.‘“~tiee~ r~;ge::i~~~-~~tid~fre;.bf~ccumdationsof
Neveruseanopenfi~e tolocatealeak. .’. ~-.
,. .%maskqrsptilbvefs~:wtich:hayiflte.
.- ,-. .,-- ;.,
,.
., ~:~~,~~ti: whenyo’~-dlea~.th~~o;ktop
B*i~g9 BrOfingandRoasting ,~~
,-
,.’ ~-b.w~tisetfiehre%over.thgpilot(onsome
~‘~pdeb)filb~ ‘hot,-..:,-~ .’
@Donotuseovenforastoragearea.Items ,, ,,,
storedktheovencan~gnite. .,.
.. .-.
wY6uNeei Se;tice.”~~~“”
@~md awayfromtherangewhenopefingthi
doorof~hotoven.Thehotairandsteamthat ‘,.. ,r
‘~~ead!6TheP~objem$~lvef’!;in.thebackof
=capecancauseburnstohands,faceandeyes. ,.
ttis@de. -.., “.-.’.. ‘.
@Keepovenfreefromgreasebddup. @
tion’t attem~tto;eptiirorreplaceanypartof
@Placeovenshelvesindesiredpositionwhileo, yourrtige:udti itiss-my recommended
ovenisCOOI. htM guide?
Allotherse~iiiug shouldbe
Jrefereedtoa.qu~led-techniciani
~~~ng outshelftotheshelf-stopisa
convenienceinIiftingheavyfoods.Itisalso
apremutionagainstburnsfromtouchinghot
suflaeesofthedoororovenwalls.Thelowest SAVE T.HisE L‘
pwition6gR99isnotdesignedtostide. INSTRUCTIONS “
5
All manuals and user guides at all-guides.com

——
FEP.TURESOFYOURMNGE
r1
II Ill
II Ill -
$, -\BurnerCap
\fi
[-~. \J
.— (onsome
II I \., models)
// @“.
u\! BurnerBase
Your range is equipped with one ofthe two types ofsutiace burners shorn above
All manuals and user guides at all-guides.com
all-guides.com

—
Feature Index (Notallmodelshaveallfeatures.Appearanceoffeaturesvaries.) ISeepage
1Backguard(onsomemodels)
2SurfaceBurners,DripPans(onsomemodels)andGrates I21,22
3OvenLampOn/OffSwitch(onsomemodels) 14
4ClockandTimer(onsomemodels) 11,12
5OvenVent(locatedoncooktoponsomemodels) I4,5,13,28
6Bake/BroilSwitch(onsomemodels) I12
7OvenControl 12
8SurfaceBurnerControls 8
9Cooktop 23,28
10 BroilerPanandRack 19,23
11 OvenShelves(numberof shelvesvaries) I13-15,23
12 OvenShelfSupports 13,14
13 AirVentin OvenDoor(locatedat topof OvenDoor) 4,28
14 BroilerDraweror StorageDrawer(dependingon model) 27
15 AirIntake 4,28
16 ModelandSerialNumbers(locatedonfrontframeofrange, 2,31
behindeitherBroilerDraweror StorageDrawer)
17 RemovableOvenDoor 25
18 Anti-TipDevice(Lowerrightrear-comeronrangeback. 3,30,40
SeeInstallationInstructions.)
19 OvenBottom 23
20 OvenInteriorLight(onsomemodels) 14,24
NOTE: Allmodelshave standard oveninteriors, exceptfor JGBC15GER,JGBC16GEP,and
JG~Cl~GE~ w~ic~have continuous-cleaningoveninteriors.SeeCareandCleaningfor
instructions.
7
All manuals and user guides at all-guides.com

..-
Yoursurfaceburnersarelightedby electricignition,
eliminatingtheneedfor standingpilotlightswith
constantlyburningflames.
In caseofapower failure, youcan lightthesurface
burnersonyourrangewithamatch.Holdalighted
matchto theburner,thenturntheknobto theLITE
position.UseextremecautionwhenE@tingburners
this way.
Surfaceburnersinusewhenanelectricalpower
failureoccurswillcontinueto operatenormally.
Theelectrodeofthesparkigniterisexposed.
WhenoneburneristurnedtoLITE,alltheburners
spark.Donotattempttodisassembleorclean
aroundanyburnerwhileanotherburnerison.
Anelectricshockmayresult,whichcouldcause
youtoknockoverhotcookware.
Stinding Blot Models
Thesurfaceburnersontiese rangeshavestanding
pilotsthatmustbe lit initially.Tolightthem:
1.Be suresurfaceburnercontrolknobsarein
theOFFposition.
2. Removethegratesandlift thecooktopup
(seetheLift-UpCooktopsection).
3. Locatethetwopilot
portsandlighteach
of themwithamatch.
NOTE:If thepilotis toohighorlow,youcan
adjustit. SeetheAdjusttheSurfaceBurnerPilots
If Necessarysectionof theInstallationInstructions.
4. Lowerthecooktop.Yoursurfaceburnersarenow
readyfor use.
5. Observelightedburners.Comparethefhirnes
topicturesin theProblemSolver.If anyflame
isunsatisfactory,callforservice.
Suflaee Burner controls
Webs thatturnthe surfaceburnerson andoff are
markedasto whichburnerstheycontrol.Thetwo
knobson theleftcontroltheleftfrontandleftrear
burners.Thetwoknobson therightcontroltheright
frontandrightrearburners.
8
On ranges with sealedburners:
IDThesmallerburner(rightrearposition)willgive
thebestsimmerresults.
~Therightfrontburneris higherpoweredthanthe,
othersandwillbringliquidsto aboilquicker
(naturalgasinstallationsonly).
All manuals and user guides at all-guides.com

...
I
Before Lighting aBurner
eIf drippansaresuppliedwithyow range,theyshouldbe usedat dl times.
*Makesurebothgratesononesideof therangearein placebeforeusing
eitherburner.
To Light aSutiace Burner
Electric I@tion Mdels:
mh tieControlbob inad
mm ittoLITE.Youwillhear
alittle“clicking”noise—the
soundof theelectricspark
ignitingtheburner.
Mter theburnerignites,turnthe
knobto adjusttheflamesize.
StandingPilotMtiel:
Wsh controlknobin andturnit to HIposition.
Theburnershouldlightwithinafewseconds.
Aftertheburnerignites,turntheknobto adjustthe
flamesize.
Flame will h*ost horizontal and willlift
sM@tlyaway from the burner when the burner
is first turned on. Ablowingor hissingsound
may be heard for 30to 60s~conds.~~s normal
soundis dueto improvedinjectionofgasandair
intotheburner.Put apan on theburnerbeforelighting
it,or adjusttheflameto matchpansizeassoonas
it lights,andtheblowingor hissingsoundwillbe
muchlessnoticeable.
-After Lighting aBurner
~Checkto be suretheburneryouturnedonis theone
youwantto use.
~Donotoperateaburnerfor an extendedperiod
oftimewithoutcookwareon tie grate.Thefinish
on thegratemay chipwithoutcookwareto absorb
theheat.
@Be suretheburnersandgratesarecoolbeforeyou
placeyourhand,apotholder,cleaningclothsor
othermaterialsonthem.
(continuednextpage)
—
All manuals and user guides at all-guides.com

ACEcoom~ --
(continued) a
How toselect Flqme size
Watchtheflame,nottheknob,asyoureduceheat.
Theflamesizeon agasburnershouldmatchthe
cookwareyouareusing.
FORSAFEHANDLINGOF
COOKWARENEVERLET
THEFLAMEEXTEND
UPTHESIDESOFTHE
COOKWARE.Anyflamelargerthanthebottom
ofthecookwareis wastedandonlyservestoheat
thehandle.
Whenboiling,adjusttheflamesothecircleit makes
is about1/2inch smallerthanthebottomofthe
cookware-no matterwhatthecookwareis madeof.
Foodscookjust asquicklyat agentleboilas theydo
at afurious,rollingboil.Ahighboilcreatessteam
andcooksawaymoisture,flavorandnutrition.Avoid
it exceptforthefewcookingprocessesthatneeda
vigorousboil.
When frying or warming foo~ in stiidess steel,
east iron or enamelware, keep theflame down
lower—toabout 1/2the diameter of the pan.
When frying in glassor ceramic cookware,lower
the flame evenmore.
Top”of”Range cookware
Aluminum: Medium-weightcookwareis
recommendedbecauseitheatsquicklyandevenly.
Mostfoodsbrownevenlyin an aluminumskillet.Use
saucepanswithtight-fittinglidswhencookingwith
minimumamountsof water.
Cast-Iron: If heatedslowly,mostskilletswillgive
satisfactoryresults.
Enamelware: Undersomeconditions,theenamelof
somecookwaremaymelt.Followcookware
manufacturer’srecommendationsforcookingmethods.
Glass: Therearetwotypesof glasscookware-those
forovenuseonlyandthosefortop-of-rangecooking
(saucepans,coffeeandteapots).Glassconductsheat
veryslowly.
Heatproof Glass Ceramic: Canbe usedforeither
surfaceor ovencooking.It conductsheatvery
slowlyandcoolsveryslowly.Checkcookware
manufacturer’sdirectionstobe sureitcanbeused
on gasranges.
StainlessSteel: Thismetalalonehaspoorheating -
propertiesandis~~suallycombinedwithcopper,
aluminumor othermetalsforimprovedheat
distribution.Combinationmetalskilletsusu~ly work
satisfactorilyif theyareusedwithmediumheatasthe
manufacturerrecommends.
wok cooking useofstoveTop Gflls
(onmodelswithsealedburners) (onmodelswithsealedburners)
oWerecommendthatyou
useonlyaflat-bottomed
wok.Theyare availableat
yourlocalretailstore.
~Do notusewoksthathave
supportrings.Useofthese
typesof woks,withor
withoutthering in place,
Do notuse stovetop grills
on yoursealedgasburners.
If youusethe stovetop
grillon the sealedgas
burnerit willcause
incompletecombustion
andcanresultin exposure
to carbonmonoxidelevels
‘t~!’i.r” ,tl!g aboveallowablecurrentstandards.
Thiscanbe hazardousto yourhealth.
canbedangero~s.placingthe
ringovertheburnergratemay
causetheburnerto workimproperlyresultingin
carbonmonoxidelevelsaboveallowablecurrent
standards.Thiscouldbedangerousto yourhealth.
Do nottry to use suchwokswithoutthering.You
couldbe seriouslyburnedif thewoktippedover.
All manuals and user guides at all-guides.com

.
..
F{)llowthe directions belowif your range has the
clock and timer shown at the right.
~Ie rangeclock and timerallowyou10set thetimer
up 1024hours.Yotihavetie choiceof havingthe
tin]crshotvthetimecountingdownor the timeof day. :m~
111cilhcrC:ISC.tic timer\villsignalat thecnc.iof lhe
[il))cr~lcri(l(l [t>:~icr(yoti [h:t[ Ihc time is ~Ip. (Appearancemay vary)
T{)settile clock
NTO”i-E:Whenyou firstplugin [herangeor tiler a
lIt)i~”c*rRlil[lre.IhcentireClwkflimer (Iispl;iyl~~iil
ligi]tLip.Af[crs~~~rillSCCOIILIS
“SET CLOCK””
apl~~.:trsin(1ICdisplfiy.
1.Press (hcCLOCKpad.
2. Pressi}ndhold {heUPor DOWNpad and {hethe
of tiaywillchange 10minutesat atime.Tochange
(hc [imcbysingleminutes,givethepadsshorttaps.
=3. Prc:;sIhcCLOCKpadtostarttheclock.
To Set the Timer
1.PresstheTWR pad.
2.UsetheUP andDOWNpads 10set (he[imcr.
Shorttapson the UP or DOWN padchange;hc
timer’ssettingoneminuteat atime.Pressingand
continuingtoholdtheWPpad increasestheselling
tenminutesat atime.The timercan be set for a
maximumof 24 hours.
To Cilange or cancel the Timer setting
When[hctimeriscoun[ingdown,usethe UPand
DOWNpflci(oCllilIlgetheremainingtime,or press
tic TIMERPild10stop(hetimer.The timercannot
kCane-cllcdLinti1•*SETTIhlE” disappearsfrom
lhc(iispln)”.
3,Press theMR pad to start the timer.
As thetimercountsdown,two beepswillindicate
whenoneminuteis left.After thesebeeps,the
displaywillcomt downti seconds.men timenms
out,asignalwillsound.Ress theT- padto stop
thesignal.
To Display tl~eClock While tl~eTimer Is Operating
w
PressingIhcCLOCKpad whilethetimeris operating
wi]1II()[intcrfcrcwithlhctimer’soperation:Ihe
displaywillcl~ange[oshow:hcclock,bl]tthe timer
\villCOIIIinllc10ct)llntdownand willstillsignalwhen
li~ncis up. Press[hcTI~R padagaintochangethe
displ;iyback[oshow!hetimer.
....
—-
All manuals and user guides at all-guides.com
all-guides.com

CLOCKAm TMR
----—-—
=Followthe directionsbelowif your range has the
clockand timer shown at the right.
ame electronicrangeclockandtimerallowyouto set c1
thetimerup to 9hoursand45 minutes.Youhavethe
choiceofhavingthetimershowthetimecounting [;] m
downor thetimeof day.Ineithercase,thetimerwill
signalattheendof thetimerperiodto alertyouthat
thetimeis up. L
\
To setthe clock To setthe Ther
NOTE: Whenyoufirstplugin therangeor after 1.PresstheTIMERpad.“:00”appearsonthedisplay
apowerfailure,theentireClock/Timerdisplaywill and“SETTIMER’flashes.
fightup.Afterseveralseconds“12:00”willthenflash 2.UsetheUPandDOWNpadsto setthetimer.
onthedisplay. Shorttapson theUPor DOWNpadchangethe
1.PresstheCLOCKpad. “12:00”stopsflashing timer’ssettingoneminuteat atime.Pressingand
and“SETME’ flasheson thedisplay. continuingtoholdtheUPpadincreasesthesetting
. .
2.PressandholdtheUP orDOWNpadandthetime fiveminu~esatatimeunti~onehour(“1:00”)is -
ofdaywillchange10minutesat atime.Tochange displayed.Afteronehouris displayed,pressing
thetimeby singleminutes,givethepadsshorttaps. andholdingtheUPpadincreasesthesetting
15minutesatatime.(ShorttapsontheUPand
For exmple, to settheclockfor 3:15,pressand DOWNpadswillalwayschangethesettingby
holdtheUPpaduntil“3:10”appears,andthentap l-minuteincrements.)Thetimercanbe setfora
-theUPpaduntil“3:15”is displayed. maximumof 9hoursand45 minutes.
_3.Pressthe CLOCKpadandtheclockwillbe set.If 3.Tostartthetimer,presstheTIMERpad.
youdo notpresstheCLOCKpad,theclockwill If theTIMERpadisnotpressed,thetimerwill
automaticallybe setwithinoneminute. automaticallystartafterafewseconds.
Asthetimercountsdown,asinglebeepwill
indicatewhenoneminute”is lefi~After-thisbeep,
thedisplaywillcountdownin seconds.Whenthe
timerreaches“:00~’youwillhearthreesetsofthree
shortbeeps,andthenasinglebeepevery 10seconds
for 10minutesoruntilyoupressanyofthe
Clock/Timerpads.
To Change or Cancel the Timer Setting
Whenthetimeris countingdown,usetheUP andDOWNpad tochange
theremainingtime,or presstheTIMER padto cancelthetimerfunction.
Thetimerfinction cannotbe cancelleduntil“SETTIMER”stopsflashing
and“TIMER”appearson thedisplay.
To Display the Time of Day While the Timer Is Operating
PressingtheCLOCKpadwhilethetimeris operatingwillnotinterfere
withthetimer’soperation;thedisplaywillchangeto showthetimeof day,
butthetimerwillcontinueto countdownandwillstillsignalwhentime
isup.SimplypresstheTMER padagainto changethedisplaybackto
showthetimerfunction.
(continuednextpage)
All manuals and user guides at all-guides.com

CLOCKAm TMR
(continued) a.
-“
clock \12 ,
@
,t~OFFII,
~s+’o4/,, ,
Followthese directiom if your range has the clockand timer shown at :~lo 3H. e
the right. TO set the clock,pushin theknobandturnit to theright.Letthe g~O~~ a
knoboutwhentheclockhandsreachthecorrecttime.Continueturningthe -,20
/<
knobto OFF. 301,%”-
4“1//,,!,\\’
16’
TheTimerhasbeencombinedwiththerangeclock. Toset the Timer,turntheknobto theleft—without
Useit to timeallyourprecisecookingoperations. pushingin—untilthepointerreachesthenumberof
You’llrecognizetheTimerasthepointerthatis minutesorhoursyouwantto time.
differentin colorthantheclockhands. At the end of the set time, abuzzer sounds to tell
Minutesaremarkedup to 30,andhoursaremarked you time is up. Turntheknob-without pushing
up to 4on thecenterof theclock. in—untilthepointerreachesOFFandthebuzzerstops.
usmG YOUROVEN
Before using Your oven
Be sureyouunderstandhowto setthecontrolsproperly.Practiceremoving .-.
md replacingtheshelveswhiletheovenis cool.Readtheinformationand
tipson thefollowingpages.Keepthisbookhandywhereyoucanreferto it,
especiallyduringthefirstweeksofusingyournewrange.
oven control
Yourovenis controlledeitherby asingleOVEN
CONTROLknobor by aBAKE/BROILswitchand
an OVENCONTROLknob.
It willnormallytake30-90secondsbeforetheflame
comeson.Aftertheovenreachestheselected
temperature,theovenburnercycles-off completely,
thenon withafullflame-to maintainthe selected
temperature.
If your range is equipped with aseparate
BA~BROILswitch:
Turnswitchto BAKEfor allnormaloven
operations—forexample,forcookingroastsor
casseroles.Onlythebottomovenburneroperates
whentheBAKEsettingis selected.
UsetheBROILsettingforbroiling.Onlythetopoven
burneroperateswhentheBROILsettingis selected.
Electric Ignition Models Power Outige
The ovenburner =d bmti burner are lighted by
electric ignition.
Tolight either burner, turnthe OVENCONTROL
hob to thedesiredtemperature.Theburnershould
ignitewithin30-90seconds.
Aftertheovenreachestheselectedtemperature,the
ovenburnercycles-off completely,thenon witha
full flam~to keeptheoventemperaturecontrolled.
CAUTION:DONOTMAKEANYA~EMPT TO
OPERATETHEELECTRICIGNITIONOVEN
DURINGANELECTRICALPOWERFAILURE.
Theovenor broilercannotbe litduringapower
failure.Gaswillnotflowunlesstheglowbaris hot.
If theovenis in usewhenapowerfailureoccurs,the
ovenburnershutsoff andcannotbere-lituntilpower =
is restored.
All manuals and user guides at all-guides.com

standing Pilot Models
Theserangeshavestandingpilotsthatmustbe
litinitially.
Tolight the ovenpilot:
1.Be sure theOVENCONTROLknobis in theOFF
position.
2.Openthebroilerdoorandremovethebroilerpan
andrack.Thiswillmakeiteasierforyouto reach
insidethebroilercompartment.
3.Findtheovenpilotportatthe
backof thebroiler
compartment.Thelongtube,
runningfromfrontto back,is
theovenburner.Thepilotport
is at thebackaboutoneinch
belowtheburner.
4.Usingalongmatchor match
hold~r,reachin andlighttheovenpilot.
-
—
oven Venb
Theovenis ventedthroughductopeningsat therear
ofthecooktop.SeeFeaturessection.Donotblock
theseopeningswhencookingin theoven—itis
importantthattheflowof hotair fromtheovenand
freshair to theovenburnersbeuninterrupted.
~The vent openingsand
nearby surfaces may ~“.>~
becomehot. Do not ~
touch them.
~Donot leaveplastic
item on the cooktop-- Ventappearanceandlocationvary
they may melt if left too
closeto the vent.
oHandles of pots and pans on the cooktopmay
becomehot if left too closeto the vent.
oMetal items willbecomevery hot if they are left
on the cooktopand couldcause burns.
oDonot leaveany items on the cooktop.Thehotair
fromtheventmayigniteflammableitemsandwill
increasepressurein closedcontainers,whichmay
causethemto burst.
oven shelves
me shelvesare ~n II Toremove a
designedwith
stop-locksSO
whenplaced
correctlyon the
shelfsupports,
they willstop
beforecoming
completelyoutof
theovenand will
nottiltwhenyou
.-. ..- -
shelffromthe
oven,pullit
towardYOU, tilt
frontendupward
andpull shelfout.
Toreplace, place
shelfon shelf
supportwithstop-
Iocks(curved
extensionof I
areremovingtood irom themor placingfoodon shelf)facingup andtowardrearof oven.Tiltup front
them. andpush shelftowardbackof ovenuntilit goes~ast
Whenplacingcookwareon ashelf,pulltheshelfout “stop” on ovenwall.Thenlowerfrontofs~elf&d
to the “stop” position.Placethe cookware on the pushit all thewayback.
shelf,thenslidethe shelfbackintotheoven.Thiswill
—eliminatereachingintothehotoven. (continuednextpage)
~-.
—
13
All manuals and user guides at all-guides.com

shelf Positions
Theovenhasfiveshelf
supportsfornormal
bakingandroasting
identifiedin this
illustrationasA
(bottom),B,C, DandE
(top).It alsohas a
speciallowshelf 1
position(R)forroasting -
extralargeitems,such
asalargeturkey-the
usm~YOUR owN
shelfis notdesignedto slideoutat thisposition.Shell
positionsforcookingaresuggestedon Bakingand
(continued) a
oven Moistire -
~
Asyourovenheatsup,thetemperaturechangeof the
airintheovenmaycausewaterdropletsto formon
thedoorglass.Thesedropletsareharmlessandwill
evaporateastheovencontinuestoheatup.
~v~~ ~i~~~ (onsomemodels)
Theovenlightcomesonautomaticallywhenthedoor
is opened.Somemodelshaveaswitchon thelower
.Alc controlpanelthatallowsyouto turnthelightonor off
Roastingpages.
whenthedooris closed.
Oven Temperature Adjustment
Thetemperatureselectedonthethemostatdial
determinestheaverageofthemaximumandminimum
temperaturesreachedduringthecyclingoftheoven
burner.Thethermostatcontrolinyournewovenhas
beencarefu~ydesignedandmanufacturedtoprovide
accuratetemperatures.Hyournewovenis replacing
oneyouhaveusedfor severalyears,youmaynotice
adifferenceinthedegreeofbrowningor thelengthof
timerequiredwhenusingyourfavoriterecipes.This
is becauseoventemperaturecontrolshaveatendency
to “drift” overaperiodof years.
Beforeattemptingto havethetemperatureof your
newovenchanged,besureyouhavecarefully
followedthebakingtimeandtemperature
recommendedby therecipe.Then,afteryouhaveused
theovenafewtimesandyoufeeltheovenistoohotor
toocool,thereisasimpleadjustmentyoucanmake
yourselfontheOVENCO~OL knob.
Pulltheknobofftherangeandlookatthebackside. -
Tomakeadjustment,loosen(approximatelyoneturn),
butdo notcompletelyremove,thetwo screwsonthe
backof theknob.Withthebackof theknobfacing
you,holdtie outeredgeof theknobwithonehand
andturnthefrontoftheknobwiththeotherhand.
Toraisetheoventemperature,movetie topscrew
towardtheright.You’llhearaclickfor eachnotch
youmovetheknob.Tolowerthetemperature,move
thetop screwtowardtheleft.Eachclickwillchange
theoventemperatureapproximately10”F.(Rangeis
plusor minus60°F.fromthearrow.)
Wesuggestthatyoumakethe adjustmentoneclick
fromtheoriginalsettingandcheckovenperformance
beforemakinganyadditionaladjustments.
Afterthe adjustmentismade,retightenscrewsso they
aresnug,butbe carefulnotto overtighten.Reinstall
knobon rangeandcheckperformance.
All manuals and user guides at all-guides.com

BAm~
.—.
=How To setYour Range For Bating
1.Toavoid possibleburro, placetheshelvesin the 3. Checkfoodfordonenessatminimumtimeon
correctpositionbeforeyouturntheovenon. recipe.Cooklongerif necessary.TurnOVEN
2.Closeovendoor.If yourmodelhasaseparate CONTROLknobto OFFandr~movefood.
BAKE/BROILswitch,turnitto BAKE.Turn Forbestbakingresults,followthesesuggestions:
OVENCONTROLknobtodesiredtemperature.
ovenshelves
Arrangetheoven
shelfor shelves
inthedesired
locationswhile
theovenis cool.
Thecorrectshelf
positiondepends
onthekindof
foodandthe
browningdesired.
Asageneralrule,
placemostfoodsin themiddleof theoven,oneither
thesecondor thirdshelffromthebottom.Seethe
chartforsuggestedshelfpositions.
~peofFood IShelfPosition
Angelfoodcake 1A
Biscuitsormuffins IBorC
Cooties orcupcakes IBorC
Brownies IBor C
Layercakes IBorC
IBundtor poundcakes IAorB I
Piesor pie shells IBorC I
Frozenpies IA(oncookiesheet) I
Casseroles Bor C
Preheating
Preheattheovenif therecipecallsforit.Preheat
meansbringingtheovenuptothespecified
temperaturebeforeputtinginthefood.Topreheat,set
theovenat thecorrecttemperature-selecting a
highertemperaturedoesnotshortenpreheattime.
Preheatingis necessaryfor goodresultswhenbaking
cakes,cookies,pastryandbreads.For mostcasseroles
androasts,preheatingisnotnecessary.Forovens
withoutapreheatindicatorlightortone,preheat10
minutes.Aftertheovenis preheatedplacethefood
intheovenasquicklyaspossibletopreventheat
fromescaping.
Roasting IAorB I
Forevencookingandproperbrowning,theremustbe
enoughroomforair circulationin theoven.Baking
resultswillbebetterif bting pansarecenteredas
muchas possibleratherthanbeingplacedto the front
orto thebackoftheoven.
Pansshouldnottoucheachotherorthewallsof the
oven.Allow 1to 1%inchspacebetweenpansas well
as fromthebackoftheoven,thedoorandthesides.
If youuse two shelves,staggerthepansso oneis not
directlyabovetheother.
(continuednextpage)
h.
—-
——.. 15
All manuals and user guides at all-guides.com
all-guides.com

BAm G
Bating Guides
Whenusingpreparedbakingmixes,followpackagerecipeorinstructions
for bestbakingresults.
Cooties
Whenbaking
cookies,flatcookie
sheets(without
sides)produce
better-looking
cookies.Cookies
bakedin ajelly roll
pan (shortsidesdl
around)mayhave
@
o
:
Nevercoverashelf
entirelywithalarge
cookiesheetor
aluminumfoil.~s
willdisturbtheheat
circulationandresults
inpoorbaking.A
smallersheetoffoil
maybeusedto catcha
darkeredgesandpaleorlightbrowningmayoccur. spilloverby placingit
Do notuseacookiesheetso largethatit touchesthe on alowershelfseveralinchesbelow
wallsor thedoorof theoven. thefood.
Forbestresults,use onlyonecookiesheetin theoven
at atime.
Res cakes
Forbestresults,b~e piesin dark,roughor dull Whenbakingcakes,warpedorbentpanswillcause
pansto produceabrowner,crispercrust.Frozen unevenbakingresultsandpoorlyshapedproducts.
piesin foilpansshouldbeplacedonan aluminum Acakebakedin apanlargerthantherecipe
cookiesheetforbakingsincetheshinyfoilpanreflects recommendswillusuallybe crisper,thinnermd drier
heatawayfromthepiecrust;thecookiesheethelps thanit shouldbe.If bakedin apansmallerthan
retainit. recommended,it maybe undercookedandbattermay
ovefflow.Checktherecipeto makesurethepan size
usedis theonerecommended.
Bating Pans
Usetheproperbakingpan.Thetypeoffinishonthe
pandeterminestheamountofbrowningthatwilloccur.
~Dark,roughor dullpansabsorbheatresultingin a
browner,crispercrust.Usethistypefor pies.
~Shiny,brightandsmoothpansreflectheat,resulting
in alighter,moredelicatebrowning.Cakesand
cookiesrequirethistypeof pan.
~Glassbakingdishesdso absorbheat.Whenbaking
in glassbakingdishes,lowerthetemperatureby
25°F.anduse therecommendedcookingtimein
therecipe.Thisis notnecessarywhenbakingpies
or casseroles.
16
.
Dom9tPeek
Setthetimerfortheestimatedcookingtimeanddo
notopenthedoortolookatyourfood.Mostrecipes
provideminimumandmaximumbakingtimessuch
as“bake 30-40mintites.”
DONOTopenthedoortocheckuntiltheminimum
time.Openingtheovendoorfrequentlyduring
cookingallowsheattoescapeandm~es baking
timeslonger.Yourbakingresultsmayalsobe
affected.
All manuals and user guides at all-guides.com

Roastingis cookingbydryheat.Tendermeator
poultrycanberoasteduncoveredin youroven.
mRoastingtemperatures,wl~ichshou~dbelowand
steady,keepspatteringto aminimum.
Theovenhas aspecial
lowshelf(R)position
just abovetheoven
bottom.Useit when
extracookingspaceis
needed,forexample,
whenroastingalarge
turkey.Theshelfis not
designedto slideoutat
thisposition.
Roastingis redly abakingprocedureusedformeats.
Roastingis easy;just followthesesteps:
1.Positionovenshelf
at (B)positionfor
smallsizeroast 1-
(3to 5lbs.)and ~
at (R)positionfor ~~
largerroasts. @
2.Checktheweight $
ofthemeat.Place 3
themeatfat-side-up
orthepoultrybrea~t-side-upontheroastingrackin
ashallowpan.Themeltingfat willbastethemeat.
Selectapanas closeto the sizeof meataspossible.
(Broilerpan withrackis agoodpanforthis.)
Linebroilerpanwithaluminumfoilwhenusingpan
formarinating,cookingwithfruits,cookingheavily
curedmeats,orbastingfoodduringcooking,Avoid
spillingthesematerialsinsidetheovenor insidethe
ovendoor.
3.If yourmodelhasaseparateBAKE/BROILswitch,
turnit to BA~. TurntheOVENCO~OL knob
to desiredtemperature.ChecktheRoastingGuide
fortemperaturesandapproximatecookingtimes.
4.Mostmeatscontinueto cookslightlywhile
standingafterbeingremovedhorn theoven.
Recommendedstandingtimeforroastsis 10to 20
minutes.Thisallowsroaststofii up andmakes
themeasierto carve.Internaltemperaturewillrise
about5°to 10°F.If youwishto compensatefor
temperaturerise,removetheroastfromtheoven
whenitsinternaltemperatureis 5°to 10°F.less
thantemperatureshownin theRoastingGuide.
NOTE: Rememberthatfoodwillcontinueto cookin
thehotovenandthereforeshouldbe removedwhen
thedesiredinternaltemperaturehasbeenreached.
Frozen Roask
QFrozenroastsof beef,pork,lamb,etc.,canbe started
withoutthawing,butallow15to 25minutesper
poundadditionaltime(15minutesperpoundfor
roastsunder5pounds,moretimefor largerroasts).
sThaw mostfrozenpoultrybeforeroastingto ensure
evendoneness.Somecommercialfrozenpoultrycan
becookedsuccessfullywithoutthawing.Follow
directionsgivenon packagelabel.
Thisallowsmorethanonefoodtobecookedat the
sametime.Forexample:Whileroastinga20-lb.
turkeyon shelfpositionR,asecondshelf(ifso
equipped)maybeaddedonpositionDsothat
scallopedpotatoescanbecookedat thesametime.
Calculatethetotalcookingtimeto enablebothdishes
tocompletecookingat thesametime.Allow15-20
minutesofadditionalcookingtimeforthepotatoes.
(continuednextpage)
17
—
All manuals and user guides at all-guides.com

Q. hit !necessa~tocheck for donenesswith aQ, Do Ineed to preheat my oveneach time Icook
meat thermometer? aroast or poultry?
A. Checkingthefinishedinternaltemperatureat the
completionof cookingtimeis recommended.
Temperaturesareshownin RoastingGuide.For
roastsover8lbs.,checkwiththermometerathalf-
hourintervalsafterhalfthe timehaspassed.
Q. Why ismy roast crumbling when Itry to
carve it?
A. Roastsareeasierto sliceif allowedto cool 10to
20minutestier removingfromoven.Be sureto
cutacrossthegrainofthemeat.
A. It isunnecessarytopreheatyouroven.
Q. When buyingaroast, are there any specialtips
that wouldhelp me cookit more evedy?
A. Yes.Buyaroastasevenin thicknessas possible,
orbuyrolledroasts.
Q. Can Isealthe sidesof my foil‘tent” when
roasting aturkey?
A. Sealingthefoilwillsteamthemeat.Leaving
it unsealedallowstheairto circulateandbrown
themeat.
ROAST~GGWE
,
IOven
Type Temperature IApproximateRoastingTime Ihternal
Doneness inMinutesper Pound Temperatum“W.
Meat
Tendercuts;rib,highqualitysirloin
tip,rumportopround~
Lamblegorbone-inshoulder?
Vealshoulder,legorloin~
Porkloin,riborshoulder?
Ham,precooked
Podtry
ChickenorDuck
Chickenpieces
Turkey
325°
325°
325°
325°
325°
325°
350°
325°
Rare:
Medium:
WellDone:
Rare:
Medium:
WellDone:
WellDone:
WellDone:
ToWarm:
WellDone:
WellDone:
WellDone:
3to5lbs. 6to8~bS.
24-35 18-25
35-39 25-31
39-45 31-33
21-25 20-23
25-30 24-28
30-35 28-33
35-45 30-40
35-45 30-40
18-23
minutesperpound(anyweight)
3to5lbs. Over5lbs.
35-40 30-35
35-40
10to15lbs. Over15Ibs,
16-22 12-19
140°-1500* -
15(?0-1600
170°-1850 w
140°-1500*
150°-1600
170°-1850 *
1700-180°
170°-180°
115°-1250
185°-1900
185°-1900
In thigh:
185°-1900
TForbonelessrolledroastsover6inchesthick,add5to10minutesperpoundtotimesgivenabove.
*TheU.S.DepartmentofAgriculturesays“Rarebeefispopular,butyoushouldknowthatcookingittoonly140°F.means
somefoodpoisoningorganismsmaysurvive.”(Source:SafeFoodBook.YourKitchenGuide.USDARev.June1985.)
All manuals and user guides at all-guides.com

Broilingis cookingfoodbydirectheatfromabovethe 3. Arrangefoodonrackandpositionthebroilerpan
food.Yourrangehaseitherabroilerintheovenoraontheappropriateshelfin theovenor broiling
—
—
compartmentbelowtheovenforbroiling.Aspecially
designedbroilerpanandrackallowsdrippingfatto
drainawayfromthefoodsandbekeptawayfromthe
highheatofthegasflame.
Both the ovenand broiler compartment doors (on
somemodels)should be closedduring broiling.
Dependingonwhetheryourrangeis equippedwitha
separatebroilerdraweror isequippedforin-oven -
broiling,youcanchangethedistanceofthefoodfrom
theheatsourceby positioningthebroilerpanandrack
ononeof theovenshelvesor oneof thethreeshelf
positionsin thebroilercompartment-A (bottomof
broilercompartment),B(middle)andC(top).
1.Reheatingthebroilerorovenis notnecessaryand
canproducepoorresults.
2.If meathasfator gristleneartheedge,cutvertical
slashesthroughit about2inchesapart,butdon’t
cutintomeat.Werecommendthatyoutrimfatto
preventexcessivesmoking,leavingalayerabout
1/8inchthick.
compartment.Placingfoodclosertoflame
increasesexteriorbrowningoffood,butalso
increasesspatteringandthepossibilityoffatsand
meatjuicesigniting.
4.Closetheovenorbroilerdoor.
5.TurnOVENCONTROLknobandBAKE/BROIL
switch(onmodelsso equipped)to BROIL.
6.Turnmostfoodsonceduringcooking(the
exceptionis thinfilletsoffish;oiloneside,place
thatsidedownonbroilerrackandcookwithout
turninguntildone).Timefoodsfor aboutone-half
thetotalcookingtime,turnfood,thencontinueto
cooktopreferreddoneness.
7.TurnOVENCONTROLknobto OFF.Remove
broilerpanhorn ovenandservefoodimmediately.
Leavepanoutsidetheovento cool.
use ofAldnum Fofl
Youcanusealuminumfoilto
he yourbroilerpanand
broilerrack.However,you
mustmoldthefoiltightlyto
therackmd cutslitsin itjust
liketherack.
Broiling Tips
/J 1.Alwaysusebroilerpanandrackthatcomeswith
1,, youroven.It isdesignedto minimizesmokingand
spatteringby trappingjuicesintheshieldedlower
partof thepan.
2. Forsteaksandchops,slashfatevenlyaround
outsideedgesofmeat.Toslash,cutcrosswise
W’ithouttheslits,thefoilwillpreventfatandmeat throughouterfatsurfacejust to theedgeofthe
juicesfromdrainingto thebroilerpan.Thejuices meat.Usetongsto turnmeatovertoprevent
couldbecomehotenoughto catchon fire.If youdo piercingmeatandlosingjuices.
notcutthe slits,youarefrying,notbroiling.
Questions &Answers
Q. When broiling,is it necessary to aiwaysuse aQ. ShouldIsalt the meat before broiting?
rack in the pan? A. No.Saltdrawsoutthejuices andallowsthemto
A.Yes.Usingtherack suspendsthemeatoverthe evaporate.Alwayssaltaftertooting. firn meat
pan.As themeatcooks,thejuicesfallintothepan, withtongs;piercingmeatwithaforkalsoallows
thuskeepingmeatdrier.Juicesareprotectedby the juicesto escape.Whenbroilingpoultryorfish,
rackand staycooler,thusp~eventingexcessive brusheachsideoftenwithbutter.
spatterandsmoking.
-Q. Why are my meats not turning out as brown as (continuednextpage)
A. Checkto seeif youareusingtherecommended
.- shelfposition.Broilfor longestperiodoftime
.indicatedin theBroilingGuide.Turnfoodonly
onceduringbroiling. 19
All manuals and user guides at all-guides.com
This manual suits for next models
16
Other GE Range manuals

GE
GE JGAS02 Operating instructions

GE
GE JB250 User manual

GE
GE QuickClean JBS03MWH Manual

GE
GE JGB428SERSS Original instructions

GE
GE PGB900DEMWW - Profile 30 in. Gas Ran Manual

GE
GE JGBP36 Original instructions

GE
GE CS980SNSS Manual

GE
GE 164D3333P033 User manual

GE
GE Profile PGB940SEF1SS User manual

GE
GE ZGP484NG User manual
Popular Range manuals by other brands

KitchenAid
KitchenAid KDDT207A Use and care guide

Frigidaire
Frigidaire GLGF388AQB Factory parts catalog

Thermador
Thermador Pro-Harmony DP304 Care and use manual

Maytag
Maytag MER4351AAQ - 30" Electric Range Use and care guide

Dacor
Dacor Epicure ER36D installation instructions

Amana
Amana AGR5715QDS Use & care guide