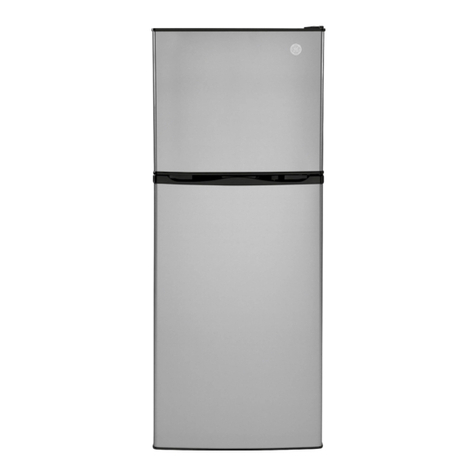
GE GFSF6KEXCBB and Operating instructions

GEAppliances.com
Q;
N
Q;
0
Safety Instructions ........... 2,3
Operating Instructions
Automatic Icemaker ............... 11
Care and Cleaning ............. 12, 13
Controls .......................... /4,5
Dispenser ........................... 5
Freezer ............................ 10
Replacing the Light Bulbs .......... 14
Fresh Food Storage Options ....... 7-9
Water Filter ......................... 6
Installation Instructions
Installing the Refrigerator ....... 16-23
Installing the Water Line ........ 24-26
Preparing to Install
the Refrigerator .................... 15
Troubleshooting Tips ...... 27-30
Normal Operating Sounds .......... 27
Consumer Support
Consumer Support ........ Back Cover
Performance Data Sheet ........... 35
StateofCaliforniaWater
Treatment Device Certificate.......36
Warranty forCanadian
Customers .........................3/4
Warranty forU.S.Customers .......3:3
GE Model 26
Cong_lateur inf_rieur
R frig rateurs
Lasection fran_aise commence6 la page 37
Congelador inferior
Refrigeradores
..................................................................................................................................................................................................................................
La secci6n en espa_ol empieza en la p6gina 71
0
Write the model and serial
numbers here:
Model #
Serial #
Find these numbers on a label
on the left side, near the middle
of the refrigerator compartment.
197D7926PO02 49-60599 05-09JR

IMPORTANT SAFETY INFORMATION.
READ ALL INSTRUCTIONS BEFORE USING.
WARNING!
Use this appliance only for its intended purpose as described in this Owner's Manual.
SAFETY PRECAUTIONS
When using electrical appliances, basic safety precautions should be followed, including the following:
;_Thisrefrigerator must be properly installed
and located in accordance with the Installation
Instructions before it is used.
Donot allow children to climb,stand or hang
on the shelvesin the refrigerator.They could
damage the refrigerator and seriouslyinjure
themselves.
Donot touch the cold surfaces in the freezer
compartment when hands are damp or wet.
Skinmay stick to these extremely cold surfaces.
Donot store or usegasolineor other flammable
vapors and liquidsin the vicinity of this or any other
appliance.
: Keepfingers out of the "pinch point" areas;
clearancesbetween the doorsand between
the doors and cabinet are necessarily small.
Becareful closing doorswhen children are
inthe area.
Inrefrigerators with automatic icemakers,
avoidcontact with the moving parts of the
ejector mechanism, or with the heating element
that releasesthe cubes. Donot place fingers or
handson the automatic icemaking mechanism
while the refrigerator isplugged in.
Unplugthe refrigerator before cleaning and making
repairs.
NOTE:Westrongly recommend that any servicing
beperformed bg o qualifiedindividual.
Donot refreezefrozen foods which have
thawed completely.
DANGER! RISK OF CHILD ENTRAPMENT
PROPERDISPOSAL OF THEREFRIGERATOR
Childentrapment and suffocation are not problems
of the past. Junked or abandoned refrigerators are
still dangerous...evenifthey will sit for 'just a few
days."If you are getting rid of your old refrigerator,
pleasefollow the instructions below to help prevent
accidents.
Before You Throw Away Your Old
Refrigerator or Freezer:
_,Take offthe doors.
Leavethe shelvesinplace sothat children may not
easily climb inside.
Refrigerants
All refrigeration products contain refrigerants,
which under federal law must be removed prior
to product disposal. If you are getting rid of an old
refrigeration product, check with the company
handling the disposal about what to do.
2
USE OF EXTENSION CORDS
Because of potential safety hazards under certain conditions, we strongly recommend against
the use of an extension cord.
However,if you must usean extension cord, it isabsolutely necessarythat it be a UL-listed(inthe United States)
or a CSAcertified (inCanada),3-wire grounding type appliance extension cord having a grounding type plug
and outlet and that the electrical rating of the cord be 15 amperes (minimum) and 120volts.

GEAppliances.com
WARNING!
HOW TOCONNECT ELECTRICITY
Do not, under any circumstonces, cut or remove the third (ground) prong from the power cord.
For personol sofetg, this opplionce must be properly grounded.
Thepower cord ofthis appliance isequipped
with a 3-prong (grounding)plug which mates
with a standard 3-prong (grounding)wall outlet
to minimizethe possibility of electric shock hazard
from this appliance.
Have the wall outlet and circuit checked by a qualified
electrician to make surethe outlet isproperly
grounded.
Where a standard 2-prong wall outlet isencountered,
it is your personal responsibility and obligation to
have it replaced with a properly grounded 3-prong
wall outlet.
Therefrigerator should always be plugged into its
own individual electricaloutlet which hasa voltage
rating that matches the rating plate.
Thisprovides the best performance and alsoprevents
overloading house wiring circuits which could cause
a fire hazard from overheated wires.
Never unplug your refrigerator by pulling
on the power cord. Always grip plug firmly
and pull straight out from the outlet.
Repairor replace immediately oil power cords that
hove become frayed or otherwise damaged. Do not
useo cord that shows crocks or abrasion damage
along its length or at either end.
When moving the refrigerator away from the wall,
be careful not to roll overor damage the power cord.
READANDFOLLOWTHISSAFETYINFORMATIONCAREFULLY.
SAVETHESEINSTRUCTIONS

About the controlswith temperature settings.
Not all features are on all models. Your controls will look like one of the following:
fEnerg?l
Sever
I Adjust_l
F..... !3
Cubed Crushed Water
-Alarml
Light .,J
Light ONIOFF
(Hold 3 seconds}
¢1¢e Off> _']
L LookJ
(Hold 3sec
to Lock Control}
"x
Location of Dispenser Controls Dispenser Models
.20 FRecommended 38 _ _ Recommended
Internal Control Hodels
Location of Internal Controls
NOTE:Therefrigerator is shippedwith protective film covering the temperature
controls. If this film was not removed during installation, remove it now.
Thetemperature controls are preset in the foctorg at38°F for the refrigerator
compartment and -2°F for the freezer compartment. Allow 24 hours for
the temperature to stabilize to the preset recommended settings.
Thetemperature controls can displag both the SETtemperature as well as
the actual temperature in the refrigerator and freezer. Theactual temperature
mag varg slightlg from the SETtemperature based on usage and operating
environment.
__ FAdjust_
reezer__
rigerat_
Changing the Temperature
Dispenser models:
To change the temperature, press and release
the Adjust Freezer or Adjust Refrigerator pad.
The display will show the actual temperature.
Tap either the Adjust Freezeror Adjust Refrigerator
pad until the desiredtemperature isdisplayed.
Oncethe desiredtemperature has been set,
the temperature display will returnto the actual
refrigerator and freezer temperatures after
10 seconds.Severaladjustments may be required.
Eachtime you adjust controls,allow 24 hours
for the refrigerator to reachthe temperature you
have set.
_Freeze 9
_-Fridge_
Internal control models:
Tochangethe temperature, pressand release
the Freezeror Fridge pad.Thedisplay will show
the actual temperature. Tapeither the Freezeror
Fridge pad until the desiredtemperature isdisplayed.
Oncethe desiredtemperature has been set,
the temperature display will returnto the actual
refrigerator and freezer temperatures after
10 seconds.Severaladjustments may be required.
Eachtime you adjust controls, allow 24 hours
for the refrigerator to reach the temperature
you have set.
4

About the controls. GEApp,iancescom
m m
SpillShelf
WaterJ
To Use the Dispenser (onsome models)
SelectCubed Ice _J,Crushed Ice _ or
Water U by pressing the Ice&Water pad.
Pressthe glassgentlg against the top
of the dispenser cradle.
Thespillshelf isnot self-draining.
Toreducewater spotting, the shelf should
be cleaned regularlg.
If no water is dispensedwhen the refrigerator
isfirstinstalled,there mag be air in the water
linesgstem. Pressthe dispenserarm for at
leasttwo minutes to remove trapped air from
the water line and to fillthe water sgstem.
Toflush out impurities in the water line,throw
awag the first six full glassesof water.
CAUTION:Neverputfingers
or any other objectsinto the icecrusher
discharge opening.
_ce Off/_
LockJ
)Hold3 sec
toLockControl)
To Lock and Unlock the Dispenser (onsomemodels)
Tolock,pressand hold the Ice Off/Lock pad
for 3 seconds.Repeatthis step to unlock the
dispenser.
Internal Water Dispenser (onsomemodels)
Tousethe internal water dispenser,placea
glass underneath the water outlet and push
gentlg against the dispenserwith gour glass.
Important Facts About your Dispenser
Donot add ice from trags or bags to the storage drawer.
It mag not crush or dispensewell.
_Avoid overfilling glasswith iceand use of narrow
glasses.Backed-up ice canjam the chute or cause
the door inthe chute to freeze shut. If iceis blocking
the chute, poke it through with a wooden spoon.
Beveragesand foods should not be quick-chilled in
the icestorage drawer.Cons,bottles or food packages
inthe storage drawer mag cause the icemakeror auger
tojam.
_To keepdispensed icefrom missingthe gloss,
put the gloss closeto, but not touching, the dispenser
opening.
_Some crushed ice mog be dispensedeventhough gou
selected CubedIce,This happens occasionallg when
a few cubes accidentallg get directed to the crusher.
_After crushed ice isdispensed,some water mag drip from
the chute.
_Sometimes a small mound of snow will form on the door in
the icechute.This condition isnormal and usuallgoccurs
when gou hove dispensedcrushed icerepeatedlg.
Thesnow will eventuallg evaporate.
Light J
Light ON/OFF
)Hold 3seconds)
About Door Alarm Ionsome models)
Thedoor alarm will sound if any
door is open for more than 3 minutes.
Thebeeping stops when gou close the door.
About Dispenser Light (onsome models)
Pressand hold the Alarm/Light pad for
3 secondsto turn on the dispenser light.
Toturn off, press and hold the pad again
for 3 seconds.
_Energy]
SaverJ
About Energy Saver
Thisproduct isequipped with an Energg
Saverfeature. Therefrigerator isshipped
with the EnerggSaverfeature on.
Overtime, moisture can form on the front
surface of the refrigerator cabinet and cause
rust. If moisture does appear on the front
surface of the refrigerator cabinet, turn off
the EnerggSaverfeature bg pressing
and releasingthe Energy Saver pad
on the control panel.
About the water filter.
Cartridge
Holder
I
Filter%_
Ice & ]
WaterJ
(Hold 3 sec
to Reset Filter)
Water Filter Cartridge
Thewater filter cartridge islocated
in the back upper right corner
of the refrigerator compartment.
When to Replace the Filter
Thefilter cartridge should be replaced
every six months or ifthe flow ofwater
to the dispenser or icemaker decreases.
Installing the Filter Cartridge
0 If you are replacingthe cartridge,first
remove the old one by slowly turning
it counterclockwise. A small amount
of water may drip down.
CAUTION:Ifairhasbeen
trapped in the system,the filter cartridge ma£1
be ejectedasit isremoved.Usecaution when
removing.
Removethe protective foil from the end
of the cartridge.
Liningup the arrow on the cartridge
and the cartridge holder,placethe top
of the new cartridge up insidethe holder.
Donot pushit up into the holder.Slowly
rotate the cartridge clockwise until it
stops.As you turn the cartridge, it will
automatically raiseitself into position.
Cartridge will rotate about 1/4 turn.
Do not overtighten.
Pressand hold the Ice &Water pad for
3secondsto resetthe filter.
_Run water from the dispenserfor
3 minutes (about lY2 gallons)to clear
the system and prevent sputtering.
SeeToUsethe Dispensersection.
NOTE:A newly installed water filter
cartridge may cause water to spurt
from the dispenser.
Filter Bgpass Plug
Youmust usethe filter bypass plug when a
replacement filter cartridge isnot available.
The icemaker will not operate without
the filter or filter bypass plug.
Replacement Filters:
To order additional filter cartridges
in the United States, visit our Website,
GEAppliances.com or call GE Parts and
Accessories, 800.626.2002.
Filter ModelMWF
Customersin Canadashould consult
the yellow pagesfor the nearest Habe
ServiceCenter.
6

About fresh food storage options. GEAppliances.com
Rearranging the Shelves
Shelvesinthe refrigerotor comportment ore odjustoble.
Toremove:
0 Removeoil itemsfrom the shelf.
0 Tilt the shelf up ot the front.
Liftthe shelf up ot the bock ond
bring the shelf out.
0
0
Toreplace:
While tilting the shelf up, insertthe top
hook ot the bock of the shelf in o slot
on the trock.
Lowerthe front ofthe shelf until
the bottom of the shelf locksinto ploce.
Spillproof Shelves
Spillproofshelveshovespeciol edgesto
help prevent spillsfrom dripping to lower
shelves.
Floating snack pan Ionsomemodels)
TheIocotion of the snock pon isodjustoble
ond con be chonged likethe other shelves.
Toremove:
Pullthe snook pon out to the stop
position.
Liftthe pon up ond post the stop.

About fresh food storage options.
Non-Adjustable Dairy Bin
Toremove: Liftthe dairy bin straight up,then
pull out. Toreplace: Engagethe bin in the molded
door supports and push down. Thebin will
lock in place.
Adjustable Bins on the Door
Adjustable binscan easilgbe carried from
refrigerator to work area,
Toremove: Liftbin straight up,then
pull out.
Toreplace or relocate: Slidein the binjust
above the molded door supports,and push
down. Thebin will lock in place.
NOTE:On models without a full-width pantrg,
the location of the bottom door bin isnot
adjustable.
Non-Adjustable Bins on the Door Ionsomemodels)
Toremove: Lift the bin straight up,then
pull out.
Toreplace: Engagethe bin in the molded
supports on the door and pushdown.
It will lock in place.
8

GEAppliances.com
Fruit -- Veg
Fruit and Vegetable Crisper
Keep fruits and vegetables organized
in separate compartments for easg access.
Excess water that mag accumulate
in the bottom of the drawers or under
the drawers should be wiped drg.
Produce
Drawer
®
®
Deli Drawer
| Adiust I
I Settinq I
Thecontrol is located onthe right
side ofthe drawen
Adjustable Dell/Produce Drawer (onsomemodels)
TheAdjustable Deli/ProduceDrawer
isa full-width drawer with adjustable
temperature control.This drawer can
be usedfor large miscellaneous items.
There isa temperature control which can
adjust the amount of cold air allowed into
the drawer.
Control
When Produce Drawer is selected,
the temperature of the drawer can be kept
around ]8°F (].2°C).
When Deli Drawer isselected,
the temperature of the drawer can be kept
around ]4°F (1°C).
NOTE:Fruits and vegetables mabl be
damaged using the Deli Drawer setting.
Do not store lettuce or other leafblproduce
in this drawer.
ill CAUTION:oonotstoreglass
bottlesin this drawer. Ifthey are frozen,
they canbreak and causepersonal injury.
Toremove:
0 Pullthe drawer out to the stop position.
0 Liftthe front of the drawer up and out.
How to Remove and Replace the Adjustable Deli/Produce Drawer
Toreplace:
Liftthe cover up.
Engagethe pantry rollersinto the side
rails.
Pushthe drawer inward (untilit is
in place).
How to Remove and Replace Drawer Divider
Toremove:
Pullthe drawer out to the stop position.
Raisethe front sideof the divider
to unhook itfrom the rear wall of
the drawer.
Toreplace:
Hookthe back of the divider over the rear
wall of the drawer.
Pushthe divider down.

About the freezer.
........................... n
_l|lllllll|ll i
lt_llllllllllll_l
O
Freezer Basket and Drawer
0 Basket,
0 Drawer.
Basket Removal
Toremove:
Remove Freezer Bin. (Seebelow.)
Pullbasketout to the stop position.
Tilt up the rear of the bin.
Lift it out to remove.
Basket Divider Removal
Toremove:
Pullbasketout to the stop position.
Tilt up the rear of the bin.
Lift it out to remove.
Toreplace:
Placethe basketinto the rail assemblg.
Toreplace:
Hookthe top corners of the divider over
the holeof the basket.
Drawer Removal
Toremove: Pullthe drawer forward and up to
remove itfrom the rails.
Toreplace: Placethe drawer wheels onto the
railsand push back asgou lower the drawer.
Non-AdJustable Bin in the Freezer
Toremove: Pullthe brackets upward until
you hear a clickingsound and remove
the bin.
Toreplace: Hookthe endsof the bin into
both brackets and push down untilthe bin
locksinto place.
10

About the automatic icemaker. GEAppliances.com
A newlg installed refrigerator mag take 12 to 24 hours to begin making ice.
Automatic Icemaker
_Ice Off/q
Lock J
The unit comes with an icemaker installed.
The icemaker cuclewill depend on the freezer
compartment temperature, room
temperature, number of door openings
and other useconditions.
If the refrigerator isoperated before the
water connection ismade to the icemaker,
pressand releasethe/ce Off/Lock or/ce Off
pad on the control panel to disengage the
icemaker.
When the refrigerator has been connected
to the water supply, pressand releasethe
Ice Off/Lock or/ce Offpad on the control
panel to engage the icemaker.
A newly installed refrigerator may take
12 to 2/4hoursto begin making icecubes.
Youwill hear a buzzing sound eachtime
the icemaker fillswith water.
Throw away the first few batches of ice
to allow the water line to clear.
Besure nothing interfereswith the sweep
of the feeler arm.
When the bin fills to the levelof the feeler
arm, the icemakerwill stop producing ice.
It is normal for severalcubes to bejoined
together.
If ice isnot used frequently, old icecubes
will become cloudu,taste stale and shrink.
NOTE:Inhomes with lower-than-average
water pressure,gou mag hear theicemoker
cgde multiple times when making one botch
of ice.
NOTE:Turn on theIce Off feature
if thewater supply isshut off.
11

Care and cleaning of the refrigerator.
Cleaning the Outside
Thedoor handles and trim.Cleanwith
a cloth dampened with soapy water. Dry
with a soft cloth. Donot usewax on the door
handlesand trim.
Keepthe outside clean. Wipewith a clean
cloth lightly dampened with kitchen
appliance wax or mild liquid dishdetergent.
Dry and polish with a clean,soft cloth.
Do not wipe the refrigerator with a soiled
dish cloth or wet towel. These may leave
a residue that con erode the paint. Do not
usescouring pods, powdered cleaners,
bleach or cleaners containing bleach
because these products con scratch
and weaken the point finish.
Thestainless steel panels and door
handles. Stainlesssteel (onsome models)
can be cleanedwith a commercially
available stainlesssteel cleaner.A spray-on
stainlesssteel cleaner works best.
NOTE:Theprotective film may leavea residue
that will need to be cleaned.
Donot useappliance wax, polish,bleach,
abrasive cleaners or other products
containing chlorine on stainlesssteel.Using
cleaners with chlorine, such as bleach, may
permanently affect the appearance of your
new refrigerator.
Silver-accented plastic parts. Wash parts
with soap or other mild detergents. Wipe
clean with a sponge,damp cloth or paper
towel.
Donot scrub with steel-wool pods or other
abrasive cleaners.
Cleaning the Inside
Tohelp prevent odors, leavean open box
of baking soda in the refrigerator and freezer
comportments.
Unplug therefrigerator before cleaning.
If this is not practical, wring excessmoisture
out of sponge or cloth when cleaning around
switches, lights or controls.
Usean appliance wax polishon the inside
surface between the doors.
Useworm water and baking sodasolution-
about a tablespoon (15ml)of baking sodato
a quart (1liter)of water.This both cleansand
neutralizesodors. Rinseand wipe dry.
After cleaning the door gaskets,apply a thin
layer of petroleumjelly to the door gaskets
at the hinge side.This helpskeepthe gaskets
from sticking and bending out of shape.
Avoid cleaning cold glass shelves with hot
water because the extreme temperature
difference may cause them to break.
Handle gloss shelves carefully. Bumping
tempered glass can cause it to shatter.
Do not wash ang plastic refrigerator
parts in the dishwasher.
Silver-accented plastic parts. Wash ports
with soapy water.Wipe cleon with a sponge,
damp cloth or paper towel.
Do not scrub with steel-wool pods or other
abrasive cleaners.
12

GEAppliances.com
Behind the Refrigerator
Becareful when moving the refrigerator
awau from the wall. Alltupes of floor
coveringscan be damaged, particularlg
cushioned coverings and those with
embossedsurfaces.
Raisethe levelinglegslocated
at the bottom front of the refrigerator.
SeeLeveltheRefrigeratorin the Installation
Instructionsfor levelingleg details.
Pullthe refrigerator straight out and return it
to position by pushingit straight in.Moving
the refrigerator ina sidedirection mag result
in damage to the floor covering or
refrigerator.
Lowerthe levelinglegsuntil theg touch
the floor.
When pushing the refrigerator back, make
sure gou don't roll over the power cord
or icemaker supplg line (on some models)
and ensure the anti-tip bracket is engaged
(if equipped).
[lcood'l
Lock
Preparing for Vacation
Forlong vacations or absences,remove
food and unplug the refrigerator.Clean
the interior with a baking soda solution of
one tablespoon (15ml)of baking sodato one
quart (1liter)of water. Leavethe doors open.
Pressand releasethe Ice Off/Lock or Ice Off
pad on the control panel to disengagethe
icemaker.
If the temperature can drop below freezing,
have a qualified servicerdrain the water
supplg system (on some models)to prevent
serious propertg damage due to flooding.
Preparing to Move
Secureall looseitems such as basegrille,
shelvesand drawers bu taping them
securelyin place to prevent damage.
When using a hand truck to move the
refrigerator,do not rest the front or back
ofthe refrigerator against the hand truck.
This could damage the refrigerator.Handle
onlg from the sidesof the refrigerator.
Be sure the refrigerator stags in on upright
position during moving.
13

Replacingthe light bulbs.
Refrigerator Lights
0 Unplugthe power cord from
the outlet.
0 Rotatethe shielddown while depressing
the two tabs on the back sideof
the cover to remove it.
Turnthe bulb counterclockwise.
Replacewith an appliance bulb
of the same or lower wattage.
Replacethe shield.
0 Plugthe refrigerator back in.
NOTE:Reveal®appliance bulbsmay be
ordered from GEPortsand Accessories,
800.626.2002.
Freezer Light
'_I _" _, CAUTION:Lightbulbsmay
be hot.
Unplugthe power cord from the outlet.
Pulldrawer out to the stop position.
Pushthe clips in on each side,and pull
down and forward.
Turnthe bulb counterclockwise.
Replacewith on appliance bulb
of the some or lower wattage.
Replacethe shield.
Plugthe refrigerator back in.
NOTE:Appliancebulbs may be ordered from
GEPortsand Accessories,800.626.2002.
14

Installation
Instructions Refrigerator
GE Model 26
Questions? Call 800.GE.CARES (800.432.2737) or visit our Website at: GEAppliances.com
In Canada, call 1.800.561.3344 or visit our Website at: www.GEAppliances.ca
BEFORE YOU BEGIN
Readthese instructions completely and carefully.
• IMPORTANT- Savetheseinstructionsforlocal
inspector's use.
•IMPORTANT-Observe allgoverningcodesand
ordinances.
• NotetoInstaller-Besuretoleavetheseinstructionswith
theConsumer.
• Note to Consumer- Keepthese instructionsfor future
reference.
• Skill level- Installationof this appliance requiresbasic
mechanicalskills.
•Completion time- RefrigeratorInstallation
20 minutes
Water Line Installation
30 minutes
• Properinstallation isthe responsibilitUof the installer.
• Product failuredue to improper installation isnot covered
under the Warrant U.
PREPARATION
MOVING THE REFRIGERATOR INDOORS
Ifthe refrigerator will not fit through a doorway,
the refrigerator doors and freezer drawer can be removed.
• Toremovethe refrigerator door,seethe Installing
the Rdrigerotor section.
• Toremove thefreezer drawer,seethe Removing
the FreezerDrawer section.
WATER SUPPLYTO THE ICEMAKER AND DISPENSER
Ifthe refrigerator has an icemaker,itwill have to be
connected to a coldwater line.AGEwater supplUkit
(containingtubing, shutoff valve,fittings and instructions)
isavailableat extra cost from uour dealer,bUvisiting
our Website at GEApplionces.com (inCanadaat
www.GEApplionces.ca)or from Partsand Accessories,
800.626.2002(inCanada1.800.661.1616).
15
TOOLS YOU MAY NEED
Adjustable Wrench
o@
1/4" Outer Diameter
Compression Nut
and Ferrule (sleeve)
3/32", 1/8", 3/16" and
4 mm Allen Wrenches
1/8" Drill Bit and
Electric or Hand Drill
3 :)})))'1
Pencil
Pliers
DIMENSIONS
70"1
I I
10 mm Socket
Ratchet/Driver
355/s''
/
Phillips-Head Screwdriver
Flat-Head Screwdriver
Tope Measure
1/4" Nut Driver
Level
Case Depth w/o
Doo[s 291/s"_
Height from
floor to hinge
cover top 687/8''
Additional Dimensions

Installation Instructions
INSTALLING THE REFRIGERATOR
REFRIGERATOR LOCATION
• Do not installthe refrigerator where the temperature will
go below 60°F(16°C)because it will not run often enough
to maintain proper temperatures.
• Do not installthe refrigerator where the temperature will
go above 100°F(37°C)becauseitwill not perform properlg.
• Installit on a floor strong enough to support it fullg loaded.
CLEARANCES
Allowthe following clearancesfor ease of installation,proper
air circulation and plumbing and electrical connections.
Sides 1/8" (3mm)
Top 1"(25mm)
Back 1"(25mm)
ITI REMOVE THE FRESH FOOD
DOOR HANDLE
Stainless steel and plastic handles:
@ REMOVING THE DOOR
HANDLE: Loosen
the set screws
with the 1/8"
Allen wrench
and remove
the handle.
NOTE: If the handle
mounting fasteners
need to be tightened
or removed, use
aPhillips-head Mounting/
screwdriver. Fasteners J
JJ
REMOVINGTHEREFRIGERATORDOORS
• IMPORTANTNOTE:This refrigerator is35.6" deep. Doors
and passageways leading to the installation location
must be at least 36" wide in order to leave the doors and
handles attached to the refrigerator while transporting it
into the installation location. If passageways are lessthan
36", the refrigerator doors and handles can easily be
scratched and damaged. Thetop cap and doors can be
removed to allowthe refrigerator to be safely moved
indoors. Start with Step 1.
• If it is not necessary to remove doors, skip to Step9. Leave
tape and all packaging on doors until the refrigerator is in
the final location.
• NOTE:Useapadded hand truck to move this refrigerator.
Placethe refrigerator on the hand truck with aside
againstthe truck. We strongly recommend that TWO
PEOPLEmove and complete this installation.
r_l REMOVE THE FREEZER DOOR HANDLE
Stainless steel and plastic handles:
@ Loosen the set screws located on the underside
of the handle with the 1/8" Allen wrench and
remove the handle.
NOTE: If the handle mounting fasteners need
to be tightened or removed, use a Phillips-head
screwdriver.
16

Installation Instructions
1-31ATTACH THE FRESH FOOD
DOOR HANDLE
Stainless steel and plastic handles:
Attach the handle
to the handle
mounting fasteners
and tighten the set
screws with a 1/8"
Allen wrench.
Q
[] ATTACH THE FREEZERDOOR HANDLE
Stainless steel and plastic handles:
@ Attach the handle firmly to the mounting
fasteners and tighten the set screws on
the bottom of the handle with a 1/8" Allen
wrench.
[] REMOVE THE REFRIGERATOR DOORS
_'1 Openthe refrigerator doors.
[] Removethe two rectangular caps with a flat-head
screwdriver.
REMOVETHEREFRIGERATORDOORS(cont.)
r_ Removethe threescrews on top with a Phillips-head
screwdriver.
r_ Disengagethe two electricalconnectors.
r_ Todisconnect the water coupling, push in on the graU
coupling and pull out the tubing.
Gray. \_.--'_" -- -- /Ill
Coupling_'__
[] Removethe two grounding cableswith a Phillips-head
screwdriver.
r_ Removethree 10 mm hex-head bolts (rightand left).
\
^,.L CAUTION:Whenthe bolts are removed,the
door maUfall and cause personalinjurUand/or damage
to the door itself.
17

Installation Instructions
INSTALLING THE REFRIGERATOR (cont.)
rsl REMOVETHEREFRIGERATORDOORS(cont.)
FH1 Liftthe door straight up to remove.
I jj_j
ITI Removethe two bolts using a 3/16" Allenwrench
and two Phillips-headscrews from the center hinge.
Setthe hinge,bolts and screwaside.
[] REPLACINGTHE REFRIGERATORDOORS
_1 Installthe center hinge on eachside.
[] Lowerthe refrigerator door onto the center hinge pin.
Ensurethat the plastichinge pinthimble ison the center
hinge pin or insidedoor hinge pin hole located in the
bottom ofthe door.
II Eli jz-
tj- j
J
?
[] Securelgtape the door shut with maskingtape
or havea second personsupport the door.
18
REPLACING THE REFRIGERATOR DOORS
(cont.}
r_ Insertthe top hinge pin into the hinge hole ontop
of the refrigerator door.Hake surethe door isaligned
with the cabinet and opposite door.Attach the hinge to
the top ofthe cabinet. Donot tighten bolts completelg.
I
rE1 On left-hand doors, passthe wires and water line
through the top hinge pin.Thenconnect the water line
and door electrical connector.
r_ Attach the ground wire with a Phillips-headscrewdriver
at the right and left hinge.
[] Hake surethe gasket on the door isflush against the
cabinet and is not folded. Hake surethe door isstraight
and the gap between the doors isevenacrossthe front.
While holdingthe aligned door in place,tighten the top
hinge bolts.
FH1 Reconnectthe two connectors at each sideof the top
cap and reattach the three Phillips-headscrewson top.
ITI Reinstallthe rectangular caps removed in Step5.

Installation Instructions
[] REMOVE THE FREEZERDOOR
_'1 Pullthe freezer door open to full extension.
[] Removethe freezerbin by pulling both brackets upward
at the same time.(Seepage 10.)
[] Takeout the lower basketby liftingthe basket up from
the railsystem. (Seepage 10.)
rD-] Removethe two 10 mm hex-head boltsfrom the right
and left side.
REMOVE THE FREEZERDOOR (cont.)
Usethe tip of a screwdriverto separate the railfrom
the rail cover.Tiltthe front end upand lift the entire door.
D Setthe door front on a nonscratching surface.
r_ Pushthe rail assembliesback intothe cabinet.
-& CAUTION:Pushboth sidesof the rail
assemblies back at the same time.
[] REPLACING THE FREEZER DOOR
Two people may be requiredto completethis procedure.
ATTACH AND SECURE THE DRAWER FRONT TO
THE SLIDES
_] Pullout the rail assembliesto the full length oneach side
of the cabinet.
CAUTION: Makesureto pull out the side
railsevenly.
19

Installation Instructions
INSTALLING THE REFRIGERATOR (cont.)
r81REPLACINGTHE FREEZERDOOR (cont.)
r_ Hangthe freezer door front onto open slots
on the sides.
Slot
rc1 Tighten screws completely.(Therearefour 10 mm
hex-headbolts.)
REPLACE THE FREEZER BASKET
Replacethe freezer basket by lowering it into the frame.
r81REPLACINGTHE FREEZERDOOR (cont.)
REPLACE THE FREEZER BIN
Hookthe endsof the freezer bin into both brackets,
and pushdown untilthey lock into place. (Seepage 10.)
[] CONNECTING THE REFRIGERATOR
TO THE HOUSE WATER LINE
A coldwater supply isrequired for automatic icemaker
operation. Ifthere isnot a coldwater supply, you will
needto provide one.SeeInstallingthe Water Line
section.
NOTE:Beforemaking the connectionto the refrigerator,
be surethe refrigerator power cord isnot plugged
into the wall outlet.
If you are using copper tubing, place
a compression nut and ferrule (sleeve) onto
the end of the tubing coming from the house
cold water supply.
If gou are using the GE SmartConnect'"
tubing, the nuts are already assembled
to the tubing.
2O
This manual suits for next models
25
Table of contents
Languages:
Other GE Refrigerator manuals

GE
GE TOP-FREEZER 16 Operating instructions

GE
GE Monogram ZIC360N RH Guide

GE
GE Profile Arctica PSS27NGP User instructions

GE
GE PFSS2MIYSS Manual

GE
GE GBSL0HCXLLS Manual

GE
GE HTH18GBCCC Assembly instructions

GE
GE ZISP480DHSS User manual

GE
GE GTV120PANR User manual

GE
GE WMR04GAV Operating instructions

GE
GE Profile CustomStyle 24 Series User manual

GE
GE GTV120PANR User manual

GE
GE GBSC0HBXBB Assembly instructions

GE
GE Monogram ZISS480DXSS Manual

GE
GE Profile PCF23MGW Safety guide

GE
GE GSL22JFXLB User manual

GE
GE GDL22KCWSS Manual

GE
GE 12828181A User manual

GE
GE Profile Series User manual

GE
GE PSE29KSESS Manual

GE
GE PFSS6SMXESS and Operating instructions