Aboutthe water filter cartridge.
On some models
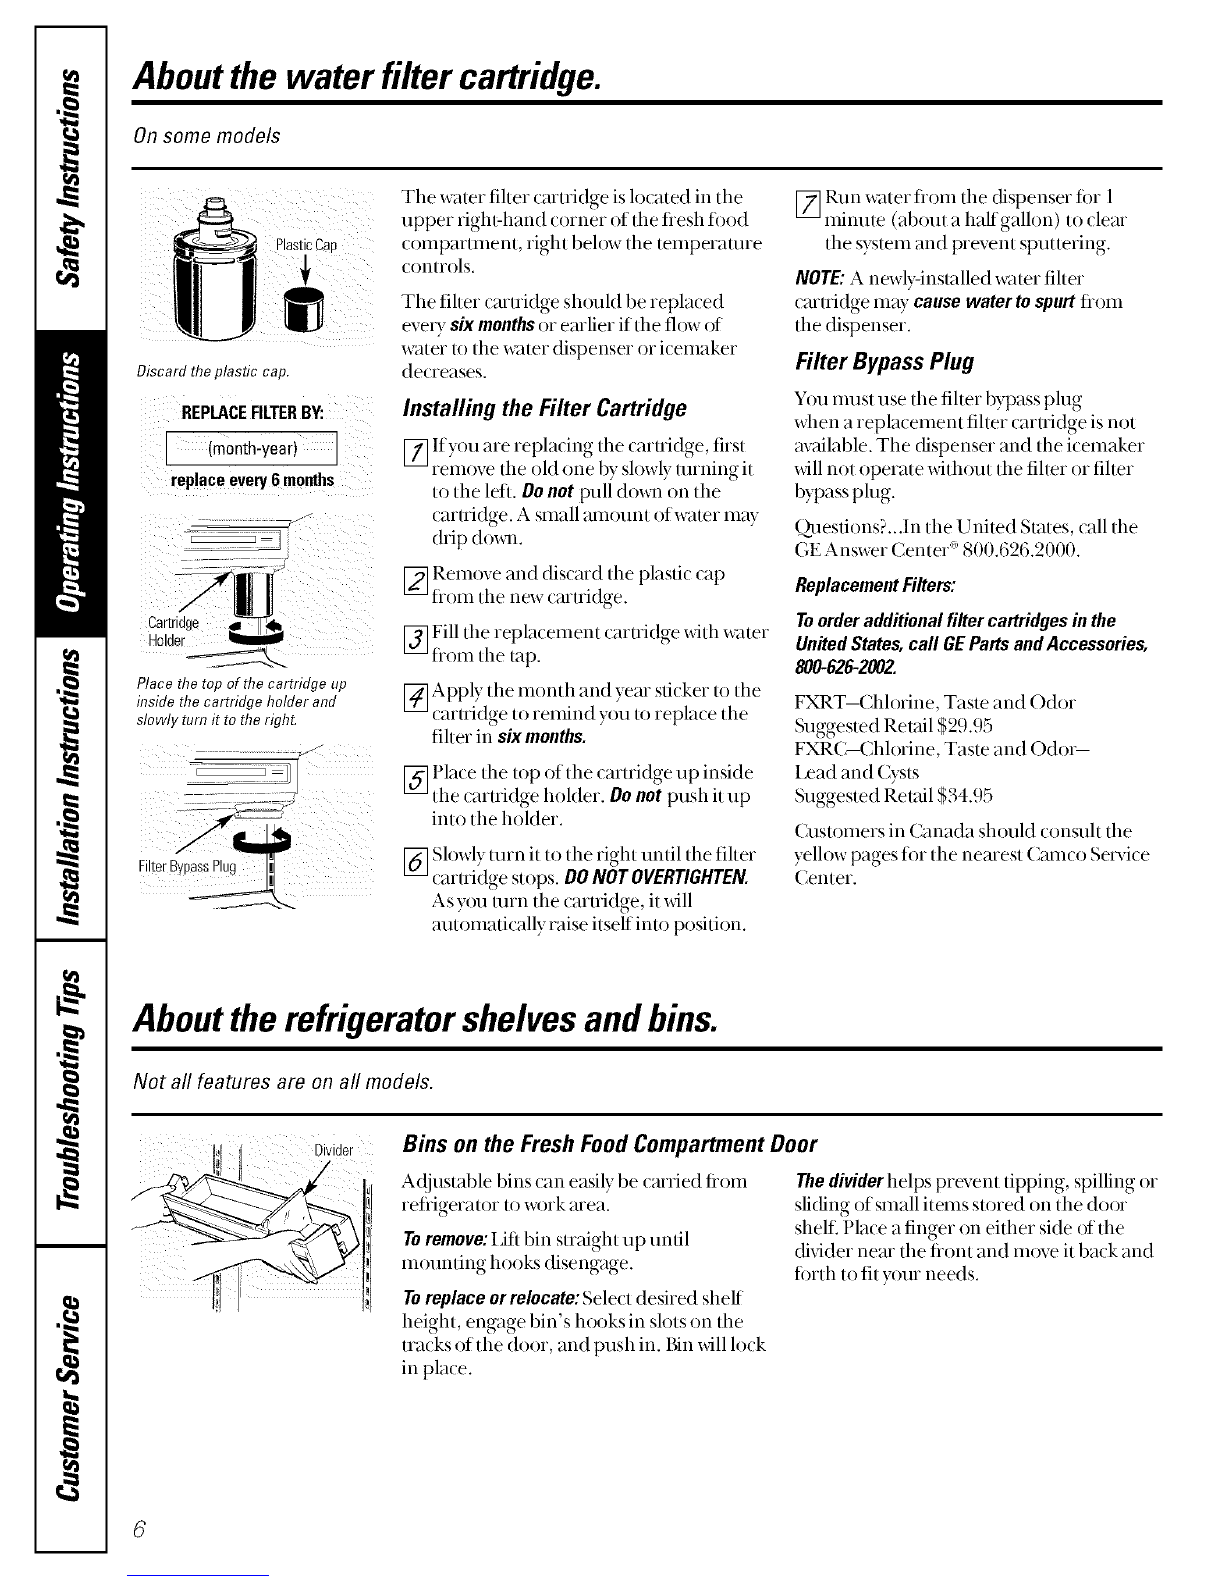
PlasticCap
Discard the plastic cap.
I (m°nthyear)I
replace every 6 months
_ _ _ iiii /iI
Cartridge i I
Holder I II
Place the top of flTecartridge up
inside the cartridge holder and
slowly turn it to the right.
.........................._
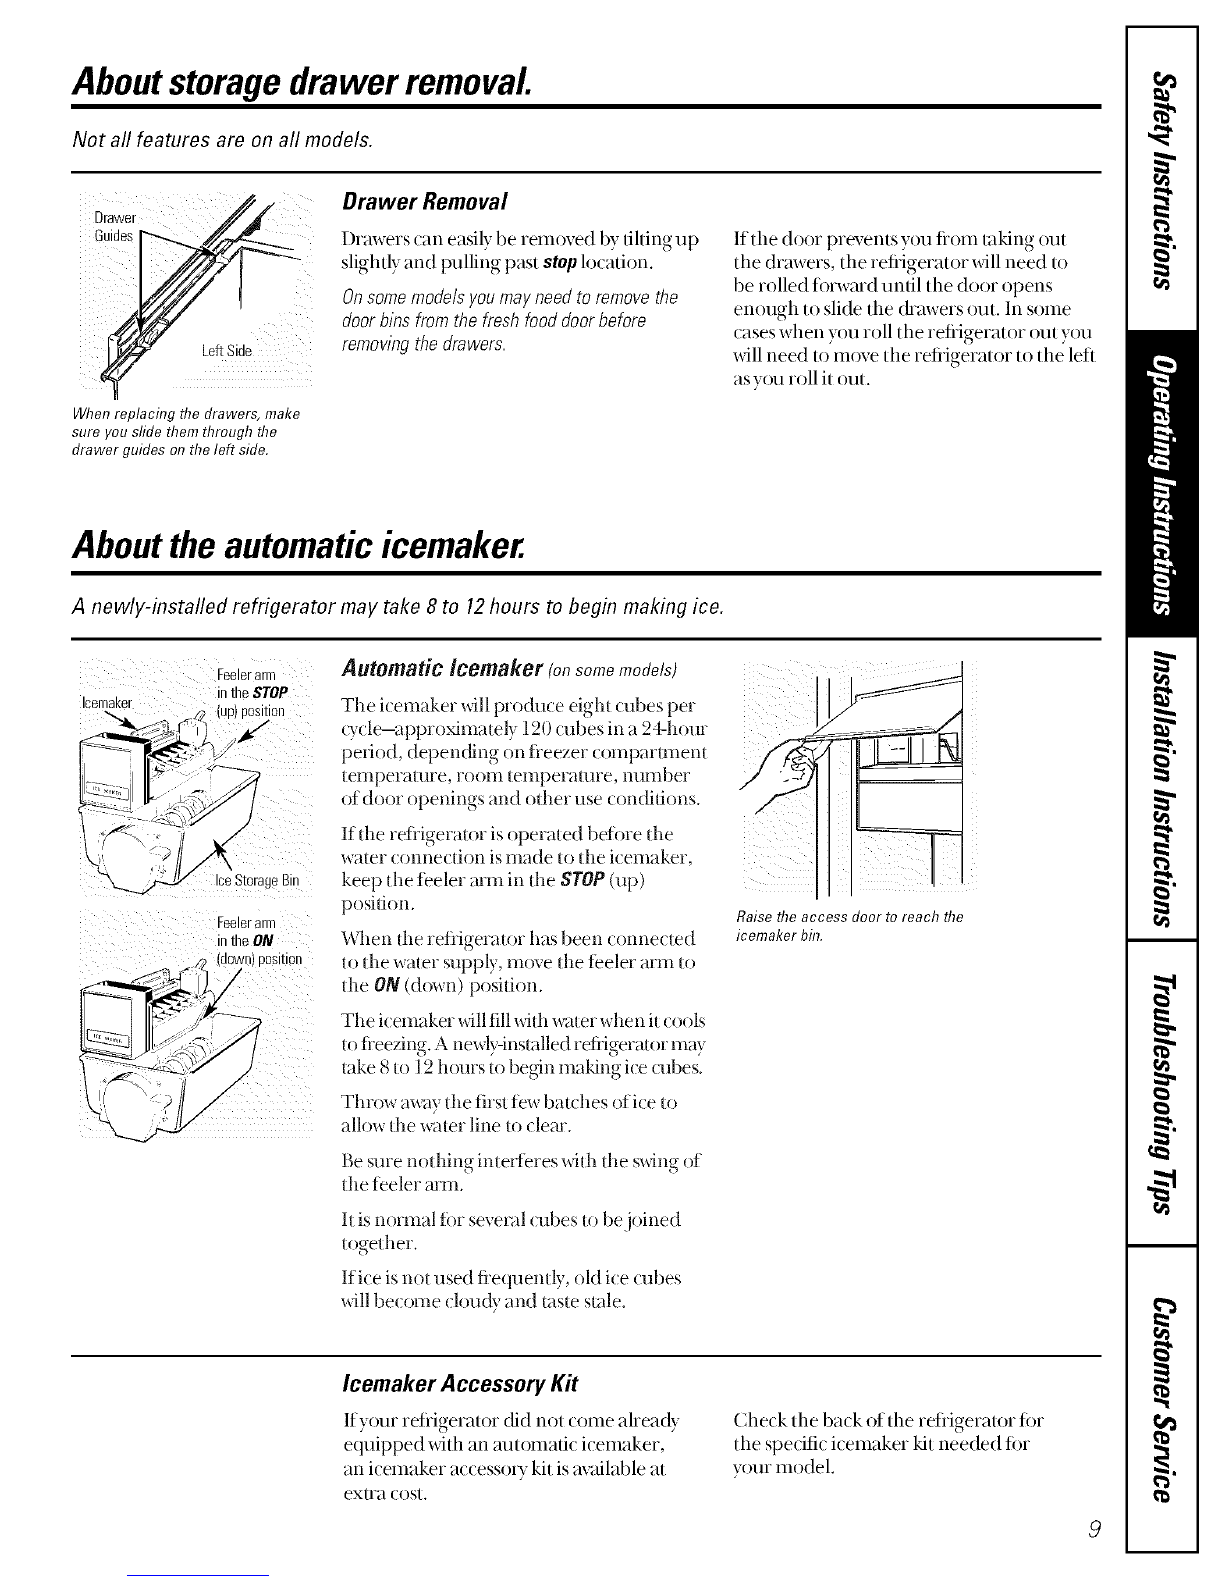
Tile water filter cartridge is located in the
upper right,hand (orner of tlle fiesh toad
comparmmnt, right below tl_e temperature
controls.
Tim filter cartridge should be replaced
every sixmonthsor earlier if tl_eflow of
water to the water dispenser or icemaker
decreases.
Installing the Filter Cartridge
[7] Ifyou are replat ing the cartridge, litst
re'nave tile i)ld one bv slowly turning it
to the let1. Donot pull (lox_l_on the
caruidge. A small atnount ofwamr mW
drip (lox_l_.
[_ Remove and discard tlle plasdc cap
fiom tile new cartridge.
[_] Fill the replacement cartridge widl water
fiom the tap.
[_]A pplv the month and year sticker it) tlle
c_irtr(dge to relnind vr)u to replace the
filter in sixmonths.
[_ Place tile top of din cartridge up inside
tlle cartridge holder. Do not push it up
into the holder.
@Slowly mrn it to the right until tile filter
cartridge strips. DONOTOVERTIGHTEN.
As you mrn tile taruidge, it _dll
autolnatically raise itself into position.
[_Run water fiom tile dispenser for 1
minute (about a half gallon) to dear
tl_esystem and prevent sputtering.
NOTE:A newly-installed water filter
(artridge may causewatertospurtfrom
die dispenser.
Rlter Bypass Plug
Y{)umust use the fiher bypass plug
when a replacement fiher carnidge is not
available. The dispenser and the icemaker
will not operate without the fiher or fiher
bypass plug.
(_mstions?...In the United States, trailthe
GE Answer Center " 800.626.2000.
Replacement Fillers:
Toorder additional filler cartridges in the
United States, call GE Parts and Accessories,
800-826-2002.
FXRT--Chlorine, Taste and Odor
Suggested Retail $29.95
FXR(_Chlorine, Taste and Odor-
I_ead and Cys/s
Suggested Retail $34.95
CustolneI's in ( anada should consult the
yellow pages tot the nemest (mnco Sevvice
Center.
Aboutthe refrigeratorshelvesandbins.
Not all features are on all models.
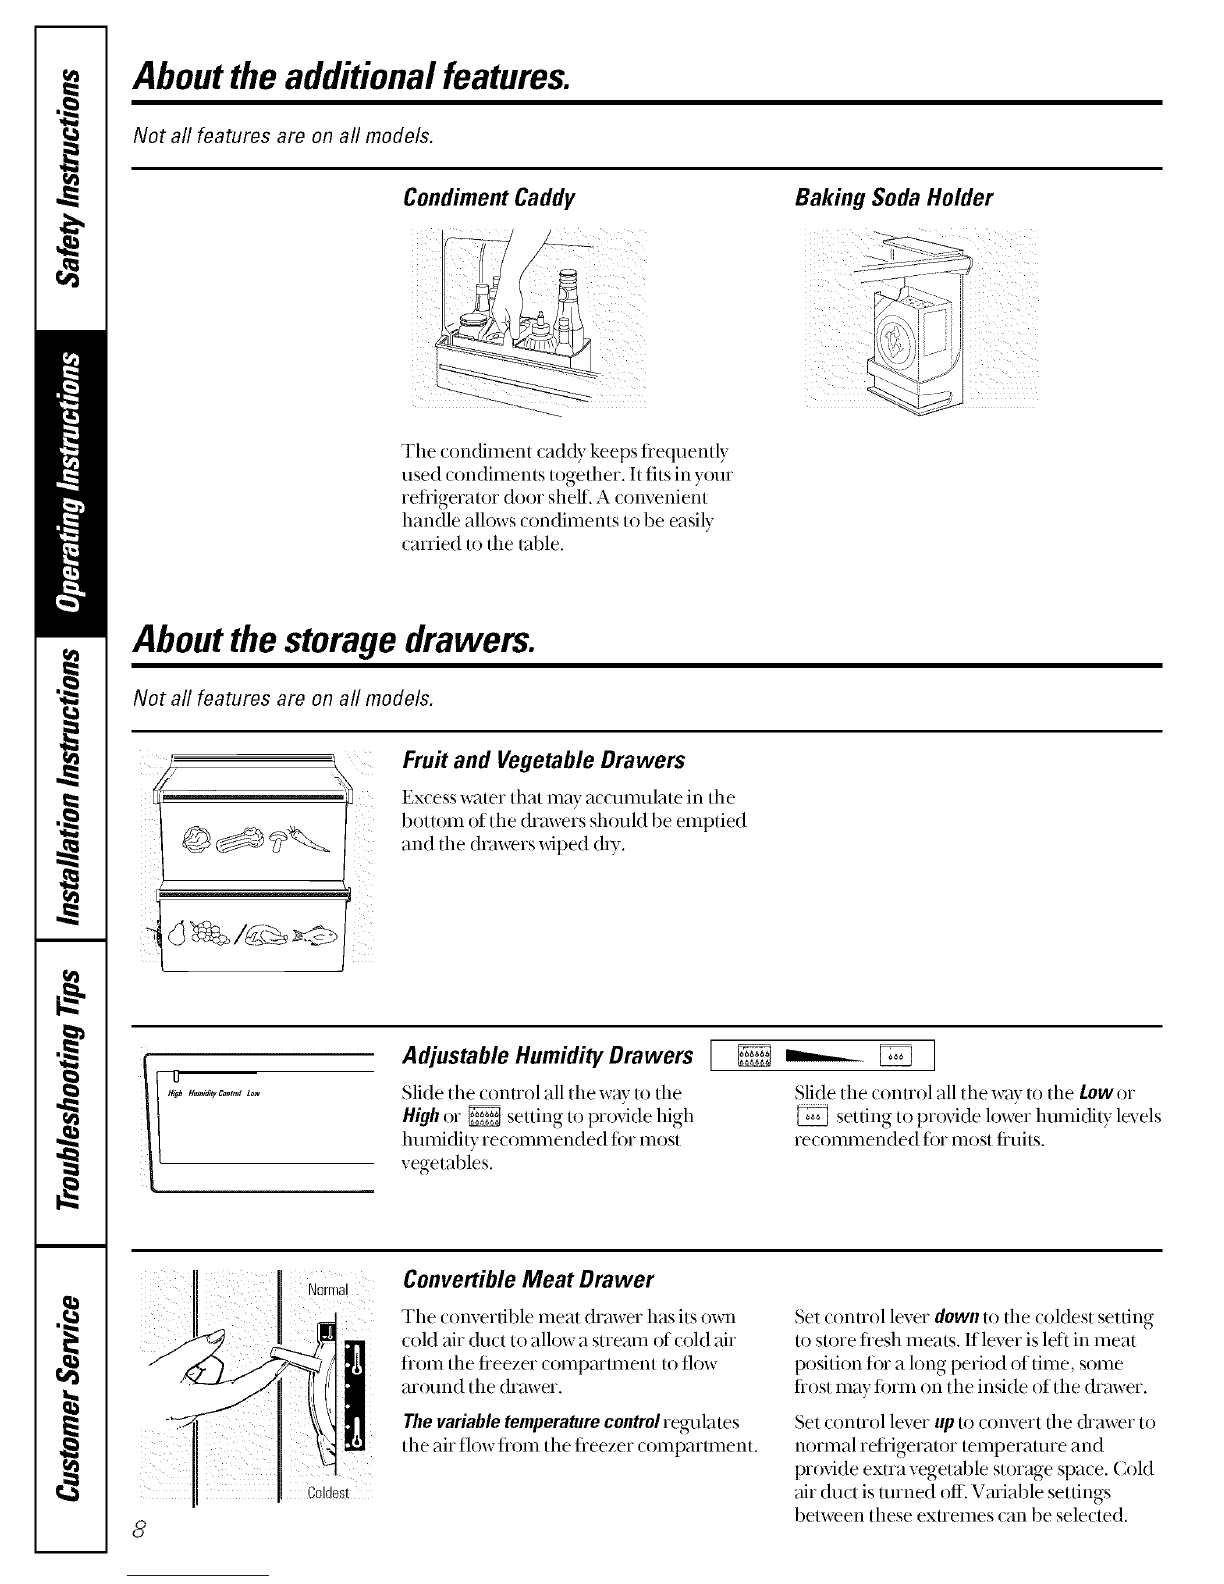
Divider Bins on the Fresh FoodCompartment Door
A(!justable bins can easily be carried from
refrigerator to work area.
Toremove:l,ifi bin str>fight up until
mounting hooks disengage.
Toreplaceorrelocate:Select desired sheff
height, engage bin's hooks in slots on the
tracks of the door, and push in. Bin will lock
in place.
Thedividerhelps prevent tipping, spilling or
sliding of small items stored on the door
shel£ Place a finger on either side of the
(fivider nero the fiont and inove it back and
ti)ith to fit your needs.