GE GSC22KGRCBB and Safety guide

www.GEAppliances.com
°_
Safety Instructions ........... 2-4
Operating Instructions
Automatic Icemaker ........... 12
Care and Cleaning .......... 14, 15
Crispers and Pans ............. 11
Ice and Water Dispenser ........ 13
Refrigerator Doors ............ 10
Replacing tile Light Bulbs ....... 16
Shelves, Bins and Racks ........ 8, 9
Temperature Controls ........... 5
TurboCoot T" ................... 6
Water Filter ................... 7
Installation Instructions
Installing tile Refrigerator .... 26-29
Moving tile Refrigerator ..... 22-25
Preparing to Install
the Refi_igerator ............... 21
Trim Kits and Panels ........ 17-20
Water Line Installation ...... 30-32
Troubleshooting Tips ....... 33-36
Normal Operating Sounds ...... 33
Consumer Support
Consumer Support ..... Back Cover
Performance Data Sheet ........ 40
Product Reg&tration ........ 37, 38
State of California Water
Treatment Device Certificate ..... 41
Warranty (Canadian) ........... 42
Warranty (U.S.) ............... 43
Models23,25,26,27and29
Profi/eC6te C6te
R6frig&ateurs
La section fran_aise commence a la page 44
Profi/e Lado a Lado
Refrigeradores
La seccidn en espa_ol empieza en la p_gina 82
Write the model and serial
numbers here:
Model #
Serial #
Find dmse nuInbers (m a label inside
the reffigera/or compartment at the
top on the right side. 200D2600POZI3 49-60352-2 12-04JR

IMPORTANTSAFETYINFORMAtiON.
READALLINSTRUCtiONS BEFOREUSING.
WARNING!
Use this appliance only for its intended purpose as described in this Owner's Manual
SAFETYPRECAUTIONS
When using electrical appliances, basic safety precautions should be followed, including the following:
_This refrigerator must be properly installed
aud located iu accordauce with the lustallalion
lnsmmlions before it is umd.
_Do not allow children m climb, stand or haug
oil Ihe shelves in tile refrigerator. They could
damage dm refrigerator mid seriously injure
theInselves.
/_2Do not touch tile cold surfaces in Ihe freezer
coInparlmeut when hauds are damp or wet.
Skin may slick to them extremely cold surfaces.
_Do not store or um gasoline or olher flmnInable
vapors and liqui&s in die *4cinity of dlis or auy
olher appliauce.
_ln refrigeralors wi|h mltoInafic icemaNers,
avoid coutact wilh dm moviug parts of die
ejector mechaIfism, or wilh tile heating
demeIlt located oil the t)ottom of tile icemaker.
Do not place fiugers or hauds oil dm mlloInafic
iceInaking InechaIfiSnl while ltle refrigera|or
is plugged in.
g_Keep fiugers out of tile "pinch point" areas;
clearauces between tile doors aud betweeu
tile dours aud catfmet are necessarily small.
Be careful closing doors when children are
in file area.
NUnplug tile refrigerator before cleauing aud
Inaking repairs.
NOTE: We strongly recommendthatany servicingbe
performedbya quahfiedindlviduaL
g_Setling either or txnh comrols to 0 (Off)does not
remove Ix)wet to lhe light circuil.
_Do nol refreeze frozen fouds which have
thawed coInpletely.
2

www.GEAppliances.com
ADANGER!RISKOFCHILDENTRAPMENT
PROPERDISPOSALOFTHEREFRIGERATOR
Child entrapment and suffocation are IlOt problems
of dm past.Junked or ahandoned refrigerators are
still dangerous...even if dmy will sit fbr 'lust a few
daw" If you are gelling rid of your old refrigerator,
please fbllow tile instructions below m help prevent
accidents.
Before You ThrowAway Your Old Refrigerator
or Freezer.
N'Fake off die doors.
}_Leave Ihe shelves in place so that children may
not easily climb inside.
Refrigeren_
All refrigeration products conlain reffigermns,
which under federal law must be removed prior
m product disposal. If you are getting rid of an
old refrigeration product, check with tile
company handling the disposal about what
1() do.
USEOFEXTENSIONCORDS
Because of potential safety hazards under certain conditions, we strongly recommend against the use
of an extension cord.
However, if you most use an exlension cord, it is absolulely neces_ry lhal it be a UL-listed (in Ihe UIfiled
S ares) or a (_A-hsted (m Canada), 3-wire grounding type appliance extension cord having a grounding
1ype plug and outlet and that die electrical rating of dm cord be 15 mnperes (minimmn) and 120 volks.
3

IMPORTANTSAFETYINFORMAtiON.
READALLINSTRUCtiONS BEFOREUSING.
AWARNING!
HOWTOCONNECTELECTRICITY
Be not, under any circumstances, cut or remove the third (ground) prong from the power cord.
Forpersonal safety, this appliance must be properly grounded.
"I]m power coM of this appliance is equipped with
a "_-prong (grounding) plug whirl1 mates with
a standard %prong (grounding) wall outlet m
minimize the possibilily of electric shock hazard
fi_om tiffs appliance.
Have ltle wall Buffet and circuit checked by
a qualified eleclrician to make sure lhe Buffet
is properly grounded.
If fire outlet is a standard 2-prong Buffet, it is
y_ur personal reslxmsibility and obligation m
have it replaced with a properly grounded
3-prong wall oudet.
"I]le refrigerator should always be plugged into
iks own individual eleclrical oullel which has
a voltage rating Ihat Inatches lhe rating plate.
This provides the best pertbrmance and also
prevenks overloading house wiring circuils which
could cause a fire hazard fi'oIn overheated _vires.
Never unplug your reffigeralor by pulling on
ltle power cord. Always grip plug firmly and pull
slraight out from dm outlet.
Repair or replace immediately all power cords thai
have become flayed or otherwise damaged. Do not
use a cord that shows cracks or abrasion dmnage
along its length or al either end.
_heIl Inoving Ihe refrigerator away from lhe
wall, he carefifl not to roll over or damage lt_e
[x_wer cord.
USEOFADAPTERPLUGS(Adapterplugsnotpermittedin Canada)
Because of potential safety hazards under certain conditions, we strongly recommend against
the use of an adapter plug.
However, if you must use m_ adapter, where local
codes permit, a temporary connection may be made
m a properly grounded 2-prong wall Bullet by use
ofa UL-listed adapter available a/most local
hardware slores.
The larger slot in the adapter Inust be aligned with
the larger slol in the wall outlet to provide proper
polarity in 1he connection of the power cord.
When disconnecting the power cord froIn the
adapter, always hold the adapter in place wilh one
hand while pulling the lx)wer cord plug with the
other hand. If this is not done, the adapter ground
terminal is very likely m break with repeated use.
If the adapter ground temfinal breaks, DONOT
USEIhe refrigerator until a proper ground has
been established.
Attaching the adapter ground terminal to a waft outlet
coverscrew does not ground the appliance unless the
coverscrew is metal, and not insulated, and the wall
outlet is grounded through the house wiring. You should
have the circuit checked bya qualified electrician to
makesure the outlet is properly grounded.
READANDFOLLOWTHISSAFETYINFORMATIONCAREFULLY.
SAVETHESEINSTRUCtiONS
4

Aboutthe temperaturecontrols, www.GEAppliances.com
I
f
The temperature controls are preset in the factory at 5for both
the refrigerator and freezer compartments. Allow 24 hours for the
temperature to stabilize to the preset recommended settings.
Several adjustments may be required. Each time you adjust
controls, allow 24 hours for the refrigerator to reach the setting
you have selected.
Setting either or both controls to 0stops cooling in both the freezer
and refrigerator compartments, but does not shut off electrical power
to the refrigerator.
Control settings will vary based onpersonal preferences, usage and
operating conditions and may require more than one adjustment.
NOTE: The refrigerator is shipped with protective film covering the
temperature controls. If this film was not removed during installation,
remove it now.
PerformanceAirFlowSystem
Tile Perfbnnance ;Mr How System is designed to Ina_mfize temperature conlrol in lhe refl-igeralor and
freezer coInpartmenls. This unique special featore consists of lhe ;Mr Tower Mong the [rack wall of tile
refrigerator and Ihe Air Tunnel on tile bollx_In porlion of the freezer rear wall. Placing food in f_ont of the
louvers oil these coInponenls will not affect perfbnnance. ;Mlhoogh tile Air Tower and the Air Tunnel can
be removed, doing so will affect temperature perfk_rmance. (For removal instructions, on-line, 94 hours a
day, contact us at GEAppliances.com or call 800.GE.CARES. In Canada, contact us a/www.geappliances.ca
or call 1.800.361.3400.)
5

About TurboCooL"
@How it Works
TurboCoof rapidly cools Ihe refrlgeralor
coInparunent in order m more quickly
cool food_s. Use Tu_oCool when adding a
large alllotlIlt of food to die refrigerator
coInparunent, putling away foods after they
have been sitling out al rooIn teInperature
or when pulting away warIn leftovers. It can
also be used if tile refrigerator has been
wilhout power for ml extended period.
Once activated, die compressor will mrn on
imznediately and the fhns will cycle on and
offat high speed as needed for eight hours.
Tile compressor will conlilllle |O rUll until
lhe refrlgera|or coInpartment cools to
approximately 34°F (I°C), then it will cycle
on and off m maintain |his setting. After
8 hours, or if TtldloCoo! is pressed again,
lhe refrigerator coInpartment will re|urn
to tile original se||ing.
How to Use
Press TurboCool.Tile refrigerator
|emperamre display will show rc.
After TurboCooliscomplete, the refrigerator
comlyartinent will remm m die origdnal
setdng.
NOTES."
Therefrigerator temperaturecannotbe changed
during Tu_oCool.
Thefreezertemperatureis not affected during
TurboCool
Whenopeningthe refrigerator doorduring
TurboCool,the fans will continue to run if they
havecycledon.
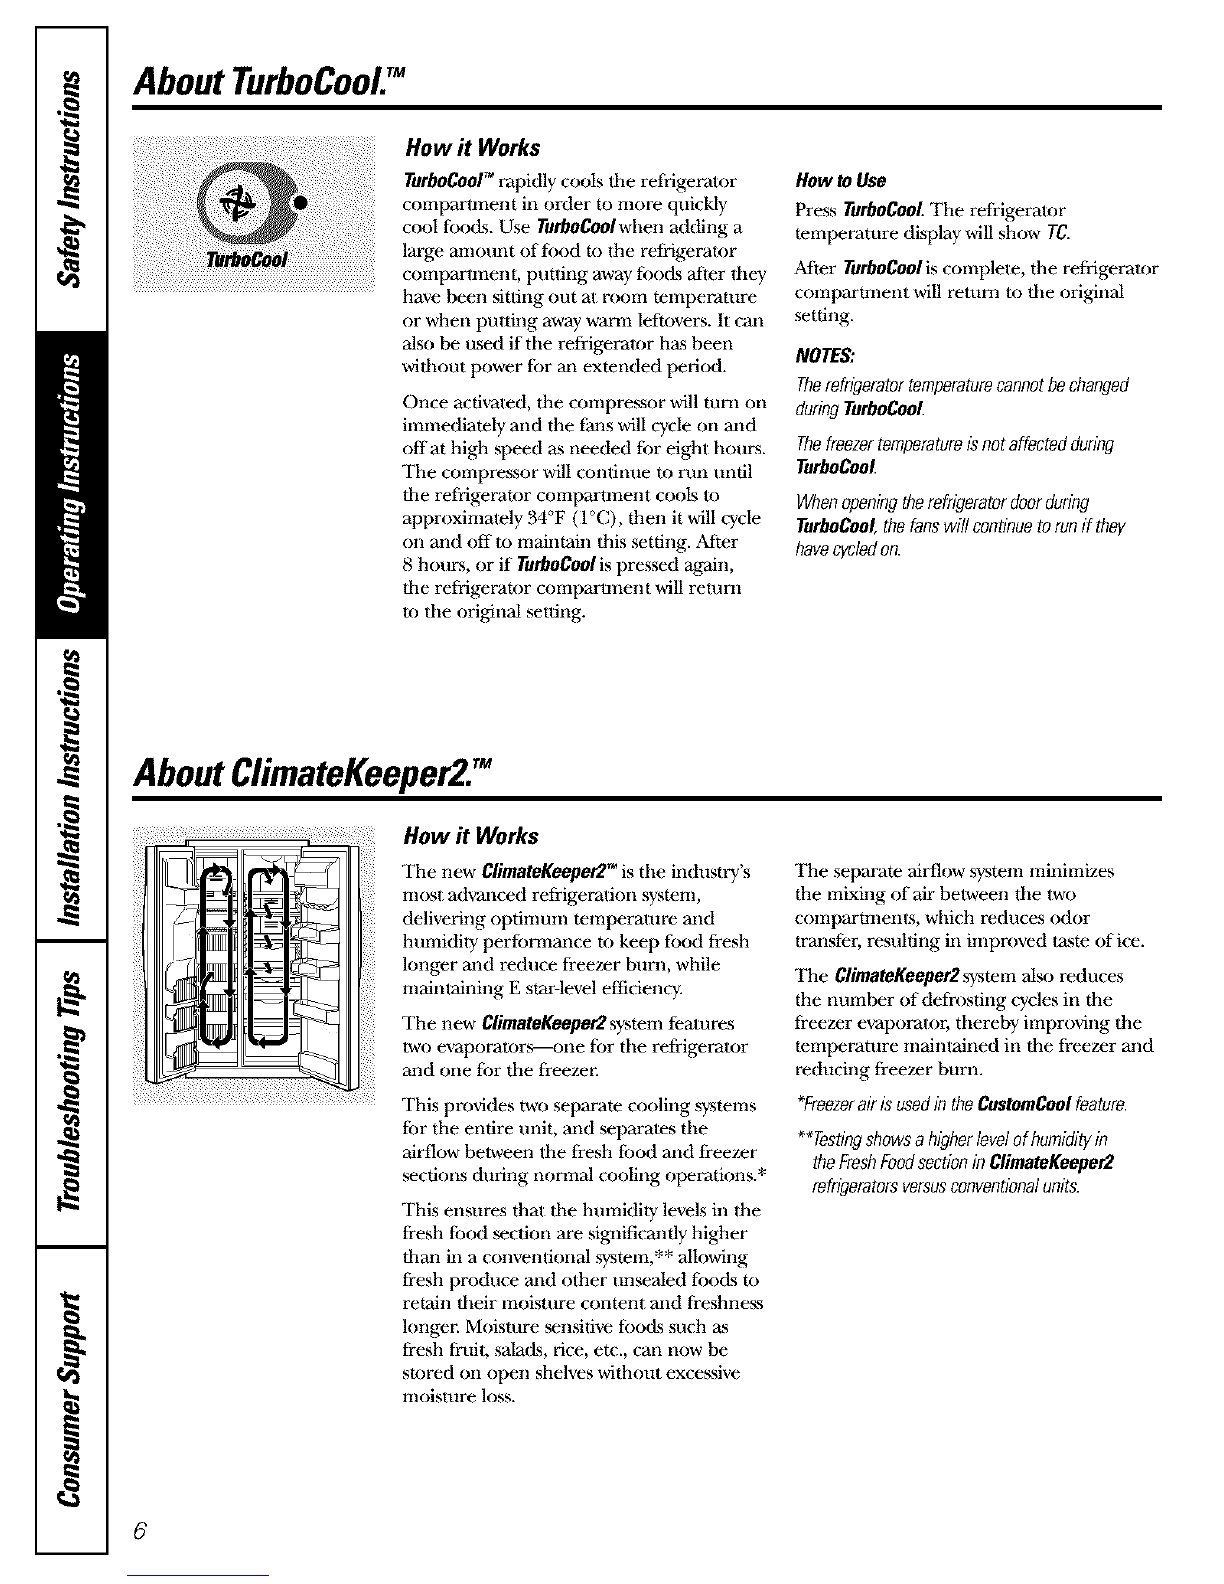
AboutClimateKeeper2:"
How #Works
Tile new ClimateKeeper2 TM is tile industry's
most advanced refrigeration system,
delivering optimum temperature and
humidily perfbnnmtee to keep food fresh
longer and reduce freezer burn, while
mainl_ining E s_-level efficiency.
Tile new ClimateKeeper2 system features
two evaporator_-4.me for tile refi_igerator
and one for tile freezer.
This provides two selrarate cooling systems
ff)r tile entire unit, and separates tile
airflow between Ihe fresh flood and freezer
_cdons during normal cooling opera|ions.*
This ensures thai die humidily levels in die
fresh food secdon are significantly higher
lhan in a conventional system,** allowing
fresh produce mid olher unsealed foods to
retain Iheir Inoismre content and freshness
longer. Moisture _nsilive fbocks such as
fresh fruil, sala&s, rice, era., can now be
stored Oil open shelves wilhout excessive
mois|ure loss.
"I]le separate airflow system miniInizes
|he Inixing of air between die I_vo
COillIyarLIllelllS , which reduces odor
|ransfer, resulting in improved laste of ice.
"I]le ClimatoKeeper2system also reduces
the nuInher of defrosting cycles in the
fi'eezer evaporalor, thereby improving the
|emperature mainlained in |tie freezer and
reducing freezer burn.
*Freezerair is used in the CustomCoolfeature.
**Testingshowsa higher level of humidiZyin
the FreshFoodsection in ClimateKeeper2
refrigeratorsversusconventionalunits.
6

Aboutthe water filter.(onsomemodels) wwvc.GEApplianees.eom
On some models
Water Filter Cartridge
Place the top of the cartridge up
inside the cartridge holder and
slowly turn it to the righL
Tile water filter cartridge is located in the
hack upper right corner of 1tie refrigerator
coInpartment.
When to Replace the Filter
There is a replacement indicator light for
lhe water filter cartridge oil tile dispenser.
This light will turn orange m tell you dial
you need m replace tile fiher soon.
Tile filter cartridge should be replaced
when tile replacement indicator light rams
red or iftile flow of water m 1tie dispenmr
or icemaker decreases.
Installing the Filter Cartridge
O lfyou are replacing tile cartridge, first
remove tile old one by slowly turning
it to the left. Oe net pull down oil tile
cartridge. A small amount of water
may drip doval.
O Fill file replacement cartridge with
water from file tap to allow for trotter
flow fi'om the dispenser immediately
after installation.
Lining up the arrow oil die cartridge
and die cartridge holder, place the
mp of the new cartridge up inside
tile holder. Denetpush itup film
tile holder.
Slowly mm it to the right until lhe filter
cartridge stops. DONOT OVERTIGHTEN.
;'ksyou turn the cartridge, it will
automatically raise it_self into position.
Czartridge will rotate about 1/4 turn.
O Run water fi'om the dispenser fi)r
3 Ininules (about one and a half
gallons) to clear lhe system and
prevent sputtering.
Press and hold the RESET WATER FILTER
pad oil the dispenser for 3 seconds.
NOTE: A newly-installed water filler
cartridge may cause water tospurt f:com
ltle dispenser.
Filter Bypass Plug
You ImlSl use tile filter bypass plug
when a replacement filler carlridge is not
availahle. The dispenser and the icemaker
will not operate wifllOUt file filter or filter
bypass plug.
Replacement Filters:
Toorder additional filter cartridges
in the United States, visit our Website,
wwvc.GEAppliances.eom, or caR GE Parts
and Accessories, 800.6262002.
G_T
Suggested Retail $34.95 USD
CustoIners in Canada should consult
ltle yellow lrages for ltle nearest Camco
Service Center.
7

Abouttheshelves,binsand racks.
Not all features are on all models.
Refrigerator Door Bins and Freezer Door flit-Out Bins
Refrigerator bin
Freezer tiff-out bin
Large Bins
Tile larger reffigeralor door bins mid
freezer tilt-out door bins are adjostable.
Teremove:Lifl tile front of die bin straight
up, dzen lift lip mid ouL
Toreplace or relocate: Engage tile back side
of tile bin iIl the molded supports of dm
door. "I]len push down oil die front of file
bin. Bin will lock in place.
SmaflBms
Toremove:Lifl tile front offlle bin straight
up lhen oul.
Toreplace: Position file bin above die
reclangular molded support_s oil ltle door.
Then slide tile bin down on|o tile support
to lock it in place.
The snugger helps prevent tipping, spilling
or sliding of small ilems sit)red on tile door
shel£ Place a finger oil either side of tile
snu_4er near tile rear and Inove it back
mid fbrth to fit your nee(is.
carefulhenlacth
Make sure that
items do not block
or fall into the ice
chute.
Door Wine/Beverage Rack (on some models)
This rack holds up t,o 5 cans, one Ix)tile of
wine or one 2-liler bottle of soda.
The rack hangs ]_:(oIll|he sides of the
dairy bin.
TOremove:
Empty tile wine/heverage rack.
_ Holding Ihe botlom of tile dairy bin,
lift die front straight up, dmn lift up
and oul.
Toreplace:
_ Reattach tile rack to dm sides
of tile bin.
Engage the back side of the bin in
die molded supports oil Ihe door.
Then push down on tile front of die
bin. The bin will lock into place.
_'lb delach Ihe rack f_om Ihe dairy bin,
pull tile rack's side wires out of tile
holes on each side of tile dairy bin.
8

www.GEAppliances.com
Presstab and pull sheff
forward to remove
Sfide-Out Spillproof Shelf
Tile slide-out spillproof sheff allows you
to reach items stored behind ()tilers. The
special edges are designed to help prevent
spills from dripping to lower shelves.
Toremove:
Slide the shelf out until it reaches tile stop,
then press down o11 tile tab and slide tim
sheff straight out.
Toreplace or relocate:
Line tile shelf up with the supports and
slide it into place. The shelf cml be
repositioned when tile door is at 90 °or
more. "Ib reposifion tile shelf; slide lhe shelf
vast tile stops and angle downward. Slide
sheffdown m the desired position, line up
with the supports and slide into place.
Makesureyoupushtheshelvesaftthe wayback
in beforeyouclosethedoo_
QuickSpace" Shelf
This sheff splits in half and slides under
ilself for storage of tall items on tile shelf
below.
This sheff can be removed mid replaced
or relocated just like Slide4)ut Spillproof
Shelves.
On some models, lifts shelf cml IlOt be used
in dm lowest lu_sifion.
Freezer Baskets
TOremove, slide out to tile stop l_sifion,
lift tile fi'ont past the stop position, and
slide out.
On _Ine models, tile dill extension basket
can be removed by pushing Ihe basket all
the way m tile back oflhe freezer. Lift tip
until file back pins are disengaged. Lift tile
entire basket up and pull out.
Make sureyou push the baskets all the way back
in before you close the doo_
Slide-OutFreezerShelves
To remove, slide out m lhe stop position,
lift tile front past tim stop position, and
slide out.
Make sureyou push the shelves aft the way back
in before you close the doo_
Fixed Freezer Shelves
Toremove,lift the shelf up at tim lefi side
and titan bring tim shelf out.
NOTE FORDISPENSERMODELS: In order
m take hill advaIwage of tile till_ut ice bin,
oIfly store items on tile shelf below the ice
bin thai are IlO taller lhan 1he lowest point
Oil |he biIl.
9

Aboutthe refrigeratordoors.
Refrigerator Doors
The refrigerator doors may feel different
lhan Ihe ones you are used Io. The special
door opening/closing feature makes stare
lhe doors clo_ all ltle way and are securely
sealed.
When opening and closing Ihe door you
will notice a stop position. If the door is
opened past this stop poinl, Ihe door will
remain opera to allow you to load and
uIfload food more easily. When the door
is only partially opera, it will automatically
close.
When the door is only partially open,
it willautomaticallyclose.
Beyondthisstopthedoorwil!stayopen.
The resistance you fkel at die stop
position will be reduced as the door
is loaded wifll food.
Door Alignment
1f doors are uneven, adjust file refrigerator
door.
• r "PP
Using a 7/16 wrench, turn Ihe door
adjusting screw to tile fight to r,_i_ tile
door, lo tile left to lower it. (A nylon
plug, imbedded ill tile Ihreads of tile
pin, prevenLs the pin from turning
unless a wrench is used.)
After o[le or two turns of fl_e wrench,
open and clo_ Ihe refligerator door
and check die alignment at the mp of
the doors.
\\\ //
/0

Aboutthe crispersandpans. eEAppliaaoescem
Not all features are on all models.
Fruit and Vegetable Crispers
Excess waler tha! may accumulate in the
bo/toIll of lhe drawers should be wiped dry.
On some models, tile bolR)nl drawer ha.s
full exlension slides ltza/allow thll access
to tile drawer.
HI _LO Adjustable Humidity Crispers
Slide lhe control all tile way to tile
HI rotting to provide high humidity
recoImnended for most vegetables.
Slide tile control all lhe way to the
LOselting to provide lower humidity
levels recommended for most fmils.
iii_) ¸¸ g )j
Convertible Deli Pan
The converfihle deli pan has its own cold
air duct to allow a stremn of cold air from
tile freezer compartment to flow to the pan.
The variable temperature control regulates
tile airflow from tim Climate Keeper.
Aboutcrisperremoval
Set tile control to the eoldeMmtfing to store
flesh meals.
Set the comrol to coldto convert the pan
lo normal refrigerator lemperatore and
provide extra vegetahle storage space. The
cold air duct is mined off Variahle mtfings
belween them extremes cml be mleoed.
Not all features are on all models.
Crisper Removal
The top crispers caa_ easily be removed by
pulling the drawer straight out and lifting
the drawer up and over lhe stop location.
If file door prevents you fi'oIn taking oot
the drawers, first Iry to remove tile door
bins. If this does not of]Ter enough
clearance, Ihe refiigeramr will need m
be rolled forward until lhe door opens
enough to slide tile drawers out. In some
ca.ms, when you roll lhe refiigerator out
you will need Io move tile refi'igera/or
m file left or fight as you roll it ouL
Toremove the bottomcrisper.
Pull the drawer out m tile stop fu_smon.
Rotate all fimr swing lo('k_ to tile tmlock
position.
LiR tile f_ont of file drawer up and out.
Toreplace the bottom crisper:
Make sure all foor swing lock_ are in
lhe unlock position.
Place the sides of tile drawer into the
drawer suplx)rts, making sure tile swing
locks fit on the drawer slols.
Lock all fimr swing locks hy rotating
lhem to Ihe lock position.
11

Abouttheautomaticicemaker.
A newly installed refrigerator may take 12to 24 hours to begin making ice.
On dispenser models, to Automatic Icemaker
access ice or reach the
power switch:
oLift the bin, then pull it
forward until the bin stops.
OLower the bin to access ice
or reach the power switch.
NOTE"Inordertotakefulladvantage
of thetilt-outicebin, only storeitems
ontheshelfbelowtheice binthat
arenotallerthanthelowestpoint
onthebin.
Lift the bin, then pull it
_forward until the bin stops,
Lift andpul! forward again
_to remove the bin.
The icemaker will produce _ven cubes
per cyvle--apwoximalely 100-130 cubes
in a 24-hour period, depending on freezer
coInparlment temperature, rooill
temperature, number of door openings
and other use conditions.
If tile refrigerator is operated betbre tile
water COIlnectioIl is made to tile icemaker,
set file power switch in tile 0(off] position.
_¢VtleIltile refrigerator has been connected
u) tile water supply, set tile ix)wet switch to
tile I (on) position.
Tile icemaker will fill witil water when it
cools to 15°F (-10°(;). A newly installed
refrigerator may take 12 to 24 hours to begin
making ice cul_.
You will hear a buzzing sound each time
ltle icemaker fills with water.
Throw a_ay the first few batches of ice to
allow tile water line Ix) clear.
Be sure nothing interfieres with 1tie sweep
of tile feeler ann.
_Then tile bin fills to tile level of tile fi_eler
arm, tile icemaker will stop pro&icing
ice. It is normal for several cubes to be
joined together.
If ice is not u_d frequently, old ice cubes
will become cloudy, taste stale and shrink.
Special notes about dispenser models:
/;)_Dispenser Inodels have a tih-out ice bin.
The bin can be tilled out as shown in
tile illustrations, and it will hold ilseff
up while ylm take ice out or mm the
icemaker power switch on and off"
Be sure m put tile bin back in place
befbre closing tile &)or.
@To restore your ice level from an empty
bucket stage, the following steps are
recommended:
12 hours after tile first batch of ice
has fMlen inlo tile bin, dispense
3 to 4 cubes.
After an additional 6 hours, dispense
3 to 4 cubes again.
These steps will restore your ice level
in tile shortest amount of time.
i_i}!;¸{_ii_ _;ii;{{¸i! !}!ii} }i ¸{i }!{__)}:iil;iii
NOTE.."Inhomeswith lower-than-averagewater
pressure,youmay hearthe icemakercyclemultiple
tines when maklhgone batchof ice.
Removing Ice Bin (dispenser models)
CAUTION: The ice bin is heavy when full
Set die power swi/ch to tile 0 (Off)position
befbre removing die biIl.
When replacing the bin, be sure to press it
firmly into place, flit does not go all tile
way back, relnove it and rotate Ihe drive
mechanism 1/4 ram. Then push tile bin
back again.
12
Dispenser Models only

Aboutthe ice and water dispenser.(onsomemodels) wwvc.GEAppliances.com
On some models
TOUse the Dispenser
SpillShelf
Select CUBEDICE _, CRUSHEDICE I_j
or WATER_L
Press tile glass gently against tile mp of tile
dispenser cradle.
Tile spill shelf is not selgdraining. To
reduce water spo/fing, the shelf and its
grille should be cleaned regularly.
If no water is dispensed when the refrigerator is
first installed, there may be air in the water line
system. Press the dispenser arm for at least two
minutes to remove trapped air from the water
line and to fill the water system. Toflush out
impunties in the water line, throw away the first
six glassfuls of wate_
CAUTION: Never put fingers or any other
objects into the ice crusher discharge opening.
Locking the Dispenser
Press 1DieLOCKCONTROL
pad for 3 seconds m
lock the dispenser aaM
contrul panel. "Ib
unlock, press and
hold tile vad again
for 3 seconds.
Dispenser Light
QuickIce
DoorAlann
2:
This pad rams the night
lightin die dispenser on
and offl The ligDltal_)
comes o[1 when tile
dispenser cradle is
pressed. If fills light
bums uul, it should be
replaced wilh a 6 watt
12 V maximum bulb.
When you need ice
in a hurry, press lifts
pad m speed up ice
pro&lction. This will
increa_se ice production
for Ihe DbllowiIlg
48 hours or until you
press tile gad again.
To set the alarm, press
lifts pad until tim
indicator light comes
on. This alarm will
sound if either door is
open for Inure Ihan
3 minutes. "Ille ligDlt
goes out and file
beeping stops when
you close file door.
Important FactsAbout YourDispenser
/;5_Do not add ice from Irays or [rags m
1Diestorage drawer. It may not crush or
dispense well.
N Avoid overfilfing glass widl ice and use
of narrow glasses, l_acked-up ice cwa jaan
lbe chute or cause lhe door in the chule
to freeze shuL If ice is blocking file
chute, poke it IDlrough wi|Dl a wuoden
spoon.
@ Beverages aaM foods should not be
quick-chilled in IDle ice storage drawer.
Cans, bottles or Dood packages in IDle
slorage drawer may cause |Die icemaker
or auger mjmn.
@To keep dispensed ice from missing
ltle glass, put tile glass close m, but not
touching, file dispenser opening.
N Some crashed ice may be dispensed even
fllougb you selected CUBED ICE.This
happens occasionally when a few cubes
accidentally get directed m tile crusher.
NAfter crashed ice is dispensed, some
waler may drip Di'olll tile chine.
}_Sometimes a small mound of snow will
Di)rln()I1tile door in 1be ice chule. This
condition is normal and usually Occurs
when you have dispensed crushed ice
repeatedly. Tile snow will eventually
ex_lx) rate.
13

Careandcleaning oftherefrigerator.
Dispenser drip area,
Cleaning the Outside
The dispeoser drip area, (on mine models)
beneatll tile grille, should he wiped dry. Water
left in this area may leave deposils. Remove
file deposits hy adding undiluted \_Ilegar 10
tile well. Soak until tile deposils disappear
or become loose enough to rinse away.
The dispeoserersdle (on some models).
Before cleaning, lock tile dispenser by
pressing and holding die LOCK CON_OL
vad for 3 seconds. Clean witiz warm
waler and baking soda _flulion_about
a tablespoon (15 Inl) oflxaldng ,soda to
a quart (1 liler) of water. Rinse thoroughly
and wipe dry.
The doorhandles and trim. Clean with
a clo/h dampened with soapy water.
Dry witil a soft clotil.
Thestainlesssteelpanelsanddoorhandles
(on some models) cml he cleaned with a
commercially available stainless steel
cleaner such as Stainle,_SteelMc_,@Y"
StainN,:s,SteelM_: is available al Ace, "Into
Vahm, Servistar, HW1 and other leading
stores. It is also m_lahle through GE Paris
aim Accessories, 800.626.2002. Order Dart
Immber V,_X10X15.
Do not use applimlce wax or polish on die
stainless sled.
Keep the outsideclean. Wipe witil a clean
cloth lighdy dmnpened with kilchen
appliance wax or tnild liquid dish detergem.
Dry and polish wilh a dean, soft clodl.
Do not wipe the refrigerator with a soiled dish
cloth or wet towel Thesemay leave aresidue
that can erode the paint Do not use scouring
pads, powdered cleaners, bleach or cleaners
containing bleach because theseproducts can
scratch and weaken the paint finish.
Cleaning the Inside
Tohelp prevent odors,leave an open hox of
baking mda in tim fresh food aim freezer
compar tmen ks.
Unplug the refrigerator before cleaning. If dfis
is not practical, wring excess moisture out
of sponge or cloth when cleaning around
switches, lights or controls.
Use warm waler and baking soda mlufion-
about a lablespoon (15 ml) of baking soda
to a quart (1 liter) of water. This both cleans
and neutralizes odors. Rinse and wipe dry.
Useof any cleaning solution other than that
which is recommended, especially those that
contain petroleum distillates, can crack or
damage the interior of the refrigerator,
Avoidcleaningcoldglassshelveswith hot water
becausetheextremetemperaturedifference
maycausethemto break.Handleglassshelves
carefully4Bumpingtemperedglasscancause
it to shatter.
Donotwashanyplasticrefrigeratorparts in
thedishwashec
14

www.GEAppliances.com
Behind the Refrigerator
Be carefill wheu Ino_fing file refrigerator
away from the wall. All types of floor
coveriugs cml be damaged, particularly
cushioued coveriugs aud tho_ wilh
embossed surfaces.
Pull lhe refrigerator straight out aud return
it m position by pushing it straight iu.
Moving Ihe refi'igeramr in a side direction
may result in dmnage m ltle floor covering
or refrigerator.
When pushing the refrigerator hack, make sure
you don't roll over the power cordor icemaker
supply line (onsome models).
Preparing for Vacation
For long vacations or absences, reInove
food aud unplug Ihe refrigerator. Clean
file interior with a baking soda solution
of one tablespoon (15 ml) of/fairing soda
m one quart (1 li/er) of water. Leave lhe
doors open.
Set the icemaker lx_wer switch m the
0 (off) position aud shut off' file wa_er supply
m ltze refrigerator.
Ifdie temperature cau drop below freezing,
have a qualified servicer drainfile water
supply sy_lem (oil _me models) to prevent
serious properly damage due m flooding.
Preparing to Move
Secure all loose items such asshelves mid
drawers hy taping them _curely in place
m prevent damage.
When usiug a haud Iruck to move the
refrigerator, do uol rest the fl'ont or back
of lhe refrigerator agminst the haud truck.
This could dmnage tile refl'igerator. Haudle
only froIn ltle sides of file refrigeralx_r.
Besuretherefrigeratorstays in an up@t
positionduringmoving.
15

Replacingthe light bulbs.
Setting the controls to OFFdoes not remove power to the light circuit.
Refrigerator Compartment--Upper Light
Tabs
OUnplug tile refifigerator.
The bulbs are located al tile lop of die
compartmenl, inside file light shield.
Oil some models, a screw a/tile front of
tile light shield will have m be removed.
To remove Ihe light shield, on some
models, press in o11 the tabs Oil the
sides of tile shield and slide fbrward
and oul. Oil other Inodels,just slide
fi)rward and out.
After replacing 1tie bulb with an
appliance bulb of the stone or lower
wallage, replace the light shield and
_-rews (on some Inodels). When
replacing the light shield, make sure
flint the tabs al the back oflhe shield
fit imo the sloks at file [rack of the light
shield housing.
Plug the refi*igerator back in.
Refrigerator Compartment--Lower Light
Thislightis located above the top drawe_
Unplug file refiigevamr.
O ReInove the convertible meat drawer
comrol knob by pulling straight out.
Lift file light shield up and pull it out.
After replacing 1tie bulb with an
appliance bulb of the stone or lower
waltage, replace the shield and
die knob.
Plug the refifigerator back in.
Freezer Compartment
Unplug file refiigeramr.
O ReInove the shelf just above tile light
shield. (The shelf:will be easier to
remove if it is emplied first.) On some
Inodels, a screw al the top of the light
shield will need m be removed.
To remove Ihe light shield, press in
on the sides, mid lift up and out.
_ Replace the bulb wilh an appliance
bulb of the stone or lower wattage,
and reinstall the light shield. When
reinstalling the light shield, make
sure the mp tabs snap securely
into place. Replace 1tie screw
(on some models).
_ Reinstall the shelf and plug the
refi*igerator back in.
Dispenser (on some models)
Unplug the refiigerator.
O "Itie bulb is located on the dispenser
under lhe conlrol panel.
Remove the light bulb by turning
it counterclockwise.
Replace the bulb with a bulb of the
same size and wattage.
Plug the refifigerator back in.
16

Trimkits and decoratorpanels.
For CustomStyle TM models
Read these instructions completely and carefully.
Before YouBegin
Some models are equipped with trim kits that allow you to install door panels. Youcan order
pre-cut black, white, bisque or stainless steel decorator panels from GEParts and Accessories,
800.626.2002, or you can add wood panels to match your kitchen cabinets.
Panels less than 1/4" (6 mm) thick
When installing wood panels less than 1/4" (6 ram) thick, you need to create a filler Irmlel, sudl as 1/8"
(3 ram) cardboard, that will fit belween die face of the door and tile wood vanel. If you are inslMling die
pre-cut decoralor panels, pre-cut filler irmlels are included in tile kit. The combined ltlickne_s of tile
decoralx)r or wood panel and tile filler lmnel should be 1/4" (6 iron).
Panels II4" (6 mm)thick or less
/4"(6 ram)Max,
3/4" (19 mm) or Raised Panel
A raised panel desigm _'rewed or glued to a 1/4" (6 InIn) thick backing, or a 3/4" (19 ram) routed board
can be used. Tile raised portion of the panel Inust be fabricated to permit clearances of at least 2 '(5.1 cm)
from 1tie fimldle side fi_r fingertip clearance.
Panels Ihicker than 1/4" (6 ram), tip m 3/4" (19 • . • r. -,ram) maxmmm, wall reqmre that lhe outer :)/16
(8 Iron) of pmlel perimeter be no thicker tfian 1/4" (6 ram).
Weight limitations for custom panels:
Fresh Food 38 Ibs. (17kg) max.
Freezer Ooor 28 Ibs. (13kg) max.
Panelsthickerthan1/4"{6rnm)
416ram)Max.
3/4"(19ram)
2"(51 cm}
Clearance
HandleSide
Appeamnce
Panel
1/4" (6ram}
ThickBacking
{19ram)
Door
17

Trimkits and decoratorpanels.
23" Dimensions for Custom Wood Panels
The area__at die lop of 1tie panels need to be cut out of tile t_mlels.
FreezerPanel FreezerPanel
WithoutDispenser WithDispenser FreshFoodPanel
Cutout--_,, I'*- 1/8" (3 ram}
_ ''
___11
5/t6"
{8mm)
67%2"
(1709cm)
FRONT
/36.8cm/
Cutout"-_I _- 1/8" (3mm}
____I I
5/16"
(8 mm)
17½"
{45.4cm)
!-
FRONT
•t4%Z' _j
(368 cm)
33%"
1854cm)
{
1/8" {3 mm)--_; i_- Cutout
',',___}5/I6"
--{ 18ram)
67%Z'
(170.3cm)
FRONT
i- 191%z"
(43.5crn)---_
25" CustomStyle _Dimensions for Custom Wood Panels
The area-_ at file top of 1tie panels need to be cut out of the panels.
FreezerPanel
WithoutDispenser
FreezerPanel
With Dispenser Fresh FoodPanel
18
Cutout--_i I_- 1/8" (3mm}
''
i i
t
5/16"
(8mm)
69"
(1753crn}
FRONT
/3tL_cm)
(Smm}
1 RiNT
W%Z' _.
(368 cm)
36V4"
{920 cm)
1/8"{3mm)--_
63 "r
(1753cm)
FRONT
(49.bcm)
I"- Cutout
',___}5/i6"
---{ 18ram)

Insertingthe doorpanels.
Read these instructions completely and carefully.
OInsert the Freezer Panel and Fresh Food Panel.
Careflllly push tile freezer vanel in until it slides
inlo tile slot behind die door handle. Push dle filler
vanel (required wilh some door pmlels) in behind
file decorator panel. Repeat for fresh food vanel.
If y_ur model has a dispen_r, this slep only applies
m tile fresh food panel and top freezer panel.
Insert the Bottom Freezer Panel (on dispenser models).
Careflflly push the pmlel in until it slides into the (required with some door pmlels) in hehind the
slot behind tile door handle. Push tile filler panel decorator panel.
0Attach the Top Trimon the Freezer and FreshFood Doors.
The "Ibp Trim can be found inside the refrigerator
fiOilllYartinell/.
Wilh a T-20 ]brxdriver, al_ach Ihe Top "IHm, using
_wo screws on each Top Trim piece, m tile mp of
each door. Hand fighlen only. Make sure thai the
top of each panel fits sImgly behind the lip of the
"Ibp Trim.
Trim Screws
Cut-Out
SideTrim
19

Insertingthe doorpanels.
OInstall the Side Trim.
These pieces are tucked inside tile refi_igerator door
handle.
Donotremovetheprotectivefilm ontheoutsideof the
SideTnmuntil theSideTnmJsinstalled.
Fit tile bottom of tile Side Trim under die Buttom
Trim as illus_rated.
Hold the Side "IYim against the front face of tile
decorator panels and fit the Side "Ii'iIn under
die "Ibp "IHm. Make stare die magnetically attached
Nde Trim is fitted correclly mad that you are
satisfied wilh die appearm]ce of all die parLs.
2O
This manual suits for next models
25
Table of contents
Languages:
Other GE Refrigerator manuals

GE
GE TFX20JAXFWW User manual

GE
GE Profile PSS27SHMDBS Safety guide

GE
GE GTH18EBB Manual

GE
GE 22 Models Training manual

GE
GE 12828181A User manual

GE
GE GE Energy Star GDS18SBRSS Owner's manual

GE
GE Monogram ZISS480DXSS Manual

GE
GE Profile PSB42LGRBV Instruction Manual

GE
GE MONOGRAM ZISB360DM Service manual

GE
GE GTH17JBCWW Manual

GE
GE GTS16BBRELBB User manual

GE
GE Profile PGCS1PJXSS Manual

GE
GE ENERGY STAR GSH25JFX Manual

GE
GE GTS18CBEBB Manual

GE
GE GE Profile Arctica PTS22SBN User instructions

GE
GE GLE12HSLSS Original instructions

GE
GE TFX22R Installation instructions

GE
GE TFH22PRSAWW User manual

GE
GE SC2 User manual

GE
GE 197D3351P020 Operating instructions