®
FI Top-Freezer
Fa FS
Top-Freezer
Refrigerators
Modal 18
Safety Instructions ............ 2-3
Operating Instructions
Additional Features ................. 6
Automatic Icemaker . ............... 7
Controls .......................... 4
Crispers and Pans .................. 6
Dispenser . ........................ 7
Shelves and Bins ................... 5
Water Filter . ...................... 4
Care and Cleaning
Care and Cleaning ............... 8, 9
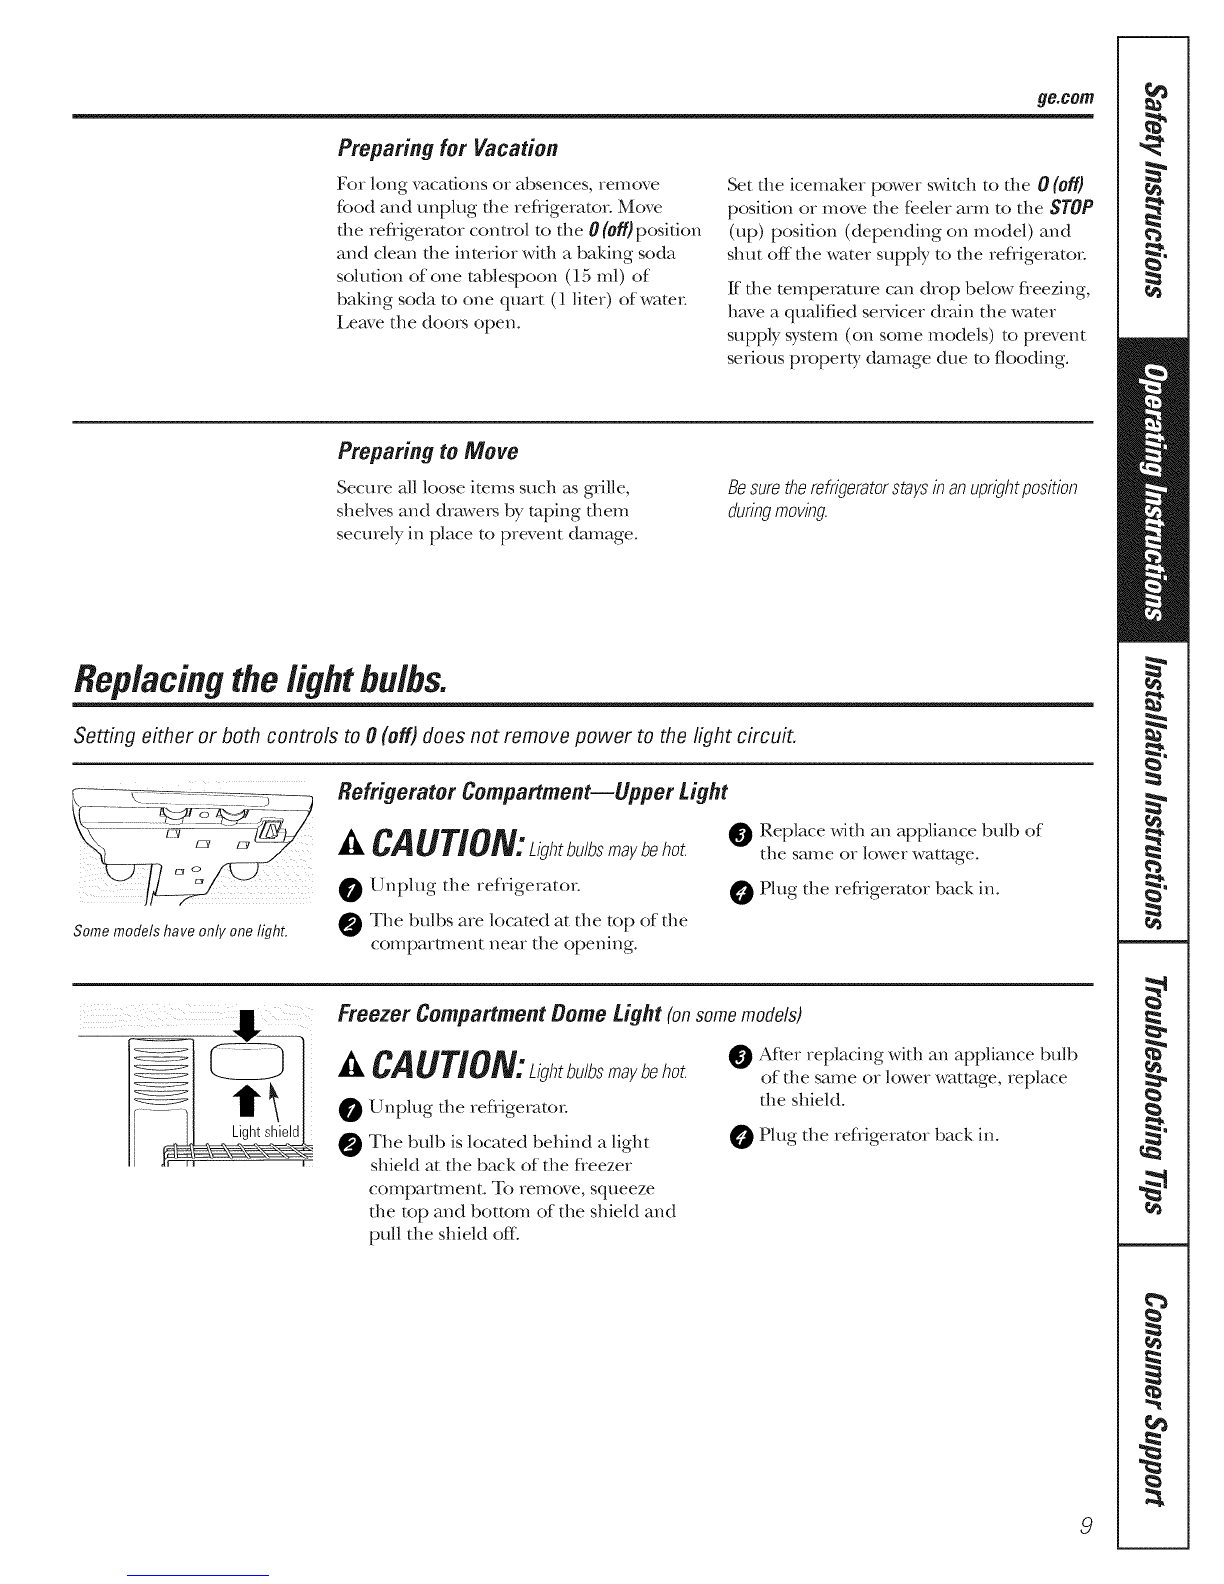
Replacing the Light Bulbs ........... 9
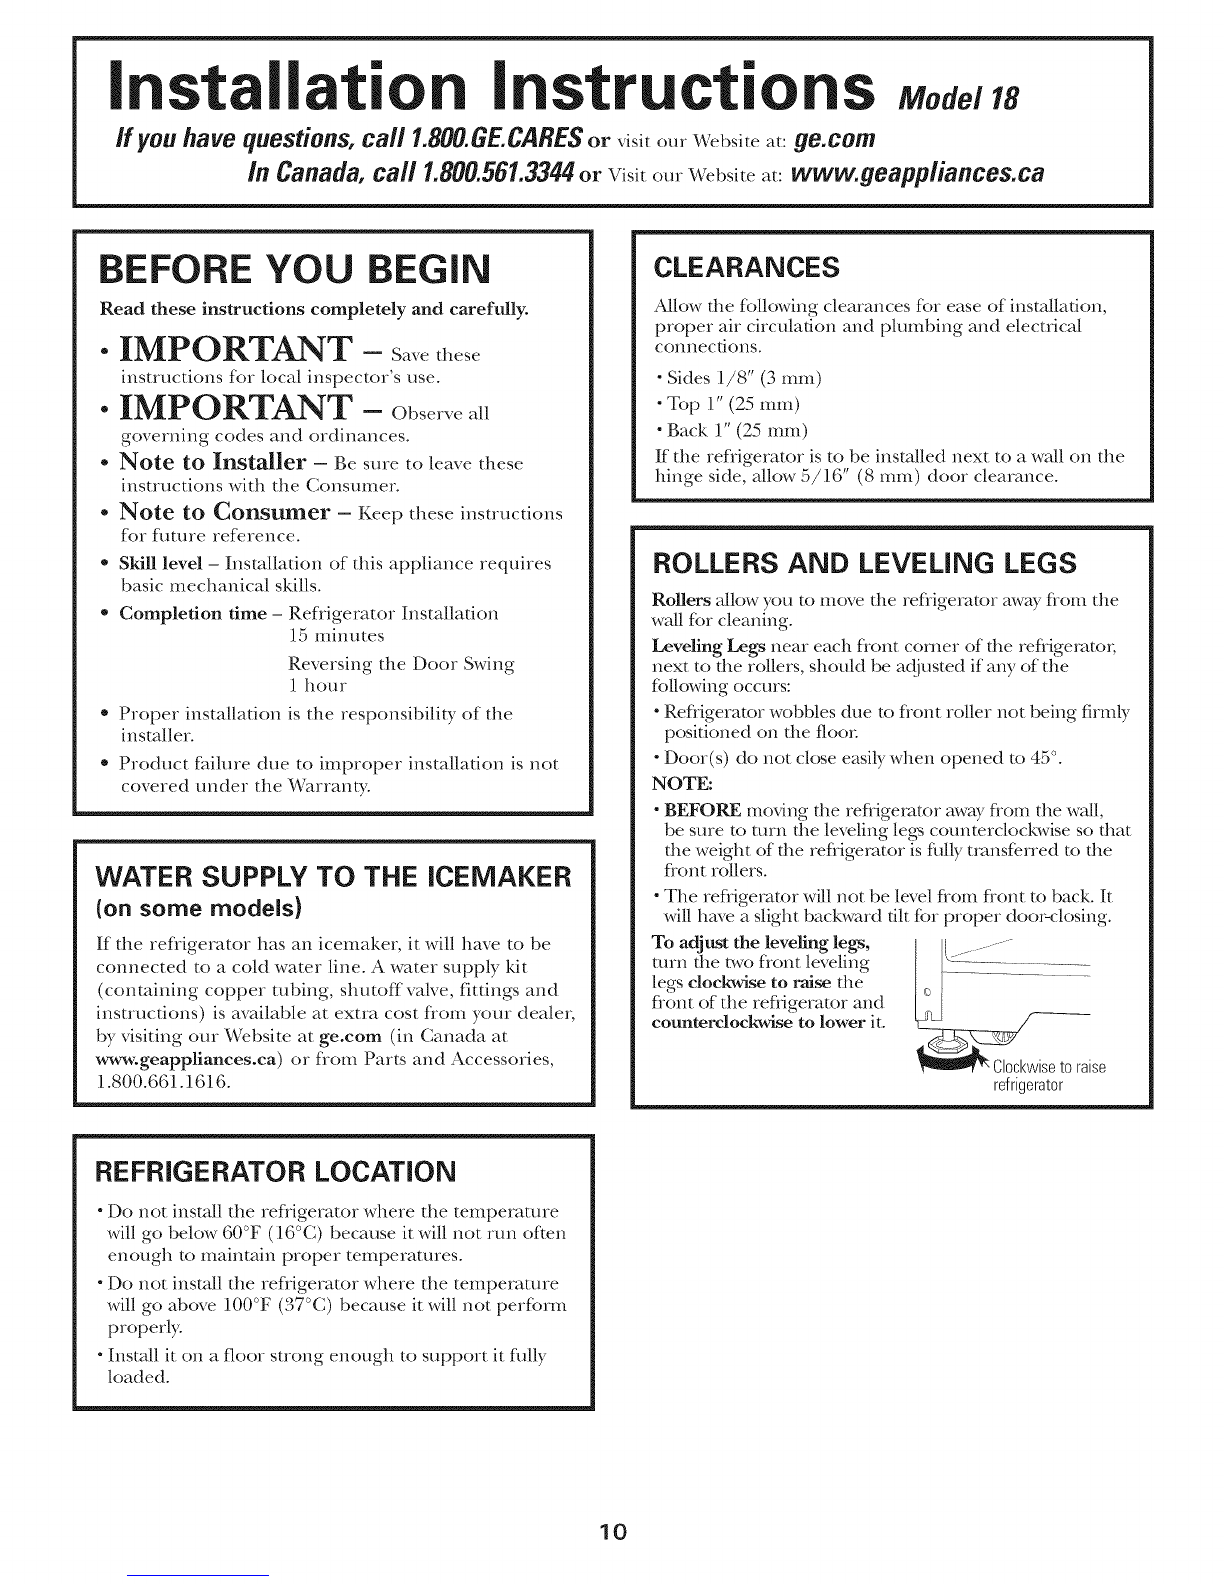
Installation Instructions
preparing to Install
the Refligerator . .................. 10
Reversing the Door Swing ....... 14-18
Water Line Installation .......... 11-14
Troubleshooting Tips ....... 19-21
Normal Operating Sounds .......... 19
Consumer Support
Consumer Support ......... Back Cover
Performance Data Sheet ........... 27
Product Registration
for Canadian Customers ......... 23, 24
Product Registration
for U.S. Customers .......... 22, 23, 24
State of California Water
Treatment Device Certificate ........ 28
_!arranty f_)I
Canadian Customers ............... 25
Warranty for U.S. Customers ........ 26
Note to Installer -Be sure to leave
these instructions with the Consumer
Note to Consumer - Keepthese
instructions for flmlre refe.rence.
Write the model and serial numbers hero:
Model #
Serial #
Find these nmnbers on the gray label
on the lef_ side, near the top of the
refiigerator compartment.
Congdlateur suudrieur
Rdfrigdrat(urs
ta section franFaisecommencea la page29
Instructions de s&_rit_ .... 29-30
Instructions de fonetionnement
gacs 5-l_gmnes ................. 33
Caract&isfiques addifionnelles .... 33
Clayettes et bacs ................ 32
Disuibuteur . ................... 34
Filtre 5-eau .................... 31
Machine 5-glacons automafique . . .34
R_glages ...................... 31
Soins et nettoyage
Remplacement des
ampoules _lectriques ............ 36
Soins et nettoyage ............ 35, 36
Instructions d 'installation
Installation de la
condtfite d'eau .............. 38-41
Inversion du sens
d'ouvermre des portes ........ 41-45
Preparation 5.l'installafion
du rSfiigSrateur . ............... 37
En CaNde panne ......... 46-49
Bruits normaux
de fbncfionnement .............. 46
Soutien au eonsommateur
Feuillet de dom%es relatives 5-la
performance de la cartouche ....... 51
Garanfie ....................... 50
Soutien au consommateur . ....... 52
Note a l'instaUateur- A_surez-_<msde
laisserces instructions au consommatem:
Note au consommateur - Conservez
ices instructions pour rdf_mnce tim/re.
EcrivezM le numorodemodbleet lenumorode
sorie:
Modble#
$orie#
\.%ustrom_rez ces num&os sur l'_fiquette grise
sim_e_tgauche, pr& du haut du comparfiment
r_flig&'amm;
9o.com
• Congelador superior
Refngeradores
ta seccihn en espaKolempieza en lapagina 53
Informaddn de seguridad ...SB-M
Instrucdones de operad6n
Caracterisfic_s adiciona/es ........... 57
Controles ......................... 55
Dispensador . ...................... 58
Esmntes y compartimientos ....... 5€>57
Filuo de agua ...................... 55
(;avetas de a/macenamiento ......... 57
M_iquina de hielos autom_ifica ....... 58
Cuidado y limpieza
Cdmo reemplazar las bombillas ...... 60
Cuidado y limpieza .............. 58-60
Instrucdones para la instalac_n
Cdmo inverfir el vaiv_.nde
la puerto ....................... 65-69
Insm/acidn de la mberfa
del agua ....................... 62-65
Preparacidn para insta/ar
el refiigerador . .................... 61
Consejos para la solud6n
de problemas ............... 70-74
Sonidos nomm/es de opemcidn ...... 70
Soporte al consumidor
Hoja de dates de flmcionamiento .... 78
(;amntfa .......................... 77
Soporte a[ consulIlidor . ............. 79
Nora al instalador - A_egdresede
dejar esmsinstrucciones con el consumkto_:
Nora aJconsumidor - Conser_
es/asinstrucciones pare reDrencia timbre.
Escribaaquielmodo/oiteln#mem
desorie:
Modo/o#
Sorie#
Encuentre estos n6meros en la etiqueta griNen
el lade izquierdo, cerca de la parte superior
del compartimiento del refligemdo_:
19703354P013 49-60511 07-07JR