manuals.online logo
Brands
  1. Home
  2. •
  3. Brands
  4. •
  5. GE
  6. •
  7. Refrigerator
  8. •
  9. GE Monogram Refrigerator User manual

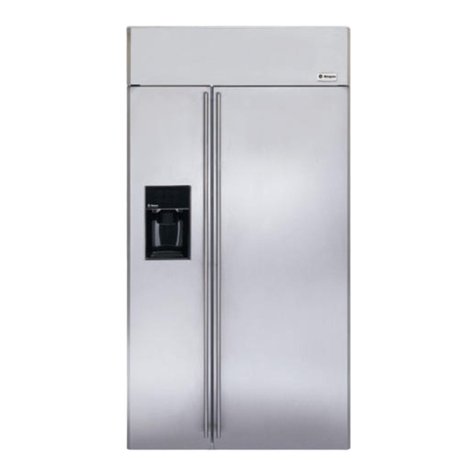
GE Monogram Refrigerator User manual

Owner's
Manual
Double-Door, Double-Drawer,
Stainless Steel, Free-Standing
Refrigerators
225DI804POII
49-60617
04-10 GE
monogram.com
Consumer Information
Stainless Steel Refrigerator
Introduction Your new Monogram refrigerator makes an eloquent statement of stgle, convenience and kitchen
planning flexibilitg. Whether gou chose it for its puritg of design, practical storage arrangements or
assiduous attention to detail-or for all of these reasons-gou'll find that gour Monogram refrigerator's
superior blend of form and function will delight gou for gears to come.
Theinformation on the following pages will help gou operate and maintain gour refrigerator properlg.
If gou have ang other questions, visit our Website at: monogram.cam
Contents Consumer Services
Important Phone Numbers .................. 27
Model and Serial Numbers .................... 3
Performance Data Sheet .................... 25
Problem Solver .......................... 20-24
Product Registration .......................... 3
Safetg Instructions ........................ 4-7
State of California
Water Treatment Device Certificate .......... 26
Warrantg .......................... Buck Cover
Care and Cleaning
Cleaning-Outside and Inside ................ 18
Light Bulb Replacement ..................... 19
Moving ..................................... 18
Vacation .................................... 18
Operating Instructions
Automatic Icemaker ......................... 17
Additional Features .......................... 15
Crispers ..................................... 16
Internal Water Dispenser .................... l0
Other Controls ................................ 9
Performance Air Flow Sgstem ................. 8
Shelves and Bins ......................... 12-14
Temperature Controls ........................ 8
TurboCooF". .................................. 9
Water Filter ................................. ll
Before
using
your
refrigerator
Read this manual carefullg. It is intended to help
gou operate and maintain gour new refrigerator
properlg.
Keep it handg for answers to gour questions.
If gou don't understand something or need
more help, there isa list of toll-free consumer
service numbers included in the back section
of this manual.
OR
Visit our Website at: monogram.cam
Consumer Information
Stainless Steel Refrigerator
Write
down
the model
& serial
numbers
You'll see them on a label inside the fresh food
compartment at the top on the right side.
Please write these numbers on the Consumer
Product Ownership Registration Card included
with the packing material.
Before sending in this card, please also write
these numbers here:
Model Number
Serial Number
Use these numbers in ang correspondence
or service calls concerning gour refrigerator.
If you
received a
damaged
refrigerator
Immediatelg contact the dealer (or builder) that
sold gou the refrigerator.
Save time
& money
Before gou request service, check the Problem
Solver in the back of this manual. It lists causes of minor operating problems that
gou can correct gourself.
If you
need
service
Toobtain service, seethe Consumer Services
page in the back of this manual.
We're proud of our service and want gou to be
pleased. If for some reason gou are not happg
with the service gou receive, here are steps to
follow for further help.
For customers in the USA:
FIRST,contact the people who serviced gour
appliance. Explain whg gou are not pleased.
In most cases, this will solve the problem.
NEXT,if gou are still not pleased, write all
the details-including gour phone number-to:
Manager, Customer Relations
GEAppliances
Appliance Park
Louisville, KY40225
For customers in Canada:
FIRST,contact the people who serviced gour
appliance. Explain whg gou are not pleased.
In most cases, this will solve the problem.
NEXT,if gou are still not pleased, write all
the details-including gour phone number to:
Manager, Consumer Relations
Mabe Canada Inc.
1 Factorg Lane,Suite 310
Moncton, N.B.EIC 9M3
IMPORTANTSAFETYINSTRUCTIONS
READ AND SAVE THESE INSTRUCTIONS
AWARNING: Whenusingthis
appliance,always exercisebasicsafety precautions,
includingthe following:
• Usethis appliance only for its intended purpose
asdescribed in this Owner's Manual.
• This refrigerator must be properly installed in
accordance with the Installation Instructions
before it isused.
Donot allow children to climb, stand or hang
onthe shelves in the refrigerator. Thegcould
damage the refrigerator and seriouslginjure
themselves.
Do not touch the cold surfaces in the freezer
compartment when hands are damp or wet.
Skin may adhere to these extremely cold surfaces.
Donot store or use gasoline or other flammable
vapors and liquids in the vicinity of this or any
other appliance.
Inrefrigerators with automatic icemakers,
avoid contact with moving parts ofthe ejector
mechanism, or with the heating element located
on the bottom ofthe icemuker. Donot place
fingers or hands on the automatic icemaking
mechanism while the refrigerator isplugged in.
Keepfingers out of the "pinch point" areas:
clearances between the doors and between
the doors and cabinet are necessarilysmall.
Becareful closing doorswhen childrenare
in the urea.
Unplug your refrigerator before cleaning and
making repairs. NOTE:We strongly recommend
that any servicingbe performed by a qualified
individual.
Beforereplacing a burned-out light bulb,
the refrigerator should be unplugged in order
to avoid contact with a livewire filament.
(Aburned-out light bulb may breakwhen
being replaced.)
NOTE:Turningcontrol to OFFdoesnot remove
power to the lightcircuit.
Donot refreeze frozen foods which havethawed
completely.
ADANGER: RISKOFCHILD ENTRAPMENT
Childentrapment and suffocation are not problems
of the past. Junked or abandoned refrigerators are
still dangerous...eveniftheg will sit for '_justa few
dags."If gou are getting rid of gour old refrigerator,
pleasefollow the instructions below to help prevent
accidents.
Before you throw away your old refrigerator
or freezer:
• Takeoffthe doors.
• Leavethe shelvesinplace sothat children
may not easily climb inside.
REFRIGERANTS
All refrigeration products contain refrigerants,which
under federal law must be removed prior to product
disposal.
If you are getting rid of an old refrigeration product,
checkwith the company handling the disposal
about what to do.
MESURES DE SI CURITEIMPORTANTES
LIREETCONSERVERCESINSTRUCTIONS
AAVERTISSEMENT: Lo que
vous utilisezle rdrig_rateur, observeztoujours
certainesprdcautions de bose,notamment :
• N'utilisez le r@frig@rateurque pour son usage
pr@vu,comme d6crit dons le pr6sent manuel.
• Instellez le r@frig@rateurconform@ment aux
directives d'installetion uvant de I'utiliser.
• Nelaissezpus lesenfants grimper, s'osseoir,
setenir debout ni se pendre eux cloyettes
du r_frig_roteur. IIspourraient endommager
le r6frig6rateur et seblessergravement.
• Unelois le r@frig@rateuren merche, ne touchez
pus lessurfaces froides du cong@lateur,surtout
sivous evez les mains humides ou mouill@es:
la peau risqued'adh6rer 5 ces surfacestr_s
froides.
N'entreposez et n'utilisez pus d'essenceou
autres vapeurs et liquides inflammables 6
proximit_ de cet appereilou de tout autre
apporeil_lectrom_nuger.
Pour les r_frig_rateurs dot6s d'une machine
6gle_ons uutometique, 6vitezle contact avec
lespi_cesmobiles du m6canisme 6jecteur,
ou avec 1'616mentchauffant situ6 6 la partie
inf6rieurede la machine 6 glagons.Neposez
pas lesdoigts ou lesmains sur le m6canisme
de la machine 6 glagons pendant que
le r6frig6rateur est branch6.
I_loignezlesdoigts desparties du r_frig_reteur
o5 I'on peut fecilement se pincer: lesespaces
entre lesportes et entre lesportes et lesplacards
sont toujours 6traits. Soyezprudent Iorsque
vous fermez lesportes de I'appareil en pr6sence
desenfants.
• D@brenchezvotre r_frig@reteurevant
de le nettoyer et de le r_porer. REMARQUE:Nous
vous recommandons vivement de confier toute
r6paration 6 un technicien qualifi6.
• Avunt de remplecer une ampoule grill_e,
le r6frig6rateur doit _tre d6branch6 (]fin
d'6viter tout contact avec un fil soustension.
(Uneampoule grill6e peut sebriser pendant
I'op6ration).
REMARQUE:Lorsquevousplacez la commande
sur_teint, I'alimentation_lectriquede I'ampoule
n'estpascouple.
• Nefeites pus recongeler des alimentssurgel_s
qui ant compl_tement d_gel_.
,A DANGER: RISQUES POUR LES ENFANTS
Lesenfants prisau pi_geou marts d'asphgxiesont
toujours d'actualit_. Lesappareils de r_frig_ration
abandon_s sont toujours aussi dangereux, m_me
sion n'attend que "quelquejours" pour s'en
d_barasser.Sivous ne gardez pasvotre ancien
appareil,veuillezsuivre lesdirectives ci-dessous
(]fin de pr_venirlesaccidents.
Avant de vous d_barasser de votre vieux
appareil de r_frig_ration :
•D_montez lesportes.
• Laissezlescla!jettes en place(]fin d'emp_cher
lesenfants de grimper 6 I'int_rieur.
REFRIGERANTS
Touslesappareilsde r_frig_ration contiennent
desrefrigerants qui,conform_ment aux lois
f_d_rales,doivent _tre enlev_savant toute
_limination de I'appareil.
Sivous vous d@barrassezde vieux appareils de
r@frig_ration,v_rifiez,aupr@sde la soci@t@qui
s'occupe de leur @limination,ce que vous
devezfaire.
IMPORTANTSAFETYINSTRUCTIONS
HOW TO CONNECT ELECTRICITY
Do not, under any circumstances, cut or remove
the third {ground} prong from the power cord.
For personal safety, this appliance must be
properly grounded.
Thepower cord of this appliance isequipped
with a 3-prong (grounding) plug which mates
with a standard :3-prong(grounding)wall outlet
to minimize the possibility of electric shock
hazard from this appliance.
Have thewall outlet and circuit checked by
(]qualified electricianto make surethe outlet
isproperly grounded.
Where a standard 2-prong wall outlet is
encountered, it isyour personal responsibility
and obligation to haveit replacedwith (]
properly grounded :3-prongwall outlet.
Therefrigerator shouldalways be plugged into
its own individual electrical outlet which has
(]voltage rating that matches the rating plate.
Thisprovidesthe best performance and also
prevents overloading housewiring circuitswhich
could cause a fire hazard from overheated wires.
Never unplug your refrigerator by pulling
on the power cord.Always grip plug firmly
and pull straight out from the outlet.
Repairor replace immediately all power cords
that have become frayed or otherwise damaged.
Donot usea cord that shows cracks or abrasion
damage (]longits length or at either end.
When moving the refrigerator away from the wall,
be careful notto roll overor damage the power cord.
USE OF EXTENSION CORDS
Because of potential safety hazards under
certain conditions, we strongly recommend
against the use of an extension cord.
However,ifyou must usean extensioncord, it is
absolutely necessorythat it be (] UL-listed,:3-wire
grounding type appliance extensioncord having
a grounding type plug and outlet and that
the electrical rating of the cord be 15 amperes
(minimum)and 120volts.
SAVE THESE INSTRUCTIONS
MESURES DE SI CURITEIMPORTANTES
RACCORDEMENT ELECTRIQUE
Ne coupez ni retirez en Clucun ccls le troisi_me
broche (mise _1la terre) de le fiche du cordon
d'elimentetion. Pour votre s_curit_, cet appareil
dolt _tre correctement mis _ le terre.
Lecordon d'alimentation de cet appareil est
muni d'une fiche 6 3 broches (mise6 laterre)
qui sebranche dans une prisemural ordinaire
@3 alv6oles(mise@laterre) pour r6duireau
minimum lesrisquesdu chocs 61ectriques.
Faitesexaminer la prisede courant et lecircuit
par un 61ectricienqualifi6 pour vous assurer
que la priseestcorrectement mise6 la terre.
Sila prisemurale est du tgpe standard 6 2 alv6oles,
il vous incombe de lafaire remplacer par une prise
6 3 alv6olescorrectement mise 6 la terre.
La machine 6 glagonsdolt toujours @tre
branch6 dans sa propre prisede courant,
dont latension nominale est identique
6 celleindiqu6e sur la plaque signal@ique.
Cette pr6caution est recommand6e pour garantir
un rendement optimum et @iter une surcharge des
circuits 61ectriquesde la r6sidence,cequi pourrait
cr@r un risqued'incendie par surschauffe desills.
Ned6branchezjamais I'appareil entirant le cordon
d'alimentation. Saisissezfermement la fiche
du cordon ettirez droit pour la retirer de la prise.
R@arez ou remplacez imm6diatement tout cordon
effiloch6 ou endommag& N'utilisezpasun cordon
fendill6ou pr6sentant dessignes d'usure.
Lorsquevous d@lacez I'appareildu mur,faites
attention de ne pasla faire rouler sur lecordon
d'alimentation afin de ne pasI'endommager.
CORDONSPROLONGATEURS
Nous vous recommendons fortement de ne pas
utiliser de cordons prolongeteurs _ cause des
risques potentiels qu'ils pr_sentent dons certeines
conditions.
Toutefoissivous d6cidez d'utilisertout de m@me
un cordon prolongateur, ilest absolument n6cessaire
qu'il s'agissed'un cordon 6 3 ills avec mise6 la terre
pour appareils61ectrom6nagershomologu6 UL
aux Etats-Unis)ou homologu6 CSA(au Canada),
pourvu d'une fiche et d'une prisemises6 la terre
de 15 amp@es (minimum)etde 120volts.
CONSERVEZ CESDIRECTIVES
Operating Instructions
Stainless Steel Refrigerator
Temperature
controls ®
®FREEZER REFRIGERATOR
The temperature controls are preset in the factory at 37°F
for the fresh food compartment and O°F for the freezer
compartment. Allow 24 hours for the temperature to stabilize
to the preset recommended settings.
The temperature controls can display both the SET temperature
as well as the actual temperature in the fresh food and freezer
compartments. The actual temperature may vary slightly
from the SET temperature based on usage and operating
environment.
Setting either or both controls to OFF stops cooling in both
the freezer and fresh food compartments but does not shut
off electrical power to the refrigerator.
NOTE: The refrigerator is shipped with protective film covering
the temperature controls. #this film was not removed during
installation, remove it now.
To chenge the temperature, press and release
the k_(warmer)or k_ (colder) pad. The SETlight
will come on and the
displag will show the set temperature. To change
the temperature, tap either the (_ (warmer) or
(_ (colder) pad until the
desired temperature isdisplaged. Fresh food
temperatures can be adjusted between 34°F
and 44°Fand the freezer temperatures can be
adjusted between -6% and +6°F.
Once the desired temperature has been
set, the temperature displag will return to
the actual fresh food and freezer temperatures
after 5 seconds. Several adjustments mag
be required. Each time gou adjust controls,
allow 2/4hours for the refrigerator to reach
the temperature gou have set.
Toturn the cooling system off, tap
the @ (warmer) pad for either the fresh food
compartment or the freezer until the
display shows OFF.To turn the unit beck on,
press
the @ (colder) pad for either the fresh food
compartment or freezer. The SETlight will
illuminate on the side you selected. Then press
the @ (colder) pad again (on the side where
the SETlight is illuminated) and it will go
to
the preset points of O°Ffor the freezer and 37°F
for the fresh food compartment.
Performance
Air Flow
System
The Performance Air-Flow Sgstem isdesigned to
maximize temperature control in the fresh food
and freezer compartments. This unique special
feature consists of the Air Tower along the top
and back walls of the fresh food compartment
and the Air Tunnel on the bottom portion of
the freezer rear wall. Placing food in front of
the louvers on these components will not affect
performance.
Although the Air Tower and the Air Tunnel
can be removed, doing so will affect temperature
performance. (For removal instructions, on-line,
24 hours a dag, contact us at GEAppliances.com
or call 800.444.1845. InCanada, call us at
1.800.561.3344.)
Other Controls
Stainless Steel Refrigerator
How
TurboCool TM
works TurboCool rapidly cools
TURBO •the refrigerator compartment in
order to more quickly cool foods.
Use TurboCool when adding
a large amount of food to the refrigerator
compartment, putting away foods after they
have been sitting out at room temperature
or when putting away warm leftovers. It can
also be used if the refrigerator has been
without power for an extended period.
Once activated, the compressor will turn on
immediately and the fans will cycle on and
off at high speed as needed for 8 hours.
The compressor will continue to run until
the refrigerator comportment cools to
approximately 34°F (1°C), then it will cycle
on and off to maintain this setting. After
8 hours, or if TURBOCOOL is pressed again,
the refrigerator compartment will return
to the original setting.
How to use
TurboCool 1 Press TURBOCOOL The refrigerator
temperature display will show TC.
2 After TurboCool is complete,
the refrigerator compartment
will return to the original setting.
NOTES:
•Therefrigerator temperature cannot
be changed during TurboCool.
• Thefreezer temperature is not affected during
TurboCool.
• When opening the refrigerator door during
TurboCool, the fans will continue to run if
they have cycled on.
Door Alarm The door alarm will sound
if either door isopen for more than
2 minutes. The beeping sound will
stop when you close the door.
Internal Water Dispenser
Stainless Steel Refrigerator
Internal Water
Dispenser Thewater dispenser is located on the left wall
inside the refrigerator compartment.
To dispense water:
1 Holdthe glass against the recess.
2 Push the water dispenser button.
3 Holdthe glass underneath the dispenser
for 2-5 seconds after releasing the dispenser
button. Water mag continue to dispense
after the button is released.
If no water is dispensed when the refrigerator is
first installed, there may be air in the water line
system. Pressthe dispenser button and run 11/2
gallons to remove trapped air from the water line
and to fill the water system. During this process,
the dispenser noise may be loud as the air is
purged from the water line system. Toflush out
impurities in the water line, throw away the first
6 glassfuls of water.
NOTE:Toavoid water deposits, the dispenser
should be cleaned periodically by wiping with
a clean cloth or sponge.
10
Water Filter
Stainless Steel Refrigerator
Water filter
Thewater filter cartridge is
located in the back upper
right corner of the j f
refrigerator compartment.
When to Replace the Filter
There is a replacement indicator light for the
water filter cartridge on the temperature display.
This light will turn orange to tell you that you
need to replace the filter soon. Thefilter cartridge
should be replaced when the replacement
indicator light turns red or if the flow of water to
the dispenser or icemaker decreases.
On models with external dispensers, the top of
the LCDscreen will display, "Replace Water Filter."
Installing the Filter Cartridge
1 If you are replacing the
cartridge, first remove
the old one by slowly turning it
to the left. DONOTpull down on
the cartridge.A small amount of
water may drip down.
5 Run 1V_ gallons from the dispenser to clear the
system and prevent sputtering. See To Use the
Dispenser section.
6 Pressand hold the RESETWATER
FILTERpad for 3 seconds.
NOTE:A newly-installed water
filter cartridge may cause water
to spurt from the dispenser.
FILTER
HOLD 3 SEC
Filter Bypass Plug
You must use the filter bypass plug when
a replacement filter cartridge is not available.
The icemaker will not operate without the filter
or filter bypass plug.
Replacement Filters:
To order additional filter cartridges
in the United States, visit our Website,
GEAppliances.com, or call GE Parts and
Accessories, 800.626.2002.
Filter Model HWF
Customers in Canada should consult the yellow
pages for the nearest Mabe Service Center.
ACAUTION: fairhasbeentrappedin
the system, the filter cartridge may be ejected as
it is removed. Usecaution when removing.
2 Removethe protective foil from the end of the
cartridge.
3 Fillthe replacement cartridge with water from the
tap to allowfor better flow from the dispenser
immediately after installation.
Lining up the arrow on the
cartridge and the cartridge
holder, slowly rotate the
cartridge clockwise until it
stops. When the cartridge is
properly installed, you will feel
it "click" as it locks into place. I
Do not overtighten.
11
Shelves and Bins
Stainless Steel Refrigerator
Rearranging
the shelves Shelves in the refrigerator compartment
are adjustable.
Refrigerator Compartment
To remove:
1 Removeall items from the shelf.
2 Tilt the shelf up at the front.
3 Lift the shelf up at the back and bring
the shelf out.
To replace:
1 While tilting the shelf up, insert the top hook
at the back of the shelf in a slot on the track.
2 Lower the front of the shelf until the bottom
of the shelf locks into place.
Somemodelshavewireshelvesthat
canbeadjustedinthesamemanner.
1 ....--4
2 i
Slide-out
spillproof
shelf
The slide-out spillproof shelf allows gou to reach
items stored behind others. The special edges
are designed to help prevent spills from dripping
to lower shelves.
To remove:
1 Removeall items from shelf.
2 Slide the shelf out until it stops.
3 Lift the front edge of the shelf until the central
tabs are above the front bar.
4 Continue pulling the shelf forward until
it can be removed.
To replace:
1 Placethe rear shelf tabs just in front
of the central notches on the shelf frame.
2 Slide the shelf in until the central tabs
are slightlg behind the front bar.
3 Lower the shelf into place until it ishorizontal
and slide the shelf in.
Make sure that the shelf sits fiat after reinstallation
and doesn't move freely from side to side.
Make sure you push the shelvesall the way
in beforeyou close the door.
OuickSpace TM
shelf This shelf splits in half and slides under itself
for storage of tall items on the shelf below.
This shelf can be removed and replaced or
relocated just like Slide-Out Spillproof Shelves.
On some models, this shelf can not be used
in the lowest position.
12
Shelves and Bins
Stainless Steel Refrigerator
Basket
removal (top
drawer)
To Remove the Full-Width Basket on
Top Freezer Drawer Models:
1 Openthe top freezerdrawer until it stops.
2 Thefreezer basket restson the insidetabs
on the drawer slides.
3 Liftthe front end of the basket sothat the front
two alignment tabs come out of the metal slide
bracket first. Thenrotate the front edge of the
basket up while lifting the remaining two rear
alignment tabs out of the metal slidebracket.
4 Makesurethe plastic sleevesremain attached
to the 4 slotson the metal slidebrackets.
When Replacing the Full-Width Basket:
Tiltthe basket back and lower itdown into
the drawer. Rotatethe basketto a horizontal position
and pressit down intothe 4 alignment tabs.
NOTE:Always besurethat all 4basketslots
are engagedin the metal slidebracketsbeforesliding
back into thefreezer.
Appearance may vary
Tab
Adjustable
divider in
bottom
freezer
basket
Thefreezer basket has a divider that can be both
repositioned or removed.
To Remove the Divider in the Bottom
Freezer Basket:
Pullthe dividerforward until the rear locating tabs
are out of the slots.Turnthe divider slightly to the
sideto releasethe front locating tabs and lift out.
To Replace the Divider in the Bottom
Freezer Basket:
Turnthe divider slightly to one sidesothe tabs on
the front fit into the vent slotson the basket. Position
the divider sothe back locating tabs snap into place
in the back vent slots.
bs
TO Reposition the Divider in the Bottom
Freezer Basket:
1 Removethe divider as instructed above.
2 Slide the divider left or right to the desired
location and replace as instructed above.
13
Shelves and Bins
Stainless Steel Refrigerator
Basket removal
(bottom
drawer)
To Remove the 2-Piece Basket:
1 Open the bottom freezer drawer until
it stops.
2 Pullthe dividerforward until the rear locating tabs
are out of the slots.Turnthe divider slightlg to the
sideto releasethe front locating tabs and lift out.
3 Thefreezer basket rests on the metal slide
brackets and is held in place with swing locks.
4 Turn the swing locks from horizontal to vertical
position.
5 Lift the front of the basket up, rotate it toward
gou, and bring it straight up to remove.
6 Lift the back portion of the basket up and out
of the drawer.
When Replacing the 2-Piece Basket:
Placethe rear of the basket onto the metal
slide brackets. There will be 2 pins on each
underside of the back that will align for
securing the basket.
Seat the front of the basket onto the metal slide
brackets and over the swing locks.
3 Turn the swing locks from vertical to horizontal
position to lock the basket in place.
Turn the divider slightlg to one side so the tabs
on the front fit into the vent slots on the basket.
Position the divider so the back locating tabs
snap into place in the back vent slots.
Appearance may vary
Adjustable
bins on
the door
Non-
Adjustable
bins on
the door
Non-
Adjustable
beverage
rack
Adjustable bins can easilg be carried from
refrigerator to work area.
To remove: Lift bin straight up, then pull out.
To replace or relocate: Slide in the bin just above
the molded door supports, and push down.
The bin will lock in place.
The snugger helps prevent tipping, spilling
or sliding of small items stored on the door shelf. Grip the finger hold near the rear of the snugger
and move it to fit gour needs.
To remove: Lift the bin straight up, then
pull out.
To replace: Engage the bin in the molded
supports on the door and push down. It will lock
in place.
To remove: Lift the rack straight up,then pull out.
To replace: Engage the rack in the molded
supports on the door and push down. It will lock
in place.
14
Additional Features
Stainless Steel Refrigerator
Door swing
clearances The doors are factorg set for a 150°
door swing. Toavoid contact damage
to the refrigerator doors or to adjacent
cabinetrg or walls, observe the minimum
clearances shown.
• Allow/4" clearance on each side
to an adjacent wall for a 90° opening
and access to drawers.
• Allow 15" clearance on each side
to an adjacent wall for removal of drawers.
IE i_1
150°DoorSwing ,
90°DoorSwing 24-5/8"
I | I
_ i JL _ :
ii ........ii 1 -1,16,,
/"1....... !i
Door
alignment If the top of the doors are uneven, first trg to raise
the lowest door bg turning the leveling leg on
the same side as the door until the doors are
even. If the unit rocks, re-adjust the leveling
legs to the extent that the unit isstable.
\ .
Leveling
Leg
If the doors remain uneven, turn the adjustable
pin to raise, or lower, the left door to match
the right door. Use a 1/4 Allen wrench
to turn the pin.
Adjustable Pin
15
Crispers and Pans
Stainless Steel Refrigerator
Fruit and
vegetable
crispers
Excesswater that mag accumulate in the bottom
of the drawers should be wiped drg.
Adjustable
humidity
crispers
Slide the control all the wag to the HIGH setting
to provide high humidity recommended for most
vegetables.
Slide the control all the wag to the LOW setting
to provide lower humidity levels recommended
for most fruits.
Convertible
meat pan The convertible meat pan has its own cold air
duct to allow a stream of cold air from the freezer
compartment to flow to the pan.
The variable temperature control regulates
the air flow from the Climate Keeper.
Setthe control to the coldest setting to store
fresh meats.
Set the control to Cold to convert the pan
to normal refrigerator temperature and provide
extra vegetable storage space. The cold air duct
is turned off. Variable settings between these
extremes can be selected.
Dell pan
removal To remove:
1 Remove the fruit and vegetable drawers.
2 Pullthe drawer out to the stop position.
3 Lift the lid to access the 4 swing locks.
4 Rotate all four swing locks to the unlock
position.
5 Lift the front of the drawer up and out.
To replace:
1 Make sure all four swing locks are in the unlock
position.
2 Placethe sides of the drawer into the drawer
supports, making sure the swing locks fit
on the drawer slots.
4
5
Lock all four swing locks bg rotating them
to the lock position.
Lower the lid and slide in the drawer.
Replace the fruit and vegetable drawers. SwingLocks- SwingLocks-
UnlockPosition LockPosition
16
Automatic Icemaker
Stainless Steel Refrigerator
Automatic
icemaker NOTE- A newly installed refrigerator may take 12 to 24 hours to begin making ice.
The icemaker will produce seven cubes
per cgcle-approximatelg 100-130 cubes
in a 24-hour period, depending on freezer
compartment temperature, room temperature,
number of door openings and other use
conditions.
See below for how to access ice and reach
the power switch.
If the refrigerator isoperated before
the water connection is made to the icemaker,
set the power switch in the O (off) position.
When the refrigerator has been connected
to the water supplg, set the power switch
to the I (on) position. The icemaker power light
will turn green when the freezer light switch is
pressed in or when the freezer door is closed.
The icemaker will fill with water when it cools to
15°F(-10°O. A newlg installed refrigerator mag
take 12 to 2/4hours to begin making ice cubes.
You will hear a buzzing sound each time
the icemaker fills with water.
Throw awag the first few batches of ice to allow
the water line to clear.
Be sure nothing interferes with the sweep
of the feeler arm.
Power
Switch
X; Icemaker
When the bin fills to the level of the feeler arm,
the icemaker will stop producing ice. It is normal
for several cubes to be joined together.
If ice is not used frequentlg, old ice cubes will
become cloudg, taste stale and shrink.
NOTE: In homes with lower-than-average water
pressure,you may hear the icemaker cycle
multiple times when making one batch of ice.
NOTE: Set the power switch to the 0 (off) position
if the water supply is shut off
Accessing ice
and reaching
the power
switch
Toreach the icemakerpower switch, open the top
freezer drawer and remove the full-width basket.
Alwags be sureto replace the basket.
To access ice, open the bottom freezer drawer.
The ice bucket is located below the mullion. Pull it
forward to access ice.
Ice _-_r
Mullion
Toreach the power switch. Toaccessice.
17
Careand Cleaning
Stainless Steel Refrigerator
Cleaning
the outside The stainless steel panels and handles can be
cleaned with a commercially available stainless
steel cleaner such as Stainless Steel MagicT.M
Stainless SteelMagic isavailable at Ace, True
Value, Servistar, HWI and other leading stores.
It is also available through GEParts and
Accessories, 800.626.2002. Order part number
WXIOX15.
Do not use appliance wax or polish
on the stainless steel.
Cleaning
the inside To help prevent odors, leave an open box
of baking soda in the fresh food and freezer
compartments.
Unplug the refrigerator before cleaning.
If this is not practical, wring excess moisture
out of sponge or cloth when cleaning around
switches, lights or controls.
Use warm water and baking soda solution-
about a tablespoon (15 ml)of baking soda to
a quart (1 liter) of water. This both cleans and
neutralizes odors. Rinse and wipe drg.
Use of any cleaning solution other than
that which is recommended, especially those
that contoin petroleum distillates, can crack
or damage the interior of the refrigerator.
Avoid cleaning cold gloss shelves with hot
water because the extreme temperature
difference may cause them to breok. Handle
gloss shelves carefully. Bumping tempered
glass can cause it to shatter.
Do not wash any plastic refrigerator parts
in the dishwasher.
Behind the
refrigerator Be careful when moving the refrigerator awag
from the wall. All types of floor coverings can be
damaged, particularlg cushioned coverings and
those with embossed surfaces.
Pull the refrigerator straight out and return it
to position bg pushing it straight in. Moving
the refrigerator in a side direction mag result
in damage to the floor covering or refrigerator.
When pushing the refrigerator back, make sure
you don't roll over the power cord or icemaker
supply line.
Preparing
for vacation For long vacations or absences, remove food
and unplug the refrigerator. Clean the interior
with a baking soda solution of one tablespoon
(15 ml) of baking soda to one quart (1 liter)
of water. Leavethe doors open.
Setthe icemaker power switch to the O{off)
position and shut off the water supplg to
the refrigerator.
If the temperature can drop below freezing,
have a qualified servicer drain the water supply
sgstem to prevent serious propertg damage due
to flooding.
Preparing
to move
18
Secure all loose items such as shelves and
drawers bg taping them securelg in place
to prevent damage.
When using a hand truck to move the
refrigerator, do not rest the front or back of the
refrigerator against the hand truck. This could
damage
the refrigerator. Handle onlg from the sides
of the refrigerator.
Be sure the refrigerator stays in on upright
position during moving.
Replacing the Light Bulbs
Stainless Steel Refrigerator
Fresh food
comportment--
upper light
Setting the controls to OFF does not remove
power to the light circuit.
1
2
Unplug the refrigerator.
The bulbs are located at the top
of the compartment, inside the light shield.
To remove the light shield, pull forward
on the shield to disengage the tabs at the back
of the shield. Pull down to remove the light
shield.
After replacing the bulbs with appliance
bulbs of the same or lower wattage, replace
the light shield.When replacing the light shield,
set the front tabs into the appropriate slots
in the front of the shield housing and pull
forward to seat the tabs at the back
of the shield into the housing.
5 Plugthe refrigerator back in.
Tabs
Freezer light CAUTION: Li Ubulbsmoybenot.
Setting the controls to OFFdoes not remove
power to the light circuit.
1Unplug the refrigerator.
2 Removethe freezer basketfor access.The bulb is
located at the rear of the freezer insidea light
shield.
3 Toremove,graspthe shieldat thetop and pull out
to releasethe tabs at the bottom.
4 After replacing with an appliance bulb of the
same or lower wattage, replace
the shield and freezer basket.
5 Plugthe refrigerator back in.
Light
Shield
\
Appearance may vary
19
The Problem Solver
Stainless Steel Refrigerator
Normal
operating
sounds
Newer refrigerators sound different from older refrigerators. Modern refrigerators have more
features and use newer technology.
Do you hear what I hear? These sounds are normal.
HUIVllVllVl...
--WHOOSH...
The new high efficiencg compressor may run
faster and longer than gour old refrigerator
and gou mag hear a high-pitched hum or
pulsating sound while it is operating.
Sometimes the refrigerator runs for an
extended period, especiullg when the doors
are opened frequentlg. This means that
the Frost Guard"feature is working
to prevent freezer burn and improve
food preservation.
You may hear a whooshing sound when
the doors close.This isdue to pressure
equalizing within the refrigerator.
CLICKS, POPS,
CRACKS ond CHIRPS
You may hear cracking or popping sounds
when the refrigerator isfirst plugged in.
This happens as the refrigerator cools
to the correct temperature.
Electronic dampers click open and closed to
provide optimal cooling and energg savings.
The compressor may cause a clicking or
chirping sound when attempting to restart
(this could take up to 5 minutes).
The electronic control board may cause
a clicking sound when relags activate
to control refrigerator components.
Expansion and contraction of cooling coils
during and after defrost can cause a cracking
or popping sound.
After an icemaking cgcle, gou mag hear
the ice cubes dropping into the ice bucket.
WHIB!
You mag hear the fans spinning at high
speeds. This happens when the refrigerator
is first plugged in,when the doors are opened
frequentlg or when a large amount of food
is added to the refrigerator or freezer
compartments. The fans are helping
to maintain the correct temperatures.
If either door is open for over 3 minutes,
gou mag hear the fans come on in order
to cool the light bulbs.
Thefans change speeds in order to provide
optimal cooling and energg savings.
WATER OUNDS
Theflow of refrigerant through the freezer
cooling coils mag make a gurgling noise like
boiling water.
Water dropping on the defrost heater can
cause a sizzling, popping or buzzing sound
during the defrost cgcle.
A water dripping noise may occur
during the defrost cgcle as ice melts from
the evaporator and flows into the drain pan.
Closing the door may cause a gurgling sound
due to pressure equalization.
20

Other manuals for Monogram Refrigerator

11

Other GE Refrigerator manuals

GE TOP-FREEZER 16 Operating instructions

GE

GE TOP-FREEZER 16 Operating instructions

GE GTH21SBWSS Manual

GE

GE GTH21SBWSS Manual

GE TCX18 User manual

GE

GE TCX18 User manual

GE TURBOCOOL 23 Safety guide

GE

GE TURBOCOOL 23 Safety guide

GE GSE26HSESS Assembly instructions

GE

GE GSE26HSESS Assembly instructions

GE Profile TFX26PPD User manual

GE

GE Profile TFX26PPD User manual

GE ENERGY STAR GTH18HBCBB Manual

GE

GE ENERGY STAR GTH18HBCBB Manual

GE 18, 19 User manual

GE

GE 18, 19 User manual

GE PCF23NGT Safety guide

GE

GE PCF23NGT Safety guide

GE GTK18ICXBS User manual

GE

GE GTK18ICXBS User manual

GE GTQ080PANR User manual

GE

GE GTQ080PANR User manual

GE 3ft 2 Door Operating instructions

GE

GE 3ft 2 Door Operating instructions

GE Monogram ZISW360DM User manual

GE

GE Monogram ZISW360DM User manual

GE GTE18GSH Manual

GE

GE GTE18GSH Manual

GE WML04GADBS Assembly instructions

GE

GE WML04GADBS Assembly instructions

GE PSC23MSWSS - Profile: 23.3 cu. Ft Manual

GE

GE PSC23MSWSS - Profile: 23.3 cu. Ft Manual

GE PFSS6SMXASS and Operating instructions

GE

GE PFSS6SMXASS and Operating instructions

GE TBX22 User manual

GE

GE TBX22 User manual

GE Profile PSB42LGRBV Instruction Manual

GE

GE Profile PSB42LGRBV Instruction Manual

GE GE Profile Arctica PSI23MGPBB User instructions

GE

GE GE Profile Arctica PSI23MGPBB User instructions

GE GTS18SHSSS Manual

GE

GE GTS18SHSSS Manual

GE GTS12BBPALCC and Operating instructions

GE

GE GTS12BBPALCC and Operating instructions

GE Profile CustomStyle PSC23PSTSS Manual

GE

GE Profile CustomStyle PSC23PSTSS Manual

GE 22-27 User manual

GE

GE 22-27 User manual

Popular Refrigerator manuals by other brands

Cres Cor H137WSRRC2020 Series Operating and maintenance instructions

Cres Cor

Cres Cor H137WSRRC2020 Series Operating and maintenance instructions

Subcold ECO 75 instruction manual

Subcold

Subcold ECO 75 instruction manual

Whirlpool REFRIGERATOR User instructions

Whirlpool

Whirlpool REFRIGERATOR User instructions

Randell 60324A Specifications

Randell

Randell 60324A Specifications

Beko RCSA340K30WN Instructions of use

Beko

Beko RCSA340K30WN Instructions of use

LG GL-479 owner's manual

LG

LG GL-479 owner's manual

Daewoo FR-4503N installation instructions

Daewoo

Daewoo FR-4503N installation instructions

Whirlpool GX5FHDXV Product dimensions

Whirlpool

Whirlpool GX5FHDXV Product dimensions

Hisense RT393D4AW1 user manual

Hisense

Hisense RT393D4AW1 user manual

Frigidaire FRS6LR5E use and care manual

Frigidaire

Frigidaire FRS6LR5E use and care manual

Electrolux SC29110 user manual

Electrolux

Electrolux SC29110 user manual

eta 154190000F user manual

eta

eta 154190000F user manual

Yolco TX95B user manual

Yolco

Yolco TX95B user manual

Westinghouse DEO-Fresh WTB2300WB user manual

Westinghouse

Westinghouse DEO-Fresh WTB2300WB user manual

Kuppersberg NRS 186 Technical Passport

Kuppersberg

Kuppersberg NRS 186 Technical Passport

KitchenAid KBSD602ESS-SS Use and care guide

KitchenAid

KitchenAid KBSD602ESS-SS Use and care guide

Hotpoint HQ9 E1L manual

Hotpoint

Hotpoint HQ9 E1L manual

Saivod AT-75 Instructions for use

Saivod

Saivod AT-75 Instructions for use

manuals.online logo
manuals.online logoBrands
  • About & Mission
  • Contact us
  • Privacy Policy
  • Terms and Conditions

Copyright 2025 Manuals.Online. All Rights Reserved.