manuals.online logo
Brands
  1. Home
  2. •
  3. Brands
  4. •
  5. GE
  6. •
  7. Refrigerator
  8. •
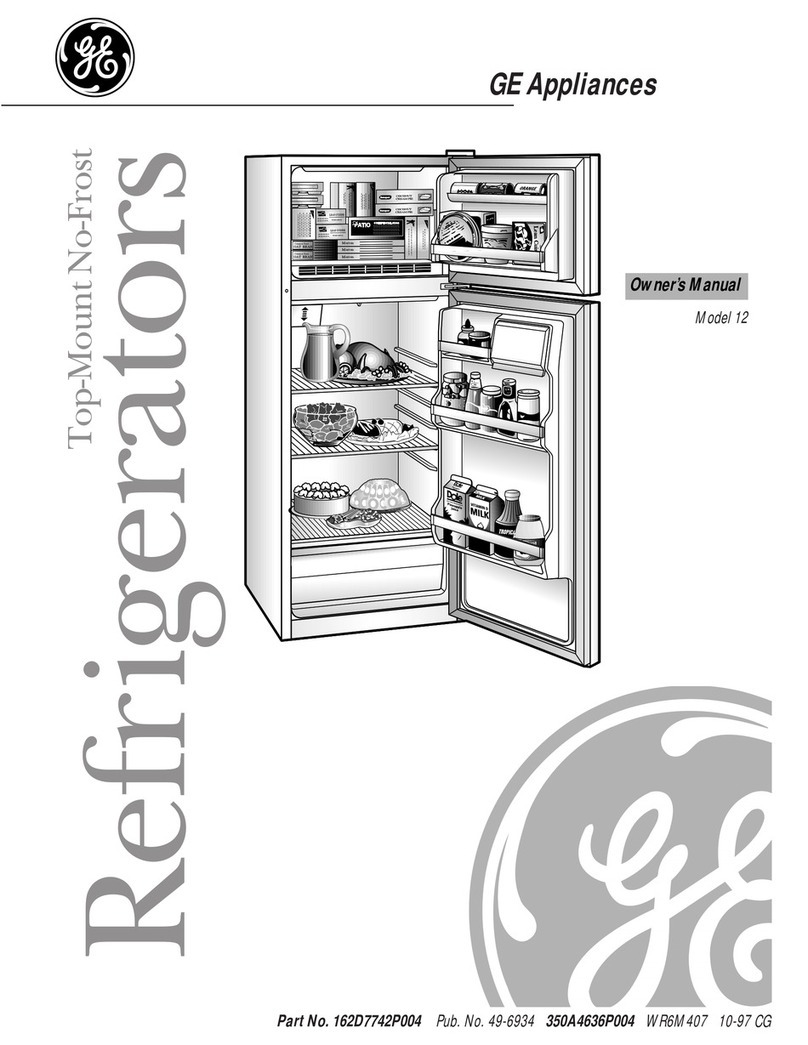
  9. GE Monogram ZDOD240 User manual

GE Monogram ZDOD240 User manual

Other manuals for Monogram ZDOD240

6

Other GE Refrigerator manuals

GE Profile CustomStyle PSI23SCRSV User instructions

GE

GE Profile CustomStyle PSI23SCRSV User instructions

GE Profile PDS21SBM User instructions

GE

GE Profile PDS21SBM User instructions

GE ENERGY STAR GFSF6KEX Original instructions

GE

GE ENERGY STAR GFSF6KEX Original instructions

GE Profile PSB48YSX Manual

GE

GE Profile PSB48YSX Manual

GE cafe Operating instructions

GE

GE cafe Operating instructions

GE GNE26GGDABB User manual

GE

GE GNE26GGDABB User manual

GE PFSF0MFCBB Assembly instructions

GE

GE PFSF0MFCBB Assembly instructions

GE ZISS36D SS User manual

GE

GE ZISS36D SS User manual

GE Profile PNQ20KMHFES Operating instructions

GE

GE Profile PNQ20KMHFES Operating instructions

GE Profile Arctica PSS27NGP User instructions

GE

GE Profile Arctica PSS27NGP User instructions

GE Profile PFCF1PJY Manual

GE

GE Profile PFCF1PJY Manual

GE TBH22RP User manual

GE

GE TBH22RP User manual

GE Appliances Profile 29 Service manual

GE

GE Appliances Profile 29 Service manual

GE PSH23PSRBSV and Safety guide

GE

GE PSH23PSRBSV and Safety guide

GE GFSS6KEXSS - r 25.8 cu. Ft. Refrigerator Manual

GE

GE GFSS6KEXSS - r 25.8 cu. Ft. Refrigerator Manual

GE GML03GAEBS Manual

GE

GE GML03GAEBS Manual

GE Profile PCF23PGW Manual

GE

GE Profile PCF23PGW Manual

GE SIDE-BY-SIDE REFRIGERATOR 26 Operating instructions

GE

GE SIDE-BY-SIDE REFRIGERATOR 26 Operating instructions

GE GTS18ABBRWW Assembly instructions

GE

GE GTS18ABBRWW Assembly instructions

GE GMV070BAYR User manual

GE

GE GMV070BAYR User manual

GE Profile 24 CustomStyle Operating instructions

GE

GE Profile 24 CustomStyle Operating instructions

GE GTS18HBMFRCC and Operating instructions

GE

GE GTS18HBMFRCC and Operating instructions

GE Profile PGCS1PJYSS Operating instructions

GE

GE Profile PGCS1PJYSS Operating instructions

GE Profile PSHF6VGXBB User manual

GE

GE Profile PSHF6VGXBB User manual

Popular Refrigerator manuals by other brands

Frigidaire FRS26TS7DW2 Use & care manual

Frigidaire

Frigidaire FRS26TS7DW2 Use & care manual

Fisher Scientific 10ECEEFSA manual

Fisher Scientific

Fisher Scientific 10ECEEFSA manual

Summit FF22BDRSS user manual

Summit

Summit FF22BDRSS user manual

Frigidaire FFRU17B2QWE use & care

Frigidaire

Frigidaire FFRU17B2QWE use & care

Hotpoint ENBGH 19xxx FW operating instructions

Hotpoint

Hotpoint ENBGH 19xxx FW operating instructions

Hitachi R-SG28KPH instruction manual

Hitachi

Hitachi R-SG28KPH instruction manual

Dometic RMH 7390 L operating instructions

Dometic

Dometic RMH 7390 L operating instructions

AEG S71700TSW0 user manual

AEG

AEG S71700TSW0 user manual

Electrolux ENB3669 Instruction book

Electrolux

Electrolux ENB3669 Instruction book

Electrolux ERN 2930 Instruction book

Electrolux

Electrolux ERN 2930 Instruction book

Beko GNE 60520 X user manual

Beko

Beko GNE 60520 X user manual

Jenn-Air JUR248LBES00 Use & care guide

Jenn-Air

Jenn-Air JUR248LBES00 Use & care guide

Dometic RGE 4000 Installation and operating manual

Dometic

Dometic RGE 4000 Installation and operating manual

Dometic L-0191B Brochure & specs

Dometic

Dometic L-0191B Brochure & specs

LG LRBP1031W - 10 Cu. Ft. Cabinet Depth Bottom Freezer... owner's guide

LG

LG LRBP1031W - 10 Cu. Ft. Cabinet Depth Bottom Freezer... owner's guide

Daewoo RN-33 Series user manual

Daewoo

Daewoo RN-33 Series user manual

Haier RF-8888-174 Service manual

Haier

Haier RF-8888-174 Service manual

Blaupunkt 5CK2 Series user manual

Blaupunkt

Blaupunkt 5CK2 Series user manual

manuals.online logo
manuals.online logoBrands
  • About & Mission
  • Contact us
  • Privacy Policy
  • Terms and Conditions

Copyright 2025 Manuals.Online. All Rights Reserved.

Owner's
Manual
Outdoor/Indoor
Refrigerator
ZDOD240
@Monogram;
Consumer Inff)rmation
Outdoor/lt_door I:_e,/ri_'erator,
Introduction Your new Monogram outdoor/indoor refrigerator makes an eloquent statement of
style, convenience and kitchen planning flexibility'. Whether you chose it for its pmity
of design or the assiduous atmntion to detail, you will find that your Monogram
outdoor/indoor refligerator's superior blend of form and function will delight you
fbr years to come.
The infbrmation on the following pages will help you operate and maintain your
outdoor/indoor refrigerator properly'.
If you have any other questions, _isit our _¢\_bsite at: ge.com
Contents Built-hi Dimensions/Clearances . . .14, 15
Care and Cleaning ............. 12, 13
Consumer Services ................ 19
Controls and Features ........... 9-11
Model and Serial Numbers .......... 2
Problem Solver ................ 16-18
Product Registration ............... 2
Repair Service .................. 4, 19
Safety Instructions ............... 5-8
Warranty' ................. Back Co_er
Be/bre
using your
outdoor/
indoor
fi ¢erator
Read this manual carefldlv. It is intended
to help y'ou operate and maintain your
new outdoor/indoor refligerator properly'.
Keep it handy fbr answers to your
questions.
If you don't understand something or
need more help, there is a list of toll-free
consumer service numbers included in
the back section of this manual.
OR
Visit our *A>bsite at: ge.com
Wdte
down the
model &
serial
7Z UT!_ [)eYS
You will find them on a label on the
ceiling inside the outdoor/indoor
refrigerator.
Please write these numbers here:
Model Number
Serial Number
Use these nmnbers in any correspondence
or service calls concerning your outdoor/
indoor refrigerator.
Consumer In )rmation
Outdoor/Indoor I:_e,/ri_'erator,
([you received
adamaged
a[_/)liance
The warranty does not co_er damage
caused after'delivery. Immediately contact the dealer (or builder)
that sold you the outdoor/indoor refrigerator.
Save time
& monu Before you request serxice, check the It lists causes of minor operating problems
Problem Solver in the back of this manual, that you can correct yourself.
J?_elTlove
packaging
Before using, be sure all packing materials
and tape have been remox ed.
To assure no damage is done to the finish
of the product, the safest way to remoxe
the adhesive left from packaging tape
on new appliances is an application of
household liquid detergent. Apply with
a soft cloth and allow to soak. Wipe dry
and then apply an appliance polish to
thoroughly clean and protect the surfi_ce.
Caring
./br your
stainless
steel
Stainless Steel--_J\b strongly advise
applying a commercially available stainless
steel cleaner such as St;£inless Steel Magic ''
to preserve and protect the fine finish
monthly.
The following substances and naturally
occurring materials will cause damage to
all stainless steel finishes. Care must be
taken not to allow these substances to
come in contact with your outdoor/indoor
refiigerator. If any of'these do get on
your unit, wash and rinse immediately
(see Care and Cleaning).
• gatte Uacid
• Pool chemicals
(such as chlorine and bromine)
• Lawn fertilizer
• Ice melting salts
• Creosote
• Iodine
• Pickling juice
• Urine
• Bird droppings
• Tree sap
• Sea water
sqpty
considerations
./br outdoor
applications
Use this appliance only for its intended use
as described in this manual.
• Do not operate the unit where the
temperature will go below 45°F (7.2°(:)
or aboxe 120 ]_(4. C) (see Unit ON/OFF).
Ensure the outdoor/indoor refrigerator
is not installed in a location prone to
standing water.
• Choose a le*el location that can
withstand 250 lbs.
• Route the power cord so that it does not
present a trip hazard.
• Surfi_ce can be hot in direct sunlight
conditions. Use caution.
• Ensure the chosen location does not
present a tip-oxer situation.
Make sure dishes cool prior to storing
them in the outdoor/indoor refrigerator.
Certain types of glass, ceramic,
earthenware or other glazed mensils
retain heat. Hot dishes can cause the
cold glass shelves to break.
• The use of a GE Vacuum Break
(serxice part #'s WR49X403 and
WR49X10026) is not authorized
on the outdoor/indoor refligerator.
Consumer Inff)rmation
Outdoor/lt_door I:_e,/ri_'erator,
([you need
service To obtain service, see the Consumer
Services page in the back of this manual.
*/\> are proud of our service and want you
to be pleased. If tbr some reason you are
not happy with tile service you receive,
here are stops to follow tbr'fllrther help.
Ih)_rcustomers in the USA:
FIRST, contact the people who serviced
your appliance. Explain why you are not
pleased. In most cases, this will solve the
problem.
NEXT, if you are still not pleased, write
all the details--including your phone
n//I?(/be r--to:
Manager, Customer Relations
GE Appliances
Appliance Park
Louisville, KY 40225
For customers" in Canada:
FIRST, contact the people who serviced
your appliance. Explain why you are not
pleased. In most cases, this will solve the
problem.
NEXT, if you are still not pleased, write
all tile details--including your phone
number to:
Manager, Consumer Relations
Camco Inc.
1 Factory Lane, Suite 310
Moncton, N.B. El C 9M3
After
installation
is completed
• Promptly inspect your new Monogram
outdoor/indoor refrigerator. If it llas
been damaged, contact the Installer
or Dealer immediatelv.
•This outdoor/indoor refrigerator must be
properly leveled to ensure correct door
alignment and door closure. Contact the
Installer if the unit is not lexel.
•The trait should be centered in the
opening. In a standard 24" opening,
the door will protrude 1-1/2" forward
of adjacent cabinetry. Contact the
installer if clearance is not correct.
•Test the door swing. Careflflly open and
close tlle door. Tlle door sllould not rub
or catch on adjacent cabinetry. NotifY'
the installer if the door makes contact
with cabinetry.
Please Contact the Installer or Dealer if
you experience any of these problems.
IMPORTANT SAFETY INSTRUCTIONS
READ AND SAVE THESE INSTRUC770NS
WARNING: Whenusingthis
appliance, ah,vavs exercise basic safety,
precautions, including the ff)llowing:
•Use this appliance only for its intended
purpose as described in this Owner's
Manual.
•Keep fingers out of the "pinch point"
areas: clearances between the door and
between the door and cabinet are
necessarily small. Be careflfl closing the
door when children are in the area.
•Unplug or turn off your outdoor/indoor
refrigerator before cleaning or making
• This outdoor/indoor refrigerator must repairs.
be properly installed in accordance with
the Installation Instructions before it is
used.
*Do not allow children to climb, stand
or hang on the shelves in the outdoor/
indoor refrigerator. They could damage
the outdoor/indoor refligerator and
seriously injure themselxes.
•Do not store or use gasoline or other
flammable vapors and liquids in the
vicinity of this or any other appliance.
NOTE: _\_ strongly recommend that any'
servicing lye perfbrmed by a qualified
individual.
•Before replacing aburned-out light bulb,
the outdoor/indoor refrigerator should
be turned OFF or unplugged in order to
avoid contact with a live wire filament.
(A burned-out light bulb may break
when being replaced.)
DANGER: tUSK OF CHILD I ],NTPu4PMI,],NT
Child entrapment and suftbcation
are not problems of the past. Junked or
abandoned refligeration products are
still dangerous...even if they will sit fbr
'_ust a few days." If you are getting rid of
your old appliance, please fbllow these
instructions to help prevent accidents.
Before You Throw Away Your Old
Refrigeration Product:
•Take off the doors.
• Leave the shelves in place so that
children may not easily climb inside.
RI,2FRIGI!:RANTS
All refligeration products contain
refligerants, which under federal law must
lye removed prior to product disposal.
If you are getting rid of an old refligeration
product, check with the company' handling
the disposal ahout what to do.
INSTRUCTIONS IMPORTANTES DE SI CURITI
IJRE ET CONSERVER CES INSTRUC770NS
IiAVERTISSEMENT :
Lorsque xous utilisez l'appareil, obserxez
to/ljonI's certaines prOcautions de base,
notalDiDent :
•N'utilisez I'appareil que pour son ttsage
pr6vu, colmne d_crit dans le present
nlannel.
• Installez le r6frig6rateur int6rieur/
ext6rieur conform6ment aux directives
d'installation avant de I'utiliser.
• Ne laissez pas les enfants grimper,
s'asseoir, se tenir debout ni se pendre
aux clayettes du r6frig6rateur int6rieur/
ext6rieur. Ils pourraient endommager
le r_flig_rateur et se blesser gravement.
•N'enweposez et n'utilisez pas d'essence ou
autres vapeurs et liquides inflammables
proximit6 de cet appareil ou de tout autre
appareil 61eca_om6nager.
• l_doignez les doigts des parties du
r6frig6rateur oiJ I'on peut facilement
se pincer : les espaces entre les portes
et entre les portes et ]es placards sont
toujours _troits. Soyez prudent lorsque
vous fermez les porms de l'appareil en
presence des enfants.
• D6branchez ou fermez votre r6frig6rateur
int6rieur/ext6rieur avant de le nettoyer et
de le r6parer.
REMARQUE :Nous xous recommandons
xixement de confier toute r_paration _
un technicien qualifi_.
• Avant de remplacer une ampoule grill6e,
le r6flig6ramur int&ieur/ext6rieur doit
&tre d6branch6 afin d'6viter tout contact
avec un fil sons tension. (Une ampoule
grill_e pent se briser pendant l'op_ration).
DANGER : tUSQUES POUR ENFANTS
Les enfimts pris an pi&ge on morts
d'asphyxie sont totoonrs d'actualit&
Les appareils de r_flig_ration abandon_s
sont to//iours aussi dangereux, re&me si
on n'attend que "quelquejours" pour
s'en d_barasser. Si wins ne gardez pas
w)tre ancien appareil, veuillez suivre
les directixes ci-dessous afin de pr_venir
les accidents.
Avant de vous ddbarasser de votre vieux
appareil de r6frigdration :
* D&nonmz les porms.
*Laissez les clayettes en place afin
d'emp&cher les enfants de grimper fi
l'int_rieur.
RF 7 (;ERANTS
Tons les appareils de r_flig_ration
contiennent des refligerants qui,
conform&nent aux lois f_d_rales, doivent
&tre enlev_s avant toute _limination de
l'appareil.
Si vons vons d_barrassez de vieux appareils
de r_flig_ration, v_rifiez, aupr&s de la
soci_t_ qui s'occupe de lent _limination,
ce que vous devez faire.
IMPORTANT SAFETY INSTRUCTIONS
HOW TO CONNECT EI 2CT RICITT
AWARNING:
THIS PRODUCT MUST BE CONNECTED TO A POWER SOURCE WITH
GROUND FAULT CIRCUIT INTERRLIPT (GFCI) PROTECTION WHEN
INSTALLED IN AN OUTDOOR LOCATION. LOCAL CODES MAY REQUIRE
A SEPARATE CIRCUIT.
IF YOU ARE UNCERTAIN ABOUT THE GFCI PROTECTION ON THE POWER SOURCE TO WHICH YOU ARE
CONNECTING THIS APPLIANCE, PLEASE CONTACT A PROFESSIONAL ELECTRICIAN FOR VERIFICATION.
Refrigerator MUST be plugged into a
functioning GFC1 circuit. Test your circuit
by pluggdng your refligerator into the
outlet and pressing the test button fbr that
circuit, verifkdng that tile unit turns off
(the light will not work with the door
open). Then press the Reset button and
confirm that the light comes on with the
door open. If you do not know if you have
a GFCI circuit, contact a qualifie({
electrician fbr assistance.
Do not place the unit in standing water or
allow the power cord to be immersed.
Do not, under any circumstances, cut or
remove the third (ground) prong from
the power cord. For personal safety, this
appliance must be properly grounded.
The power cord of this appliance is
equipped with a 3-prong (grounding)
plug which mates with a standard 3-prong
(grounding) wall outlet to minimize the
possibility of electric shock hazard flom
this appliance.
Haxe tile electrical outlet and circuit
checked by a qualified electrician to make
sure the outlet is properly grom_ded.
Where a standard 2-prong elecnical
outlet is encountered, it is your personal
responsibility and obligation to have
it replaced with a properly grounded
3-prong wall outlet.
The appliance should always be plugg>d
into its own indixidual electrical outlet
which has a voltage rating that matches
the rating plate. This provides the best
perfbrmance and also prevents o_vrloading
house wiring circuits which could cause a
fire hazard flom overheamd wires.
Nexer unplug an appliance by pulling on
the power cord. Always grip the plug firmly
and pull straight out flom the outlet.
Repair or replace immediateb all power
cords that hme become flaved or otherwise
damaged. Do not use a cord that shows
cracks or abrasion damage along its length
or at either end.
When moving the appliance, be carefld
not to roll o_er or damage the power cord.
DO NOT USE AN ADAPTF2R PLUG OR EXTE NSION CORD
(Ad@ter plugs not permitted in Canada)
Do not use an adapter plug to connect the
refligerator to a 2-prong outlet.
Do not use an extension cord with this
appliance.
SAVE THE\SE INS 7R UC770NS
INSTRUCTIONS IMPORTANTES DE SECURITE
RA CCORDEMI ;N7 C7't QUE
&AVERTISSEMENT •.
CE PRODUIT DOlT I_TRE CONNECTI_ A UNE SOURCE D'AI./MENTATION
h DISJONCTEUR DE FUrFE h LA TERRE, EN CAS D'INSTALLATION EN
PLEIN-AIR. LES REGLEMENTATIONS LOCALES PEUVENT EXIGER UN
CIRCUIT DISTINCT.
EN CAS DE DOUTE SUR LA PROTECTION ASSURI_E PAR LE DISJONCTEUR DE FUITE A LA TERRE SUR
LA SOURCE D'ALIMENTATION _ALAQUELLE VOUS CONNECTEZ CET APPAREIL, VEUILLEZ FAIRE VI_RIFIER
L'INSTALLATION PAR UN ELECTRICIEN PROFESSIONNEL.
Vous DEVEZ braJacher votre r&frig&rateur a tm
drcuit avec interrnpteur de dSfaut h la terre.
Essavez wm'e circuit en branchant _tre
rOffigOrateur darts la prise et en appu_;mt sur le
bouton d'essai pour ce circuit, en vous assm'ant
que le rg_fligg_rateur ne recoit plus de courant
(la lumibre du rg_tifgg_rateur ne s'allume pas
quand wins ouvrez la poiqte). Appuyez ensuite
sur le bouton Reset (remise 5 zg_ro) et v&_ifiez
que la lumibre s'allume quand vous ouvrez la
pox_e. Si x_ms ne savez pas si votre drcuit est
(_quip(_ d'tm interrupteur de d_fimt a la terre,
demandez fitm (_lectricien qualifi(_ de vous aide_:
N'immergez jmnMs votre appaxeil daaas
de Feau, ni son cordon d'alimentafion.
Ne coupez ni refirez en aucun cas la troisi&me
broche (raise a la terre) de la fiche dn cordon
d'aJtimentafion. Pour votre s_curit_, cet appaxeil
doit 6tre correctement mis/_ la terre.
I,e cordon d'alimentation de cet appareil est
mtmi d'mre fiche fi 3 broches (raise _ la terre)
qui se bnmche dans tree prise mm'al ordinaire
5 3 alvgu_les (raise 5 la terre) pour rg_duire au
minimum les risques du chocs (_lectriques.
Faites examiner la prise de com'ant et le circuit
par un (_lectricien qualifi(_ pour _ous assm'er
que la prise est correctement raise 5 la terre.
Si la prise de courant est du t)pe standard 5
2 alvOoles, il vous incombe de la fidre remplacer
par une prise a 3 alv&>les correctement raise
a la terre.
L'appareil dolt toujoul_ &tre branch(4 darts
sa propre prise de courant, dont la tension
nominale est Mentique 5 celle indiqug_e sur
la plaque signal&ique.
Cette prg_caution est recommandg_e pore"
garantir un rendement optimmn et &'iter
tree sm'cha_ge des circuits (_lectriques de la
rg_sidence, ce qui pourrait crg_er un risque
d'incendie par surschaufle des ills.
Ne dObranchezjamais l'appareil en tirant le
cordon d'alimentation. Saisissez temrement la
fiche du cordon et tirez droit pour la retirer
de la prise.
Rg_parez ou remplacez immg_diatement tout
cordon ettih)ch_ ou endommag& N'utilisez pas
tm cordon fbndill(_ ou prg_sentant des signes
d' tlStlre.
Lorsque xous dg_placez l'appareil, fidtes
attention de ne pas la fhire rotder sin" le cordon
d'alimentation afin de ne pas l'endommager.
NE PAS U77LISER DE FICHE D'ADAPT3TION OU
DE CORDON PROLONGAT TUR
(PTchesd'a&q)tation non p_mises au Canada)
N'utilisez pas de fiche d'adaptafion pour
brancher le i'(_frig_rateur darts une prise fi
2 broches.
N'utilisez pas de cordon I)r°hmgateur, avec
cet appareil.
CONSER VEZ CES DIRl'2C77VES
8
Controls and Features
Ouldoor/l_door I¢_(/rig'eralor
7 mperature
control The temperature display shows tile actual
temperature of the outdoor/indoor
refligerator. The actual temperature may
vary slightly fiom the set mmperature
based on factors such as door opening,
amount of food and outside temperature.
To change the temperature setting, press
the _\;-KRMER or COLDER pads until yon
reach the desired set temperature. After
several seconds, the display will return to
the actual temperature.
Allow 12-24 hours fbr the outdoor/indoor
refligerator to reach the temperature that
you have set.
TEMP. CONTROL
WARMER COLDER
Temperature Settings
Minimum: 34°F (1.1°C)
Maximum: 45°F (7.2°C)
Child control
lochout This child control lockout feature
prments unwanted changes to your
temperature settings.
After tile desired temperature is set, tile
temperature can be locked. To lock, press
both tile + and - pads at tile same time for
five seconds. To unlock, press both + and
- pads tBr five seconds.
Unit
ON/()I,T This pad stops cooling in the
outdoor/indoor refligeratoi; turns off
tile temperature controls and removes
power to the light circuit.
Press this pad ff)r a mininmm of 3 seconds
to turn the outdoor/indoor refiigerator
OFF fbr long _ acations or absences, or
when cleaning the unit or changing tile
light bulb. Press the pad again to turn the
outdoor/indoor refligerator ON.
Key ejecting
loch Keep the keys out of reach of children.
Store the keys in a safe place.
Keys for the spring-loaded lock are
automatically ejected. Keys will not
remain ill tile lock while the door is
opened or closed.
NOTE: Two keys are included.
CAUTION: Beforeclosingthe
door, make sure tile lock pin does not
protrude beyond the top of the door, m
prevent potential damage m the cover
or cabinet W.
Interior fan The inmrior fan is located in tile rear wall
of tile outdoor/indoor refrigerator and is
designed to run continuously to help
maintain the proper cooling temperature.
The interior t:an will only turn off when
the door is opened.
Controls and Features
Outdoor/Indoor I¢_/rig'eralor
Glass shelves Tempered glass sheEes in the outdoor/
indoor refligerator are remo_ able for
easy cleaning or for storing larger items.
To remove a shelf, open the door
completely to aw)id potential damage
to the gasket. Lift up on the back of the
shelf slightly. Tilt the shelf m one side
at an angle while pulling forward.
Appearance may vary
To replace a shelf, open the door
completely to aw)id potential damage
to the gasket. Tilt the shelf to one side
at an angle and slide toward the back wall,
placing one side onto the shelf support.
Place the other side onto the opposite
shelf support. Ensure rear locking tabs
are engaged. When installed properly,
the shelf will not slide forward when
gently pulled.
/
To remove, lift up on the back
ofthe shelf Tilt the shelf at an angle while
removing or replacing Place in slots when replacing
the shelf
QuichSpace '_'
Shelf
This shelf splits in half and slides under
itself for storage of tall items on the shelf
below.
Step 1: i,ift the back edge of the flont half
of the shelf.
Step 2: Pull slightly forward.
Step 3: i,ower the back edge of the Dont
half of the shelf while sliding it underneath
the back half.
The entire Quick Space shelf can be
remoxed and replaced (see (-;lass Shehes
section).
Step 3
10