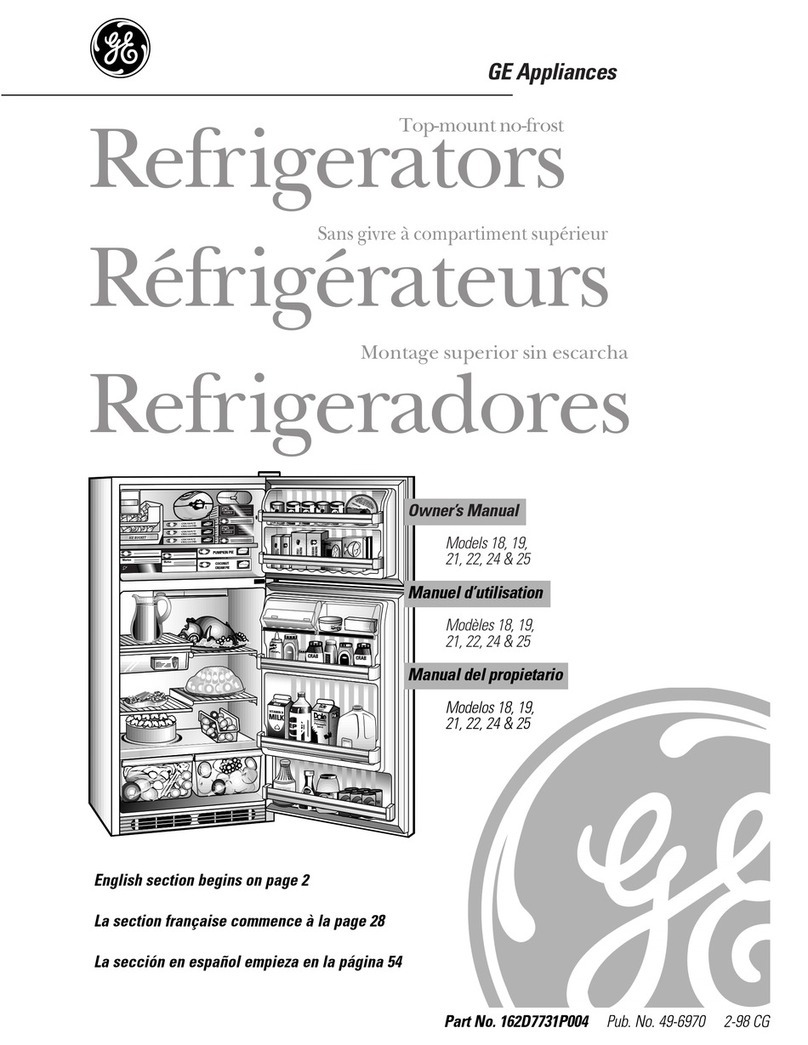
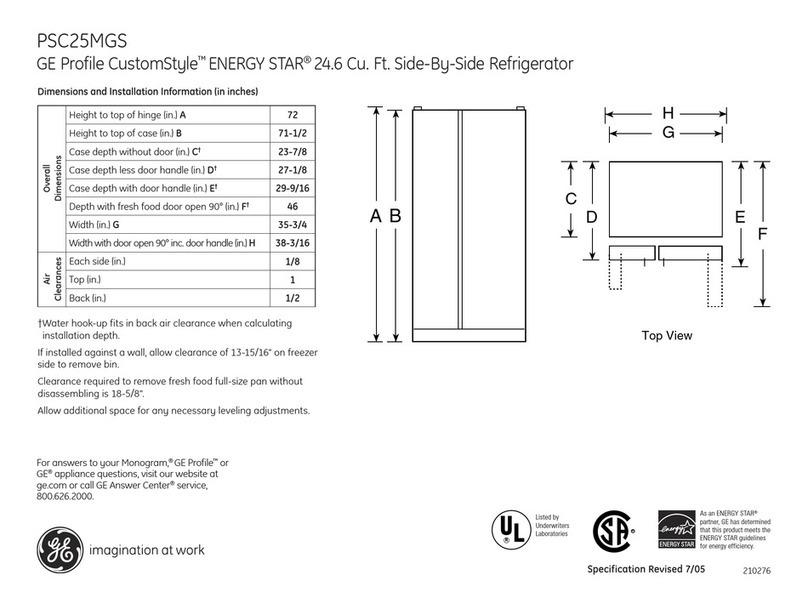
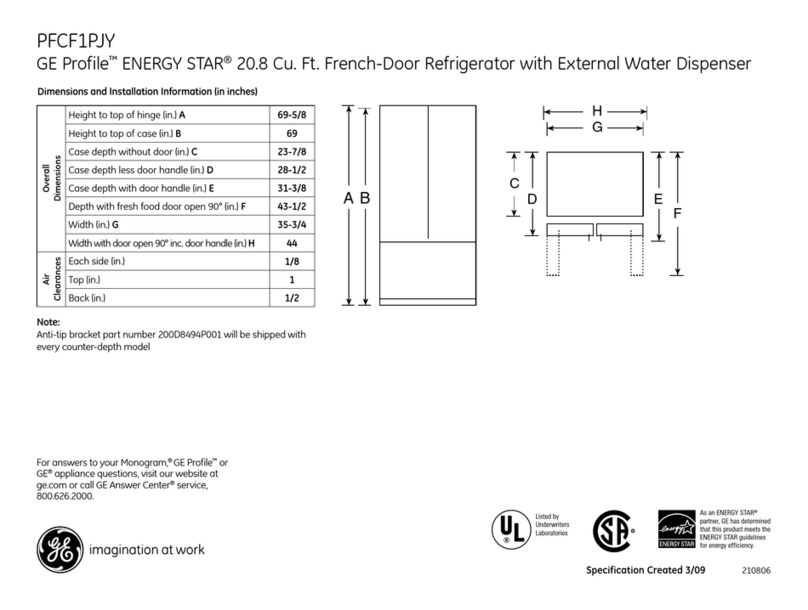
GE TBH22RP User manual

ApplianceRegistration 2PowerSaverSwitch 6
BaseGrille lfj Porta-Bins 8,9
ConsumerServices 19 ProblemSolver 16,17
Careand (leaning 13,14 QuickServeT”System 9
Energy-SavingTips 2QuickStore
FoodSaverSystem 10 Repair Service J
FoodStorageSuggestions 7SafetyInstructions 3
StorageTimes 7Shelves 8,9
Ice Dispenser 4,~StorageDrawers 10-12
Icemaker 4,5 Drawer&CoverRemoval 12
Installation 14,15 Take-outCenter
Adapter Plug 14 Temperature Controls -:..
AdjustableRollers 15 .Vacation&MovingTips 14 ,
Clearances 15 Warranty BackCover
ElectricalRequirements 15,16 WaterFilterAccessory 5
ExtensionCo;d 16
Grounding 15,16
Location 16
LightBulbReplacement 14 GEAnswerCenfera
Modeland SerialN’umbers 28U7,626.2LU.UI
Models m
‘1’Bxzm. ~
TBX?5R ?
TB~
TB
P
with Ice Dispenser

Rtb
It is intendedto help you operate
and maintainyour new refrigerator
properly.
Keep it handyfor answersto your
questions.
If you don’tunderstandsomething
or need morehelp, write (include
yourphone number):
ConsumerAffairs
GE Appliances
AppliancePark
Louisville,KY 40225
wdtmodela
se
m.
You’llsee them on alabelon the
left side,near the top of thefresh
food compartmentor at the
bottom,just inside the fresh food
compartmentdoor.
These numbers are also on the
Consumer Product Ownership
RegistrationCard that came with
your refrigerator.
Before sendingin the registration
card, please write these numbers
here:
MN
SN
Use these model and serial
numbers in any correspondence
or service calls concerning your
refrigerator.
Myreceivedadamaged
Immediately contact the dealer (or
builder) that sold you the
refrigerator.
m-d.mo
B&M%?
you! K?ser
Check the Problem Solver on
pages 16 and 17, Itlists causes of
minor operaling problems that yOLI
can correct yourself.
2
*Locationof yourrefrigeratoris
important.Avoidlocatingit next to
yourrange,aheatingventor where
the sun willshinedirect.yon it.
~Don’t openthe doorsmore often
than necessary.
eClosethedoorsas soonaspossible,
particularlyinhot,humidweather.
*Keep power saverswitch in
the power saversettingunless
moistureforms on theoutside
of the refrigerator.
oBe sure the doors areclosed
tightly.Before leavingthe house
or retiring for the night,check to
be surethe doors haven’tbeen left
open accidentally.
~Store only those foodsrequiring
refrigeration in your refrigerator.
~Wipe moisture frombottles and
cartons before puttingthem in the
refrigerator.
~Keep foods covered to reduce
moisture buildup insidethe
refrigerator.
*If you turn the controlsto the
coldest position for quick chilling
or freezing, be sure to turn them
back to regular settings.
~Don’t overcrowd your
refrigerator. Overcrowding can
require extra electrical energy to
keep everything cool.
TOobtain service,seethe
ConsumerServicespage in the
back of this book,
We’reproud of our serviceand
want you to be pleased.If for some
reason you are nothappy with the
serviceyou receive,here are three
stepsto follow for further help.
FUIST’,contactthe people who
servicedyour appliance.Explain
why you are not pleased.In most
cases,this will solvethe problem.
NEXT, if you are stillnot pIeased,
write all the details—including
your phone number—to:
Manager, ConsumerRelations
GE Appliances
AppliancePark
Louisville, Kentucky 40225
FINALLY,if your problem is still
not resolved, write:
Major ApplianceConsumer
Action Panel
20 North WackerDrive
Chicago, Illinois 60606
--
—
.—

ReadWbeforeusingthis
IVAIW!+JIH$JG-Whenusingthis
appliance,alwaysexercisebasic
safetyprecautions,includingthe
following:
@Use this applianceonlyfor its
intendedpurposeas describedin
this Use and B
oThis refrigeratormust be
properlyinstalledin accordance
withthe InstallationInstructions
beforeit is used. See grounding
instructionsonpages 15and 16.
*Never unplugyour refrigerator
by paling& %i power cord.
Always gripplug firmly andpull
straightout from the outlet.
@Repair or replacehmnediately
dilelectric service cords that
have becomefrayed or otherwise
damaged. Do not use acord that
shows cracksor abrasion damage
along its Iengthor at either the
plug or connectorend.
eDo not allow ehikhwnto dimb5
stand or hang on the shelves in
the refrigerator.They could
damage the refrigerator and
seriously injure themselves.
eM’teryour refrigerator is in
operation?do not touch the cold
surfaces, particularly when
hands are damp or wet. Skin may
eWhen moving your
refrigerator’away fromthe
wall,be carefulnot to ro!iover
or damagethe power cord.
eDON9trefreezefrozenhods
which havethawed completely.
The UnitedStatesDepartmentof
Agriculturein Home and Garden
BulletinNo. 69 says:
“...You may safely refreezefrozen
foods thathave thawed if they still
containice crystals or if they are
stillcold—below40”F.
“...Thawed ground meats,
poultry or fish that haveany off-
odor or off-color shouldnot be
refrozen and should notbe eaten.
Thawed ice cream shouldbe
discarded.1fthe odor or color of
any food ispoor or questionable,
get rid of it. The food maybe
dangerousto eat.
“Even partial thawing and
refreezing reduce the eating
quality of foods, particularly
fruits, vegetables and prepared
foods. The eating quality of red
meats is affected less than that of
many other foods. Use refrozen
foods as soon as possible to save
as much of their eating quality as
you can.”
oHyour old refrigeratoris still
aroundthe housebut not in
use9be sure to removethe
doors.This willreducethe
possibilityof dangerto children.
~Unplug your refrigerator:
A. Before makingany repairs.
Note:We stronglyrecommend
that any servicingbe performed
by aqualifiedindividual.
B. Before cleaning.
C. Before replacingaburned-
outlight bulb, therefrigerator
shouldbe unpluggedin order
to avoid contactwith alive
wire filament. (Aburned-out
lightbulb may break when
being replaced.)Note: Turning
controlto OFF positiondoes
not remove powerto the light
circuit.
@Do nstore or use gasoiine or
other fkmmalde vapors or
liquids in the vicinity of this or
any other appliance.
adhere to theseextremely cold
surfaces.
UIOnce you haveremovedtheice
cubestoragecontainerfromyour
refrigerator,do notplacefingersor
handson theautomaticicemaking
whilethe
isphqggedin.Thiswillhelpprotect
you frompossibleinjury.It willalso
preven{interferencewith themoving
parts of the ejector mechanism, or
with the heating element that
releases the cubes.
.
——-...-—-. ..—....— -.... . --- -—..---......— —.—...—..
.-- ------- m“- -- -=- -

HOW k@im’dKer
aIDiw
Yourrefrigeratorhas WIautomatic
icemakerand adispenserthat
dispensesicecubesand crushedice
throughthefreezercompartment
door.Here’show they work.
When the selector switch is set at
ICE ‘CUBES...
(1) Automatic Icemaker fills the
(2) ice storage bin.
(3) Pressure on ice cradle activates
(4) motor-powered auger and feeds
cubes into glass through the
(!5)chute.
When the selector switch is
moved to CRUSHED ICE, a
baffle in the housing channels
cubes through the
(6) crusher and crushed ice falls
into the glass through the chute.
Spills arecallght in a
(’7)recessed area.
water is supplied autonlatica~iyto
the icemaker by asolenoid valve.
Aconnection to the household
colclwater system is all that’s
needed.
.——-— .
F
~Your imnaker willpnwhw an
averageof eight cubes per eyck-
approximately120cubesin a24-
hourperiod—dependingOnfreezer
compartmenttemperature,room
temperature,numberof door
openingsand other useconditions.
~htermittent dispensingdice is
normal.If ice flow interruptionis
more than brief, ice clumpsmay
be the cause and shouldbe
removed,following instructionson
page 5.
@Avoidoverfilling gkis$with ice
and use of narrow or extra-tall
glasses.Backed-up ice canjam the
chute or cause the doorin the
chute to freeze shut.Periodically
open the freezer compzulmentdoor
and look down into the chute. If
ice is blocking the chute,poke it
through with awooden spoon.
~TOhelp keep bits ofice from
being sprayed beyond.the g~aw9
place glass close to ice chute—
but not so close thatit blocks
outcoming ice.
*Ice should not he dispensed
into thin glasses, fine chha or
delicate crystal—theycan crack
or chip from the combined
pressure of your hand pressing
them against the cradle and ice
dropping into them.
~Ice should be dispensed before
filling glass with beverage. This
will prevent splashing, which is
annoying and which, if the sPlash
reaches the ice selector switch,
could cause it to stick 01-bind.
QBeverages and.foods should not
be in the ke
storage bin. Cans, bottles or food
packages in the storage bin may
cause the icemaker to malfunction.
aIce othel”tka.n that produced
by yokn’ieemakel” shmdd. not be
ad&d $0$heice storage bin—it
may not crush Oi”dispense well.
B‘Y
ken-lakera
If yourrefrigeratoris operated
beforethe waterconnectionis
made,removetheice storagebin
and make suretheicemakerfeeler
arm is in the Ol?F(up) position.
Toremove the ice storage bin, Ii
the front of thebin and pullthe bi
straightout while supportingit at
front and rear.
ft
n
‘lb replace the ice storage bin:
Slide it back on the ice bin shelf. If
the bin does not go all the way
back, remove it and rotate the
drive mechanism 1/4turn.
Then push the bin back again.
—.—.
——

VVhmwasupply hasbeen
connected to the icemak;
remove the ice storagebin,move
theicemaker feeler arm to theON
(down)position,andreplacethebin.
The ice cube mold autonmlically
fillswith water after coolingto
freezing temperatures.Firstcubes
normallyfreeze after severalhours.
NOTE: With anewly-installed
refrigerator,allow about24 hours
for freezer compartmentto cool
down to proper icemaking
temperatures.
O~C~ %?OU~
ke
hi
The icemaker ejects cubesin
grof eiThrow away first
few batches (16 or 24 cubes).This
flushes away impuritiesin the
water line. Do the same after
vacations or extended periods
when ice isn’t used.
c
Under rare circumstances,
ice cubes may be discolored,
usually with agreen-bluishhue.
This unusual discolorationis
apparently due to several
factors, such as certain
characteristics of local waters,
household plumbing and the
accumulation of copper saltsin
an inactive water supply line
that feeds the icemaker.
Continued use of such
discolored ice cubes may be
injurious to health. If such
discoloration is observed,
discard the ice cubes and
contact youI*CJEFactory
Service Center or an authorized
Customer Care(@Servicer.
‘m dkp?mw
Set the selector switch on frontof
fi.eezercompartment door to ICE
CUBES’or CRUSHED ICE.
4
Grip theglasswarefirmlynear the
rim and pressrim gentlybut firmly
againsttherubber-cushionedcradle.
Some crushed icemay be
dispensedeventhoughyou
selectedCUBES.Thishappens
occasionallywhenafew cubes
accidentallygetchanneledto the
crusher.
Sometimesamoundofsmw will
form onthe doorin theice chute.
This conditionis normal,and
usuallyoccurswhen you have
dispensedcrushedicerepeatedly.
The snowwilleventuallyevaporate.
CAUTION: Never put fingers
or otherobjectsintothe ice
musher disdmge opening.
Tostop dispensing:
Releasepressurefrom cradle and
withdraw slowlyto catch lastbitsof
ice or dropsof water.
Some slightdrippingmay occur
followingdispensingof crushed ice.
Excessive spillsshouldbe wiped
dry immediately.
Do not pour water in the spill
shelf because itis not self-
draining—pourit in kitchen sink.
The shelf and itsgrilleshould be
cleaned regularlyaccordingto
instructionson page 13.
Hkdumps storage bin:
Infrequentusageof ice can cause ice
clumps to form in the storagebin,
resulting in temporary malfunction
of the dispensermechanism. If this
happens:
~remove the storagebin from the
freezer umlpallment
~break LIpice c]Lmlpswith
fingertippressureand discard
remainingclumps
~replacethe bin beforeremaining
cubesmelt and fusetogether
It’ice is not used frequently,old
icecubes will becomecloudyand
tastestale. Empty the ice storage
bin periodicallyand wash it in
luk~warmwater.Be sureto allow
the storagebin to dry before
replacingit—--otherwiseice cubes
may stickto the metal auger.
If the doors arenot opened
regularly9the ice cube freezing
rate will be reduced.
Move the kemaker feeler arms
to the OFF (up)positionwhen:
ehome water supplyis to be turned
off for several hours
~ice storagebin is to be removed
for aperiod of time
~going away on vacation, at which
time you shouldalso turn off the
valve in the water supplyline to
your refrigerator
If this is your first kemaker,
you’ll hear occasional soundsthat
may be unfamiliar.They are
norrna.1icemaking sounds and are
not cause for concern.
wFiner Accessory
Yourice cubes can only be
as clean and fresh-tasting
asthe water thatproduces
them.That’swhy it’sa
goodidea to purifyyour
water with awater filter.
Its activatedcharcoal
removesmusty,staleodors
and unpleasantmedicinal,
metallictastes. Aporous
fibercartridge catchesdirt,
rust particles, sand and silt;
specialcrystalsreduce
depositsof hard scale.
The water filter is an w
option at extratcostand is availabh
from your GE dealer.Specify
WR97X)214. It has cornple~e
installationinstructionsand install
in minutes on U4°O.D. copper
water line.

c.
Two controlslet you regulate
temperaturein the fresh food and
freezercompartments.
Hthe temperature controlsin
your refrigeratorhave letters
and numbers, initially setthe
freezer controlat “C” and the fresh
food controlat “5.”
4d
11<
E“
D“
ISC
CE
~
5IS
9C
The freezer control has settings
from “A” (the warmest) to “E” (the
coldest). The fresh food control
has settings from “1” (the
warmest) to “9” (the coldest).
Hthe temperature controls in
your refrigerator have “COLD/’
“NORMAL” and “COLDER”
settings, initially set the freezer
and fI”cshfood controls at the
ccntcr of the “NORMAL” range,
ICNC
%3ii
m
FRCX
IFRF
‘Witheither totemperature
controls,turning or movingthe
freshfood controlto “OFF”
stops coding in both
uxfood and
freezer—butdoes not shutoff
power to the refrigerator.
IIMPORTANT: Allow24 hours
for the temperatureto stabilize,
whether you are settingthe
controlsfor the firsttime or
adjustingthem later.Then,if you
wantcolderor warmertemperatures
in eithercompartment,adjustthe
controlsone step atatime.
How to test temperatures
Use the milk test for the fresh
food compartment. Place a
container of milk on thetop shelf
in the fresh food compartment.
Check it aday later.If the milk is
too warm or too cold, adjustthe
temperature controls.
Use the ice cream testfor the
freezer compartment. P1acea
container of ice cream in the center
of the freezer compartment.Check
it after aday.If it’stoo hard or too
soft,adjustthe temperaturecontrols.
Always allow 24 hours for the
refrigerator to reach the
temperature you set.
If you mm y
b(a
n
.you may want to move the
freezer control one step colder.
Cooler temperatures in the house
may cause the compressor to
operate less frequently, thus
allowing the freezer compartment
to warm somewhat. To protect
your frozen food supply,leave the
freezer setting at this colder setting
for the entire winter or for as long
as you keep yoLIrthermostat
tLmlecldown.
Moving the freezer control to a
co[del”setting should have no
effect on yoLwfresh food
cc>lll]>:~~mt]~le~lt.However, if freezing
OCCLII-S.move the fresh food
controlone stepwarmer.
When you stopturningthe
thermostatdown,turn the
refrigerator’scontrolsbacl<
regular settings.
Power saver s
to their
The power saverswitch is located
on the temperaturecontrolpanel.
To reduce the amountof
electricityrequiredto operate
your refrigerator,push switch to
the POWER SAVERsetting.
This turns off theheater in your
refrigerator thatpreventsmoisture
from forming on the cabinet
surfacebetween the doors.
With the heaterturned off,there is
achance that moisturemay form
on the outsideof your refrigerator,
especially when the weather is
humid. The humidityis most likely
to be high in the summer,in the
early morning hours, and in homes
which are not airconditioned.
Over an extendedperiod of time,
moisturethat forms on the cabinet
surface may cause deteriorationof
the paint finish.It will be important
to protect the finishby using
appliance polish wax as described
on page 13.
Move the power saver switch
from the POWER SAVER
setting and electricity flows
through the low wattage heater
which warms the cabinet surface
between the doors. Under most
conditions, this prevents the
forming of moisture or water
droplets.
Nodefrosting
It is not necessary to defrost the
freezer or fresh food compartments.
Although your refrigerator is
designed and equipped to defrost
itself automatically, some frost on
packages is normal.

sugstt
fapm
DAYS M
IN
EaJ3EFI?IGERATOFIFJIEEZER
ats4(
FMeats
R(&L.5 6
R(& V .54 8
S(...5 6 t
C(...5 6 9
C(...53 4
G& S M.2 3 4
VM...23 4
S(..21 2
P
B....
1
Frank
‘
f(...
1 2
(...51 2
(...
1 2
LM..5F
S(..
r
S(& S m
CM
MD..42 3
G&MB..22 3
P
C&T(2
C(..29
T(..26
D&G(.2
G....2:
P
P(wB26
P(NotCovered)..........3to41
CookedPoultryD.44 6
FC.t.44
&pOUIWY)FREEZER
Mfveg
2months
Lf.....m
Ffrb
s s c ..
months
Cpsa
Ie
c(c..m m
Ktechniquesareconstantlybeing
developed.ConsulttheCollegeor County
ExtensionServiceoryour localUtility
Companyfor thelatestinformation on
freezingandstoring foods,
*U.S.DepartmentofAgriculture
Meats. fishand pmdtrypLmhased
from [k storevary in qLuNityand
ag.c;conscqLlently,safe storagetime
inyour refrigeratorwill vary.
/-2~ Tost(lE”euB2fl”ozei11’fi12ats,tlsh211d
K:-;.=’
t“””--’)
oAlways I“cmovc?XOI-Cwrappirigs.
{,-..
<- --
—~
~Rewrapinfoil,filmor waxpaper
andrefrigerateimmediately.
Tostore cheese9wrapwellwith
waxpaperoraluminumfoil,or put
in aplasticbag.
~Carefullywrapto expelair and
helppreventmold.
~Storeprepackagedcheesein its
own wrappingifyouwish.
Tostore vegetables,usethe
vegetabledrawers—they’vebeen
designedto preservethenatural
moistureandfreshnessof produce.
@Coveringvegetableswithamoist
towelhelpsmaintaincrispness.
eAs afurtheraid to freshness,
prepackagedvegetablescan be
storedin theiroriginalwrapping.
Note:Specialjieshfoodcompartment
drawers(onmodelssoequ~ped)make
itun.wcessary10wrapcertainfoohthat
they’vebeendesignedtopwserve.Zhese
drawersaredescribedonpages7and9.
To storeice cream—Fine quality
ice cream,withhigh creamcontent,
willnormallyrequireslightlylower
temperaturesthan more“airy”
already-packagedbrandswithlow
cream content.
oItwillbe necessaryto experimentto
determinethefreezercompartment
locationandtemperaturecontrol
settingto keepyouricecreamatthe
rightservingtemperature.
eThe rearof thefreezercompartment
is slightlycolderthanthefront.
‘rips offoods
Therearethreeessentialrequirements
forefficienthomefreezing.
1.Initialquality.Freezeonlytop-
qualityfoods.Freezingretainsquality
andflavor;itcannotimprovequality.
2. Speed. The quicker fruits and
vegetables are frozen after picking,
the better the frozen product will
be. You’Hsave time, too, with less
culling and sorting TOdo,
3, Proper packaging. Use food
wraps designed especially for
freezing; they’re readi~yavailable
at most food stores.
‘1%fmfish and poultry,
wrap well in freezer-weightfoil (or
otherheavy-dutywrapping
material)formingit carefully to
the shapeof thecontents.This
expelsair.Fold and crimp ends of
thepackage to provideagood,
lasting seal.
Don’trefreeze meat that has
completelythawed;meat, whether
raw or cooked,can be frozen
successfullyonlyonce.
Limit freezing offresh (unfrozen)
meats or seafoodsto 22 pounds at
atime.
FUm%mienceee.
oStorelike thingstogether.This
savesboth timeand electricity
because you can find foods faster.
6Place the oldestitems up front so
they can be used up promptly.
~Use shelves orbins on the door
for most often used sauces and
condiments.
eUse the meat drawer, on models
so equipped, for temporary storage
of meats you do not freeze.
TsmWkixgy
andhod c
~Cover moist foods with tight lids,
plastic film or foil.
S+Leaf vegetables and fruits placed
in drawers will last longer when
stored in closed plastic containers
or wrapped in plastic film.
eDo not overload your fresh food
or freezer compartment with alot
of warm food at once.
~Open the door the fewest times
possible to save electrical energy.
~When going out of town
for several days, leave as few
perishables as possible in the
refrigerator. If your refrigerator
has an ice~a.ker, move the icemaker
feeler arm to the OFF (up) position
and shutoff water to the refrigerator.
F7
—.
‘rake-out mwists da lb remove the utilityCmpamem
Akemkr,an IceDispenser raisetheinnerdoorpartway,liftthe
and aspecialTake-outCenter compartmentandtakeit out.Note:
mnpadmmt withitsowndoortk$ ~Eopenedfully,theinnerdoorwill
honl=acoukrwhenyou~wn~ k’Jqinterferewithremovalof the utility
2
~&t% compartment.
Tac
Frequentlyuseditemsstoredon the
freshfooddoorarereadilyaccessible
withouthaving to open the main
refrigerator door.
TheT&e-outCounterprovidersanextra
worksurfacerightattherefrigerator.
Although durable,stain- and
scratch-resistant,the work surface
on the Take-outCounter shouldnot
be used as acuttingboard. Sharp
utensilscan damageit.
Cold air enteringfrom the freezer
compartmentkeepsthe temperature
in the Take-outCenter at proper
food-keepinglevels.
To open the Take-outCenter door,
lift the door handleand pull down.
Close the door after use.
IL—
/
M
Shelvesinthefreshfood andfreezer
compartmentsareadjustablein any
combination,enablingyou to make
efficientshelfarrangementstofit
yourfamily’sfoodstorageneeds.
/--—
—
-3fl
~————
TP1[
The Take-out Center is also
accwssib]ethroLlghalift-up door on
[hc inside of the fresh food door.
TUttmy
some models)
Tl~eutility compartment provides
on extra ICVC1of storage in the
Tah-out Cmtcr. }70Ucan slide ii
i.ronlside to side [0 suit your
stor;l~!-(!nlxds.
o
,Op I
cI /
❑
P
To replacetheutilitycompartment,
raisetheinnerdoorpartway.Then
insertitstoplipintotheslotatthe
topof theTake-outCenter.Lowerits
bottomgrooveontothePorta-13in’s
rim.Slidetheutilitycompartmentto
thedesiredlocation.
TacPorta”m-1.
This Porta-13inhas aspecial lip
that overlaps the Take-outCenter.
It is not interchangeablewith the
other door bins. To remove it, first
remove the utility compartment.
Then open the Take-outCenter
door to free the lip.
P
Raise the inner door and lift the
bin straight up until the hooks on
the bin come out of the tracks on
the door.
When yOLIreplace it. make sure the
T’akc-outCenter door is open so
the lip is positioned properly.
To remm shelves:Tilt shelf up
at front, then lift it up and out of
tracks on rear wall of refrigerator.
,Iplll
-
lb replace shelves: Select desired
shelf height. With shelf front raised
slightly,engage top lugs in tracks
at rear of cabinet. Then lower front
of shelf until it locks into position.
—.

..3
(contin~fd
(&sB
This removabletilt-outbin made of
Lexan@polycarbonateresin can be
locatedon the freshfGGdor freezer
compartmentdoor.It has been
designedfor convenientstorageof
thosefrequently-useditems that do
notfiteasilyintoaPorta-Binorsocm-
to-be-useditemsthatrequirecovered
storageto keep from drying out.
❑UP
l-+,
-%?
,,I—\ \\ I II
-II“II
To open, push the latch up and
pull the bin handle forward.
To remove the bin, lift it up and
outof the bin housing.
To relocate the oukk Woreunit,
lift the bin housingup and out of
the slots on the door,move it to
the desired new location, and
lower the hookson the housing
into the slotson the door.Youdo
not have to removethe bin from
the housing when relocating the
Quick Store unit.
Quickss
cc)oking-servin~-storage dishes
with sealable, durable lids fit into a
space-saving, under-the-shelf rack.
Dishes can be removed from and
returned to the rack as needed, and
the rack (and shelf to which it is
o[tacheci)cm be relocatedanywhere
in the fresh fGGdcompal”tment.
Dishes and lids are safe for use in
nlici.OWaVeovens. refrigerator-s,
frw.zcrs, and are dishwasher-safe.
Quick ServeTN1dishesonly are safe
for use in conventionalovensat
temperaturesup to 400°F.
CAUTION:
UILids cannot withstandthe heat
generatedin Conventionalovens.
~Dishes and lids are not designed
for range top cooking or broiler
use. Such use can be hazardous.
PotD
AdjustablePorta-Binscmthe fresh
food and freezer compartment
dom”scan easily be carried from
the refrigeratorto the work area.
TOremove: Lift Porta-Bin straight
up untilmountinghooksdisengage
TOrelocate: Select desired shelf
height, engage Porta-Bin’shooks
in slotscmthe tracks of the door,
and push in and down. Porta-Bin
will hook in place.
Snuggers are designed to give you
storageflexibilityon yourfresh fool
door.Items such as salad dressing:
steak saucesand other condiments
can nowbe keptsecurelyagainsttl
door liner to help prevent tipping,
spilling or sliding.
Place index finger and middle
finger on either side of the snugg
near the front and simply move i
back and forth to fit your needs.
/.
1
d
3,
;
le
er
jer
t
g
.
——
—

S
M
Fr&vegDr
The storagedrawers at the bottom
of the fresh food compartmentare
designedto provide high humidity
levels required by most vegetab~es
and lower humidity levels required
for most fruits.
When replacing the drawers,
always push them all the way in.
Storage time will depend upon the
type of food and its condition
when placed in the drawers.
Excess water which may
accumulate in the bottom of the
drawers should be emptied and the
drawers wiped dry.
MoFD
This refrigerated drawer is
designed to keep unwrapped
foods fresh by retaining thenatural
moisture contentof foods such as:
eA~C~P
“oCoR
oBt0C*R
@B“Gl*
0CoL eT
oC0Pr
0Pg
As in any refrigeratedstoragearea,
it is recommendedthatfoodswith
strongodorsbe storedwrapped—
foodssuch as:
oBeCoP
B0CeT
S0G O
G
Adjustablehumiditycontrolslet
you regulatethe amountof cold air
entering the drawers.
I(.
Slide the control all the way
to the HIGH setting andthe
drawer provideshigh humidity
recommended for most vegetables.
the amtrd all the way to
the LOW setting to providelower
humidity levels recommended for
most fruits.
Frwh m
This refrigerateddrawer is designed
to provide lower humiditystorage
for items such as:
eA0O~S
oAoPs
“GePeS
0M~ReT
aN

(continued)
Drawers at the bottomof thefresh Drawer and cover
food compartmentwill stopbefore
comingall the way out ofthe
refrigerator,to helpprevent
contentsfrom spillingonto floor.
These drawers can be removed
easily by graspingthe sidesand
liftingup slightlywhilepulling
drawerspast the “stop” location.
Toremove drawers and theircover
when the fresh food compartment
door cannotbe openedfully,
follow the procedure at right.
E-
‘
1.Remove the drawer farthest
from the door. 4. Upend the cover,tilt it and take
it out. Ih
h
Slide the other drawer toward
the middle and remove it.
5. Remove the drawer slide.
6. Remove the drawer frame. Lift
the frame off the supports at each
side, pull it forward, upend it, tilt i
and take it out.
3. Reach in, push the front of the
glass cover up and, at the same
time, pull it forward as far as it
will come.
—..— ——
.—

~tOll%li~~ (continued)
To ~*epIace:
1.Lower the frameuntilit rests on
the supportsat each side.
2. Put thedrawer slidebackon the
frame. The slopedend must be at
thefront.
3. Slide one side of the drawer
onto the drawer slide.
4. Move the slideand drawer all
the way to the hingeside untilthe
other side of the drawer rests on
the frame.
5. Slide the other drawer
intoplace.
Replace the glasscover,pushing
its rear edge firmly into the rear
frame channel and gently lowering
the front into place.
MD
Fresh meats are storedbest in the
coldestpart of the refrigerator.
When thisdrawer is placedin the
top 6slots on the left side and the
lever is set at COLDEST,air from
the freezer is forced aroundthe
drawer to keep it very cold.
Youcan move the drawer to any
location for storageof items other
than fresh meats.
Variable temperaturecontrols,
similarin appearance,operate in
the samemanner.
variabletemperature control
lever letsyou regulate the amount
of cold air surroundingthe drawer.
When the lever is set at coldest,
the damper over the opening in the
drawer is fully open to provide the
coldest storage area.
When the lever k set acold, the
damper is fully closed. Normal
refrigerator temperatures will be
maintained.
Variablesettings between these
extremes may be selected.

$
midk3pemerspin shelf
shouldbe wiped dry immediately
topreventspotting,if excessive
spillsoccur.Waterleft on the shelf
may leavedepositsthat you can
removeby soakingthem with
undiiutedvinegar.Youcan also
useamixture of one teaspoonof a
non-precipitatingwater softener
(sL!chas Calgon brand)and water,
or one teaspoon of citric acid
powderper pint of hot tap water.
Soak untilthe depositdisappears
orbecomes loose enoughto rinse
away.Usually 30 minu;es of
soakingtime is adequate.
Avoidusing wax on the spill
shelf and trim.
T-hedoor handles and trim can
be cleaned with acloth dampened
with asolution of mild liquid
dishwashing detergent and water.
Dry with asoft cloth. Don’t wax
handlesor trim.
Keep the finish ckan. Wipe with
aclean cloth, lightly dampened
with kitchen appliance wax or mild
liquid dishwashing detergent. Dry
and polish with aclean, softcloth.
Do not wipe the refrigerator with a
soileddishwashing cloth or wet
towel. These may leave aresidue
that can damage the paint. Do not
use scouring pads, powdered
cleaners, bleach, or cleaners
containing bleach, because these
products can scratch and weaken
the paint finish.
protect the paint finish. The
finish on the outside of the
refrigerator is ahigh quality,
baked-on paint finish. With proper
care, it will stay new-looking and
rust-free for years, Apply acoat of
ki[chen/appliance wax when the
rcti-igeratoris new, and then at
least twice ayear.
AppliancePolish Wax&Cleaner
(Cat. No. WR97.X0216)is available
fromGE Appliance Ruts Mar[s.
clean t-heinside theflx!shfood
and frcompartmentsatleast
onceayear.Unplugrefrigerator
beforecleaning.If thisisnot
practical,wringexcessmoistureout
of spongeor clothwhencleaning
aroundswitches,lightsor controls.
Use warm water and bakingsoda
solution—aboutatablespoonof
baking sodato aquartof water.
This both cleans and neutralizes
odors.Rinse thoroughlywith water
and wipe dry.
Otherparts of the refrigerator—
includingdoor gaskets,meat and
vegetabledrawers, Quick Store
unit on models so equipped,ice
storagebin and all plasticparts—
can be cleaned the sameway.Do
not use cleansingpowdersor other
abrasivecleaners.
To help prevent odors,leave an
open box of baking sodain the rear
of the refrigerator, on thetop shelf.
Change the box every three
months. An open box of baking
soda in the freezer will absorb stale
freezer odors.
Do not wash any of your
refrigerator’s piastieparts in
your autoxnaticdishwasher.
r
shouldbe taken in moving
yourrefrigerator away from the
wall.All types of floorcoverings
can be damaged,particularly
cushionedcoveringsand those
withembossed surfaces.Pullthe
refrigeratorstraightoutand return
it to positionby pushingit straight
in.Moving your refrigeratorin a
sidedirectionmay resultin damage
toyourfloorcoveringorrefrigerator.
c
Formostefficientoperation,you
needto keepthe condenserclean.
Turntemperaturecontrolto OFF.
Removethebase grille-see page
15.Sweepaway orvacuumdust
thatisreadilyaccessibleon
condensercoils,thenturnthe
controlback on. For bestresultsuse
abrushspeciallydesignedfor this
purpose.It is availableat most
applianceparts stores.Thiseasy
cleaningoperationshouldbe done
atleastonceayear.
C
-.

Lmb
Alightbulband socketare
locatedat the top of thefresh
food compartmentoppositethe
temperaturecontrolpanel.
Some modelsalsohave abulband
socketin the upper left corner of
the freezer compartmentbehind a
flexible lightshield.
Toreplace either bulb,unplug
refrigeratorfrom its electrical
outlet, unscrew bulb when cool,
and replace with simikirsize bulb.
wJmR.g(IIR
lb+ extended vacationsor
absences,removefood and shut
offpower to therefrigerator.Clean
the interiorwith baking soda
solutionof one tablespoonof
bakingsoda to onequartof water.
Wipedry.To preventodors,leave
open box of bakingsoda in
refrigerator.Leave doorsopen.
For shorter vacations,remove
perishablefoods and leavecontrols
at regular settings.However,if
room temperatureis expectedto
drop below 60°F.,follow same
instructionsas for extended
vacations.Move icemaker feeler
arm to the OFF (up)positionand
be sureto shut off water supply
to refrigerator.
wym
Disconnectpowercordfromwall
outlet,removeallfood,andclean
anddrytheinterior.Seeure ail
kmseitems suchasgrille,shelves
andstoragepans,by tapingthem
securelyin placetopreventdamage.
Be surerefrigeratorstays in
uprightposition during actual
moving and in van. Refrigerator
mustbe secured in van to prevent
movement.Protectthe outside of
the refrigeratorwith ablanket.
For safety,
this mustbe
pr
The power cord of this appliance is
equipped with athree-prong
(grounding) plug that mates with a
standard three-prong (grounding)
wall outlet (Fig. 1)to minimize the
possibility of electric shock hazard
from this appliance.
TGE
F/BUSE
DONH’, UNDERMW
(XKX.JMS’I’A.I!WES, (WI’
OR REMOVE
(GPRONG FROM
POWER CORD.
uNk@er plug
Becauseof potentialsafetyhazards
undercertainconditions,we strongly
recommendagainstuseof an adapter
plug. However, if you stillelect
to use an adapter, where local
codes permit,aTEMPORARY
CONNECTION may be madeto a
Proper]ygroundedtwo-prongwdl
outletby use of aUL-listedadapter
(Fig.2) availableat mostlocal
hardwarestores.
Have wall outletand circuitchecked
by aqualifiedelectricianto make
sure outletis properlygrounded.
Where i!standard two-prong wail
oLItletisencountel”ed,it is your
ixmonai responsibility and
obligation to have it replaced with
a\3roperly:l-OUndeClthree-prong
w::ll011[1(3(. I
TEMPORARYMETHOD
(ADAPTERPLUGSNOT
PERiWITEDINCANADA)
ALIGNLARGE Pm\
PRONGS/SLOTS 1
@?zJ’11
--e -e
u
~’;y”’ .~
>,_. ~-:Q
h
‘q, “-F-> f
IP
G
~/J FIRMCONNECTION
FBEFORE
The larger slotin the adapter must
be aligned with the larger slotin
the wall outlet to provide proper
polarity in the connection of the
power cord.
CAUTION: Attaching an adapter
ground terminal to the wall outlet
cover screw does not ground the
appliance unless the cover screw is
metal, and not insulated, and the
wall outlet is grounded through the
house wiring. Youshould have
circuit checked by aqualified
electrician to make sure the outlet
is properly grounded.
when discmm!cting the power
cord from the adapter~ always
hold the adapter with one hand. If
this is not done, the adapter ground
terminal is very likely to break
with repeated use.
should the adapter
—.
-.
.-
break, DUSE the p
[.
appliance until aproper grwdnd
has Ibeen$eStabkhxlo

———. k-
G
g$$li!iuOfliCs k
>.
Bofpotentialsafetyhazards Youwillneedto connectyour
—undercertainconditions,we
stronglyrecommendagainstthe
an extensionco;d. However,
if you stillelect to use an extension
cord, it is absolutelynecessary that
it be aUL-Iisted3-wire grounding-
type applianceextensioncord
havingagrounding-typeplug and
outlet and thatthe electricalrating
of the cord be 15amperes
(minimum)and 120volts,
‘Me refrigeratorshould
always be phgged into itsown
individualelectrical outiet—
(115 volt, 60 hertz, or 100volt,
50 hertz, singlephase AC). This
is recommended for best
performance and to prevent
overloadinghouse wiring circuits,
which couldcause afire hazard
from overheating wires.
IM..@H3~o~ Lo
Do not instaH refrigerator
where temperature willgo
below 60°F.because it will not
run often enough to maintain
proper temperatures.
Do installiton a floor strong
enough to support itfullyloaded.
Also see Energy-Saving Tips.
Cka
AHOWthe following clearances
for ease of installation, pB*oper
air circulation and phmbing and
dectrkd connections:
icemakerto acold waterline,A
watersupplykitcontainingcopper
tubing,shut-offvalve,fittingsand
instructionsisavailableat extracost
fromyourdealer.Thereshouldbe
sufficienttubingfor theicemaker
fromthecold watersupplyto
allowyouto movetherefrigerator
outfromthe wallseveralfeet
(approximately8feetof 1/4”copper
tubinginthree 10”diametercoils).
L
Some modelshave adjustable
roUersthat enable you to move
the refrigerator away from the
wail for cleaning;othermode~s
have adjustable leveling legs.
Rollers or legs shouldbe set so
the refrigerator is firmly positioned
on the floor and the front is raised
just enough that the doors close
easily when opened abouthalfway.
Turn the two front roller adjusting
screws or four corner leveling legs
clockwise to raise the refrigerator,
counterclockwise to lower it.
When adjustingrollersor leveling
legsfor properdoorclosure,
werecommendthatthe bottom
frontedge of the cabinetbe
approximately3/4”from
thefloor.
U’your refrigeratorhas a
basegrille, youcan turn the
adjustingscrewsthrough
openingsin the grille.
Hyou would ratherremovethe
base grille, graspthe bottomof the
grilleand pullit out.
-41 I
TOreplace the base grille, lineup
the clips on the back of the grille
with the openingsin the baseplate
and push the grilleforward until it
snaps into place.
Sides
, ...........,,, .,,,0,. .............
Top .......................................i“
Back 1t!
.....................................
If refrigerator is to be installed
against awall on the hinge side,
allow i‘/~”for door clearance.

PROBLEM
REFRIGERATOR
DOES NOT OPERATE
MOTOR OPERATES
FOR LONG PERIODS
MOTOR STARTS&
STOPS FREQUENTLY
VIBRATIONOR
RATTLING
OPERATING
SOUNDS
7AH?
BOTTOM OF
REFRIGIX A-roll
FOODS DRY C)LJT
——
Pos$mm CAI.JSEAND
eMay be in defrostcycle when motordoes not operate for about 35 minutes.
oTemperaturecontrolin OFFposition.
~If interiorlightis not on, refrigeratormay notbe pluggedin at wall outlet.
~If plug is secureand the refrigeratorstillfails to operate,plug alamp or asmall
applianceintothe same outletto determineif there is atripped circuitbreaker or
burned out fuse.
@Modem refrigeratorswith more storagespace and alarger freezer compartment
require more operatingtime.
eNormal when refrigeratoris firstdeliveredto your bome—usu~ly requires24 hours
to completely cooldown.
eLarge amountsof food placed inrefrigeratorto be cooled or frozen.
eHot weather—frequentdoor openings.
~Door left open.
~Temperaturecontrolsare set too cold. Refer to page 6.
~Grille and condenserneed cleaning.Refer to page 13.
~Check ENERGY-SAVINGTIPS on page 2.
~Temperature controlstarts and stopsmotor to maintain even temperatures.
~If refrigeratorvibrates,more than likelyit is not restingsolidlyon the floor.The front
roller screwsneed adjusting,or flooris weak or uneven.Refer to ROLLERS on page ~~.
~If dishesvjbrateon shelves,try movingthem. Slightvibrationis normal.
eThe high speed compressor motorrequired to maintain near zero temperatures in the
l~ge freezer compartment may producehigher sound Ievelsthan your old refrigerator.
~Normal fan air flow—one fan blows cold air through the refrigerator and freezer
compartments—another fan cools the compressor motor.
~These NORMAL sounds will also be heard from time to time:
eDefrost timer switch clicks at defrost.
~Defrost water dripping.
~Temperature control clicks ON or OFF.
~Refrigerant boiling Orgl%ling”
~Cracking or popping of cooling coils caused by expansion and contraction during
defrost and refrigeration following defrost.
eIce cubes dropping into the bin and water ~nning in PiPesas icem~er l“efil~s”
~Normal air flow cooling motor. In the refrigeration process, it is normal that heat be
expelled in the area under the refrigerator. Some floor coverings will discolor at these
normal and safe operating temperatures. Your floor covering supplier shotdd be
consulted if you object to this discoloration.
~Foods not covered, wrapped or sealed properly.

PROBLEM
FRESHFOOD
OR FREEZER
COMPARTMEPJT
TEMPERATURE
TOO WARM
FROST OR ICE
CRYSTALSON
FROZEN FOOD
AUTOMATIC
ICEMAKER
DOES NOT WORK
CUBESTOO SMALL
CUBE DISPENSER
DOES NOT WORK
SLOW ICE CUBE
FREEZING
ICE CUBES HAVE
ODOIUTASTE
MOISTURE FORMS
ON OUTSIDE OF
REFRIGERATOR
MOISTURE
COLLECTS INSIDE
REFRIGERATOR
HAS ODOR
POSSIBLE CAUSE AND Rm’mlY
*Temperaturecontrolnot set coldenough.Refer tOpage4.
frequentdoor openings.~Warmweather-
*Door left openfor too long atime.
~Packageholdingdoor open or blockingair duct in freezercompartment.
eDoormay havebeen left ajar or packageholdingdooropen.
8Toofrequentor too long door openings.
~Frost withinpackage is normal.
~Feeler arm in OFF (Lip)position.
@Watersupplyturned off or notconnected.
@Freezer compartment too warm.
@Piled up cubesin storagebin may cause icemaker to shut off prematurely.Remove
storagebin from freezer compartmentand level cubesin bin by hand.
Watershutoffvalveconnectingrefrigeratorto homewaterlinemaybe clogged.
0No ice cubes. Remove storagebin. If cubes are frozen to wire arm, remove them.
0No ice cubes. Icemaler turned off or water supply turnedoff.
~Irregularice clumps in storagecontainer.Break up as many as you can with fingertip
pressure and discard the remaining clumps.
@Door may have been left ajar.
~Turn temperature of freezer compartmentcolder.
eIf the doors are not opened regularly,the ice cube freezing rate will be reduced.
‘Old cubes need to be discarded.
eIce storagebin needs to be emptied and washed.
eUnsealed packages in refrigerator and/or freezer compartments may be transmitting
odor/taste to ice cubes.
~Interior of refrigerator needs cleaning. Refer to page 13.
~Poor-tasting incoming water. Install awater filter—see page 5.
@Not unusual during periods of high humidity.
3Move the power saver switch to the moisture setting.
~Too frequent or too long door openings.
)In humid weather, air carries moisture into refrigerator when doors are opened.
~Foods with strong odors should be tightly covered.
ICheek for spoiled food.
Interior needs cleaning. Refel-to page ]3.
Defrost water system needs cleaning.
Keep open box of baking soda in refrigerator; replace every three months.
——.—

With tpurckmeof y n Ga
aiyino as
0
.f(_wb~h~you have to do is
cd{
.,
.-
ConsumerServiceprofessional
r~’illprovideexpertrepair service,
-
scheduledat a~imethat’sconvenient
foryou,IManyGEConsumerService
.
@company-op~ratecllocationsofferyou
ervicetodayor tomorrow,or at your
convenience(7:00a.m.to ‘7:00p.m.
weekdays,9:00a.m.to 2:00p.m.Satur-
days).Our factory-trainedtechnicians
knowyourapplianceinsideand out—
somostrepairscan be handled injust
visit.
feelingthat
GEConsumerServicewillstillbe
thereafteryourwarrantyexpires.Pur-
chaseaGEcontractwhileyourwar-
rantyisstillin effectand you’llreceive
asubstantialdiscount.Withamultiple-
yearcontract,you’reassuredoffiture
serviceat today’sprices.
Individuals Cpdifkd to stheir
ownappliances can haveneeded
parts or accessoriessentdirectlyto
their home, free of shippingcharge!
The GEparts systemprovidesaccess
to over4’7,000parts...and allGE
Genuine RenewalPartsare fully
warranted.VISA,I’vlasterCardand
Discovercardsare accepted.
user maintenance i
cip
s
eis
‘
WhateveryourquestionaboutanyGE
majorappliance,GEAnswerCente@
informationserviceisavailableto
help.Yourcall-and yourquestion—
willbe answeredpromptlyand
courteouslyAnd youcancallany
time.GEAnswerCente@serviceis
open 24hours aday7daysaweek.
T
Upon request,GEwillprovideBraille
controlsfor avarietyof GEappliances,
and abrochure to assistin planning aI
barrier-freekitchenfor per~onswith
limited r
C
or who a~[
A
actp~
Cd 800-TDD-GEAC(800-833-4322) [I
~
to recpest information or service. !: --1
%=-,

.!
-.~
——.
IGE
WARRANTY
HSave p o p ceA
FULL 13N!E-YEARWVARRAWW
yearfrom date of original
purchase,we will provide,free of
charge, parts andservice labor in
your hometo repairor replaceany
part of the reffjgeratorthat fails
becauseof amanufacturing
defect.
FULL FIVE-YEAR WARRANTY
Forfive yearsfrom date of original
purchase,we will provide, free of
charge, partsand service labor in
your hometo repairor replaceany
part dthe sealed refrigerating
system (the compressor,
condenser,evaporatorand all
connecting tubing)that fails
because of amanufacturing
defect.
Forthelifeoftherefrigerator,wewill
replace,freeof charge,WEtinted
see-through QL4kkStorebin(on
modelssoequipped)ifthe bin,made
fromLexan@polycarbonateresin,
breaksduringnormalhouseholduse.
Thebinhousingisnotincluded.The
bincanbeexchangedat aGE
AppliancePartsMart,Factory
ServiceCenter,orbywritingtothe
addressbelow.
This warrantyis extendedto
the originalpurchaserand any
succeedingownerfor products
purchasedfor ordinaryhome use
inthe 48 mainlandstates, Hawaii
andWashington,D.C. In Alaskathe
warrantyis the same exceptthat it
is LIMITED becauseyou must pay
to ship the productto the service
shop or for the servicetechnician’s
travel coststo your home.
All warrantyservice will be
providedby our FactoryService
Centersor by our authorized
Customer Care” servicersduring
normalworking hours.
Look in the White or YellowPages
of your telephone directoryfor
GENERAL ELECTRIC COMPANY,
GENERAL ELECTRIC FACTORY
SERVICE, GENERAL ELECTRIC-
HOTPOINT FACTORYSERVICE
or GENERAL ELECTRIC
CUSTOMER CARE@SERVICE.
Ill ---
-.
.
.
1@Service trips to your home to oReplacement of house fuses or I
teach you howto usethe product. reset~ingof circuit breakers.
Read ycmr Use and Care materiaL ~Failure of the product if it is used ‘
If you then have any questions for other than its intended purpose
aboutoperating the product please or used commercially. (
contact your dealer or our
Consumer Affairs office at the ~Damage to product caused
by accident, fire, floods or acts
address below, or call, toll free: of God.
GE Answer Center”
800.626.2000 ~Loss of food due to spoilage.
consumer information service WARRANTOR IS NOT
RESPONSIBLE FOR
~Improper installation. CONSEQUENTIAL DAMAGES.
If you have an installation problem,
contact your dealer or installer.
Youare responsible for providing
adequate electrical, plumbing and
other connecting facilities.
Some states a e l i cd a le
ayTwgyou specific legal rights, and you may also have other rights which vary from state to state.
To know what your legal rights are in your state, consult your local or state consumer affairs office or your state’s Attorney General.
WarrantOr: C%wwrd Hectric Chrnpany
If further help i%needed this write:
Affairs, GE AIh3uisvilk, KY 40225
.——--
---...=..-.-==,-=—=5
:PNo. 496655
...——....-—
::-9 IT
This manual suits for next models
4
Other GE Refrigerator manuals

GE
GE GSL22JFTBS Manual

GE
GE Profile PSW26PSTSS Manual

GE
GE DFE Series Original instructions

GE
GE GTQ095PANR User manual

GE
GE GTS18IBR User manual

GE
GE PDCS1NCY - Profile: 21.1 cu. Ft.... User manual

GE
GE TOP-FREEZER 16 User manual

GE
GE Profile ENERGY STAR PFSF5NJW Manual

GE
GE GTH17BBCRWW Manual

GE
GE TURBOCOOL 23 Safety guide

GE
GE Monogram ZIDI240PII User manual

GE
GE Profile PGCS1PJXSS Manual

GE
GE Monogram ZIK30GNZAII User manual

GE
GE ZS48N User manual

GE
GE GSH25JSCSS Assembly instructions

GE
GE 49-60327 Original instructions

GE
GE Monogram ZIF36N LH User manual

GE
GE GSL25JGBLB Manual

GE
GE GW12XDBB User manual

GE
GE PSSS3RGXSS - Profile 23' Dispenser... User manual