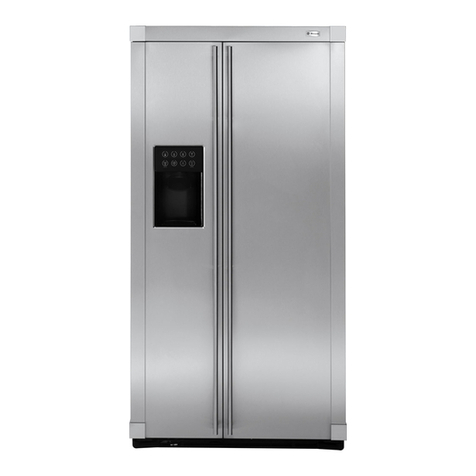
GE TBX22R Installation instructions

---.
0Howtoget
thekt fmm
●
e,... . ...
*
UsemdCareof
No-FrostModelTBX22Rwith
CustomIceDispenser
Energy-SavingTips p2
Icebythebinful p5
Energy-SaverWitch p7
Howlongshouldyou
storefoods? p8
Savetimeandmoney
Beforeyourequestservice,
usetheProblemSolverep12
YourDirectLinetoGeneralElectric
TheGEAnswerCenteF800e626.2000
. .

.-
..
—
contents
Page
Energy-SavingTips............2
Important Safety Instructions. ..3
How to Connect Electricity. ....3
Installation Requirements. ...3.4
How to Adjust Rollers..........4
Automatic Icemaker and
Custom Dispenser... ... . . . . .5,6
How to Set Temperature
Controls. . . . . . . . . . . . . . ..-. -.-y
How to Use Energy-Saver
Switch ........................7
Food Storage Suggestions. ....8
Howto Adjust Shelves. .. . . . ...9
Food-Saver System. . . . . . . ...10
User Maintenance
Instructions . . . . . . . . . . . . . ..--ll
Water Filter Accessory........11
Problem Solver.. .........12-14
ConsumerServices. . . . . . . ...15
Warranty. . .. . . . . ....E3acktiver
Helpus
helpyou=,m
Readthisbookcarefully.
It is intended to help you operate
and maintain your new refrigerator
properly.
Keep it handyfor answersto your
questions.
If you don’t understandsomething
or need more help...
Call,toll-free:
The GE Answer Centerm
800.626.2000
consumer information service
or write (include your phone
number)
ConsumerAffairs
General Electric Company
Appliance Park
Louisville, KY40225
Writedownthe modeland
serialnumbers.
You’llfind them on a label at the
bottom, just insidethe fresh food
compartment door.
These numbersare a9soon the
ConsumerProduct Ownership
Registration card that came with
your refrigerator, Before sending
in this card, pleasewrite these
numbers here:
Usethese numbers in any
correspondence or service calls
concerning your refrigerator.
If you receivedadamaged
refrigerator, immediate ycontact
the dealer (or builder) that sold you
the refrigerator.
Savetime and money.
Before you request service, check .
the Problem Solver on pages 12
through 14.It lists minor causesof
operating problems that you can
correct yourself.
Energy~SavingTips
*Location of your refrigerator is
important. Avoid locating it next to
yaur range, aheating vent or where
sun will shine directly on it,
@Don’t open doors more often
than necessary.
*CIOSQthe doors assoon as
possible, particularly in hot, humid
weather.
*Keep ~nergy s~v~r Swi!ch in the
I(;fi position un!ess tmoistureforms
0$1the outside of the rafri<jerator.
~Be sure the doors are closed
tightly. Before leaving the house
or retiring for the night, checkto
besuredoorshaven’tbeenleft
open accidentally.
@Store only those foods requiring
refrigeration in your refrigerator.
@Wipe ail moisture from bottles
and cartons before putting them in
the refrigerator.
@Keep all foods covered to ‘
reduce moisture build-up inside
the refrigerator.
@If you turn controls to coldest
position for quick chilling or freez-
ing, be sure to turn them back to
regular settings.
~Don’t overcrowd your refrigerator.
overcrowding can require extra
electrical energy to keep every-
thing COOI.
2

lmponantsafety,Instructions ‘-–-
~.=
——.
-a.
~
Readal!instructionsbeforeusingthisappliance. _–
ew=
-1
=___
.
,. m.
-. –
W~~~~~~–When usingthis, ~
appliance, alwaysexercisebasic
safety precautions including the
following:
*Usethisapplianceonlyfor it~
intendedpurposeasdescribed in
this Useand Care Book.
~Thisrefrigeratormustbeproperly
installedinaccordancewiththe
InstallationInstructionsbeforeit
isused.See grounding instructions
below and on page 4.
@Never unplugyourrefrigerator
bypullingonthe powercord.
Always grip plug firmly and pull
straight out from the receptacle.
.Repairor replaceimmediately
allelectricservicecordsthat
havebecomefrayedor otherwise
damaged.Do not use acord that
showscracks or abrasion damage
along its length or at either the
e
plug or connector end.
oWhenmovingyourrefrigerator
awayfromthe wall, be careful
notto roll over or damagethe
powercord.
*Afteryour refrigeratorisin
operation,do nottouchthe cold
surfaces,particularlywhen hands
aredampor wet. Skin may adhere
to these extremely cold surfaces.
eOnceyouhaveremovedthe ice
cubestoiagetint~ner fromybur
refrigeratoi;do.,notplace ~ingersor
handsonthe aut~rna~icicemaking
‘mechanismwhiletherefrigeratoris
pluggedin.This will help protect’
you from possible injury. 1~will
also prevent interference with the
moving partof the ejector mechan-
ismor with the heating element.
that releasesthe cubes. ”
●Don’trefreezefrozenfoods
whichhavethawedcompletely.
The United States Department of “
Agriculture in Home and Garden
Bulletin No. 69 says:
‘~..Youmaysafely refreeze frozen
foods that havethawed if they still
contain ice crystals or if they are
still cold—below 40°F..
‘~..Thawedground meats,poultry,
or fish that haveany off-odor
or off-color should not be refrozen
and should not be eaten. Thawed
ice cream should be discarded. If
the odor or color of any food is
poor or questionable, get rid of it.
The food may be dangerous to eat.
“Even patiial thawing and refreez-
ing reduce the eating quality of
foods, particularly fruits, vege-
tables and prepared foods. The
eating quality of red meats is
affected lessthan that of many ~
other foods. Userefrozenfoodsas ~f;
soon aspossible,to saveas much =-’
of their eating quality asyou can.” s,
-—
.If youroldrefrigeratorisstill E
aroundthe housebutnot‘inuse, ~- .
besureto removethe doors=This —
~-
-1
wiii reducethe ,~ossibilityof danger m“ -
to chiidren. --
~J
——.
~- r
*, Unplugyourrefrigerator:
A. Before making any repairs.
Note: Westrongiy recommend
that any servicing be performed —-
by aquaiified individual. -
-
B. Before cieaning. ~
~
m.
C. Before repiacing aburned-out -~
iight buib, the refrigerator shouid ==
be unpiugged in order to avoid ~–
---
contact with aiive wire fiiament. -
m
(A burned-out iight buib may ~
-
break when being repiaced.) =Fp
Note: Turning controi to OFF --,
-
position does not remove power ~
w. .
to the iight circuit. ~.
E
*Donotoperateyourrefrigerator -
inthe pr~ence ofexpiosivefumes. -
~-
E#
w-r
~.
SAVETHESE ~
—.-..—
.———..
=
-
w.
INSTRUCTIONS
r---
-—--
insta~iationRequirements–IMPORTANT. ..Please ReadCarefully
How toconnect
electricity
For perSOnal saf~ty,
il~is a~~lianc~ must be
properly grounded.
The power cord of this appliance
is equipped with athree-prong
(grounding) plug which mates with
—. Qstandard three-prong (grounding)
‘!! receptacle (Fig, 1)to minimize
,-----
-tho possibility of electric shock
l]:]zflr~jfrom this appliance
PREFERRED
METHOD
Fig. 1
Have the wall receptacle and
circuit checked by aqualified
electrician to make sure the
receptacle is properly grounded.
m
~.
Where astandard two-prong waii &-. ....
receptacle isencountered, it isthe -—
XW---.
personai responsibility and obli- %TL--
-==—_–
gation of the customer to have it ~
-.-< --
til
repiaced with aproperiy grounded w=—--
kT*::I
three-prong waii receptacle. m’
.. .W..
%=z—
DO NOT, UNDER ANY CIRCUM- m---
=. *%;.
*< ~
STANCES,CUTORREMOVE R:m:
hr.
THE THIRD (GROUND) PRONG E%:r–:.
SW.–-
FROM THE POWERCORD. ~+=~_–_
&:4_—_4.
~~: -~
3
Becauseof potential safetyhazards
undercertainconditions, westrongly
recommendagainstuseofanadapter
plug. However,if,youstill eiectto use
anadapter,where localcodespermit,
aTEMPORARYCONNECTIONmay ~
bemadetoaproperly grounded
tweprong wall receptacle byuseof
aULlisted adapter (Fig. 2)available
at most local hardware stores.
TEMPORARYMETHOD
Fig. 2~] BEFOREUSE
TheIargerslot inthe adapter mustbe
aligned with the larger slot inthe wall
receptacle to provide proper polarity
in the connection of the powercord.
CAUTION:Attaching adapter
ground terminal to wall receptacle
cover screw does not ground the
ap~liance unless cover screw is
metal, and not insulated, and wall
receptacle is grounded through
house wiring. Customer should
havethe circuit checked byaqual-
ified electrician to make sure the
receptacle is properly grounded.
When disconnecting the power
cordfromtheadapter,always hold
the adapter with one hand. If this
is not done, the adapter ground
terminal is very likely to break
with repeated use.
Shouldthe adapterground
terminalbreak, DO NOT USE the
applianceuntilaproper ground
hasagain been established.
.
Useof extensioncords
Becauseof potential safety hazards
undercertain conditions, westrongly
recommend againstthe useof an
extension cord. However, ifyou still
elect to usean extension cord, it is
absolutely necessarythat it beaUL
listed 3-wire grounding type appli-
ance extension cord andthat the
current carrying ratingofthe cord be
15ampe~esminimum. Such exten-
sion cords are obtainable through
your local service organization,
The refrigeratorshouldalways
be pluggedintoitsown
individualelectricalout[et—
(115volt, 60 Hertz, or 100volt,
50 Hertz, single phaseAC).
This is recommended for best
performance and to prevent over-
loading house wiring circuits,
which could cause apossible fire
hazardfrom overheating wires.
RefrigeratorInstallation
Location
Do notinstallrefrigeratorwhere
temperaturewill go below60°F.
because it will not run often enough
to maintain proper temperatures.
Doinstallitonafloorstrongenough
tosupportafu!lyloadedrefrigerator.
Also see Energy-Saving Tips
regarding location.
Clearances
Allow5/8’1at each sideand 1“over
the topfor ease of installationand
properair circulation.
Water SU~~ly
There should be sufficient tubing
for the icemaker from the cold
water supply to allow you to move
the refrigerator out from the wall
several feet (approximately 3coils
of l/4-inch copper tubing that mea-
sure at least 10inches in diameter).
‘Rollers
Adjustablerollers,which enable
you to moveyour refrigerator away
from the wall for cleaning, are
located behind the basegrille.
These rollers should be set sothat
the refrigerators firmly positioned
on the floor andthe front is raised
just enough that.the doors close
easily when opened about halfway.
Toadjustrollers,remove the base
grille-by grasping it at the bottom
and pulling it out.
Turnrolleradjustingscrewsclock-
wise to raise refrigerator, counter-
clockwise to lower it. Useadjustable
wrench (3/8” hexheadbolt) or pliers.
When adjusting front rollers for
proper door closure, it is recom-
mended that the bottom front edge
of the cabinet be approximately
5/8 inch from the floor.
Toreplace basegrille, align prongs
on back of grille with clamps in -
cabinet and push forward until
griile snaps into place.

Automatic[Cemaker &customiceDispenser
eHOW~utomatic !cemaker
anal Ice Dispenser Work
Yourrefrigerator hasanauto-
matic icemakerandacustom
dispenserthat dispensesice
cubesandcrushed ice through
the freezer compaflment door.
Here’showthey work.
Automatic icemaker (1)fills ice
storage bin (2).
Pressureon the ice cradle(3)
activates the motor-powered
auger (4), feeds cubes from
storage bin into glassthrough
chute (5)when selector switch
isset at ICE CUBES.
When the switch is moved to
CRUSHED ICE,abaffle in
the housing channels cubes
through the crusher (6)and
crushed ice falls into the
glassthrough the chute.
Spills are caught in arecessed
area [7).
Water is supplied automatically
to the icemaker by asolenoid
valve. Aconnection to the
household cold water system
isall that’s needed.
-
,~, ,,’
eyour’icerna~er’,wilj:pr~ducean
average’offivpcub= an hour—
approximately 120cubesina24-
hour period–depending onfreeze
com-pa~ment,temperatur~,ioom
temperature; number of door open
ings and other useconditions. ~
The ice storage bin holds about
200cubes. :‘
●lntermitten~dispensing of ice is
normal.If ice flow interruption is
more than brief, iceclump(s)maybe
the causeand should be removed,
following instructions below and
on page 6.
eoverfilling glasswith ice and
use of narrow or extra-tall glasses
shouldbeavoided.Backed-up ice
canjam the chute or causethe door
in the chute to freeze shut. Periodi-
cally open the freezer compartment
door and look down into the chute.
[f ice is blocking the chute, poke
it through with awooden spoon.
~Tohelpkeep bitsoficefrombeing
sprayedbeyondthe glass,place
glass close to ice chute—but not so
close that it blocks outcoming ice.
oIce shouldnotbedispensedinto
thinglasses,fine chinaor delicate
crystal—they can crack or chip from
the combined pressure ofyour hand
pressing them against the cradle
and ice dropping into the container.
~Ice shouldbe dispensedbefore
filling glasswithsodaor other
beverage mixes.This will prevent
splashing which is annoying and
which, if the splash reaches the ice
selector switch, could cause it to
stick or bind.
sBeveragesandfoodsshouldnot
be quick-chilledin the ice storage
bin. Cans, bottles or food packages
in the storage bin can cause the
icemaker to malfunction.
@Ice other than that producedby
your icemaker shouldnot be added
to the ice storagebin–it may not
crush and/or dispense well.
5
Before Using Your
Icemaker and Dispenser
If your refrigerator is operated
before the water connection is
made,removethe ice storagebin
andmakesurethe ON-OFF lever
isin the OFF (up)position. (Lever
isshown in orangemerely tohelp
you identify it.)
Toremoveice storagebin:
1. Lift left corner to disengage
the tab on the bin from the slot
in the ice bin shelf.
2. Pull bin straight out while
supporting it at front and rear.
Toreplace ice storagebin:
Slide it back until the tab at the
left front corner of bin engages
the slot in the ice bin shelf. If the
bin does not go all the way back,
remove it and rotate the drive
mechanism 1/4 turn,
Then push the bin back again until
tab on bin engages slot in bin shelf.
(continued next page)

Whenwatersupplyhasbeen
connectedtoicemaker,remove
icestoragebin,moveON-OFF lever
on icemakerto the ON(down)posi-
tion, and replace bin.
Ice cube mold automatically fills
with water after cooling to freezing
temperatures. First cubesnormally
freeze after several hours.
NOTE:With anewly-installed re-
frigerator, allow about 24 hoursfor
freezer compartment to cool down
to proper icemakingtemperatures.
OnceYourIcemaker
1sinOperation
Throw awaythe first few batches
of ice cubes (10or 15cubes).This
will flush awayany impurities inthe
water line. Dothe samething after
vacations or extended periods
when ice isn’t used.
Keepice level to keep icemaker
productive.Cubes ejected into an
empty storage bin will pile up close
to the icemaker and pushthe feeler
arm up to the OFF position prema-
turely when the bin is only partially
full. Level the cubes by hand–or
dispense some–and icemaking will
resume. Keep cubes distributed
evenly and the icemaker will pro-
duce enough ice to fill the bin to
its maximum capacity.
Caution:
Under certain rare circum-
stances, ice cubes may be
discolored, usually appearing
with agreen-bluish hue. The
cause of this unusual discolor-
ation isapparently due to a
combination of factors such as
certain characteristics of local
waters, household plumbing
and the accumulation of copper
salts in an inactive water supply
line which feeds the icemak~r.
Continued consumption of such
discolored ice cubes may be
injurious to health. If such dis-
coloration is observed, discard
the ice cubeSand contact your
General Electric Factory Service
Center or anauthorized Customer
Care” servicer.
Todispenseice:
Set selector switch on front of
freezer compartment door to ICE
CUBES or CRUSHED ICE.
Grip glasswarefirmly near rim and
pressrim gently but firmly against
the rubber-cushioned cradle.
Whendispensingice
Somecrushedicemaybedispensed
eventhoughyouselectedCUBES.
This happensoccasionally when a
few cubesinadvertently get diverted
to the crusher.
Sometimesamoundof snowwill
formonthe doorinthe icechute.
This condition isnormal,andusually
occurs when you havedispensed
crushed ice repeatedly. The snow
will eventually evaporate.
Caution:Never putfingers
or otherobjectsintotheice
crusherdischargeopening.
Tostopdispensing:
Release pressure from cradle and
withdraw slowly to catch last bits
of ice or drops of water.
Some slight dripping may occur
following dispensing of crushed ice.
Excessive spills should be wiped
Donot pour water in spill shelf
becauseit isnot self draining—pour a
it in kitchen sink. The sheif and its
griiie shouid becleaned reguiariy
accordingto instructionsonpage11.
if iceclumpsforminstoragebin:
The icemaker ejects cubes in
groupsof five, and it isnormai for
severaicubesto bejoined together.
However,infrequentusageof ice
cancauseiceciumpstoforminthe
storagebin,resuiting in temporary
malfunction of the dispenser
mechanism.
if this happens:
@remove storage bin from freezer
compartment.
~break up iceciumps with fingertip
pressure and discard remaining
ciumpso
~repiace bin before remaining
cubes meit and fuse together.
If iceisusedinfrequently,“old”ice
cubeswillbecomecloudyandtaste
stale. Empty ice storage bin period-
ically and washit in iukewarmwater.
Be sure to aiiow storage bin to cooi
before replacing it–otherwise ice
cubes wiii stick to the metai auger.
Turnmanualicemakerswitchto
OFF positionwhen:
@home water suppiy isto be turned
off for severai hours.
~ice storage bin is to be removed
for aperiod of time.
*going away on vacation, at which
time you shouid aiso turn off the
vaive in the water suppiy iine to
your refrigerator.
Whenalargesupplyof icewill
be needed, make extra cubes
ahead of time. Store them in plastic
bags or containers in the freezer
compartment.
If thisisyourfirsticemaker,you’ii
hear occasional sounds that may be
unfamiliar. They are normai ice-
making sounds and are not cause
for concern.
dry immecliately.
6

operatingYourRefrigerator
Setthe
temperaturecontrols
~. ,::’‘[%,Q
ALLOW 24 HOURS FOR TEMPERATURES TO STABILIZE
lWI
Yourrefrigerator hastwo controls
that let you regulate the tempera-
ture in the fresh food and freezer
compartments.
INITIALLY,setthe FRESH FOOD
controlat 5andthe FREEZER
controlat C.
For colder or warmer temperatures,
adjustthe desired compartment con-
trol one letter or number at atime.
IMPC)RTANT
Wheninitiallysettingthecontrolsor
whenadjustingthem,allow24 hours
forthetemperaturestostabilize,or
evenout.
Note:Turningthefreshfoodcontrol
to“OFF”turnsoff BOTHcompart-
ments—freshfoodAND freezer.
How totest tem~~rat~r~s
Usethe milktestforthefreshfood
compartment. Place acontainer of
milkon the top shelf inthe fresh food
compartment. Check it aday later.
If the milk is too warm or too cold,
adjust the temperature controls.
Usethe ice cream test for the
freezer compartment. Place acon-
tainer of ice cream in the center of
the freezer compartment. Check it
after aday. If it’stoo hard or too soft,
adjust the temperature controls.
Always allow 24 hours for the refrig-
If you turn your household
thermostat below 60°F. at night
...you maywant to turn the Ietiered
control one step colder,asfrom “C”
to “D.” Cooler temperatures in the
house maycause the freezer con-
trols to operate lessfrequently,
thus allowing the freezer compart-
ment to warmsomewhat.Toprotect
your frozen food supply, leave your
Ietieredsetting atthis coidersetting
for the entire winter orfor whatever
period of time you areturning down
your thermostat. This is especially
important when the thermostat is
turned down for anextended period.
This change should have no
effect on your fresh food section.
However, if freezing occurs, turn
the numbered control one step
warmer, asfrom “5” to “4.”
When you stop turning the therm~
statdown, turn temperature controls
backto their regular settings.
EnergySaverSwitch
The Energy Saver Switch is located
on the temperature control panel.
Toreduce the amount of electricity
required to operate yourrefriger-
ator, ptJsh switch to the left position.
Thisturns off heaters in your
refrigerator that prevent moisture
from forming on the outside.
Useof the Energy Saver Switch
can saveyou money.Estimated
yearly savings,depending on your
local electric rates,are asfollows:
-JEstimatedYearlySavin9sEnergy
ITBX22RI$13.35I$21,36I$29,37116%~
With the heaters turned off, there
isachance that moisture may form
on the outside of your refrigerator,
especially when the weather is
humid. The humidity is most likely
to be high in the summer, in the
early morning hours, and in homes
which are not air conditioned.
Over an extended period of time,
moisture that forms on the outside
maycausedeterioration of the paint
finish. It will be important to protect
the finish by using appliance polish
wax asdescribed on page 11.
m
Whenthe EnergySaver Switchis
pushedtothe right,electricity flows
through the low wattage heaters
which warm the outside of the cab-
inet and, under most conditions,
prevent the forming of moisture
or water droplets.
Nodefrosting
It is not necessary to defrost the
freezer or fresh food compartments.
Your refrigerator isdesigned and
equipped to defrost itself
automatically.

Foodstoragesuggestions
Suggestedstoragetimes
for meatand~oultry*
Eatingqualitydrops REFRI;!RATOR FR~{ZER
aftertimeshown 35° ;T40”F. oo~
MONTHS
FreshMeals DAYS
ProcessedMeats
CookedMeats
Cooked
FreshPoultry
CookedPoultry
(NotCovered)...... 3to4
Cooked
6to12
4t08
6to12
6t09
3t04
3t04
3t04
lto2
1
Y2
lto2
lto2
lto2
(Otherthanformeats&poultry) FREEZER
Newtechriiquesareconstantlybeingdeveloped.
ConsulttheCollegeorCot.rntyExtensionServiceor
yourlocalUtilityCompanyforthelatestinformation
onfreezingandstoringfoods.
‘U.S. Departmentof Agriculture
Meats, fish and poultry purchased
from the store vary in quality and
age; consequently, safe storage
time in your refrigerator will vary.
TOstore unfrozenmeats,fishand
poultry:
=Alwaysremovestore wrappings.
@
Rewrap in foil, film or waxpaper
ondrefrigerate immediately.
Tostorecheese,wrapwell with wax
paper or aluminum foil, or put in a
plastic bag.
.Carefuily wrapto expel airand
help prevent mold.
~Store pre-packagedcheese in its
own wrapping if you wish.
Tostorevqetables, usethe
vegetable drawers—they’vebeen
designed to preservethe natural
moisture andfreshnessof produce.
●Crispnesscan be maintained by
covering vegetables with amoist
towel.
@As afurther aid to freshness,
pre-packaged vegetables can be
stored in their original wrapping.
Note: Special fresh food com-
partment drawers (on models so
equipped) make it unnecessary
to wrapcertain foods which they’ve
been designed topreserve. These
drawersare described on page 10.
Tostoreicecream– Fine-quality
ice cream, with high cream
content, will normally require
slightly lower temperatures than
more “airy” already-packaged
brands with low cream content.
*It will be necessaryto experiment
to determine the freezer compart-
ment location andtemperature con-
trol setting to keep your ice cream
at the right serving temperature.
~The rear of the freezer compart-
ment isslightly colder thanthe front.
Tipson freezing foods
There are three essential require-
ments for efficient home freezing.
1. Initial quality.Freeze only
top-quality foods. Freezing retains
quality and flavor; itcannot improve
quality.
2. Speed. The quicker fruits and
vegetables are frozen after picking,
the better the frozen product will
be. You’ll save time, too, because
less culling and sorting will be
necessary.
3. Properpackaging.Use food
wraps designed especially for
freezing.
8
Tofreezemeat,fishandpoultry, *
wrap well in freezer-weight foil (or
other heavy-dutywrappingmaterial)
forming it carefully to the shapeof
the contents. This expels air,Fold
and crimp endsof the packageto
provide agood, lasting sealt
Don’t refreeze meatthat hascom-
pletely thawed; meat,whether raw
or cooked, can be frozen success-
fully only once.
Limit freezing of fresh (unfrozen)
meatsor seafoodsto 21pounds at
atime.
Organize yourfoodstorage
for convenience.
@
Store all like things together.This
not only savestime, bute[ectricity—
becauseyou can find foods faster.
oplace the oldest itemsUpfront so
they can be used up promptly.
~Useshelvesonthedoorfor most
often usedsaucesandcondiments.
~Use the Adjusts-Temp drawer for
temporary storage of meats you do
not freeze.
Tosave moneyinenergy
and food costs.
ePlace most perishable items such
as milk, cream or cottage cheese
toward the rear of the top shelf as
they will stay coldest in this part
of the fresh food compartment.
@Cover moist foods with tight Iids,
plastic film or foil.
eLeaf vegetables and fruits placed
in your Moist’n Fresh or Adjusta-
Fresh drawer will last longer when
stored in closed plastic containers
or wrapped in plastic film.
~Do not overload your fresh food
or freezercompartmentwith alot
ofwarmfoodatonce.
@Open the door the fewest times
possible to save electrical energy.
~When going out of townfor
severaldays,leaveasfew perish-
ablesaspossibleintherefrigerator.
Move the icemakermanualswitch
to“OFF” and shutoff water to the
refrigerator.

—.
Shelf Positions
Howto rearrange
yourshelves
AdjustableShelvesin
Fresh Food Compartment:
Shelves in the fresh food
compartment are adjustableinany
combination, enabling you to make
efficient shelf arrangementsto fit
your family’sfood storage needs.
—
‘up
B
—Toremoveshelves:Tiltshelf up at
front, then lift it up and out of tracks
on the rear wall of the refrigerator.
❑top lug
❑Lower to
lock into place
Toreplace shelves:Selectdesired
shelfheight.With shelf front raised
slightly, engage top lugs in tracks
at rear of cabinet. Then lower front
of shelf until it locks into position.
Ports-Binson FreshFood
CompartmentDoor
PortabieEggTrays
Adjustable Ports-Bins can easily
becarried from refrigerator to work
area.Adozen eggs intheir original
cartonwill fit securely inaPorts-Bin.
door shelf with
handle side out ~.
‘1
Egg trays are designed to fit
securely on the fresh food com-
partment door when placed on door
shelf with handleside out. Handle is
an added convenience when carry-
ingtray to countertop or rangeand
returning it to refrigerator. Toremove:Lift Ports-Bin straight
up until mounting hooksdisengage.
Toreiocate Select desired shelf
height, engage Ports-Bin’s hooks in
slots on the tracks of the door, and
pushin. Ports-Bin will lock in place.

~enerai~!ectricFood-Saver~ySt~~
Drawer Removal
Adjusts-TempDrawer
This drawer hasan adjustable two-
position temperature control which
letsyou regulate the amount of cold
air entering the drawer.
Whencontrolisall the wayto the
leftatthe “MEATS”setting,baffle
is fully open to provide coldest
storage area.
Whencontrolisall the wayto the
rightatthe“FRUITS”setting,baffle
isfully closed to provide normal
refrigerator temperature.
~oist’n Fresh Drawer
Thisrefrigerated drawer isdesigned
to keep unwrappedfoodsfresh
by retaining the natural moisture
content of such as:
●Artichokes oCherries o
●●
it is recommended thatodorous
foods be stored wrapped–foods
such as:
*
●
Storage time will depend upon the
type of food and its condition when
Excesswater whichmayaccumulate
in the bottom of the Moist]n Fresh
drawer should be poured out and
the drawer wiped dry.
TheMoist’nFreshdrawerispartially
sealedbygasketsattachedtothe
coveratthe frontandbackedges.
Alwaysreplaceit inthis coverand
push the drawer all the way in.
Adjusts-FreshDrawer
This drawer hasasecond, inside
cover.The adjustable humidity con-
trol lets you regulate the amount
of cold air entering the drawer.
Slide the controlall the wayto the
righttothe “VEGETABLES”setting
andthecoverclosesfulIytoprovide
ahigh humidity storage area.
Slide the controlall the wayto the
lefttothe “FRUITS”settingand the
cover stays partially open to provide
aless humid storage area.
Variable settings between” FRUITS”
and“VEGETABLES”candeselected
as user desires.
Sealed Snack Pack
TheSealedSnackPack–and
shelfto which it is attached-can
be relocated within the fresh food
compartment. The sealed drawer
retains high humidity for convenient
storage of unwrapped meats and
cheese, bacon, hors d’oeuvres,
spreads and snacks.
Drawerswill stopbeforecoming
allthewayoutof refrigeratorto
helppreventcontentsfromspilling
ontoflooc Drawerscaneasilybe
removedbytilting upslightlyand
pullingpast“stop”location,
Toremovedrawerswhenthe fresh
foodmmpartrnentdoorcannotb
openedfully:
1. Removedrawerfarthestfrom
door,removecenterdrawer,lifttheir
coversandpullthemout,
2. Slide remaining drawer and
cover to the middle.
3. Pulldrawerout until it hitsthe e
stops. Lift drawer slightly up and
forward over the stops.
4. Place hand on drawer cover and
pull out drawer.
5. Lift cover and remove it.
After cleaning, replace in reverse
order.
10

UserMaintenanceInstructions
cleaningyour
refrigerator
OutSi~e
Protectthe paintfinish.The finish
on the outside of the refrigerator is
ahigh quality, baked-onpaintfinish.
With proper care, it will stay new-
Iookingandrust-free foryears,Apply
acoatofappliancepolishwaxwhen
the refrigerator is new and then at
leasttwice ayear.
Appliance Polish Wax&Cleaner
(Cat.No. WR97X216)isavailable
from GE and i-iotpoint Appliance
PartsMarts.
Keepthefinishclean.Wipewith a
clean cloth lightly dampened with
appliance polish wax or mild liquid
dishwashing detergent. Dry and
polish with aciean,soft cloth, Donot
wipe the refrigerator with asoiled
dishwashing cloth or wet towel.
~notusescouring pads,powdered
cleaners, bleach, or cleaners con-
etaining bleach.
Ice dispenserspillshelfshould be
wiped dry immediately if excessive
spills occur.Waterallowed to remain
on sheif mayleave deposits remov-
ab!e by soaking with amixture of
one teaspoon of anon-precipitating
water softening compound (such as
Calgon brand) or citric acid powder
per pint of hottap water or undiluted
vinegar. Soak until deposit disap-
pearsor becomes loose enough to
rinse away Usually 30 minutes
soaking time is adequate.
Inside
Clean both fresh food and freezer
compartments at least orIce ayear.
It is recommended that the refriger-
ator be unplugged before cleaning.
If this is not practical, wring excess
moisture out of sponge or cloth
when cleaning in the vicinity of
switches, lights or controls.
Use warm water and baking soda
solution—about atablespoon of
baking soda to aquart of water.
Rinse thoroughly with water and
wipe dry. Follow this same pro-
cedure for cleaning door gaskets,
meat and vegetable drawers, and
allplastic parts.Washice storage
bin in lukewarmwateronly.hnot
usecleansingpowdersorother
abrasivecleaners.
Behind
Careshould be taken in moving
your refrigerator awayfrom the
watt.All types of floor coverings
can be damaged,particularly cush-
ioned coverings andthose with
embossedsurfaces, Pull the refrig-
erator straight out and return it to
position by pushing it straight in.
Moving your refrigerator in aside
direction may result in damageto
your floor covering or refrigerator,
condenser
For most efficient operation,
remove the basegrille (see page 4)
and remove the defrost water pan,
11+<)$
then either sweep I~,-~‘h
awayor vacuum
updust that is >\l “3 I
-b ,....*
‘.
readilyaccessible. ~.
Thiseasycleaning
operation should
k
L* Y
be done at least \,T
once ayear. il
DefrostwaterPan
Pan located behind basegrille
should be cleaned at least once a
year.When reinstalling pan,firmly
push pan ALL THE WAYIN until
it stops.
whenyougoon
vacation
Forextendedvacationsor
absences,shut off power to
refrigerator, turn the numbered
control OFF, clean interior with
baking soda so!ution of one table-
spoon of soda to one quart of water.
Wipe dry. To prevent odors, leave
open box of soda in refrigerator.
Leave doors open.
Forshortervacations,remove per-
ishablefoods and leavecontrols at
regular settings. However,if room
temperature isexpected to drop
below 60°F, followsameinstru~-
tionsasfor extended vacations.
Move icemaker manual~witchto
OFF position and be sure to shut
off water supply ON-OFF switch
is located near the front of the
icemaker.
Whenyoumove
Disconnect power ~ord from wall
receptacle, ramove allfoodand
cleananddry theinterior.
Secureall10oseitemssuch as
grille, shelves, andstorage pansby
taping them securely in place to
prevent damage.
Be sure refrigerator stays in
upright position on/y during actual
moving and in van, Refrigerator
must be secured invan to prevent
movement. Protect outside of
refrigerator with blanket.
Accessory
Yourice cubes can only be
asclear and fresh-tasting
asthe water that produces
them. That’swhy it’sagood
idea to purify your water
with aQuadra Kleen Water
Filter.
its activated charcoal
removes musty,stale odors
and unpleasant medicinal,
metallic tastes. Aporous
fiber cartridge catches dirt,
rust particles, sand and
silt while special crystals
reduce deposits of hard
scale.
The water filter is an option at extra
cost and is availabie from your GE
dealer. Specify
in minutes on 1/4110.D.
copper water line,
11

I
‘
Tosavetimeand money,
check the Problem solver
before yourequestServicem
If you haveaproblem, it maybe
minor.Youmay be able to correct
it yourself. Just usethis Problem
Solver to locate your problem and
then follow the suggested
recommendations.
Rapid
ElectricalDiagnosis
Yourrefrigerator iswired for accurate @
electrical-diagnosisinyourhome—
takesonlyminutesforaservice
technicianto check its entire elec-
tricalsystem,Noneedforthetechni-
cianto unplug,moveor unloadthe
refrigeratorto makethediagnosis,
The Problemsolver
Savetimeand money.,, before yourequestservice, check the following:
PROBLEM
REFRIGERATOR
DOES NOT OPERATE
MOTOROPERATES
FORLONGPERIODS
MOTORSTARTS&
STOPSFREQUENTLY
.—.——. —. .— ..—.”..
P..= . . . . . .
POSSIBLE CAUSE AND REMEDY .— ———.——.. —..
eMaybeindefrostcyclewhenmotordoesnotoperateforabout35minutes,
@TemperaturecontrolinOFFposition.
@Ifinteriorlightisnoton,refrigeratormaynotbepluggedinatwallreceptacle,
*If plugissecureandthe refrigeratorstillfailsto operate,plugalampor asmall
applianceintothesameoutlettodetermineif there isatripped circuit breaker or
burned outfuse, I.m...-
~Modernrefrigeratorswith morestoragespaceandalargerfreezercompartment
requiremoreoperatingtime.
~Normal whenrefrigeratorisfirstdeliveredto your home—usuallyrequires24 hours
to completely cool down.
*Largeamountsoffood placedin refrigeratorto becooledor frozen.
@Hotweather—frequentdooropenings.
eDoorleft open.
@Temperaturecontrolsaresettoocold. Referto instructionsfor useof
TEMPERATURE CONTROLS on page 5,
0Grilleandcondenserneedcleaning,Referto page11.
@CheckENERGYSAVINGTIPSon page2.
@Temperaturecontrol startsandstopsmotorto maintaineventemperatures.
@If refrigeratorvibrates,morethanlikely it isnot restingsolidly onthe floor andfroni
rollerscrewsneedadjustingorfloor isweakor uneven.Referto ROLLERSon page4.
@If dishesvibrateonshelves,try movingthem.Slight vibration isnormal.
@Defrostwater panrattling,needsto be positionedproperly.

.-
—
/PROBLEM
iOPERATINGSOUNDS~
HOTAIR FROM
BOTTOMOF
REFRIGERATOR
‘RESH FOOD
3RFREEZER
}OMi?ARTMENT
‘FMPERATURE
’00 WARM
OODSDRYOUT
ROSTORiCE
RYSTALSON
ROZENFOOD
—
JTOMATiCiCEMAKER
3ES NOTWORK
POSSIBLECAUSE AND REMEDY
@
Thehighspeed compressormotor required to maintain nearzerotemperatures
intheiargefreezercompartmentmayproducehighersoundievelsthan your oid
refrigerator.
QNor~ai fan airfiow—one fan~[OWS COid air throughtherefrigeratorandfreezer
compartments-anotherfancooisthecompressormotor.
.TheseNORMALsoundswiiiaisobeheardfromtimetotime:
sDefrosttimerswitchciicksatdefrest.
@Defrostwaterdrippingintodrainpan.
QTemperaturecontroiciicksONorOFF.
eRefrigerantboiiingor gurgiing.
@Crackingorpoppingofcooiingcoiiscausedbyexpansionandcontraction
duringdefrostandrefrigerationfoiiowingdefrost.
eWithautomaticicemaker,thesoundofcubesdroppingintothebinandwater
runningin pipesasicemakerrefiiis.
*Normaiairfiowcooiingmotor./n the refrigeration process, it is norms/ that heat
be expelled in the areaunder the refrigerato~ Some floor coverings will discolor
at thesenormal andsafe operating temperatures. Yourfloor covering supplier
should be consulted if you object to this discoloration.
~Temperaturecontroinotsetcoidenough.RefertoTEMPERATURE
CONTROLSon page7.
@Warmweather—frequent dooropenings.
@Doorieft openfor iongtime.
~Packagemaybehoidingdooropen.
BPackagebiockingair ductinfreezercompatiment. —
~Foodsnotcovered,wrappedorseaiedproperiy.
~Doormayhavebeenieft ajaror packagehoidingdooropen.
)Toofrequentandtoo iongdooropenings.
~Frostwithin packageisnormai.
QON-OFFcontroi inOFF position.
@Watersuppiyturnedoff or notconnected.
~Freezercompartment too warm.
sCubestoosmaii—watershut-offvaiveconnectingrefrigeratorto homewater
iine maybe ciogged.
@Piiedupcubesinstoragebinmaycauseicemakerto shutoff prematurely.
Removestoragebinfromfreezercompartmentandieveicubesinbinby hand.
—(continued next page)
13

IPROBLEM
.,
MOISTUREFORMS
ONOUTSIDEOF
5EFt?lGERATOR
MOISTURE
COLLECTS INSIDE
WATERON
THEFLOOR
REFRIGERATOR
HASODOR
IPOSSIBLE CAUSE AND REMEDY
1
!~,.’No ice’pubes. Icernaker~urnsdoff ‘orwatersupplyturnedoff.
,- ,’
1:~
“:’.l~regqlar~ceclumpsinstoragecontainenBreakupasmanyasyoucanwith
flpge@ip’pressureanddiscardthe remainingones.
,,
. . . ‘,, l.
:. ! ., ‘,
~‘s,DQQt~ay.have,been’leftajar. t , , ~
.,’”
.“Turnte~peratureof freezercotnpafimentcolder.
>,‘,, . .
t,eOld cubesneedto be,discarded..‘
●Icestoragebinneedsto beem~~edandwashed.
,,
‘QUnsealedpackagesin refrigeratorand/orfreezercompartmentsmaybe
transmittingodor/tasteto icecubes. “,
.?Interiorof refrjgerator“needscleaning—referto page11.
~Poor-tastingincomin~water.InstallQuadra-CleanwaterfiIter—seepage11.
..
*Not unusual’duringperiodof highhumidity.
.’ -
@
Move theenergysaverswitchto the right.
Il-l 1
@Toofrequentandtoo longdooropenings. ,
@Inhumidweatheraircarriesmoistureintorefrigeratorwh@ndoorsareopened.
@Defrostwaterpanfull, missingor notin position;
@Foodswith strongodorsshouldbetightly covered.
@Checkfor spoiledfood.
@Interior needscleaning.Referto page11.
@Defrost,water panneedscleaning.
@Keepopen boxof bakingsodain refrigerator;replacemonthly.
o

service.
Our Consumer Services are designed with your needs and wants in mind.
WarrantyProtection
Yournew appliance is awell designed and engineered See the warranty on the back pageof this book for
product. Before it left the factory, it went through details,
mrigorous tests to detect manufacturing defects. And
you haveawritten warranty to protect you,
❑
PromptService at your Convenience
Whether your appliance is in or out of warranty,
you’re just a phone call away from our nationwide
network of Factory Trained Service professionals.
Simply call our GE service organization. You’ll find’
them in the White Pages under “General Electric
Company” or “General Electric Factory Service;’
and in the Yellow Pages under “General Electric
Customer Care” Service.”
Service is scheduled at your convenience and the
technician drives afully-stocked parts service truck
so that, in most cases, the repair can be completed
in one visit.
We’re proud of our service and want you to be
pleased, but if for some reason you are not happy
with the service you receive, here are three steps to
follow for further help.
!
FIRST,contact the people who serviced your
appliance. Explain why you are not pleased, in most
cases, this will solve the problem,
NEXT,if you are still not pleased write all the details
—including your phone number to:
Manager, Consumer Relations
General Electric Company
Appliance Park
Louisville, Kentucky 40225
FINALLY,if your problem is still not resolved, write:
Major Appliance Consumer Action Panel
20 North Wacker Drive
Chicago, Illinois 60606
Service Contracts .,,*.
Fortrouble=freeservicebeyond
o
,, ;; ~:,,keepyourappliance
in good operating,,,,.,..‘
.,,..,,.~v..
#-
~< .++,..\. condition during the contract period at
thewrittenwarrantyperiod. .... .“”+
.... /:0/.~
y~~ no additional charge. Service contracts
.. . ..
.. ,,~
\
‘> ~i let you pay today’s prices for service
,. ~~~
If you prefer to.budget your repair expenditures ‘J;::+-~<<-z0
‘?,. amonth, ayear,or several‘years from
instead of being surprised by them, GE offers ~%/..- now. And, you’ll receive service from
service contracts for varying lengths of time on ;.S1!?Y:,*yy&”-‘-...l=’ GE trained service technicians using
~@‘ .... ““” onlY Genuine GE parts.
all GE major appliances. With acontract, we’ll .. .,,,,,,,.:J.
yl’>..,
The Quick FixTMSystem
Youcan save money-and time
by doingit yourself.
For do-it-yourselfers who would
prefer to fix GE major appliances
themselves ...GE offers an industry
first, the Quick Fix’” System.
Aprogram for do-it-yourself appliance repair,
the system includes sfep-by-step repair
manua/s for refrigerators, most non-microwave
electric ranges, dishwashers, and standard
and large capacity washers and dryers, plus
specially packagedreplacementparts, and
technical help with ato//-free 800 numbez
Help for Youby Phone The GE Answer CenterT~ 800.626.2000
Should you need help in the selection and purchase consumer information service is open 24 hours a
of new appliances, or have questions about the
B
day, seven days aweek.
w- operation of the GE appliances you now own-or have
:.l+-_ any other questions about our consumer products Our staff of experts stands ready to assist you
or services, you are only aTOLL-FREEcall away. anytime.
15

This warranty is extended to the
original purchaserand any succeed-
ing owner for products purchased
for ordinary home use in the 48
mainland states, Hawaii and
Washington, D.C.In Alaska the
warranty is the same except that it
is LIMITEDbecause you must pay
to ship the product to the service
shop or for the service technician’s
travel costs to your home,
All warranty servicewill be provided
by our Factory Service Centers or
by our authorized Customer Care”
servicers during normal working
hours.
Look in the White or Yellow Pages
of your telephone directory for
GENERAL ELECTRICCOMPANY,
GENERAL ELECTRICFACTORY
SERVICE,GENERAL ELECTRIC-
HOTPOINTFACTORYSERVICEor
GENERAL ELECTRICCUSTOMER
CARE@SERVICE.
~Failure of the product if it is
used for other than its intended
purpose or used commercially.
~Damage to product caused
by accident, fire, floods or acts
of God.
WARRANTORIS NOT RESPON-
SIBLE FORCONSEQUENTIAL
DAMAGES.
Other manuals for TBX22R
1
Table of contents
Other GE Refrigerator manuals

GE
GE PSE25KGHBHBB User manual

GE
GE 18, 19 User manual

GE
GE GDSL0KCXLS Manual

GE
GE HTH17CBCBB Assembly instructions

GE
GE GTQ080PANR User manual

GE
GE GTS22KBPWW - 21.7 cu. Ft. Top-Freezer... Manual

GE
GE Profile PFCF1PJX Manual

GE
GE RHM 15 Operating instructions

GE
GE GTH22KBR Original instructions

GE
GE Profile PSCS3TGX User manual