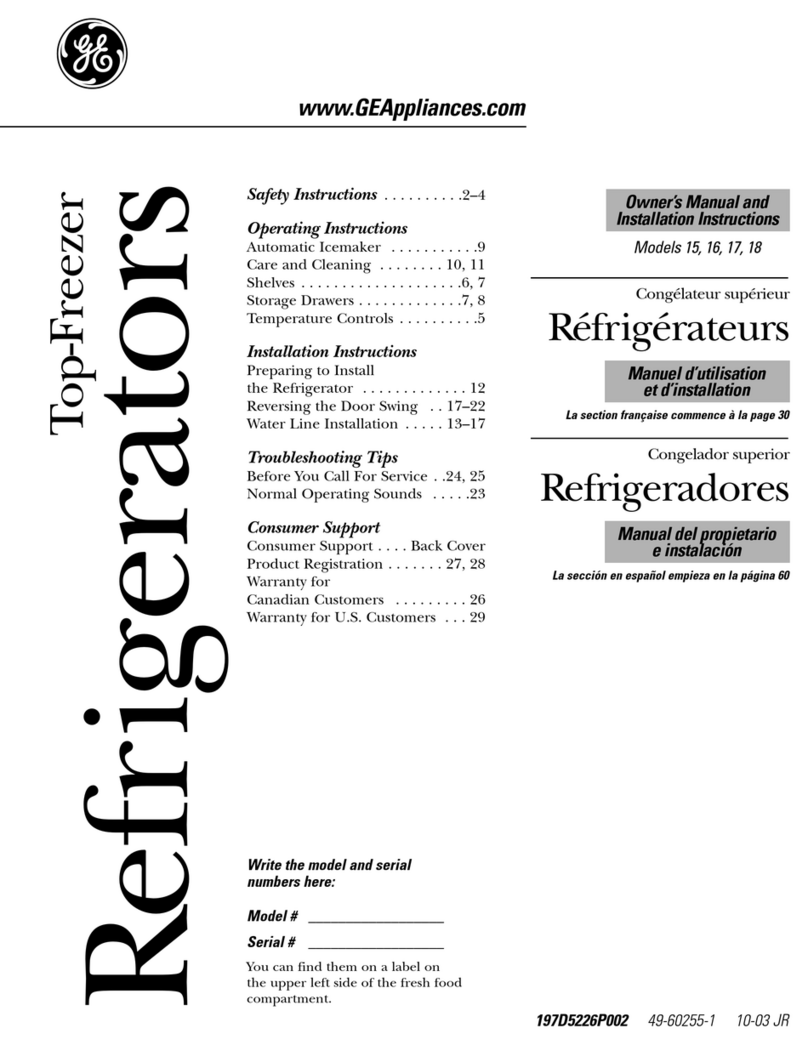
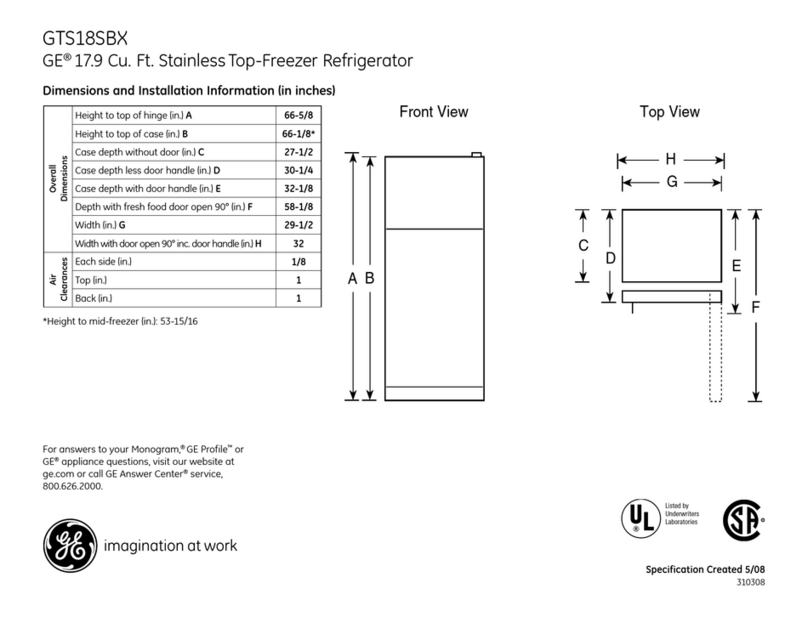
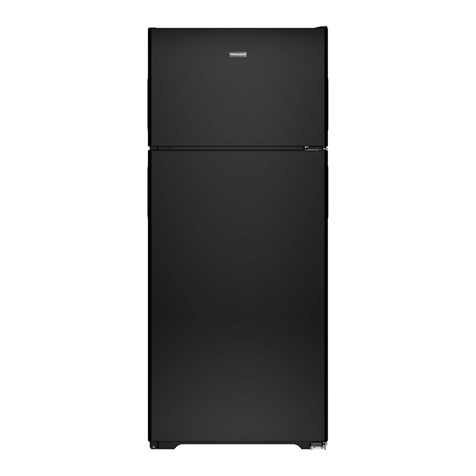
GE TCX18 User manual

GEAppliances
©
©
Z
©
©
0
Models
TCX18
TCC18
TDC18
TCD18
TCS18
Part No. 162D9629PO0#Pub.No. 49-60085 WR6M433 02-00JR

w
,0
,0
,0
m
m
m
w
q
Safety Information
SafetyPrecautions......... 3
Useof ExtensionCords ...... 3
How toConnectElectricity ...4
UseofAdapter Ptugs ...... 4
Operating Instructions
Controls .................. 5
Features................ 6-9
Careand Cleaning...... 10,11
Installation Instructions
Preparingto
Instafl theRefrigerator...... 12
ReversingtheDoorSwing 13-16
Troubleshooting 77ps
NormalOperatingSounds... 17
BeforeYou
CaflForService .. I7-19
Customer Service
Warranty
for CanadianCustomers .... 20
Warrant},
for U.S.Customers........ 21
ServiceTelephone
Numbers ................. 2_2
Congratulations!
We're proud of our quality products and we are
committed m providing dependable set_ice. You'll
see it in this eastern-use Owner's Manual and you'll
hear it in the fliendlyvoices of our customer set_ice
department.
Best of all, you'll experience flmse values each time
you use your refrigerator. That's important, because
your new refiigerator _dllbe part ofyour tiredly for
many years. And we hope you _dll be part of ours fbr
a long time to come.
We appreciate your purchase, and hope you _ill
continue to rely on us whenever you need quality
appliances fbr your home.
A Service Partnership.
IMPORTANT!
Staple sales slip or cancelled check here.
Proof of the original purchase date is needed to obtain set_i(:e
under the warranty.
FORYOURRECORDS
Write themodel and serial numbershere:
#
#
You can find them on a label on the left side, near the top of the
freezer compartlnent.
READTHISMANUAL
Inside you xdll find many helpfifl hint_son how to use and maintain
your refligerator properly.Just a little preventive care on your part
can save you a great deal of time and money over the life of your
refligerator.
IFYOUNEEDSERVICE
You'll find ma W answers to common problems in the Before You
CallForServicesection. If you review our chart of Troubleshooting
17psfirst, you may not need to call for set_4ce at all.
ffyou do need service, you can relax kno_ing help is only a phone
call away. A list of toll-free customer sels_icenumbers is included in
fl_eback section. Or, in the U.S.,you can always call fl_e GE Answer
Center ®at 800.626.2000, 24 hours a day, 7 days a week. In Canada,
call 1-800-361-3400.
2

IMPORTANTSAFETYINFORMATION.
READALLINSTRUCTIONSBEFOREUSING.
WARNING!
Use this appliance only for its intended purpose as described in this Owner's Manual
SAFETYPRECAUTIONS
When using electrical appliances, basic safety precautions should be followed, including the following:
{{This refiigerator must be properly installed
and located in accordance with the Installation
Instructions befbre it is used.
Do not allow chiMren to climb, stand or hang
on the shelves in the refrigerator. They couM
damage the refrigerator and seriously injure
themselves.
{{Do not touch the cold surfhces in the freezer
compartment when hands are damp or wet.
Skin m Wstick to these extremely coM surfaces.
{{Do not store or use gasoline or odmr flammable
vapors and liquids in the vicinity of this or any
other appliance.
{{Do not refreeze frozen foods which hm_e
thawed completely.
{{Keep fingers out of the "pinch point" areas;
clearances between the doors and between the
doors and cabinet are necessarily small. Be carefld
closing doors when chiMren are in the area.
{{Unplug the refiigerator before cleaning and
making repairs.
NOTE."IA/estronglyrecommendthatanyservicingbeperformed
byaqualifiedindividual
Before replacing a burned-out light bulb, unplug
the refrigerator or turn offpower at the circuit
breaker or fuse box in order to avoid contact with
a live wire filament. (A burned-out light bulb may
break when being replaced.)
{{Turning the control to the OFFposition does
not remove power to the light circuit.
DANGER!RISKOFCHILDENTRAPMENT
PROPERDISPOSALOFTHEREFRIGERATOR
ChiM entrapment and suffbcation are not problems
of the past. Junked or abandoned refrigerators are
still dangerous...even ifthey,_411sit far '_just a few
days." Ifyou are getting rid of your oM refrigerator,
please follow the instructions below to help prevent
accident.s.
Before You ThrowAway Your Old Refrigerator
or Freezer:
Take offflm doors.
Lem_ethe shelves in place so that children may
not easily climb inside.
CFCDisposal
Your old refrigerator has a cooling system that used
CFCs (chlorofluorocarbons). CFCs are believed to
hann stratospheric ozone.
Ifyou are fllro_4ng away your oM refiigerator, make
sure the CFC refrigerant is removed fbr proper
disposal by a qualified sets_icer.If you intentionally
release this CFC refiigerantyou can be subject to
fines and imprisonment under provisions of
environmental legislation.
USEOFEXTENSIONCORDS
Because of potential safety hazards under certain conditions, we strongly recommend
against the use of an extension cord.
However, ifyou must use an extension cord, it is absolutely necessapy that it be a UL-listed (in the United
States) or a CSA certified (in Canada), 3-wire _'ounding type appliance extension cord having a grounding
type plug and outlet and that the electrical rating of the cord be 15 amperes (minimum) and 120 volts.
3

IMPORTANTSAFETYINFORMATION.
READALLINSTRUCTIONSBEFOREUSING.
WARNING'!
HOWTOCONNECTELECTRICITY
Do not, under any circumstances, cut or remove the third (ground) prong from the power cord.
For personal safety, this appliance must be properly grounded.
The power cord of this appliance is equipped _@h
a 3-prong (grounding) plug which ulates v_4flla
standard 3-prong (grounding) wall outlet to
minimize dm possibility, of electric shock hazard
from this appliance.
HmTe tim wall outlet and circuit checked by a
qualified electrician to make sure tim outlet is
properly _'ounded.
Where a standard 2-prong wall outlet is
encountered, it isyour personal responsibility,
and obligation to have it replaced with a properly
grounded 3-prong wall outlet.
The refrigerator should always be plugged into its
o_m indMdual electrical outlet which has a voltage
rating that matches the rating plate.
This provides die best perfbnnance and also
prevents overloading house wiring circuits which
could cause a fire hazard from overheated wires.
Never unplug your refrigerator by pulling on the
power cord. Always _'ip plug firmly and pull straight
out from the outlet.
Repair or replace immediately all power cords that
have become frayed or otherwise damaged. Do not
use a cord that shows cracks or abrasion damage
along its length or at either end.
When moving file refiigerator a_vlyfrom the wall,
be carefifl not to roll over or damage the power cord.
USEOFADAPTERPLUGS(A_pterp/u_notpermi,e_inC_n_)
Because of potential safety hazards under certain conditions, we strongly recommend against
the use of an adapter plug.
However, ifyou must use an adapter, where local
codes permit, a temporaryconnectionulay be made
to a properly _'ounded 2-prong wall outlet by use
ofa UL-listed adapter available at most local
hardware stores.
The larger slot in die adapter must be aligned widl
the larger slot in the wall oudet to provide proper
polarity, in the connection of dm power cord.
When disconnecting the power cord frOUlthe
adapter, always hoM the adapter in place _4th one
hand while pulling the power cord plug _4th the
other hand. If this is not done, the adapter ground
temdnal is veUlikely to break with repeated use.
If the adapter _'ound terminal breaks, DONOTUSE
the refiigerator until a proper ground has been
established.
Attachingtheadaptergroundterminaltoa wall outlet
coverscrewdoesnotgroundtheapplianceunlessthe
coverscrewismetalandnotinsulated,andthewall
outlet isgroundedthroughthehousewiring.Youshould
havethecircuitcheckedbya qualifiedelectriciantomake
suretheoutletisproperlygrounded.
Readandfollow thisSafetyInformationcarefully.
SAVETHESEINSTRUCTIONS
4
Aboutthe controlsontherefrigerator.
The temperature controls on your refrigerator have letters
and numbers. Initially set the refrigerator control at 5and
the freezer control at C.
If you want colder or warmer temperatures, adjust the
refrigerator temperature first. When satisfied with that
setting, adjust the freezer temperature.
H nnN DB
Temperature Control Center Centre de temperature
Freezer Congelateur ..... REFRIGERATOR R#FRIGC:RATEUR
Initial setting Initial setting
"C.... 5"
Reglage de depart Reglage de depart
Coldest Coldest
"E.... 9"
Plus froid Plus froid
Control Settings
oFreezer Control
The freezer control moves a damper to change tile amount ofcold air that lllOVeS
fi'Oln tile freezer to the refrigerator COlnpartment.
Refrigerator Control
Tile refiigerator control maintains tile telnperamres throughout tile refiigerator.
Moving tile refiigerator control to 0FFstops cooling in both areas-refiigerator
and fl'eezer--but does not shut offpower to the refrigerator.
How ToTest Temperatures
Use tile milk test fbr tile refi'igerator COlnpartment. Place a container of milk on tile top shelf
and check it a d W later. If the milk is too waxm or too cold, a(!just tile telnperamre control.
Use the ice cream test for tile freezer COlnpamnent. Place a container of ice cream in tile
center of the freezer and check it after a dW. If it's too hard or too soft, a(!just the
telnperature control.
After changingthecontrols,allow24 hoursfortherefrigeratortoreachthetemperatureyouhaveset.
Food Storage
Tile tyi_eof packaging used and tile storage telnperatures will affect how long food will keep
in tile refrigerator.
New food storage guidelines are constantly being developed.
5

Aboutthe refrigeratorshelves,binsandstoragedrawers.
Not all features are on all models.
Rearranging the Shelves
Glass and _4re shelves in the refiigerator compartment are adjustable.
ToRemove
E] LiftUpandOut rrl_
% 1.2Jlilt Up
I
ToReplace
Slide-Out Spillproof Shelf
The slide-out spillproof shelf allows you
to reach items stored behind others. The
special edges are designed to help prevent
spills fi'om dripping to lower shelves.
Makesureyoupushtheshelvesall the wayback
in beforeyouclosethedoor.
Adjustable Door Bins
Adjustable bins can easily be cmTied fi'om
refi'igerator to work area.
Toremove: Tilt the bin tip and pull otlt on
the molded supports until it comes
completely out of the door.
Toreplace or relocate: Select desired height,
engage the bin in the molded support_s of
the door and slide the bin in. The bin will
hook in place.
The snuggers help prevent tipping, spilling
or sliding of small items stored on dm door
shel£ Place a finger on either side of the
dMder near the fi'ont and lnove it back and
forth to fit your needs.
Fruit and Vegetable Drawers
Excess water that may accumulate in tim
bottom of die drawers should be emptied
and the drawers wiped dU.
6

Adjustable Humidity Drawers
Slide the conu'ol all the way to the MAX
setting to provide high humidity
recommended fbr most vegetables.
Slide the control all the way to the MIN
setting to provide lower hmnidity levels
recommended for most fruits.
Detachable Meat Drawer
The slide-out meat drawer can be
removed and taken to the sink or fbod
preparation area.
The drawer and the adjustable shelf
to which it attaches can be relocated
at any level.
Storage Drawer and Cover Removal
ToRemove:
These &awers can be removed easily by lifting up slightly
while pulling the drawers past the stop location.
When the door cannot be opened enough to pull dm (kawer
straight out, slide the drawer toward the middle and reznove it.
Remove fl_eglass, fl_en the flame. When replacing file glass,
push the rearedge firlnly into file flame.
Step I
i
Step 2
7

Someadditionalfeatures.
Not all features are on all models.
Beverage Rack
This slide-out rack prox4des storage fbr a
vadeb_ of beverages. The rackand the adjustable shelf to which
it attaches can be relocated to any level.
iii _ iii _i _ _ii _ik
iiiiii!iii!! iiii))i(i Removable Wine Rack
This rack is designed to hold a bottle on
it.sside.
(Appearance may vary)
Freezer Shelves and Baskets
Onswingdoormodelswith twosliding
baskets: Both the lower and upper baskets
slide out to provide easy access to fbods
stored in the freezer. X_len the lower basket
is pulled out, the upper basket mW be
pushed back to further improve access
to the lower basket.
Onswingdoormodelswith onesliding
basketandonefullwidthfixedshelf:
The lower basket slides out to provide
easy access to foods stored in this basket.
The top fifll width fixed shelfprox4des a
convenient location to store ice cube trays
and ice bucket aswell as a variety of foods.
Ondrawermodels:The lower basket slides
out when the door is opened to provide
easy access m foods stored in this basket.
The upper basket may be pushed back to
fllrther improve access m the lower basket.
Boil1 baskets may be easily removed for
cleaning spills or crumbs offthe freezer
floor, or for installing an icemaker.
8

Automatic Icemaker Kit (optional at extra cost)
An Automatic Icemaker Kit is available
at extra cost. Check tim back of the
refrigerator for the specific icemaker kit
needed for your model.
If your model came _ith an ice bucket and
icemaker extension arm, they _ill need to
be used if you install an icemaker. If tim
bucket or extension arm have been
misplaced, they _411need to be ordered
befi)re installing the icelnaker.
Water Filter Accessory (optional at extra cost)
The water filter is an option at extra cost
and is available fi'om your dealer. Speci_ T
WR97X0214.
It has complete inst_dlation instructions and
installs on 1/4" O.D. copper water line.
i ¸ _
i _
Ice Cube Tray Shelf (on some models)
Some models have a small separate shelf
fbr ice cube trws.
Ice Trays and Bucket (on some models)
To relnove ice cubes from tray, place tim
trW upside clown on bucket as shown. Press
down on the tray and the cubes will pop out.
Large Ice Bucket (on some models)
A larger ice bucket is provided in some
models to give _'eater ice storage capacity,.
It can also be removed and used as a utility,
bucket in the fi'esh fbod section, gMng
more capacity, in the fi'eezer section.
9

Careand cleaningofthe refrigerator.
Cleaning the Outside
Keep the outside clean. Wipe ,@h a clean
cloth lightly dmnpened,_4th miM liquid
dish detergent. DUand polish,@h a clean,
soft cloth.
Donot wipetherefrigeratorwith asoileddish
clothor wet towel. Thesemayleavea residue
thatcanerodethepaint. Donotusescouring
pads,powderedcleaners,bleachorcleaners
containingbleachbecausetheseproductscan
scratchandweakenthepaint finish.
Stainlesssteelpanelsanddoorhandles
(on some models) shouM be cleaned _,6dl
a comlnercially available stainless steel
cleaner, wiping the surface along the _'ain
of the lnetal with a clean, soft cloth.
Stainless steel can also be cleaned with a
wet cloth using a solution of soap and
warn1 water. DUthe sm_hce _4th a clean,
soft cloth wiping the surface along the
grain of the lnetal.
Donotuseappliancewaxorpolishonthe
stainlesssteel
Cleaning the Inside
Tohelp prevent odors, lemTean open box of
baking soda in die fresh food and freezer
compartments.
Unplug the refrigerator before cleaning. If dds
is not practical, wring excess lnoismre out of
sponge or cloth when cleaning around
switches, lights or controls.
Use warn1 water and baking soda solution-
about a tablespoon (15 ml) of baking soda
to a quart (11) of water. This both cleans
and neutralizes odors. Rinse and wipe dpy.
After cleaning d_e door gaskets, apply a
thin layer of petroleum jelly to the door
gaskets at the hinge side. This helps keep
the gaskets from sticking and bending out
of shape.
Avoid cleaning cold glass shelves (on
some models) with hot water because
the extreme temperature difference
may cause them to break. Handle glass
shelves carefully. Bumping tempered
glass can cause it to shatter.
Donotwashan}/plasticrefrigeratorparts in
thedishwasher.
Behind the Refrigerator
Be carefld when lnoving tim refrigerator
away from the wall. All types of floor
coverings can be damaged, particularly
cushioned coverings and those with
elnbossed suKhces.
Pull the refrigerator straight out and remm
it to position by pushing it straight in.
Moving the refiigerator in a side direction
may result in damage m the floor coveting
or refiigerator.
When pushing the refrigerator back,
make sure you don't roll over the
power cord.
10

Clean the condenser coils at least
twice a year.
Under the Refrigerator
For most efficient operation, keep the
area under the refrigerator clean. Remove
the base _'ille and sweep away or vacuum
up dust.
For best results, use a brash specially
designed fbr this purpose. It is mTailable
at most appliance parLs stores.
Preparing for Vacation
For long vacations or absences, relnove
food and unplug the refrigerator. Move
the control to the OFFposition, and clean
the interior xdth a baking soda solution
of one tablespoon (13 lnl) of baking soda
to one quart (11) of water. Leave the
doors open.
If an icelnaker isinstalled, move the
icemaker feeler axm to the STOP(up)
position and shut off the water supply m
the refligerator.
Preparing to Move
Secure all loose items such as grille,
shelves and drawers by taping them
securely in place to prevent damage.
Besuretherefrigeratorstaysin an upright
positionduringmoving.
J
Replacing the Light Bulb
To replace a burned-out bulb, unplug the
refrigerator from its electrical outlet.
In therefrigeratorcompartment,remove the
lens cover by gently appMng pressure to the
side of the lens cover and pull the cover free
froln the control housing. Unscrew the bulb
when cool and replace it with an appliance
bulb of the same or lower wattage.
Inthefreezercompartment,silnply unscrew
and replace the bulb after ensuring the
refrigerator is unplugged.
TurningthecontroltotheOFFpositiondoesnot
removepowertothefightcircuit.
//

Preparingtoinstallthe refrigerator.
Read theseinstructionscompletely and carefully.
RefrigeratorLocation
Do not install dm refiigerator where dm
temperature _ill go below 60°F (16°C) because
it will not mn often enough to maintain proper
telnperatures.
Install it on a floor strong enough to support it
fiflly loaded.
Clearances
Allow tile following clearances for ease of
installation and proper air circulation.
Sides 0" (0 mln)
Top 1" (25 111111)
Back* 1%" (32 111111)
If refrigerator is to be installed against a wall on tile
hinge side, allow a minimum of 1_/4" (45 mm)
between the wall and tile side of the refrigerator to
allow fbr door and handle clearance.
*Metal cover on back may touch wall.
Packaging Tapes
Remove all packaging tapes and peel-off fihns.
These tapes were added to secure and protect
your refrigerator during transit.
12
Leveling
Yourrefrigeratorcomeswith adjustablerollers and
adjustablelegs.Either rollers or legs shouM be set so
tile refiigerator is firlnly positioned on tile floor and
tile front is raised just enough that tile doors close
easily when opened about halfivay.
\-O
ilt top out
Toadjust the rollers, tilt tile base grille out
exposing tile a(tjustment screws. Using an
adjustable wrench, turn the two front roller
adjusting screws counterclockv_4se to raise the
refrigerator, clockv_4se to lower it.
Turnadjustingscrew
counterclockwisetoraise
............... refrigerator
Adjustablelegs are located at file front corners.
Turn tile a@lstable legs clockwise to raise tile
refrigerator, counterclockwise to lower it.
Ac
Le
Turnadjustmentlegclockwise
to raise refrigerator
Jstable

Reversingthe doorswing.
Read theseinstructionscompletely and carefully.
BeforeYouBegin
Whenreversing the door swing:
Read fl_einstructions all the waythrough
before starting.
NOTE:Doors on stainless steel models are not
reversible.
Handle parts careflflly to avoid scratching paint.
Set screws down bytheir related parts to avoid
using theIn in the wrong places.
Theseinstructionsareforchangingthehingesfrom the
rightsideto theleft side.
Ifyou ever want to change dm hinges back to dm
right side, follow dmse same instructions (merely
reverse all references to left and right).
Unplug the refrigerator from its electrical outlet.
Empty all door shelves including the dairy
compartment.
Provide a non-scratching work suKhce for tim doors.
ToolsRequired
Masking mpe
Phillips screw(hiver
Putty knife or thin-blade screw(hiver
Square head #2 screwdriver
......7/. 2 , 5/16" and 3/8" sockets and ratchet
(6-point sockets are recommended)
Removingthe Doors
%Remove Refrigerator Door (Top Door)
E_]Tape the (toot" shut with masking tape.
[7] Remove the hinge cover (on some models).
With a 5/16" socket, remove the two screws that
hold the top hinge to the cabinet.
[7] Lift the hinge straight tip to flee the hinge pin
fi'om the s_:ket in _he top of the door. "
[--_Remove tape, tilt the door awW fl'om the
cabinet and lift it to fl'ee its bottom socket from
the hinge pin on the center hinge bracket.
Z%
[7] Set the door on a non-scratching suKhce with
the outside tip.
_] Remove Freezer Door (Bottom Door) (Formodels with a freezer drawer, complete step 2b only.)
E_]Tape the door shut with masking tape.
Remove the hinge pin with a 7/. 2 socket and
'-' ratchet.
[7] Remove tape, tilt the door away from the
cabinet. Remove and sm_ethe washer on the
hinge pin.
[--_Lift the door straight tip to fi'ee its bottom socket
fi'om the pin in the bottom hinge bracket.
_-_ PlasticWasher
HingePin
Center Hinge Bracket
13

Reversingthe doorswing.
Read theseinstructionscompletely and carefully.
ReversingtheHardware
[_ Transfer Bottom Hinge Bracket to the Left (Forfreezer swing door models only.)
[_-]Pull out _'ille 1" (25 mm) and setit down on the
floor to gain access to the hinge bracket screws. Plastic
[--_Using a 3/8" socket, remove the hinge bracket,
screws, plastic washer and spacer shim fi'om the
bottom right side of the cabinet.
BottomRight
[-_ Remove plug button and screw from the
bottom left side of the cabinet and install at
the bottom right.
[---_Reinstall the spacer shim, hinge bracket,
screws and plastic washer to tl_ebottom left
side of the cabinet.
Plastic
BottomLeft
_-_ Transfer Center Hinge Bracket to the Left
[-_ Remove the center hinge bracket and shim by
removing the three screws. NOTE:Keep these
screws _ith the hinge bracket. They are longer
screws and will be used when installing the hinge
on the other side.
[--_Remove the fllree painted screws and take
washers from tim center left side of the cabinet.
Screw them into the holes on the tight side,
which were uncovered in Step "a" above.
[-_ Place the center hinge bracket and shim over
the holes at the center left side of the cabinet.
Insert the three screws that were removed with
the center hinge bracket in Step "a" and
tighten securely.
Do not install the hinge pin yet. Center Left
Transfer Top Hinge to the Left
Interchange hinge and shim at top right with two
plug buttons at top lef_of cabinet. Do not tighten
screws on hinge side at this time.
14

[] Transfer Door Stops
On each door remove the metal door stop. Use the
center hinge pin as a guide to align the door stop on
the opposite side, after reversing the handles.
On fi'eezer drawer models, only the fi'esh food door
has a door stop.
Washer
LeftSide
DoorStop Washer
RightSide
ReversingtheDoorHandles
%Transfer the Refrigerator Door Handle to the Right
[_] Remove the four handle mounting screws.
F_ Using a putty knife, remove the four screw hole
plug buttons fl'om the right side of the door.
[_] Reinstall the plug buttons on the left side of
the door.
Handle
Mounting
Screws_-
[_ Align fl_ehandle over fl_e holes in file right side
of the door and install the four mounting screws.
I'e--]At the top of the door, remove the plug button
using a putty knife and reinstall it in the top
fight hand side hole.
NOTE:Make sure the door stop on the bottom of the
door has been transDrred to the left side of the
door as explained above.
FreshFoodDoor
•-_-- Plug
Button
_] Prepare the Freezer Handle for Door Swing Change (Forfreezer swing door models only.)
Onmodelswith afull-widthfreezerdoorhandle:
Simply remove the plug button fl'om the top
left corner and transfer it to the top right
corner of the fl'eezer door. PlugButton
NOTE:Make sure the door stop on the bottom
of the door has been transferred to the left
side of the door as explained above.
_-_ Onmodels with apartial-width freezer door handle:
Remove the plug button and screw from d_e top
fight hand side of the door. Remove the two
screws fl'om the handle.
Inst_tll the machine screw in fl_e hole that is
closest to the center of the door. Install the
tapping screw in the hole that is closest to the
outside edge of the door. Reinstall the screw and
plug button to the top left hand side of the door.
PlugButton
,/Tapping
qJIr Screw
15

Reversingthe doorswing.
Read theseinstructionscompletely and carefully.
E_ Rehang Freezer Door (Formodels with a freezer drawer, complete step 3c only.)
[-_-]Lower bottom socket offl'eezer (toot" onto pin on
bottom hinge bracket. Be sure washer is in place.
I-J]Tilt door toward cabinet and gently push door
under center hinge bracket and align ,_ith the
hole in the center hinge bracket.
7] Reinstall hinge pin wifll a 7/32" socket and
ratchet so it extends through a hole in center
hinge bracket and into socket on top of
freezer door.
ige
Pin
FreezerDoor
[] Rehang Refrigerator Door
[-_]Lower bottom socket of the refl'igerator (toot"
onto center hinge pin. Be sure washer is in place.
[7] Tilt door toward cabinet, lifting the top hinge so
the pin fits into the socket on top of the door.
_] Tighten the top hinge screws _ffter supporting
the door on the handle side and ensuring the
gap between the doors is even all across the
fl'ont.
[] Replace file hinge cover (on some models).
16

Normal operatingsounds.
Depending on the placement of the refrigerator in your kitchen,
you may want to place a piece of rubber backed carpet under
the refrigerator to reduce noise.
[]
[]
%
%
%
Evaporator Fan.You may hear air being fbrced through the cabinet
by the fan.
Evaporator.The flow of refrigerant through the evaporator may create a
boiling or gurgling sound.
DefrostHeater.During defl'ost (?_cles,water dripping onto dm heater may
cause a hissing or sizzling sound. After defl'osting, a popping sound may
occur and the evaporator may create a boiling or gurgling sound.
ColdControl&Defrost77mer.These parts can produce a snapping sound
when turning the refrigerator on or of£ The timer also produces a sound
similar to an electric clock.
Water Pan.Water may be heard nmning into die drain pan during die
defl'ost (_cle.
Compressor.Modern, high efficienc3, compressors operate much faster
than older models. The compressor may hm_e a high pitched hum or
pulsating sound.
[7] CondenserFan.You may hear air being fbrced over the condenser by the fan.
Beforeyoucall forservice...
Troubleshooting -tips
Save time and money! Review the charts on the following
pages first and you may not need to call for service.
Refrigeratordoesnot
operate
Vibrationorrattling
(slightvibration
is normal)
Possible Causes
Refrigerator in defrost cycle.
Control in OFFposifion.
Refrigerator is unplugged.
The fuse is blown/circuit
breaker is tripped.
Front adjustable legs or
rollers need adjusting.
What ToDo
*Wait about 30 minutes for defrost (_<:leto end.
*Move the control to a teznperature setting.
"Push the plug coznpletely into the outlet.
*Replace fllse or reset the breaker.
• See Leveling.
17

Beforeyoucall forservice...
Possible Causes What ToDo
*Wait 24 hours for the refi'igerator to completely
cool down.
"This is normal.
Normal when refrigerator
is first plugged in.
Motor operates for
longperiods or cycles
on and offfrequently.
(Modem refrigerators Often occurs when large
amounts of food are
with more storage
space and a larger placed in refrigerator.
freezer require more Door left open. *Check to see if package is holding door open.
operating time. They
start and stop often Hot weather or frequent * This is nomlal.
to maintain even door openings.
temperatures.) Temperature control •See About the controls.
set at the coldest setting.
Grille and condenser need •See Care and cleaning.
cleaning.
Refrigerator or freezer Temperature controls not set *See About the controls.
compartmenttoo warm cold enough.
Warm weather or frequent •Set dm temperature control one step colder.
door openings. See About the controls.
Door left open. • Check to see if package is holding door open.
Frost or ice cqstals Door left open. • Check to see if package is holding door open.
onfrozen food Too frequent or too long
(frostwithin package
is normal) door openings.
Ice cubes have Food transmitting odor/taste •Wrap foods well.
odor/taste to ice cubes.
Interior of refrigerator •See Care and cleaning.
needs cleaning.
Slowice cube freezing Door left open. •Check to see if package is holding door open.
Freezer control not set •See About the controls.
cold enough.
Foods transmitting •Foods with strong odors should be righdy wrapped.
odor to refrigerator._ • Keep an open box of baking soda in the refiigerator;
replace every three lnonths.
Interior needs cleaning. • See Care and cleaning.
/8

Moistureformson
outsideofrefrigerator
Moisturecollectsinside
(inhumidweather,air
carriesmoistureinto
refrigeratorwhendoors
areopened)
Possible Causes
Not tmusual during
periods of high humidity.
Too frequent or too
long door openings.
What ToDo
• Wipe sm_me (hy and reset the refi'igerator control
one setting colder.
Foodfreezing in Food too close to air vent. • Move the fbod away ffozn the air vent (near the controls).
the refrigerator Refrigerator control is set *Move the refi'igerator control to a warlner temperature.
too cold.
Door does not close Front rollers or legs need *See the Leveling section.
by itself adjusting.
Interiorlight does No power at outlet. *Replace fi_se or reset the breaker.
not work Light bulb burned out. • See Replacingthelightbulb.
Doorsqueakswhen
opened Hinge and/or gasket needs
lubrication.
19

CUSTOMER WARRANTY
(for customers in Canada)
Your refrigerator is warranted to be free of defects in material and workmanship.
_ What is covered How Long Warranted Parts Labour lee}
(From Date of Sale) Repair or Replace
[('463/ at Camco's Option lee}
id_ Compressor Ten (10) Years Ten (10) Years Five (5) Years /eel
[(4_/Sealed System (including Five (5) Years Five (5) Years Five (5) Years _!
i_/ evaporator, condenser lee}
leeJtubing and refrigerant) ¢-_}
1(__3/All Other Parts One (1) Year One (1) Year One (1) Year _}
TERMS AND CONDITIONS:
1. This warranty applies only for single
family domestic use in Canada when the
Refrigerator has been properly installed
according to the instructions supplied by
Camco and is connected to an adequate
and proper utility service.
Damage due to abuse, accident,
commercial use, and alteration or
defacing of the serial plate cancels all
obligations of this warranty.
Service during this warranty period must
be performed by an Authorized Camco
Service Agent.
2. Neither Camco nor the Dealer is liable for
any claims or damages resulting from
failure of the Refrigerator or from service
delays beyond their reasonable control.
3. To obtain warranty service, purchaser
must present the original Bill of Sale.
Components repaired or replaced are
warranted through the remainder of the
original warranty period only.
4. This warranty is in addition to any
statutory warranty.
WHAT IS NOT COVERED:
• Service trips to your home to teach you
how to use the product.
• Damage to finish after delivery.
• Improper installation--proper installation
includes adequate air circulation to the
refrigeration system, adequate electrical,
plumbing and other connecting facilities.
• Replacement of house fuses or resetting
of circuit breakers.
• Replacement of light bulbs.
• Damage to product caused by accident,
fire, floods or acts of God.
Loss of food due to spoilage.
Proper use and care of product as listed
in the owner's manual, proper setting of
controls.
• WARRANTOR IS NOT RESPONSIBLE
FOR CONSEQUENTIAL DAMAGES.
IMPORTANT
Keep this warranty and your bill of sale as proof of original purchase and purchase date.
Camco Service is available coast to coast.
If further help is needed concerning this warranty, contact:
Manager, Consumer Relations
Camco Inc., Consumer Service
1 Factory Lane
Suite 310,
Moncton, New Brunswick
ElC 9M3
20
Other manuals for TCX18
2
This manual suits for next models
4
Table of contents
Languages:
Other GE Refrigerator manuals

GE
GE GSL25JFTBS User instructions

GE
GE Profile Arctica PTS22LCPWW User instructions

GE
GE GFSF6KEXBB - 25.8 cu. Ft. Refrigerator Manual

GE
GE Appliances 24 User manual

GE
GE Profile PSF26NGT Manual

GE
GE GTH21SBXSS Manual

GE
GE PFSS6SMXASS and Operating instructions

GE
GE GBS20HBS Manual

GE
GE GTE21 Operating instructions

GE
GE CustomStyle GSC23LGR Manual