manuals.online logo
Brands
  1. Home
  2. •
  3. Brands
  4. •
  5. GE
  6. •
  7. Refrigerator
  8. •
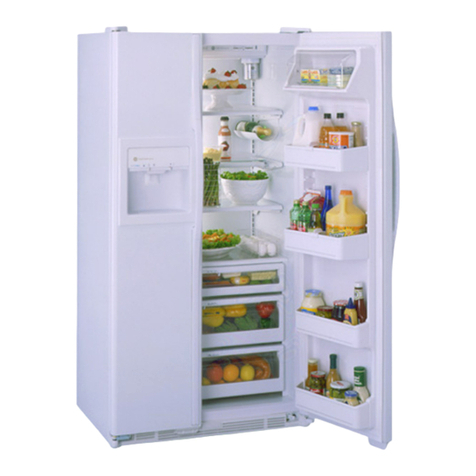
  9. GE TURBOCOOL 23 Operating instructions

GE TURBOCOOL 23 Operating instructions

Other manuals for TURBOCOOL 23

19

This manual suits for next models

2

Other GE Refrigerator manuals

GE CustomStyle GCL22QGT Programming manual

GE

GE CustomStyle GCL22QGT Programming manual

GE TBX22PRBMLBB User manual

GE

GE TBX22PRBMLBB User manual

GE 49-6235 User manual

GE

GE 49-6235 User manual

GE GSS20IEP User instructions

GE

GE GSS20IEP User instructions

GE GBSC3HBXWW - 23.2 cu. Ft. Bottom-Freezer... Manual

GE

GE GBSC3HBXWW - 23.2 cu. Ft. Bottom-Freezer... Manual

GE Profile PSC23MSTSS Programming manual

GE

GE Profile PSC23MSTSS Programming manual

GE GPE12 Original instructions

GE

GE GPE12 Original instructions

GE GSHS5MGXSS Manual

GE

GE GSHS5MGXSS Manual

GE CustomStyle GSC23KGT Manual

GE

GE CustomStyle GSC23KGT Manual

GE GFSF6KEXBB - 25.8 cu. Ft. Refrigerator Assembly instructions

GE

GE GFSF6KEXBB - 25.8 cu. Ft. Refrigerator Assembly instructions

GE 20 Operating instructions

GE

GE 20 Operating instructions

GE GTL21KCW User manual

GE

GE GTL21KCW User manual

GE Appliances 19 Training manual

GE

GE Appliances 19 Training manual

GE GTV120PANR User manual

GE

GE GTV120PANR User manual

GE PSW26MSTSS Manual

GE

GE PSW26MSTSS Manual

GE 162D3904P005 User manual

GE

GE 162D3904P005 User manual

GE TBX17 User manual

GE

GE TBX17 User manual

GE Profile PSB42YSXSS User manual

GE

GE Profile PSB42YSXSS User manual

GE TBF21 Installation instructions

GE

GE TBF21 Installation instructions

GE ESH22XGRECC and Operating instructions

GE

GE ESH22XGRECC and Operating instructions

GE GTH18EBB Manual

GE

GE GTH18EBB Manual

GE GTS18KHP User manual

GE

GE GTS18KHP User manual

GE Monogram ZFGP21HYASS User manual

GE

GE Monogram ZFGP21HYASS User manual

GE GSHS5PGXSS Manual

GE

GE GSHS5PGXSS Manual

Popular Refrigerator manuals by other brands

Frigidaire FRS26TS7DW2 Use & care manual

Frigidaire

Frigidaire FRS26TS7DW2 Use & care manual

Fisher Scientific 10ECEEFSA manual

Fisher Scientific

Fisher Scientific 10ECEEFSA manual

Summit FF22BDRSS user manual

Summit

Summit FF22BDRSS user manual

Frigidaire FFRU17B2QWE use & care

Frigidaire

Frigidaire FFRU17B2QWE use & care

Hotpoint ENBGH 19xxx FW operating instructions

Hotpoint

Hotpoint ENBGH 19xxx FW operating instructions

Hitachi R-SG28KPH instruction manual

Hitachi

Hitachi R-SG28KPH instruction manual

Dometic RMH 7390 L operating instructions

Dometic

Dometic RMH 7390 L operating instructions

AEG S71700TSW0 user manual

AEG

AEG S71700TSW0 user manual

Electrolux ENB3669 Instruction book

Electrolux

Electrolux ENB3669 Instruction book

Electrolux ERN 2930 Instruction book

Electrolux

Electrolux ERN 2930 Instruction book

Beko GNE 60520 X user manual

Beko

Beko GNE 60520 X user manual

Jenn-Air JUR248LBES00 Use & care guide

Jenn-Air

Jenn-Air JUR248LBES00 Use & care guide

Dometic RGE 4000 Installation and operating manual

Dometic

Dometic RGE 4000 Installation and operating manual

Dometic L-0191B Brochure & specs

Dometic

Dometic L-0191B Brochure & specs

LG LRBP1031W - 10 Cu. Ft. Cabinet Depth Bottom Freezer... owner's guide

LG

LG LRBP1031W - 10 Cu. Ft. Cabinet Depth Bottom Freezer... owner's guide

Daewoo RN-33 Series user manual

Daewoo

Daewoo RN-33 Series user manual

Haier RF-8888-174 Service manual

Haier

Haier RF-8888-174 Service manual

Blaupunkt 5CK2 Series user manual

Blaupunkt

Blaupunkt 5CK2 Series user manual

manuals.online logo
manuals.online logoBrands
  • About & Mission
  • Contact us
  • Privacy Policy
  • Terms and Conditions

Copyright 2025 Manuals.Online. All Rights Reserved.

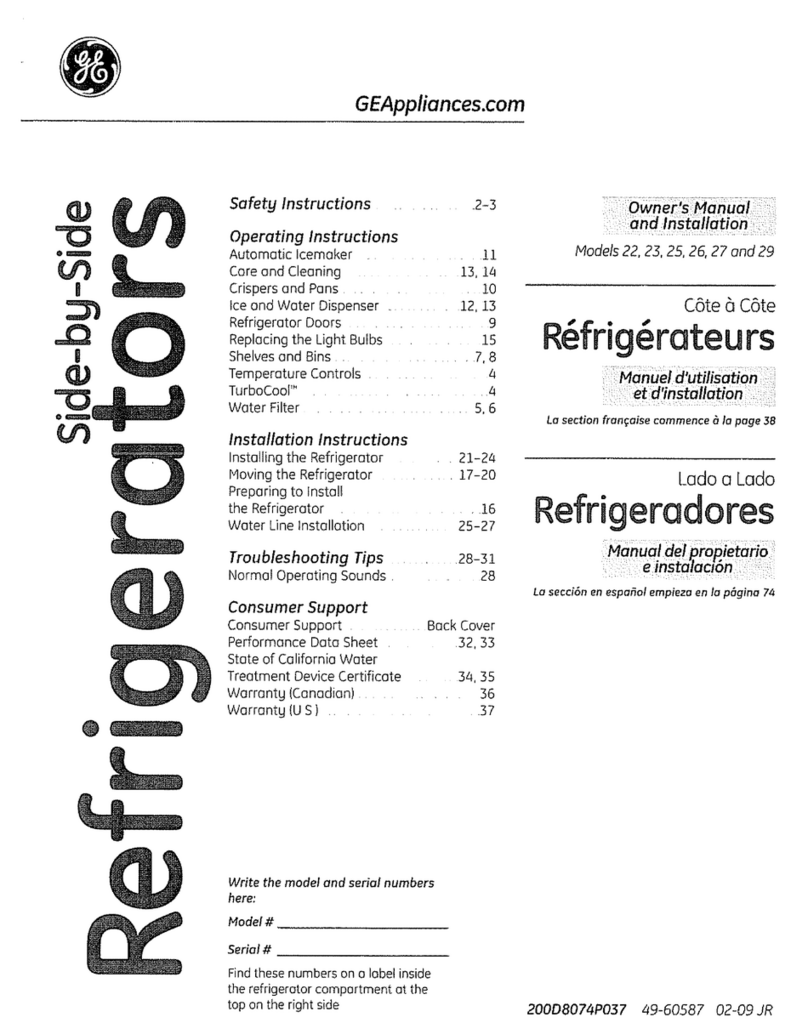
www.GEAppliances.com
Safety Instructions ........... 2-4
Operating Instructions
Automatic Icemaker ........... 11
Care and Cleaning .......... 13, 14
Crispers and Pans ............. 10
Ice and Water Dispenser ..... 12, 13
Refiigerator Doors ............. 9
Replacing the i,ight Bulbs ....... 15
Shelves and Bins ............. 7, 8
Temperature Controls ........... 5
TurboCool F'' . .................. 5
Water Filter ................... 6
Installation Instructions
Installing the Refrigerator .... 21-24
Moving the Refrigerator ..... 17-20
Preparing to Install
the Refrigerator ............... 16
Water Line Installation ...... 25-27
Troubleshooting Tips ....... 28-31
Normal Operating Sounds ...... 28
Consumer Support
Consumer Support ..... Back (]over
Performance Data Sheet ........ 34
Product Registration ........ 37, 38
State of California Water
Treatment Device Certificate ..... 35
Warranty (Canadian) ........... 32
Warranty (U.S.) ............... 33
Mode/s 23, 25 and 27
C6te fiC6te
R frigdrateurs
La section frangaise commence a la page 40
Lado a Lado
Refrigeradores
La seccidn en espa_ol empieza en la pagina 74
Writethemodelandserial numbershere:
Model #
Serial #
Find these numbers on a label inside
the refrigerator compartment at the
top on the right side. 200D2600P029 49-60298 10-03JR
IMPORTANTSAFETYINFORMATION.
READALLINSTRUCTIONSBEFOREUSING.
a, WARNING'!
Use this appliance only for its intended purpose as described in this Owner's Manual
SAFETYPRECAUTIONS
When using electrical appliances, basic safety precautions should be followed, including the following:
This refl-igerator must be properly installed
and located in accordance with the Installation
Instructions before it is used.
Do not allow children m climb, stand or hang
on the shelves in the refrigerami: They could
dmnage the refrigerator and seriously injure
themseNes.
{{_iDo not touch tile cold surfaces in tile fleezer
compamnent when hands are damp or wet. Skin
may stick to these extremely cold surfaces.
{{_iDo not store or use gasoline or other fl_umnable
vapors and liquids in tile vicinity of this or any
other appliance.
In refl_igeramrs wifll automatic icemakers,
avoid contact with tile moving parts of tile
ejector mechanism, or with tile heating element
located on the bottom of the icemake_. Do
not place fingers or hands on the automatic
icemaking mechanism while tile refligeramr
is plugged in.
Keep fingers out of tile "pinch point" areas;
clearances between the doors and between
tile dooIs and cabinet are necessarily small.
Be careflfl closing doors when children are
in the area.
Unplug die refligemtor before cleaning and
making repaiI_.
NOTE:Westrong/}/recommendthatan}/servicingbe
performedbyaquafifiedindividual
{{_iSetdng either or both controls to 0(Off}does not
remove power to tile light circuit.
{{_iDo not refleeze flozen foods which have
thawed completel):
2
wvvvv.GEAppliances.com
DANGER! RISK OFCHILD ENTRAPMENT
PROPERDISPOSALOFTHEREFRIGERATOR
Child entrapment and suffbcadon aIe not pIoblems
of tile past. Junked or abandoned IefligeIamI_ aIe
still dangeious...even if they will sit foi "just a few
days." If you are getting _-id ofyoui old refl-igerami;
please follow tile instmcOons below m help pievent
accidents.
Before You ThrowAway Your Old Refrigerator
or Freezer:
_,_ke offthe doois.
I,eave tile shelves in place so that chikhen may
not easily climb inside.
Refrigerants
All refligmafion pIoducts contain refligerants,
which undei fedeIal law must be iemoved p_ior
to p_oduct disposal. If you are getting iid of an
old _eflige_adon p_oduct, check with tile
company handling the disposal about what
to do.
USEOFEXTENSIONCORDS
Because of potential safety hazards under certain conditions, we strongly recommend against the use
of an extension cord.
However, ifyou must use an extension coid, it is absolutely necessa D, that it be a UIAisted (in tile United
States) or a CSA-listed (in Canada), _wire giounding type appliance extension cord having a gIounding
type plug and outlet and that tile electrical _v_tingof tile coid be 115ampe_es (minimum) and 120 volts.
3
IMPORTANTSAFETYINFORMATION.
READALLINSTRUCTIONSBEFOREUSING.
a, WARNING'!
HOWTOCONNECTELECTRICITY
Do not, under any circumstances, cut or remove the third (ground) prong from the power cord. For
personal safety, this appliance must be properly grounded.
The power cord of fllis appliance is equipped with
a ,%prong (grounding) plug which mates with
a standard 3-prong (grounding) wall outlet to
minimize the possibilit T of elecuJc shock hazard
flom this appliance.
Have the wall outlet and circuit checked by a
qualified electrician to make sure the outlet is
properly grounded.
If die oudet is a standard 2-prong oudet, it is
your personal responsibilit T and obligation m
have it replaced with a properly grounded
3-prong wall oudet.
The refligerator should ahvays be plugged into its
own individual electrical outlet which has a voltage
rating that matches the rating plate.
This provides the best performance and also
prevents overloading house wiring circuits which
could cause a fire hazard flom overheated wires.
Never unplug your refligerator by pulling on
the power cord. Ahvays grip plug firefly and pull
straight out flom the outlet.
Repair or replace immediamly all power cords that
have become flayed or otherwise damaged. Do not
use a cord that shows cracks or abrasion d_unage
along its length or at either end.
x_qlen moving the refligerator away flom the
wall, be careful not to roll over or damage the
power cord.
USEOFADAPTERPLUGS(A_pterp/u_notper_i_e_inC_n_)
Because of potential safety hazards under certain conditions, we strongly recommend against
the use of an adapter plug.
Howevex; if you must use an adapmx; where local
codes pemlit, a temporary connection may be made
to a properly grounded 2-prong wall outlet by use
of a UIAisted adapter available at most local
hardware stores.
The larger slot in the adapter must be aligned with
the larger slot in the wall outlet to provide proper
poladty in the connection of the power cord.
When disconnecting die power cord flom die
adaptex, ahvays hold the adapter in place with one
hand while pulling the power cord plug with the
other hand. If this is not done, the adaptor ground
mrminal is vexT likely m break with repeamd use.
If the adapter ground terminal breaks, DONOT
USEthe refrigerator undl a proper ground has
been established.
Attachingtheadaptergreundterminaltoa walloutlet
coverscrewdoesnotgroundtheapplianceunlessthe
coverscrewismetal,andnotinsulated,andthewall
outlet isgroundedthroughthehousewiring.Youshould
havethecircuitcheckedbya qualifiedelectricianto
makesuretheoutlet isproperlygrounded.
READANDFOLLOWTHISSAFETYINFORMATIONCAREFULLY.
SAVETHESEINSTRUCTIONS
4
Aboutthe temperaturecontrols, www.GEAppliances.com
FREEZER FRESHFOOD
9 IS COLDEST
0IS OFF
.......ill
Initially,set therefrigerator control at5andthe freezercontrol at 5and allow 12-24
hoursfor the temperaturetostabilize.
Severaladjustmentsmay berequired.Adjust the controlsoneincrementata time,and
allow 12hoursafter eachadjustmentfortherefrigerator to reachthe temperatureyou
haveset.
Settingthe controlsto0stopscoolingin boththerefrigeratorandfreezer compartments
butdoesnot shut off electricalpower to therefrigerator.Onsomemodels,onlythe
refrigerator control hasa 0 setting.
Touchpadcontrols
•Settingeithercontrol at0will automaticallyset theother control atO.Thezeroswill
blinkuntilyouset thecontrols.
•If bothcontrols areset at0 and eitherCOLDERpad ispressed,the controlswill
automaticallyresetto 5.
Controlsettings will varybasedonpersonalpreferences,usageandoperating
conditionsandmayrequiremorethanoneadjustment.
NOTE."Onsomemodels,therefrigeratorisshippedwithprotectivefilmcoveringthetemperature
controls.If thisfilmwasnotremovedduringinstallation,removeit now.
About TurboCooEM(onsome models)
TurboCool
i IiiiH_H_H_H_H_H_H_H_H_H_H_H_H_H_H_H_H_H_H_H_
How it Works
TurboCoolrapidly cools file refligermor
compamnent in order m more quickly
cool foods. Use rurboCoolwhenadding a
laxge amount of food to the refrigerator
compartment, put0ng away foods after they
have been sitting out at room temperature
or when putting awaywam:t leftovers. It can
also be used if the refrigerator has been
without power for an exmnded period.
Once acOvamd, the compressor will mrn on
immediately and the fans will cycle on and
off at high speed as needed for eight horns.
The compressor will conOnue m run un01
the refligeramr compartment cools m
approximately 34°F (1°C), then it will cycle
on and off to maintain this set0ng. After 8
hours, or if rurboCoolis pressed again, the
refligeramr compartment will return m
the original set0ng.
HowtoUse
Press TurboCool.The TurboCool
indicator light will come on; however;
the refligerator temperature display
will still show the current set0ng.
After TurboCoolis complete, the TurboCool
indicator light will go out.
NOTES: The refligeramr mmperamre
cmmot be changed dining
TurboCooL
The fieezer temperature is not
affbcmd dining TurboCool.
When opening the refrigerator
door during TurboCootthe f.ns
will conOnue mrun if they have
cycled on.
5
Aboutthe water filter (onsome models).
On some models
Water Filter Cartridge
Place the top of the cartridge up
inside the cartridge holder and
slowly turn it to the right.
The water filter cartridge is located in the
back upper right corner of the refligerator
compartment.
When to Replace the Filter
There is a replacement indicator light for
the water filmr camidge on the dispenseL
This light will unn orange to tell you that
you need m replace the filmr soon.
The filter cartridge should be replaced
when file replacement indicator light turns
red or if the flow ofwamr m the dispenser
or icemaker decreases.
Installing the Filter Cartridge
0
0
ii i
RESETWATERFILTER
HOLD3 SECS
If you are replacing die caruidge,
first remove the old one by slowly
turning it m the left. Donotpull down
on the cartridge. A smaU amount of
wamr m W drip down.
Fill die replacement carnidge widl
wamr flom die tap to aUow for better
flow flom the dispenser immediamly
after installaOon.
I,ining up die arrow on die caruidge
and the caruidge holdex, place die
mp of the new carnidge up inside
the holdeL DOnotpush it up into
the holdeL
Slowly mrn it m file fight until the filmr
caruidge stops. DONOTOVERTI6HTEN.
As you mrn the caruidge, it will
automaficaUy raise itself into position.
Cartridge will romm about 1/4 turn.
O Run water flom the dispenser for
3 minutes (about one and a half
gallons) to clear the system and
prevent sputtering.
Press and hold the RESETWATERFILTER
pad on the dispenser for 3 seconds.
NOTE:A newlyqnsmlled water filter
cartridge may cause water to spurt flom
the dispenseL
Filter Bypass Plug
You must use file filmr bypass plug
when a replacement filter cartridge is not
available. The dispenser and the icemaker
will not operam without the filmr or filmr
bypass plug.
Replacement Filters:
Toorderadditionalfiltercartridges
in theUnitedStates,visit ourWebsite,
www.GEAppliances.com,orcall GEParts
andAccessories,800.626.2002.
Suggested Retail $34.95 USD
Customers in Canada should consult die
yellow pages for the nearest Camco Se_'ice
CenmL
6
Abouttheshelvesandbins. www.GEAppliances.com
Not all features are on all models.
lRefrigerator Door Bins and Freezer Door Tilt-Out Bins
Refrigerator bin
Freezer bin
t
LargeBins
The larger reflige_v_tor door bins and
fleezer flit-out door bins are adjustable.
Toremove:Lift the fiont of the bin straight
up, then lift up and out.
Thesnuggerhelps prevent dpping, spilling
or sliding of small items stored on the door
shel£ Place a finger on either side of the
snugger near the rear and move it back
and forth to fit your needs.
Toreplace or mlocate: Engage the back side Donotblock
of the bin in the molded supports of the
dooL Then push down on the flont of the
bin. Bin will lock in place.
SmallBins
Toremove:I,iff the flont of the bin straight
up then out.
Toreplace: Position the bin above file
rectangular molded supports on file dooL
Then slide file bin down onto file support
to lock it in place.
CAUTION:On
modelswithanice
chuteinsidethetop
freezerdoorbin,be
carefulwhenp/acing
itemsin thebin.
Makesurethat
itemsdonotblock
orfallintotheice
chute.
Freezer tilt-out bin
Press tab andpull shelf
forward to remove
Slide-Out Spillproof Shelf
The slide-out spillproof shelf allows you
m reach imms stored behind others. The
special edges are designed m help prevent
spills flom dripping to lower sheNes.
Toremove:
Slide the shelf out until it reaches the stop,
then press down on the tab and slide the
shelf suaight out.
Toreplaceorrelocate:
Line the shelf up with the supports and
slide it into place. The shelf can be
reposifioned when the door is at 90° or
more. To reposifion the shelf, slide the shelf
past the stops and angle downward. Slide
shelf down m the desired position, line up
with the supports and slide into place.
Makesureyoupushtheshelvesall thewayback
in beforeyoudosethedoor.
7
Abouttheshelvesandbins.
Not all features are on all models.
OuickSpaceTM Shelf (onsomemodels)
This shelf splits in half and slides under
itself for storage of tall items on the shelf
below.
This shelf can be removed and replaced
or relocated just like Slide-.Out Spillproof
Shelves.
On some models, this shelf can not be used
in the lowest position.
ii TM
il i
Freezer Baskets
Toremove, slide out to the stop position,
lift the flont past the stop position, and
slide out.
Makesureyoupushthebasketsall thewayback
in beforeyouclosethedoor.
Slide-Out Freezer Shelves
Toremove, slide out to the stop position,
lift the flont past the stop position, and
slide out flom rib.
Makesureyoupushtheshelvesall the wayback
in beforeyouclosethedoor.
TM iii
Fixed Freezer Shelves
Toremove,lift the shelf up at the left side
and then bring the shelf out. NOTEFORDISPENSERMODELS'.In order
m rake flfll advantage of the flit-out ice bin
(on some models), only store items on the
shelf below the ice bin that are no taller
than the lowest point on the bin.
8
Abouttherefrigeratordoors. OEAppli..oosoom
Refrigerator Doors
The refligeramr doors may feel diffbrent
than the ones you are used m. The
special door opening/closing feanne
makes sure the dooi_ close all the way
and are securely sealed.
When opening and closing die door you
will notice a stop position. If file door is
opened past this Moppoint, the door will
remain open m aUowyou m load and
unload food more easily. When the door
is only partially open, it will automatically
close.
The resistance you feel at tile stop
posidon will be reduced as tile door
is loaded wkh food.
When the door is only partially open,
it will automatically close.
Beyond this step the door will
stay open.
7/16" SocketWrench
Toremovethe base I I
gril!elopenthedoors, _L
removethescrewat
eachendofthebase __
gril!eandthenpu!l Raise
thegrillestraightout,
Door Alignment
If doors are uneven, adjust tile
refrigerator dooL
Using a 7/16" socket wrench, turn
tlle door adjusting screw to the right
m raise the door; m the left, to lower
it. (A nylon plug, imbedded in the
dlreads of the pin, prevents the pin
flom mining unless a wrench is
used.)
O Afker one or two tmns of tile
wrench, open and close tlle
refrigerator door and check the
alignment at tile top of the doo_s.
9
Aboutthe crispersandpans.
Not all features are on all models.
iii ii
Fruit and Vegetable Crispers
Excess water dmt may accumulate in the
bottom of the drawePs should be wiped dry:
HI _ LO Adjustable Humidity Crispers
Slide tile control all tile way to tile H/setfing
to provide high humidity recommended for
illost vegetables.
Slide the control all tile way to tile LO
setting to provide lower humidity levels
recommended for illost fluits.
Aboutcrisperremoval
Not all features are on all models.
__ Crisper Removal
Crispers can easily be removed by pulling
the drawer straight out and lifting the
drawer up and over tile stop location.
If die door prevents you flom taking out
the dmwexs, first ny m remove the door
bins. If this does not offer enough
clearance, the refligerator will need m
be rolled forward until the door opens
enough to slide the draweI_ out. In some
cases, when you roll the refligeramr out,
you will need m move the reflJgeramr
m the left or right as you roll it out.
10