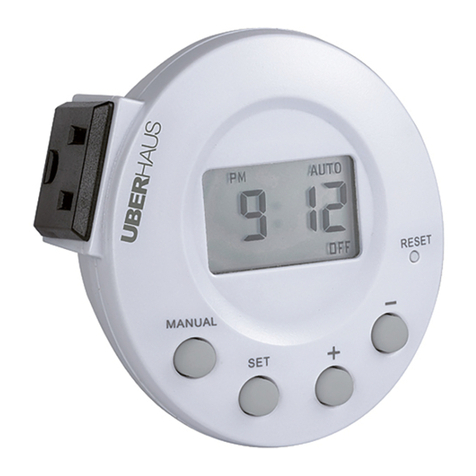
Programación inicial:
1. Si aparecen números en la pantalla LCD se puede comenzar con la programación.
Continúe con el paso número 2. Si la pantalla está en blanco conecte el
temporizador y aguarde dos horas hasta que la batería interna se cargue antes de
comenzar con la programación.
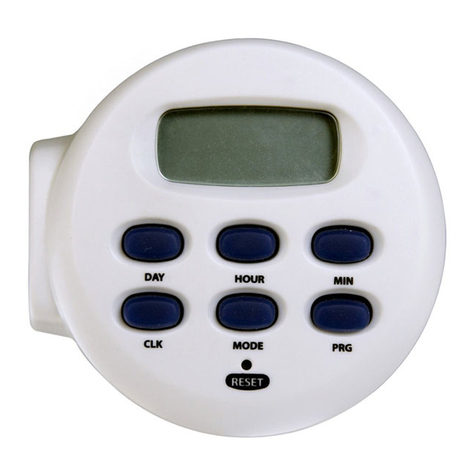
2. Utilice un mondadientes o un lápiz puntiagudo para empujar el botón RESET
(REINICIO). Una vez desplazado este botón, la pantalla se pondrá en blanco por un
instante y luego mostrará las 12:00 AM. Ver Figura 2.
Cómo configurar la hora:
1. Mantenga presionada la tecla CLOCK mientras dura el proceso de configuración
de la hora y el día.
2. Mientras presiona CLOCK, apriete la teclaHOUR hasta que aparezca la hora actual.
Observe que las palabras AM y PM aparezcan en la parte inferior derecha de la
pantalla. Ver Figura 1.
3. Presione la tecla MINUTE, mientras oprime la tecla CLOCK. Continúe presionando
la tecla MINUTE hasta que aparezcan los minutos actuales.
4. Presione DAY, mientras oprime la tecla CLOCK. Continúe presionando la tecla DAY
hasta encontrar el día actual.
5. Una vez que haya aparecido el día actual en la pantalla suelte la tecla "CLOCK".
Programación de los horarios de
ENCENDIDO y APAGADO
Observación: Si no se presiona ninguna tecla por el término de 10 segundos mientras
se realiza la configuración, el temporizador volverá a mostrar la pantalla del reloj.
1. Presione y suelte la tecla PROGRAM para
comenzar con la configuración. La pantalla
mostrará la indicación 1ON y todos los días de la
semana.
Ver Figura 3.
2. Presione ”DAY” para seleccionar entre las
opciones de los diferentes días de la semana que desea configurar:
• MO (LUNES) TU (MARTES) WE (MIÉRCOLES) TH (JUEVES) FR (VIERNES) SA (SÁBADO) SU
(DOMINGO)
• MO (LUNES)>TU (MARTES)>WE (MIÉRCOLES)>TH (JUEVES)>FR (VIERNES)>SA
(SÁBADO)>SU (DOMINGO) (para mostrar uno a uno cada día de la semana, esto
significa que la configuración de encendido y apagado solo está activa para el día
que ha sido seleccionado)
• MO (LUNES) TU (MARTES) WE (MIÉRCOLES) TH (JUEVES) FR (VIERNES)
• SA (SÁBADO) SU (DOMINGO)
• MO (LUNES) TU (MARTES) WE (MIÉRCOLES) TH (JUEVES) FR (VIERNES) SA (SÁBADO)
• MO (LUNES) WE (MIÉRCOLES) FR (VIERNES)
• TU (MARTES) TH (JUEVES) SA (SÁBADO)
• MO (LUNES) TU (MARTES) WE (MIÉRCOLES)
• TH (JUEVES) FR (VIERNES) SA (SÁBADO)
3. Encuentre los días en los que desearía que el temporizador funcione y deje de
presionar la tecla DAYS. De esta forma permitirá que aparezcan en la pantalla los
días en que quiere que el temporizador funcione.
4. Presione la tecla HOUR hasta que aparezca en la pantalla el horario en que usted
desea que el temporizador se active. (Las palabras AM y PM aparecen en la esquina
inferior derecha de la pantalla. Asegúrese de que sean correctas cuando configure
el horario).
5. Presione la tecla MINUTE hasta que aparezcan en la pantalla los minutos en que
usted desea que el temporizador se active.
6. Presione y suelte la teclaPROGRAM para configurar el horario de 1OFF (apagar).
Repita los pasos 1 al 5 si desea que el temporizador se APAGUE para el programa
número 1.
7. Presione "PROGRAM" para ir al Programa número 2 (P2ON) y repita los pasos
1 al 6 si desea configurar horarios adicionales de ENCENDIDO y APAGADO o
presione "CLOCK" (en cualquier momento) para finalizar la configuración. ¡Puede
configurar hasta 20 programas de ENCENDIDO y APAGADO para que se ejecuten
simultáneamente!
8. Una vez que haya terminado la configuración, puede volver al "modo reloj"
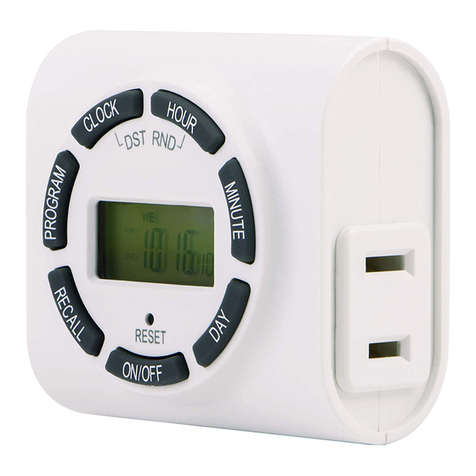
Figura 2 Pantalla LCD Listo para comenzar la configuración
Figura 3
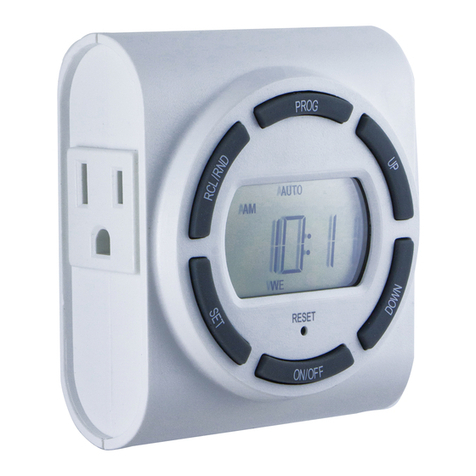
MANUAL DEL
USUARIO
Modelo #15089
TEMPORIZADOR
DIGITAL
RESET
MINUTOS
- Mientras presiona CLOCK (reloj),
apriete esta tecla para configurar
los minutos.
- Mientras está en el modo
programación, presione esta tecla
para configurar los minutos de los
horarios de APAGADO y
ENCENDIDO (ON/OFF).
DÍA
- Mientras presiona CLOCK, apriete
esta tecla para configurar el día
de la semana.
- Mientras está en el modo
programación, presione esta tecla
para seleccionar entre las opciones
de los diferentes días de la semana.
HORA (RND - Aleatoria)
- Mientras presiona CLOCK, apriete esta
tecla para configurar la hora.
- Mientras está en el modo
programación, presione esta tecla
para configurar la hora de los
horarios de APAGADO y ENCENDIDO.
- Mientras está en el modo reloj,
mantenga presionada esta tecla (3
segundos) para activar la función
aleatoria de seguridad.
ON/OFF (ENCENDIDO y
APAGADO) (presionar para
seleccionar)
ON= siempre ENCENDIDO
Auto ON/OFF = temporizador
activado
OFF = siempre APAGADO
PROGRAMA
Presione para ingresar el
modo programación del
temporizador.
RELOJ (DST -
Horario de verano)
- Para configurar la hora
y el día mantenga
apretada la tecla CLOCK
y presione las teclas
HOUR>MINUTE>DAY.
- En el modo reloj, mantenga
presionada esta tecla
por 5 segundos para
adelantar o atrasar una
hora (Ajustar horario de
verano).
ESTA PANTALLA SE MUESTRA EN EL MODO
“RELOJ” ESTÁNDAR.
MANTENGA PRESIONADA ESTA TECLA PARA
RESTABLECER TODOS LOS PROGRAMAS DE
MANERA PERMANENTE
Figura 1
presionando la tecla "CLOCK" .
9. Una vez que haya terminado toda la configuración, asegúrese de que la lámpara o
el dispositivo esté en la posición ON. Conecte la luz o el dispositivo al temporizador y
este último a la pared. ¡El temporizador está listo para usarlo!
Escanear código o visite:
http://goo.gl/gZRhj
RIESGO DE DESCARGA ELÉCTRICA
• CONECTE DIRECTAMENTE A UNA TOMA ELÉCTRICA
• NO LO USE CON CABLES DE EXTENSIÓN
• NO UTILICE EN LUGARES HÚMEDOS
• USE SOLAMENTE EN ESPACIOS INTERIORES
• DESCONECTE EL TEMPORIZADOR ANTES DE LIMPIAR
• MANTENGA ALEJADOS A LOS NIÑOS
RIESGO DE INCENDIO
• NO USE PARA CONTROLAR ELECTRODOMÉSTICOS QUE
CONTENGAN ELEMENTOS CALORÍFICOS (APARATOS
PARA COCINAR, CALENTADORES, PLANCHAS, ETC.).
• NO EXCEDA LAS ESPECIFICACIONES ELÉCTRICAS LÍMITE
ADVERTENCIA
Observaciones
1. Observación: La lámpara o el dispositivo no se encenderán
hasta que se active el próximo horario de ENCENDIDO. Para
ENCENDER el dispositivo de manera manual y dar inicio al
programa, vuelva a presionar la tecla ON/OFF hasta que la
luz o el dispositivo se enciendan y en la pantalla aparezca la
indicación AUTO ON. También puede utilizar la tecla ON/OFF
para anular el temporizador y configurarlo en ON (siempre
encendido) u OFF (siempre apagado).
Opciones de ENCENDIDO y APAGADO
Hay 4 configuraciones diferentes para el temporizador. Presione
la tecla ON/OFF para seleccionar entre las opciones y para
detenerse en la opción deseada.
a. ON – La salida del temporizador está siempre ENCENDIDA
(Anula la programación).
b. AUTO ON – La salida del temporizador está ENCENDIDA en este
momento y se APAGARÁ en el próximo horario programado de
APAGADO.
c. OFF – La salida del temporizador está siempre APAGADA (Anula
la programación).
d. AUTO OFF – La salida del temporizador está APAGADA en este
momento y se ENCENDERÁ en el próximo horario programado
de ENCENDIDO.
El temporizador contralará el aparato si se lo programa en AUTO
ON o AUTO OFF
Opción de seguridad aleatoria
(RND, por su sigla en inglés):
Esta opción del programa ENCENDERÁ o APAGARÁ las luces por medio de los horarios
establecidos de + o - 30 minutos y de esta forma la vivienda parecerá estar ocupada
mientras sus dueños están fuera.
1. Presione la tecla HOUR (RND) por 5 segundos para activar la función aleatoria. En la
pantalla aparecerá la indicación RND arriba de los segundos. Ver Figura 1.
2. Presione la tecla HOUR (RND) por 5 segundos para desactivar la función aleatoria. En
la pantalla no aparecerá la indicación RND. Ver Figura 1.
Función para modificar de manera sencilla el horario de verano (DST, por su sigla en inglés):
Presione la tecla CLOCK por 5 segundos para adelantar 1 hora el horario actual. En la
esquina inferior izquierda de la pantalla debe aparecer la indicación de 1h. Si se repite
este proceso el horario disminuirá en 1 hora y desaparecerá la indicación +1h.
Ver Figura 1.
FCC NOTA: Los cambios o modificaciones a esta unidad que no hayan sido expresamente
aprobados por la parte responsable del cumplimiento de las reglas, pueden anular la autoridad
del usuario para poder operar el equipo.
NOTA: Este equipo ha sido probado y cumple con los límites para un dispositivo digital de Clase B,
de conformidad con la Parte 15 de las Normas de la FCC. Estos límites están diseñados para
proporcionar una protección razonable contra interferencias en una instalación residencial. Este
equipo genera, utiliza y puede irradiar energía de radiofrecuencia y, si no se instala y utiliza de
acuerdo con las instrucciones, puede causar interferencia dañina a la comunicación por radio.
Sin embargo, no hay ninguna garantía que no ocurra interferencia en una instalación en
particular. Si este equipo causa interferencias perjudiciales a la recepción de radio o televisión,
esto se puede comprobar apagando y encendiendo el equipo repetidamente, se le sugiere al
usuario tratar de
remediar la interferencia tomando una o más de las siguientes medidas.
• Reorientar o reubicar la antena de recepción
• Aumentar la separación entre el equipo y el receptor
• Conectar el equipo a un tomacorriente en un circuito distinto de aquel al que está conectado el
receptor
• Consultar al distribuidor o a un técnico de radio / TV para
obtener ayuda.
Este aparato digital Clase B cumple con el ICES-003
Visite www.byjasco.com para solucionar problemas y consultar las preguntas más
frecuentes.
Paso-a-Paso Video Instructivo
HECHO EN CHINA
GE es una marca comercial de General Electric Company con licencia otorgada a
Jasco Products Company LLC,10 E. Memorial Rd., Oklahoma City, OK 73114.
Este producto de Jasco tiene una garantía limitada de 1 año.
Visite www.byjasco.com para conocer los detalles de la garantía.
¿Preguntas? Comuníquese al 1-800-654-8483 entre las 7:00 a. m. y las 8:00 p. m. CST
(hora central estándar).
