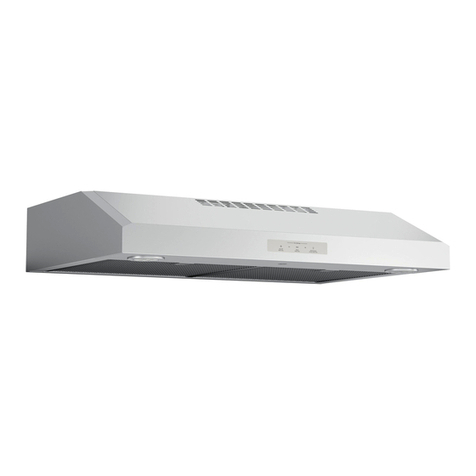
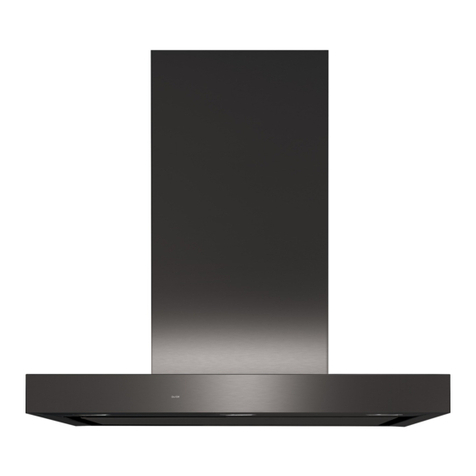
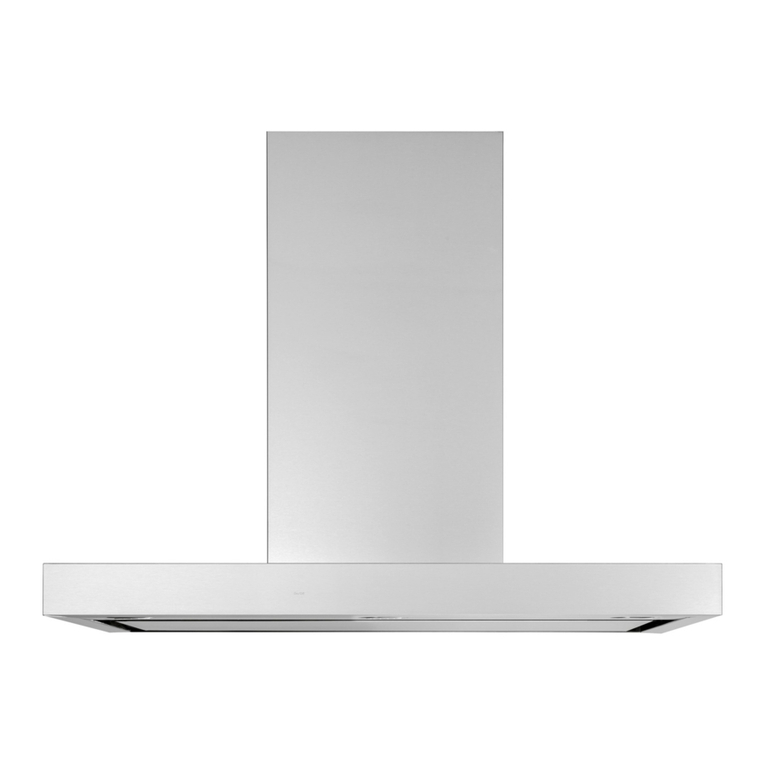
GE JVC3300 Operating instructions

49-80778 10-15 GE
Write the model and serial
numbers here:
Model # ______________________
Serial #_______________________
You can find them on a label on the
inside of the hood.
Owner’s Manual and
Installation Instructions
JVC3300 Hood
Custom Hood
Insert
For a Spanish version of this manual, visit
our Website at GEAppliances.com.
Para consultar una version en español
de este manual de instrucciones, visite
nuestro sitio de internet GEAppliances.com.
For a French version of this manual, visit
our Website at GEAppliances.com.
Pour obtenir une version française de
ce manuel, visitez notre site Web sur
GEAppliances.com.
Safety Information ..........2,3
Warranty........................4
Assistance / Accessories......5
Using The Hood
Controls...........................6
Filters..............................7
Care and Cleaning
Surfaces...........................8
Lights..............................8
Installation Instructions
BeforeYouBegin...................9
InstallationPreparation........10-13
InstallingtheHood............14,15
FinalizeInstallation................15
Troubleshooting Tips .........16

249-80778
WARNING TO REDUCE THE RISK OF FIRE,
ELECTRIC SHOCK OR INJURY TO PERSONS,
OBSERVE THE FOLLOWING:
A. Use this unit only in the manner intended by the
manufacturer. If you have questions, contact the
manufacturer.
B. Before servicing or cleaning unit, switch power
off at service panel and lock the service
disconnecting means to prevent power from
being switched on accidentally. When the service
disconnecting means cannot be locked, securely
fasten a prominent warning device, such as a
tag, to the service panel.
C. Do not use this unit with any solid-state speed
control device.
D. This unit must be grounded.
CAUTION FOR GENERAL VENTILATING USE
ONLY. DO NOT USE TO EXHAUST HAZARDOUS
OR EXPLOSIVE MATERIALS AND VAPORS.
CAUTION TO REDUCE RISK OF FIRE AND TO
PROPERLY EXHAUST AIR, BE SURE TO DUCT
AIR OUTSIDE. DO NOT VENT EXHAUST AIR
INTO SPACES WITHIN WALLS OR CEILINGS OR
INTO ATTICS, CRAWL SPACES OR GARAGES.
WARNING TO REDUCE THE RISK OF INJURY
TO PERSONS IN THE EVENT OF A RANGE TOP
GREASE FIRE, OBSERVE THE FOLLOWING*:
A. SMOTHER FLAMES with a close-fitting lid,
cookie sheet or metal tray, then turn off the
burner. BE CAREFUL TO PREVENT BURNS.
If the flames do not go out immediately,
EVACUATE AND CALL THE FIRE
DEPARTMENT.
B. NEVER PICK UP A FLAMING PAN—You may
be burned.
C. DO NOT USE WATER, including wet dishcloths
or towels—a violent steam explosion will result.
D. Use an extinguisher ONLY if:
1. You know you have a Class ABC extinguisher,
and you already know how to operate it.
2. The fire is small and contained in the area
where it started.
3. The fire department is being called.
4. You can fight the fire with your back to an exit.
*Based on “Kitchen Fire Safety” published by NFPA.
READ AND SAVE THESE INSTRUCTIONS
SAFETY PRECAUTIONS
IMPORTANT SAFETY INFORMATION.
READ ALL INSTRUCTIONS BEFORE USING.
SAFETY INFORMATION
This is the safety alert symbol. This symbol alerts you to potential hazards that can kill or hurt you and others.
All safety messages will follow the safety alert symbol and the word “DANGER”, “WARNING”, or “CAUTION”. These
words are defined as:
DANGER Indicates a hazardous situation which, if not avoided, will result in death or serious injury.
WARNING Indicates a hazardous situation which, if not avoided, could result in death or serious injury.
CAUTION Indicates a hazardous situation which, if not avoided, could result in minor or moderate injury.

49-80778 3
WARNING TO REDUCE THE RISK OF A
RANGE TOP GREASE FIRE:
A. Never leave surface units unattended at high
settings. Boilovers cause smoking and greasy
spillovers may ignite. Heat oils slowly on low or
medium settings.
B. Always turn hood ON when cooking on high heat
or when flambéing food (i.e. Crepes Suzette,
Cherries Jubilee, Peppercorn Beef Flambé).
C. Clean ventilating fans frequently. Grease should
not be allowed to accumulate on fan or filter.
D. Use proper pan size. Always use cookware
appropriate for the size of the surface element.
WARNING TO REDUCE THE RISK OF FIRE,
ELECTRIC SHOCK OR INJURY TO PERSONS,
OBSERVE THE FOLLOWING:
A. Installation work and electrical wiring must be
done by qualified person(s) in accordance with
all applicable codes and standards, including
fire-rated construction.
B. Sufficient air is needed for proper combustion
and exhausting of gases through the flue
(chimney) of fuel burning equipment to prevent
back drafting. Follow the heating equipment
manufacturer’s guidelines and safety standards
such as those published by the National Fire
Protection Association (NFPA), the American
Society for Heating, Refrigeration and Air
Conditioning Engineers (ASHRAE) and the local
code authorities.
C. When cutting or drilling into wall or ceiling, do
not damage electrical wiring and other hidden
utilities.
D. Ducted fans must always be vented to the
outdoors.
E. When applicable, install any makeup
(replacement) air system in accordance
with local building code requirements. Visit
GEAppliances.com for available makeup air
solutions.
F. Turn off breaker to adjacent rooms while
working.
WARNING TO REDUCE THE RISK OF FIRE,
USE ONLY METAL DUCTWORK.
ŶDo not attempt to repair or replace any part of
your hood unless it is specifically recommended
in this manual. All other servicing should be
referred to a qualified technician.
READ AND SAVE THESE INSTRUCTIONS
SAFETY PRECAUTIONS (Cont.)
SAFETY INFORMATION

449-80778
GE Warranty
GEAppliances.com
All warranty service is provided by our Factory Service Centers, or an authorized Customer Care®technician.
To schedule service, on-line, visit us at www.geappliances.com/service_and_support/, or call 800.GE.CARES
(800.432.2737). Please have serial number and model number available when calling for service.
Servicing your appliance may require the use of the onboard data port for diagnostics. This gives a GE factory
service technician the ability to quickly diagnose any issues with your appliance and helps GE improve its products
by providing GE with information on your appliance. If you do not want your appliance data to be sent to GE, please
advise your technician not to submit the data to GE at the time of service.
For the period of one year from the date of the original purchase, GE will provide any part of the hood insert which
fails due to a defect in materials or workmanship. During this limited one-year warranty, GE will also provide, free of
charge, all labor and in-home service to replace the defective part.
What GE will not cover:
Ŷ Service trips to your home to teach you how to use
the product.
Ŷ Improper installation, delivery or maintenance.
Ŷ Failure of the product if it is abused, misused,
modified or used for other than the intended purpose
or used commercially.
Ŷ Replacement of house fuses or resetting of circuit
breakers.
Ŷ Damage to the product caused by accident, fire,
floods or acts of God.
ŶDamage to finish, such as surface rust, tarnish, or
small blemishes not reported within 48 hours of
delivery.
Ŷ Incidental or consequential damage caused by
possible defects with this appliance.
Ŷ Damage caused after delivery.
Ŷ Product not accessible to provide required service.
Ŷ Service to repair or replace light bulbs, except for
LED lamps.
EXCLUSION OF IMPLIED WARRANTIES
Your sole and exclusive remedy is product repair as provided in this Limited Warranty.Any implied warranties,
including the implied warranties of merchantability or fitness for a particular purpose, are limited to one year or the
shortest period allowed by law.
This warranty is extended to the original purchaser and any succeeding owner for products purchased for home use
within the USA. If the product is located in an area where service by a GE Authorized Servicer is not available, you
may be responsible for a trip charge or you may be required to bring the product to an Authorized GE Service location
for service. In Alaska, the warranty excludes the cost of shipping or service calls to your home.
Some states do not allow the exclusion or limitation of incidental or consequential damages. This warranty gives you
specific legal rights, and you may also have other rights which vary from state to state. To know what your legal rights
are, consult your local or state consumer affairs office or your state’s Attorney General.
Warrantor: General Electric Company. Louisville, KY 40225
Extended Warranties: Purchase a GE extended warranty and learn about special discounts that are available while
your warranty is still in effect. You can purchase it on-line anytime
www.geappliances.com/service_and_support/shop-for-extended-service-plans.htm
or call 800.626.2224 during normal business hours. GE Consumer Home Services will still be there after your
warranty expires.
Register Your Appliance: Register your new appliance on-line at your convenience!
www.geappliances.com/service_and_support/register/
Timely product registration will allow for enhanced communication and prompt service under the terms of your warranty,
should the need arise. You may also mail in the pre-printed registration card included in the packing material.
Staple your receipt here. Proof of the original purchase
date is needed to obtain service under the warranty. WARRANTY
Thank You! ... for your purchase of a GE Brand appliance.

49-80778 5
Schedule Service: Expert GE repair service is only one
step away from your door. Get on-line and schedule your
service at www.geappliances.com/service_and_support/
Or call 800.GE.CARES (800.432.2737) during normal
business hours.
Parts and Accessories: Individuals qualified to service
their own appliances can have parts or accessories sent
directly to their homes (VISA, MasterCard and Discover
cards are accepted).Order on-line today, 24 hours
every day or by phone at 800.626.2002 during normal
business hours.
Instructions contained in this manual cover procedures
to be performed by any user. Other servicing generally
should be referred to qualified service personnel. Caution
must be exercised, since improper servicing may cause
unsafe operation.
Real Life Design Studio: GE supports the Universal
Design concept of products, services and environments
that can be used by people of all ages, sizes and
capabilities. We recognize the need to design for a wide
range of physical and mental abilities and impairments.
For details of GE’s Universal Design applications,
including kitchen design ideas for people with disabilities,
check out our Website today. For the hearing impaired,
please call 800.TDD.GEAC (800.833.4322).
Contact Us: If you are not satisfied with the service you
receive from GE, contact us on our Website with all the
details including your phone number, or write to:
General Manager, Customer Relations
GE Appliances, Appliance Park Louisville, KY 40225
Try the GE Appliances Website (www.geappliances.com/service_and_support/) 24 hours a day, any day of the
year! For greater convenience and faster service, you can now download Owner’s Manuals, order parts or even
schedule service on-line.
Accessories
Looking For Something More?
GE offers a variety of accessories to improve your cooking and maintenance experiences!
To place an order visit us online at:
www.GEApplianceParts.com or call 800.626.2002
The following products and more are available:
How to Remove Protective Shipping Film and Packaging Tape
Carefully grasp a corner of the protective shipping film
with your fingers and slowly peel it from the appliance
surface. Do not use any sharp items to remove the film.
Remove all of the film before using the appliance for the
first time.
To assure no damage is done to the finish of the
product, the safest way to remove the adhesive from
packaging tape on new appliances is an application of
a household liquid dishwashing detergent. Apply with a
soft cloth and allow to soak.
NOTE: The adhesive must be removed from all parts.
Parts
Liners 30":JXL30 36":JXL36
Recirculation Kit JXN30
Grease Filter WB02X26416
Have a question or need assistance with your appliance?
ASSISTANCE / ACCESSORIES

649-80778
1. Light Switch: 0 is OFF. Move switch to 1
for ON.
2. Blower Switch: 0 is OFF. Move switch to 1 for
LOW speed, 2 for MEDIUM speed, and 3 for HIGH
speed. The pilot lamp illuminates when the blower
switch is set to 1, 2, or 3.
Heat Sensor
Your hood is equipped with a HEAT SENSOR
thermostat. This thermostat is a device that will turn on
or speed up the blower if it senses excessive heat above
the cooking surface.
1. If blower is OFF - it turns blower ON to HIGH speed.
2. If blower is ON at a lower speed setting - it turns
blower up to HIGH speed.
When the temperature level drops to normal, the blower
will return to its original setting.
USING THE HOOD: Controls
Controls
0 1 0 1 2 3
2
Pilot
Lamp
1

49-80778 7
USING THE HOOD: Filters
For Recirculation Installation Only
Charcoal Filter (Not Included)
When the hood is installed with the recirculation kit
JXN30, there is a charcoal filter on top of the grease
filter. To remove and reinstall the charcoal filter, follow
the steps for the grease filter.
NOTE: DO NOT rinse, or put charcoal filter in an
automatic dishwasher.
The charcoal filter cannot be cleaned. It must be
replaced. It is recommended that the charcoal filter
be replaced every 6 months or if it is noticeably dirty
or discolored.
Order Charcoal Filter WB28X10120
To inquire about purchasing replacement charcoal filters
or to find the location of a dealer nearest you, please call
our toll-free number:
National Parts Center 800.626.2002
Filters
Be sure the circuit breaker is off and all surfaces are cool before cleaning or servicing any part of the vent hood.
Metal Grease Filter
The metal filters trap grease during cooking.
The filter must ALWAYS be in place when the hood is in
use. The grease filter is dishwasher-safe and should be
cleaned every 6 months, or as needed.
To remove:
Remove the access panel by sliding the two side
latches. Remove the wire retainers and then remove the
grease filter.
To replace:
Align the grease filter and install the wire retainers.
Replace the access panel.
To clean,swish the filter in hot soapy water and rinse
in clean water or wash it in the dishwasher. Do not use
abrasive cleansers.
NOTE: Some discoloration may occur in the dishwasher.
Wire Retainers
Grease Filter

849-80778
Surfaces
Light Bulbs
CARE AND CLEANING: Surfaces/Lights
Painted Surfaces
Do not use a steel wool pads or other abrasive
cleaners; they will scratch the surface.
Clean grease-laden surfaces of the hood frequently. To
clean the hood surface, use a hot, damp cloth with a
mild detergent suitable for painted surfaces. About one
tablespoon of ammonia may be added to the water. Use
a clean, hot, damp cloth to remove soap. Dry with a dry,
clean cloth.
NOTE: When cleaning, take care not to come in contact
with filters and other non-enameled surfaces.
CAUTION When cleaning the hood surfaces,
be certain that you do not touch the light with
moist hands or cloth. A warm or hot light may
break if touched with a moist surface. Always
let the light cool completely before cleaning
around it.
CAUTION Allow lights to cool before
touching.
To change the light bulbs:
1. Before attempting to replace the lights, make sure that
the light switch is turned off.
2. Remove the access panel (slide the two side latches).
3. Replace with candelabra base light bulbs (MAX 40W,
120V, E12, Type B or Type T8 Bulb).
CAUTION BULB MAY BE HOT!
4. Reinstall the access panel.

49-80778 9
Installation
Instructions
“If you have questions, call 800.GE.CARES (800.432.2737) or visit our website at:
GEAppliances.com”
BEFORE YOU BEGIN
Read these instructions completely and
carefully.
•IMPORTANT — Save these
instructions for local inspector’s use.
•IMPORTANT —Observe all governing
codes and ordinances.
•Note to Installer – Be sure to leave these
instructions with the Consumer.
• Note to Consumer – Keep these
instructions for future reference.
• Skill level – Installation of this vent hood
requires basic mechanical and electrical
skills.
• Proper installation is the responsibility of the
installer.
• Product failure due to improper installation is
not covered under the Warranty.
FOR YOUR SAFETY:
WARNING Before beginning the installation,
switch power off at service panel and lock the
service disconnecting means to prevent power
from being switched on accidentally. When the
service disconnecting means cannot be locked,
securely fasten a prominent warning device,
such as a tag, to the service panel.
WARNING TO REDUCE THE RISK OF
FIRE, ELECTRIC SHOCK OR INJURY TO
PERSONS, OBSERVE THE FOLLOWING:
A. Installation work and electrical wiring
must be done by qualified person(s) in
accordance with all applicable codes and
standards, including fire-rated construction.
B. Sufficient air is needed for proper
combustion and exhausting of gases
through the flue (chimney) of fuel burning
equipment to prevent back drafting. Follow
the heating equipment manufacturer’s
guidelines and safety standards such
as those published by the National Fire
Protection Association (NFPA), the
American Society for Heating, Refrigeration
and Air Conditioning Engineers (ASHRAE)
and the local code authorities.
C. When cutting or drilling into wall or ceiling,
do not damage electrical wiring and other
hidden utilities.
D. Ducted fans must always be vented to the
outdoors.
E. Turn off breaker to adjacent rooms while
working.
WARNING TO REDUCE THE RISK OF
FIRE, USE ONLY METAL DUCT WORK.
CAUTION TWO PEOPLE ARE
RECOMMENDED FOR PROPER
INSTALLATION.
Custom Hood Insert
JVC3300 Hood

10 49-80778
Installation Preparation
PRODUCT DIMENSIONS INSTALLATION CLEARANCES
This vent hood and liner assembly must be installed
24" required minimum and 36" recommended
maximum above the cooking surface.
• Always refer to the cooktop or range installation
instructions for product-specific clearances.
NOTE: Installation height should be measured from
the cooking surface to the bottom edge of the metal
hood liner or cabinet surface.
NOTE: UL requires any combustible surface to be a
minimum of 30" above the cooking surface.
• The custom cabinet internal height must be 16"
minimum.
• This hood can be vented to the outdoors, or it
can be installed for recirculating operation. For
recirculating operation, refer to Recirculating
Installation Planning.
• This hood may be mounted onto a cabinet or
installed over an island.
9-5/8"
10-3/16"
11-1/4"
20-1/2"
19-7/16"
3-1/4"
5-7/8"
2"
1"
17-1/4"
10-1/4"
19-9/16"
4"
28-7/16" (JXL30)
34-7/16" (JXL36)
*24" Minimum required
*36" Maximum recommended
36" min.
16" min.
INSTALLATION PREPARATION
Liners (Optional)

49-80778 11
INSTALLATION PREPARATION
Installation Preparation
ADVANCE PLANNING
Duct Install Planning
• This hood is designed to be vented vertically
through the ceiling. Use a 6" round duct. Use
locally supplied elbows to vent horizontally
through the rear wall.
• Use metal ductwork only.
• Determine the exact location of the vent hood.
• Plan the route for venting exhaust to the outdoors.
To maximize the ventilation performance of the
vent system:
1. Minimize the duct run length and number of
transitions and elbows.
2. Maintain a constant duct size.
3. Seal all joints with duct tape to prevent any
leaks.
4. Do not use any type of flexible ducting.
• Install a wall cap or roof cap with damper at the
exterior opening. Purchase the wall or roof cap
and any transition and length of duct needed in
advance.
• When applicable, install any makeup
(replacement) air system in accordance with local
building code requirements. Visit GEAppliances.
com for available makeup air solutions.
Wall and Ceiling Framing for Adequate
Support
This vent hood is heavy and the cabinet structure
needs to support the weight of the loaded insert
sleeve. Adequate structural support must be
provided in all types of installations.
• Installation will be easier if the vent hood is
installed before the cooktop is installed.
Custom Cabinet Frame Planning
•The custom canopy or cabinet should have a
rectangular hole to accommodate the custom hood
insert by itself, or with the liner. This hole is the
same size for both a wall installation and an island
installation.
Metal Liners
• Metal liners (30" width JXL30 and 36" width JXL36)
are optional but are recommended for installation
heights below 30" for cabinetry protection. You can
construct a custom metal (or non-combustible) liner
when a larger liner is needed.
Recirculation Install Planning
A recirculation duct kit JXN30 is available for
recirculation installation.
Power Supply Planning
The location of the power supply connection
is called out in the Wall Installation and Island
Installation sections on page 13.
POWER SUPPLY
IMPORTANT – (Please read carefully)
WARNING
FOR PERSONAL SAFETY, THIS APPLIANCE
MUST BE PROPERLY GROUNDED.
In the event of an electrical short circuit, grounding
reduces the risk of electric shock by providing an
escape wire for the electric current. This appliance
is equipped with a cord having a grounding wire with
a grounding plug. The plug must be plugged into an
outlet that is properly installed and grounded.
Remove house fuse or open circuit breaker before
beginning installation.
Do not use an extension cord or adapter plug with
this appliance. If the power supply cord is too short,
have a qualified electrician install an outlet near the
appliance. Do not operate any fan with a damaged
cord or plug. Discard fan or return to an authorized
service facility for examination and/or repair. Follow
National Electrical Codes or prevailing local codes
and ordinances.
Electrical supply
These vent hoods must be supplied with 120V,
60Hz, and connected to an individual, properly
grounded branch circuit, and protected by a 15 or
20 amp circuit breaker or time delay fuse.
• Wiring must be 2 wire with ground.
• If the electrical supply does not meet the above
requirements, call a licensed electrician before
proceeding.
• Route house wiring as close to the installation
location as possible in the ceiling or wall.
• Connect the wiring to the house wiring in
accordance with local codes.
WARNING
The improper connection of the
equipment-grounding conductor can result
in a risk of electric shock. Consult a qualified
electrician if the grounding instructions are
not completely understood, or if doubt exists
as to whether the appliance is properly
grounded.
10-1/4"
19-1/2"
Front of hole
must be 3"
minimum from
cabinet front
Back of hole
must be 1"
minimum from
back wall

12 49-80778
TOOLS AND MATERIALS REQUIRED
(NOT SUPPLIED)
Pencil and tape measure
Step ladder
Phillips and flat-
blade screwdrivers
Spirit level Safety glasses 6" ducting and
caps as needed
Aluminized
duct tape
Electric drill and
appropriate bits
Gloves
Flashlight
Silicone
Needle-nose pliers
Tin snips Wire cutter/
stripper
Installation Preparation
INSTALLATION PREPARATION
PARTS PROVIDED
Locate the parts packed with the hood.
Phillips head
wood screws
Damper
assembly
Phillips head machine
screws, nuts and washers
Hardware
bag
Hood
PLAN THE INSTALLATION
CAUTION To reduce risk of fire and to
properly exhaust air, be sure to duct the
air outside – Do not vent exhaust air into
spaces within walls or ceilings or into attics,
crawl spaces, or garages.
WARNING
PERSONAL INJURY HAZARD
It is recommended that 2 people are used to
install the range hood. Failure to properly
lift rangehood could result in damage to the
product or personal injury.
NOTE: This rangehood can be installed as
either ducted or recirculation. In a ducted
application, this rangehood can be vented
through the wall or ceiling. When installed for
recirculation, the rangehood vents back into the
room.
REMOVE THE PACKAGING
CAUTION Wear gloves to protect against
sharp edges.
• Remove the duct covers.
• Remove the hardware bag, literature package
and other boxed parts.
• Remove and properly discard the protective
plastic wrapping and other packaging
materials.

49-80778 13
INSTALLATION PREPARATION
Installation Preparation
PREPARE FOR CABINET INSTALLATION
1. Insert the damper assembly into the hood
exhaust duct.
2. The hood should be centered left to right over the
cooktop.
NOTE: The exhaust duct on the hood is closer to
the rear of the hood. It is important to plan for the
alignment to the connection point of the hood.
3. The back surface of the hood must be 1"
minimum from the back wall. The front surface
of the hood must be 3" minimum from the front
custom cabinet panel.
4. The metal liner should be used when the
hood installation height is less than 30". The
liner dimensions are provided in the Product
Dimensions section.
5. The electrical receptacle location maximum
dimension is shown here.
6. The custom cabinet should provide for removal
of panels to provide access to the electrical cord
plug and to the ducting and its connection to the
hood in case of any need for servicing or other
reasons.
PREPARE FOR ISLAND INSTALLATION
1. Insert the damper assembly into the hood
exhaust duct.
2. The hood should be centered left to right over the
cooktop.
NOTE: The exhaust duct on the hood is closer to
the rear of the hood.
The front to back location of the hood over
the cooktop can be chosen by the installer
or homeowner.The island duct run is usually
centered over the cooktop and it is important to
plan for the alignment to the connection point of
the hood.
4. The metal liner should be used when the
hood installation height is less than 30". The
liner dimensions are provided in the Product
Dimensions section.
5. Locate the electrical receptacle in the cabinetry
or area above the hood so that it complies with
local and electrical codes.
6. The custom cabinet should provide for removal
of panels to provide access to the electrical cord
plug and to the ducting and its connection to the
hood in case of any need for servicing or other
reasons.
33-7/16"
9/16"
9/16"

14 49-80778
STEP 2 INSTALL THE HOOD (Cont)
3. Fasten with 4 screws. There is a spring locking
clip on one side of the hood to assist with holding
one side up while installing the screws.
NOTE: 4 screws can be installed into the sides or
into the front and back holes in the hood.
4. If the liner is used, an alternate mounting method
is to assemble the hood to the liner using the 4
machine screws, washers, and nuts provided.
Then assemble the liner to the framing or custom
cabinet using the 4 screws provided with the liner.
5. Once the hood is in place, seal the duct to the
hood with duct tape.
Installation
INSTALLATION
STEP 1 INSTALL HOOD LINER (If Used)
1. The rectangular opening in framing or custom
cabinet must be sized for the liner outside and
inside dimensions. Refer to Product Dimensions
section.
2. Secure the liner with the 4 screws that are
provided with the liner.
STEP 2 INSTALL THE HOOD
1. Confirm the damper is in place in the hood
exhaust opening.
2. Insert the hood and power cord into the cabinet
opening or into the liner opening.
Spring
Locking
Clip
Possible screw
locations

49-80778 15
STEP 3 RECIRCULATION KIT (If Used)
1. Cut a hole into the soffit for the exhaust duct.
2. Install the vent grill over the exhaust duct.
3. Seal the duct joints with duct tape.
STEP 4 FINALIZE INSTALLATION
1. Plug in the hood.
2. Install the access panel.
3. Check operation of the lights and blower.
4. Finish the custom cabinetry.
INSTALLATION
Installation
L
C
Hood Center Line Soffit Cutout 90°Angle Boot
6" Round to
7" Round
Transition
Combination Filter
Liner
10-1/4"
25"

16 49-80778
Troubleshooting tips ... Before you call for service
Save time and money! Review the charts on the following pages first and you may not need to call for service.
Problem Possible Cause What To Do
Fan/Light does not operate
when slide switch is turned
ON
A house fuse may be blown or
a circuit breaker tripped. Replace fuse or reset circuit breaker.
Loud or abnormal airflow
noise Wrong duct size used in
installation. This hood requires 6” ducting to perform optimally. Using
smaller duct pipe will cause reduced venting. Minimize
the duct run length and number of transitions and elbows.
GE service technicians cannot correct this issue if
installed improperly.
Fan fails to circulate
air or moves air slower
than normal and/or fan is
making loud or abnormal
airflow noise
Obstructions in duct work. Make sure nothing is blocking the vent. Make sure your
wall or roof cap has a blade or door.
Damper blade on wall or roof
cap may not be open. Make sure damper swings freely. Damper blades may flip
over and will not fully open when this happens. Adjust to
original position.
Metal grease filter and charcoal
filter (if present) may be dirty. Clean the metal grease filter and replace charcoal filter (if
present). See Care and Cleaning of the Vent Hood.
Insufficient makeup
(replacement) air Sufficient makeup (replacement) air is required for
exhausting appliances to operate to rating. Check with
local building codes, which may require or strongly
advise the use of makeup air. Visit GEAppliances.com for
available makeup air solutions.
Early light failure Light wattage is too high. Replace with correct wattage.
Fan automatically turns on
and can not be turned off. This is normal. The sensor feature will automatically turn the fan on if
cooking temperature becomes too hot. The fan will then
turn off when temperatures cool to an appropriate level.
Fan keeps going off and on The motor is probably
overheating and turning itself
off. This can be harmful to the
motor.
Check to be sure the filters are clean. If off and on
cycling continues, call for service.
TROUBLESHOOTING TIPS

49-80778 10-15 GE
Inscrivez les numéros de modèle et
de série ici :
No modèle #__________________
No de série #__________________
Vous pouvez les trouver sur une
étiquette sur l’intérieur de la hotte.
Manuel du propriétaire et
instructions d’installation
Hotte JVC3300
Hotte Encastrable
Et Adaptable
Renseignements
de sécurité..............2,3
Garantie.....................4
Assistance / Accessoires.....5
Utilisation de la hotte
Commandes ..................6
Filtres........................7
Entretien et nettoyage
Dessurfaces. .................8
Lampes......................8
Instructions d’installation
Avantdecommencer............9
Préparation de l’installation. . .10-13
Installation de la hotte.......14,15
Finaliser l’installation...........15
Conseils de dépannage .....16

249-80778
AVERTISSEMENT POUR RÉDUIRE LE RISQUE
D’INCENDIE, DE SECOUSSE ÉLECTRIQUE OU
DE BLESSURE CORPORELLE, OBSERVEZ LES
PRÉCAUTIONS SUIVANTES :
A. N’utilisez cet appareil que de la manière prévue par
le fabricant. Si vous avez des questions, appelez le
fabricant.
B. Avant de réparer ou de nettoyer votre appareil,
débranchez le courant au niveau du panneau
de service et verrouillez les mécanismes de
débranchement de service pour éviter tout
branchement accidentel au courant. Si vous
ne pouvez pas verrouiller les mécanismes de
débranchement de service, attachez soigneusement
un avertissement bien visible, comme une étiquette,
au panneau de service.
C N’utilisez jamais cet appareil avec un mécanisme de
réglage de la vitesse à semi-conducteurs.
D. Cet appareil doit être bien mis à la terre.
ATTENTION UNIQUEMENT À USAGE DE
VENTILATION GÉNÉRALE. N’UTILISEZ JAMAIS
POUR L’ÉCHAPPEMENT DE MATIÈRES ET DE
VAPEURS EXPLOSIVES.
ATTENTION POUR RÉDUIRE LE RISQUE
D’INCENDIE ET ÉVACUER L’AIR VICIÉ
CORRECTEMENT, ASSUREZ-VOUS DE DIRIGER
L’AIR DES CONDUITS À L’EXTÉRIEUR. NE VENTILEZ
PAS L’AIR D’ÉVACUATION DANS DES ESPACES
SITUÉS ENTRE DES MURS, DES PLAFONDS,
DES COMBLES, DES VIDES SANITAIRES OU DES
GARAGES.
AVERTISSEMENT POUR RÉDUIRE LE RISQUE DE
BLESSURE CORPORELLE SI DE LA GRAISSE
PREND FEU SUR LA SURFACE DE CUISSON DU
FOUR, SUIVEZ LES INSTRUCTIONS SUIVANTES* :
A. ÉTOUFFEZ LES FLAMMES avec un couvercle qui
convient, une tôle à biscuits ou un plateau en métal,
puis éteignez le brûleur. FAITES BIEN ATTENTION
DE NE PAS VOUS BRÛLER. Si les flammes ne
s’éteignent pas immédiatement, SORTEZ ET
APPELEZ LES POMPIERS.
B. NE DÉPLACEZ JAMAIS UNE CASSEROLLE QUI
FLAMBE-Vous pouvez vous brûler.
C. N’UTILISEZ JAMAIS D’EAU, en particulier de
serviette ou de chiffon mouillé – il se produira une
explosion violente de vapeur brûlante.
D. N’UTILISEZ UN EXTINCTEUR que si :
1. Vous avez un extincteur de classe ABC et vous
savez comment l’utiliser;
2. Le feu est réduit et confiné à l’endroit où il a
commencé;
3. Vous avez déjà appelé les pompiers;
4. Vous combattez les flammes en tournant le dos à
une sortie.
* Basé sur l’ouvrage intitulé «Kitchen Fire Safety Tips»
publié par la NFPA.
LISEZ ET CONSERVEZ CES INSTRUCTIONS
CONSIGNES DE SÉCURITÉ
RENSEIGNEMENTS DE SÉCURITÉ IMPORTANTS.
LISEZ TOUTES LES INSTRUCTIONS AVANT L’UTILISATION.
RENSEIGNEMENTS DE SÉCURITÉ
Ce symbole représente une alerte de sécurité. Ce symbole vous avise de dangers possibles pouvant causer la mort,
des blessures ou autres. Tous les messages de sécurité seront précédés du symbole d’alerte de sécurité ainsi que des mots
« DANGER », «AVERTISSEMENT » ou « MISE EN GARDE ». Ces messages sont les suivants :
DANGER
Signale une situation qui présente un danger imminent et qui, si elle n’est pas évitée, entraînera des blessures
graves, voire la mort.
AVERTISSEMENT
Signale une situation qui présente un danger imminent et qui, si elle n’est pas évitée, peut entraîner des
blessures graves, voire la mort.
.
ATTENTION Signale une situation qui présente un danger imminent et qui, si elle n’est pas évitée, peut entraîner
des blessures mineures ou graves.

49-80778 3
AVERTISSEMENT
RÉDUISEZ LE RISQUE D’UN FEU DE
GRAISSE SUR LA SURFACE DE CUISSON DU FOUR :
A. Ne laissez jamais sans surveillance les unités de
cuisson de surface à une température élevée. Le
bouillonnement occasionne des débordements
fumants et graisseux qui peuvent prendre feu.
Chauffez à feu doux les substances huileuses, avec
un réglage bas ou moyen.
B. Mettez toujours la hotte en marche si vous cuisez à
température élevée ou préparez des mets flambés
(p.ex. crêpes suzettes, cerises jubilé, flambé de bœuf
au poivre).
C. Nettoyez les mécanismes de ventilation fréquemment.
Il ne faut pas permettre une accumulation de graisse
sur le ventilateur ou sur le filtre.
D. Utilisez une casserole de bonne taille. Utilisez
toujours un ustensile de cuisine qui convienne au
diamètre de l’élément de cuisson.
AVERTISSEMENT POUR RÉDUIRE LE RISQUE
D’INCENDIE, DE SECOUSSE ÉLECTRIQUE OU
DE BLESSURE CORPORELLE, OBSERVEZ LES
PRÉCAUTIONS SUIVANTES :
A. Vous devez faire exécuter tous les travaux
d’installation et de câblage électrique par une
personne qualifiée, conformément à tous les codes
et les normes en vigueur, en particulier ceux de
construction relatifs aux incendies.
B. Vous devez assez d’air pour avoir une bonne
combustion et permettre l’évacuation des gaz par le
conduit de cheminée du matériel de combustion du
carburant, afin d’éviter tout retour d’air. Suivez les
directives du fabricant de matériel de combustion
et les normes de sécurité comme celles publiées
par la National Fire Protection Association (NFPA)
et l’American Society for Heating, Refrigeration and
Air Conditioning Engineers (ASHRAE), ainsi que les
modalités des codes locaux. Le cas échéant, installez
un système de ventilation d’appoint (air extérieur)
conformément aux conditions des codes locaux du
bâtiment. Visitez le site GEAppliances. com pour
connaître les solutions offertes en matière de système
de ventilation d’appoint.
C. Si vous faites un trou ou une ouverture dans un mur
ou un plafond, n’endommagez pas les fils électriques
et les autres installations cachées de service public.
D. Vous devez toujours alimenter les ventilateurs dans
les conduits en air en provenance de l’extérieur.
E. Si nécessaire, installez tout système de ventilation
d’appoint (air extérieur) conformément aux
exigences du code du bâtiment en vigueur. Visitez
GEAppliances.com pour connaître des solutions de
ventilation d’appoint.
F. Désarmez (OFF) le disjoncteur relié aux pièces
adjacentes lorsque vous travaillez.
AVERTISSEMENT POUR RÉDUIRE LE RISQUE
D’INCENDIE, N’UTILISEZ QUE DES CONDUITS EN
MÉTAL.
ŶN’essayez jamais de remplacer ou de réparer un
élément de votre hotte si le présent manuel ne le
recommande pas expressément. Tout autre entretien
doit être effectué par un technicien qualifié.
LISEZ ET CONSERVEZ CES INSTRUCTIONS
CONSIGNES DE SÉCURITÉ (Suite)
RENSEIGNEMENTS DE SÉCURITÉ

449-80778
Garantie GE
GEAppliances.com
Tous les services de garantie sont fournis par nos centres de service d’usine, ou par un technicien Customer Care®
agréé. Pour programmer en ligne la visite d'un technicien, visitez le ww.geappliances.com/service_and_support/, ou composez le
800.GE.CARES (800.432.2737). Veuillez garder les numéros de série et de modèle à portée de la main au moment d'effectuer un
appel de service.
La réparation de votre appareil peut nécessiter l'utilisation d'un port de données embarqué pour établir les diagnostics. Le
technicien d'usine GE aura ainsi la possibilité de diagnostiquer rapidement toute défectuosité de votre appareil et de fournir à GE
des informations sur votre appareil en vue de l'amélioration de ses produits. Si vous ne souhaitez pas transmettre des données de
votre appareil à GE, veuillez en aviser votre technicien au moment de la réparation.
Durant une période de un an à partir de la date d'achat d'origine, GE fournira toute pièce de la hotte encastrable qui s'avère
défectueuse en raison d'un vice de matière ou de main-d'oeuvre. Au cours de cette année de garantie limitée, GE fournira,
gratuitement, toute la main-d’oeuvre et le service à domicile nécessaires pour remplacer la pièce défectueuse.
Ce qui n’est pas couvert par GE :
Ŷ/HVGpSODFHPHQWVjYRWUHGRPLFLOHSRXUYRXVDSSUHQGUHj
utiliser le produit.
Ŷ8QHLQVWDOODWLRQXQHOLYUDLVRQRXXQHQWUHWLHQLQDGpTXDWV
Ŷ/DGpIDLOODQFHGXSURGXLWDWWULEXDEOHjVDPRGLILFDWLRQRX
à un usage abusif, erroné ou destiné à une autre fin que
celle prévue dont commerciale.
Ŷ/HUHPSODFHPHQWGHVIXVLEOHVGXGRPLFLOHRXOH
réarmement des disjoncteurs.
Ŷ7RXWGRPPDJHRFFDVLRQQpSDUXQDFFLGHQWXQLQFHQGLH
une inondation ou autre catastrophe naturelle.
Ŷ/HVGRPPDJHVDXILQLWHOVTXHURXLOOHGHVXUIDFH
ternissement ou petites imperfections qui ne sont pas
rapportés dans les 48 heures suivant la livraison.
Ŷ/HVGRPPDJHVDFFHVVRLUHVRXLQGLUHFWVFDXVpVSDU
d'éventuels défectuosités de cet appareil.
Ŷ/HVGRPPDJHVVXUYHQXVDSUqVODOLYUDLVRQ
Ŷ/HSURGXLWQHVWSDVDFFHVVLEOHSRXUIRXUQLUOHVHUYLFH
requis.
Ŷ/HVHUYLFHSRXUUpSDUHURXUHPSODFHUOHVDPSRXOHVj
l'exception des lampes DEL.
EXCLUSION DES GARANTIES IMPLICITES
Votre seul et unique recours consiste dans la réparation du produit tel que stipulé dans la présente garantie limitée. Toute garantie
implicite, y compris les garanties implicites relatives à la qualité marchande ou à l’adéquation à un usage particulier, se limitera à
une période d’un an ou à la période la plus courte prescrite par la loi.
Cette garantie est offerte à l’acheteur initial et à tout propriétaire subséquent d’un produit acheté aux États-Unis à des fins d’usage
domestique. Si le produit est situé dans une localité où un réparateur autorisé GE n’est pas disponible, vous pourriez encourir des
frais de déplacement ou devoir acheminer le produit à un réparateur autorisé GE pour faire réparer l’appareil. En Alaska, cette
garantie exclut les frais d’expédition et les visites de service à votre domicile.
Certains États ou provinces ne permettent pas l'exclusion ou la restriction des dommages accessoires ou indirects. Certains droits
particuliers vous sont dévolus en vertu de la présente garantie et peuvent s'accompagner d'autres droits qui varient selon votre lieu
de résidence. Pour connaître la nature exacte de vos droits, consultez l’organisme de protection du consommateur de votre région,
ou encore le bureau du procureur général de l’État.
Garant : General Electric Company. Louisville, KY 40225
Garantie prolongée : Procurez-vous une garantie prolongée GE et renseignez-vous sur les rabais spéciaux offerts pendant que
votre garantie est toujours en vigueur. Vous pouvez vous la procurer en ligne à tout moment au
www.geappliances.com/service_and_support/shop-for-extended-service-plans.htm
le 800.626.2224 pendant les heures d’affaires normales. Les services pour le domicile du consommateur GE seront toujours
disponibles après l’expiration de la garantie.
Enregistrez votre électroménager : Enregistrez votre nouvel appareil en ligne au moment qui vous convient le mieux!
www.geappliances.com/service_and_support/register/
L’enregistrement de votre produit dans les délais prescrits permet une meilleure communication et un service rapide, selon les
modalités de votre garantie, si besoin est. Vous pouvez également envoyer par courrier la carte d’enregistrement pré-imprimée qui se
trouve dans l’emballage de votre appareil.
Agrafez votre reçu ici. La date sur la preuve d’achat d’origine
est requise pour obtenir une réparation sous garantie. GARANTIE
Merci! ...
pour votre achat d'un électroménager de marque GE.
Table of contents
Languages:
Other GE Ventilation Hood manuals

GE
GE Monogram ZV30 User manual

GE
GE Monogram ZV925 User manual

GE
GE PV976NSS Original instructions

GE
GE JVB36 User manual

GE
GE Monogram ZVB30 User manual

GE
GE 36" CUSTOM HOOD INSERT ZVC36LSS User manual

GE
GE PVX7360 Original instructions

GE
GE Monogram ZVC30LSS User manual

GE
GE RN328HSA User manual

GE
GE Monogram ZV1050 User manual
Popular Ventilation Hood manuals by other brands

Smeg
Smeg HOBD682R installation manual

Trade-wind
Trade-wind P7200 Series Installation instructions & use & care guide

CONSTRUCTA
CONSTRUCTA CD646850 User manual and installation instruction

Westinghouse
Westinghouse QR056 owner's manual

Caple
Caple INCH instruction manual

Pando
Pando E-245 installation manual