GE Appliances Profile PFWS4605 Original instructions

GEAppliances.corn
Safety Instructions .............. 2,s
Operating Instructions ........ 4-16
Control Panel ......................... 4
Control Settings ................... 5-10
Features .......................... 10, 11
Loading and Using the Washer .... 12-15
Available Accessories ................. 15
Smart Appliance ..................... 16
Installation Instructions ...... 17-22
preparing to Install Your Washer ...... 17
Location of Your Washer ............. 18
Rough-In Dimensions ................. 18
Unpacking Your Washer .............. 19
Electrical Requirements .............. 19
Grounding Requirements ............. 19
Drain Requirements .................. 20
Water Supplg Requirements .......... 20
Installing the Washer .............. 20, 21
Replacement Parts ................... 21
Adaptive Vibration Control ............ 22
Troubleshooting Tips ......... 23-28
Consumer Support
Warrantg (U.S.)....................... 27
Warrantg (Canada) ................... 28
Consumer Support ................... 29
PFWS4605
PFWS4600
PFWH4405
PFWH4400
Laveuses
Profile
La section fran(;aise commence _ la page 30
Lavadoras
Profile
La secci6n en espa_ol empieza en la p6gina 55
ENERGYSTAR
As an ENERGYSTAR@ partner,
GEhas determined that this
product meets the ENERGYSTAR@
guidelines for energg efficiencg.
Write the model and serial
numbers here:
Model #
Serial #
You can find them on a label on the
sideof the washer. 49-90391 06/16/10 GE

IMPORTANT SAFETY INFORMATION.
READ ALL INSTRUCTIONS BEFORE USING.
_,WARNING! _o__o__o_,_ informationin_,i_mon.o_m._b__o,ow_,_omin,mi__ _i_,
of fire or explosion, electric shock, or to prevent property damage, personal injury or
loss of life.
The instructions in this manual and all other literature included with this washer are
not meant to cover every possible condition and situation that may occur. Good, safe
practices and caution MUSTbe applied when installing, operating and maintaining any
appliance.
WATERHEATERSAFETY
Undercertain conditions, hydrogengas may beproduced in a water heater that has not been usedfor two weeks
or more. Hydrogen gascan be explosiveunder thesecircumstances.
Ifthe hot water has not been usedfortwo weeksor more, preventthe possibilityof damage or injury by
turning on all hot water faucets and allowing them to run for several minutes. Dothis before usingany electrical
appliancewhich isconnected to the hot water system.Thissimple procedurewill allow any built-up hydrogen
gasto escape.Sincethe gas isflammable, do not smokeor usean open flame or appliance during this process.
PROPERINSTALLATION
Thiswasher must be properly installedand located in accordance with the Installation Instructions beforeit is used.
'_Installor store where itwill not beexposed ,_Properlyground washerto conformwith all governing
to temperatures belowfreezingor exposed codesand ordinances.Followdetailsin Installation
to the weather,which couldcause permanent damage Instructions.
and invalidatethewarranty.
YOURLAUNDRYAREA
[] Keepthe area underneath and around your
appliances free of combustible materials such as
lint, paper, ragsand chemicals.
[] Donot leavethe washer door open.An open door
could entice children to hang on the door or crawl
insidethe washer.
[] Closesupervision isnecessary ifthis appliance is
used by or near children. Donot allow children to
play on,with or insidethis or any other appliance.

Use this
appliance
only for its
intended
purpose as
describedin
this Owner's
Manual.
GEAppliances.com
WHEN USINGTHEWASHER
[] Never reach into washer while it is moving. [] Never attempt to operate this appliance
Wait until the machine has completely stopped if it is damaged, malfunctioning, partially
before opening the door. disassembled, or has missing or broken parts,
including a damaged cord or plug.
Donot mix chlorine bleach with ammonia
or acids such as vinegar and/or rust remover.
Mixing different chemicals can produce a toxic gas
which may cause death.
Donot wash or dry articles that have been cleaned
in, washed in, soaked in or spotted
with combustible or explosive substances (such
as wax, oil, paint, gasoline, degreasers, dry-
cleaning solvents, kerosene, etc.)which may ignite
or explode. Do not add these substances to the
wash water. Do not use or place these substances
around your washer or dryer during operation.
The laundry process can reduce the flame
retardancg of fabrics. To avoid such a result,
carefully follow the garment manufacturer's
wash and care instructions.
[]
[]
Do not slam the washer door closed. Do not try
to force the door open when locked (LOCKED
indicator ON).This could result in damage to
the washer.
The washer is equipped with an electrical overload
protector. The motor will stop
if it becomes overheated. The washer will
automatically restart after a cool-down
period of up to 2 hours, if the washer
has not been manually turned off
during this time.
To minimize the possibility of electric shock, unplug
this appliance from the power supply
or disconnect the washer at the building's
distribution panel by removing the fuse or
switching off the circuit breaker before attempting
any maintenance or cleaning. NOTE:Pressing the
power button does NOT disconnect the appliance
from the power supply.
WHEN NOT IN USE
[]
[]
Turn off water faucets to relieve pressure
on hoses and valves and to minimize leakage
if a break or rupture should occur. Check
the condition of the fill hoses; they should
be replaced every 5 years.
Before discarding a washer, or removing it
from service, remove the washer door to prevent
children from hiding inside.
[] Do not attempt to repair or replace any part of this
appliance unless specifically recommended
in this Owner's Manual, or in published user-repair
instructions that you understand and have the
skills to carry out.
[] Do not tamper with controls.
READANDFOLLOWTHISSAFETYINFORMATIONCAREFULLY.
SAVE THESE INSTRUCTIONS

About the washer control panel.
Youcan !ocateyour mode!numberon a labe!onthe sideof the washer.
^,_WARNING! _o_d_ _h__,_ko_,_,_/_,__ho_k,o__nj__o_o_, _od_h_,_o_
SAFETY INSTRUCTIONS before operating this appliance.
Quick Start
Ifthe screen isdark, pressthe POWERbutton to "wake up" [] If you selected a cycle other
the display. POWER than the SPECIALTYCYCLE,
E] Pressthe POWERbutton, press the START/PAUSEbutton.
[27 Selecta wash cycle
or Steam Refresh cycle.
(Defaultsare set for each cycle.
Thesedefault settings can be
changed. SeeControl settings
for more information.)
If you selectedSPECIALTYCYCLE,choose between Rinse
and Spin, Garments, Bed and Bath, and Other Specialty
for your specific needsbefore pressing START/PAUSESee
specialty cycles for more information."
PFWS4600, PFWS4605 -Profile HA Steam Washer w/ SmartDispense TM
PFWH4400, PFWS4405 -Profile HA Washer w/o Steam, w/SmartDispense TM
"-e
Power
Pressto "wake up" the display. If the display is active, press to put the washer into standby mode.
NOTE:Pressing POWERdoes not disconnect the appliance from the power supply.

Control settings. GEApplionces.com
Wash Cycles
The wash cycles are optimized for specific types of wash loads. The chart below will help you match
the wash setting with the loads. The GentleClean_ lifters lightly tumble the clothes into the water and
detergent solution to clean the load.
For heavily to lightly soiled white cottons, household linens, work and play
WHITES/HEAVY DUTY clothes. Can usethe STEAMASSISToption with this cNcle.
For heavy to lightly soiled colorfast cottons, household linens, work and play
clothes. Can usethe STEAMASSISToption with this cqcle.
COLORS/NORMAL
WRINKLE FREE
(PERMA PRESS)
STEAM REFRESH
(some models)
HANDWAS H
DELICATES
ACTIVE WEAR
WASHABLE WOOL
(some models)
SPEEDWASH
DRAIN & SPIN
BASKET CLEAN
For heavy soiled colorfast cottons, household linens, work and play clothes.
To de-wrinkle ! to 5 cotton blend items. This is not a wash cycle, but a cycle
that applies only steam to the garments. Select the correct number of
garments using the arrow kegs and press Enter,
The washer will beep upon completion of the cycle, and will continue to
tumble for 30 minutes to keep wrinkles from setting in. PressStart/Pause to
remove clothes.
If clothes are slightly damp after completion of the cycle, hang dry clothes for
10 minutes before wearing.
For items labeled hand-washable with light soils. Provides gentle rocking to
mimic the handwashing action.
For lingerie and special-care fabrics with light to normal soil. Provides gentle
tumbling and soak during wash and rinse.
For active sports, exercise and some casual wear clothes. Fabrics include
modern technology finishes and fibers such as spandex, stretch and micro-
fibers.
For the washing of machine washable wool products, provided that they are
washed according to the instructions on the garment label. When selecting
this cqcle, qou must use a deterqent suitable for washinq wool.
For lightly soiled items that are needed in a hurry. Cycle time is approximately
30 minutes, depending on selected options.
To quickly drain and spin out any items at any time.
Use for cleaning the basket of residue and odor. Recommended use of once
per month.
SPECIALTY CYCLES Forunique garments that may need special treatment.
Specialty Cycles Rinse & SPIN
Quickly rinse out any
items at any time.
GARMENTS BED and BATH
Coats
DressShirts
Hosiery/Bras
Jeans
Khakis
Sweaters
Blankets (cotton)
Comforters
Sheets
Towels
SPECIALIZEDCYCLES
Athletic Shoes
Energy Savings
Fabric Refresh
Fleece
FragileCottons
Performance Fabrics
PetBedding
PlayClothes
Single ItemWash
SleepingBag
Soak
SuperClean
Throw Rugs
While in the Specialty Cycle, usethe A and Y
arrow kegs to scroll between the different options.
Press ENTERto select the cycle. PressBACKto go
to the previous menu.

Control settings.
Soil Level
Changingthe SOILLEVELincreasesor decreasesthe wash time to remove different amounts ofsoil.
To change the SOILLEVEL,pressthe SOILLEVELbutton until gou have reached the desired setting. Youcan choose
between Extra Light, Light,Normal, Heavg or Extra Heavg soil.
Spin Speed
Changingthe SPINSPEEDchangesthe final spin speedof the cgcles.Alwags follow the garment manufacturer's care
label when changing the SPINSPEED.
To change the SPINSPEED,pressthe SPINSPEEDbutton until gou have reached the desired setting. Youcan choose
between No Spin,Low, Medium, Highor Extra HighSpin.Higherspin speeds are not available oncertain cgcles,such
as Delicates.
Higherspin speeds remove more water from the clothes and will help reduce drg time, but mag alsoincrease the
possibilitgof setting wrinkles on some fabrics.
Wash Temp
Adjust to selectthe proper water temperature for the wash cgcle.Theprewash and rinsewater isalwags cold to help
reduce energg usageand reducesetting of stains and wrinkles.
Follow the fabric manufacturer's care labelwhen selecting the wash temperature.
To change the wash temperature, pressthe WASHTEMPbutton until gou have reached the desired setting. Youcan
choose between TapCold,Cold,Warm, Hot or Sanitize.TheSanitizedwash temperature isnot availableon certain
cgcles,such as Delicates.
When selectingthe Sanitizewash temperature, the washer increasesthe water temperature to sanitizeand killmore
than 99% of mang common bacteria found in home laundrg.Thesanitizewash temperature is onlg available on
the Whites/Heavg Dutg wash cgcle.Forbest results,selectthe heavg soilsetting when usingthe Sanitizewash
temperature setting.
NOTE:Thefirst !0 secondsof the wash fill is alwags cold. Thisfeature assistsin conditioning the fabric and
preventing stainsfrom setting on garments.
START/PAUSE
Pressto start a wash cgcle.If the washer is running,pressing it once will pausethe washer and unlock the door.
It will take a few secondsfor the door to unlock after pressing PAUSE.Pressagain to restart the wash cgcle.
NOTE:Ifthe washer ispaused and the cgcle is not restarted within 15 minutes, the current wash cgcle will be
cancelled.
NOTE:Insome cgclesthe washer will drain first, then unlock the door when it ispaused.
NOTE:Thewasher performs automatic sgstem checks after pressingthe STARTbutton. Water will flow in 45 seconds
or less.You mag hear the door lock and unlock before water flows;this isnormal.
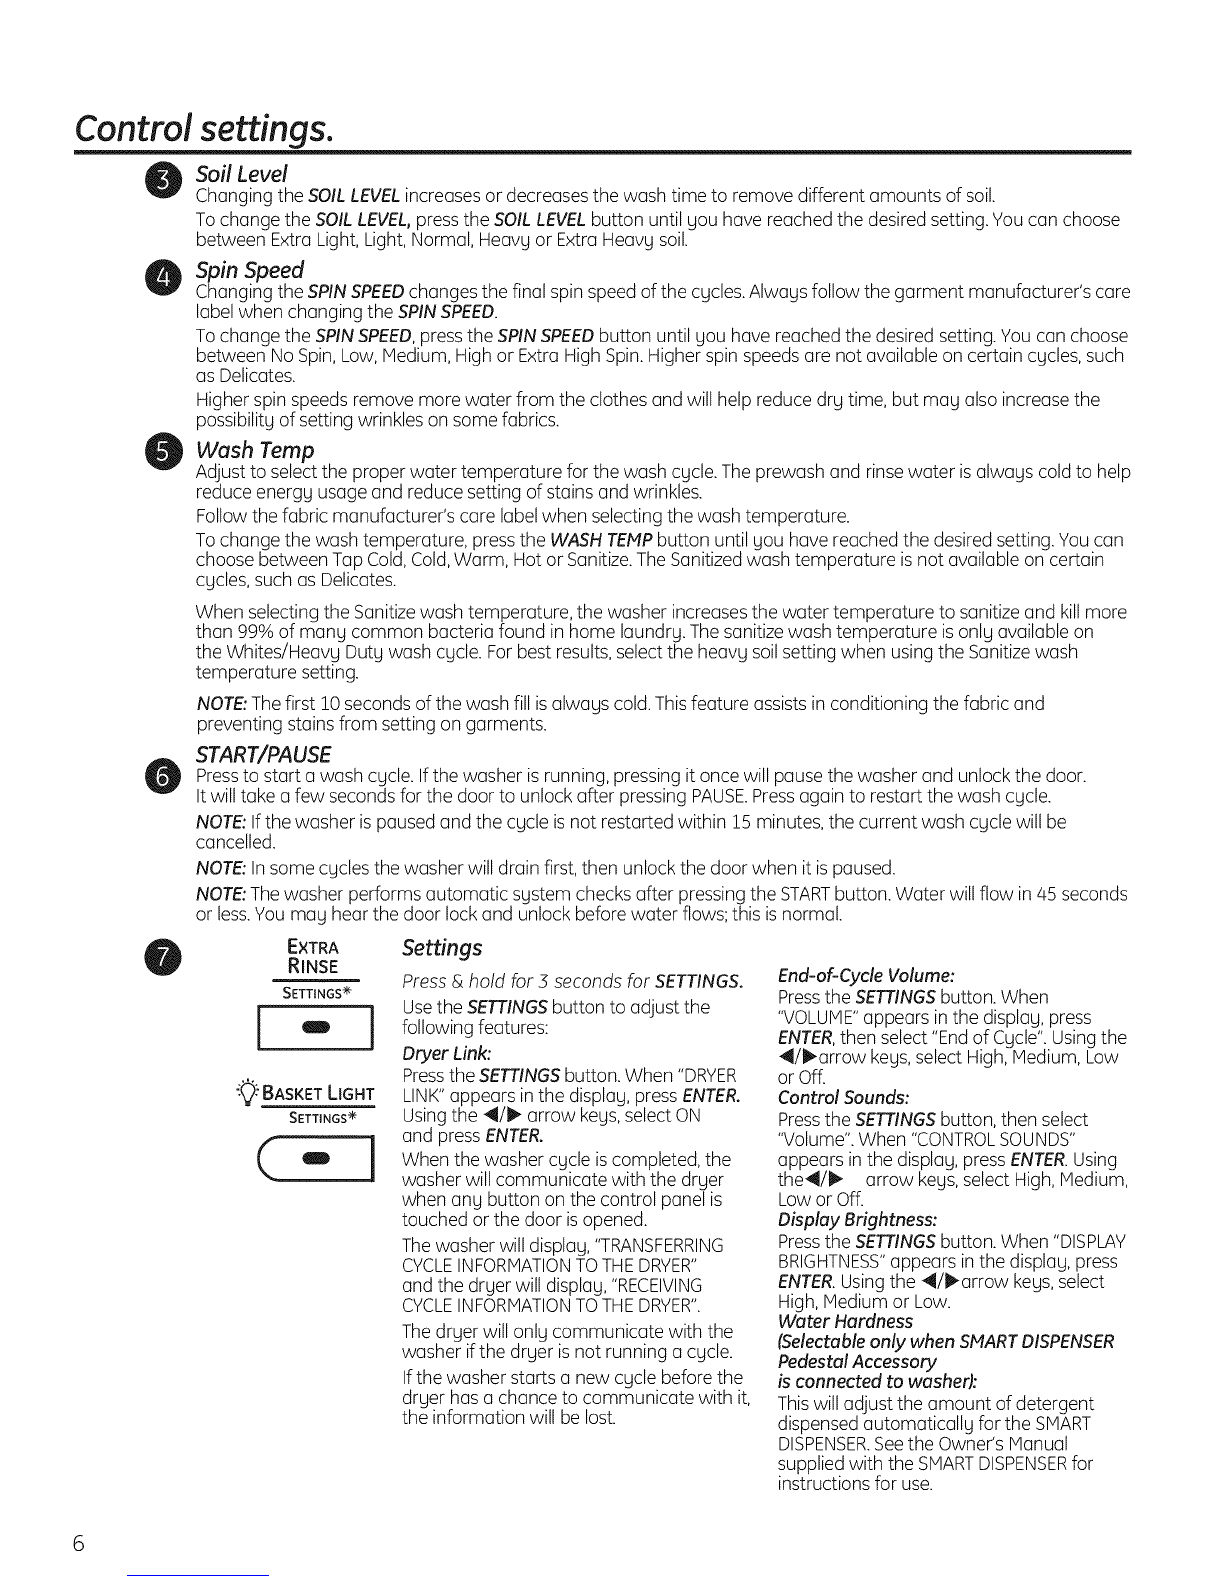
EXTRA Settings
RINSE
SETTINGS ÷
I"1
_ BASKETLIGHT
SETTINGS ÷
("1
Press&hold for 3 seconds for SETTINGS.
Usethe SETTINGSbutton to adjust the
following features:
Dryer Link:
Pressthe SETTINGSbutton. When "DRYER
LINK"appears in the displag, press ENTER.
Usingthe 4/i_ arrow kegs,selectON
and pressENTER.
When the washer cgcle is completed, the
washer will communicate with the drger
when ang button onthe control panel is
touched or the door isopened.
Thewasher will displag, "TRANSFERRING
CYCLEINFORMATIONTOTHEDRYER"
and the drger will displag,"RECEIVING
CYCLEINFORMATIONTOTHEDRYER".
Thedrger will onlg communicate with the
washer ifthe drger isnot running a cgcle.
If the washer starts a new cgcle before the
drger hasa chance to communicate with it,
the information will be lost.
End-of-Cycle Volume:
Press the SETTINGS button. When
"VOLUME"appears inthe displag, press
ENTER,then select "End of Cgcle". Using the
_l/l_arrow kegs, select High, Medium, Low
or Off.
Control Sounds:
Press the SETTINGS button, then select
"Volume". When "CONTROLSOUNDS"
appears in the displag, press ENTER. Using
the41/_ arrow kegs, select High, Medium,
Lowor Off.
Display Brightness:
Press the SETTINGS button. When "DISPLAY
BRIGHTNESS"appears in the displag, press
ENTER. Using the 41/ll_arrow kegs, select
High, Medium or Low.
Water Hardness
(Selectable only when SMART DISPENSER
Pedestal Accessory
is connected to washefl:
This willadjust the amount of detergent
dispensed automaticallg for the SMART
DISPENSER.See the Owner's Manual
supplied with the SMARTDISPENSERfor
instructions for use.

I
i
[
GEAppliances.com
PRE
WASH
"_ BASKET LIGHT ÷
(-i
PRE
WASH
i-I
EXTRA
RINSE
SETTINGS ÷
EXTRA
RINSE
Prewash
Prewash isan extra wash before
the main wash. Use it for heavilg soiled
clothes or for clothes with a care label
that recommends prewashing before
washing. Be sure to add high-efficiencg
detergent, or the proper wash additive
to the prewash dispenser.
Extra Rinse
Use an extra rinse when additional
rinsing isdesired to remove excess dirt
and detergent from soiled loads.
The prewash feature will fill the washer
(adding the prewash detergent), tumble
the clothes, drain and spin. Then the
washer will run the selected wash
cgcle.
NOTE:In some special cgcles,
the prewash is selected automaticallg
as the default. You can modifg this
selection at ang time.
NOTE:In some special cgcles, the extra
rinse is selected automaticallg as the
default. You can modifg this selection at
ang time. Some cgcles have additional
rinses done automaticallg.
DELAY
START
O!Delay Start
You con delog the start of o wash cgcle
for up to 2/4hours. Pressthe
DELAYSTARTbutton to choose the
number of hours gou want to delag
the start of the cgcle. Use the A and
Y(up and down) arrows to find the
desired delog time; then press ENTERto
select the delag time. Finallg, press the
STARTbutton after the desired cgcle is
selected. The machine will count down
and start automaticallg at the correct
time.
NOTE:If gou forget to fullg close
the door, a reminder signal will beep
reminding gou to do so.
NOTE:If gou open the door when the
delag iscounting down, the machine
will enter the pause state. You must
close the door and press STARTagain
in order to restart the countdown.
LOCK
(..)
PushtoLockControl
Hold5SecstoUnlock
Lock
You can lock the controls to prevent
ang selections from being made. Or
gou can lock or unlock the controls
after gou have started a cgcle.
Children cannot accidentallg start the
washer bg touching pads with this
option selected. To lock the washer,
press and hold the LOCK button for 3
seconds. To unlock the washer controls,
press and hold the LOCKbutton for
3 seconds. A sound is made to indicate
the lock/unlock status.
The control lock icon on the displag will
light up when it is on.
NOTE:The POWERbutton can still be
used when the machine is locked.
PRE
WASH
_" BASKET LIGHT ÷
(--1
_9:BASKETLIGHT
SETTINGS ÷
(..
BASKET LIGHT
The basket light will turn on and remain
on for 5 minutes when the door opens,
start/pause button is pressed, or bg
pressing and holding the basket light
button for 3 seconds. The basket light
can be turned off bg pressing and
holding the basket light button for 3
seconds. The basket light can not be
turned off while the unit is idle.

Control settings.
',_iSTEAM
ASSIST
STAIN INSPECTOR ÷
-1
STAIN
INSPECTOR
Stain Inspector
PFWS4600,4605 Press &hold for 3
seconds for STAININSPECTOR.
The STAIN INSPECTORfeature allows you
to indicate what stains are on the
garments in your load. This feature can be
used with any wash cycle.
To use STAIN INSPECTOR:
1. Select the wash cycle.
2. Pressthe STAININSPECTORbutton
(the button will light up when it is on).
3. Check the wash instructions on your
garment.
F'r'e:_i::_EHTER t.o Cor_t.i.r_ue
4. Press the ENTER button to continue.
5. Use the A and Y arrows to find the
desired stain category,
6. Pressthe ENTERbutton to select the
stain category,
7. Usethe A and Y arrows to select the
desired stain.
You have the following stains available to choose from:
OUTDOOR
Clay
Grass
Mud/Dirt
Rust Iron
Tree Sap
COSMETICS
Lipstick/LipBalm
Deodorant
Lotions
Makeup (water-based)
Oil(hair/mineral)
BEVERAGES FOOD/COOKING
GrapeJuice
Coffee/Tea
FruitJuice Other
Milk/Dairy
Wine (red/white)
Butter/Margarine
Cooking/Vegetable Oil
Chocolate
Tomato Based
BarbecueSauce
PERSONAL
Blood
Perspiration
Urine/Feces
Mouthwash
Vomit
SCHOOL/OFFICE/HOME LAUNDRY
Adhesive Tape
Ballpoint Ink
Glue (white common)
PencilHark
Correction Fluid
Dingy White Socks
Collar/Cuff Soil
Dye Transfer
FabricSoftener
Yellowing
OIL/GREASE/WAX
Motor Oil/Lube
Ointment/Salve
CandleWax
Crayon
Chapstick_
8. Pressthe ENTERbutton to select the stain,
9. Your selected stain will appear on the display.
10. Pressthe STARTbutton to start the cycle.
NOTE:To turn off STAININSPECTORor to select a
different stain, press the STAININSPECTORbutton
again.
NOTE:Prewash is selected automatically
as the default for some stains. When selected
automatically, the PREWASHbutton will light.
For optimum stain removal, it is recommended
to add high-efficiency detergent or proper wash
additive to the prewash dispenser. You can turn
off the prewash option ifyou do not want to add
the prewash to the cycle.

GEAppliances.com
SMART
DISPENSE TM
SMART DISPENSE"- optionalaccessory(on
somemodels)
If you have purchased the PROFILE
SMARTDISPENSESystem, refer to the
Owner's Manual that comes with the
SMARTDISPENSESystem.
If you have not purchased the PROFILE
SMARTDISPENSESystem, you will not
have bulk-dispensing capability. If you
select the SMARTDISPENSEoption,
a message will be displaged advising
that your unit does not have the
capabilitg. You should then put
detergent and other selected additive
in the flow-through dispenser drawer
located at the top left of
the unit. To purchase the PROFILE
SMARTDISPENSESgstem, go online to
GEAppliances.com or contact gout local
retailer.
,,_STEAM
ASSIST
STAIN INSPECTOR ÷
i-i
STEAM ASSIST (onsomemodels)
STEAMASSISTadds steam into the
washer during WHITES/HEAVYDUTY,
COLORS/NORMALWRINKLEFREEor
ACTIVEWEARcycles.
To use:
.Turn power ON and select a wash
cgcle.
The STEAH ASSISToption isonlg
available on WHITES/HEAVYDUTY,
COLORS/NORMAL,WRINKLE FREEor
ACTIVEWEAR cgcles.
2. Select the STEAM ASSIST button to
activate Steam.
3. Press the START/PAUSE button.
WASH
ENERGY SAVINGS WASH
Use "e" WASH to save energg on
specified wash cgcles. "e" WASH cannot
be used with STEAM REFRESH, ENERGY
SAVING, ATHLETIC SHOES, BASKET
CLEAN, and WASH CARE w/ SOAK.
OVERNIGHT
READY
OVERNIGHT READY
(onsomemodels)
OVERNIGHTREADYis intended for
smaller loads only. This feature is
intended for use when clothes need
to be washed and ready to hang or
finished the next morning. This feature
will tumble clothes and introduce a
constant stream of air into the machine
compartment upon completion of select
wash cycles. Clothes can be removed
at any time by pressing pause. To
use the feature, press the Overnight
Ready button and follow the prompts
on the screen. After use, check the lint
filter located at the top of the rubber
door gasket, cleaning as needed.
High wear or delicate articles are not
recommended for this cgcle.
Thetable below describes example
loads that can be used with this
feature:
2-3athletic uniforms
2 sets of scrubs
2 sets of baby's crib sheets
1 dress shirt, 1 pair of dress pants
3 dress shirts

Control settings.
CLEANING OVERNIGHT READY LINT FILTER
(onsomemodels)
Thefilterislocatedinthetoprightportionofthe thewashergasket.
Forbestperformance,cleanthisfilteraftereveryOvernightReadycycle
by runningyourfingersoverthefiltertoremovelint.
Forfurthercleaning,thefiltercanberemovedbypullingforwardonthe
tab..Replacethefilteraftercleaning.
Overnight Ready
Lint Filter
oO_OoOoO
oOoOoOoO
%°°°°°°°
.oOoO°°o_
OoO°O°O_O
About the washer features.
The Dispenser Drawer
Slowlyopen the dispenser drawer by pulling
it out untilit stops.
After adding laundry products,slowly close
the dispenserdrawer.Closingthe drawer
too quickly couldresultin early dispensing
of the bleach,fabric softeneror detergent.
Youmay seewater in the bleachandfabric
softenercompartments atthe end ofthe cycle.
Thisisa resultof the flushing/siphoningaction
and is portof the normaloperationof the
washer.
UseonlyHEHigh-Efficiency
detergent.
Addpre-washto /// LThe Prewash Compartment
_/
thislocation,,_ _ @ I Onlyusethe PrewashCompartmentifyou
___ areselectingthe Prewashcyclefor heavily
__ _._ soiledclothes.Add measureddetergent or
_ _,_-._,,":_ prewashadditiveto the back left prewash
Detergent _"'
_/_ compartmentof thedispenserdrawer.
selection insert __/'/' I Detergentor prewashadditive isflushed
from the dispenserinthe prewashcycle (if
selected).
NOTE: Liquid detergent will drain
into the washer basket as it is added.
mDetergentusagemay needto be adjusted
for water temperature,water hardness,size
and soillevelofthe load.Avoidusingtoo
much detergent in your washeras itcan
lead to oversudsinganddetergent residue
being left on the clothes.
10

About the washer features. GEAppliances.com
_ Adjustment
Rails
ForHEpowderdetergentremove
theDetergent selectioninsertand
addpowderhere
The Detergent Compartment
Onlyusehigh-efficiency detergent
in this washer. DONOTfill high-efficiency
detergent over the HA× line. Use
detergent manufacturer's rcommended
amount.
PowderDetergent- Removethe Detergent
selectioninsertand placeit in a safe
locationoutsideof the washer.Followthe
detergentmanufactrer's instructionswhen
measuringthe amount of powderto use.
Liquid Detergent- Locatethe
concentrationof your detergenton the
bottle.Placethe Detergentselectioninsert
inthe correspondinglocationdependingon
the concentration.
I Movethe insertby pulling it up and replace
it by slidingit down betweentwo detergent
compartment rails.Makesureto pushthe
insert to thebottom of the compartment
sothat it isflush to the bottom ofthe
compartment, tt isnot an issueif the
detergent leakspastthe insertto the back
of the compartment.
I Detergentusagemay needto be adjusted
for water temperature,water hardness,
sizeand soillevelof the load.Avoidusing
too much detergent in yourwasher asit
can leadto oversudsing,detergentresidue
being left on the clothes,and couldextend
wash times.
Donot put clumpeddetergent in the
dispenser.Clumpeddetergent cancausea
leak.
ForHEliquiddetergentthatisnon-
concentrated,placetheinsertinthe"IX"
position
J
/J
ForHE2×liquiddetergent,place
theinsertinthe"2X"position ForHE3Xliquiddetergent,place
the insert in the "3X"position
The Liquid Bleach Compartment
tf desired,measureout the recommended
amount of liquid bleach,notto exceed
1/3 cup(80ml)and pour intothe center
compartmentlabeled"LIQUIDBLEACH"
markedwith this symbol\.
tt isrecommendedto useHigh-Efficiency(HE)
bleachinthis front-load washer.
Donot exceedthe maximum fill line.Overfilling
can causeearlydispensingof the bleachwhich
could resultin damagedclothes.
NOTE:Donot usepowderedbleachin the
dispenser.
The Fabric Softener Compartment
tf desired,pour the recommendedamount
of liquidfabric softenerintothe compartment
labeled"FABRICSOFTENER."
Useonly liquidfabric softenerin the dispenser.
Dilutewith water to the maximumfill line.
Donot exceedthe maximum fill line.Overfilling
can causeearlydispensingof the fabric
softener,which couldstain clothes.
NOTE:Donotpour fabric softenerdirectly
on thewash load.
11

Loadingand usingthewasher.
Always follow fabric manufacturer's care label when laundering.
Sorting Wash Loads
[]
[]
[]
[]
Colors Soil Fabric Lint
Whites Heavy Delicates LintProducers
Lights Normal EasyCare LintCollectors
Darks Light Sturdy Cottons
Combine large and small items in aload. Load large items first. Large items should not be more than half
the total wash load.
Washing single items is not recommended. This may cause an out-of-balance load. Add one or two
similar items.
Pillows and comforters should not be mixed with other items. This may cause an out-of-balance load.
Sort dark-colored clothes from Iighbcolored clothes to prevent dye transfer. This is a high-efficiency
washer, so it uses less water, making dye transfer more common.
Loading the Washer
The wash drum may be fully loaded with loosely
added items. Do not wash garments containing
flammable materials (waxes, cleaning fluids, etcJ.
Loading Examples*
To add items after the washer has started, press
START/PAUSEand wait until the door is unlatched.
The washer may take up to 30 seconds to unlock
the door after pressing START/PAUSE,depending
on the machine conditions. Do not try to force
the door open when it is locked. After the door
unlocks, open gently. Add items, close the door
and press START/PAUSEto restart.
WORKWEAR
4 Jeans
5 Work Wear Shirts
5 Work Wear Punts
LINENS
2 Both Sheets
10 Bath Towels/
12 Washcloths
7 Hand Towels/
2 Terrycloth Bath
Mats
OR
2 Flat Queen-Sized
Sheets
2 Fitted
Queen-Sized
Sheets
4 Pillowcases
MIXEDLOAD
/4Pillowcases
2 Hand Towels
2 Flat Sheets/
DELICATES*
7 Bras
7 Panties
3 Slips
2 Fitted Sheets
2 Bath Towels/
4 Washcloths
OR
6 Shirts (Men's
or Women's)
4 Pair Pants
(Khakis
or Twills)
5 T-shirts
7 Pairs of Boxers
/4Pairsof Shorts
OR
6 T-shirts
4 Pairs of
Sweatpants
/4Sweatshirts
2 Hoodies
7 Pairs of Socks
2 Camisoles
4 Nightgowns
*Using a nylon
mesh bag for
small items is
recommended.
SPEEDWASH
(2-4 GARMENTS)
2 Casual Wear
Work Shirts
! Pair Casual Wear
Work Pants
OR
3 Soccer Uniforms
*Using a nylon mesh bag for small items is recommended.
12

Always follow fabric manufacturer's care label when laundering. GEAppliances.com
Care and Cleaning/General Maintenance
Cleaning the Pump Filter
Dueto the n(]ture of the front-lo(]d w(]sher,
it is sometimes possible for sm(]ll (]rticles
to p(]ss to the pump. The washer h(]s a
filter to c(]pture lost items so they (]re not
dumped to the dr(]in. To retrieve lost items,
cle(]n out the pump filter.
1. Using (] sm(]ll fl(]the(]d screwdriver,
open the (]ccess door.
2. Pl(]ce (] sh(]llow p(]n or dish under
the pump (]ccess door (]nd towels
on the floor in front of the w(]sher to
protect the floor. It isnorm(]l to c(]tch
(]bout (]cup of w(]ter when the filter
is removed.
\",,.
Pump
,_filter
3. Pull down the pour spout.
o
5°
6.
Turn the pump filter counterclockwise
(]nd remove the filter slowly, controlling
the flow of the dr(]ining w(]ter.
Remove the filter (]nd cle(]n the debris
from the filter.
Repl(]ce the filter (]nd turn clockwise.
Tighten securely.
°
8. Flip up the pour spout.
Close the (]ccess door by hooking the
bottom t(]bs first, then rot(]ting the
(]ccess door shut.
Cleaning the Door Gasket
Open the w(]sher door. Using both h(]nds, press down the door g(]sket. Remove (]ny
foreign objects if found tr(]pped inside the g(]sket, ivl(]kesure there is nothing blocking the
holes behind the g(]sket.
While holding down the door g(]sket, inspect the interior g(]sket by pulling it down with
your fingers. Remove (]ny foreign objects if found tr(]pped inside this g(]sket. H(]ke sure
there is nothing blocking the holes behind the g(]sket.
When you (]re finished cle(]ning the door g(]sket, remove your h(]nds (]nd the g(]skets will
return to the oper(]ting position.
13

Loading and using the washer.
Always follow fabric manufacturer's care label when laundering.
Lock tab is visible only after
drawer has been pulled out
_!i_!ii__ii_I_Iii__ii!_i_i_i_i___"- ................_ __!i;i_i_ili
,,,S ,,,
Dispenser Drawer Area: Detergent and fabric softener mag build up in the dispenser
drawer. Residue should be removed once or twice a month.
m Remove the drawer bg first pulling it out until it stops. Then reach back into the
right rear corner of the drawer cavitg and press down firmlg on the lock tab,
pulling out the drawer.
[] Remove the insert from the bleach and fabric softener compartments and the
detergent insert. Rinse the inserts and the drawer with hot water to remove
traces of accumulated laundrg products.
[] To clean the drawer opening, use a small brush to clean the recess.
Remove all residue from the upper and lower parts of the recess.
[] Return inserts to the proper compartments. Replace the dispenser drawer.
[] To reduce buildup in the Dispenser Drawer area:
Useonly HE
High-Efficiency
detergent.
14

Always follow fabric manufacturer's care label when laundering. GEAppliances.com
FabricCare Labels
Below are fabric care label "symbols" that affect the clothing you will be laundering.
WASH LABELS
wash m
cycle N.... I p....... t Press/ Gentle/ Do not wash Do not wring
wrinkle resistant delicate Hand wash
Water • • • • • Q
temperature Hot Warm Cold/cool
(50°C/120°F) (40°C/105°F) (30°C/85°F)
BLEACH LABELS
Bleach__. ,A A
symuois Any bleach Only non-chlorine bleach
(when needed) (when needed) Do not bleach
DETERGENT LABELS
Useonly HEHigh-Efficiency detergent.
Available accessories.
Pedestal
There is a pedestal available for your
washer, This pedestal gives the washer
more height and gives storage for your
washing necessities, Included with the
pedestal is a divider that allows you
to store liquid laundry detergent out
of sight. See the pedestal installation
instructions.
Profile Smart Dispense System
The Profile SMARTDISPENSESystem lets
you store laundry detergent and fabric
softener to be dispensed automatically
during the wash and rinse cycles of this
washer. NOBLEACHmay be used in
this dispense system. See the Owner's
Manual that is included with the Profile
SMARTDISPENSESystem for installation
instructions.
15

SmartAppliance GEAppliances.com
Models PFWS4600/5 AND 4400/5 are compatible with the
GESmart Appliance Module (SAM)which can be purchased
separately. Contact your local utility or visit www.
GEAppliances.com/smart-appliances to see if your urea is
using Demand Response(SAM)technology.
INSTALLATION
The preferred locution for the module installation is on top of
the clothes dryer.
Details on how to connect the cables to the module are in the
instructions that come with the module.
Wait 5 minutes; then press the Settings button. Scroll and
look for the energy management screen as seen below.
EnergLl i'lanagemeiq t.
This screen means the module is attached correctly and
you can begin to use your Smart appliance following the
instructions below.
If the Energy Management Screen isnot available, refer to
the SAMmodule troubleshooting guide.
QUICK GUIDE
There are 4 power levels available: Critical, High, Normal and
Low. On the Normal and Low levels,the unit runs as normal.
Thefollowing steps show how the unit reacts during startup
at Critical and High power levels.
Option 1(Delay EP)
During startups at Critical and High levels, the unit will delay
starting until the level becomes Medium or Low. Press the
START/PAUSEbutton.
Option 2 (Override Delay EP)
When Delay EPisshown, the delay function can be
overridden by pressing the DELAYSTARTbutton. Pressing the
START/PAUSEkey will begin the selected cycle with "e"WASH
enabled. The "e"WASH indicator will be illuminated.
During a Critical Rate period, the Critical Response Mode**
will also be activated to maximize energy savings. EPwill be
displayed. _, _;T_i
Option 3(Override "e" WASH)
After overriding the delay function, pressing the "e'WASH
button will disable the "e'WASH setting. Pressingthe START/
PAUSEkey will begin the selected cycle.
During a Critical Rate period, the Critical Response Mode** will
be activated to maximize energy savings. EPwill be displayed.
**Note: The Critical Response Mode can be disabled at any
time by pressing and holding the "e'WASH Button for 3 sec-
onds. EPwill be removed from the display
SETTINGS MENU
Press SETTINGS;then select Energy Management.
Del...':'_LIEP O,..,er.r.]de
Delay EPOverride
This option allows your smart washer to automatically engage
the "e'WASH setting when overriding a Delay EPand starting
a cycle during a Critical or High Rate period. The default
setting isYES.
Auto-Extend Delays
If a timed delay is selected, this option allows for the
scheduled start to extend if the utility rate is Critical or
High at the scheduled start. The default setting will
automatically extend these cycles.
Critical Rate Option
This option allows your smart appliance to respond to Critical
Rate information by automatically engaging the Critical
Response Mode. The Critical Response Mode is designed to
maximize energy savings when a cycle is run during a Critical
Rate period. The default setting is YES.Setting this option to
NO will disable the Critical Response Mode.
In order for the demand response features on the appliance
to work, additional equipment is required to be installed to
interface with the local utility. Such equipment may be sold
separately and/or is available through your utility as part of
the pilot test program. Check with your utility company to
see if a pilot test program isavailable in your area and for full
details.
PLEASENOTE:If you move to an area where the program
is not available, the demand response features cannot be
activated and utilized on the appliance. The appliance will
function as normal after the demand response equipment has
been deactivated or disconnected.
16

Instailati
Istr cti s Washer
PFWS4605, PFWS4600
PFWH4405, PFWH4400
If you have any questions, call 800.GE.CARES(800.432.2737)
or visit our Website at: GEAppliances.com
In Canada, coil 1.800.561.3344 or visitwww.GEAppliances.ca
BEFORE YOU BEGIN
Read these instructions completely and carefully.
" IMPORTANT - Savetheseinstructions
for local inspector's use.
. IMPORTANT - Observeallgoverning
codes and ordinances,
, Note to Installer - Be sure to leave these
instructions with the Consumer.
. Note to Consumer - Keepthese instructions
for future reference.
, Skill level - Installation of this appliance requires
basic mechanical and electrical skills.
, Completion time - 1-3 hours
, Proper installation isthe responsibilitu of the installer.
, Product failure due to improper installation is not
covered under the Warranty.
FOR YOUR SAFETY:
_Z_WARNING
This appliance must be properlg grounded and
installed as described in these Installation Instructions.
Do not install or store appliance in an area where
it will be exposed to water/weather. See Location
of Your Washer section.
NOTE: This appliance must be properly
grounded, and electrical service to the washer
must conform with local codes and ordinances
and the latest edition of the National Electrical
Code, ANSI/NFPA 70.
TOOLS REQUIRED FOR
WASHER INSTALLATION
[] 1/4" nut driver
[] 3/8" socket with ratchet
[] 3/8" open-end wrench
[] Adjustable wrench or 7/16" socket with ratchet
[] Adjustable wrench or 9/16" open-end wrench
[] Channel-lock adjustable pliers
[] Carpenter's level
PARTS SUPPLIED
@
[] Water Hoses(2)
[] Cable Tie
17

Installation Instructions
LOCATION OF YOUR WASHER
Do Not Install the Washer:
1.In an area exposed to dripping water or outside
weather conditions. The ambient temperature
should never be below 60°F (!5.6°C) for proper
washer operation.
2.In an area where it will come in contact with curtains or
drapes.
3.On carpet. The floor MUST be a hard surface with
a maximum slope of !/2" per foot (1.27cm per
:SOcm).To make sure the washer does not vibrate
or move, you may have to reinforce the floor.
NOTE:If floor is in poor condition, use 3/4" impregnated
plywood sheet solidly attached to existing floor covering.
IMPORTANT:
Minimum Installation Clearances
. When installed in alcove: Sides, Rear,
Top = O" (0 cm)
. When installed in closet: Sides, Rear,
Top = O" (0 cm), Front = r' (2.54 cm)
• Closet door ventilation openings required:
2 louvers each 60 square in. (387 cm2),located 3"
(7.6cm) from top and bottom of door
ROUGH-IN DIMENSIONS
FRONT
27" (68 6cm)
h
SIDE
544" (873crn)
h
*NOTE:
With Washer Legs: 40.5" (102.5 cm)
(0.75" adjustability)
With Pedestal: 53.75" (136.6 cm)
(0.75" adjustability)
Stacked: 82.75" (209.8 cm)
18

Installation Instructions
UNPACKING THE WASHER
WARNING: Recycleor destroy the carton
and plastic bags after the washer is unpacked. Make
materials inaccessibleto children. Children might use
them for play. Cartons covered with rugs,bedspreads
or plastic sheetscan become airtight chambers causing
suffocation.
1. Cut and remove the top and bottom packaging straps.
2. While it isin the carton, carefully lay the washer on its side.
DONOTlay the washer on itsfront or back.
3. Turndown the bottom flaps-remove allbase packaging,
including the cardboard, styrofoam baseand styrofoam
tub support (insertedin center of base).Savethe stacking
brackets located on the styrofoam pad that covered
the top ofthe washer.
NOTE:If you ere installing a pedestal, proceed to
the installetion instructions that come with the pedestel.
4. Carefully return the washer to an upright position and
remove the carton.
5. Carefully move the washer to within 4 feet (122cm)
of the final location.
6. Removethe following from the back sideof the washer:
/4bolts
4 plasticspacers (includingrubber grommets)
/4power cord retainers
Z. Removethe shipping bolt. Insertplug into shipping
bolt hole.
J
//
/,
J
NOTE:Feilure to remove the shipping braces cen cause
the washer to become severely unbalanced.
Saveall bolts for future use.
NOTE:If you must transport the washer at u later date,
you must reinstall the shipping support hardware to prevent
shipping damage. Keepthe hardware in the plastic bag
provided.
ELECTRICAL REQUIREMENTS
Read these instructions completely
and carefully.
-A WARNING--TOREDUCETHERIsKOF
FIRE,ELECTRICALSHOCKAND PERSONALINJURY:
,, DONOTUSEAN EXTENSIONCORDORAN ADAPTER
PLUGWITH THISAPPLIANCE.
Washer must be electrically grounded in accordance
local codes and ordinances, or in the absence of local
codes, in occordance with the NATIONALELECTRICAL
CODE,ANSI/NFPANO. 70.
CIRCUIT- Individual,properly polarizedand grounded
15-amp branch circuit fused with 15-amp time-delay fuse
or circuit breaker.
POWERSUPPLY- 2-wire, with ground, 120-volt,
single-phase,60-Hz,Alternating Current.
roper
grounded 3-prong receptacle to be
located sothe power supply cord is
accessiblewhen the washer is
in an installed position.
GROUNDING REQUIREMENTS
WARNING: Improperconnectionofthe
equipment grounding conductor can result in a risk
of electricalshock.Checkwith a licensedelectrician
if you are indoubt asto whether the appliance is
properly grounded.
.Thewasher MUSTbegrounded. Inthe event of
malfunction or breakdown,grounding will reduce
the riskof electrical shockby providing a path of least
resistancefor electrical current.
.Sinceyour washer isequipped with a power supply
cord having an equipment-grounding conductor and
a grounding plug,the plug MUSTbe plugged into an
appropriate, copper-wired receptacle that isproperly
installedand grounded in accordance with all localcodes
and ordinances or in the absence of localcodes,with the
National ElectricalCodes,ANSI/NFPA70 (latestedition).
If in doubt, call a licensedelectrician. DONOTcut off or
alterthe grounding prong on the power supply cord. In
situations where a two-slot receptacle ispresent,it isthe
owner's responsibilityto have a licensedelectrician replace
itwith a properly grounded three-prong grounding-type
receptacle.
19

Installation Instructions
WATER SUPPLY REQUIREMENTS
Hot and cold water faucets MUSTbe installed within
42 inches(107 cm)of gour washer's water inlet.Thefaucets
MUSTbe 3/4" (1.9cm) garden hose-tgpe so inlethoses can
be connected. Water pressure MUSTbe between 10 and 120
pounds per square inch.Your water department can advise
gou of gour water pressure.Thehot water temperature
should be set to deliverwater at 120° to 140°F(48°-60°C)
to provide proper Automatic Temperature Control (ATC)
performance.
NOTE:A water softener is recommended to reduce buildup of
scale insidethe steam generator if the home water supplg is
verg hard.
DRAIN REQUIREMENTS
!. Drain capable of eliminating 17 gals (64.3L)
per minute.
2. A standpipe diameter of i 1/4" (3.18cm) minimum.
3. Thestandpipe height above the floor should be:
Minimum height: 24" (61 cm)
Maximum height: 96" (244cm)
BACK
I OII ::©
f_
96"
(244 cm)
Max.
24"
(61 cm)
IV]in.
NOTE:The drain hoseattached to the washer can reach
a 58" (!47 cm) high standpipe. Fora higher standpipe,
contact an authorized parts distributor.
INSTALLING THE WASHER
1. Runsomewater from the hot and cold faucets to flush the
water linesand remove particlesthat might clog
the water valve screens.
.
3.
o
Removethe inlet hosesfrom the plastic bag.
(90°elbow end)
Carefullg connect the inlet - -- ...............
hose marked HOTto the
outside "H"outlet of the
water valve.Tighten bg hand,
then tighten another 2/3 turn
with pliers.Carefullg connect
the other inlet hoseto the
inside"C"outlet of the water (G _
valve.Tighten bg hand;then
tighten another 2/3 turn with pliers.Do not crossthreod
or over-tighten these connections.
Connectthe inlet hoseends to the HOTand COLDwater
faucets tightlg bg hand,then tighten another 2/3 turn with
pliers.Turnthe water on and checkfor leaks.
5o Carefullg move the washer to its final location.Gentlg rock
the washer into position.It is important not to damage the
rubber leveling legswhen moving gour washer to its final
location. Damaged legscan increasewasher vibration. It
mag be helpful to sprag window cleaner on the floor to
help move gour washer into itsfinal position.
NOTE:To reduce vibration, ensure thet oll four rubber
leveling legs ore firmly touching the floor. Pushand pull
on the back right and then back left of your washer.
NOTE:Donot usethe dispenser drawer or door to lift
the washer.
NOTE:If gou are installing into a drain pan, gou can use
a 24-inch long 2x4to leverthe washer into place.
2O
Other manuals for Appliances Profile PFWS4605
1
This manual suits for next models
3
Table of contents
Languages:
Other GE Washer manuals

GE
GE WNRD2050E0WC User manual

GE
GE GCWP1000MWW User manual

GE
GE Spacemaker WSSH300 Original instructions

GE
GE GTUN275GMWW User manual

GE
GE Profile WPDH8800 Original instructions

GE
GE GTWN7450DWW User manual

GE
GE GTWN4250DWS Manual

GE
GE WMCD2050G User manual

GE
GE WSLP1500H0WW How to use

GE
GE WNSE5699 User manual