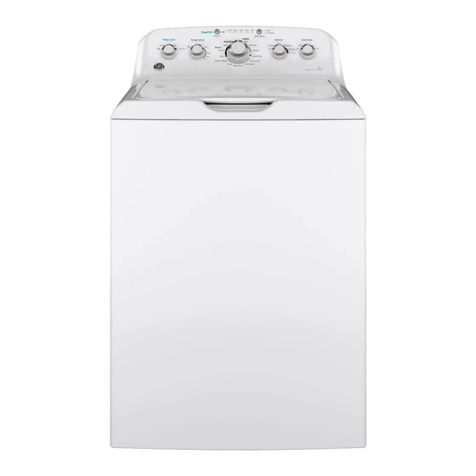
GE G152 User manual

GEAppliances.com
Safety Instructions .......... 2,s
Operating Instructions
Care and Cleaning
of the Washer ...................... 7
Control Panel ...................... 4
Control .......................... 4-S
Features ......................... 6, 7
Loading and Using
the Washer ........................ 7
Troubleshooting Tips....... 8-1o
Consumer Support
Consumer Support ................ 12
Warranty .......................... 11
Write the model and serial
number here:
Model #
Serial #
You can find them
under the lid of
the washer.
49-90433 02-12 GE

IMPORTANT SAFETY INFORMATION.
READ ALL INSTRUCTIONS BEFORE USING.
of fire or explosion, electric"shock, or to prevent property damage, personal inju(y,
or loss of life.
WATERHEATERSAFETY
Under certain conditions, hydrogen gas may be produced in awater heater that has not been used
for two weeks or more. Hydrogen gas can be explosive under these circumstances.
If the hot water has not been usedfor two weeks or more, prevent the possibility of damage or injury by turning
on all hot water faucets and allowing them to run for several minutes. Dothis before usingany electrical appliance
which is connected to the hot water system.This simple procedure will allow any built-up hydrogen gasto escape.
Sincethe gas isflammable, do not smoke or usean open flame or appliance during this process.
PROPERINSTALLATION
This washer must be properly installed and located in accordance with the Installation Instructions
before it is used. ff you did not receive an installation instructions sheet, you can receive one by
visiting GEAppliances.com or by calling 800.GE.CARES (800.432.2737).
• Installor store where it will not be exposed to • Thiswasher does not includewater supply hoses.
temperatures below freezing or exposedto the
weather, which could cause permanent damage and
invalidate the warranty.
Properlyground washer to conform with all
governing codes and ordinances. Follow details
in Installation Instructions.
Toensure proper installation, run two Speed Wash
cycles BEFOREwashing the first load.
GEstrongly recommends the useof factory specified
parts. A list of factory hosesavailable for purchase
are listed below. Thesehoses are manufactured and
tested to meet GEspecifications.
GEstrongly recommends the use of new water
supply hoses. Hosesdegrade over time and need to
be replaced every 5 years to reduce the risk of hose
failures and water damage.
Parts and Accessories
Order on-line at GEAppliances.com today, 24 hours
a day or by phone at 800.626.2002during normal
businesshours.
Part Number
WH41X10207
OR
Accessorg
4 ft RubberWater SupplyHoses
WX14X10005 4 ft Braided Water SupplyHoses
YOURLAUNDRYAREA
• Keepthe area underneath and around your
appliances free of combustible materials such as
lint, paper,rags, chemicals,etc.
• Closesupervision isnecessary ifthis appliance is used
by or near children. Do not allow children to play on,
with or insidethis or any other appliance.

GEAppliances.com
WHEN USING THE WASHER
Use this •
opp//ance
only for its
intended
purpose as •
described in
this Owner's
Manual.
Never reach into the washer while it ismoving.
Wait until the machine hascompletely stopped
before opening the lid.
Do not mix chlorine bleach with ammonia
or acids such asvinegar and/or rust remover. Mixing
different chemicals can produce a toxic gaswhich
may cause death.
Do not wash or dry articlesthat have been
cleaned in,washed in,soaked in or spotted with
combustible or explosivesubstances (suchas
wax, oil,paint, gasoline,degreasers,dry-cleaning
solvents,kerosene,etc.).Thesesubstances giveoff
vapors that may ignite or explode. Donot add these
substancesto the wash water. Donot useor place
these substances around your washer or dryer
during operation.
Thelaundry processcan reducethe flame retardancy
of fabrics. Toavoid such a result,carefully follow the
garment manufacturer's
wash and care instructions.
Tominimize the possibility of electric shock,
unplug this appliance from the power supply
or disconnect the washer at the building'sdistribution
panel by removing the fuse orswitching off the circuit
breaker before attempting any maintenance or
cleaning.
NOTE: Turningthe CycleSelectorKnob to an off
position, or pressing PAUSEdoesNOT disconnectthe
appliancefrom thepower supply
Neverattempt to operate this appliance if it is
damaged, malfunctioning, partially disassembled,or
hasmissing or broken parts, including a damaged
cord or plug.
WHENNOTIN USE
•Turnoff water faucets to minimize leakage if a break
or rupture should occur. Checkthe condition of the fill
hoses;GErecommends changing the hosesevery 5
years.
•Beforediscarding a washer, or removing it
from service,remove the washer lid to prevent
children from hiding inside.
•Donot attempt to repair or replace any part
of this appliance unlessspecifically recommended
in this Owner's Manual, or in published user-repair
instructions that you understand and have
the skillsto carry out.
•Do not tamper with the controls.
READAND SAFETYINFORMATIONCAREFULLY
LoLLowr,ls
SAVE THESE INSTRUCTIONS

About the control panel-for models with STARTbutton.
Step
• Add fabric softener Ion
models with a fabric softener
dispenser); see page 6 for
details
• Add detergent. GErecommends
the use of High Efficiency
detergents in all Energy
Star-rated washers
Step 4
Step_ S__
• Looselg add items around !nfusor.
Overloadingmag_ negativel9 .
impact wash performance. Adjust
the load size accordingly.
• Close lid
NOTE:Washer will nat start to fill
with lid open
• Select wash options,
including Fabric
Softener option
• Select wash cycle
• Select OPTIONS
• Push START
SIGNAL TEMPERATURE OPTIONS
000O0
FILL SOAK WASH RINSE SPIN START
0
STOP/PAUSE
Controls
Signal
• Selectfor an end of cycle signal.
Temperature
Selectthe water temperature for the wash and rinse cycles.Alwaysfollow fabric manufacturer's care labelor instructions
when laundering.
PerfecTempsensesthe incomingwater temperatureand adjuststhe fillwater to obtain a more precisetemperature rangefor
allwash temperatures exceptTAPCOLD.Forexample,in a COLDwash selection,somewarm water may be addedto reacha
temperature neededto better dissolvedetergents.Often,detergentsare notcompletely dissolvedin verycoldwater, especially
in coolerclimates.During winter months, when the water entering your home iscolder, or for locationswith very cold water
year round, usethe PerfecTempCOLDto help dissolvepowdered detergents and to improve the cleaning of your clothes.
TheTAPCOLDfeature turnsthe PerfecTempfeature on your washer off and usesyour householdtap water temperature
for a COLDwash. Thiscan provide energy savings by reducingthe amount of hot water usedin your wash.
Options
Autosoak Option (on some models)
Thisoption beginswith abrief agitation, soaksfor aspecified period of time, then movesthrough the rest of the cycle
automatically. On some models,this option is located on the CycleSelector knob.
2nd Rinse Option (on some models)
When you use extra detergent or bleach to clean heavily soiled clothes,usethe 2nd Rinseoption to better remove additional
residues.
Extended Spin Option (on some models)
Usethis option to extract more water from your clothes. Clotheswill be drier when this option isselected and will dry more
quickly in your dryer.
Fabric Softener and Power Rinse
Setthisoption when addingfabric softener to the washer orto select the enhanced Power Rinse.
NOTE:Donot usefabric softenerdispensingballs with this washer, Theydo not work correct_ in high efficiency washers,

GEAppliances.com
Status Indicator Lights
The Cycle Indicator Lights show what stage the washer is in. When the Selector knob is set to a new cycle, the Indicator
Lights will flash momentarily, showing what stages the cycle will go through. On models without an AUTO SOAK option, the
SOAK light will not light up.
0 0 0 O0 I
FILL SOAK WASH RINSE SPIN
Wash Cycle--Cycle Selector Knob
The wash cycle controls the length and intensity of the washing process. The knob can be turned in either direction. Turning
the Cycle Selector knob after starting a cycle will stop the washer and reset the cycle to the new selection. Press STARTto
begin the new cycle selection.
The chart below will help you match the wash cycle setting with your clothing.
WHITES For heavy to lightly soiled cottons, household linens, work and play clothes. This cycle provides the best overall
cleaning and should be used for most everyday items. Provides a regular wash and a high speed spin.
PREWASH For removing surface dirt from heavily soiled clothes. Hake sure to follow with a regular wash cycle.
COLORS For non-colorfast cottons and blends or items that are labeled cold wash. Provides a regular wash with periods of
soak and a high speed spin.
PERMANENT PRESS For wrinkle-free and permanent press items and knits. Provides a regular wash with periods of
soak and a low speed spin.
DELICATES For lingerie and special-cure fabrics with light soil. Provides an extra gentle wash and (l low speed spin.
HAND WASH For items labeled hand washable with light soil. Provides an extra low speed spin.
SPEED WASH For small loads of lightly soiled items that are needed in a hurry. Provides a high speed spin.
DRAIN &SPIN OR SPIN ONLV For draining the tub and spinning water out of the clothes. Provides a high speed spin.
TOWELS & SHEETS Provides periods of agitation and soak tailored for washing towels and sheets. Provides a regular wash
and a high speed spin.
JEANS For washing medium to lightly soiled jeans. Provides (l gentle wash and (l high speed spin. (For heavily soiled work
jeans, use WHITES cycle.)
QUICK RINSE Rinses and spins non-soiled items where a rinse only is desired. Provides a high speed spin.
_START
Press START to begin the cycle. Pressing START again will PAUSE the cycle and the Cycle indicator light will blink.
To continue the cycle, press STARTagain or close the lid. If machine is paused more than 24 hours, the cycle will be
cancelled. To stop the cycle, hold the button for 3 seconds. Ifwater remains in the machine, select the DRAIN & SPIN OR
SPIN ONLV cycle to drain tub and spin water out of the washer tub.
Raising the lid will stop agitation or spin action but does not pause the cycle.
This model has AUTOMATIC LOAD SENSING. This selection provides the correct amount of water suited to the size and type
of load placed in the unit.
- The washer will not fill with water during automatic load sensing if the lid is open. When the lid is closed the machine is
able to begin filling with water in order to sense the load size.
Note: This is a high efficiency washing machine with Infusor TM wash action, This system requires less water while providing
effective cleaning action, You may notice that the water level is lower than on your previous washer, This is normal for an
/nfusor_M-equipped washer,
Liquid Bleach Funnel
The water fill dilutes liquid chlorine bleach as the washer fills for the wash cycle.
[] Check clothing care labels for special instructions.
r_] Measure liquid bleach carefully, following instructions on the bottle.
•Never pour undiluted liquid chlorine bleach directly onto clothes or into the wash basket,
• Do notpourpowdered bleach into bleach funnel,
B]Beforestarting the washer, pour measured amount of bleach directly into bleachfunnel.
Avoid splashing or over-filling dispenser.If you preferto usepowdered bleach,add it into the
wash basketwith your detergent.
• Donot mix chlorinebleach with ammonia or acids suchas vinegarand/or 5
rust remover,Mixing canproduce atoxicgas which may causedeath,
About washer features.
3 \
J
4 OPTIONS
+ EX!ENOEO SPN AUIO + 2rid NSE
SOAK
The Fabric Softener Dispenser (onsomemodels)
Thefabric softener dispenser automaticnl_ releasesliquid fabric softenerat theproper time during
thecycle.
Do not stop the washer or raise the lid during the first spin. This will causethe dispenser to
emptg too soon.
Never pour fabric softener directlg on clothes. This mag cause stains on gour clothing.
Touse, follow these steps."
%
Liftthe tab onthe fabric softener dispenser
top.
Measureout fabric softener into the cap
and pour the softener into the dispenser
top. Thefabric softener will drain intothe
receiving cup insidethe dispenser.Useonly
"Ultra" or concentrated fabric softeners.
Pushdown on the tab to closethe
dispenser top. Makesure the tab is pushed
down fully and snaps shut.
r_ SelectFABRICSOFTENERfrom OPTIONS
on the control panel.
NOTE:Overfilling the dispenser will cause fabric
softener to drain out of the holesin the side of
the infusor when filling. Donot overfill.
NOTE: Do not use fabric softener dispensing
balls with this washer, They do not work
correctly in high efficiency washers,
Turning
Tubs
Turning
Cleaning the Fabric Softener Dispenser (onsome models)
TheFabric Softener Dispenserisself cleaning.This dispensershould not require regular cleaning
likestandard fabric softener dispensers.Wipe down exterior surfaces of the dispenseras needed. If
cleaning of the internal dispenser components isneeded,follow these steps after the wash cycle is
complete:
B3
Liftthe dispensertop tab and turn the top
counterclockwise usingthe 2 turning tabs
shown. Lift the dispenser out of the
Infusor TM.
@Cleanout any buildup from insidethe
InfusorTM with a soft cloth or toothbrush.
Ensurethe three rectangular holes inthe
bottom that allow the fabric softener to
drain are not blocked.
r_l Placethe dispenser assembly into the
InfusoffM.Turn the top clockwise usingthe 2
turning tabs shown. Pushdown on the tab
to close the dispensertop. Make surethe
tab ispushed down fully and snaps shut.
B1
B]
B1
Gently pull the cap away from the
dispenser cup to separate.
Wipe surfaces with a soft cloth or soak the
parts in a solution of i gallon warm water,
1/4 cup liquid detergent and l_cup bleach.
Ensurethe small hole in the top surface of
the cap and its associated tube are not
obstructed.
Reassemblethe dispenser cup and cap by
snapping them together.

Loading and using the washer.
Always follow fabric manufacturer's core label when laundering.
GEAppliances.com
Sorting WashLoads
Sort bycolor (whites,lights,colors),soillevel,
fabric type (sturdycottons, easy care, delicates) and whether the fabric produces lint (terry cloth,
chenille)or collects lint (velveteen,corduroy).
Proper Use of Detergent
Add detergent and fabric softener before adding items
sothat the detergent can work effectively. Usingtoo
little or too much detergent isa common cause of
laundry problems.
Uselessdetergent if you have soft water, a smaller load
or a lightly soiledload.
Forspots,applypre-treatment to itemsasrecommended
on the product label. Application shouldbe made in
the basketto prevent overspraywhich may causethe
coloringon the lidor graphicsto fade.
GErecommends the useof High Efficiency
detergents in all EnergyStarrated washers.
HEdetergents are formulated to work with low water
wash and rinsesystems.HEdetergents reduce
the oversudsing problems commonly associated
with regular detergents.
When using high efficiency or concentrated detergents,
consult the product labelto determine amount required
for optimum performance. Excessivedetergent will
negatively impact wash performance.
Loading the Washer
Loaddry items loosely inthe washer basket. Forbest
results, load items evenly and loosely around the
outside of the basket.To add items after washer has
started, lift the lid and submerge additional items
around the outside of the basket.
• Donot place large items such assheets, blankets
and towels acrossthe InfusorTM. Loadthem around
the outside of the basket.
• Donot wash fabrics containing flammable materials
(waxes,cleaning fluids,etc.).
• Washer will not agitate or spinwith the lid up,
however the timer will continue to run.
Care and cleaning of the washer.
Wash Basket: Leave the lid open after washing to allow
moisture to evaporate. Ifyou want to clean the basket,
use a clean, soft cloth dampened with liquid detergent;
then rinse. (Do not use harsh or gritty cleaners.)
Fill Hoses: GErecommends changing the hoses every
5years.
Exterion Immediately wipe off any spills. Wipe with damp
cloth. Try not to hit surface with sharp objects.
Interior: Theoccasionaluseofa cyclethat contains
bleachwill keeptheinsideof thewasher clean.
Moving and Storage: Askthe service technician to remove
water from drain pump and hoses. See the Installation
Instructions packed with product for information on how
to reinstall the shipping rod to keep the tub stationary
when moving the washer. For more information, visit
6EAppliances.com or call 800.6E.CARES (800.432.2757).
Do not store the washer where it will be exposed to the
weather.
Long Vacations: Besure water supply is shut off at
faucets. Drain all water from hoses if weather will be
below freezing.

Before you call for service...
_roubleshooting hfas
Save time and money! Review the charts on the following pages,
or visitGEAppliances.com Youmay not need to call for service.
WATER Possible Causes What To Do
Water level seems low
Water fills and drains
at the same time
Too many suds
Water leaks
This is normal
Drain stand pipe istoo low
• Water may not cover the top levelof the clothes.
Thisis normal for this high efficiency washer.
• Thedrain stand pipe must be above 30".
•Measure your detergent carefully. Uselesssoap ifyou have
soft water, a smaller load or a lightly soiledload.
Tgpe of detergent • Switchto HE_ detergent.
Soft water • Try lessdetergent.
Using too much detergent • Use lessdetergent. Uselesssoap ifyou havesoft water,
in washer a smaller load or a lightly soiled load.
Tgpe of detergent • Switchto HE_ detergent.
Fill hoses or drain hose is • Make sure hoseconnections are tight at faucets and
improperlg connected rubber washers are installed.Make sureend of drain hose
iscorrectly inserted in and secured to drain facility.
Household drain Tog • Checkhousehold plumbing. You may needto call
be clogged a plumber.
Drain hose is loose • Makesure drain hoseisfully seated in back of washer and
that the two retaining screws are fully seated.
Drain hose rubs on wall • Makesure drain hosedoes not make contact with the wall.
May cause excessivewear on the hose.
Constant water pressure • Tightenhosesat the faucets and turn the water off after each use.
to the fill hoses at the • Checkcondition of the fill hoses;they should be replaced
water source every 5 years.
Water temperature Cooler water temperatures • New laundry detergents have been formulated to work
seems incorrect provide improved energg with cooler water temperatures without affecting wash
efficiencg performance.
Water supplg is turned off • Turn both hot and cold faucets fully on and make sure
or improperlg connected hoses are connected to correct faucets.
Water valve screens are • Turn off the water source and remove the water connection
stopped up hoses from the upper buck of the washer. Use a brush or
toothpick to cleon the screens inthe machine. Reconnect
the hoses and turn the water back on.
Cool/Cold Water when • This is normal. PerfecTemp senses water temperature and
selecting Hot optimizes for best results. Cold water is added periodocally
when hot is selected.
House water heater is • Hake sure housewater heater isdeliveringwater at
not set properlg 120°F-140°F(48°C-60°C).
Water pumped out before Lid lifted or cgcle was put in • Resetcycle.
cgcle is complete pause for over 24 hours
Water won't drain Drain hose is kinked or • Straighten drain hoseand make surewasher isnot sitting on it.
improperlg connected • Topof drain outlet should be lessthan 6 ft (1.8m)
above floor.
Washer pauses during The PREWASHCgcle • Thisis normal.The washer alternates between agitate and
wash cycle was chosen soak during these cycles to get your clothes cleaner with
lesswear.
Washer pauses during This is normal • Thewasher may pause during the spin cycleto remove
spin cgcle soapy water more efficiently.
Washer does not fill This is normal • Thelid must be closed for washer to fill or operate.
when lid is open
8
Too much detergent

GEAppliances.com
OPERATION Possible Causes What To Do
Washer won't operate Washer is unplugged •Hake sure cord is plugged securely into a working outlet.
Water supplg is turned off • Turn both hot and cold faucets fully on.
Controls ore not set properlg • Check controls.
Lid is open--safety feature • Close lid and reset cycle, to the beginning if necessary.
prevents agitation and
spinning when lid is up
Circuit breaker/fuse is • Check house circuit breakers/fuses. Replace fuses or
tripped/blown reset breaker. Washer should have a separate outlet.
Electronics need to be reset • Unplug washer, wait 2 minutes, plug back in and press START.
STARTwas not pressed • Press START.
Lid magnet missing • Call for service.
Time not shown Unit filling • This is normal. Estimated time remaining is updated during
on displag fill time.
Movement inside machine Shifting mechanism is • When the machine is manually turned off, the shifter will
when shut off disengaging the motor disengage the motor before completely shutting down.
If lid is raised before the motor isdisenguged, it will resume
when lid is closed.
Basket seems loose Basket moves or rotates freely • Washer basket does not have a traditional brake. Basket will
move freely. This is normal.
PERFORMANCE Possible Causes What To Do
Clothes too wet Incorrect cycle selected. • Hake sure the cycle selected matches the load you are
washing. Somefabrics will feel wetter when rinsed with cold water.
Wash load out of balance • Redistribute load in washer and run through Drain & Spin cycle.
Colored spots Incorrect use of fabric •Check fabric softener package for instructions and follow
softener directions for using dispenser.
• Make sure you have selected the Fabric Softener option.
• Pretreat stain and rewash.
Dye transfer • Sort whites or lightly colored items from dark colors.
Graged orgellowed Detergent amount • Be sure to follow detergent manufacturer's directions.
clothes Herd water • Use a water conditioner like Calgon brand or install
a water softener.
Water is not hot enough • Make sure water heater is delivering water at
120°F-140°F (48°C-60°C).
Washer is overloaded • Loosely load clothes no higher than the top row of holes inthe
washer basket. For best results, load items around the outside
of the basket.
Detergent is not • Add detergent to the wash basket before you load clothes.
dissolving
Dye transfer • Sort clothes by color. If fabric label states wash separately,
unstable dyes may be indicated.
Lint or residue on Clothes ore air or line dried • Ifyou do not dry your clothes with a clothes dryer, your
clothes clothes may retain more lint.
Incorrect sorting • Separate lint producers from lint collectors.
Washing too long • Wash small loads for a shorter time than larger loads.
Detergent not dissolving • Add detergent to wash basket before you load clothes.
• Try a liquid detergent.
• Use warmer water temperature.
Overloading • Loosely load clothes in the washer basket. For best results, load
items around the outside of the basket.
Incorrect useof fabric
softener • Check fabric softener package for instructions
and follow directions for using dispenser.
• Make sure you have selected the Fabric Softener option.

Before you call for service...
Troubleshooting Tips
PERFORMANCE (cont.) Possible Causes What To Do
Pilling Result of normal wear on polg- •Whilethis is not caused by the washer, you can slow the
cotton blends and fuzzg fabrics pilling processbywashing garments insideout.
Snags, holes,tears, rips Pins,snaps, hooks, sharp • Fastensnaps,hooks,buttons and zippers.
or excessivewear buttons, belt buckles, • Removelooseitems likepins,objectsin pockets and
zippers and sharp objects sharp buttons.
left in pockets • Turn knits(whichsnag easily)inside out.
Undiluted chlorinebleach • Checkbleach package instructions for proper amount.
• Never add undiluted bleachto wash or allow clothes to
come in contact with undiluted bleach.
Chemicals like hair bleach or • Rinseitemsthat may havechemicals onthem before
dge, permanent wave solution washing.
Wrinkling Improper sorting • Avoid mixing heavy items (likework clothes)with light items
(likeblouses).
• Try a fabric softener.
Overloading or incorrect • Looselyloadclothesinthe washer basket.
water level
Incorrect wash and • Hatch Cycleselectionto the type of fabric you are washing
drg cgcles (especiallyfor easy care loads).
Repeated washing in • Wash inworm or cold water.
water that istoo hot
SOUNDS Possible Causes Reason
"Metallic clicking" Shifter mechanism is • Thedrive system will engage at the start ofagitate and
engaging or disengaging disengage when agitate iscomplete. This occursmultiple
times during the wash.
Back and forth "swoosh" Electric motor reversing • Thismachine has a drivesystem that doesn't use gears.
or light "clicking" sound direction Thissound isthe motor rotating back and forth to clean
during agitate your laundry.
Quick short agitation Clothing redistribution • Atthe end of agitate, the motor makes short agitation strokes
sounds at end of agitate to redistribute the load.
"Click" when water Relag switch • Therelay makes a click sound when activated. Thewater
stops filling levelactivates the relay and stopsfilling.
"Clicking" behind Control Automatic Temperature • Twovalvesmix cold and hot water. The "clicking" iswhen either
Panel during fill Control Valve valve turns on oroffto raiseor lowerthe fillwater temperature.
Water flow changes Automatic Temperature • Two valvesmix cold and hot water. Theflow changes when either
during fill Control Valve valve turns on oroffto raiseor lowerthe fillwater temperature.
Motor "whining up" or Motor rampingup/down • Themotor will speed up incrementally during the spin cycle.
"coasting down" in spin during spin cgcle When spin iscomplete, itwill coast until it stops.
"Humming" Water drain pump • Thedrain pump will make a humming sound when pumping
outwater after agitation stops and continue until spin iscomplete.
"Gurgling" Water drain pump • When the pump starts drawing inair,It starts to gurgle.
Thewasher shouldthen begin spinning and the sound will
continue until it isdone spinning.
Water "swishing" Thisis normal • Thiswasher usesa InfusorTM wash action.Water swishingwhile
the unit isagitating isnormal,especiallywith smaller loads.
Washer is noisy Washer is uneven • Tolevelthe front of the washer, adjust the front leveling legsby
rotating the individual leg in the proper direction for up or down.
Tolevelthe back of the washer, lift the back of the machine
4" (11 cm)and set down.
Shipping rod is still assembled • Toremovethe shipping rodfrom the washer,pull the yellow tag
in the unit and remove the attached rod from the bottom right hand sideof
10 the washer.

GEWasher Warrantg.
All warranty service provided by our Factory Service Centers,
or an authorized Customer Care technician. Toschedule service,
on-line, visit us atGEAppliances.com, or ca// 8OO.GE.CARES
(800.432.2737). Please have serial number and mode/number
available when calling for service.
Staple your receipt here,
Proof of the original purchase
date is needed to obtain service
under the warranty,
For The Period Of'.
One Year
From the date of the
original purchase
We Will Replace:
Any factory specified part of the washer which fails due to a defect in materials or workmanship.
During this limited one-gear warranty, we will also provide, free of charge, all labor and related
service to replace the defective part.
What Is Not Covered:
• Service trips to your home to teach you how to use
the product.
• Improper installation, delivery or maintenance.
• Failure of the product if it is abused, misused, or
used for other than the intended purpose or used
commercially.
• Replacement of house fuses or resetting of circuit breakers.
• Products which are not defective or broken, or which are
working as described in the Owner's Manual.
• Damage to the product caused by accident, fire, floods
or acts of God.
• Incidental or consequential damage caused by possible
defects with this appliance.
• Defects or damage due to operation in freezing
temperatures.
• Damage caused after delivery.
• Product not accessible to provide required service.
EXCLUSION OF IMPLIED WARRANTIES--Your sole and exclusive remedg is product repair as provided in this Limited
Wurrantg. Ang implied warranties, including the impfied warranties of merchuntubilitg or fitness for u particular purpose,
ore limited to one gear or the shortest period allowed bg low.
This warranty is extended to the original purchaser and any succeeding owner for products purchased for home use within
the USA if the product is located in an area where service by aGE,4uthorized Servicer is not available, you may be responsible
for atrip charge oryou may be required to bring the product to an ,4uthorized GEService location,/n,41aska, the warranty excludes the
cost of shipping or service calls toyour home,
/fyou need to order replacement parts, we recommend that you only use GE factory specified parts, Theseparts are designed to work
with your appliance and are manufactured and tested to meet GEspecifications,
Some states do not allow the exclusion or limitation of incidental or consequential damages, This warranty gives you specific legal
rights, and you may also have other rights which vary from state to state, Toknow what your legal rights are, consult your local or
state consumer affairs office oryour state's,4 ttorney General,
Warranton General Electric Company. Louisville, KY 40225
11

ConsumerSupport.
GEAppliances Webs/te GEAppliances.com
Have a question or need assistancewith your appliance? Trythe GEAppliancesWebsite 24 hours a day,
any day of the year! Forgreater convenience and faster service,you can now download Owner's Manuals,
order parts or even schedule serviceon-line.
Schedule Service GEAppliances.com
Expert GErepair serviceisonly one step away from your door. Geton-line and schedule your serviceat
your convenience any day of theyear! Or call 800.GE.CARES(800.432.2737)during normal businesshours.
Real Life Design Studio GEAppliances.com
GEsupports the Universal Designconcept-products, servicesand environments that can beused by
people of all ages,sizesand capabilities. We recognizethe need to designfor a wide range of physicaland
mental abilities and impairments. Fordetails of GE'sUniversalDesignapplications, including kitchen design
ideasfor peoplewith disabilities,check out our Website today. Forthe hearing impaired, pleasecall 800.TDD.
GEAC(800.833.4322).
Extended Warranties GEAppliunces.com
Purchase a GEextended warranty and learn about special discounts that are available while your warranty
isstill in effect. Youcan purchase it on-line anytime, or call 800.626.2224during normal businesshours.
GEConsumer Home Serviceswill still be there after your warranty expires.
Parts and Accessories GEAppliunces.com
Individuals qualified to servicetheir own appliances can have parts or accessoriessent directly to their homes
(VISA,MasterCard and Discovercards are accepted).Order on-line today, 24 hours every day or by phone
at 800.626.2002 during normal businesshours.
If you need to order replacement parts,we recommend that you only useGEfactory specified parts.These
parts are designed to work with your appliance and are manufactured and tested to meet GEspecifications.
Instructions contained in this manual cover procedures to be performed by ang user. Other servicing
generallg should be referred to qualified service personnel. Caution must be exercised, since improper
servicing may cause unsafe operation.
Contact Us GEAppliances.com
If you are not satisfied with the serviceyou receivefrom GE,contact uson our Website with all the details
including your phone number, or write to: General Manager, Customer Relations
GEAppliances,Appliance Park
Louisville,KY80225
Register YourAppliance GEAppliunces.corn
Register gour new applianceon-line--at gour convenience! Timely product registration will allow for
enhanced communication and prompt serviceunder the terms of your warranty, should the need arise.
You may also mail inthe pre-printed registration card included in the packing material.
]- 2 Printed in the United States

GEAppliances.com
Instrucciones
de seguridad.................. 2,s
Instrucciones de operaci6n
Ajustes de control ............... 4-5
C6mo cargar y usar
la lavadora ......................... 7
Cuidado y limpieza
de la lavadora ...................... 7
Funciones .......................... 6
Panel de control .................... 4
Consejospara la soluci6n
de problemas ................ 8-1o
Soporte al consumidor
Garantia .......................... 11
Soporte al consumidor............ 12
Escriba el n_mero de modelo
yde serie aqui:
No. de modelo
No. de serie
Puede encontrarlos
bajo la puerta
de la lavadora.
49-90433 02-12 GE

INFORMACION DESEGURIDAD IMPORTANTE.
LEATODASLAS INSTRUCCIONESANTES DE USAR.
,iADVERTENCIA! Porsu seguridad,debeseguirlasindicacionesde este manual para minimizar
el riesgodeincendioo explosi6n,descargael6ctrica,o paraevitardahos a la
propiedad,lesionespersonales,o muerte.
SECURIDADDELCALEWTADORDEAOUA
En determinadas condiciones, en un calentador de agua que no se haya utilizado durante un minima de
dos semanas se puede producir gas hidrdgeno. Elgas hidrdgeno puede resultar explosivo
en determinadas cimunstancias.
Siel agua caliente no seha utilizado por dos semanaso mds,prevengala posibilidadde sufrir daBoso lesiones
abriendo todos losgrifos de agua calienteydejandola correr durante varios minutos. Realiceeste proceso antes de
utilizar cualquier electrodom6stico que seconecte al sistema de agua caliente.Estesencillo procedimiento
le permitird liberar todo el gas hidr6geno acumulado. Debidoa que el gasesinflamable, no fume ni utilice ninguna
llama o electrodom6stico durante el proceso.
%INSTAMCIONCORRECTA
Lalavadora sedebeinstalarycolocar correctamentedeacuerdocon lasinstruccionesde instalaci6n,
antes deutilizarla.Si no recibi6 la hoja con instrucciones de instalaci6n, puede obtener
una visitando GEAppliances.com oIlamando al 800.GE.CARES (800.432.2737).
• Instaleo almacenela lavadoraen un lugardonde •
no est6 expuestaa temperaturas bajo cero nialas
inclemenciasclimaticas,ya queesto puede provocar
damosirreversiblese invalidarla garantia.
Conectecorrectamentea tierra la lavadorade
conformidad contodos losc6digosy ordenanzas
regulatorias.Sigala informaci6nde Instrucciones
de instalaci6n.
Paraasegurar una instalaci6n adecuada, deje correr
dos ciclosde Speed Wash (Lavado R6pido) ANTESde
realizar el primer lavado.
Estalavadora no incluye mangueras de suministro de
agua.
GErecomienda enf6ticamente el usode piezas
especificadas de f6brica. Acontinuaci6n seencuentra
una lista de mangueras de f6brica disponibles para
la compra. Estasmangueras est6n fabricadas y
probadas para cumplir con lasespecificacionesde
GE.
GErecomiendaenf6ticamenteelusodemangueras
nuevasdesuministrodeagua.Lasmanguerasse
desgastanconeltiempo ydeben reemplazarsecada5
aBospara reducirelriesgodefallasen lasmanguerasy
daBosprovocadosporel agua.
Piezas g accesorios
Solic[teloson-line hay mismo a GEAppliances.com,
las 24 horas cteld[a o par tel6fono a1800.626.2002en
horario normal de trabajo.
N6mero de Pieza Accesorio
WH41XI0207
0
Mangueras de goma
de suministro de agua
de 4 pies
ZONADELAVADERO
• Mantenga la zona por debajo y alrededor
de suselectrodom#sticos libresde materiales
combustibles como pelusa,papel,trapos,
productos qu[micos,etc.
WXI4XIO005 IVlanguerastrenzada
de suministro de agua
de 4 pies
• Esnecesario vigilar con atenci6n a losniBos
si utilizan la lavadora o se encuentran en las
proximidades. Nodeje que los niBosjueguen sobre
6ste u otro electrodom6stico, con 61o en su interior.

GEAppliances.com
AL UT/LIZARLALAVADORA
Ut/liceeste
e/ectrodomestico•
solopare d uso
que sedescribe
en estemanual
delpropietario, •
Nunca introduzca lasmanos en la lavadora mientras
6sta se encuentre en movimiento. Esperea que la
m6quina sehaya detenido por completo antes de
abrir la tapa.
No mezcleblanqueadores clorados con amoniaco o
6cidos como vinagre o desoxidantes. Lamezcla de
distintos productos quimicos puede producir gases
t6xicos que pueden causar la muerte.
No laveni sequeprendas que sehayan limpiado,
lavado, empapado o manchado con sustancias
inflamables o explosivas(como cera, aceite, pintura,
gasolina,desengrasantes, disolventes
de limpieza en seco,queroseno, etc.)que puedan
prenderse o explosionar. NoaBada ninguna de estas
sustancias al agua de lavado. Noutilice ni coloque
ninguna de estassustancias en torno a la lavadora
o la secadora durante el funcionamiento.
Elproceso de lavado puede reducir el tiempo previo
a la inflamaci6n de lostejidos. Paraevitar este efecto,
siga con atenci6n lasinstrucciones de lavado
y cuidado del fabricante de la prenda.
Para minimizar la posibilidad de descarga el6ctrica,
desenchufe el electrodom6stico de la corriente o
desconecte la lavadora en el panel de distribuci6n de
la vivienda quitando el fusible o apagando
el interruptor antes de realizarcualquier tarea
de mantenimiento o limpieza.
NOTA: El Ilevar I_ perill_ selectora de ciclo
a I_ posicion OFFu oprimir PAUSENO desconect_
el electrodomestico de la alimentaciOn,
Nointente en ningOncaso utilizar la lavadora
si est6 daBada,funciona incorrectamente, est6
parcialmente desmontada, lefaltan piezas o algunas
est6n rotas, incluidos el cable o el enchufe.
CUANDONO ESTEENUSO
CierrelasIlavesde paso minimizar lasfugas en
caso de que seproduzca una rotura o grieta.
Compruebe el estado de lasmangueras de Ilenado;
GErecomienda el cambio de lasmangueras cada 5
afios.
Antes de deshacersede una lavadora o de
desecharla,quite la puerta de la lavadora para evitar
que losni_os seescondan en su interior.
•Nointente reparar ni sustituir ninguna piezade este
electrodom#stico, a menos que se recomiende de
manera expl[cita en el manual del propietario
o en instrucciones publicadas de usoy reparaci6n
que sean comprensiblesy que pueda realizarusted.
•Nomanipule loscontroles.
LEAYSIGAESTAINFORMACION
DESEGURIDADCUIDADOSAMENTE.
CONSERVE ESTASINSTRUCCIONES

Panel de control-para modelos que empieza con bot6n de START.
7
•Agregue el suavizante (en
modelos con dosificador
para suavizante); para m6s
detalles,lea la p6gina 6
• Agregue el detergente.
GErecomienda el uso
de detergentes de
Alta Eficiencia
en todas las
lavadoras clasificadas
por Energg Star
Paso 7
• Agregue las prendas sin ajustar
alredeclor del Infusoff M.Sobrecargar
el tambor puede proclucir un impacto
negativo en eldesempe_o de lavaclo.
Ajuste el tama_o de la carga seg6n
corresponda.
• Cierre la tapa
NOTA: La lavadora no comienza a
Ilenarse con la tapa abierta.
P_ Paso4
• Seleccione el tama_o de
carga g otras opciones
de lavado, inclugendo
la opci6n del Suavizante
•Seleccioneelciclo de
lavado
• Oprima START
• Seleccione OPTIONS.
SIGNAL TEMPERATURE OPTIONS
Controles
O0000
SOAK WASH RINSE SPIN
START
0
STOP/PAUSE
Signal (sePal)
• SeJeccioneparaobtenerunasefiaJdefinaJdeciclo.
Temperature (Temperatura)
Seleccionelatemperaturadelaguaparalosciclosdelavadoyenjuague.CuandorealiceeJlavado,observesiempreJasinstruccionesor6tulosdecuidadosdeJ
fabricantedeltejido.
PerfecTemp@tectalatemperaturadelaguaentranteyajustaelaguadellenadoparaobtenerunagamadetemperaturasmcisprecisaparatodaslas
temperaturasdelavadoexceptoTAPCOLDtLigeramente Frio).Porejempb,enlaseJecci6ndeJavadoCOLD(enfrio),puedeagregarseunpocodeagua
calienteparaalcanzarlatemperaturanecesariaparadisolvermejorlosdetergentes.Amenudo,losdetergentesnosedisuelvenpotcompletoenaguamuyfrfa,
especialmenteendimascontemperaturasm6sbajas.DuranteJosmesesdeinvierno,cuandoeJaguaquerecibesuhogarestcim6sfriaoenbcalidadesconagua
muyfriatodoelafio,useeJPerfecTempCOLDparaayudaradisolverlosdetergentesenpoJvoylimpiarmejorsusprendas.
Lofunci6nTAPCOLD(Ligeramente Frio) desactivalafunci6nPeffecTempensulavadorayusalatemperaturadelaguacorrientedesuhogarparaunlavado
FRIO.Estopuedeproporcionarahorrosdeenergiaal reducirlacantidaddeaguacalienteutilizadaensulavado.
Options (Opciones)
Opci6nAutosoak(remojoautom_tico)(enalgunosmodelos)
Estaopci6ncomienzaconuna agitaci6nbreve,remoiaporunperbdodetiempoespecificadoycontinc3aconetrestodetcido autom6ticamente.En
atgunosmodetos,estaopci6nseencuentraenla perittasetectorade cicto.
Opci6nde2doenjuague(enatgunosmodetos)
Cuandoutitizam6sdetergenteobtanqueadorparatimpiarropamuysucia,utitizartaopci6nde2doeniuaguepara eliminar meior losresiduos
adicionales.
Opci6ndecentrifugadoextendido(enatgunosmodetos)
Useestaopci6nparaextraerm6saguadesusprendas.Cuandoseseteccioneestaopci6n,tasprendassatdr6nm6ssecasysesecar6nm6sr6pidoensu
secadora.
Suavizanteg PowerRinse(EnjuagueIntenso)
Configureesteopci6ncuandoagreguesuavizantea tatavadoraoparaseteccionarPowerRinse(EnjuagueIntenso)mejorado.
NOTA:No utilice esfer_sdosific_dor_s de su_viz_nte de tel_scon est_I_w_dor_,No funcion_n bien en I_w_dor_sde_lt_ eficienci_,

II
GEAppliances.com
Status Indicator Lights (Luces /nd/cadoras de estado)
Lastucesindicadorasdeciclomuestranenqu@cictodetavadoseencuentratatavadora.Cuandoseajustataperittasetectoraaunciclonuevo,
taslucesindicadorasdestettar6nmoment6neamente,indicandoqu@etapasefectuardetciclo.Enlosmodetossin taopci6nAUTOSOAK(REHOJO
AUTOHATICO),noseencenderdtatuzSOAK(REMOJO). ooooo I
FILL SOAK WASH RINSE SPIN
Wash Cycle-Cgcle Selector Knob (Ciclo de lavado-perilla selectora del ciclo)
Elcido detavadocontrolataduraci6ne intensidaddetprocesodelavado.Laperitlapuedesergiradaenambasdirecciones.Sisegirataperillasetectora
decictodespu@sdecomenzarlo,tatavadorasedetendr6yetcictoserea]ustarddeacuerdocontanuevasetecci6n.OptimaSTARTparacomenzarta
setecci6ndetciclonuevo.
Elgrdficodeaba]oteayudar6acombinartaconfiguraci6ndetciclodetavadoconsuropa.
WHITES(BLANCOgParaprendas,ropadecoma,detraba]oydejuegodeatgod6nmuyo medianamentesucias.Esteciclobrindatame]ortimpieza
generalysedeberiausarcontamayoriadelositemstodoslosdias.Brinda un lavado regular yun giro en alta velocidad.
PREWASH(PRELAVADOIParaetiminartasuciedadsuperficialdeprendasmuysucias.Aseg@esedeseguirconun cictodetavadoregular.
COLORS(COLORES)Para algodones ymezclas que no sedestiBeno prendas con la etiqueta de lavadoen frio.Brinda un lavado regular
con periodos de remojo yun giro en alta velocidad.
PERMANENTPRESS(PRESIONPERMANENTE)Paraprendassinarrugasy conptanchadopermanentey ropadepunto.Brindaun tavadoregularcon
periodosde remojoyun giro en bajavetocidad.
OELICATES(OELICAOAS)Pararopainteriory tetasquerequierencuidadosespeciatesconsuciedadteve.Brindatunavadoextrasuaveyun giroenbaja
vetocidad.
HAND WASH(LavadoManual) Para prendascon etiqueta de lavadoa mano con poca suciedad. Brindaun giro develocidad extra baja.
SPEEDWASH(Lavado R6pido) Parapequehas cantidades de prendas con poca suciedad quese necesitan deforma r6pida.Brinda un
lavadoregular yun giroen alta velocidad.
DRAIN&SPINORSPINONLY(SECARYCENTRIFUGAR0CENTRIFUGARSOLAIViENTE)ParaeldesagOedetcestamet6ticoyelaguadetcentrifugadodetaropa.
Brindaungirodeattavetocidad.
TOWELS&SHEETSITaallas uU,S4banasl Proveeperfodos de agitaci6n yremojo adecuado para lavar toallas ys6banas. Brinda un lavado
regular yun giro en alta velocidad.
JEANS(Vaqueros) Para lavar vaqueros poca suciedad o ligeramente sucios. Brinda un lavado suaveyun giro en alta velocidad. (Para
vaqueros usados para trabajar con mucha suciedad, use el ciclo Whites (Blancos).
qUICKRINSE(Enjuaguer4pido) Enjuagaycentrifugaprendasnosuciascuandos61osenecesitaunenjuague.Brindauncentrifugadodeattavetocidad.
START(INICIO)
OprJmaSTARTparacomenzaretciclo.Aivolvera oprJmJrSTARTotto vezseINTERRUMPIRAetcido ylaluzindicadoradetcidotitiiar6.
Paracontinuaretciclovuetvaa oprimirSTARTocierretapuerto.Sitatavadoraquedaenpausaparm6sde24horas,etcicloset6cancetado.
Paradetenerelcido,sostengaetbot6noprimidopar3segundos.Siquedaaguaentatavadora,seteccioneetcido BRAIN&SPINORSPINONLYpara
drenaretcestayetaguadecentrifugadodetrecipientemetdticodetatavadora.
Sisetevantetapuerto,tatavadorasedetendrdtaagitaci6noetcentrifugado,peronoseinterrumpir6etcido.
EstemodetocuentaconunSENSORDECARGAAUTOMATICO.Estaseiecci6nproporcionatacantidadcorrectadeaguaque seajustaattamaSoytipodecargo
colocadaen taunidad.
- Lalavadoranosettenar6deaguaduranteetciclodesensordecargoautomdticositatapaseencuentraabierta.Cuandosecierratatapatam@uinapuede
comenzara ttenarsedeaguaparapoderdetectorettamaSodetacargo.
Nota:Estaesunalavadoradealtoeficienciaconuna acciondelavadoInfuserTM, Estesistemarequieremenosaguaal tiempoquebrindaunaacciondeIimpieza
excepcional.Ustedpuedenotarqued niveldeaguaesmenorqueeldesulavadoraanterior Estoesnormalparaunalavadoraequipadaconun/nfuserTM,
Embudo para el blanqueadar liquido
ElIlenado de agua diluye el blanqueador Ifquido con clara a medida que se va Ilenando para
el ciclo de lavado.
rll Lea las etiquetas de cuidado de las prendas determinar si hay instrucciones especiales.
para
r_l Mida la cantidad de blanqueador liquido con todo cuidado siguiendo las instrucciones de la botella.
•No viertanunc_ blanque_dor Ifquido con cloro sin diluir directamente sobre la ropa ni en elcesto
delaw,do.
•No viertab/anque_dor enpolvo end embudo dr/b/anque_don
r_l ntes de encender la lavadora, vierta la cantidad medida de blanqueador directamente
en el embudo. Evitesalpicar o Ilenar el dosificador en exceso.Siprefiere usar blanqueador en polvo,
agr6guelo en el cesto de lavado con su detergente.
•No mezc/eblanqueador con clorocon amonf_co o bcidos como vinagrey/o removedor dr oxido.
La mezcladr qufmicosdLstinto,spuedeproducir un g_s toxicoquec_usela muerte.

Funciones de la lavadora.
ILengieta
3 \
J
/4- OPTIONS
OFF
2 n_ Set when addil_g
_INSE FABRICSOFTENER
_XT FABRICSOFTeNeR
SpIi4A@IFT_N ER+2rd_,_S£&_xrE_o_osP_
SOA_
El dosificador de suavizante de telas (en algunos modelos)
El dosificador de suavizante de telas autombticamente /ibemsuavimnte de te/as/fquido
en e/momento adecuado dumnte e/c/do,
No detenga la lavadora durante elprimer centrifugado. Esto hard que el dosificador
se vocie mug pronto.
Nunca vierto suavizonte de telas directomente sobre la ropa. Esto puede generor monchas en
su ropa.
Para uti/izar, siga estos pasos:
r_l Levante la leng0eta de la parte superiordel
dosificador de suavizante de telas.
r_l iVlidael suavizante de telas en la tapa
y vierta el suavizante dentro de la parte
superior del dosificador. Elsuavizante
de telas caer6 dentro de la taza de
recepci6n ubicada dentro del dosificador.
Utilices61osuavizantesde telas "Ultra"
o concentrados.
%Presionela lengOetahacia abajo para
cerrar la parte superior del dosificador.
Aseg0resede que la leng0eta est6 bien
cerrada.
r4-1SeleccioneFABRICSOFTENER(suavizante
de telas) de OPTIONS(opciones)del panel
de control.
NOTA: La sobrecarga de/dispositivo de
suministro dejabdn ocasionar4 el desague de/
suavizante de tela a traves de los agderos a un
costado de/infusor al Ilenarse, No sobrecargue
el mismo,
NOTA: /Voutilice esferas dosificadoras de
suavizante de telas con esta lavadora, IVo
funcionan bien en lavadoras de alta eficiencia,
LengOetas
de giro
LengOetas
de giro
C6mo limpiar el dosificador de suavizante de telas (ena/gunosmodelos)
Eldosificador de suavizante de telas selimpia autom6ticamente. Estedosificador no debe requiere
de una limpieza regular como esel caso de losdosificadores est6ndar de suavizante de telas.
Limpie con un paBo lassuperficies exterioresdel dosificador seg0n seanecesario.Sisenecesita
la limpieza de loscomponentes internos del dosificador, siga estospasos despu6s de finalizado el
ciclo de lavado:
rll
@
Bq
B1
Levantela leng0eta de la parte superiordel
dosificador y gire la parte superior
en sentido contrario a las agujas del reloj
utilizando lasdos lengOetasde giro
mostradas. Levantey quite el dosificador 161
del Infuso¢_.
Limpiecualquier acumulaci6n de la parte
interior del Infuso¢_con un paBo suave
o un cepillo de dientes.Aseg0resede que
lostres orificios rectangulares del fondo
que permiten el drenaje de suavizante
de telas no seencuentren bloqueadas.
Suavemente quite la tapa de la taza
del dosificador para separarlos.
Limpielassuperficies con un pa_o suave o
sumerja las piezasen una soluci6n
de i gal6n de agua tibia, 1/4taza
de detergente liquido y i taza
de blanqueador. Aseg0resede que
el orificio pequeBode la superficie superior
de latapa y el tubo asociado
no seencuentren obstruidos.
Vuelvaa ensamblar la taza y tapa
del dosificador encastr6ndolas una con la
otra.
Coloqueel ensamblaje del dosificador
dentro del InfusorTM. Girela parte superior
en sentido de las agujas del reloj utilizando
las dos lengOetasde giro mostradas.
Presionela lengOetahacia abajo para
cerrar la parte superior del dosificador.
AsegOresede que la lengOetaest# bien
cerrada.

C6mo cargar y usar la lavadora.
Siempre siga los instrucciones del fabricante de la ropa cuando lave.
GEAppliances.com
Cuidado
Separaciondecar,gas
Sepmrepar color (blmncos,claros,colores),nivel de suciedmd,
tipo detela (algodones r0sticos,limpiezaf6cil, delicados)y si Iotelmproduce pelusa(telade toalla, felpilla)o junta pelusa
(terciopelo,pana).
Usacorrectode/deterqente
Etusade demasiadopocoocantidadesexcesivasde
detergenteescausacom0n de problemascon la colada.
Usemenosdetergente sitiene aguablanda, una cargo m6s
livianaoropa poco sucia.
Paratratar manchas,apliquepretratamiento a losprendasseg0n
se recomiendaenla etiqueta detproducto. Loaplicaci6n debe
realizarseenel tambor para evitar una pulverizaci6nexcesiva
que podr[aprovocarque loscoloresdela tapa o de losgr6ficos
pierdansuintensidad.
GErecomiendoel usadedetergentesdeAltoEficiencia_ en
todas laslavadorasclasificadasparEnergyStar.Los
detergentesHEest6nformulodosporo funcionorensistemosde
Iovodoy enjuoguecon pocooguo. LosdetergentesHEreducen
losproblemosdeespumoexcesivacom0nmente asociadoscon
losdetergentescomunes.
Cuondo utilice detergentes de olta eficiencio oconcentrodos,
consulte la etiqueta del producto poro determinor Iocontidad
requerido poro un desempeflo 6ptimo. Uno contidod
excesiva de detergente puede tener un impacto negativo en
el desempeflo de lavado.
Cargodela lavadora
Agregue los prendos secas sin opretor en el tombor de Io
Iovodoro.Paramejoresresultodos,corgue losprendosenformo
uniformey sinopretorlosalrededorde Ioparle exteriordeltombor.
Poraagregar prendasdespu_sdeque la lavadoraha comenzado
ofuncionor,levanteIotopay sumerjolosprendasadicionales
alrededorde la parleexteriordeltambor.
•IVo coloque prend_s gmndes t_ffes coma sbb_n_s, colch_s
y toall_s sabre el Infuso# M,C_Jrguel_s alrededor dr I_ porte
exterior dr/t_rnbon
• No I_ve tel_s que conteng_n materi_ffes infl_m_bles (ceres,
Ifquidos dr limpiez_, etc,),
• La I_w_dom no realiz_rb I_ accidn dr agit_do o d
centrifug_do con I_ t_pa lewmt_d_, sin embargo d
temporiz_dor continu_rb funcionando,
glimpieza de la lavadora.
Cesta de lavado: Deje Io topo abierta despu_s de Iovor poro
que se evapore lahumedad. Sidesea limpiarelcesta,use un
pa_o suave y limpioempapado en detergentel[quido;luego
enju6guelo.(No use limpiadoresdurosj
Mangueras de Ilenado: GE recomienda el cambio
de las mangueras cada S a_os.
Exterior: Seque los derromes de inmedioto. S_quelos
con un pa_o h0medo. Evitegolpear la superficiecon objetos
cortantes.
Interion Elusa ocosionol de un ciclo que contiene lejfa
mantendr6 limpia la parte interna de la lavadora.
Traslado g almacenamiento: Pfdaleal t6cnico de servicio que
elimine el ogua de la bombay los mangueras.
Consulte los instrucciones de instolaci6n que se incluyen con
el producto paro recibir informoci6n sabre c6mo reinstolar
Iovarilla de embarque para montener elcesta met61ico
estacionario cuando se cambie la lavadora de lugar. Para
mayor informaci6n, visite GEAppliances.com o Ilame al
800.GE.CARES(800./452.2757).No guarde la lavadora donde
pudiera quedar expuesta a los condiciones clim6ticas.
Vacaciones prolongadas: AsegOrese de cerror Io provisi6n de
ogua en los grifos. Drene toda el agua de los mangueras sila
temperatura Ilegar6 avalores inferiores a cero.

Antes de Ilamar para solicitar servicio...
_ onsejos pare la soluci6n de problemas
iAhorre tiempo y dinero! Consulte primero las tables de las p6ginas siguientes o
visite GEAppliunces.com yquiz6s no necesite Ilamar al servicio.
AGUA Causas posibles Ou_ hacer
El nivel de agua
parece bajo
El agua ingresa g sale
al mismo tiempo
Demasiada espuma
Fugas de agua
Esto es normal
La tuberia vertical de desagLie
est6 mug baja
Demasiado detergente
Tipo de detergente
Agua blanda
Demasiado detergente
en la lavadora
Tipo de detergente
La manguera de Ilenado
o la de desagLie est6 mal
conectada
• Elagua puede no cubrir el nivel superior de las prendas.
Estoes normal para esta lavadora de alta eficiencia.
• Latuberfa vertical de desagOedebe encontrarse porencima
de los 30L
• Ftidael detergente con cuidado. Usemenosjab6n sitiene agua
blanda, una carga m6s liviana o ropa poco sucia.
• Cambie a detergente HE_".
• Pruebe con menos detergente.
• Use menos detegente. Use menosjab6n sitiene agua blanda,
una carga m6s liviana o ropa poco sucia.
• Cambie a detergente HE_.
• AsegOresede que las conexionesde la manguera est6n firmes
en los grifos y que las arandelas de goma est6n instaladas.
AsegOresede que elextremo de la manguera de desagOe
est6 insertado como corresponde y bien seguro aldesagOe.
EldesagLiedela caseest6 tapado • Examinela tubefia de la casa.Tendr6 queIlamar al fontanero.
Manguera de desagLiefloja • AsegOresede que la manguera de desagOeest6 bien
colocada en laparte trasera de la lavadora y que losdos
tornillos de retenci6n seencuentren firmemente instalados.
La manguera de desagLie • AsegOresede que la manguera de desagOe no haga contacto con
roza la pared la pared. Estopuede provocar un desgaste excesivo en la manguera.
PresiBn de agua constante • Ajuste las mangueras a los grifosy cierre el agua despu_s
alas mangueras de Ilenado de cada uso.
en la fuente de agua • Verifique la condici6n de las mangueras de Ilenado; sedeben
reemplazar cada 5 aflos.
La temperatura del agua Temperaturas m6s frias • Se han formulado nuevos detergentes para colada que
parece incorrecta del agua proporcionan trabajan con temperaturas mas frfas del agua sin afectar
magor eficiencia energ_tica el rendimiento del lavado.
La provisi6n de agua est6 • Abra los grifos de agua caliente y frfa y asegOrese de que
cerrada o mal conectada las mangueras est6n conectadas a los grifos correctos.
Los filtrosde malla de • Cierrelafuente de agua yretire lasmangueras de conexi6n de
la v61vulade agua est6n agua de la parle superiortrasera de la lavadora.Useun cepilloo
tapados mondadientes para limpiar losfiltros de malla de lalavadora.
Vuelva a conectar las mangueras y abra el agua de nuevo.
Agua fresca/fria cuando • Estoes normal. PerfecTemp detecta la temperatura delagua y
se selecciona caliente, la optimiza para mejores resultadosse. Elagua fffa se agrega
en forma peri6dica cuando seselecciona agua caliente.
Elcalentador de agua de la casa no • AsegOresede que elcalentador est6 suministrando agua
est_ configurado correctamente a 120°F-140°F(48°C-60°C).
Agua bombeada antes La puerta est6 levantada o • Reconfigure el ciclo.
de completarse el cido el ciclo se puso en pausa por
m6s de 24 horas
El agua no drena La manguera de desagLie • Enderece la manguera de desag0e yaseg0rese de que
est6 doblada o mal conectada la lavadora no est6 apoyada sobre ella.
• La parte superior de la salida del desag0e debe ester
a menos de 6 pies(1,8m)por encima del piso.
La lavadora seinterrumpe Seeligi6 el ciclo PREWASH • Estoes normal. La lavadora alterna entre agitar yremojer
durante el ddo de lavado durante estos cicIos pare quesus prendas se limpien mejor
con menos desgaste.
La lavadora seinterrumpe Esto es normal • La lavadora puede hacer pauses durante elciclo de
durante el ciclo de centrifugado para eliminar el aguajabonosa con m6s
centrifugado eficiencia.
La lavadora no se liana Esto es normal. • Latape debe ester cerrada para que la lavadora se Ilene
cuandolatapasehallaabierta, ofuncione.
8
Other manuals for G152
2
Table of contents
Languages:
Other GE Washer manuals

GE
GE WISQ416C User manual

GE
GE WCVH6800JMS - 27" Front-Load Washer Manual

GE
GE GTWN8250DWS Manual

GE
GE WCCN2050FWC User manual

GE
GE WWA8354V Installation instructions

GE
GE VKXR4100T User manual

GE
GE GTWS8450DWS User manual

GE
GE GTW585 Original instructions

GE
GE WWA8800M User manual

GE
GE GTW485 Original instructions