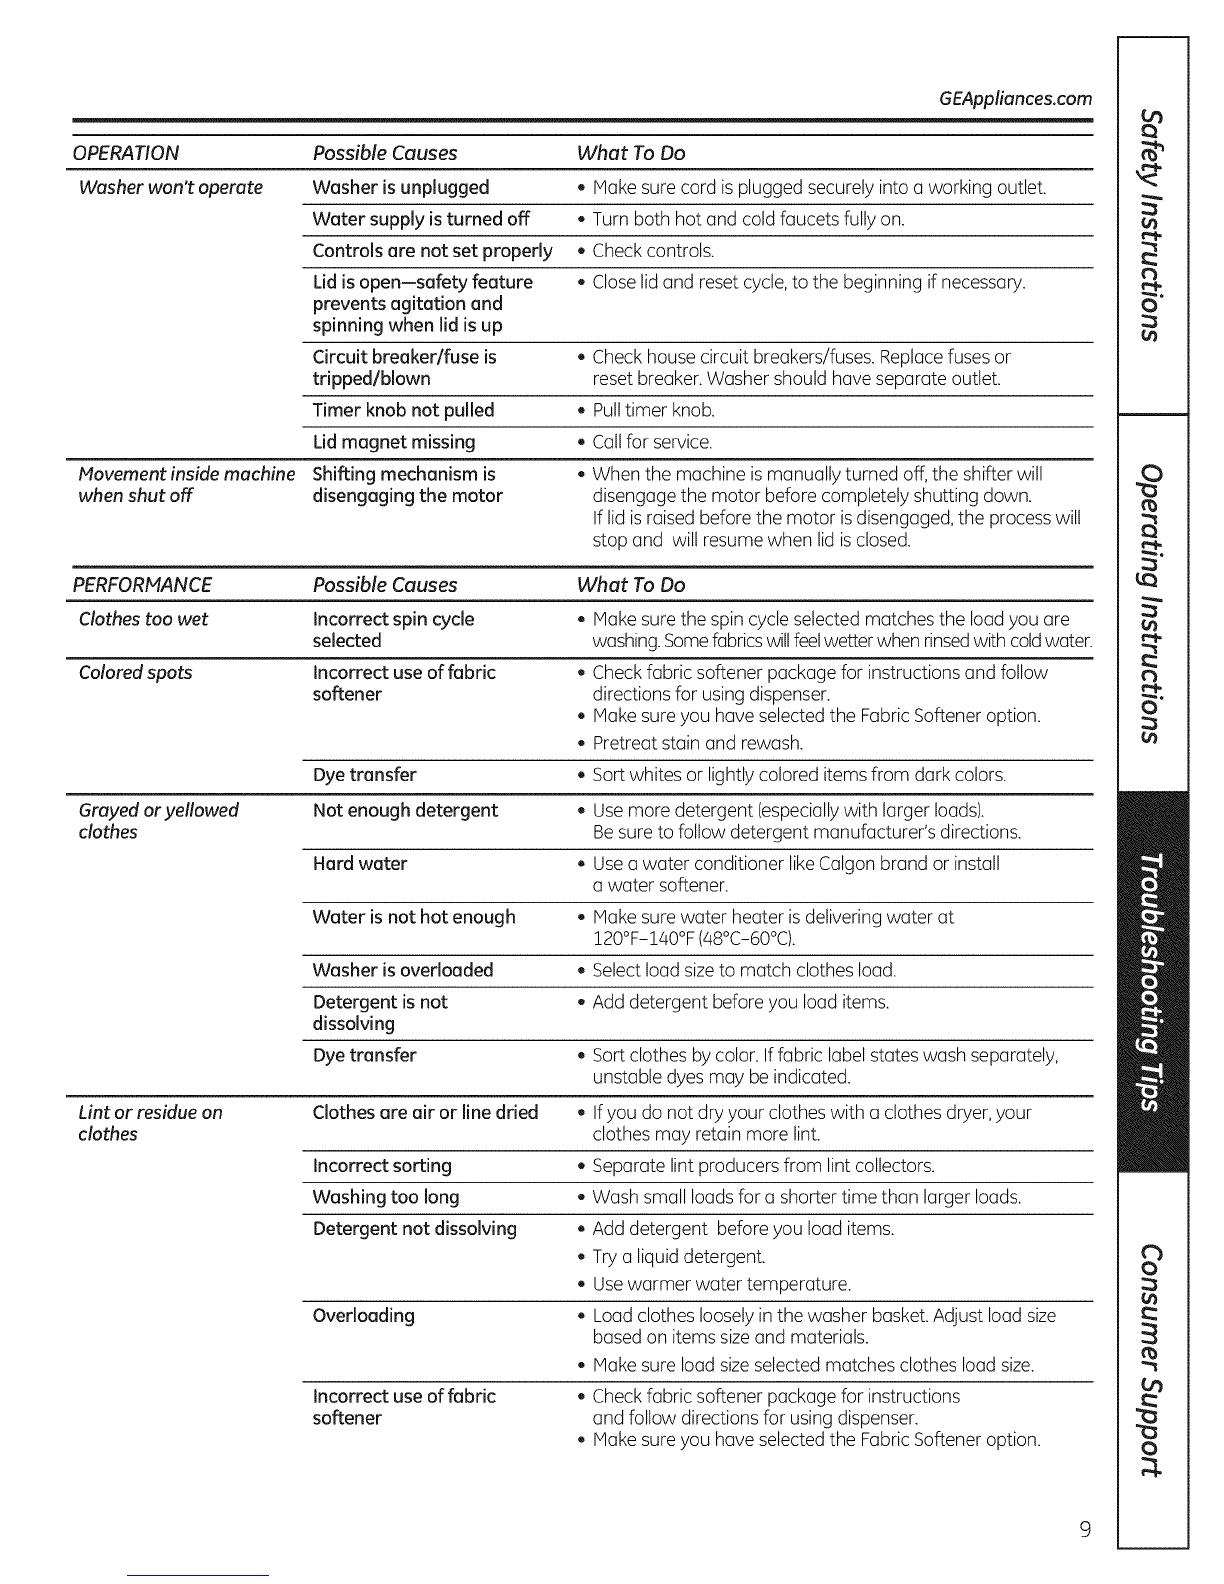
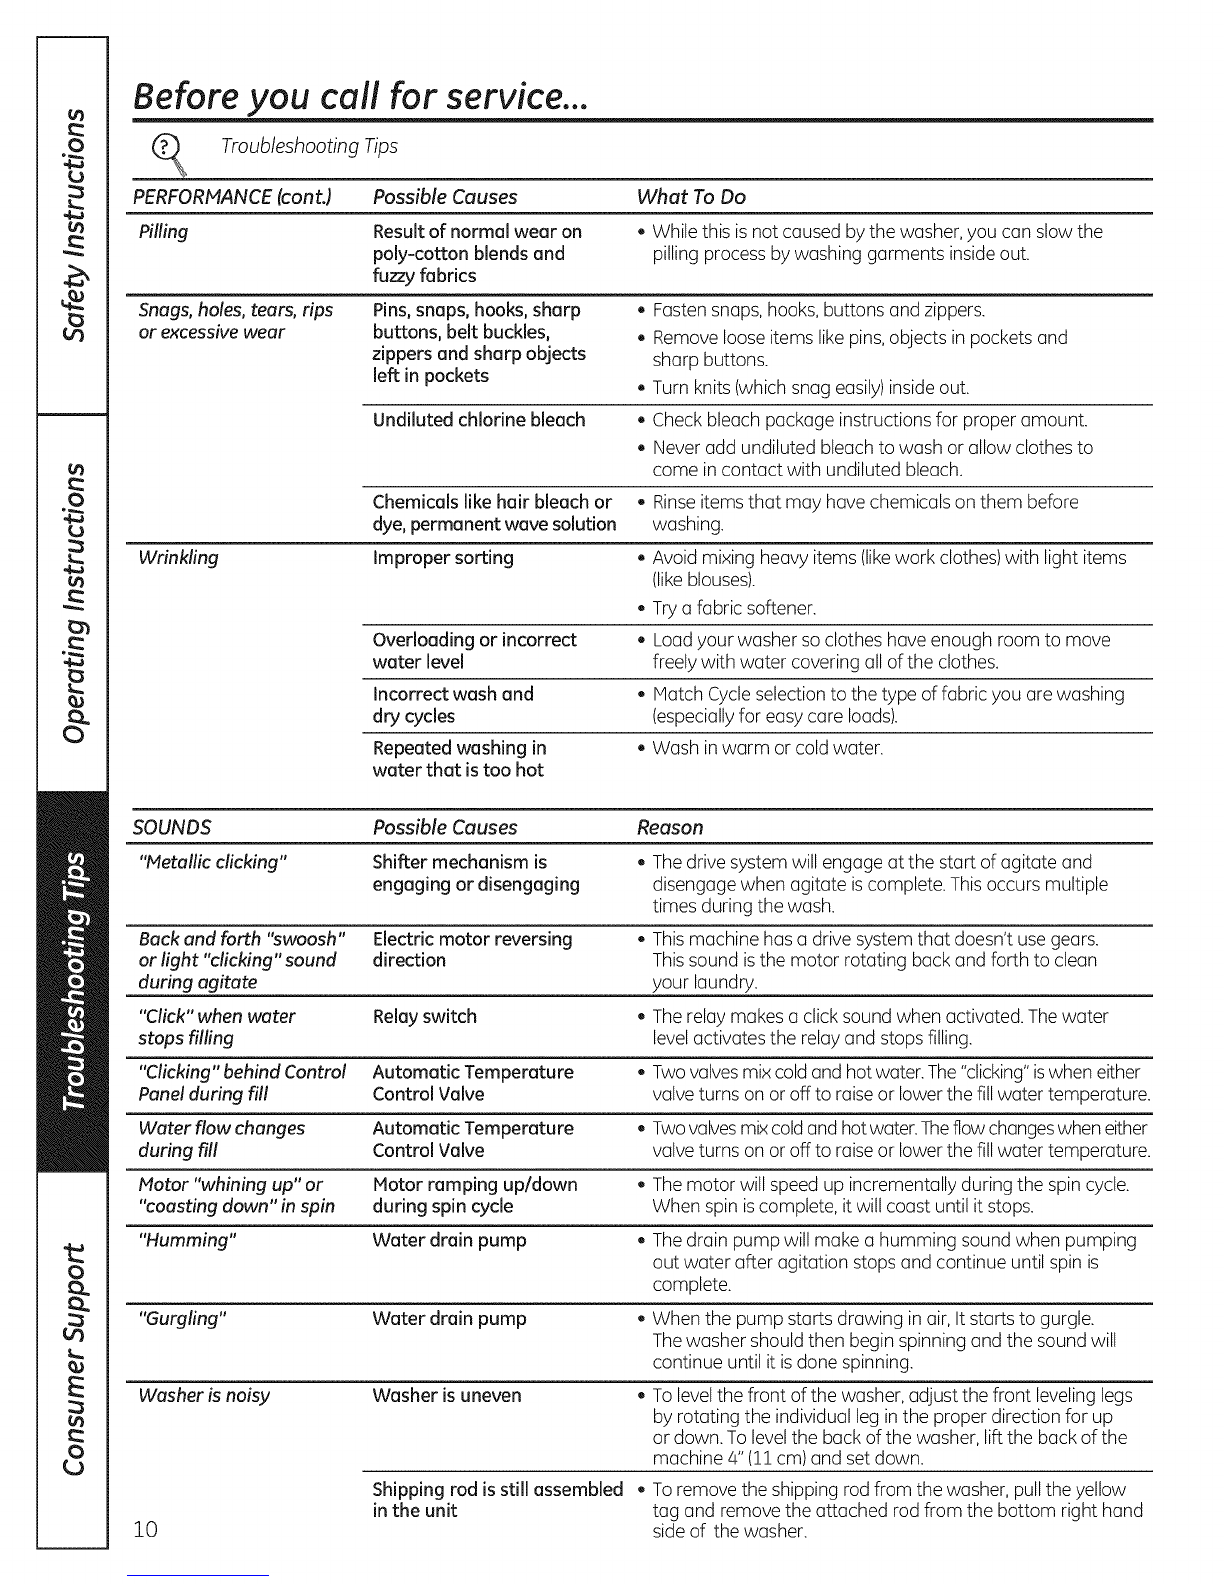
Before you call for service...
Troubleshooting Tips
PERFORMANCE (cont.) Possible Causes What To Do
Pilling Result of normal wear on . While this is not caused by the washer, you can slow the
poly-cotton blends and pilling process by washing garments inside out.
fuzzy fabrics
Snags, holes, tears, rips
or excessivewear Pins, snaps, hooks, sharp
buttons, belt buckles,
zippers and sharp objects
left in pockets
. Fastensnaps,hooks,buttons and zippers.
. Removelooseitems likepins,objects in pockets and
sharp buttons.
. Turn knits(which snag easily)inside out.
Undiluted chlorine bleach . Checkbleach package instructions for proper amount.
. Never add undiluted bleachto wash or allow clothes to
come in contact with undiluted bleach.
Chemicals like hair bleach or . Rinseitemsthat may havechemicals on them before
dye, permanent wave solution washing.
Wrinkling Improper sorting . Avoid mixing heavy items (likework clothes)with light items
(likeblouses).
. Trya fabric softener.
Overloading or incorrect • Loadyour washer so clothes have enough room to move
water level freely with water covering all of the clothes.
Incorrect wash and . Match Cycleselectionto the type of fabric you are washing
dry cycles (especiallyfor easy care loads).
Repeated washing in . Wash inwarm or cold water.
water that istoo hot
SOUNDS Possible Causes Reason
"Hetallic clicking" Shifter mechanism is . Thedrive systemwill engage at the start of agitate and
engaging or disengaging disengage when agitate iscomplete. This occurs multiple
times during the wash.
Back and forth "swoosh" Electric motor reversing . Thismachine has a drivesystem that doesn't use gears.
or light "clicking" sound direction Thissound isthe motor rotating back and forth to clean
during agitate your laundry.
"Click" when water Relay switch . Therelay makes a click sound when activated. Thewater
stops filling levelactivates the relay and stopsfilling.
"Clicking" behind Control Automatic Temperature . Twovalvesmix coldand hotwater.The"clicking"iswhen either
Panel during fill Control Valve valve turns on or off to raiseor lower the fillwater temperature.
Water flow changes Automatic Temperature . Twovalvesmixcoldand hotwater.Theflow changeswhen either
during fill Control Valve valve turns on or off to raiseor lower the fillwater temperature.
Motor "whining up" or Motor ramping up/down . Themotor will speed up incrementally during the spin cycle.
"coasting down" in spin during spin cycle When spin iscomplete, itwill coast until it stops.
"Humming" Water drain pump . Thedrain pump will make a humming sound when pumping
out water after agitation stops and continue until spin is
complete.
"Gurgling" Water drain pump . When the pump starts drawing in air,It starts to gurgle.
Thewasher shouldthen begin spinning and the sound will
continue until it isdone spinning.
Washer is noisy Washer is uneven . Tolevelthe front of the washer, adjust the front leveling legs
by rotating the individual leg inthe proper direction for up
or down. Tolevelthe back of the washer, lift the back of the
machine 4" (11cm) and set down.
10
Shipping rod is still assembled . To remove the shipping rod from the washer, pull the yellow
in the unit tag and remove the attached rod from the bottom right hand
side of the washer.