GeeMo G130 User manual

WIRELESS HANDHELD VACUUM CLEANER
INSTRUCTION MANUAL
G130
For any questions and malfunctions of the appliance during use, please contact our


CONTENT
IMPORTANT SAFEGUARDS
OVERVIEW
PART INSTALLATION INSTRUCTIONS
DESCRIPTION OF PRODUCT USE
DAILY MAINTENANCE OF THE PRODUCT
01
02
03
04
07

1
Before using this product, read the following safety instructions and follow all normal
safety precautions, any actions that do not comply with this instruction may result in
damage to the product.
*This product is not intended for use by persons with physical, sensory or intellectual
disabilities or persons with inexperience and common sense ,including children, unless
they are supervised or directed by others to ensure their safe use.
This product is only suitable for working in dry environments and should not be used
outdoors or in wet environments.
*Do not touch the adapter plug and adapter body with your wet hand to avoid the risk
of electric shock. If the charger or plug is damaged, stop using, Please call our profes-
sional maintenance personnel for replacement to avoid hazards.
*Do not smoke high temperature substances (cigarette butts, matches or hot ash),
ultrafine substances (e.g. lime, cement, wood chips, gypsum powder, ash, toner, etc.),
large sharp pieces (e.g. glass, nails, needles, etc.), dangerous substances (e.g. solvents,
descaling agents, etc.), chemicals (e.g. acid, detergent, etc.), flammable and explosive
liquids (gasoline, alcohol products).
*Keep the product airflow passages and active sections away from hair, loose clothing,
fingers, and other parts of the body. Do not place a vacuum pipe, tube extension handle
or tool against the eyes, ears, or into the mouth.
*Before use, please check the cleaning area, if you find large pieces of paper, paper
balls, plastic sheet or sharp items, as well as thicker than the straw caliber, please
pre-exclude, so as not to block the suction pipe affect the use of the product.
*When used, if the leakage or motor temperature is too high or abnormal sound, such
as body heat, noise, odor, weak suction, etc., should be stopped immediately.
*When charging, use the company's special charger to charge, when replacing the
battery, can only use the company's special battery bag, other types of chargers or
battery packs may explode, resulting in personal injury and product damage risk.
*After use, keep the machine in a dry place, where dampness affects the insulation and
service life of the appliance.
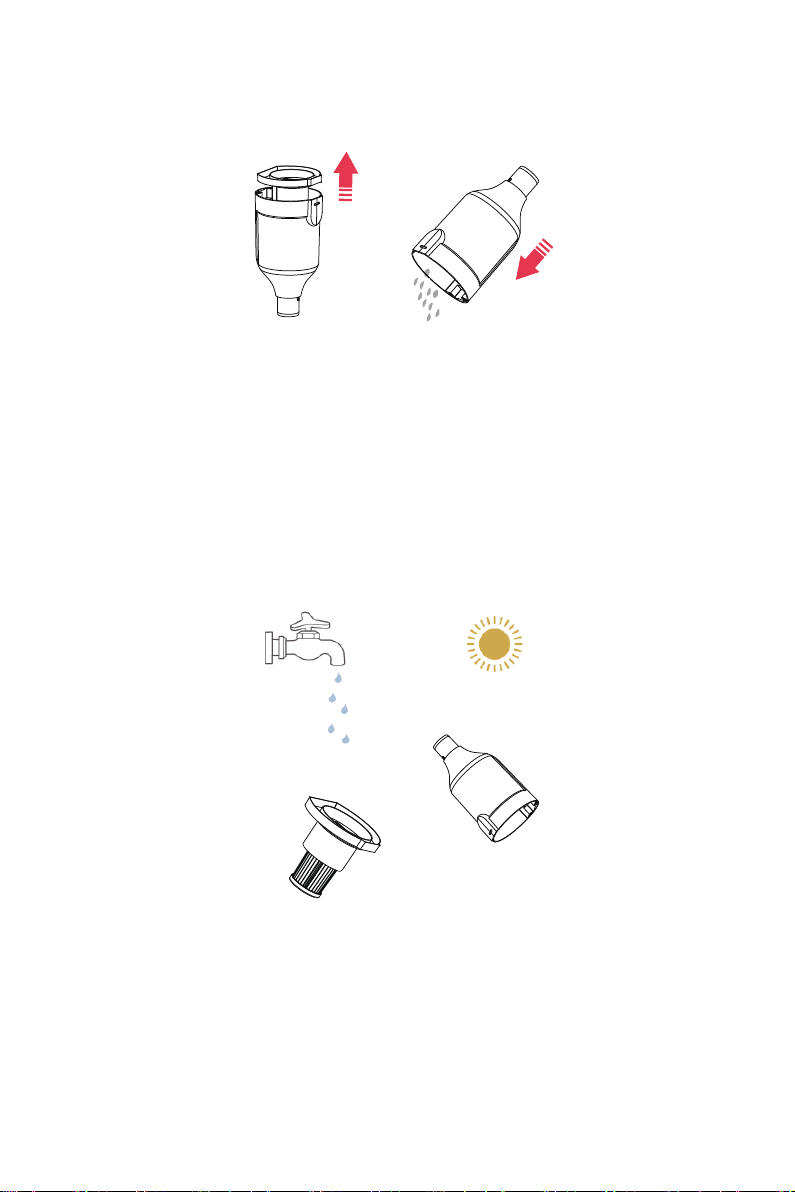
*Please check the dust cup and long aluminum tube regularly check, if the dust cup
inside more garbage, please clean up in time, long aluminum pipe to keep the ventila-
tion path open, to avoid blocking lead to a drop in suction, motor heating, reduce the
life of the vacuum cleaner.
*Do not repair the machine in the event of a machine failure, please call the company's
after-sales department for assistance.
Important Safeguards

2
Model
Input
Output
Battery Voltage
Rated Power
100-240V/50-60Hz
G130
26V/800mA
22.2V
130W
Standard Mode 7kpa/29min
High Mode 10kpa/20min
Charging Time 2.5H
Overview
Product schematics
Specifications
Floor brush Tube
Wall hanger
Dust cup
Dust cup latch
Switch
Main unit
Crevice tool 2 in 1 brush Adapter

3
*Depending on the area to clean, insert the attachment directly into the host port after
a reasonable selection of the attachment.
Part installation instructions
Host direct access to attachments
First the tube is inserted into the main unit, and according to the area to be cleaned, the
accessories is inserted directly into the other end of the tube after a reasonable
selection of the accessories.
When the cleaning is complete, pull the tube out of the main unit and then the
accessories from the other end of the tube.
Accessories brush selection instructions
Crevice tool is suitable for cleaning space small space, such as corner, aluminum alloy
door and window frames, drawers, car cushions, keyboard and other places.
2-in-1 brush is suitable for cleaning soft materials surface, such as curtains, fabrics,
sofas, beds and other places.
Main unit + tube + accessories

4
Description of product use
Product charging
Product work
Power LIGHT
Plug the adapter into the wall socket, then the end of the adapter is inserted into the
machine charging jack, and the charging light flashes in turn.
About the LED.
The number of lights on three indicators indicates how much the battery is consuming
when the appliance is charging.
The number of lights on three indicators indicates how full the battery is when the product
is fully charged.
Three leds are turned off when full in indicates charging is complete when the appliance
is low on power when a light flashes, it is low on power and requires a shutdown to
charge.
Notice
When the battery is deeply discharged, it is recommended to store after charging,
long-term power loss will affect the life of the battery pack.
Preparations
Depending on the cleaning area, select the accessories as needed. (See part installation
instructions)

5
Work begins
Press the machine switch button, the machine low-grade operation, and then press the
switch button, the machine high-end operation, and then press the button, the machine
shut down, so cycle, as needed to suck up the type of garbage, reasonable choice of
machine gear.
Take out dust
One hand to hold the dust cup, one hand press the host on the dust cup remove button,
you can take off the dust cup.
Switch high and low button
Dust removal cup

6
Dust cup: Please dump the dust in the dust cup regularly.
HEPA filter: Please clean the HEPA filter regularly and replace it with new one once 3~6
months.
Remove the middle HEPA filter and the dust can be empty.
Remove HEPA Empty the dust

7
Daily maintenance of the product
Product maintenance
To maintain product performance, it is recommended that you maintain the machine
and components
Main unit
Please let the machine stop working before cleaning.
Tube the surface of the main unit with water or neutral detergent and do not seep water
into the body.
Dust cups and filtration components
It is recommended to clean the dust in the dust cup regularly.
Dust cup cleaning: remove the filter hepa, after the dust is removed, if you need to deep
clean the dust cup, you can beat the filter hepa, if necessary, can use water to clean the
hepa. (To ensure product performance, it is recommended that Hepa be replaced after
3-6 months of use)
After drying with a damp cloth, wipe the inner surface of the dust cup and, if necessary,
clean the dust cup with water.
After cleaning the hepa and dust cup, it must be dried and loaded into the machine,
and no water residue inside the cup.
In order to maintain the vacuum cleaner's performance, it is recommended to brush the
tube 4-5 times after a clean-up of the floor brush.

8
The vacuum cleaner
does not work Battery low
The suction port is blocked
Filter ingress with dust。
Filter, Hepa, blocked
Clean up the product vacuum
Charging the battery
FAULT POSSIBLE CAUSES THE SOLUTION
Reduced suction
of the product
The motor is running
with a different sound
The appliance cannot
be charged
Blocked vacuum tube or
filtration components
The adapter and battery
pack are not connected Reconnect after check
Clean dust cups and
filtration components
Clean up or replace filtered
hepas
Clean extension tubes or
filtering components
Troubleshooting
Common fault analysis and handling

Table of contents
Other GeeMo Vacuum Cleaner manuals