2
.....................1
Contents........................................2
Projector features.......................3
.................................3
.........................3
....................................4
............................................4
....................................5
.................................5
Picture menu(PC mode)......................21
Picture menu(Video mode).................22
Audio menu.........................................23
Setting menu(PC mode).....................24
Setting menu(Video mode).................25
Advanced menu..................................26
Logo Setting.................................26-A
Logo Capture................................26-B
Presentation menu..............................27
Security menu......................................29
Auto filter alert..................................30
PIN Key in operation...........................32
......................................6
Arrangement.....................................6
..................8
................10
Using the security anchor................10
Using the hiding-style Handle..........11
Remote control..........................12
Putting batteries..............................12
About the remote control signal......13
Using as a simple PC mouse &
keyboard.........................................13
Power on/off...............................14
Turning on the power......................14
Turning off the power......................14
Operating.................................... 15
Adjusting the volume...................... 15
Adjusting the mute..........................15
Selecting an input signal.................15
Searching an input signal...............16
Selecting an aspect ratio................16
Adjusting the image position.......... 17
Adjusting the zoom and focus........ 17
Correcting the keystone
distortions
........................................18
Stilling the Screen...........................19
Temporarily blanking the screen.....19
Using the menu function.................20
MENU
Maintenance...................................33
Lamp....................................................33
Lamp Warning...................................34
Air filter................................................35
Other care........................................... 36
Troubleshooting............................ 37
Appendix
Contents
Regarding the indicator lamps............ 37
Mistaken for machine defects............. 38
List of supported Monitor Display....... 39
CeilingMounted Installation Guide......41
PIN codenumbermemo......................42
About this manual
Preparations
Contents of package
Part Names
Projector
Control panel
Remote control
Setting up
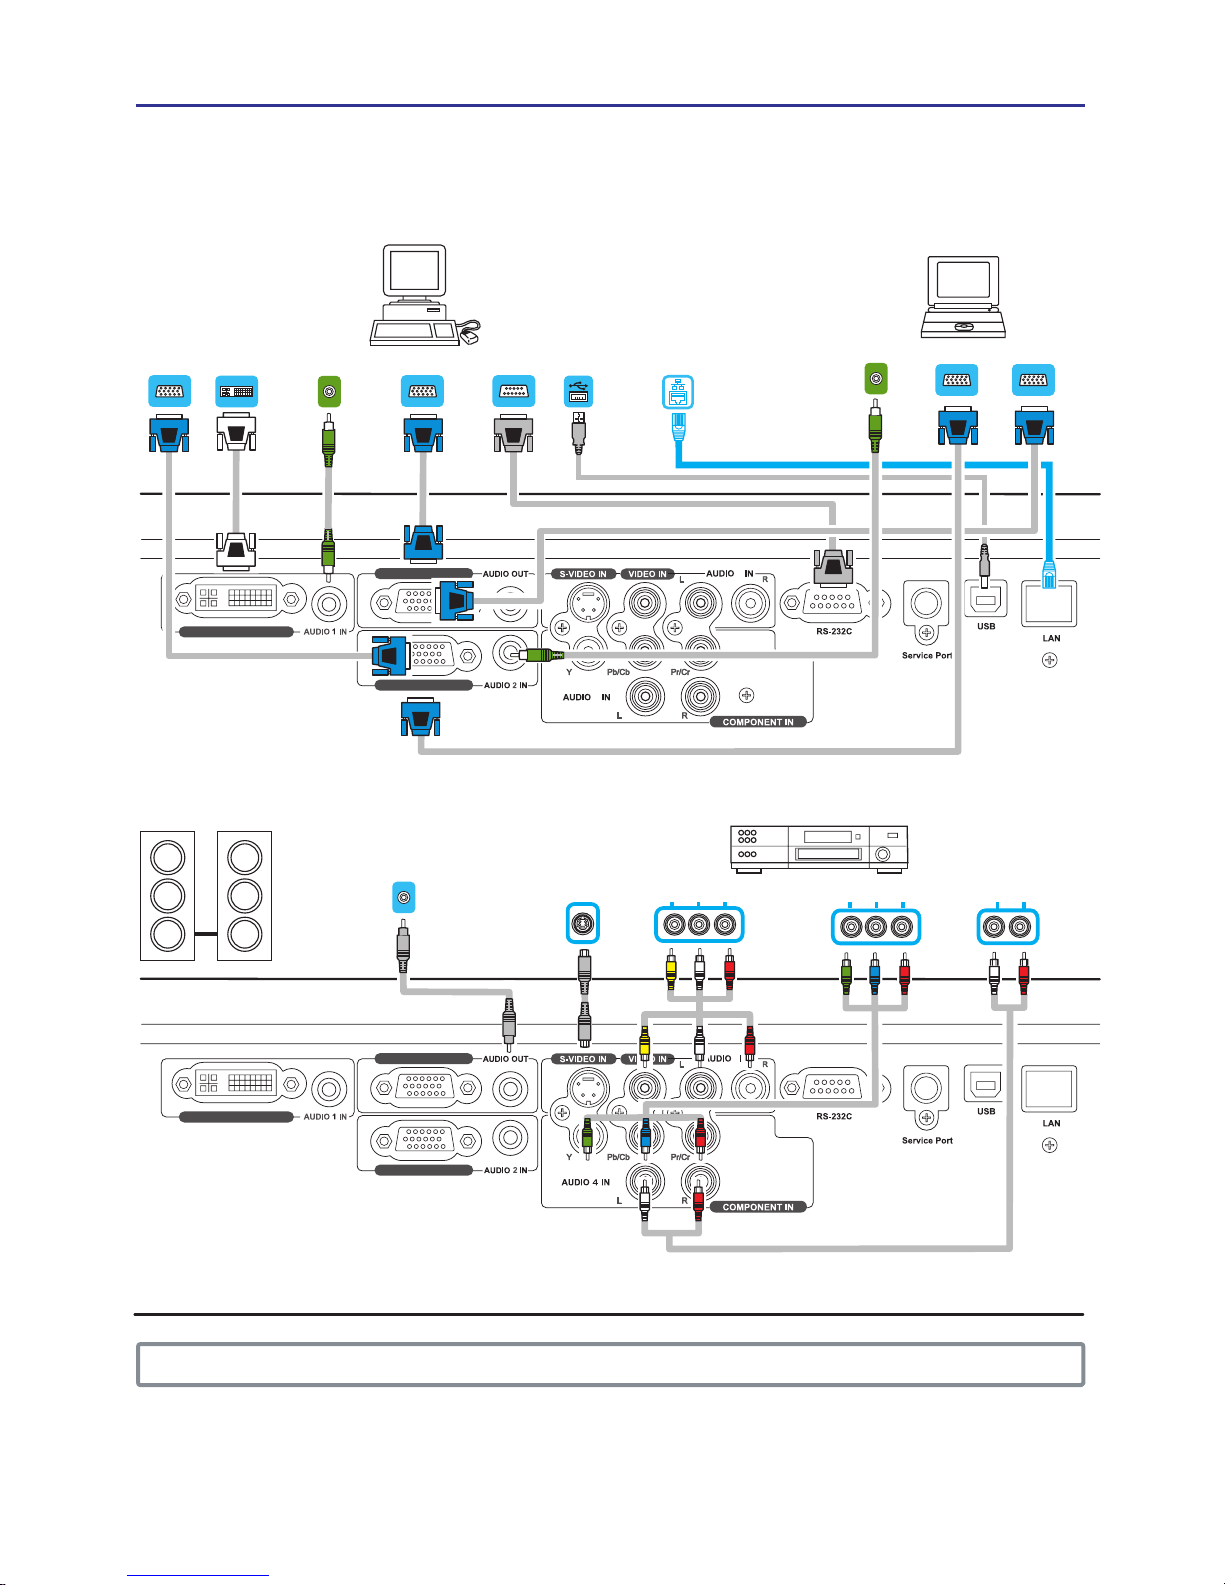
Connecting your devices
Connecting power supply
...........................................41