Canon LV-CL15 User manual

MULTIMEDIA PROJECTOR
LV-CL15 Ceiling-mounting Hanger
Installation Manual
キヤノン パワープロジェクター
天吊り金具 LV-CL15
使用説明書
MULTIMEDIA-PROJEKTOR
LV-CL15 Deckenbefestigung
Installationshandbuch
ENG
GER
JPN


MULTIMEDIA PROJECTOR
LV-CL15 Ceiling-mounting Hanger
Installation Manual
Thank you for your purchase of the Canon Multimedia Projector Ceiling-mounting
Hanger.
Please read this installation manual carefully to ensure proper use.
• This ceiling-mounting hanger is for use with the LV-7385/LV-7380/LV-7285/LV-7280/
LV-8310/LV-8215/LV-7375/LV-7370/LV-7275/LV-8300.
(March 2010)
Special skills are required for the installation of the projector.
This work should never be performed by the customer.
Consult your dealer for installing the projector on the ceiling.
To the Dealer and the Installer
For the safety of the customer, we ask that the installation work be started after careful
attention is paid to the strength of the mounting location to be sure it will withstand the
weight of the projector and ceiling-mounting hanger.
CONTENTS
Heed the Following ............................................................................................ENG-2
Preparation .........................................................................................................ENG-4
■ListofPackagedParts...............................................................................................ENG-4
■RequiredTools...........................................................................................................ENG-4
■NamesoftheParts....................................................................................................ENG-5
■Dimensions.................................................................................................................ENG-5
Guide to Screen Size and Projector Mounting Position ...................................ENG-6
■ScreenSizeandProjectionDistance........................................................................ENG-6
<LV-7385/LV-7380/LV-7285/LV-7280/LV-7375/LV-7370/LV-7275>...........................ENG-6
<LV-8310/LV-8215>..................................................................................................ENG-7
<LV-8300>................................................................................................................ENG-8
■ScreenSizeConversionTable...................................................................................ENG-9
<LV-7385/LV-7380/LV-7285/LV-7280/LV-7375/LV-7370/LV-7275>...........................ENG-9
<LV-8310/LV-8215/LV-8300>....................................................................................ENG-9
Mounting the Projector ....................................................................................ENG-10
Adjustment of the Projection Angle.................................................................ENG-14
■DistortionAdjustment...............................................................................................ENG-14
■FineAdjustment.......................................................................................................ENG-16
Specifications ...................................................................................................ENG-16

ENG-2
Heed the Following
• Do not modify any parts. Doing so may
resultinthe projectorfalling andcausing
injury.
• Do not use broken parts. Doing so may
resultinthe projectorfallingand causing
injury.Ifapartshouldbebroken,consult
yourdealer.
• Donotlookintothelenswhentheprojec-
toristurnedon.Doing socoulddamage
youreyesight.
• Make adjustments as described in this
manual.
Incorrect adjustments may result in the
projectorfallingandcausinginjury.
WARNING
• When installing the projector, be sure to
do so as explained in this manual. The
projectormay fallandcause injuryifit is
installedimproperly.
• Topreventtheprojectorfromfalling,install
it in a place and fasten it in a way with
sufficient strength to support the com-
binedweight(4.6kg)oftheprojector(3.3
kg) and the ceiling-mounting hanger (1.3
kg)foranextendedperiodoftimeaswell
as to withstand earthquakes. Insufficient
strength or fastening may result in the
projectorfallingandcausinginjury.
• To ensure safety, be sure to tighten the
bolts and screws securely. Also be sure
tousetheincludedunitsandothermetal
fittings.Failuretodosomayresultinthe
projectorfallingandcausinginjury.
• When sliding the opening of the mount-
ing adapter over the pin of the ceiling-
mountinghanger,checkthatthepinofthe
ceiling-mountinghangerisfully seatedin
theopening.Ifnot,theprojectormayfall
andcauseinjury.
• Besuretousethesuppliedwirestoinstall
theprojector.Failuretodo so mayresult
intheprojectorfallingandcausinginjury.
This symbol alerts the user that important information concerning the
operation and maintenance of this ceiling-mounting hanger has been
provided. The information should be read carefully to avoid problems.

ENG-3
Heed the Following
CAUTION
• Do not obstruct the projector’s ventila-
tion holes. Doing so will prevent the dis-
sipationofheatandmayresultinfires.In
particular,donotusetheprojectorinthe
followingways:
Donotinstalltheprojectorinawallorina
tightplacewhereventilationispoor,place
acoverit,etc.
• Donotinstalltheprojectorinfrontofthe
outletsofanairconditionerorheaterorin
aplacewherevibrationsarestrong.
Doingsomayresultinfires.
• Do not install the projector in humid or
dusty places or exposed to smoke or
steam (such as near cooking equipment
or humidifiers). Doing so may result in
fires.
• When installing the projector, leave suf-
ficientspace between it and surrounding
objects. Failure to leave sufficient space
will prevent the dissipation of heat and
mayresultinfires.
• Whencabling,donotobstructtheprojec-
tor’s ventilation holes with cables. Doing
sowillpreventthedissipationofheatand
mayresultinfailureoftheprojector.
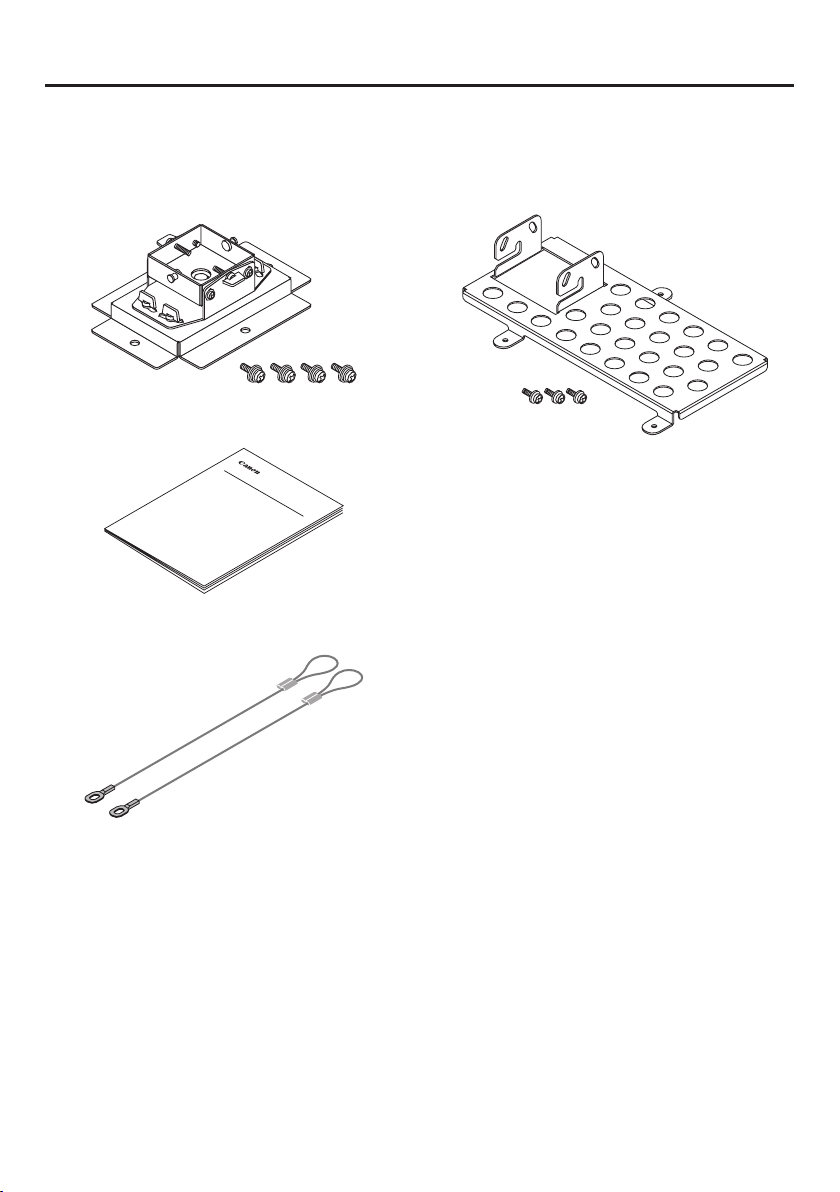
• When removing the screws on left and
right on the mounting adapter, be sure
to support the projector while doing so.
Failingtodosomayresultintheprojec-
tor swinging back abruptly and causing
injury.
• for PLUGGABLE EQUIPMENT, the sock-
et-outletshallbeinstalledneartheequip-
mentandshallbeeasilyaccessible.
Installation Precautions
• Special techniques are required for the
installation work of the projector and
installation work should only be under-
takenbyqualifiedandlicensedinstallers.
• Canon will not accept any responsibil-
ity related to any accidents or incidents
due to insufficient or inferior mounting
techniques.
Installation Location
Avoid places of high temperature or low
temperature.
Ambient operating temperature : 5°C to
40°C.(Quietmodeselectedautomatically
at35°Cto40°C)
Avoidplacesexposedtodirectsunlightand
the vicinity of ventilation holes of room air
conditioningandheating.
Avoid rooms with a lot of dust, humidity,
greasysmoke,ortobaccosmoke.
Dirt will adhere to optical parts such as
lenses and mirrors and this will cause a
deteriorationofimagequality.
Avoidplacesinwhichthescreenisexposed
todirectsunlightorilluminationlight.
When surrounding light directly hits the
screen,theimageappearswashedoutand
isdifficulttoview.

ENG-4
■List of Packaged Parts
■Required Tools
• Phillipsscrewdriver
• Fixedceilingpart…1
• Up-down angle adjustment screws (M5)
…4
• Installationmanual(thisdocument)…1
• Anti-fallwires…2
Preparation
• Projectormountingadapter…1
• Projectormountingscrews(M4)…3

ENG-5
■Dimensions
■Names of the Parts
Fixed Ceiling Part Bolt Hole Position
Dimensions
Fixed Ceiling Part and Lens Center
Dimensions Diagram
Inclinationaxisscrews* Left-rightangleadjustmentscrews*
Inclinationadjustmentscrews* Up-downangleadjustmentscrews*
Front
side
Right
side
*Therearealsoscrewsontheoppositeside.
Fixed ceiling part
Preparation
Projector mounting
adapter
79.5
210
180
113.9
134
47.7
4-
∅10
Centerlineof
fixedceilingpart
Lenscenter
Lenscenter
Centerlineoffixedceilingpart
Distancetolensend
(Unit: mm)

ENG-6
Guide to Screen Size and Projector Mounting Position
■Screen Size and Projection Distance
< LV-7385/LV-7380/LV-7285/LV-7280/LV-7375/LV-7370/LV-7275 >
Use this guide when considering the distance to the screen and the screen size.
• Theceilingmountunitcanbeadjustedupanddownamaximumof+/−10°,butiftoomuch
ofanangleistakentheimagewillshowsomedistortion.Therefore,itisrecommendedthatan
adjustmentismadeinconjunctionwiththescreenprojectionangle.
• Recommended screen sizes for projectors are from 21 inches to 300 inches. (Screen sizes
representthediagonaldimension.)
Using the Diagrams
Referringtothediagram,screensizesthatcanbeusedataprojectiondistanceof3mwillrangefrom80
inchesto95inches.
Toprojecttoascreensizeof180inches,theprojectiondistancewillrangefrom5.6to6.8maccordingto
thediagram.
SeePageENG-9fortheverticalandhorizontaldimensionsofthescreensize.
(*1)Distancefromcenteroffixedceilingparttoendofmainunitlens.
(*2)Distanceoflenscenterfromceilingmountsurfaceoffixedceilingpart.
(*3)Theangleis7.8to7.9°usingatelephotosettingfordistancesfromlenscenter(horizontal)toscreencenter.
(*4)Theangleis9.3to9.5°usingawideanglesettingfordistancesfromlenscenter(horizontal)toscreencenter.
(*1)
(*2)
113.9mm
134mm
Throw Distance and Screen Size
Screen size 21" 25" 30" 40" 60" 80" 100" 150" 180" 200" 250" 300"
(W×H) cm 43×32 51×38 61×46 81×61 122×91 163×122 203×152 305×229 366×274 406×305 508×381 610×457
Projection
distance
Zoom (max)
−0.8 m
(2.6')
0.9 m
(3.0')
1.2 m
(3.9')
1.9 m
(6.2')
2.5 m
(8.2')
3.1 m
(10.2')
4.7 m
(15.4')
5.6 m
(18.4')
6.2 m
(20.3')
7.8 m
(25.6')
9.4 m
(30.8')
Projection
distance
Zoom (min)
0.8 m
(2.6')
0.9 m
(3.0')
1.1 m
(3.6')
1.5 m
(4.9')
2.2 m
(7.2')
3.0 m
(9.8')
3.7 m
(12.1')
5.6 m
(18.4')
6.8 m
(22.3')
7.5 m
(24.6')
9.4 m
(30.8')
11.3 m
(37.1')
H1 27 cm
(0.9')
32 cm
(1.1')
39 cm
(1.3')
51 cm
(1.7')
77 cm
(2.5')
103 cm
(3.4')
129 cm
(4.2')
193 cm
(6.3')
231 cm
(7.6')
257 cm
(8.4')
321 cm
(10.5')
386 cm
(12.7')
H2 5 cm
(0.2')
6 cm
(0.2')
7 cm
(0.2')
10 cm
(0.3')
14 cm
(0.5')
19 cm
(0.6')
24 cm
(0.8')
36 cm
(1.2')
43 cm
(1.4')
48 cm
(1.6')
60 cm
(2.0')
71 cm
(2.3')
H1andH2:H1istheheightofthescreenfromtheintersectionofopticalaxisandscreensurface,andH2istheheight
oftheintersectionwhenanimageisprojectedatrightangletothescreen.
(*3)(*4)
Optionalaxiswhenimageisprojectedat
rightangletothescreen.
1.2m
40"
32"
2.5m
4.7m
6.2m
9.4m(Zoommax.)
11.3m(Zoommin.)
H1
H2
Zoom(min.)
Zoom(max.)
300"
250"
300"
150"
126"
67"
80"
165"
200"
Screen

ENG-7
< LV-8310/LV-8215 >
Use this guide when considering the distance to the screen and the screen size.
• Theceilingmountunitcanbeadjustedupanddownamaximumof+/−10°,butiftoomuch
ofanangleistakentheimagewillshowsomedistortion.Therefore,itisrecommendedthatan
adjustmentismadeinconjunctionwiththescreenprojectionangle.
• Recommended screen sizes for projectors are from 21 inches to 300 inches. (Screen sizes
representthediagonaldimension.)
Using the Diagrams
Referringtothediagram,screensizesthatcanbeusedataprojectiondistanceof3mwillrangefrom80
inchesto90inches.
Toprojecttoascreensizeof180inches,theprojectiondistancewillrangefrom6.0to7.2maccordingto
thediagram.
SeePageENG-9fortheverticalandhorizontaldimensionsofthescreensize.
Guide to Screen Size and Projector Mounting Position
(*1)Distancefromcenteroffixedceilingparttoendofmainunitlens.
(*2)Distanceoflenscenterfromceilingmountsurfaceoffixedceilingpart.
(*3)Theangleis7.9to8.3°usingatelephotosettingfordistancesfromlenscenter(horizontal)toscreencenter.
(*4)Theangleis9.5to9.9°usingawideanglesettingfordistancesfromlenscenter(horizontal)toscreencenter.
(*1)
(*2)
113.9mm
134mm
Throw Distance and Screen Size
Screen size 21" 25" 30" 40" 60" 80" 100" 150" 180" 200" 250" 300"
(W×H) cm 45×28 54×34 65×40 86×54 129×81 172×108 215×135 323×202 388×242 431×269 538×337 646×404
Projection
distance
Zoom (max)
–0.8 m
(2.6')
1.0 m
(3.2')
1.3 m
(4.2')
2.0 m
(6.4')
2.6 m
(8.6')
3.3 m
(10.8')
5.0 m
(16.3')
6.0 m
(19.5')
6.6 m
(21.7')
8.3 m
(27.2')
9.9 m
(32.6')
Projection
distance
Zoom (min)
0.8 m
(2.6')
1.0 m
(3.2')
1.2 m
(3.8')
1.6 m
(5.1')
2.4 m
(7.7')
3.2 m
(10.4')
4.0 m
(13.0')
6.0 m
(19.5')
7.2 m
(23.5')
8.0 m
(26.1')
10.0 m
(32.7')
12.0 m
(39.2')
H1 26 cm
(0.8')
31 cm
(1.0')
37 cm
(1.2')
49 cm
(1.6')
74 cm
(2.4')
98 cm
(3.2')
123 cm
(4.0')
184 cm
(6.0')
221 cm
(7.3')
246 cm
(8.1')
307 cm
(10.1')
369 cm
(12.1')
H2 2 cm
(0.1')
3 cm
(0.1')
4 cm
(0.1')
5 cm
(0.2')
7 cm
(0.2')
9 cm
(0.3')
12 cm
(0.4')
18 cm
(0.6')
21 cm
(0.7')
24 cm
(0.8')
29 cm
(1.0')
35 cm
(1.2')
H1andH2:H1istheheightofthescreenfromtheintersectionofopticalaxisandscreensurface,andH2istheheight
oftheintersectionwhenanimageisprojectedatrightangletothescreen.
(*3)(*4)
Optionalaxiswhenimageisprojectedat
rightangletothescreen.
1.3m
40"
33"
2.6m
5.0m
6.6m
9.9m(Zoommax.)
12.0m(Zoommin.)
H1
H2
Zoom(min.)
Zoom(max.)
300"
248"
300"
150"
125"
65"
80"
165"
200"
Screen

ENG-8
< LV-8300 >
Use this guide when considering the distance to the screen and the screen size.
• Theceilingmountunitcanbeadjustedupanddownamaximumof+/−10°,butiftoomuch
ofanangleistakentheimagewillshowsomedistortion.Therefore,itisrecommendedthatan
adjustmentismadeinconjunctionwiththescreenprojectionangle.
• Recommended screen sizes for projectors are from 21 inches to 300 inches. (Screen sizes
representthediagonaldimension.)
Using the Diagrams
Referringtothediagram,screensizesthatcanbeusedataprojectiondistanceof3mwillrangefrom90
inchesto100inches.
Toprojecttoascreensizeof180inches,theprojectiondistancewillrangefrom5.3to6.4maccordingto
thediagram.
SeePageENG-9fortheverticalandhorizontaldimensionsofthescreensize.
Guide to Screen Size and Projector Mounting Position
(*1)Distancefromcenteroffixedceilingparttoendofmainunitlens.
(*2)Distanceoflenscenterfromceilingmountsurfaceoffixedceilingpart.
(*3)Theangleis7.5to8.0°usingatelephotosettingfordistancesfromlenscenter(horizontal)toscreencenter.
(*4)Theangleis9.1to9.6°usingawideanglesettingfordistancesfromlenscenter(horizontal)toscreencenter.
(*1)
(*2)
113.9mm
134mm
Throw Distance and Screen Size
Screen size 21" 25" 30" 40" 60" 80" 100" 150" 180" 200" 250" 300"
(W×H) cm 45×28 54×34 65×40 86×54 129×81 172×108 215×135 323×202 388×242 431×269 538×337 646×404
Projection
distance
Zoom (max)
–0.7 m
(2.3')
0.9 m
(3.0')
1.1 m
(3.6')
1.7 m
(5.6')
2.3 m
(7.5')
2.9 m
(9.5')
4.4 m
(14.4')
5.3 m
(17.4')
5.9 m
(19.4')
7.4 m
(24.3)
8.8 m
(28.9')
Projection
distance
Zoom (min)
0.7 m
(2.3')
0.9 m
(3.0')
1.0 m
(3.3')
1.4 m
(4.6')
2.1 m
(6.9')
2.8 m
(9.2')
3.5 m
(11.5')
5.3 m
(17.4')
6.4 m
(21.0')
7.1 m
(23.3')
8.9 m
(29.2')
10.7 m
(35.1')
H1 24 cm
(0.8')
29 cm
(0.9')
34 cm
(1.1')
46 cm
(1.5')
69 cm
(2.3')
92 cm
(3.0')
114 cm
(3.8')
172 cm
(5.6')
206 cm
(6.8')
229 cm
(7.5')
286 cm
(9.4')
343 cm
(11.3')
H2 4 cm
(0.1')
5 cm
(0.2')
6 cm
(0.2')
8 cm
(0.3')
12 cm
(0.4')
16 cm
(0.5')
20 cm
(0.7')
30 cm
(1.0')
36 cm
(1.2')
40 cm
(1.3')
50 cm
(1.7')
61 cm
(2.0')
H1andH2:H1istheheightofthescreenfromtheintersectionofopticalaxisandscreensurface,andH2istheheight
oftheintersectionwhenanimageisprojectedatrightangletothescreen.
(*3)(*4)
Optionalaxiswhenimageisprojectedat
rightangletothescreen.
1.1m
40"
31"
2.3m
4.4m
5.9m
8.8m(Zoommax.)
10.7m(Zoommin.)
H1
H2
Zoom(min.)
Zoom(max.)
300"
247"
300"
150"
125"
66"
80"
166"
200"
Screen

ENG-9
■Screen Size Conversion Table
< LV-7385/LV-7380/LV-7285/LV-7280/LV-7375/LV-7370/LV-7275 >
Using the Table
Thedimensionsofa100inchscreensizeaccordingtothetablewillbeapproximately2mhorizontallyand
approximately1.5mvertically.
Height of the screen
(Inches)
(m)
25
0
0
0.5
1.0
1.5
2.0
2.5
3.0
3.5
4.0
4.5
0.5 1.0 1.5 2.0 2.5 3.0 3.5 4.0 4.5 5.0 5.5 6.0 (m)
40
60
80
100
120
150
180
200
240
270
300
Width of the screen
< LV-8310/LV-8215/LV-8300 >
Using the Table
Thedimensionsof a100 inch screensizeaccordingtothe tablewillbe approximately2.15mhorizontally
andapproximately1.34mvertically.
Height of the screen
(Inches)
(m)
25
0
0
0.5
1.0
1.5
2.0
2.5
3.0
3.5
4.0
4.5
0.5 1.0 1.5 2.0 2.5 3.0 3.5 4.0 4.5 5.0 5.5 6.0
40 60
80
100
120
150
180
200
240
270
300
6.5 (m)
Width of the screen
Guide to Screen Size and Projector Mounting Position

ENG-10
2Attach the Projector Mounting Adapter to the Projector
UsethreeM4screwstomounttheprojectormountingadapter.
M4
1Attach the Fixed Ceiling Part to
the Ceiling
First, partially tighten the four screws, then
tightenthescrewsfirmlyafterpositioning.
WARNING!
Use M8 bolts for the fixed ceiling part.
Use of types other than M8 could cause
the projector to fall.
Fixedceiling
part
Mounting the Projector

ENG-11
3Suspend the Projector from the Fixed Ceiling Part
Slidetheslottedpartoftheprojectormountingadapteroverthepinofthefixedceilingpart
andpushallthewaytotheback.
Theprojectoristemporarilysuspendedinthisconditionandattentionmustbepaidsothat
theunitdoesnotfallsinceitisnotfixedinplace.
Pinoffixedceiling
part
Slottedpartofmountingadapter
4Temporarily Fasten the Projector Mounting Adapter
Temporarilyfastenbypartiallytighteningthefoursupplied(M5)screws.
Tightenfirmlyaftercompletingthescreenprojectionangleadjustment.
Temporarilyfastenthe
othersidetoo.
Mounting the Projector

ENG-12
1
2
1
3
2
• Installing anti-fall wire (The second
wire)
[Fixedceilingpart]
❶Pass the ring of the larger wire
through the hole of the ceiling sus-
pensionunit.
[Projectorside]
❷Turntherearadjustmentfootnearest
themainpowerswitchandremoveit
fromtheprojector.
❸Passtherearadjustmentfoot’sscrew
through the ring in wire, then install
therearadjustmentfootbackonthe
projector.
• Installing anti-fall wire (The first
wire)
[Projectorside]
❶Pass the ring of the larger wire
through the carrying handle of the
projector.
[Fixedceilingpart]
❷Put the screw (M5) of the projector
mountingadapterthroughtheringin
wiretomount.
Mounting the Projector
5 Attachthewirestotheprojectorandtheceilingsuspension
unit.
Besuretoinstallthetwowiresasdescribedbelowtopreventtheprojectorfromfalling.

ENG-13
•WhentheCeilingisWoodConstruction:
•WhentheCeilingisConcreteConstruction:
Ceiling
Nutandwasher
Anchornut(Purchasecommercially-availableM8-typeanchornuts
thatarestrongenoughtoenduretheweightofthewholeunit.)
Bolt(M8)
NOTE:Mountingboards,M8-typeanchornuts,bolts,nutsandwashersarecommercially
available.
HINT:InstallationExamples
Mountingboard
(Strongenoughtosupporttheweightofthewholeunit.)
Beam
Washer
Nutandwasher
Bolt(M8)
Mounting the Projector

ENG-14
10° 10°
■Distortion Adjustment
Before the Adjustment
• Refertotheuser’smanualoftheprojector,switchonthepowerandprojectanimage.
• Refertothesection“ImageflipH/V”ofSetupandselecttheprojectionorientation.
• Select “Ceiling mounted” when projection is from the front side, and “Rear, Ceiling
mounted”whenprojectionisfromtherearside.
• Provisionally determine the projection size with the manual zoom, then perform the
angle adjustment.
Left-rightangleadjustmentscrews
(Therearealsoscrewsonthe
oppositeside.)
Maximumadjustment
angle+/−10°
1Adjust the Left-Right Angle
Turn the projector left and right so that
theupperandloweredgesofthescreen
are parallel, then firmly tighten the four
left-right angle adjustment screws. It is
acceptableiftheimageextendsbeyond
thescreen.
1. Distortion Adjustment
Adjust each of the left-right, up-down, and
inclinationanglessothattheprojectedimage
becomesrectangular.
It is acceptable if the image extends beyond
thescreenatthistime.
2. Fine Adjustment
Adjust the lens shift function of Finely adjust
each of the left-right, up-down, and inclina-
tionanglesofthefittingssothattheprojected
imagecoincideswiththescreen.
Adjustment of the projection angle should generally follow the steps described below.
Adjustment of the Projection Angle
Upper
andlower
edges

ENG-15
10°10°
10°
10°
Maximumadjustment
angle+/−10°
Up-downangleadjustmentscrews
(Therearealsoscrewsontheoppo-
siteside.)
2 AdjusttheUp-DownAngle
Turntheprojectorupanddownsothattheleftandrightedgesofthescreenareparallel,
thenfirmlytightenthefourup-downangleadjustmentscrews.Itisacceptableiftheimage
extendsbeyondthescreen.
3Adjust the Inclination
Adjustsothattheimageisprojectedtothescreenwithoutbeingslanted,thenfirmlytighten
thefourinclinationadjustmentscrews.Lastly,tightenthetwoinclinationaxisscrewsifthey
areloose.
Iftheadjustmentdoesnotworkout,readjustfromStep1.
Maximumadjustment
angle+/−10°
Inclinationadjustmentscrews
(Therearealsoscrewsontheoppo-
siteside.)
Inclinationaxisscrew
Adjustment of the Projection Angle
Leftandrightedges

ENG-16
■Fine Adjustment
Loosen the same screws that were used in the distortion adjustment and finely
adjust the angle so that the projected image fits the screen, then tighten all the
screws (i.e., a total of 14 including the inclination axis screws).
After the adjustments, check that the ceiling-mounting hanger
and the projector are fixed securely.
Specifications
ProductName: Ceiling-mountinghanger
Model: LV-CL15
Adjustmentangle: Up-downangle+/−10°
Left-rightangle+/−10°
Inclinationangle+/−10°
Dimensions: 327(W)×166(D)×88(H)mm
(whenassembled,notincludingprotrudingparts)
Weight: Approximately1.3kg
SuppliedItems: Fixedceilingpart............................................... 1
Projectormountingadapter.............................. 1
Projectormountingscrews(M4)....................... 3
Up-downangleadjustmentscrews(M5)........... 4
Anti-fallwires.................................................... 2
Installationmanual............................................ 1
Specificationsandappearancearesubjecttochangewithoutnotice.
Adjustment of the Projection Angle

MULTIMEDIA-PROJEKTOR
LV-CL15 Deckenbefestigung
Installationshandbuch
Vielen Dank für den Erwerb der Canon Multimedia Projektor Deckenbefestigung.
Bittelesen Siedas Installationshandbuchsorgfältig um eine sachgerechteNut-
zungzugewährleisten.
• DieseDeckenbefestigung ist für die Modelle LV-7385/LV-7380/LV-7285/LV-7280/LV-8310/
LV-8215/LV-7375/LV-7370/LV-7275/LV-8300geeignet.
(März2010)
Für die Montage des Projektors sind Fachkenntnisse erforderlich.
Diese Arbeit sollte auf keinen Fall vom Kunden ausgeführt werden.
FürdieInstallierungdesProjektorsandieDecke,wendenSiesichanIhrenVerkäufer.
An den Verkäufer und den Monteur
Um die Sicherheit des Kunden zu gewährleisten, sollte sichergestellt sein, dass die
Anbringung erst beginnt, wenn der Ort der Befestigung daraufhin überprüft ist, ob er dem
GewichtdesProjektorsundderDeckenbefestigungstandhält.
INHALT
Beachten Sie Folgendes ....................................................................................GER-2
Vorbereitung .......................................................................................................GER-4
■AuflistungdermitgeliefertenTeile..............................................................................GER-4
■ErforderlicheWerkzeuge............................................................................................GER-4
■BezeichnungderTeile................................................................................................GER-5
■Abmessungen............................................................................................................GER-5
Anleitung zur Bildschirmgröße und Aufstellungsposition des Projektors .......GER-6
■BildschirmgrößeundProjektionsabstand..................................................................GER-6
<LV-7385/LV-7380/LV-7285/LV-7280/LV-7375/LV-7370/LV-7275>...........................GER-6
<LV-8310/LV-8215>..................................................................................................GER-7
<LV-8300>................................................................................................................GER-8
■BildschirmgrößeUmrechnungstabelle.......................................................................GER-9
<LV-7385/LV-7380/LV-7285/LV-7280/LV-7375/LV-7370/LV-7275>...........................GER-9
<LV-8310/LV-8215/LV-8300>....................................................................................GER-9
Aufstellen des Projektors.................................................................................GER-10
Einstellung des Projektionswinkels .................................................................GER-14
■Verzerrungseinstellung.............................................................................................GER-14
■Feinjustierung...........................................................................................................GER-16
Technische Daten .............................................................................................GER-16

GER-2
Beachten Sie Folgendes
• Verändern Sie keine Teile. Dieses kann
zum Absturz des Projektors führen und
Verletzungenverursachen.
• Verwenden Sie keine beschädigten Teile.
Dieses kann zum Absturz des Projektors
führen und Verletzungen verursachen.
WenneinTeilbeschädigtseinsollte,kon-
taktierenSieIhrenVerkäufer.
• Schauen Sie nicht in die Linse, während
der Projektor eingeschaltet ist. Dieses
kannIhrAugenlichtschädigen.
• NehmenSiedieEinstellungenvor,wiesie
indiesemHandbuchbeschriebensind.
Fehlerhafte Einstellungen können zum
AbsturzdesProjektorsführenundVerlet-
zungenverursachen.
ACHTUNG
• Stellen Sie sicher, dass die Installation
des Projektors so ausgeführt wird, wie
in diesem Handbuch beschrieben. Der
Projektor könnte fallen und Verletzungen
verursachen, wenn er unsachgemäß auf-
gestelltist.
• UmdenAbsturzdesProjektorszuverhin-
dern, befestigen Sie ihn an einem geeig-
netenOrtundsosicher,dassdaskombi-
nierteGewicht(4,6kg)vonProjektor(3,3
kg) und Deckenbefestigung (1,3 kg) über
einen langen Zeitraum erdbebensicher
gehalten wird. Unzureichende Festig-
keit oder Befestigung kann zum Absturz
des Projektors führen und Verletzungen
verursachen.
• Um Sicherheit zu gewährleisten, stellen
Siesicher,dieBolzenundSchraubenfest
anzuziehen. Stellen Sie ebenfalls sicher,
die dazugehörigen Geräte und andere
Beschläge zur Befestigung zu nutzen.
Versäumnisse dieses zu tun, kann zum
AbsturzdesProjektorsführenundVerlet-
zungenverursachen.
• Wird die Öffnung der Projektorhalterung
über den Stift der Deckenbefestigung
geschoben, überprüfen Sie, ob der Stift
ganz in der Öffnung sitzt. Anderenfalls
kann der Projektor abstürzen und Verlet-
zungenverursachen.
• StellenSiesicher,dassSiediemitgeliefer-
tenKabelzurInstallierungdes Projektors
benutzen. Ein Versäumnis dies zu tun,
könnte dazu führen, dass der Projektor
herunterfälltundVerletzungenverursacht.
Dieses Symbol warnt den Benutzer, dass wichtige Informationen zu
Betrieb und Instandhaltung dieser Deckenbefestigung behandelt wer-
den. Diese Informationen sollten sorgfältig gelesen werden, um Pro-
bleme zu vermeiden.
Table of contents
Languages:
Other Canon Projector manuals

Canon
Canon LV-7325U User manual

Canon
Canon ReallS SX80 User manual

Canon
Canon P 400 User manual

Canon
Canon Rayo S1 User manual

Canon
Canon LV-X4 User manual

Canon
Canon REALIS WUX10 MARK II D User manual

Canon
Canon LV-WU360 User manual

Canon
Canon LV-7215U User manual

Canon
Canon REALiS SX80 Mark II D Manual

Canon
Canon REALIS LV-7590 User manual

Canon
Canon T2000 User manual

Canon
Canon LV-7275 User manual

Canon
Canon LV-7340 User manual

Canon
Canon LV-HD420 User manual

Canon
Canon LV 7490 User manual

Canon
Canon LV-7320U User manual

Canon
Canon 4231B005 User manual

Canon
Canon REALiS SX80 Mark II D Owner's manual

Canon
Canon LV-8320 User manual

Canon
Canon 7215 - LV XGA LCD Projector User manual