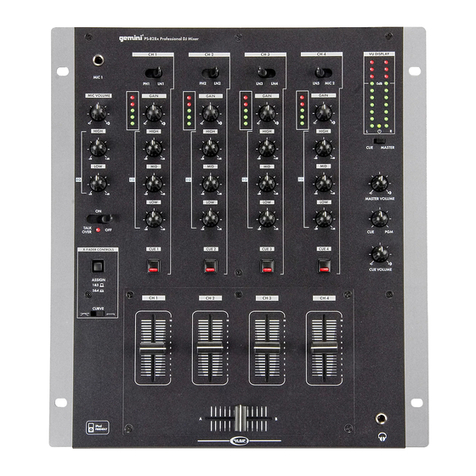
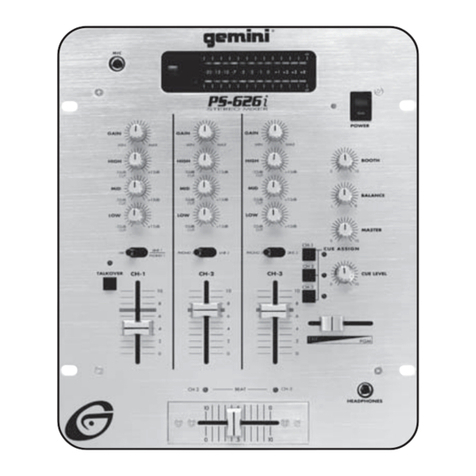
Gemini PS-626 User manual

10" 3 CHANNEL STEIED MIXEI
PROFESSIONELLER 3-KANAL STEREO-MIXER
MEZCLADOR ESTEREO DE 3 CANALES PROFESIONAL
MIXER STEREO 3 VOIES PROFESSIONNEL
OPERATIONS MANUAL
BE DIEN U N GS HAN D BUCH
MANUAL DEL OPERADOR
MANUEL D'INSTRUCTIONS
qemìnì
PS-626 Mixer
emuni
gAINIJJ.O1
_
.i Pod
o FRI ENDLY
PDF compression, OCR, web optimization using a watermarked evaluation copy of CVISION PDFCompressor

Use el interruptor para elegir del CH I al CH 3 para asignar el
canal CH(s) a monitorizar en los auriculares.
Use el CONTROL DE VOLUMEN CUE (17) para ajustar el
nivel de CUE sin cambiar el de mezcla. Girando el CONTROL
CUEIMIXIPGM ROTATIVO (18) al contrario del reloj podrá mon-
itorizar las señales de cue programadas. Pasando el control a la
posición central podrá monitorizar la señal CUE MIX CON EL
PGM. Moviendo en sentido del reloj permite monitorizar la sali-
da principal PGM (Main).
6. SECCION CROSS FADER: El CROSS FADER (19) permite
mezclar de una fuente a otra. El CROSS FADER (19) en esta
unidad es reemplazable y puede hacerse de forma sencilla. Su
mezclador Gemini trae un RG-45 (RAIL GLIDETM) DUAL-RAIL
CROSS FADER, que tiene dos barras internas de acero inoxid-
able que permite mover suavemente de lado a lado y controlar
una curva especial de mezcla. Tambien tiene controles de
CURVA y REVERSE (20) en el panel frontal paraajustar la rapi-
dez para pasar de un lado a otro y la dirección en que cada
canal es asignado. También está disponible el RG-45 Pro (RAIL
GLIDE Pro1M ) DUAL-RAIL CROSS FADER. Este único
CROSS FADER incorpora un toque mas suave y una curva mas
corta especial para scratching. Simplemente compre uno a su
distribuidor Gemini y siga las instrucciones:
CROSS FADER REEMPLAZABLE
1. DESATORNILLE LA CARATULA QUE HAY EN LA PARTE INFERIOR DEL MEZ-
CLADOR. QUITE LOS BOTONES DE LOS FADERS Y LA CARATULA.
2.QUITE LOS TORNILLOS DEL
FADER (B) SIN TOCAR LOS
TORNILLOS INTERIORES (C).
QUITE CON CUIDADO EL VIEJO
CROSS FADERY DESCONECTE EL
CABLE (D).
CONECTE EL NUEVO CROSS
FADER EN EL CABLE (D) Y INTRO-
DUZCALO EN EL MEZCLADOR.
ATORNILLE EL CROSS FADER
AL MEZCLADOR CON LOS
TORNILLOS DE LA PLATINA (B).
COLOQUE LA CARATULA Y J
ATORNILLE AL MEZCLADOR.
I.
.1L
NOTA: NO APLIQUE PRESION CUANDO UTILICE EL CROSS FADER (46).
SOLO DESLICE EL CROSSFADER A UN LADO Y OTRO. PRESIONAR PUEDE
DOBLAR LAS PISTAS Y CAUSAR PERDIDAS DE SONIDO.
7. SELECTOR DE SALIDA: Una vez haya ajustado a su elec-
ción el nivel de su música, puede ajustar el volumen general con
MASTER (21).
gm
(lo)
SECCION MIC: Conecte su micrófono en la entrada MIC 1/4"
(6) en el panel trasero. Puede usar el control Mic Ganancia (22)
así como el AGUDO (23) y GRAVES (24) para ajustar el volu-
men y tono de la señal de micrófono.
VU METER: El PS-626x tiene un doble modo VU METER
(25) que permite monitorizar el nivel de decibelios de CUE y
PGM o los niveles estéreo de IZQUIERDA y DERECHA del
MASTER. Con el INTERUPTOR DE VU MODO (26) puede
monitorizar CUE y PGM cuando está arriba. En este modo el
CUE estará a la izquierda del VU METER, mientras que PGM
estará a la derecha. O puede monitorizar IZQUIERDA Y
DERECHA de la señal estéreo de MASTER OUTPUT cuando
el interruptor está abajo.
10."Ipod Friendly" Cable:Para conectar su iPod u otro repro-
ductor digital, use el cable incluido para iPod. Conecte el
extremo del cable con jack 1/8" a la salida de auriculares de su
reproductor, y los RCA a la entrada de línea (7) de su mez-
clador.
ESPECIFICACIONES:
ENTRADAS:
Phono
Line
MIC
3 mV, 47 KOhm
150 mV, 27 KOhm
1.5 mV, 1 KOhm Balanced
SALIDAS:
Max 20V Peak-to-Peak
Rec 225 mV, 5 KOhm
GENERAL:
Respuesta en frecuencia 23Hz - 23KHz i-/- 2 dB
Distorsión < 0.02%
Relación S/N Mayor de 85 dB
Impedancia Auriculares 16 Ohm
Alimentación 115/230 V, 60/50 Hz, 20 W
Dimensiones 10 x 3.3 x 11.9
(254 x 84 x 303 mm)
Peso 6.93 lbs (3.15 kg)
ESPECIFICACIONES SUJETAS A VARIACION SIN PREVIO AVISO PARA
MEJORAS.
In'
PDF compression, OCR, web optimization using a watermarked evaluation copy of CVISION PDFCompressor

MULTI LANGUAGE INSTRUCTIONS PAGE 1-4ENGUSH PAGES-7DEUTSCH
PLEASE READ BEFORE USING APPLIANCE, IMPORTANT WARNING & SAFETY INSTRUCTIONS!
A A
CAUTION: This product satisfies FCC regulations when shielded cables and connec-
tors are used to connect the unit to other equipment. To prevent electromagnetic
interference with electric appliances such as radios and televisions, use shielded
cables and connectors for connections.
The exclamation point within an equilateral triangle is intended to alert the user to
the presence of important operating and maintenance (servicing) instructions in
the literature accompanying the appliance.
The lightening flash with arrowhead symbol, within an equilateral triangle, is
intended to alert the user to the presence of uninsulated dangerous voltage" with-
in the product's enclosure that may be of sufficient magnitude to constitute a risk
of electric shock to persons.
READ INSTRUCTIONS: All the safety and operating instructions should be read
before the product is operated.
RETAIN INSTRUCTIONS: The safety and operating instructions should be retained
for future reference.
HEED WARNINGS: All warnings on the product and in the operating instructions
should be adhered to.
FOLLOW INSTRUCTIONS: All operating and use instructions should be followed.
CLEANING: The product should be cleaned only with a polishing cloth or a soft dry
cloth. Never clean with furniture wax, benzine, insecticides orother volatile liquids
since they may corrode the cabinet.
ATTACHMENTS: Do not use attachments not recommended by the product manu-
acturer as they may cause hazards.
WATER AND MOISTURE: Do not use this product near water, for example, near a
bathtub, wash bowl, kitchen sink, or laundry tub; in a wet basement; or near a
swimming pool; and the like.
ACCESSORIES: Do not place this product on an unstable cart, stand, tripod, brack-
et, or table. The product may fall, causing serious injury to a child or adult, and
serious damage tothe product. Use only with a cart, stand, tripod, bracket, ortable
recommended by the manufacturer, or sold with the product. Any mounting of the
product should follow the manufacturer's instructions, and should use a mounting
accessory recommended by the manufacturer.
CART: A product and cart combination should be moved with care. Quick stops,
excessive force, and uneven surfaces may cause the product and cart combina-
tion to overturn. See Figure A.
VENTILATION: Slots and openings in the cabinet are provided for ventilation and to
ensure reliable operation of the product and to protect it from overheating, and
these openings must not be blocked or covered. The openings should never be
blocked by placing the product on a bed, sofa, rug, or other similar surface.This
product shouldnot be placed in a built-in installation such as a bookcase or rack
unless proper ventilation is provided or the manufacturer's instructions have been
adhered to.
POWER SOURCES: This product should be operated only from the type of power
source indicatedon the marking label. If you are not sure ofthe type of power sup-
ply to your home, consult your product dealer or local power company.
LOCATION: The appliance should be installed in a stable location.
NON-USE PERIODS: The powercord ofthe appliance should be unplugged from the
outlet when left unused for a long period oftime.
GROUNDING OR POLARIZATION:
If this product is equipped with a polarized alternating current line plug (a plug
having one blade widerthan the other), it will fit into the outlet only one way. This
is a safety feature. If you are unable to insert the plug fully into the outlet, try
reversing the plug. If the plug should still fail to fit, contact your electrician to
replace your obsolete outlet. Do not defeat the safety purpose of the polarized
plug.
If this product is equipped with a three-wire grounding type plug, a plug having
a third (grounding) pin, it will only fit into a grounding type power outlet. This is a
safety feature. If you are unable to insertthe plug into the outlet, contact your elec-
trician to replace your obsolete outlet. Do not defeat the safety purpose of the
grounding type plug.
POWER-CORD PROTECTION: Power-supply cords should be routed so that they
are not likely to be walked on or pinched by items placed upon or against them,
paying particular attention to cords at plugs, convenience receptacles, and the
point where they exit from the product.
OUTDOOR ANTENNA GROUNDING: If an outside antenna or cable system is con-
nected to the product, be sure the antenna or cable system is grounded so as to
provide some protection against voltage surges and built-up static charges. Article
810 of the National Electrical Code, ANSI/NFPA 70, provides information with
CAUTION
RISK OF ELECTRICAL SHOCK DO NOT OPEN!
(1
regard to proper grounding of the mast and supporting structure, grounding of the
lead-in wire to an antenna discharge unit, size of grounding conductors, location
of antenna-discharge unit, connection to grounding electrodes, and requirements
for the grounding electrode. See Figure B.
LIGHTENING: For added protection for this product during a lightening storm, or
when it is left unattended and unused for long periods of time, unplug it from the
wall outlet and disconnect the antenna or cable system. This will prevent damage
to the product due to lightening and power-line surges.
POWER LINES: An outside antenna system should not be located in the vicinity of
overhead power lines or other electric light or power circuits, or where it can fall
into such power lines or circuits. When installing an outside antenna system,
extreme care should be taken to keep from touching such power lines or circuits
as contact with them might be fatal.
OVERLOADING: Do not overload wall outlets, extension cords, or integral conven-
ience receptacles as this can result in a risk offire or electric shock.
OBJECT AND LIQUID ENTRY: Never push objects of any kind into this product
through openings as they may touch dangerous voltage points or short-out parts
that could result in a fire or electric shock. Never spill liquid of any kind on the
product.
SERVICING: Do not attempt to service this product yourself as opening or removing
covers may expose you to dangerous voltage or other hazards. Refer all servic-
ing to qualified service personnel.
DAMAGE REQUIRING SERVICE: Unplug this product from the wall outlet and refer
servicing to qualified service personnel under the following conditions:
When the power-supply cord or plug is damaged.
If liquid has been spilled, or objects have fallen into the product.
Ifthe product has been exposed to rain or water.
Ifthe product does not operate normally by following the operating instructions.
Adjust only those controls that are covered by the operating instructions as an
improper adjustment ofother controls may result in damage and will often require
extensive work by a qualified technician to restore the product to its normal oper-
ation.If the product has been dropped or damaged in any way.
When the product exhibits a distinct change in performance, this indicates a
need for service.
REPLACEMENT PARTS: When replacement parts are required, be sure the service
technician has used replacement parts specified by the manufacturer or have the
same characteristics as the original part. Unauthorized substitutions may result in
fire, electric shock, or other hazards.
SAFETY CHECK: Upon completion of any service or repairs to this product, ask the
service technician to perform safety checks to determine that the product is in
proper operating condition.
WALL OR CEILING MOUNTING: The product should not be mounted to a wall or
ceiling.
HEAT: The product should be situated away from heat sources such as radiators,
heat registers, stoves, or other products (including amplifiers) that produce heat.
(E
- MAr 041*L ILCICAL
}
PDF compression, OCR, web optimization using a watermarked evaluation copy of CVISION PDFCompressor

INTRODUCTION:
Nos félicitations pour l'achat du mixeur Gemini PS-626x.
Cette Table de mixage a été conçue grâce aux dernières
avancées technologiques et dispose d'une garantie de 2 ans, à
l'exception du cross-fader dont la garantie est de 90 jours. Avant
toute utilisation, merci de lire attentivement les instructions de
ce manuel.
CARACTÉRISTIQUES
- Mixeur stéréo 3 voies au format 10 pouces
- 6 entrées ligne en RCA dont 2 commutables phono/ligne
- Sortie générale (master),zone et enregistrement (rec) en RCA
- Entrée microphone
- Vis de terre pour platine vinyles
- Cross fader type rail glide interchangeable
- Correction trois bandes rotatives et gain par tranche
- Réglage de pré-écoute facilité
- Contrôle rotatif du volume de pré-écoute, et la balance
- Commutateur de pré-ecoute Chl/Ch2/Ch3
- Vumètre à LEDS avec sélecteur de source
- Contrôle de la sortie générale par fader (Master)
- Sortie casque réglable en face avant
AVERTISSEMENTS
1 .Toutes les instructions de fonctionnement doivent être lues
avant l'utilisation du matériel
Afin de réduire le risque de choc électrique, n'ouvrez pas lap-
peril. Veuillez soumettre l'entretien et la réparation au Service
Après Vente de Gemini France
Ne pas exposer directement cet appareil aux rayons du
soleil ou à une source de chaleur, telle qu'un radiateur ou un
poêle.
Cet appareil doit être exclusivement nettoyé avec un chiffon
légèrement humide. Proscrire solvants et autres détergents.
Lors du déplacement du matériel, celui-ci doit être emballé
dans son carton d'origine avec ses polystirènes de protection.
Ceci limitera les risques de dégâts pendant les transports.
NE PAS EXPOSER CETAPPAREIL A LA PLUIE OU A L'HUMIDITÉ
N'UTILISEZ PAS DE PRODUIT DE NETTOYAGE OU LUBRIFIANT
EN VAPORISATEUR SUR AUCUN DES BOUTONS OU INTERRUP-
TEURS
CONNECTIONS:
Assurez-vous que le commutateur POWER (1) est sur la posi-
tion OFF avant de connecter l'adaptateur secteur (2) sur le pan-
neau arrière.
Le mixeur PS-626x comporte deux sorties séparées situées
en face arrière.
- La sortie générale (assymétrique) MASTER RCA OUTPUT:
sert à relier la console à l'amplificateur de puissance. Le type de
connecteur est RCA.
La sortie enregistrement REC (4) sert à relier votre console à
l'entrée de votre enregistreur à l'aide d'un cablage en RCA
Votre casque peut être branché en face avant sur le con-
necteur au format jack HEADPHONE (5).
L'entrée micro MICROPHONE (6) se trouve en face avant et
est au format jack.6,35mm stéréo.
Sur le panneau arrière de la PS-626x , se trouvent deux
entrées LIGNE en RCA commutables PHONO/LINE (7). Les
entrées convertibles phono/ligne se trouvent à droite pour
PHI/LNI (7) et à gauche pour PH3/LN5 (7). Un communtatur
phono/ligne vous permet de choisir entre les deux niveaux d'en-
trée possibles. Il se situe au milieu des connecteurs RCA (8) Les
entrées phono n'acceptent que des tourne-disque avec des cel-
lules magnétiques. Les entrées ligne ( LINE) acceptent tous
autres types de source: CD, DAT, Mini-Disc, etc.
7.Une vis de masse pour mise à la masse de la platine vinyle est
située sur le panneau arrière (9) Elle est obligatoire pour l'utilisa-
tion des platines vinyle. Ne pas brancher la masse des platines
vinyle provoquera un bourdonnement lors de l'écoute.
MISE SOUS TENSION DE L'APPAREIL:
Une fois que tous les branchements sont effectués à votre
mixeur, appuyez sur POWER (1) pour la mise sous tension.
Canal 1: Le commutateur(10) vous permet de sélectionner la
source choisie PH1/LN1 ou LN2. Afin de contrôler la source
choisie, poussez légèrement le curseur de canal CHi Slide con-
trol (11) au niveau voulu. Vous pouvez intervenir sur votre son
grâce aux commandes GAIN (12), HIGH (13), MID (14), LOW (15).
Ces contrôleurs rotatifs se trouvent en amont du curseur de
canal CHi slide control (11).
Canal 2: Le commutateur (10) vous permet de sélectionner la
source choisie PH2/LN2 ou LN3. Afin de contrôler la source
choisie, poussez légèrement le curseur de canal CH2 slide con-
trol (11) au niveau voulu. Vous pouvez intervenir sur votre son
grâce aux commandes GAIN (12), HIGH (13), MID (14), LOW (15).
Ces contrôleurs rotatifs se trouvent en amont du curseur de
canal CH2 slide control (11).
Canal 3: Le commutateur (10) vous permet de sélectionner la
source choisie LN5 ou LN6. Afin de contrôler la source choisie,
poussez légèrement le curseur de canal CH3 slide control (11)
au niveau voulu. Vous pouvez intervenir survotre son grâce aux
commandes GAIN (12), HIGH (13), MID (14), LOW (15). Ces con-
trôleurs rotatifs se trouvent en amont du curseur de canal CH3
slide control (11).
NOTE: CHAQUE CANAL DISPOSE D'UNE EGALISATION DE BASSES,
MEDIUM, AIGUS, AVEC UNE TRES GRANDE PLAGE DE REGLAGES, CE QUI
VOUS PERMETTRA D'OPTIMISER AU MIEUX VOTRE SON. AFIN D'EVITER
TOUTE SATURATION, VEUILLEZ AJUSTER CHACUNE DE VOS ENTREES
GRACE AU CONTROLE ROTATIF DE GAIN (12).
Pré-écoute "CUE": En branchant votre casque au jack
HEADPHONE (5), vous pouvez écouter le canal 1, le canal 2 ou
le canal 3. Servez-vous du commutateur de pré-ecoute
Chi/Ch2/Ch3 pour entendre le canal désiré.
(72)
PDF compression, OCR, web optimization using a watermarked evaluation copy of CVISION PDFCompressor

Other manuals for PS-626
2
Table of contents
Languages:
Other Gemini Music Mixer manuals

Gemini
Gemini PMX-04 User manual

Gemini
Gemini PMX-20 User manual

Gemini
Gemini PS-626 User manual

Gemini
Gemini PS-1000 PRO User manual

Gemini
Gemini CDM-3700G User manual

Gemini
Gemini PMX-500 User manual

Gemini
Gemini PMX-1100 User manual

Gemini
Gemini PS-650I User manual

Gemini
Gemini PMX-120 User manual

Gemini
Gemini PS-540i User manual

Gemini
Gemini PS-850i User manual

Gemini
Gemini PS-626USB Reference manual

Gemini
Gemini ps-02usb User manual

Gemini
Gemini PS-767 User manual

Gemini
Gemini GMX User manual

Gemini
Gemini PS-121x User manual

Gemini
Gemini EX-26 User manual

Gemini
Gemini MDJ-1000 User manual

Gemini
Gemini PMX-03 User manual

Gemini
Gemini PMX-05 User manual