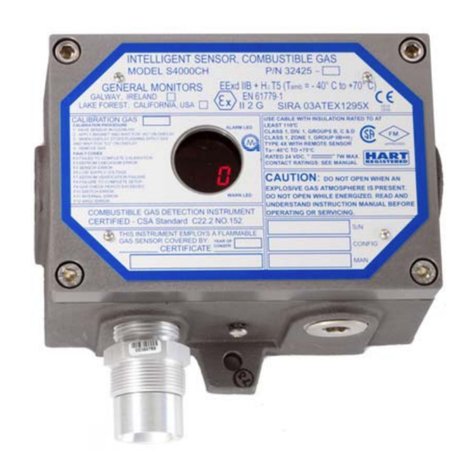
General Monitors S4000C User manual

Model S4000C
Intelligent Sensor for
Combustible Gas Detection
The information and technical data disclosed in
this document may be used and disseminated
only for the purposes and to the extent
specifically authorized in writing by General
Monitors.
Instruction Manual 0307
General Monitors reserves the right to change
published specifications and designs without
prior notice.
MANS4000C
Part No. MANS4000C
Revision G/03-07

S4000C
ii
This page intentionally left blank

S4000C
iii
3.5 Terminal Connections................................................................................................................7
Table of Contents
TABLE OF FIGURES..................................................................................................................VI
TABLE OF TABLES...................................................................................................................VII
QUICK START GUIDE.................................................................................................................1
Mounting and Wiring...............................................................................................................................1
Tools Required...........................................................................................................................1
Terminal Connections.............................................................................................................................1
1.0 INTRODUCTION ....................................................................................................................1
1.1 Protection for Life.......................................................................................................................1
1.2 Special Warnings.......................................................................................................................1
1.3 System Integrity Verification ......................................................................................................1
2.0 PRODUCT DESCRIPTION.....................................................................................................3
2.1 General Description ...................................................................................................................3
3.0 INSTALLATION......................................................................................................................4
3.1 Receipt of Equipment.................................................................................................................4
3.2 Tools Required...........................................................................................................................4
3.3 Choosing Product Locations......................................................................................................4
3.3.1 Remote Mounting of the Sensor from the Electronics..................................................5
3.4 Mounting and Wiring..................................................................................................................5
3.5.1 Terminal Block TB1 – Sensor Connections..................................................................7
3.5.2 Terminal Block TB2 – Power and Signal Connections.................................................7
3.5.3 DC Power and Ground Connections.............................................................................8
3.5.4 Analog Signal Connections...........................................................................................9
3.5.5 Terminal Block TB3 – Relay Connections ..................................................................10
3.5.6 European Union (EU) Approved Applications.............................................................11
3.5.7 Cable Termination in the Non-Hazardous Area..........................................................11
3.6 Maintaining the X/P Integrity....................................................................................................12
4.0 OPERATION.........................................................................................................................13
4.1 Start-Up Checklist....................................................................................................................13
4.2 Start-Up....................................................................................................................................13
4.3 Relay Reset..............................................................................................................................13
4.4 User Selectable Options ..........................................................................................................14
4.4.1 Model S4000C User Menu Structure..........................................................................15
4.4.2 Calibration Level .........................................................................................................15
4.4.3 Warning Relay Settings ..............................................................................................16
4.4.4 Alarm Relay Settings...................................................................................................16
4.4.5 MODBUS Channel 1 Settings.....................................................................................17
4.4.6 MODBUS Channel 2 Settings.....................................................................................17
4.5 Gas Check Mode .....................................................................................................................18
4.5.1 Procedure for Checking the Calibration......................................................................18

S4000C
iv
8.0 MODBUS INTERFACE ........................................................................................................26
4.6 Calibration................................................................................................................................18
4.6.1 Calibration Procedure .................................................................................................19
4.6.2 Aborting Calibration.....................................................................................................20
4.6.3 Adjustable Calibration Level .......................................................................................20
4.6.4 Remaining Sensor Life................................................................................................20
4.6.5 Initializing the Remaining Sensor Life.........................................................................20
4.7 Calibration Equipment..............................................................................................................21
4.7.1 Portable Purge Calibrator ...........................................................................................21
5.0 MAINTENANCE ...................................................................................................................22
5.1 General Maintenance...............................................................................................................22
5.2 Storage.....................................................................................................................................22
6.0 TROUBLESHOOTING .........................................................................................................23
6.1 Fault Codes & Their Remedies................................................................................................23
6.1.1 F2 Failed to Complete Calibration ..............................................................................23
6.1.2 F3 EEPROM Checksum Error....................................................................................23
6.1.3 F4 Sensor Error...........................................................................................................23
6.1.4 F5 Unused...................................................................................................................23
6.1.5 F6 Low Supply Voltage...............................................................................................24
6.1.6 F7 EEPROM Verification Failure ................................................................................24
6.1.7 F8 Failure to Complete Setup.....................................................................................24
6.1.8 F9 Gas Check Period Exceeded.................................................................................24
6.1.9 F10 Switch Error .........................................................................................................24
7.0 CUSTOMER SUPPORT.......................................................................................................25T
7.1 General Monitors’ Offices.........................................................................................................25
8.1 Baud Rate................................................................................................................................26
8.2 Data Format.............................................................................................................................26
8.3 MODBUS Read Status Protocol (Query/Response)................................................................26
8.3.1 MODBUS Read Query Message................................................................................26
8.3.2 MODBUS Read Response Message..........................................................................26
8.4 MODBUS Write Command Protocol (Query/Response) .........................................................27
8.4.1 MODBUS Write Query Message ................................................................................27
8.4.2 MODBUS Write Response Message..........................................................................27
8.5 Function Codes Supported ......................................................................................................27
8.6 Exception Responses and Exception Codes...........................................................................27
8.6.1 Exception Response...................................................................................................27
8.6.2 Exception Code...........................................................................................................28
8.7 S4000C Command Register Locations....................................................................................29
8.8 S4000C Command Register Details........................................................................................30
8.8.1 Analog.........................................................................................................................30
8.8.2 Mode...........................................................................................................................30
8.8.3 Status/Error.................................................................................................................30
8.8.4 Unit Type.....................................................................................................................31

8.8.5 Software Revision.......................................................................................................31
8.8.6 Status Block................................................................................................................31
8.8.7 Alarm Settings.............................................................................................................31


S4000C
v
9.5 Sensitivities to Other Gases.....................................................................................................39
8.8.8 Warn Settings..............................................................................................................32
8.8.9 Com1 Address ............................................................................................................32
8.8.10 Com1 Baud Rate.........................................................................................................33
8.8.11 Com1 Data Format......................................................................................................33
8.8.12 Com2 Address ............................................................................................................33
8.8.13 Com2 Baud Rate.........................................................................................................33
8.8.14 Com2 Data Format......................................................................................................34
8.8.15 Cal Level.....................................................................................................................34
8.8.16 Reset Alarms...............................................................................................................34
8.8.17 Sensor Life..................................................................................................................34
8.8.18 HazardWatch (Co – Calibration Output).....................................................................34
8.8.19 Total Receive Errors ...................................................................................................34
8.8.20 Bus Activity Rate %.....................................................................................................34
8.8.21 Function Code Errors..................................................................................................35
8.8.22 Starting Address Errors...............................................................................................35
8.8.23 Number of Register Errors..........................................................................................35
8.8.24 RXD CRC Hi Errors.....................................................................................................35
8.8.25 RXD CRC Low Errors .................................................................................................35
8.8.26 Clear Comm Errors.....................................................................................................35
9.0 APPENDIX............................................................................................................................36
9.1 Warranty...................................................................................................................................36
9.2 Principle of Operation...............................................................................................................36
9.3 Specifications...........................................................................................................................37
9.3.1 System Specifications.................................................................................................37
9.3.2 Mechanical Specifications...........................................................................................37
9.3.3 Electrical Specifications..............................................................................................37
9.3.4 Environmental Specifications......................................................................................38
9.4 Approvals.................................................................................................................................39
9.6 Spare Parts and Accessories...................................................................................................41
9.6.1 Sensors.......................................................................................................................41
9.6.2 Sensor Housing...........................................................................................................41
9.6.3 Sensor Accessories ....................................................................................................41
9.6.4 Calibration Equipment.................................................................................................41
9.6.5 Intelligent Transmitter (S4000C) Replacement Parts.................................................42
9.6.6 Recommended Spare Parts for One (1) Year ............................................................42
9.7 FMRC Approval........................................................................................................................43

S4000C
vi
Table of Figures
Figure 1: Outline and Mounting Dimensions..........................................................................................................1
Figure 2: Spring Type Terminal Block Operation...................................................................................................2
Figure 3: Screw Type Terminal Block Operation....................................................................................................2
Figure 4: Model S4000C Intelligent Sensor............................................................................................................3
Figure 5: Outline and Mounting Dimensions..........................................................................................................6
Figure 6: Spring Type Terminal Block Operation...................................................................................................8
Figure 7: Screw Type Terminal Block Operation....................................................................................................8
Figure 8: Wire Strip Length.....................................................................................................................................8
Figure 9: Relay Protection for DC and AC Loads.................................................................................................11
Figure 10: Relay Reset.........................................................................................................................................14
Figure 11: User Menu Structure...........................................................................................................................15
Figure 12: Calibration Check................................................................................................................................18
Figure 13: Automatic Calibration Mode................................................................................................................19
Figure 14: Calibration In Progress Mode..............................................................................................................19
Figure 15: Calibration Complete Mode.................................................................................................................19

S4000C
Table of Tables
Table 1: TB2 Power and Signal Connections.........................................................................................................7
Table 2: Ground or Common Connections.............................................................................................................9
Table 3: Power Connections ..................................................................................................................................9
Table 4: Analog Signal Connections ....................................................................................................................10
Table 5: Alarm Relay Connections.......................................................................................................................10
Table 6: Warn Relay Connections........................................................................................................................10
Table 7: Fault Relay Connections ........................................................................................................................10
Table 8: GM Locations..........................................................................................................................................25
Table 9: Data Format............................................................................................................................................26
Table 10: Exception Codes ..................................................................................................................................28
Table 11: Command Register Locations..............................................................................................................29
Table 12: Command Register Locations Cont. ....................................................................................................30
Table 13: Com1 Baud Rate..................................................................................................................................33
Table 14: Com1 Data Format...............................................................................................................................33
Table 15: Com2 Baud Rate..................................................................................................................................33
Table 16: Com2 Data Format...............................................................................................................................34
Table 17: 24VDC Cable Lengths..........................................................................................................................38
Table 18: Analog Output Cable Lengths ..............................................................................................................38
Table 19: Sensor Cable Lengths..........................................................................................................................38
Table 20: Chemical List from1994 NFPA.............................................................................................................40
vii

S4000C
Quick Start Guide
Mounting and Wiring
Tools Required
1. “5mm” Allen head wrench to remove enclosure lid (included with gas detector).
2. Flat-head screwdriver maximum 3/16” (5 mm) width for terminal block connections
(included with gas detector).
3. Adjustable wrench for conduit or cable gland connections (not included).
It is not necessary to seal the Model S4000C housing to maintain its explosion-proof integrity;
however, conduit runs containing wires attached to the Model S4000C’s relay contacts must be
sealed.
Information on Class I location seals can be found in the NEC, Article 501-5.
Figure 1: Outline and Mounting Dimensions
Terminal Connections
The terminal blocks (TB) are located inside the housing and can be accessed by removing the
cover. A label on the inside of the housing cover provides details of all the terminal
connections.
WARNING: Do not connect +24VDC to TB1. Damage to the electronics, or sensor may
result.
It is recommended that a three-wire (red, black, white) shielded cable be used for making
power and output signal connections on the Model S4000C. The Spring Type terminal block
accepts 14 AWG to 20 AWG and the Screw Type terminal block accepts 12 AWG to 18 AWG
stranded or solid wire. Each wire should be stripped before wiring the Model S4000C Intelligent
Sensor. To connect wiring to the Spring Type terminal block, insert a screwdriver into the
orange tab and press down (Figure 2), opening the terminal. Insert the wire into the terminal
1

S4000C
2
and release the orange tab, clamping the wire in the terminal. Check the hold of the wire by
GENTLY tugging it to ensure it is locked in.
To connect wiring to the Screw Type terminal block, (Figure 3) use a screwdriver to loosen the
top screw counter clock wise. Insert the wire into the terminal and tighten the top screw clock
wise. Check the hold of the wire by GENTLY tugging it to ensure it is locked in.
Figure 2: Spring Type Terminal Block Operation
Figure 3: Screw Type Terminal Block Operation
NOTE: Power must remain disconnected until all other wiring connections have been made.
The maximum distance between the Model S4000C and the power supply is 3430 feet or 1040
meters (each cable run should be as short as possible). See Section 9.3.3 for cable length
specifications. Connect +24VDC to TB2, position 9. Connect the ground or common to TB2,
position 8.
The instrument is now ready to operate. Please consult the manual for more information on the
instrument’s many features.
NOTE: If you have any problems in the set-up or testing of the detector, please refer to the
“Trouble Shooting Section”, or call the factory direct.

S4000C
3
Worldwide service is available by calling:
Lake Forest, California
(24 hr. service) Toll Free: +1-800-446-4872
Phone: +1-949-581-4464
Fax: +1-949-581-1151
Houston, Texas Phone: +1-281-855-6000
Fax: +1-281-855-3290
Ireland Phone: +353-91-751175
Fax: +353-91-751317
Singapore Phone: +65-6748-3488
Fax: +65-6748-1911
United Arab Emirates Phone: +971-4-8815751
Fax: +971-4-8817927
United Kingdom Phone: +44-1625-619583
Fax: +44-1625-619098

S4000C
1.0 Introduction
1.1 Protection for Life
General Monitors’ mission is to benefit society by providing solutions through industry leading
safety products, services, and systems that save lives and protect capital resources from the
dangers of hazardous flames, gases, and vapors.
This manual provides instruction for installing and operating General Monitors’ Model S4000C
for Combustible Gas Detection. While the S4000C is easy to install and operate, this manual
should be read in full and the information contained herein understood before attempting to
place the system in service.
The safety products you have purchased should be handled carefully and installed, calibrated,
and maintained in accordance with the respective product instruction manual. Remember these
products are for your safety.
1.2 Special Warnings
The Model S4000C Intelligent Sensor contains components, which can be damaged by static
electricity. Special care must be taken when wiring the system to ensure that only the
connection points are touched.
Toxic, combustible and flammable gases and vapors are very dangerous. Extreme caution
should be used when these hazards are present.
1.3 System Integrity Verification
Commissioning Safety Systems
Before power up, verify wiring, terminal connections and stability of mounting for all integral
safety equipment including, but not limited to:
•Power supplies
•Control modules
•Field detection devices
•Signaling / output devices
•Accessories connected to field and signaling devices
After the initial application of power (and any factory specified warm-up period) to the safety
system, verify that all signal outputs, to and from devices and modules, are within the
manufacturers’ specifications. Initial testing should be performed per the manufacturers’
recommendations and instructions.
Proper system operation should be verified by performing a full, functional test of all component
devices of the safety system, ensuring that the proper levels of alarming occur.
Fault/Malfunction circuit operation should be verified.
1

S4000C
2
Periodic Testing of Field Devices
Periodic testing/calibrating should be performed per the manufacturer’s recommendations and
instructions. Testing/Calibrating procedures should include, but not be limited to:
•Verify integrity of all optical surfaces and devices
•For flame detectors, use the appropriate test lamp
When testing produces results outside of the manufacturer’s specifications, replacement of the
suspect device(s) should be performed as necessary. Maintenance intervals should be
independently established through a documented procedure, including a maintenance log
maintained by plant personnel or third party testing services.
Periodic System Verification
The following system verifications should be performed at least annually:
Verify wiring, terminal connections and stability of mounting for all integral safety equipment
including, but not limited to:
•Power supplies
•Control modules
•Field detection devices
•Signaling / output devices
•Accessories connected to field and signaling devices

S4000C
2.0 Product Description
2.1 General Description
The Model S4000C is an intelligent sensor for the detection of combustible gases and vapors.
The microprocessor-based electronics processes information at the sensor site, within an
explosion-proof housing.
A digital display provides indications and display codes that can be viewed through a window in
the cover. A red LED above the digital display signifies an ALARM condition, while a red LED
below the digital display signifies a WARN condition. Analog signal (4-20mA) and optional Dual
Redundant MODBUS communications and relays, provide remote and/or discrete indications of
the sensor’s operation.
The Model S4000C Intelligent Sensor is rated explosion-proof for use in the following
hazardous areas:
•CSA/FM: Class I, Division 1, Groups B, C, D and Class I, Zone 1, Ex d IIB+H2, T6
•ATEX: II 2 G EEx d IIB T5 (Tamb=-40°C to +70°C) EN 61779-1
Figure 4: Model S4000C Intelligent Sensor
3

S4000C
3.0 Installation
3.1 Receipt of Equipment
All equipment shipped by General Monitors is pre-packed in shock absorbing containers, which
provide protection against physical damage (original containers should be kept for future
shipping or storage needs).
Shipping container contents should be carefully removed and checked against the packing list.
If any damage has occurred, or there is any discrepancy in the order, please notify General
Monitors as soon as possible.
All correspondence with General Monitors must specify the equipment part number and serial
number.
The factory tests each unit; however, a complete system checkout is suggested upon initial
installation to ensure system integrity.
WARNING: Installation and Maintenance must be carried out by suitably skilled and
competent personnel only.
3.2 Tools Required
1. “5 mm” Allen head wrench to remove enclosure lid (included with gas detector).
2. Flat-head screwdriver maximum 3/16” (5 mm) width for terminal block connections
(included with gas detector).
3. Adjustable wrench for conduit or cable gland connections (not included).
3.3 Choosing Product Locations
There are no standard rules for sensor placement, since the optimum sensor location is
different for each application. The customer must evaluate conditions at the facility to make this
determination. Generally, the Model S4000C Intelligent Sensor should be easily accessible for
calibration checks.
•The transmitter should be mounted pointing down to prevent water build-up on the sensor
head.
•The transmitter should not be placed where contaminating substances may coat it.
•Although the Model S4000C is RFI resistant, it should not be mounted in close proximity to
radio transmitters or similar equipment.
•Locate the Model S4000C where prevailing air currents contain the maximum
concentration of gas.
•Locate the Model S4000C near possible sources of gas leaks.
•Observe the Model S4000C’s temperature specification and locate the unit away from
concentrated sources of heat.
4

S4000C
5
•Transmitters should be mounted in an area that is as free from wind, dust, water, shock,
and vibration as possible. See Section 9.3.4 for the environmental specifications of the unit.
If the sensor cannot be located away from dust and rain, then we recommend the use of
our splash guard GM P/N 10395-1 to help protect the sensor.
Sensors may be adversely affected by prolonged exposure to certain materials. Loss of
sensitivity or corrosion may be gradual if such materials are present in low concentrations, or it
may be rapid at high concentrations. The more important materials adversely affecting sensors
are:
•Constant presence of high concentrations of Hydrogen Sulfide (H2S) gas
•Silicones (often contained in greases and aerosols)
•Halides, compounds containing Fluorine, Chlorine, Bromine and Iodine
•Heavy metals, e.g. Tetraethyl Lead
•Caustic and acidic liquids and vapors
The presence of poisons and contaminants in an area does not necessarily preclude the use of
a Model S4000C Intelligent Sensor. The feasibility of using a sensor in such areas must be
determined by an analysis of the specific factors in each application and General Monitors
should be consulted before attempting any such installation.
Sensors used in these areas usually require more frequent calibration checks than normal, and
typically have a shorter life. In many such applications, the standard two-year warranty would
not apply.
WARNING: General Monitors discourages the painting of sensor assemblies. If the sensor
head is painted over, the gas will not be able to diffuse into the sensor. If the
assembly cover is painted over, the digital display cannot be read.
3.3.1 Remote Mounting of the Sensor from the Electronics
If it is necessary to remotely mount the sensor from the electronics and the housing, the
maximum distance can be no greater than 7600 feet, using 14 AWG wire. Sensors that are
remotely mounted must be placed in an explosion-proof rated sensor housing (GM P/N 10252-
1), and the cable run must be contained in conduit running from the sensor housing to the
electronics. See Section 9.7 for FMRC approval requirements.
3.4 Mounting and Wiring
WARNING: The conduit entries should be sealed per the NEC 500-3d or Canadian Electrical
Code Handbook (Part 1, Section 18-154). Additional benefit of conduit seals is
the prevention of water entering the housing through the conduit entry.
WARNING: Unused cable entry holes must be sealed with an approved explosion-proof
stopping plug. Red caps supplied by General Monitors are for dust protection
only, and must not be left on the unit when installed.

S4000C
6
The overall and mounting dimensions for the Model S4000C (Figure 5) should be used when
making installation determinations. A complete list of the mechanical specifications can be
found in Section 9.3.2.
To prevent possible corrosion due to moisture or condensation, it is recommended that the
conduit connected to the Model S4000C housing be sealed, or contain a drain loop. Each
conduit run from a hazardous location to a non-hazardous location should be sealed so that
gases, vapors, and/or flames cannot pass beyond the seal. The purpose of seals in a Class I
hazardous location is to prevent the passage of gases, vapors, or flames from one electrical
installation to another through the conduit system.
It is not necessary to seal the Model S4000C housing to maintain its explosion-proof integrity;
however, conduit runs containing wires attached to the Model S4000C’s relay contacts must be
sealed (Section 3.5).
Information on Class I location seals can be found in the NEC, Article 501-5.
WARNING: Acetic acid will cause damage to metal components, metal hardware, ceramic
IC’s, etc. If damage results from the use of a sealant that outgases acetic acid
(RTV silicone), the warranty will be void.
Figure 5: Outline and Mounting Dimensions
Once correctly installed, the Model S4000C requires little or no maintenance, other than
periodic calibration checks to ensure system integrity. General Monitors recommends that a
schedule be established and followed.
NOTE: The system’s full two-year warranty will be voided if customer personnel or third parties
damage the system during repair attempts.
Sensor heads exposed to the elements may require the accessory mounting threads to be
lubricated. Grease must not be used. As an alternate, PTFE (Teflon) tape may be used on
sensor accessory threads.

S4000C
7
NOTE: Do not use any material or substance on threads that contact the sensor housing.
The removal of particulate matter from sensor accessories may be done through the use of an
appropriate halogen-free solvent. Water or ethanol are examples of suitable solvents. The
accessories should be thoroughly dried with compressed air, if necessary, before refitting to the
sensor body.
3.5 Terminal Connections
The terminal blocks (TB) are located inside the housing and can by accessed by removing the
cover. A label on the inside of the housing cover provides details of all the terminal
connections.
3.5.1 Terminal Block TB1 – Sensor Connections
TB1 contains the three sensor connections, white (W), black (B), and red (R). Remove the
display board by loosening the two captive screws on the board and lifting it straight up.
Connect the color-coded wires from the combustible sensor to the matching colored terminals
on TB1. The label on the inside of the cover can serve as a guide. Replace the display board
by pressing it into place, and tightening the two captive screws.
WARNING: Do not connect +24VDC to TB1. Damage to the electronics may result.
3.5.2 Terminal Block TB2 – Power and Signal Connections
TB2 contains the connections for Power, Relay Reset, Remote Calibration, MODBUS and 0-
20mA Output Signal. The terminal connections are as follows:
TB2 position Function
1 0-20mA Output
2 CH1 MODBUS -
3 CH1 MODBUS +
4 CH2 MODBUS -
5 CH2 MODBUS +
6 Remote Calibration
7 Relay Reset
8 Ground
9 +24VDC Power
Table 1: TB2 Power and Signal Connections
It is recommended that a three-wire (red, black, white) shielded cable be used for making
power and output signal connections on the Model S4000C. The Spring Type terminal block
accepts 14 AWG to 20 AWG and the Screw Type terminal block accepts 12 AWG to 18 AWG
stranded or solid wire. Each wire should be stripped before wiring the Model S4000C Intelligent
Sensor. To connect wiring to the Spring Type terminal block, insert a screwdriver into the
orange tab and press down (Figure 6), opening the terminal. Insert the wire into the terminal
and release the orange tab, clamping the wire in the terminal. Check the hold of the wire by
GENTLY tugging it to ensure it is locked in.

S4000C
8
To connect wiring to the Screw Type terminal block, (Figure 7) use a screwdriver to loosen the
top screw counter clock wise. Insert the wire into the terminal and tighten the top screw clock
wise. Check the hold of the wire by GENTLY tugging it to ensure it is locked in.
Figure 6: Spring Type Terminal Block Operation
Figure 7: Screw Type Terminal Block Operation
Figure 8: Wire Strip Length
NOTE: Up to 12 AWG wire can be used if it is carefully stripped (on a Screw Type terminal)
(Figure 6).
3.5.3 DC Power and Ground Connections
The customer must provide primary DC power unless one of the following General Monitors
Modules is being used with the Model S4000C:
•DC130 Dual-Channel Readout/Relay Display Module
•TA102A Trip Amplifier Module with a PS002 Power Supply & Relay Module

S4000C
9
The following General Monitors Modules provide power connections for the Model S4000C, but
need a customer supplied DC source:
•DC110 Eight-Channel Readout/Relay Display Module
•TA102A Trip Amplifier Module without a PS002
Since the Model S4000C is designed to operate continuously, a power switch is not included, in
order to prevent accidental system shutdown.
NOTE: Power must remain disconnected until all other wiring connections have been made.
The maximum distance between the Model S4000C and the power supply is 3000 feet or 910
meters (each cable run should be as short as possible). See Section 9.3.3 for cable length
specifications. To connect +24VDC to the Model S4000C, connect the red wire to TB2, position
9. Connect the black wire to TB2, position 8. For making power and ground connections to
display devices see Table 2 and Table 3.
FROM TO
Model
S4000C Model
DC110 Model
DC130 Model
TA102A
TB2-8
“COM”
Rear
COMMON
Rear
Pin 3 or 6
“COM”
Rear
Pin 30d or 30z
Table 2: Ground or Common Connections
FROM TO
Model
S4000C Model
DC110 Model
DC130 Model
TA102A
TB2-9
“+24
VDC”
Rear
CH 1 – 8
24V
Rear
Pin 4 or 7
“DC OUT”
Rear
Pin 28d or 28z
Table 3: Power Connections
3.5.4 Analog Signal Connections
The Model S4000C Intelligent Sensor provides a 4 to 20mA output signal. It can be sent up to
9000 feet (2740 meters) to a General Monitors’ readout/relay display module, or an industrial
analog to digital converter, or a computer-based monitor, a PLC, a DCS, etc. The 4 to 20mA
signal provides for control room or other locations remote to the Model S4000C to display
indications of operation and alarm conditions. To connect the 4 to 20mA output signal with
another unit, connect the wire into TB2, position 1, labeled 4-20mA OUT. For making output
signal connections to display devices (Table 4), refer to the specific manual for that device.

S4000C
10
FROM TO
Model
S4000C Model
DC110 Model
DC120 Model
DC130 Model
TA102A
TB2-1
4-20mA
Output
Rear
CH 1 – 8
4-20mA
Rear
TB1
Pin 8 or 9
Rear
Pin 2 or 5
Analog In
Rear
Pin 26d or
26z
Table 4: Analog Signal Connections
If a device other than a General Monitors’ readout/relay display module is being used, the DC
ground, COM, of both systems must be connected together.
3.5.5 Terminal Block TB3 – Relay Connections
TB3 contains the connections for the Relay Contacts (optional). The function for the Warn and
Alarm Relay connections vary according to the normal state of the relay. Use the following as a
guide for determining the Normally Open (NO) and the Normally Closed (NC) contact:
TB3
position Relay Contact
(De-Energized) Relay Contact
(Energized)
1 Normally Closed Normally Open
2 Common Common
3 Normally Open Normally Closed
Table 5: Alarm Relay Connections
TB3
position Relay Contact
(De-Energized) Relay Contact
(Energized)
4 Normally Closed Normally Open
5 Common Common
6 Normally Open Normally Closed
Table 6: Warn Relay Connections
TB3 position Relay Contact (Energized)
7 Normally Open
8 Common
9 Normally Closed
Table 7: Fault Relay Connections
*NOTE: Fault relay is normally energized. Relay will change state after power up.
WARNING: Contact with PCB components should be avoided to prevent damage by static
electricity. All wire connections are made to the Terminal Blocks.
WARNING: Relay contacts must be protected against transient and over voltage conditions
(Figure 9).
Table of contents
Other General Monitors Accessories manuals

General Monitors
General Monitors S4000T User manual

General Monitors
General Monitors 610 Use and care manual

General Monitors
General Monitors S4000CH User manual

General Monitors
General Monitors S214 User manual

General Monitors
General Monitors S104 User manual

General Monitors
General Monitors S216A User manual
Popular Accessories manuals by other brands

Bee-Ball
Bee-Ball ZY-020 instruction manual

Keysight Technologies
Keysight Technologies N6841A user guide

Black Diamond Equipment
Black Diamond Equipment JetForce Instruction and use

Holman
Holman EVIE WX8RS user guide

Brüel & Kjaer Vibro
Brüel & Kjaer Vibro DS821 Series instructions

EZ CONNECT
EZ CONNECT EZ Button Getting started