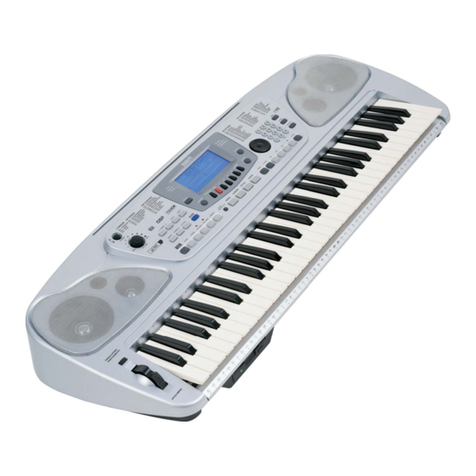
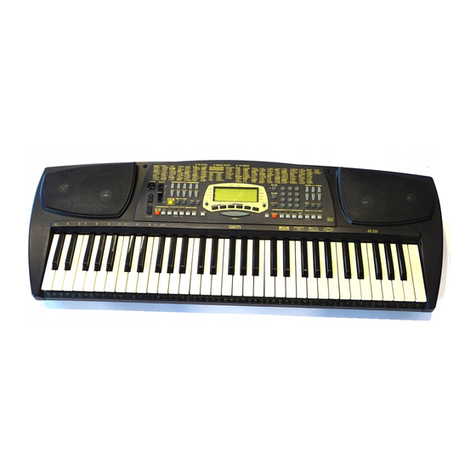
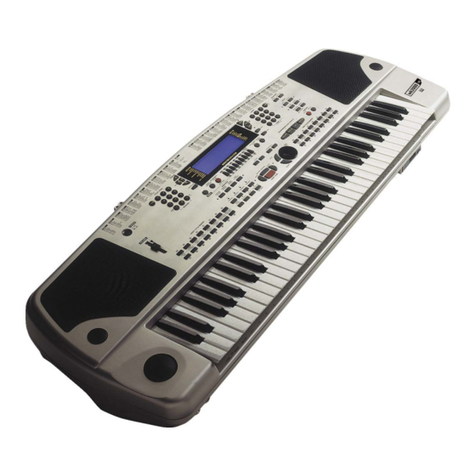
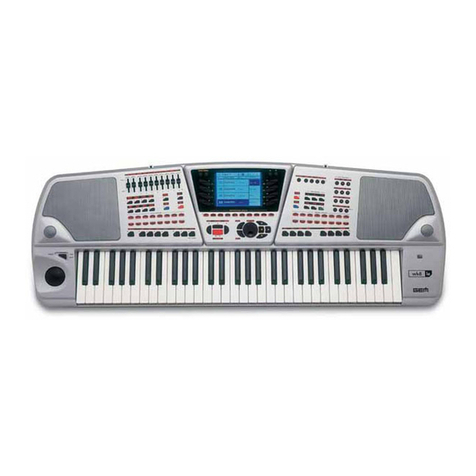
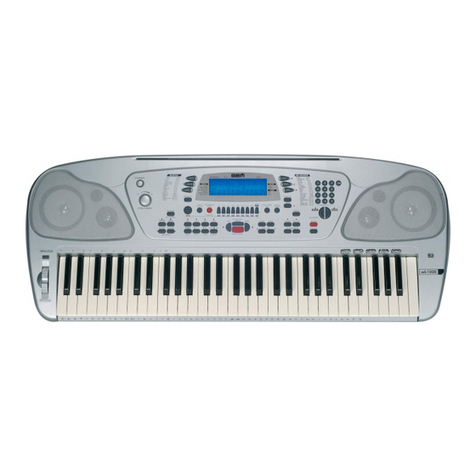
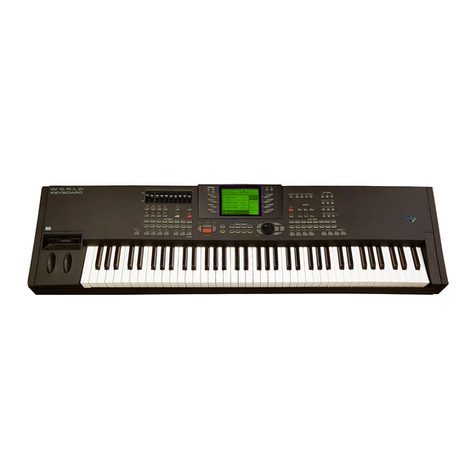
Generalmusic WK4 User manual

Cod. 271054
English
OWNER’S
MANUAL

CAUTION
RISK OF ELECTRIC SHOCK
DO NOT OPEN
The lightning flash with arrowhead symbol,
within an equilateral triangle, is intended to alert
the user to the presence of uninsulated “dan-
gerous voltage” within the product’s enclosure
that may be of sufficient magnitude to consti-
tute a risk of electric shock to persons.
The exclamation point within an equilateral tri-
angle is intended to alert the user to the pres-
ence of important operating and maintenance
(servicing) instructions in the literature accom-
panying the product.
CAUTION: TO REDUCE THE RISK OF
ELECTRICSHOCK,DONOTREMOVECOVER
(ORBACK).NOUSER-SERVICEABLEPARTS
INSIDE. REFER SERVICING TO QUALIFIED
SERVICE PERSONNEL.
IMPORTANT SAFETY INSTRUCTIONS
INSTRUCTIONS PERTAINING TO A RISK OF FIRE, ELECTRIC SHOCK OR INJURY TO PERSONS
1. Read all the instructions (Safety, Installation and FCC if applicable) before using the product.
2. Do not use this product near water (example, near a swimming pool, spa, tub, sink or wet basement) and do not
expose to rain.
3. This product should be used only with a cart or stand that is recommended by the manufacturer, or should be
used with the components supplied. If this product requires assembly before being played, take special care to
follow the assembly instructions found at the back of the manual.
4. This product, whether alone or in combination with an amplifier and headphones or speakers, may be capable
of producing sound levels that could cause permanent hearing loss. Do not operate for long periods of time at a
high volume level or at a level that is uncomfortable. If you experience any hearing loss or ringing in the ears,
you should consult an audiologist.
5. WARNING: Do not place this product or any other objects on the power cord, or place it in a position where
one could walk on, trip over or roll anything over power or connecting cords of any kind.
6. This product should be located so that its location does not interfere with its proper ventilation.
7. This product should be located away from heat sources such as radiators, heat registers, or other products that
produce heat.
8. This product should be connected to a power supply only of the type described in the operating instructions or
as marked on the product.
9. This product may be equipped with a polarised line plug (one blade wider than the other). This is a safety
feature. If you are unable to insert the plug into the wall outlet, contact an electrician to replace your obsolete
outlet. Do not defeat the safety purpose of the plug.
10. The power supply cord of the product should be unplugged from the outlet when left unused for long periods of
time.
11. Care should be taken so that objects do not fall and liquids are not spilled into the enclosure through openings.
12. This product should be serviced by qualified service personnel when:
a) the power supply cord or the plug has been damaged; or
b) objects have fallen, or liquid has been spilled into the product; or
c) the product has been exposed to rain; or
d) the product does not appear to operate normally or exhibits marked changes in performance; or
e) the product has been dropped, or the enclosure damaged.
13. Do not attempt to service the product beyond that described in the user-maintenance instructions. All servicing
should be referred to qualified service personnel.
14. Some products may have benches and/or accessory mounting fixtures that are either supplied as part of the
product or as optional accessories. Please ensure that benches are correctly assembled and stable and any
optional fixtures (where applicable) are well secured before use.
15. Electromagnetic Interference (RFI) This electronic product utilises digital sample wave processing technology
(S.W.P.) that may adversely affect radio/TV reception. Read the FCC note on the inside back cover of the
owner’s manual for additional information.
SAVE THESE INSTRUCTIONS

○○○○○○○○○○○○○○○○○○○○○○○○○○○○○○○○○○○
Contents i
Contents
USER GUIDE
• 1 Quick Guide
Introduction i
Power up 1. 1
Adjusting the general volume 1. 2
The initial status (default) 1. 2
Play with Auto Accompaniment Styles 1. 3
Listen to the Demo Songs 1. 5
Multimedia 1. 6
Selecting instrument Sounds 1. 8
Selecting the Performances 1. 11
Play the Programmable Pads 1. 12
Play with Effects or bypass them 1. 12
Play with headphones 1. 13
Play with the pedals 1. 13
Play with the wheels 1. 14
Reverb control 1. 15
Equalization 1. 15
Transpose the instrument (Semitones) 1. 16
Transposing tracks by octaves 1. 17
Preload 1. 18
Record a Song - Quick Rec Recording 1. 20
• 2 Front & Rear Panel
Front Panel 2. 3
Rear Panel (Connections) 2. 9
• 3 Basic concepts
Connections 3. 7
The Display 3. 10
Data Entry 3. 18
User Configurations 3. 23
• 4 Sounds and Performances
Selecting single Sounds 4. 2
Selecting Performances 4. 4
Select Sounds, Performances or Styles using Display Hold 4. 5
How to Program Performances 4. 6
How to Store Performances 4. 16
Restoring the original Performance settings 4. 22
• 5 Styles
Selecting Styles 5. 1
The accompaniment tracks 5. 5
The Style controls 5. 6
The chord recognition modes (Arrange Mode) 5. 9
Dynamic Arrange 5. 13
Autobacking 5. 13
Tempo 5. 19
Restoring the Style-Performances 5. 20

○○ ○○○○○○○○
ii Contents
• 6 Disk & Hard disk
The general «Disk» procedure 6. 5
Load Operations 6. 8
Save operations 6. 21
General disk handling information 6. 35
• 7 Songs & MIDI files
What is a Song 7. 1
What is a MIDI File 7. 1
Selecting Songs 7. 4
Song Playback/Jukebox 7. 5
«Play view» parameters 7. 7
Play view Soft buttons 7. 9
Jukebox Soft buttons 7. 11
To display score, chords and lyrics (Score button) 7. 11
Rapid Song recording (QuickRec) 7. 17
Restoring the Songs memory 7. 22
• 8 MIDI
Playing WK4 with a master keyboard 8. 4
WK4 used as a controlling device 8. 7
Programming Songs on an external sequencer 8. 8
• 9 Digital Signal Processor
Selecting the effect types 9. 2
Bypassing the effects 9. 4
Regulating the Send levels 9. 5
REFERENCE GUIDE
• 10 Selection/Help
Selecting Performances 10. 1
Selecting Styles 10. 2
Selecting Sounds 10. 3
Selecting Songs 10. 6
Selecting Song-Performances 10. 7
Display Hold 10. 8
Effects Off 10. 8
Help 10. 9
• 11 Recording a Song
The Quick Rec method 11. 2
The Record method 11. 3
The «Record View» page in detail 11. 6
• 12 User Style recording
Recording 12. 2
The «Record View» page in detail 12. 5
• 13 Edit overview
How to navigate through the Edit pages 13. 1
The Edit Pages 13. 2
Memorizing modifications to a Performance 13. 4
• 14 Edit Effects
Effects type 14. 1
Send Level 14. 2
General Eff 1 balance 14. 2

○○○○○○○○○○○○○○○○○○○○○○○○○○○○○○○○○○○
Contents iii
Effects programming 14. 3
Effect 1 - Reverb table 14. 5
Effect 2 - Modulation table 14. 6
• 15 Edit MIDI
MIDI Channels 15. 1
Configuration 15. 2
MIDI Filters 15. 3
General settings 15. 3
Common Channel/Arrangement 15. 6
MIDI Dump 15. 7
Local Off 15. 9
MIDI Lock 15. 9
• 16 Edit Mixer
Volume 16. 1
Pan 16. 1
Random pan 16. 2
Audio Out 16. 2
Equalizer 16. 3
• 17 Edit Controllers/Pads
Wheels 17. 1
Pedals Programming 17. 2
Pads & Ped/Pads Lock 17. 3
The Switch Pedal Functions 17. 4
The Continuous Pedal Functions 17. 5
• 18 Edit Tracks/Splits
Transpose 18. 1
Master Transpose enable/disable 18. 1
Detune 18. 2
Random Pitch 18. 2
Mode/Priority 18. 3
Velocity curve 18. 3
Velocity Range 18. 4
Harmony 18. 4
Delay 18. 6
Key Range 18. 6
Create Track 18. 7
Copy Track 18. 7
Erase Track 18. 8
• 19 Edit PerfSound/Sound Patch
Edit Perf Sound 19. 2
Edit Sound Patch 19. 5
• 20 Option 20. 1
Option 20. 1
• 21 Edit General
General controls 21. 2
Tuning/Scale 21. 2
Pedalboard/Computer 21. 4
Date & Time 21. 5
Display controls 21. 6
Mic/Line Input 21. 6

○○ ○○○○○○○○
iv Contents
Battery & Release 21. 9
System Info 21. 9
Restore 21. 9
• 22 Edit Song
The main Menu Options 22. 2
Erase 22. 3
Move 22. 5
Copy 22. 6
Quantize 22. 8
Insert measures 22. 10
Delete measures 22. 11
Velocity 22. 12
Transpose 22. 13
Microscope 22. 14
Master Track 22. 17
Score & Edit Score 22. 20
• 23 Edit Style
Erase 23. 3
Move 23. 5
Copy 23. 6
Quantize 23. 8
Insert Measures 23. 10
Delete measures 23. 11
Velocity 23. 12
Transpose 23. 13
Microscope 23. 14
Mask 23. 17
• 24 Preload
Playback all the Songs or MIDI Files on disk 24. 1
Create a Preload list 24. 2
The Preload functions 24. 3
• 25 Edit Disk & Hard Disk
Erase 25. 2
Copy 25. 4
Move 25. 6
Utility 25. 8
Additional functions 25. 12
APPENDIX
Tables (Sounds, Drumkits, Styles, Performances, Effects,) A. 1-21
MIDI Implementation chart A. 22
MIDI Controllers A. 24
Glossary A. 25
Index (alphabetical) A. 29

User
Guide
• Introduction
• 1 Guick Guide
• 2 Layouts
• 3 Basic concepts
• 4 Sounds & Performances
• 5 Styles
• 6 Disk & Hard Disk
• 7 Songs & MIDI Files
• 8 MIDI
• 9 Effects

○○○○○○○○○○○○○○○○○○○○○○
User Guide
Generalmusic on Internet: http://www.generalmusic.com
The information in this publication has been carefully prepared and checked. The manufacturers however decline
all liability for eventual errors. All rights are reserved. This publication may not be copied, photocopied or
reproduced in part or in whole without prior written consent from Generalmusic S.p.A. Generalmusic reserves the
righttoapplyanyaesthetic,designorfunctionmodificationsitconsidersnecessarytoanyofitsproductswithoutprior
notice. Generalmusic declines all liability for damage to property or persons resulting from improper use of the
instrument.
MakesurethatallinternalelectronicoptionsareinstalledbyanauthorizedGeneralmusicservicetechnician.Check
with an authorized Generalmusic dealer for information on the closest service center.
Copyright Generalmusic © 1997. All rights reserved.
Products and brand names that are referred to in this publication (Apple, IBM, Macintosh, Microsoft, MS-DOS,
Windows) may either be trademarks and/or registered trademarks of their respective owners. The Publisher/s and
Author/s make no claim to these trademarks.
IMPORTANT INFORMATION
1. The WK4 should contain the following items from the factory:
a) Instrument;
b) 3 Floppy disks (1 Operating System (OS) -Disk, 2 Demo disks);
c) Owner’s manual.
2. When contacting your retailer or authorized Generalmusic technical assistance center, always pro-
vide the model name and serial number of your instrument (found on the identification plate).

○○○○○○○○○○○○○○○○○○○○○○
Introduction i
INTRODUCTION
Congratulations, and thanks for purchasing Generalmusic’s WK4 World Keyboard! Your World Key-
board is packed with high quality sounds and auto accompaniments, advanced professional features
and a simple user interface with a graphic display allowing total control of all the performance and
programming activities.
MULTIMEDIA FACILITIES
The WK4 is a multimedia keyboard workstation which offers several ways of interfacing with the instru-
ment. With the optionalA/V board, a guitar player can connect to the audio inputs of the WK4 and play
the chords which appear on a monitor connected to the instrument’s video outputs, and mix his sounds
with those of the workstation (complete with effects processing!). At the same time a group of singers
can follow the lyrics projected on a television (or other video projection device) by the WK4 video
interface.
THE OWNER’S MANUAL
The Owner’s Manual is supplied as a 3-ring binder with instructions inserted inside.
How to use the manual
Do not use it as a paperweight: read it. If you understand how WK4 operates, you can save a lot of time.
You are encouraged to experiment with alternative operating methods: the
WK4 is sufficiently flexible to
permit several approaches to obtain the same results. This User Guide offers information on three
different levels of complexity: as numbered pictures or images, as brief instructions and as detailed
instructions. You can limit yourself to following the images only, or by reading the bold black type, or by
referring to the normal text containing detailed instructions.
The second part of the manual contains the Reference Guides which describe the instrument’s func-
tions in detail without discussing procedures. Experienced users can limit themselves to the reference
chapters.
1
2ndlevel - procedurein
conciseform
3rdlevel -detailed
instructions 1st.level -numbered
images
1. Insert the disk in the disk drive.
The first step in loading songs from a
disk is to insert a disk containing com-
patible songs into the disk drive of the
WK. This instrument is compatible with
WX Series songs, Standard MIDI Files
and of course, WK Series songs.

○○○○○○○○○○○○○○○○○○○○○○
ii Introduction
SPECIFICATIONS
• Polyphony/multitimbral capabilities
Maximum polyphony: 64 voices. Multitimbric-
ity: 16 parts (Style/RealTime modes) or 32
parts (Song mode). Each part is assigned to
a track. In Style/RealTime mode 8 tracks are
assigned to the keyboard and the other 8 to
the auto-accompaniment section.
• Sound generation
Based on sampled waveforms (Wave), modi-
fied by programmable digital filters (DCF, Dig-
itally Controlled Filters). Waves are assigned
singularly or in pairs up to a maximum of 3
Layers, to obtain Sounds consisting of a max-
imum of 6 Waves per voice.
• ROM-Sounds
ROM (permanent memory) contains 8 mega-
bytesofsamples,whicharethesource of over
600 ROM-Sounds.
• RAM-Sounds
You can load disk-based RAM-Sounds based
on samples contained in ROM. RAM Sounds
canbesuppliedby Generalmusic, by thirdpar-
ties, or can be created by the user with the
optional sound editor program. Sounds can
be loaded from WK4 or WX/SX Series disks.
• Performance-Sounds
The “Edit Perf Sound” and “Edit Sound Patch”
functionspermitsquickmodification of Sounds
and Drumkits to produce “Performance-
Sounds”. The modifications are stored in Per-
formance tracks to allow Songs, Styles or Per-
formances to load the correct sounds.
• System-RAM
System-RAM is the microprocessor memory
zone, also used to store Songs, programma-
bleStyles,Performances andRAM-Soundsaf-
ter powering up the instrument. It is backed
by a rechargeable battery. The amount of
available memory to store the data is approx.
1.9 megabytes (1.6 Mb as standard System-
RAM boosted to 1.9 Mb by a DRAM included
with the instrument).
• Backed S-RAM (optional)
WK4 can be fitted with an optional 2 mega-
bytes of RAM for samples (Waves), backed
by a Ni-Cd battery to retain data after turning
offtheinstrument. Sample-RAMallowsto load
new samples (Waves) on which RAM Sounds
can be based.
• Volatile Sample RAM (optional)
It is possible to install up to 32 megabytes of
additional Sample-RAM via standard 30 pin
computer SIMMs obtainable from most com-
puter outlets.
• Digital Effects Processor
Four Digital Effects Processors, controlled in
realtime, enrichthesound witheffects(reverbs
and modulations). A flexible matrix allows dif-
ferent effects to be assigned to every track.
• Sequencer
The 32 track sequencer has a Microscope
function (microscopic edit) and Score facility
(to display Score, chords and Lyrics). The
QuickRec recording method allows the rapid
recording of a Song by using existing Styles.
ThestandardSystem-RAMallows you to store
up to 250.000 events distributed through 16
Songs.
• Jukebox & Preload
The Jukebox function allows you to chain the
Songs in memory and play them one after the
other with a single command. The Preload
function allows you to create a list of disk-
based Songs or MIDI file and play them all by
meansofasingle command, without first load-
ing all data in memory.
• Automatic accompaniment
Styles provide automatic musical accompani-
ments, consisting of 8 tracks. Every Style has
4Variations. Up to 32diskbased Styles(User
programmable) can be loaded and automati-
callystoredin thebatterybacked systemmem-
ory.
• Disk drive
Data can be stored on 3.5" HD floppy disks, in
WK4
expandedformat(1.6megabyte)orstand-
ard MS-DOS (1.44 megabyte). The Atari ST/
Falcon format (720 Kb) can be used for MIDI
file exchanges. WK4 is able to initialize disks
for every format. It is possible to load RAM-
Sounds, Styles, and Songs from WK4, WX2,
○○○○○○○○○○○○○○○○○○○○○○
Introduction iii
SX2 floppydisks. Ifa Sample-RAM isinstalled,
itis alsopossibletoloadnewsamplesfrom disk
(as RAM Sounds). MS-DOS compatibility per-
mits MIDI file exchange with other instruments
and computers.
• Hard disk (optional)
It is possible to install a 2.5” IDE or E-IDE in-
ternal hard disk (max. 500 megabytes). The
installation requires the Generalmusic HD in-
stallation kit.
The hard disk operating functions include an
integral test and a data restoring procedure,
torecoverdamaged data. Compared to aflop-
pydisk,the harddiskhas faster accessspeeds
and provides for improved data protection.
The installation kit is available from authorized
Generalmusic stores and should be installed
by a qualified service technician. A compati-
bleIDEhard drivecanbe purchased frommost
computer outlets.
• Multitasking operating mode
The Multitasking operating system allows you
to execute several operations simultaneous-
ly, such as modifying sounds while a song is
playing, loading a song during song play, for-
matting a disk while playing.
• Up-dateable operating system (OS)
Since the operating system resides in a flash-
ROM, it is possible to load updates from flop-
py disk. Operating system updates can add
new functions to the instrument.
• Score view
The display can show the score, the lyrics and
chord symbols of a song.
It is also possible to connect WK4 to a video
system (monitor, domestic TV, closed circuit
video) by means of the optional Generalmusic
Audio/Video board to display score and lyrics
on a television. Lyrics can be projected onto
a television or other video devices during a
performance to allow others to sing with the
player.
• Audio inputs
With the optional A/V board, it is possible to
connect a microphone, another instrument, a
mixer or hi-fi outputs to the WK4 audio MIC/
LINE IN inputs. The optional Generalmusic
Audio/Video board sends the input signals to
the WK4 internal Digital Effects processor.
• Advanced MIDI operation
WK4 has two independent MIDI circuits (A and
B), offering up to 32 MIDI channels, with MIDI-
merge and MIDI-thru functions.
• Direct connection with a computer
The Computer jack permits the connection of
computers not fitted with a MIDI interface to
WK4 via a single serial cable.

○○○○○○○○○○○○○○○○○○○○○○
iv Introduction
IMPORTANT PRELIMINARY NOTES
Observe these important preliminary notes before using your instrument
AVOID PLACING DISKS NEAR MAGNETS - Do not place floppy disks on top of speakers, near mag-
nets, telephones, or other sources of electromagnetic fields. The disk contents could be damaged.
MODELS WITH OPTIONAL HARD DISK INSTALLED- the hard disk may appear to operate rather
slowly the first time you open its directory. This is caused by operations relating to the organization of
the internal data and tests on the integrity of the device. The delay is eliminated on all successive hard
disk access operations. You may also find that the Hard Disk is write protected - this is merely a
precuationary measure to avoid accidental erasure of any factory-loaded files. The protection is re-
moved in the Disk Utlity page.
UP-DATEABLE OPERATING SYSTEM - A disk containing the operating system is supplied with the
instrument. The disk can contain a more recent version of the operating system than the one contained
in the instrument’s Flash ROM.
To load the operating system contained on the floppy disk:
(1) turn off the instrument, (2) insert the floppy disk in the drive, (3) turn on the instrument, (4) When the
message «Loading OS-disk clears all memory!! ENTER to load, ESCAPE to abort» appears, press
ENTER to start the OS update, (5) wait while the operating system is being loaded, (6) when the mes-
sage «Loading successful (Enter to continue)» is displayed, press ENTER.After completing this proc-
ess, proceed with the power-up reset that follows below to insure proper operation.
RESETTING AT POWER UP - If the data contained in the instrument’s memory has been damaged,
either by being exposed to the effects of a strong magnetic field, or other unknown reason, the instru-
ment may not operate properly. The remedy is a power-up reset:
(1) Turn on the instrument while simultaneously pressing the POWER switch and rotating the DIAL, (2)
when the message «!!WARNIING!! Dial on Power-Up Requests MEMORY CLEAR !! < ENTER to
CLEAR / ESCAPE to abort>» appears, press ENTER to clear the MEMORY.
1
+
TEMPO /DA
TA
2!!WARNIING!! Dial on Power-Up
Requests MEMORY CLEAR !!
< ENTER to CLEAR / ESCAPE to abort
POWER
ON
OFF
ENTER
ESCAPE

○○○○○○○○○○○○○○○○○○○○○○
Introduction v
BEFORE STARTING - CONSERVING DATA IN RAM
The rechargeable battery
The WK4 conserves the data in RAM after turning off, thanks to a rechargeable battery. The battery is
recharged while the instrument is turned on (not just plugged in!).
When the instrument is turned off, if the battery is at maximum charge level, the data in RAM is con-
served for about two weeks. The charge of the battery increases by one day for every hour the instru-
ment is left on, until the maximum level is reached. If the battery discharges, leave the instrument on for
at least 15 hours to recharge it completely.
To increase the efficiency of the rechargeable battery, repeat the complete recharging operation at least
once a month. In most cases, normal use of the WK4 will keep the battery charged.
○○○○○○○○○○○○○○○○○○○○○○○○○○○○○○○○○○○○○○○○○○○○○
WARNING- Sounds based on sample RAM (RAM ~ -Sounds) are conserved after power down only if the
Backed Sample-RAM is installed. If the volatile Sample-RAM is installed, the Sounds and samples will be lost at
power down (much like typical computer memory). If desired, these Sounds can be reloaded from disk after
○○○○○○○○○○○○○○○○○○○○○○○○○○○○○○○○○○○○○○○○○○○○○
powering up the instrument again
○○○○○○○○○○○○○○○○○○○○○○○○○○○○○○○○○○○○○○○○○○○○○
○○○○○○○○○○○○○○○○○○○○○○○○○○○○○○○○○○○○○○○○○○○○○
Note: It is possible to load RAM ~-Sounds (totally new Sound Waves) only if the Sample-RAM is installed.
What remains in memory and what is cancelled
Stored after turning off Not stored after turning off
Performances
Modified Style-Performances
User Styles (User buttons)
Songs
Setup (general settings)
RAM-Sounds (based on samples in ROM)
RAM -Sounds (based on samples in
Backed S-RAM
) RAM -Sounds(basedonsamplesin
VolatileS-RAM
)
Samples in
Backed S-RAM
Samples in
Volatile S-RAM
The status of the following buttons also remain memorized:ARRANGE ON/OFF,ARRANGE MEMORY,
LOWER MEMORY, TEMPO LOCK, MIXER LOCK, BASS TO LOWEST and the ARRANGE MODE
settings.

○○○○○○○○○○○○○○○○○○○○○○
vi Introduction
RAM reset
If you want to recall the factory settings, you can reset the backed RAM.
1. Press GENERAL in the EDIT section to enter the “Edit General” menu.
2. Press F4 to select the “Restore all” command. The following dialogue window is displayed.
3. Press ENTER to confirm the initialization, or ESCAPE to cancel the procedure. If the procedure is
confirmed, the instrument can be played after few seconds.
Battery discharged message
If the instrument has been left turned off for a long period of time, the battery will slowly discharge.
When the battery discharges completely, it causes the total loss of all user programmed data.
If the battery has lost its charge completely, turning the instrument on will show the following message:
The message cancels automatically after 2/3 seconds. After the message cancels, be sure to save all
of your edited work to disk until after the battery has sufficiently charged. Leave the instrument on for a
few hours to recharge the battery (one day charge for each hour of recharging-maximum of 15 days
charge).
If you foresee leaving the instrument turned off for a long period of time, be sure to save all user-
programmed data to disk to safeguard your data against automatic erasure due to battery discharge.

○○○○○○○○○○○○○○○○○○○○○○
Quick Guide 1•1
• 1 Quick Guide
1
POWER
ON
OF
F
CONTRAST
2
3
POWER UP
1. Besurethatthe powerswitchontherear panel
is in the “OFF” position before connecting the
powercord.
2. Insert the instrument’s power cord into a suit-
ablegroundedwalloutlet.
○○○○○○○○○○○○○○○○○○○○
Note: If you want to use external amplification,
connect the stereo audio outputs (Left, Right) to
your amp. system (mixer, powered speakers, etc.)
using audio cables with standard 1/4” jacks. Use
RCA jacks to connect to domestic stereo units. For
mono reproduction, connect to either the Left or
○○○○○○○○○○○○○○○○○○○○
Right jack.
3. Pressthepower switch to turn on
WK4
.
After a few seconds the instrument sets to
the default situation.
Ifnecessary,regulatethedisplaycontrastwith
theDISPLAYCONTRASTpanelknobon the
left of the display. Different viewing angles
mayrequireanadjustment of thedisplaycon-
trast. The display reaches its maximum
brightness a few minutes after turning on.
At this point, WK4 is ready to play.
Automatic loading at power up
It is possible to load a Block of data automati-
cally from disk at power up. Change the name
oftheBlock to loadinAUTOLOAD.BLK(usecapi-
tal letters only). At power up, if the floppy-disk
containing the AUTOLOAD.BLK file is inserted
in the drive, the Block is loaded in RAM.
○○○○○○○○○○○○○○○○○○○○
WARNING - The automatic AUTOLOAD.BLK
loading procedure replaces all the data conserved
○○○○○○○○○○○○○○○○○○○○
in System RAM.

○○○○○○○○○○○○○○○○○○○○○○
1•2 Quick Guide
THE INITIAL STATUS (DEFAULT)
After turning on, WK4 sets to Style/Performance
mode with the Grand Piano Performance ready
to play across the full keyboard. This Perform-
ance corresponds to the first slot in bank 1 of the
Performance Groups section. WK4 defaults to
this mode every time you turn on the instrument.
The status bar shows the name of the current
Style and Performance, the tempo, the locator
andthecurrentAccompanimentChordselection.
The menu shows the track status options (Full
Keyboard [selected], Upper & Lower, Multi) and
the soft button to select the Split Point.
Let’s go through some of the basic operations
that you can carry out after powering up.
Performancename
Stylename
statusbar
Sound
name
Tempo Locator
Stylechord
zone
M.VOL MIC/LINE
MAX
MIN
ADJUSTING THE GENERAL VOLUME
Adjust the general volume with the M. VOLUME
slider.
Ifyou are usingheadphones, a comfortable level
is around half way of the slider’s travel distance.
If you are using external amplification, better re-
sults are obtained by adjusting the volume with
mixer or amplifier controls rather than lowering
the volume of the instrument.
○○○○○○○○○○○○○○○○○○○○
Note: If the Audio/Video interface is not
installed, the Master Volume slider does not affect
○○○○○○○○○○○○○○○○○○○○
the signal fed into the MIC/LINE IN inputs.
○○○○○○○○○○○○○○○○○○○○
WARNING - Playing at high volumes levels
could be harmful to your hearing and could
○○○○○○○○○○○○○○○○○○○○
damage the amplifier and speakers
.

○○○○○○○○○○○○○○○○○○○○○○
Quick Guide 1•3
PLAY WITH AUTO ACCOMPANIMENT
STYLES
WK4has 96autoaccompanimentStyles withfour
Variations four Intros, four Fills and four Endings
for each Style. You can also load up to 32 disk
based user-programmable Styles of your choice
into the 4 PROG banks available.
1. PressSINGLETCH. PLAY.
The ARRANGE ON/OFF and ARRANGE
MEMORY buttons will activate if not already
on.
When SINGLE TOUCH PLAY is on, the
sounds memorized in the Style Performance
are assigned to all the tracks. Selecting a
Style changes the sounds of the accompani-
ment tracks as well as those assigned to the
keyboardsections. Alsorecalledaresettings
relatingtothekeyboardmode and chord rec-
ognition mode for the current Style.
2. PressaStylebuttonintheSTYLEGROUPS(8Beat,
16Beat,Rock,etc.).
3. SelectaStyle.
Use the soft buttons near the Style name in
the DISPLAY (SWING in this example).
4. PresstheSTART/STOPbuttontostarttheaccom-
paniment.
You’ll hear the drum track playing.
1
SINGLE
TCH. PLAY
ARRANGE
ON / OFF ARRANGE
MEMORYLOWER
MEMORYARRANGE
MODE
2
USER. 2
USER. 4
USER. 3
USER. 1
DANCE. 2
DANCE. 1
LATIN. 2
LATIN. 1
TRAD. 2
TRAD. 1
FUNK
ROCK
16. BEAT
8. BEAT
US. TRAD
JAZZ
STYLE GROUP
3
INTRO KEY STARTENDING
START / STOP
4
A
B
C
D
E
F
G
H

○○○○○○○○○○○○○○○○○○○○○○
1•4 Quick Guide
5. Play a chord (at least three notes) below the
ChordSplitPoint(noteB3)tostartStyle play.
A fully orchestrated auto accompaniment
pattern is triggered.
In default conditions, the keyboard’s chord
recognition mode is set to “Fingered 1”. You
can change the chord recognition mode to
“One finer”, “Fingered 2” or “Free 1 & 2”, by
enteringtheARRANGE MODE options. See
the ARRANGE MODE function in the Styles
chapter 5.
6. Playadifferentchord.
Note how the accompaniment pattern is
transposed.
7. Starttoplay a melody with the right hand.
The combination of sounds that play and the
current keyboard mode will depend on the
Style selected.
8. StoptheStyle with Start/Stop or Ending.
Styles are discussed in detail in the relative
chapter afterwards.
5
6/7
8
INTRO KEY STARTENDING
START / STOP
OR

○○○○○○○○○○○○○○○○○○○○○○
Quick Guide 1•5
Demo
Listen to the Demo Songs
You can listen to the automatic playback of your
WK4 to get an idea of what the instrument is ca-
pable of doing.
1. PressDEMOto open the Demo window.
Theleftpartcontainsfour Songs andtheright
part contains three Style medleys and the
«ALL DEMO» command.
2. SelectademosongwiththecorrespondingFunc-
tionbutton.
The selected demo playback starts and
shows up in negative highlight. When the
end is reached, the demo stops.
3. Select the «ALL DEMO» command to chain all
sevendemos.
Playback starts automatically from the first
song shown in the top left hand corner.
Demos not yet played are shown in negative
highlight while those played return positive.
While a demo plays, all the buttons on the
control panel (except DEMO, the Function
buttons and ESCAPE) and the keyboard are
disabled.
4. To stop a demo song without closing the DEMO
display, press the corresponding Function but-
ton.
TostoptheDemoSongandclosetheDEMOdis-
play,press ESCAPE.
Styledemos
Songdemos
1
2
F8
F7
F6
F5
F4
F3
F2
F1
3
4
A
B
C
D
E
F
G
H
A
B
C
D
E
F
G
H
ENTER TEMPO /DA
TA
ESCAPE
DEMO PRELOAD DISK
H. D.
0
+
_
OR

○○○○○○○○○○○○○○○○○○○○○○
1•6 Quick Guide
Multimedia
1/2
3/4
5
WK4 can display Lyrics when playing WK4 & PS
Series Disks. There are a wide variety of disks
that display lyrics when played. No other key-
board brings vision to your music like the
Generalmusic WK4 Series does!
1. PresstheSONGBUTTON.
You will see up to sixteen Song choices in
thedisplay(autoloadthefour song demodisk
provided with the instrument if necessary).
2. Selectthe desiredSONGwiththecorresponding
Softbutton.
3. PressPLAY to start the SONG playback.
4. Press the SCORE button and the score will ap-
pear.
5. Press the F8 soft button to activate the SCORE
CONTROLS.
A
B
C
D
E
F
G
H
SONG
SCORE
PLAY
F8
F7
F6
F5
Table of contents
Other Generalmusic Electronic Keyboard manuals

Generalmusic
Generalmusic WK1000 User manual

Generalmusic
Generalmusic WK2000 SE User manual

Generalmusic
Generalmusic WK 6 User manual

Generalmusic
Generalmusic GK 330 User manual

Generalmusic
Generalmusic SK76 User manual

Generalmusic
Generalmusic WK3 World Keyboard User manual

Generalmusic
Generalmusic gk380 User manual

Generalmusic
Generalmusic GEM GK 340 User manual