owners manual wk2000 se
Page3
Introduction
17
19 20
21
18
22
23
24
25
26
27 28
29 30
31
32
33
34
35
36
37
38
39
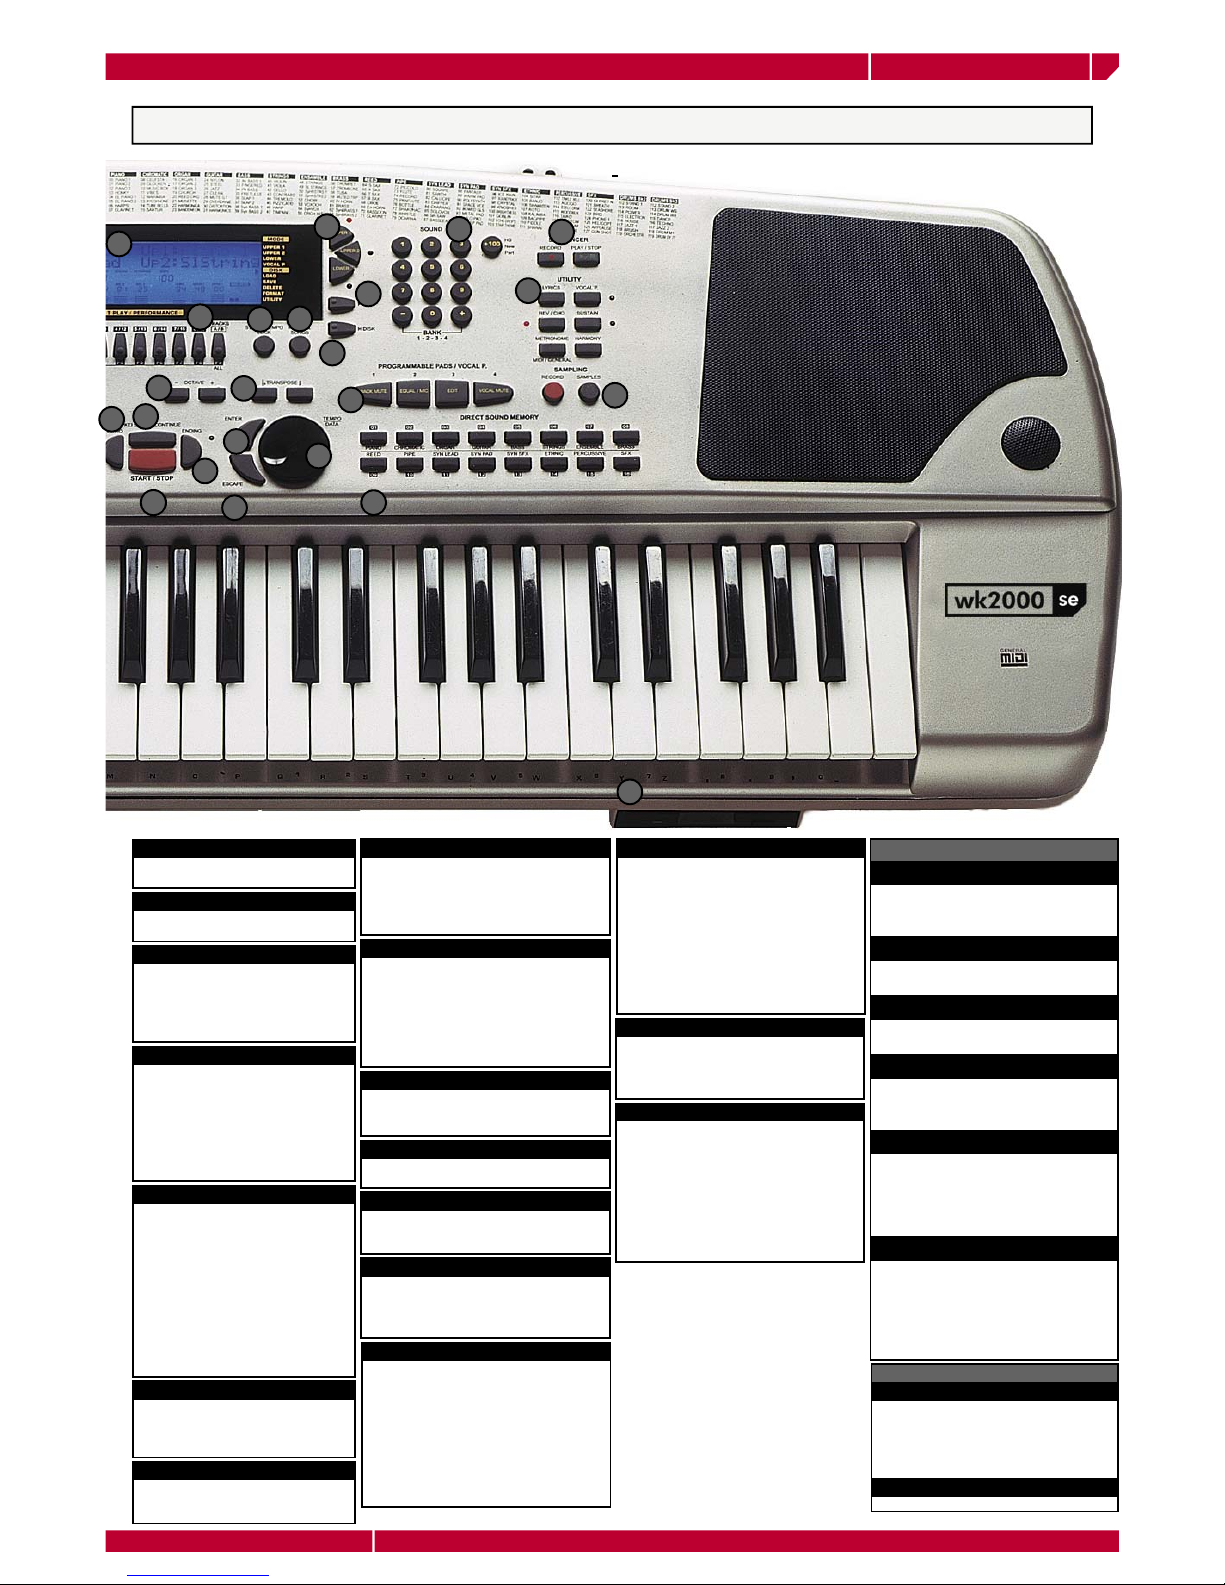
WK2000 SE Front Panel
24 TEMPO/DATA DIAL
In Song, Song Style and Style modes,
the Dial is active for Tempo changes.
When the instrument is set to one of
the edit modes, the Dial operates as
a data entry device.
22 ENTER
Confirms specified data in edit
situations.
23 ESCAPE
Cancels specified data and/or esca-
pes an edit situation.
27 OCTAVE +/-
Shift the selected track over the maxi-
mum range of ±2 octaves. Pressing
+/– buttons at the same time cancels
the setting
28 TRANSPOSE b/#
Shift the pitch of the whole instrument
in semitone steps, (±12 semitones
range).
29 STYLE LOCK
When this function is ON (the display in-
dicates the status), when a Performance is
selected only the keyboard sounds (Lower,
Upper 1 and 2) change, while the accom-
paniment tracks remain unchanged.
29 TEMPO LOCK
When active (display indicator ON), the
current Tempo setting is locked for all Style
changes. When OFF, each Style recalls the
stored DIAL. When Tempo Lock function
is ON, the display will show a flashing “
Tempo” indication that alternates the cur-
rent value with the “Lock” indication.
30 PLAY ALL SONGS
Enabling this function, all the MIDI files
contained in the floppy will be played in
a sequence.
35 DISPLAY
A colored, backlit, LCD multi-function dis-
play simultaneously displays and provides
access to the various parameters. The
user interface shows the current status of
the machine at all times. The ON or OFF
status of the panel keys is shown by cor-
responding indicators or icons that turn on
or off accordingly. Playing a midifile the
display will show the lyrics of the song in
the first two lines (24 characters max.).
31 UPPER1-UPPER 2-LOWER
These buttons enable (led ON) or disable (led
OFF) the realtime keyboard sections.
34 SOUND
Enables (led ON) or disables (led OFF) the
numeric keypad to recall Sounds (00-127)
including the Drumkits located in banks 2,
3 and 4), referred to the silk screened val-
ues written above in the panel. Three-digit
numbers are selected by first pressing the
[+100] button, then the remaining two digits.
The sound banks 1, 2, 3 and 4) are selected
in cyclic order by pressing the + / – buttons
simultaneously.
32 FLOPPY DISK
Enters the disk drive operating functions (Load,
Save, Delete, Format) when transferring data
to disk (SAVE), or from disk (LOAD).
33 HARD DISK
Enters the Hard Disk operating functions
(Load, Save, Delete, Format and Utility)
which allow you to organise the Hard
Disk data.
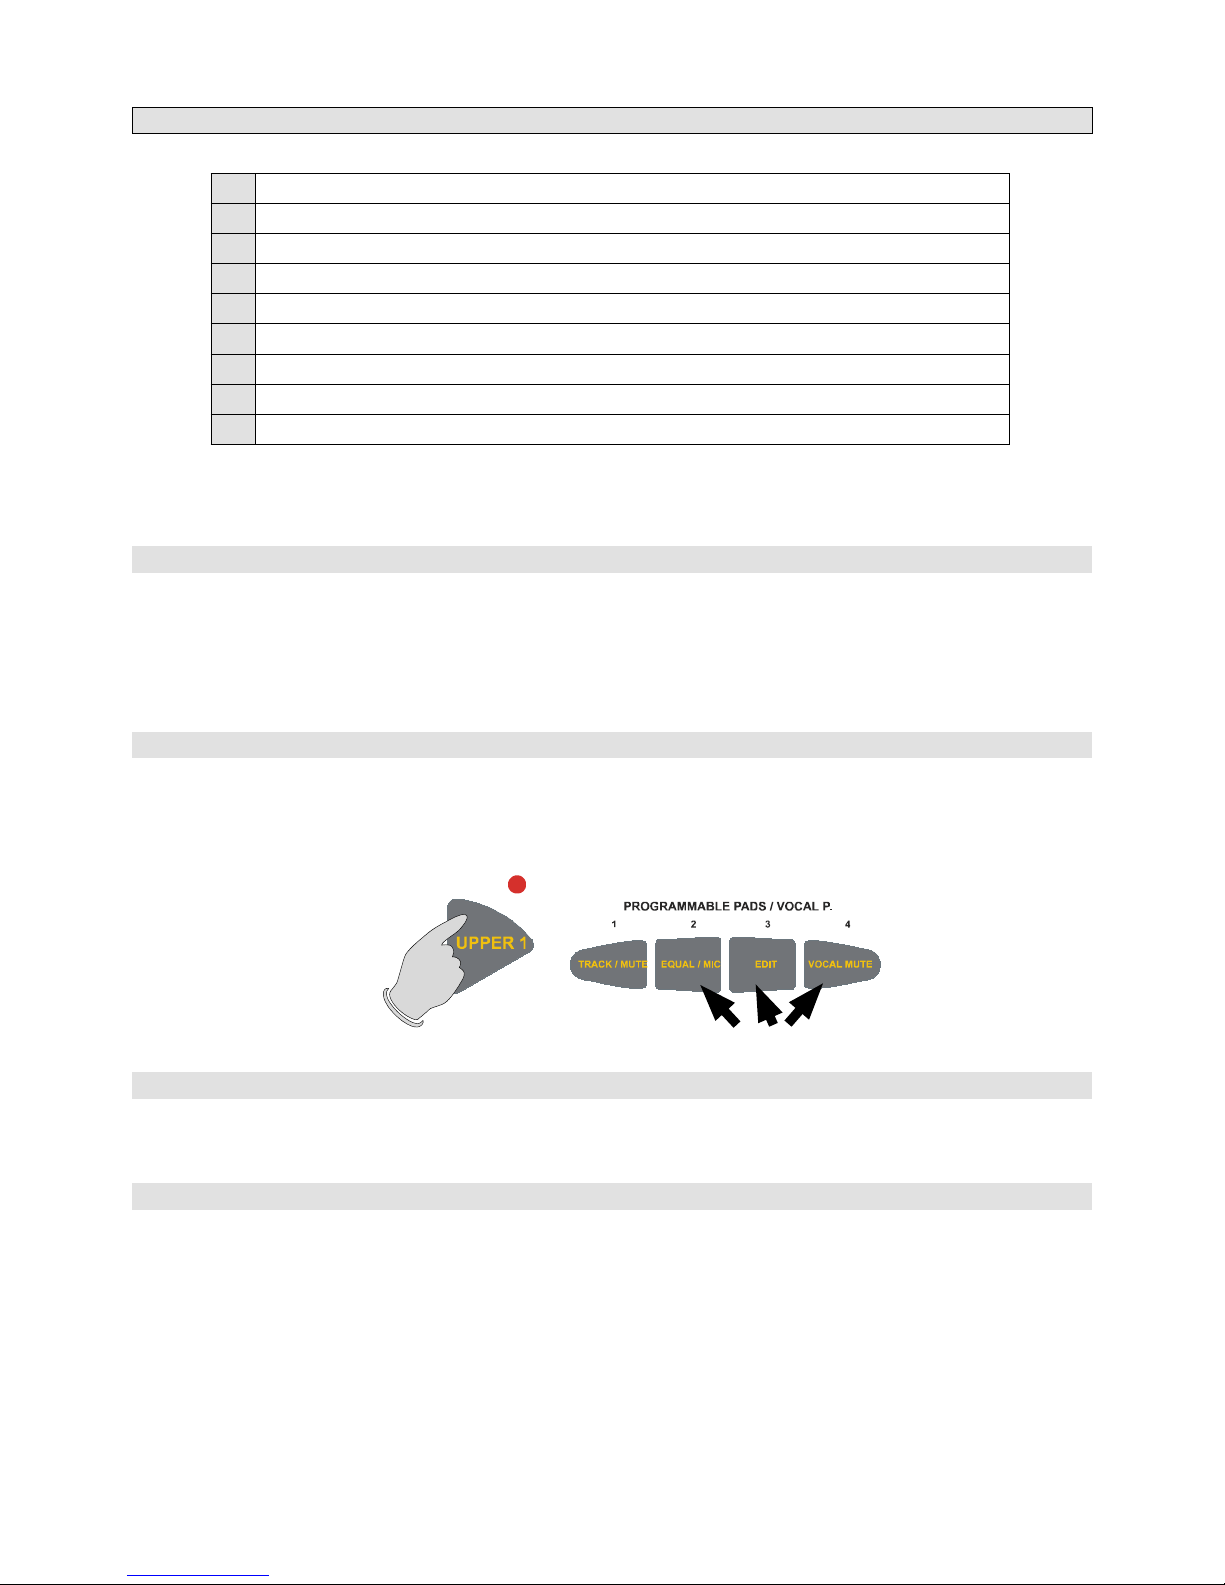
25 PROGRAMMABLE PADS
These four buttons provide sounds or
samples that can be played in real time.
All buttons are assignable (samples or
percussive sounds). VOCAL PROCESSOR:
when working with the Vocal Processor,
each pads gains access to a related func-
tion (Track Mute [Pad1], Equal/Mic [Pad2],
Edit [Pad3] and Vocal Mute [Pad4])
26 DIRECT SOUND MEMORY
Each of the 16 memory buttons of
this section can memorise a preferred
configuration of the Upper 1, Upper 2
and Lower sections (including Sound
and Effects assignments, Volume
settings, etc.) for quick and easy
selection during your live performan-
ces. The overall memorised status of
both direct memory sections can be
stored to floppy disk or hard disk for
future loading.
37 SEQUENCER
Recording and playback Song Styles.
RECORD automatically sets the sequencer
for Song Style recording. Holding the
button pressed for a few seconds gains
access to the Clear function which allows
you to cancel recording errors and parts
not wanted (all, chord, etc.). PLAY/STOP
starts and stops the Song Style recording
and playback the Songs.
38 UTILITY SECTION
LYRICS
This button enables (led ON ) or disables
(led OFF) the song lyrics in the display,
playing a midifile.
VOCAL P
Gains access to the Vocal Processor
functions.
REV/CHO
Enables (led ON) or disables (led OFF)
The Digital Signal Processor.
SUSTAIN
Applies the sustain effect to the three
keyboard sections (Upper 1, 2 and
Lower).
METRONOME/MIDI GENERAL.
A twin action button. METRONOME: ac-
tivates/deactivates the metronome in
play-back and record mode. MIDI GENERAL:
press and hold the button to access in
Midi General menu.
HARMONY
Enables/disables the melody harmony
function according to the current Har-
mony Type. Holding down the VOCAL P,
HARMONY and REV/CHO buttons gains
access to the edit of the corresponding
function.
39 SAMPLING SECTION
RECORD
Activates the sampling process, allowing
you record your voice (trough a micropho-
ne) or a musical instrument connected to
the Mic/Line jack of the Vocal Processor
interface.
SAMPLES
Gains access to the SAMPLES bank.
36 DISK DRIVE
The Disk Drive is located to the right side
of the instrument, under the keyboard.
This device works with 3.5" DD disks and
2HD disks.