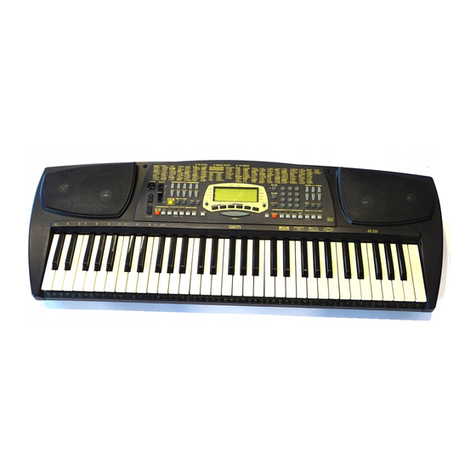
Generalmusic WK3 World Keyboard User manual

IMPORTANT
ReadBefore Using Keyboard!
Congratulations on your purchase of the new Generalmusic WK3 World Keyboard. This instrument is
equipped with cutting edge Flash ROM memory,so that your new keyboard can be permanently updated
bydiskswiththelatestoperationaladvantagesandnewfeatures. Itisimportantthatyoufollowtheproce-
dure below before using your instrument for the first time to ensure that the instrument functions prop-
erly. CheckwithyourauthorisedGeneralmusicdealerforexcitingnewfeaturestoloadinyourFlashROM
in the future.
STEP 1
With the instrument turned OFF,insert the first Generalmusic“WK3 OS-Disk
1/2”included in your materials packet into the disk drive. After you have
inserted the disk, turn the instrument ON.
STEP 2
You will see a message in the instrument display screen that says:
Loading OS-DISK clears ALL MEMORY!! <Enter to Load/Escape to abort>
Press ENTER and wait about 3 minutes until you see a second message in the
display that says:
INSERT NEXT OS-DISK please <Enter to load/Escape to abort>
STEP 3
Remove the first disk from the drive and insert the second disk“WK3 OS-
Disk 2/2”in the drive.
Press ENTER and wait until the loading operation terminates.
When the new system has finished loading,remove the operating system
disk WK3 OS-DISK 2/2 from the drive before proceeding to the final step.
FINAL STEP
Press and hold the UPPER 1 selector button located to the right of the LCD
display and simultaneously press buttons 2,3 and 4 of the PROGRAMMA-
BLE PADS section. The message SYSTEM RESET appears in the display for
a few seconds then the instrument resets to the factory-set situation.
You have now completed the update process, and your Generalmusic World
Keyboard has been permanently upgraded.
UPPER 2
UPPER 1
LOWE
R
PROGRAMMABLE PADS
Buttons to press for the System Reset
TEMPO
DATA
ESCAPE
ENTER
Position of the
Enter & Escape
controls
Procedure to unlock the instrument
If the instrument has been left turned off for a long period of time,the backing battery will slowly
discharge,causing the total loss of all user programmed data. If the battery has lost its charge com-
pletely,when you turn the instrument on,it will lock. To restore normal operation, follow the
procedure outlined below to recharge the battery.
1. Turn the instrument on with the ”WK3 OS Disk 1/2”inserted in the drive and follow the Operat-
ing System loading procedure as described on the front page of the owner’s manual,“IMPOR-
TANT - Read Before Using Keyboard!”.
2. When you have carried out the SYSTEM RESET procedure as described in the FINAL STEP,leave
the instrument on for at least 2 hours to recharge the battery.
If you foresee leaving the instrument turned off for a long period of time, be sure to save all user-
programmed data to disk (Songs and Song/Styles, User Styles,Performances).
If the instrument works at power up after being left turned off for a long period of time,leave it on for
at least 3-4 hours to recharge the battery.
271050
IMPORTANT
ReadBeforeUsingKeyboard!
Congratulations on your purchase of the new Generalmusic WK3 World Keyboard. This instrument is
equipped with cutting edge Flash ROM memory, so that your new keyboard can be permanently updated
bydisks withthelatestoperationaladvantagesandnewfeatures. Itisimportantthatyoufollowtheproce-
dure below before using your instrument for the first time to ensure that the instrument functions prop-
erly. CheckwithyourauthorisedGeneralmusicdealerforexcitingnewfeaturestoloadinyourFlashROM
in the future.
STEP 1
With the instrument turned OFF, insert the first Generalmusic“WK3 OS-Disk
1/2”included in your materials packet into the disk drive. After you have
inserted the disk,turn the instrument ON.
STEP 2
You will see a message in the instrument display screen that says:
Loading OS-DISK clears ALL MEMORY!! <Enter to Load/Escape to abort>
Press ENTER and wait about 3 minutes until you see a second message in the
display that says:
INSERT NEXT OS-DISK please <Enter to load/Escape to abort>
STEP 3
Remove the first disk from the drive and insert the second disk“WK3 OS-
Disk 2/2”in the drive.
Press ENTER and wait until the loading operation terminates.
When the new system has finished loading, remove the operating system
disk WK3 OS-DISK 2/2 from the drive before proceeding to the final step.
FINAL STEP
Press and hold the UPPER 1 selector button located to the right of the LCD
display and simultaneously press buttons 2, 3 and 4 of the PROGRAMMA-
BLE PADS section. The message SYSTEM RESET appears in the display for
a few seconds then the instrument resets to the factory-set situation.
You have now completed the update process,and your Generalmusic World
Keyboard has been permanently upgraded.
UPPER 2
UPPER 1
LOWER
PROGRAMMABLE PADS
Buttons to press for the System Reset
TEMPO
DATA
ESCAPE
ENTER
Position of the
Enter & Escape
controls
Procedure to unlock the instrument
If the instrument has been left turned off for a long period of time,the backing battery will slowly
discharge,causing the total loss of all user programmed data. If the battery has lost its charge com-
pletely,when you turn the instrument on,it will lock. To restore normal operation, follow the
procedure outlined below to recharge the battery.
1. Turn the instrument on with the”WK3 OS Disk 1/2”inserted in the drive and follow the Operat-
ing System loading procedure as described on the front page of the owner’s manual,“IMPOR-
TANT - Read Before Using Keyboard!”.
2. When you have carried out the SYSTEM RESET procedure as described in the FINAL STEP,leave
the instrument on for at least 2 hours to recharge the battery.
If you foresee leaving the instrument turned off for a long period of time, be sure to save all user-
programmed data to disk (Songs and Song/Styles, User Styles,Performances).
If the instrument works at power up after being left turned off for a long period of time, leave it on for
at least 3-4 hours to recharge the battery.
271050


OWNER’S
MANUAL
English
Cod. 271050
OWNER’S
MANUAL
English
Cod. 271050

CAUTION
RISK OF ELECTRIC SHOCK
DO NOT OPEN
The lightning flash with arrowhead symbol,
within an equilateral triangle, is intended to alert
the user to the presence of uninsulated “dan-
gerous voltage” within the product’s enclosure
that may be of sufficient magnitude to consti-
tute a risk of electric shock to persons.
The exclamation point within an equilateral tri-
angle is intended to alert the user to the pres-
ence of important operating and maintenance
(servicing) instructions in the literature accom-
panying the product.
IMPORTANT SAFETY INSTRUCTIONS
INSTRUCTIONS PERTAINING TO A RISK OF FIRE, ELECTRIC SHOCK OR INJURY TO PERSONS
1. Read all the instructions (Safety, Installation and FCC if applicable) before using the product.
2. Do not use this product near water (example, near a swimming pool, spa, tub, sink or wet basement) and do not expose
to rain.
3. This product should be used only with a cart or stand that is recommended by the manufacturer, or should be used with
the components supplied. If this product requires assembly before being played, take special care to follow the assembly
instructions found at the back of the manual.
4. This product, whether alone or in combination with an amplifier and headphones or speakers, may be capable of produc-
ing sound levels that could cause permanent hearing loss. Do not operate for long periods of time at a high volume level
or at a level that is uncomfortable. If you experience any hearing loss or ringing in the ears, you should consult an
audiologist.
5. WARNING: Do not place this product or any other objects on the power cord, or place it in a position where one could
walk on, trip over or roll anything over power or connecting cords of any kind.
6. This product should be located so that its location does not interfere with its proper ventilation.
7. This product should be located away from heat sources such as radiators, heat registers, or other products that produce
heat.
8. This product should be connected to a power supply only of the type described in the operating instructions or as marked
on the product.
9. This product may be equipped with a polarised line plug (one blade wider than the other). This is a safety feature. If you
are unable to insert the plug into the wall outlet, contact an electrician to replace your obsolete outlet. Do not defeat the
safety purpose of the plug.
10. The power supply cord of the product should be unplugged from the outlet when left unused for long periods of time.
11. Care should be taken so that objects do not fall and liquids are not spilled into the enclosure through openings.
12. This product should be serviced by qualified service personnel when:
a) the power supply cord or the plug has been damaged; or
b) objects have fallen, or liquid has been spilled into the product; or
c) the product has been exposed to rain; or
d) the product does not appear to operate normally or exhibits marked changes in performance; or
e) the product has been dropped, or the enclosure damaged.
13. Do not attempt to service the product beyond that described in the user-maintenance instructions. All servicing should
be referred to qualified service personnel.
14. Some Generalmusic products may have benches and/or accessory mounting fixtures that are either supplied as part of
the product or as optional accessories. Please ensure that benches are correctly assembled and stable and any optional
fixtures (where applicable) are well secured before use.
15. Electromagnetic Interference (RFI) This electronic product utilises digital sample wave processing technology (S.W.P.)
that may adversely affect radio/TV reception. Read the FCC note on the inside back cover of the owner’s manual for
additional information.
SAVE THESE INSTRUCTIONS
GROUNDING INSTRUCTIONS
This product may be grounded. If it should malfunction or breakdown, grounding provides a path of least resistance for
electric current to reduce the risk of electric shock. This product is equipped with a cord having an equipment-grounding
conductor and a grounding plug. The plug must be connected to an appropriate outlet that is properly installed and grounded
in accordance with all local codes and ordinances.
DANGER - Improper connection of the equipment-grounding conductor can result in a risk of electric shock. Check with a
qualified electrician or serviceman if you are in doubt as to whether the product is properly grounded. Do not modify the plug
provided with the product - if it will not fit the outlet, have a proper outlet installed by a qualified electrician.
CAUTION: TO REDUCE THE RISK OF
ELECTRICSHOCK,DONOTREMOVECOVER
(ORBACK).NOUSER-SERVICEABLEPARTS
INSIDE. REFER SERVICING TO QUALIFIED
SERVICE PERSONNEL.

CAUTION
RISK OF ELECTRIC SHOCK
DO NOT OPEN
The lightning flash with arrowhead symbol,
within an equilateral triangle, is intended to alert
the user to the presence of uninsulated “dan-
gerous voltage” within the product’s enclosure
that may be of sufficient magnitude to consti-
tute a risk of electric shock to persons.
The exclamation point within an equilateral tri-
angle is intended to alert the user to the pres-
ence of important operating and maintenance
(servicing) instructions in the literature accom-
panying the product.
IMPORTANT SAFETY INSTRUCTIONS
INSTRUCTIONS PERTAINING TO A RISK OF FIRE, ELECTRIC SHOCK OR INJURY TO PERSONS
1. Read all the instructions (Safety, Installation and FCC if applicable) before using the product.
2. Do not use this product near water (example, near a swimming pool, spa, tub, sink or wet basement) and do not expose
to rain.
3. This product should be used only with a cart or stand that is recommended by the manufacturer, or should be used with
the components supplied. If this product requires assembly before being played, take special care to follow the assembly
instructions found at the back of the manual.
4. This product, whether alone or in combination with an amplifier and headphones or speakers, may be capable of produc-
ing sound levels that could cause permanent hearing loss. Do not operate for long periods of time at a high volume level
or at a level that is uncomfortable. If you experience any hearing loss or ringing in the ears, you should consult an
audiologist.
5. WARNING: Do not place this product or any other objects on the power cord, or place it in a position where one could
walk on, trip over or roll anything over power or connecting cords of any kind.
6. This product should be located so that its location does not interfere with its proper ventilation.
7. This product should be located away from heat sources such as radiators, heat registers, or other products that produce
heat.
8. This product should be connected to a power supply only of the type described in the operating instructions or as marked
on the product.
9. This product may be equipped with a polarised line plug (one blade wider than the other). This is a safety feature. If you
are unable to insert the plug into the wall outlet, contact an electrician to replace your obsolete outlet. Do not defeat the
safety purpose of the plug.
10. The power supply cord of the product should be unplugged from the outlet when left unused for long periods of time.
11. Care should be taken so that objects do not fall and liquids are not spilled into the enclosure through openings.
12. This product should be serviced by qualified service personnel when:
a) the power supply cord or the plug has been damaged; or
b) objects have fallen, or liquid has been spilled into the product; or
c) the product has been exposed to rain; or
d) the product does not appear to operate normally or exhibits marked changes in performance; or
e) the product has been dropped, or the enclosure damaged.
13. Do not attempt to service the product beyond that described in the user-maintenance instructions. All servicing should
be referred to qualified service personnel.
14. Some Generalmusic products may have benches and/or accessory mounting fixtures that are either supplied as part of the
product or as optional accessories. Please ensure that benches are correctly assembled and stable and any optional
fixtures (where applicable) are well secured before use.
15. Electromagnetic Interference (RFI) This electronic product utilises digital sample wave processing technology (S.W.P.)
that may adversely affect radio/TV reception. Read the FCC note on the inside back cover of the owner’s manual for
additional information.
SAVE THESE INSTRUCTIONS
GROUNDING INSTRUCTIONS
This product may be grounded. If it should malfunction or breakdown, grounding provides a path of least resistance for
electric current to reduce the risk of electric shock. This product is equipped with a cord having an equipment-grounding
conductor and a grounding plug. The plug must be connected to an appropriate outlet that is properly installed and grounded
in accordance with all local codes and ordinances.
DANGER - Improper connection of the equipment-grounding conductor can result in a risk of electric shock. Check with a
qualified electrician or serviceman if you are in doubt as to whether the product is properly grounded. Do not modify the plug
provided with the product - if it will not fit the outlet, have a proper outlet installed by a qualified electrician.
CAUTION: TO REDUCE THE RISK OF
ELECTRICSHOCK,DONOTREMOVECOVER
(ORBACK).NOUSER-SERVICEABLEPARTS
INSIDE. REFER SERVICING TO QUALIFIED
SERVICE PERSONNEL.


○○○○○○○○○○○○○○○○○○○○○○○○○○○○○○○○○○○○
Contents i
○○○○○○○○○○○○○○○○○○○○○○○○○○○○○○○○○○○○
Contents i
Contents
Introduction Intro. i
OS-Disks - updateable operating system Intro. v
SYSTEM RESET Intro. v
USER GUIDE
• 1 Get started 1. 1
Power up and get to know the basics 1. 1
Play and recall keyboard sounds in real time 1. 2
Select Performances and play keyboard sounds 1. 3
Play keyboard sounds with automatic accompaniments (Styles) 1. 4
Play the Programmable Pads 1. 5
Add Pitch Bend and/or Modulation to your playing 1. 5
Play with Effects or bypass them 1. 6
Play with headphones 1. 7
Play with the pedals 1. 7
Regulate the general Effect
volumes and activate loudness 1. 8
Transpose the instrument (Semitones) 1. 9
Demo 1. 10
Song Play - Direct from Disk 1. 11
Record the Song 1. 13
Record a Song & save it to disk 1. 13
Save the Song to disk 1. 16
• 2 Front & Rear Panel 2. 1
Front Panel (buttons & controls) 2. 6
Rear Panel (Connections) 2. 10
• 3 Basic concepts 3. 1
Connections 3. 6
The Display 3. 10
Data Entry 3. 13
• 4 Sounds & Performances 4. 1
Selecting Sounds 4. 4
Selecting Performances 4. 7
How to modify the Performances 4. 10
STORE PERFORMANCE 4. 18
• 5 The Styles 5. 1
Selecting Styles 5. 2
The accompaniment tracks 5. 5
The Style controls 5. 6
The Automatic Styles section 5. 8

○○○○○○○○○○○
ii Contents
○○○○○○○○○○○
ii Contents
The Utility section 5. 14
The Style Tempo 5. 16
Examples of how to use the Styles 5. 18
• 6 Disk 6. 1
Load operations - Play a Song or MidiFile direct from disk 6. 5
Loading WS and CD compatible files 6. 11
Save Operations 6. 14
Utility functions 6. 21
General disk handling information 6. 26
Precautions to observe when using WK3 disks with a computer 6. 28
• 7 Songs 7. 1
Selecting and playing back Songs 7. 2
Song Playback 7. 3
Displaying lyrics 7. 8
• 8 Song/Styles 8. 1
Selecting and playing back Song/Styles 8. 2
Song/Style Playback 8. 3
• 9 Digital Signal Processor 9. 1
Selecting the effect types 9. 2
Bypassing the effects 9. 4
Regulating the Send levels 9. 5
• 10 MIDI 10. 1
Principal MIDI applications 10. 6
Piloting WK3 with a master keyboard 10. 9
Additional MIDI parameters 10. 12
• 11 New Release (OS update) 11. 1
How to set the new functions 11. 2
Auto Arrange 11. 2
Fingered 1 11. 3
Fingered 2 11. 3
Auto Name 11. 5
REFERENCE GUIDE
• 12 Selection 12. 1
Selecting Performances 12. 1
Selecting Styles 12. 2
Selecting Sounds 12. 4
Selecting Samples 12. 6
Selecting Songs & Song/Styles 12. 7

○○○○○○○○○○○○○○○○○○○○○○○○○○○○○○○○○○○○
Contents iii
○○○○○○○○○○○○○○○○○○○○○○○○○○○○○○○○○○○○
Contents iii
• 13 Edit Performance section 13. 1
• Performance 13. 3
Program 13. 3
Transposer 13. 4
Detune 13. 4
Pitch Bend Range 13. 4
Sound Edit 13. 4
Priority 13. 4
Pedals 1/2/3 Assign 13. 5
Pitch/Modulation assign 13. 5
Volume Pedal assign 13. 5
Mode 13. 6
Performance Name 13. 6
• MIDI 13. 7
The MIDI Edit functions 13. 8
Filter 13. 9
Local 13. 9
Dump 13. 10
Clock 13. 11
Set 13. 12
General MIDI 13. 12
• Mixer 13. 15
Volume 13. 15
Pan 13. 15
Mixer: Utility (Mixer Lock) 13. 16
• Sound (Edit) 13. 17
The Sound parameters 13. 20
Clear Sound and Clear All 13. 24
• Drumkit (Edit) 13. 27
The Drumkit parameters 13. 31
Erase “Drumkit” and Clear “Drumkit” 13. 34
• 14 Edit General 14. 1
MIC/LINE 14. 2
General Reverb, Effect and Loudness 14. 3
Keyboard and Video controls 14. 4
Parameters for the pedal sockets 14. 5
Pedal Switch Logic 14. 6
Computer port & Pedalboard functions 14. 7
Restore Original Block 14. 9

○○○○○○○○○○○
iv Contents
○○○○○○○○○○○
iv Contents
• 15 Edit DSP effects 15. 1
How to edit an effect 15. 1
The Reverb parameters 15. 4
The Effects parameters 15. 4
Reverb/Effects tables 15. 6
• 16 User Style recording 16. 1
Recording User Styles 16. 3
Programming the User Style Performance 16. 7
• 17 Song/Style Recording 17. 1
Recording Song/Styles 17. 2
Programming the Song/Style Performance 17. 6
• 18 Song Recording 18. 1
Recording Songs 18. 2
Programming the Song Performance 18. 6
• 19 Sequencer Edit 19. 1
Quantize function 19. 2
Clear function 19. 4
Master Track function 19. 9
Copy function 19. 13
• 20 REC / EDIT 20. 1
Regulating the Mic/Line signal 20. 3
Preparing to sample - select the Splits 20. 4
Programmable Pads Assign 20. 12
APPENDIX
Tables A. i
Midi Implementation chart A xii
Audio/Video Interface
Installation instructions A. xiv
Specifications A. xvi
Index A. 17

○○○○○○○○○○○○○○○○○○○○○○
Introduction i
○○○○○○○○○○○○○○○○○○○○○○
Introduction i
CONGRATULATIONS!
Congratulations and thanks for purchasing Generalmusic’s
World Keyboard
WK3. This instrument
provides high quality sounds and accompaniments, and a simple user interface with a display which
allows total control of all the performance and programming activities.
MULTIMEDIA WORKSTATION
The WK3 is a multimedia piano workstation which offers several ways of interfacing with the instrument.
With the optional A/V board, a guitar player can connect to the audio inputs of the WK3
and mix his
sounds with those of the workstation (complete with effects processing!). At the same time a group of
singers can follow the lyrics projected on a television (or other video projection device) by the WK3
video interface.
2ndlevel -procedure in
conciseform
The first step in loading songs from a
disk is to insert a disk containing com-
patible songs into the disk drive of the
WK3.Thisinstrumentiscompatiblewith
WS Series songs, Standard MIDI Files
and of course, PS Series songs.
1st.level - numbered
images
1
1. Insert the disk in the disk drive.
3rdlevel - detailed
instructions
The second part of the manual contains the Reference Guides which describe the instrument’s func-
tions in detail without discussing procedures. Experienced users can limit themselves to the reference
chapters.
At the end of the manual is the Appendix containing tables, midi specs and technical specs.
THE OWNER’S MANUAL
The Owner’s Manual is supplied as a 3-ring binder with instructions inserted inside.
How to use the manual
Do not use it as a paperweight: read it. If you understand how WK3 operates, you can save a lot of time.
You are encouraged to experiment with alternative operating methods: the
WK3 is sufficiently flexible to
permit several approaches to obtain the same results. This user guide offers information on three
different levels of complexity: as numbered pictures or images, as brief instructions and as detailed
instructions. You can limit yourself to following the images only, or by reading the bold black type, or by
referring to the normal text containing detailed instructions.
CONGRATULATIONS!
Congratulations and thanks for purchasing Generalmusic’s
World Keyboard
WK3. This instrument
provides high quality sounds and accompaniments, and a simple user interface with a display which
allows total control of all the performance and programming activities.
MULTIMEDIA WORKSTATION
The WK3 is a multimedia piano workstation which offers several ways of interfacing with the instrument.
With the optional A/V board, a guitar player can connect to the audio inputs of the WK3
and mix his
sounds with those of the workstation (complete with effects processing!). At the same time a group of
singers can follow the lyrics projected on a television (or other video projection device) by the WK3
video interface.
2ndlevel -procedure in
conciseform
The first step in loading songs from a
disk is to insert a disk containing com-
patible songs into the disk drive of the
WK3.This instrumentiscompatiblewith
WS Series songs, Standard MIDI Files
and of course, PS Series songs.
1st.level - numbered
images
1
1. Insert the disk in the disk drive.
3rdlevel - detailed
instructions
The second part of the manual contains the Reference Guides which describe the instrument’s func-
tions in detail without discussing procedures. Experienced users can limit themselves to the reference
chapters.
At the end of the manual is the Appendix containing tables, midi specs and technical specs.
THE OWNER’S MANUAL
The Owner’s Manual is supplied as a 3-ring binder with instructions inserted inside.
How to use the manual
Do not use it as a paperweight: read it. If you understand how WK3 operates, you can save a lot of time.
You are encouraged to experiment with alternative operating methods: the
WK3 is sufficiently flexible to
permit several approaches to obtain the same results. This user guide offers information on three
different levels of complexity: as numbered pictures or images, as brief instructions and as detailed
instructions. You can limit yourself to following the images only, or by reading the bold black type, or by
referring to the normal text containing detailed instructions.

○○○○○○○○○○○○○○○○○○○○○○
ii Introduction
○○○○○○○○○○○○○○○○○○○○○○
ii Introduction
SPECIFICATIONS
•Polyphony & multitimbricity
Maximumpolyphony:64 voices . Multitimbric-
ity: 16 parts (Song mode) or 8 parts (Style
mode). Each part is assigned to a track. In
Stylemode, 5tracks areassigned tothe auto-
accompaniment section and 3 tracks to the
keyboard.
•Sound Generation
Sounds are based on sampled waveforms
(PCM, Wavetables and Subtractive Synthe-
sis technology) and modified by a series of
macro functions. The instrument’s 32 oscilla-
tors generate “single” Sounds (32-note poly-
phonic) or “layered” Sounds (16 note poly-
phonic), depending on the number of oscilla-
tors used to elaborate the Sound (1 or 2).
•ROM Sounds
ROM (permanent memory) contains 4 Mega-
bytes of samples, which are the source of al-
most 400 ROM-Sounds.
•Sound Edit
WK3’sSound Edit functionpermitsquick mod-
ification of Sound and Drumkits, producing E-
Sounds (“Performance-Sounds”) which are
storedin thePerformances. The modifications
are stored in Performance tracks to allows
Songs,Styles orPerformances toload thecor-
rect sounds.
•Sample-RAM
WK3
is fitted with a battery-backed Sample-
RAM dedicated to the storage of Samples.
Disk-basedSamples canbe loadedinto Sam-
ple-RAM, or can be recorded with the
WK3
sampler, a feature made available by install-
ing the optional Audio/Video Interface.
•Digital Signal Processor
WK3
featuresan on-boardTwo DigitalEffects
Processors, controlled in real time, enrich the
soundwith effects(reverbs andmodulations).
Each Performance can store its own effects
configuration and an editor is available to cre-
ate user-effects which are stored in the Per-
formances.
•Sequencer
The 16-track Sequencer includes a series of
functions that allow Style, Song/Style and
Song recording (real time system), playback
and editing. Also featured is a Lyrics function
(Text) which displays Song lyrics during play-
back. The Quick Rec function allows the rap-
id recording of a Song/Style by using existing
Styles. ThestandardSystem-RAM allowsyou
to store up to 7 Song/Styles and 7 Songs.
•Chain, Preload, Play Direct from Disk
The Chain function allows you to chain the
Song/Styles and Songs in memory and play
them one after the other with a single com-
mand. The Preload function allows you to
load new data into memory (Songs: WK for-
mat and Midi files) while the sequencer is in
play or while you play in real time. The Di-
rect-from-Disk function allows you to play a
Song or MIDI File directly from disk without
loading the data into memory.
•Automatic Accompaniments
Styles provide automatic musical accompa-
niments, consisting of 5 tracks. Every Style
has 4 Variations. Up to 16 disk-based Styles
(User programmable) can be loaded and au-
tomatically stored in memory.
•Disk Drive
Data can be stored on 3.5” HD floppy disks in
WK3 format(1.44 megabyte)orstandard MS-
DOS (1.44 megabyte). The Atari ST/Falcon
SPECIFICATIONS
•Polyphony & multitimbricity
Maximumpolyphony:64 voices .Multitimbric-
ity: 16 parts (Song mode) or 8 parts (Style
mode). Each part is assigned to a track. In
Stylemode, 5tracks areassigned tothe auto-
accompaniment section and 3 tracks to the
keyboard.
•Sound Generation
Sounds are based on sampled waveforms
(PCM, Wavetables and Subtractive Synthe-
sis technology) and modified by a series of
macro functions. The instrument’s 32 oscilla-
tors generate “single” Sounds (32-note poly-
phonic) or “layered” Sounds (16 note poly-
phonic), depending on the number of oscilla-
tors used to elaborate the Sound (1 or 2).
•ROM Sounds
ROM (permanent memory) contains 4 Mega-
bytes of samples, which are the source of al-
most 400 ROM-Sounds.
•Sound Edit
WK3’sSound Edit functionpermitsquick mod-
ification of Sound and Drumkits, producing E-
Sounds (“Performance-Sounds”) which are
storedin thePerformances. The modifications
are stored in Performance tracks to allows
Songs,Styles orPerformances toload thecor-
rect sounds.
•Sample-RAM
WK3
is fitted with a battery-backed Sample-
RAM dedicated to the storage of Samples.
Disk-basedSamples canbe loadedinto Sam-
ple-RAM, or can be recorded with the
WK3
sampler, a feature made available by install-
ing the optional Audio/Video Interface.
•Digital Signal Processor
WK3
featuresan on-boardTwo DigitalEffects
Processors, controlled in real time, enrich the
soundwith effects(reverbs andmodulations).
Each Performance can store its own effects
configuration and an editor is available to cre-
ate user-effects which are stored in the Per-
formances.
•Sequencer
The 16-track Sequencer includes a series of
functions that allow Style, Song/Style and
Song recording (real time system), playback
and editing. Also featured is a Lyrics function
(Text) which displays Song lyrics during play-
back. The Quick Rec function allows the rap-
id recording of a Song/Style by using existing
Styles. ThestandardSystem-RAM allowsyou
to store up to 7 Song/Styles and 7 Songs.
•Chain, Preload, Play Direct from Disk
The Chain function allows you to chain the
Song/Styles and Songs in memory and play
them one after the other with a single com-
mand. The Preload function allows you to
load new data into memory (Songs: WK for-
mat and Midi files) while the sequencer is in
play or while you play in real time. The Di-
rect-from-Disk function allows you to play a
Song or MIDI File directly from disk without
loading the data into memory.
•Automatic Accompaniments
Styles provide automatic musical accompa-
niments, consisting of 5 tracks. Every Style
has 4 Variations. Up to 16 disk-based Styles
(User programmable) can be loaded and au-
tomatically stored in memory.
•Disk Drive
Data can be stored on 3.5” HD floppy disks in
WK3 format(1.44 megabyte)orstandard MS-
DOS (1.44 megabyte). The Atari ST/Falcon

○○○○○○○○○○○○○○○○○○○○○○
Introduction iii
○○○○○○○○○○○○○○○○○○○○○○
Introduction iii
format (720 Kb) can be used for MIDI file ex-
changes. WK3 is able to initialize disks for
everyformat.TheDisk DrivefeaturestheSlow
and Fast loading options, the former allowing
data to be loaded without blocking the instru-
ment (background loading) while the latter
provides faster loading times. It is possible to
load Styles, Performances, Song/Style and
Songs from WK, WS and CD floppy disks. It
is also possible to load disk-based samples
into the Sample-RAM. MS-DOS compatibili-
ty permits MIDI file exchange with other in-
struments and computers.
• Sampling Inputs (Mic/Line)
With the optionalAudio/Video board, it is pos-
sible to connect a microphone or another in-
strument to the audio Mic/Line inputs to sam-
ple the signals and process them with the in-
strument’son-boardDigital Effectsprocessor.
The captured sample can also be edited with
specificSample Editparameters. Disk-based
Samples can also be loaded directly to the
Sample-RAM from disk.
• Text view (Karaoke)
The display can show the lyrics of a song.
It is also possible to connect WK3 to a video
system (monitor, domestic TV, closed circuit
video) by means of the optional Generalmusic
Audio/Video board to display lyrics on a televi-
sion. Lyrics can be projected onto a television
or other video device during a performance to
allow others to sing with the player.
• Updateable Operating System (OS) from
floppy disk
Since the operating system resides in flash
ROM, it is possible to load updates from flop-
py disk. Operating system updates can add
new functions to the instrument.
•Audio Inputs (Analog & Digital)
Analog: WK3 is fitted with a set of audio in-
puts suitable for the connection of musical in-
struments, mixer or h-fi outputs. The level of
the input signal can be regulated by an ap-
propriate volumecontrol situated closeto the
inputs. The signal can be directed to the out-
puts for further external amplification.
Digital: The optional Audio/Video Interface
renders the Mic/Line input operational, suita-
blefor samplingpurposes andprocessing the
input signals with the instrument’s on-board
Digital Signal Processor.
•MIDI
WK3 has a standard MIDI interface (In, Out,
Thru) offering up to 16 MIDI channels with a
General MIDI compatibility switch, MIDI Fil-
tersand MIDIDump facilities. Theinstrument
can act as a Master controlling device, or as
a 16 part multitimbric slave device regardless
of the currently selected playing mode.
• Direct Connection with a computer
WK3 is fitted with The a Computer jack per-
mitstheconnectionofcomputersnotfittedwith
a MIDI interface to WK3 via a single serial
cable.
format (720 Kb) can be used for MIDI file ex-
changes. WK3 is able to initialize disks for
everyformat.TheDiskDrive featurestheSlow
and Fast loading options, the former allowing
data to be loaded without blocking the instru-
ment(backgroundloading)while thelatter pro-
vides faster loading times. It is possible to
load Styles, Performances, Song/Style and
Songs from WK, WS and CD floppy disks. It
is also possible to load disk-based samples
into the Sample-RAM. MS-DOS compatibili-
ty permits MIDI file exchange with other in-
struments and computers.
• Sampling Inputs (Mic/Line)
With the optionalAudio/Video board, it is pos-
sible to connect a microphone or another in-
strument to the audio Mic/Line inputs to sam-
ple the signals and process them with the in-
strument’son-boardDigital Effectsprocessor.
The captured sample can also be edited with
specificSample Editparameters. Disk-based
Samples can also be loaded directly to the
Sample-RAM from disk.
• Text view (Karaoke)
The display can show the lyrics of a song.
It is also possible to connect WK3 to a video
system (monitor, domestic TV, closed circuit
video) by means of the optional Generalmusic
Audio/Video board to display lyrics on a televi-
sion. Lyrics can be projected onto a television
or other video device during a performance to
allow others to sing with the player.
• Updateable Operating System (OS) from
floppy disk
Since the operating system resides in flash
ROM, it is possible to load updates from flop-
py disk. Operating system updates can add
new functions to the instrument.
•Audio Inputs (Analog & Digital)
Analog: WK3 is fitted with a set of audio in-
puts suitable for the connection of musical in-
struments, mixer or h-fi outputs. The level of
the input signal can be regulated by an ap-
propriate volumecontrol situated closeto the
inputs. The signal can be directed to the out-
puts for further external amplification.
Digital: The optional Audio/Video Interface
renders the Mic/Line input operational, suita-
blefor samplingpurposes andprocessing the
input signals with the instrument’s on-board
Digital Signal Processor.
•MIDI
WK3 has a standard MIDI interface (In, Out,
Thru) offering up to 16 MIDI channels with a
General MIDI compatibility switch, MIDI Fil-
tersand MIDIDump facilities. Theinstrument
can act as a Master controlling device, or as
a 16 part multitimbric slave device regardless
of the currently selected playing mode.
• Direct Connection with a computer
WK3 is fitted with The a Computer jack per-
mitstheconnectionofcomputersnotfittedwith
a MIDI interface to WK3 via a single serial
cable.

○○○○○○○○○○○○○○○○○○○○○○
iv Introduction
○○○○○○○○○○○○○○○○○○○○○○
iv Introduction
Generalmusic on Internet: http://www.generalmusic.com
Theinformationinthispublicationhasbeencarefullypreparedandchecked.Themanufacturershoweverdecline
all liability for eventual errors. All rights are reserved. This publication may not be copied, photocopied or
reproduced in part or in whole without prior written consent from Generalmusic S.p.A. Generalmusic reserves
the right to apply any aesthetic, design or function modifications it considers necessary to any of its products
without prior notice. Generalmusic declines all liability for damage to property or persons resulting from
improper use of the instrument.
Make sure that all internal electronic options are installed by an authorised Generalmusic service technician.
Check with an authorised Generalmusic dealer for information on the closest service center.
Gem by Generalmusic © 1996. All rights reserved.
Apple, IBM, Macintosh, Microsoft, MS-DOS, Windows, Atari, are registered trademarks of the respective
companies.
IMPORTANT INFORMATION
1. The WK3 should contain the following items from the factory:
a) Instrument;
b) 3 Floppy disks (2 Operating System (OS) -Disks, 1 Demo);
c) Owner’s manual.
2. When contacting your retailer or authorized Generalmusic technical assistance centre, always pro-
vide the model name and serial number of your instrument (found on the identification plate).

○○○○○○○○○○○○○○○○○○○○○○
Introduction v
○○○○○○○○○○○○○○○○○○○○○○
Introduction v
SYSTEM RESET
Ifthedata containedintheinstrument’smemory hasbeendam-
aged, either by being exposed to the effects of a strong mag-
netic field, or other unknown reason, the instrument may not
operate properly. The remedy is a system reset:
(1) press and hold the UPPER 1 selector button located to the
rightof theLCD display, (2)simultaneously pressthe topgroup
of THREE buttons in the PROGRAMMABLE PADS section
while still holding the UPPER 1 selector button, (3) the mes-
sage «System Reset» appears for an instant then the instru-
ment resets to the factory-set situation. All user-programmed
data is irremediably lost.
IMPORTANT PRELIMINARY NOTES
Observe these important preliminary notes before getting into your instrument
AVOID PLACING DISKS NEAR MAGNETS - Do not place floppy disks on top of speakers, near mag-
nets, telephones, or other sources of electromagnetic fields. The disk contents could be damaged.
OS-DISKS - UPDATEABLE OPERATING SYSTEM
UPDAEABLE OPERATING SYSTEM - Two floppy disks containing the operating system are supplied
with the instrument. The OS disks can contain a more recent version of the operating system than the
one contained in the instrument’s Flash ROM.
To load the operating system contained in the OS disks:
(1) turn off the instrument, (2) insert OS-disk 1 in the drive, (3) turn on the instrument, (4) When the
message “Loading OS-DISK clearsALL MEMORY !! < Enter to load / Escape to abort >” appears, press
ENTER to start the op. system update, (5) when the message, “INSERTNEXT OS-DISK please < Enter
to load >” appears, extract the first disk, insert OS-Disk 2 and press ENTER to continue (6) when the
operation is complete, carry out the SYSTEM RESEToperation described below. Remember to extract
the second OS-disk and store both OS-disks in a safe place. Make back-up copies and use those
instead.
1
2
Hold
+
SYSTEM RESET
Ifthedata containedintheinstrument’smemory hasbeendam-
aged, either by being exposed to the effects of a strong mag-
netic field, or other unknown reason, the instrument may not
operate properly. The remedy is a system reset:
(1) press and hold the UPPER 1 selector button located to the
rightof theLCD display, (2)simultaneously pressthe topgroup
of THREE buttons in the PROGRAMMABLE PADS section
while still holding the UPPER 1 selector button, (3) the mes-
sage «System Reset» appears for an instant then the instru-
ment resets to the factory-set situation. All user-programmed
data is irremediably lost.
IMPORTANT PRELIMINARY NOTES
Observe these important preliminary notes before getting into your instrument
AVOID PLACING DISKS NEAR MAGNETS - Do not place floppy disks on top of speakers, near mag-
nets, telephones, or other sources of electromagnetic fields. The disk contents could be damaged.
OS-DISKS - UPDATEABLE OPERATING SYSTEM
UPDAEABLE OPERATING SYSTEM - Two floppy disks containing the operating system are supplied
with the instrument. The OS disks can contain a more recent version of the operating system than the
one contained in the instrument’s Flash ROM.
To load the operating system contained in the OS disks:
(1) turn off the instrument, (2) insert OS-disk 1 in the drive, (3) turn on the instrument, (4) When the
message “Loading OS-DISK clearsALL MEMORY !! < Enter to load / Escape to abort >” appears, press
ENTER to start the op. system update, (5) when the message, “INSERT NEXT OS-DISK please < Enter
to load >” appears, extract the first disk, insert OS-Disk 2 and press ENTER to continue (6) when the
operation is complete, carry out the SYSTEM RESEToperation described below. Remember to extract
the second OS-disk and store both OS-disks in a safe place. Make back-up copies and use those
instead.
1
2
Hold
+

○○○○○○○○○○○○○○○○○○○○○○
vi Introduction
○○○○○○○○○○○○○○○○○○○○○○
vi Introduction

User
Guide
•1Getstarted
•2Layouts
•3Basicconcepts
•4Sounds&Performances
•5Styles
•6Disk
•7Songs
•8SongStyles
•9Effects
•10MIDI
•11Newfunctions(Upgrade)
User
Guide
•1Getstarted
•2Layouts
•3Basicconcepts
•4Sounds&Performances
•5Styles
•6Disk
•7Songs
•8SongStyles
•9Effects
•10MIDI
•11Newfunctions(Upgrade)

○○○○○○○○○○○○○○○○○○○○○○
User Guide
○○○○○○○○○○○○○○○○○○○○○○
User Guide
GENERAL SAFETY INSTRUCTIONS
Power source
• Be sure that your localAC mains voltage matches the voltage specified on the name plate before
connecting to the mains.
• DC power cannot be used to power this instrument.
• If the instrument is to remain unused for long periods of time, remove the power cord from its wall
outlet. For safety purposes, remove the power cord in cases of storms with lightning.
Handling the power cord
• Never touch the power cord or its plug with wet hands.
• Never pull on the cord to remove it from the wall socket, always pull the plug.
• Never forcibly bend the power cord.
• If the power cord is scarred, cut or broken, or has a bad contact, it will be a potential fire hazard or
source of serious electric shock. NEVER use a damaged power cord; have it replaced by a qualified
technician.
If water (or other liquid) gets into the instrument
• Do not allow liquids to penetrate the instrument. Do not place containers of liquids on the instru-
ment. If water or liquids penetrate the instrument, remove the power cord from the wall socket at
once, and contact the store where the unit was purchased.
• As a general precaution, never open the unit and touch or tamper with the internal circuitry.
If the instrument plays in an abnormal way
• Turn off the power immediately, remove the power cord from the mains outlet and contact the store
where it was purchased.
• Discontinue using the unit at once. Failure to do so may result in additional damage or other
unexpected damage or accident.
Important notes
• Place the keyboard on an appropriate stand or on a hard, flat surface.
• Do not place heavy objects on the keyboard and avoid leaning on it.
• Before turning on the instrument, be sure to set the volume to a reasonable level (master volume
slider at about two thirds of the course).
• Before connecting your instrument to other devices, always remember to turn off the power to all
units; this will help to prevent damage or malfunction.
General user maintenance
• Clean the external casing and keys of your WK3 Keyboard using a soft, clean, slightly damp cloth
and polish with a soft, dry cloth.
• Never use industrial cleaners, detergents, abrasive cleansers, waxes, solvents or polishes as they
may damage the instrument finish.
• Always turn off the power supply after use and never turn the unit on and off repeatedly in quick
succession as this places an undue load on the electronic components.
GENERAL SAFETY INSTRUCTIONS
Power source
• Be sure that your localAC mains voltage matches the voltage specified on the name plate before
connecting to the mains.
• DC power cannot be used to power this instrument.
• If the instrument is to remain unused for long periods of time, remove the power cord from its wall
outlet. For safety purposes, remove the power cord in cases of storms with lightning.
Handling the power cord
• Never touch the power cord or its plug with wet hands.
• Never pull on the cord to remove it from the wall socket, always pull the plug.
• Never forcibly bend the power cord.
• If the power cord is scarred, cut or broken, or has a bad contact, it will be a potential fire hazard or
source of serious electric shock. NEVER use a damaged power cord; have it replaced by a qualified
technician.
If water (or other liquid) gets into the instrument
• Do not allow liquids to penetrate the instrument. Do not place containers of liquids on the instru-
ment. If water or liquids penetrate the instrument, remove the power cord from the wall socket at
once, and contact the store where the unit was purchased.
• As a general precaution, never open the unit and touch or tamper with the internal circuitry.
If the instrument plays in an abnormal way
•Turn off the power immediately, remove the power cord from the mains outlet and contact the store
where it was purchased.
• Discontinue using the unit at once. Failure to do so may result in additional damage or other
unexpected damage or accident.
Important notes
• Place the keyboard on an appropriate stand or on a hard, flat surface.
• Do not place heavy objects on the keyboard and avoid leaning on it.
• Before turning on the instrument, be sure to set the volume to a reasonable level (master volume
slider at about two thirds of the course).
• Before connecting your instrument to other devices, always remember to turn off the power to all
units; this will help to prevent damage or malfunction.
General user maintenance
• Clean the external casing and keys of your WK3 Keyboard using a soft, clean, slightly damp cloth
and polish with a soft, dry cloth.
• Never use industrial cleaners, detergents, abrasive cleansers, waxes, solvents or polishes as they
may damage the instrument finish.
• Always turn off the power supply after use and never turn the unit on and off repeatedly in quick
succession as this places an undue load on the electronic components.

○○○○○○○○○○○○○○○○○○○○○○
Get started 1•1
○○ ○○○○○○○○○○○○○○○○○○○○
Get started 1•1
1
2
3
In this chapter, you’ll find step by step instruc-
tions on some basic functions that will help you
get to know your instrument right away.
POWER UP AND GET TO KNOW THE
BASICS
1. Besurethat thepowerswitchontheleft lateral
panelisinthe“OFF”positionbeforeconnecting
tothemains.
2. Insertthesuppliedpowercordintotherearpanel
mainssocket.
Insert the other end into a wall outlet.
3. Pressthepower switch toturnonWK3.
After a few seconds the instrument sets to
the default situation.
If necessary, regulate the display contrast
usingtheCONTRASTknobontherearpanel.
Different viewing angles may require a regu-
lation of the display contrast.
At this point, WK3 is ready to play.
The initial status (default)
After turning on, WK3 sets to Real Time Mode
with the Performance “GrandP” ready to play.
Variation 1 of the Style 8BtStd (8 Beat Standard)
is shown selected but disabled (Arrange=Off).
• 1 Get started

○○○○○○○○○○○○○○○○○○○○○○
1•2 User Guide
○○○○○○○○○○○○○○○○○○○○○○
1•2 User Guide
PLAY AND RECALL KEYBOARD SOUNDS
IN REAL TIME
1. Playonthe keyboard.
You will hear the “Piano” sound play across
the full keyboard extension.
The group of
Keyboard Activators
(Upper 2,
Upper1, Lower)shows Upper1selected (led
on), indicating that the UPPER 1 keyboard
section is active to play.
The current keyboard mode is set to SPLIT
MODE and the Upper 2 and Lower keyboard
sections are enabled for activation.
2. PressUPPER2.
A second sound is introduced, layered with
the first. Pressing a single note on the key-
board plays two sounds simultaneously.
3. PressLOWERand play withbothhands.
Athird sound isintroduced and thekeyboard
is now divided with a Split Point at note B3.
The LOWER keyboard plays over the range
C2 - B3. The UPPER 1 and UPPER 2 sec-
tions are assigned to the range C4 - C7.
○○○○○○○○○○○○○○○○○○○○
©
Note: If you deactivate LOWER in SPLIT
MODE, the UPPER 1 & UPPER 2 sections are
○○○○○○○○○○○○○○○○○○○○
reassigned to the full keyboard extension.
4. Adjusttheoverall volume.
Use the MASTER VOLUME control to adjust
the general volume of the instrument.
A comfortable level is about two thirds of the
maximum course of the slider.
1
< --------- SINGLE SOUND(Upper 1or Upper2) --------- >
2
< --------LAYERED SOUNDS (Upper1 &Upper 2)-------- >
SPLITKeyboard
< -------Lower ------- >< ----- Upp 1&/or Upp2------- >
3
4
PLAY AND RECALL KEYBOARD SOUNDS
IN REAL TIME
1. Playonthe keyboard.
You will hear the “Piano” sound play across
the full keyboard extension.
The group of
Keyboard Activators
(Upper 2,
Upper1, Lower)shows Upper1selected (led
on), indicating that the UPPER 1 keyboard
section is active to play.
The current keyboard mode is set to SPLIT
MODE and the Upper 2 and Lower keyboard
sections are enabled for activation.
2. PressUPPER2.
A second sound is introduced, layered with
the first. Pressing a single note on the key-
board plays two sounds simultaneously.
3. PressLOWERand play withbothhands.
Athird sound isintroduced and thekeyboard
is now divided with a Split Point at note B3.
The LOWER keyboard plays over the range
C2 - B3. The UPPER 1 and UPPER 2 sec-
tions are assigned to the range C4 - C7.
○○○○○○○○○○○○○○○○○○○○
©
Note: If you deactivate LOWER in SPLIT
MODE, the UPPER 1 & UPPER 2 sections are
○○○○○○○○○○○○○○○○○○○○
reassigned to the full keyboard extension.
4. Adjusttheoverall volume.
Use the MASTER VOLUME control to adjust
the general volume of the instrument.
A comfortable level is about two thirds of the
maximum course of the slider.
1
< --------- SINGLE SOUND(Upper 1or Upper2) --------- >
2
< --------LAYERED SOUNDS (Upper1 &Upper 2)-------- >
SPLITKeyboard
< -------Lower ------- >< ----- Upp 1 &/or Upp 2------- >
3
4

○○○○○○○○○○○○○○○○○○○○○○
Get started 1•3
○○ ○○○○○○○○○○○○○○○○○○○○
Get started 1•3
SELECTPERFORMANCES AND PLAY KEY-
BOARD SOUNDS
1. PressaPERFORMANCE GROUPS button.
2. SelectaPerformance.
Use the Function buttons F1…F8 to select
one of the 8 displayed Performances.
○○○○○○○○○○○○○○○○○○○○
©
Note: If you do not select a Performance within
the first 2/3 seconds, the display returns to the
○○○○○○○○○○○○○○○○○○○○
previous situation automatically.
3. Playonthe keyboard.
The selected Performance recalls a different
soundcombination. Thekeyboardmodemay
also change (Split or Full mode).
The sound combination and keyboard mode
will depend on the Performance selected.
In theAppendix, you’ll find a table of the fac-
tory-programmed Performances names.
Performances can:
• recall combinations of up to 3 keyboard
sounds;
• reset the keyboard mode;
• recall different panel settings;
• recall different Styles.
What happens when Performances are se-
lected is discussed in detail afterwards.
1
3
2

○○○○○○○○○○○○○○○○○○○○○○
1•4 User Guide
○○○○○○○○○○○○○○○○○○○○○○
1•4 User Guide
PLAY KEYBOARD SOUNDS WITH AUTO-
MATIC ACCOMPANIMENTS (STYLES)
A Style will already be selected but you can se-
lect another Style in the following manner:
1. PressSINGLETOUCHPLAY.
The ARRANGE ON/OFF and ARRANGE
MEMORYbuttons will activate.
2. Press a Style Group button in the SONG/STYLE
GROUPS(8Beat, 16 Beat,etc.).
○○○○○○○○○○○○○○○○○○○○
©
Note: Avoid pressing the User, Song/Style and
○○○○○○○○○○○○○○○○○○○○
Real Song buttons for the time being.
3. SelectaStyle.
Use Function buttons F1…F8 to select one
of the 8 displayed Styles.
○○○○○○○○○○○○○○○○○○○○
©
Note: If a Style is not selected within the first 2/
3 seconds, the display returns to the previous
○○○○○○○○○○○○○○○○○○○○
situation automatically.
4. PressSTART/STOP
The Drum accompaniment starts to play.
5. Play a note (below split point B3) with the left
handanda melody withtheright.
You’ll hear a fully orchestrated arrangement
accompanying the keyboard sound.
The combination of sounds that play and the
keyboard mode will depend on the Style se-
lected.
You canchangethe combinationof keyboard
sounds by intervening on the keyboard acti-
vators (Upper 2, Upper 1 and Lower).
Styles are discussed in detail in the relative
chapter afterwards.
3
4
5
1
StyleGroups
2
Table of contents
Other Generalmusic Electronic Keyboard manuals

Generalmusic
Generalmusic GK 330 User manual

Generalmusic
Generalmusic WK2000 SE User manual

Generalmusic
Generalmusic gk380 User manual

Generalmusic
Generalmusic GEM GK 340 User manual

Generalmusic
Generalmusic WK1000 User manual

Generalmusic
Generalmusic WK4 User manual

Generalmusic
Generalmusic SK76 User manual

Generalmusic
Generalmusic WK 6 User manual