Page 7of 14
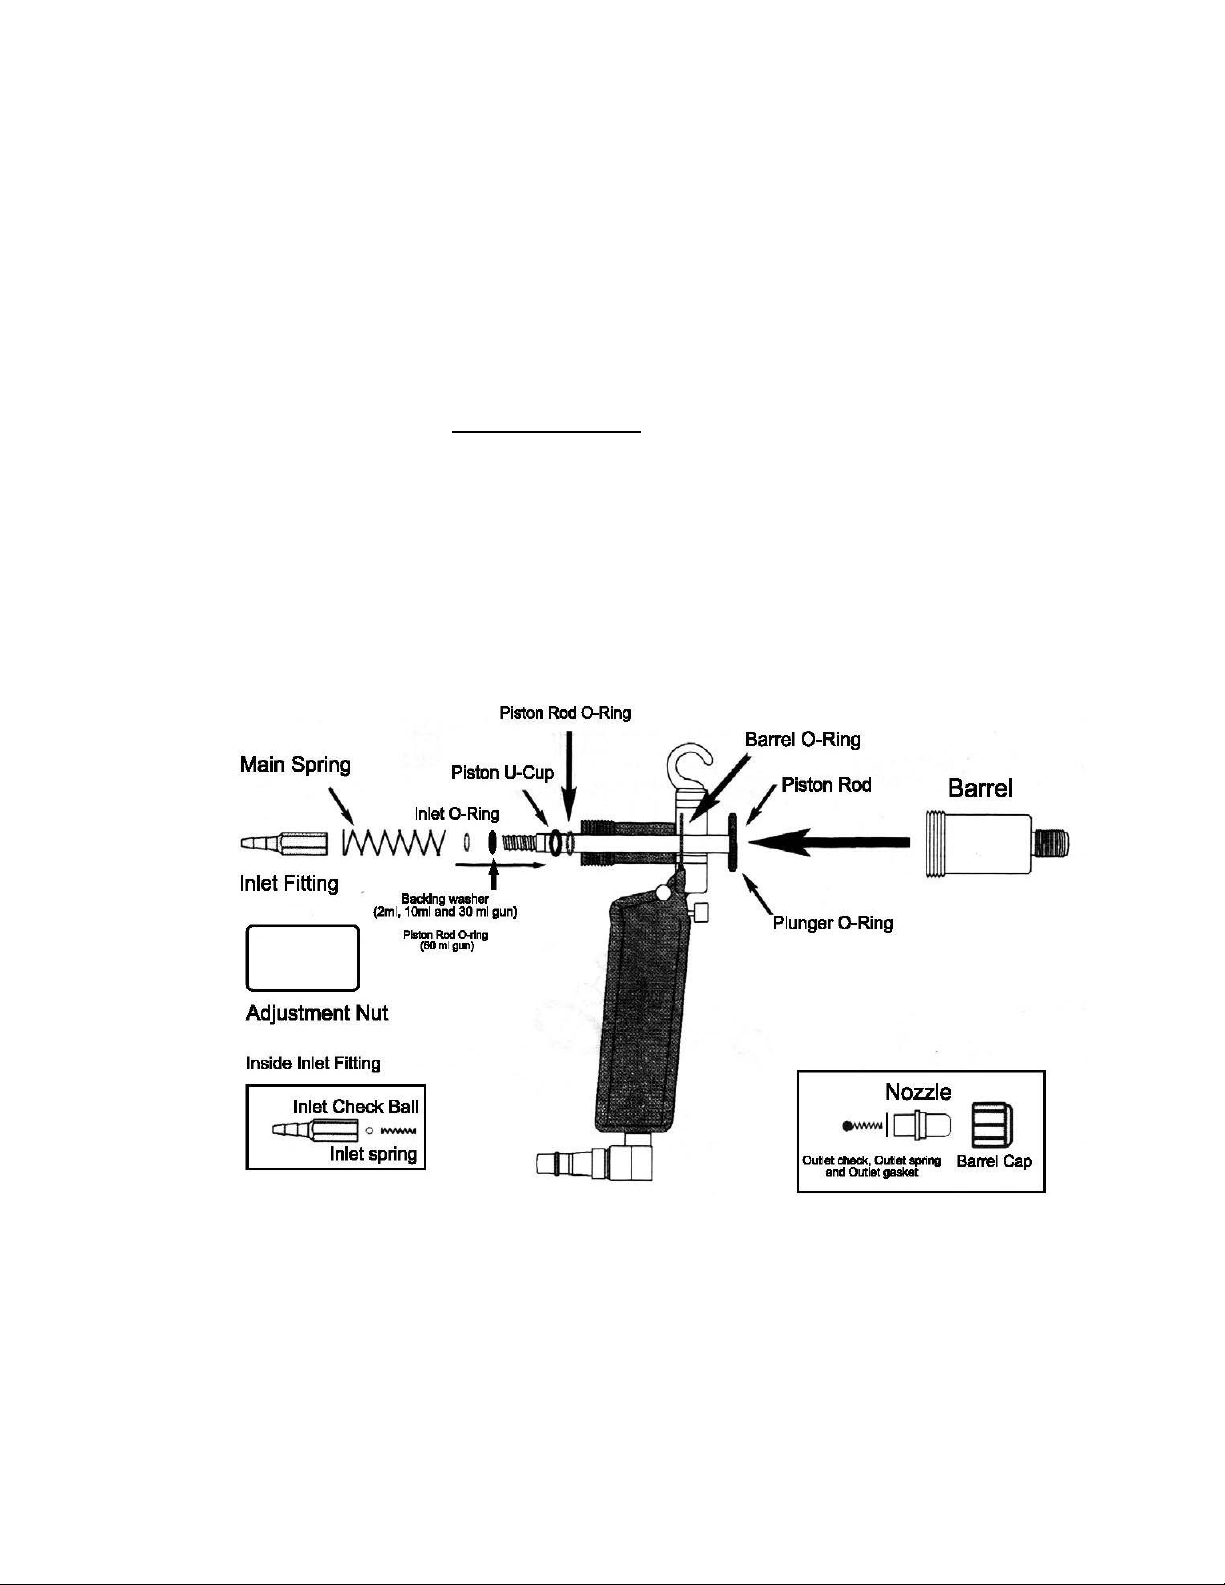
Cleaning the Power Doser™
After use, follow these steps.
Step 1 Pump out product at the end of each day after use.
Step 2 Pump through good quality mineral oil, then pump out.
Step 3 Unscrew barrel & wipe out with a clean rag.
Step 4 Lubricate Plunger “O” ring with Genesis Power Lube (or petroleum jelly).
Your applicator is ready for the next job.
Maintenance
Cleaning the Power Doser™regularly will prevent it from getting
‘clogged up’ and failing while in the middle of a task.
*Only clean the Power Doser™with warm soapy water when
disassembling the applicator for maintenance.
Lubricating the Power Doser™
Lubricating the Power Doser™regularly with Genesis Power Lube
(or petroleum jelly) will help prevent wear and tear and will assist refill.
First, unscrew the barrel and liberally apply Genesis Power Lube (or
petroleum jelly) to the Plunger “O-ring”and inside the barrel.
It is best to lubricate the Power Doser™ every day or when the return of the piston
rod begins to slow.
WHEN LUBRICATING THE POWER DOSER™, ONLY USE LUBRICANTS SUGGESTED IN
THIS MANUAL.