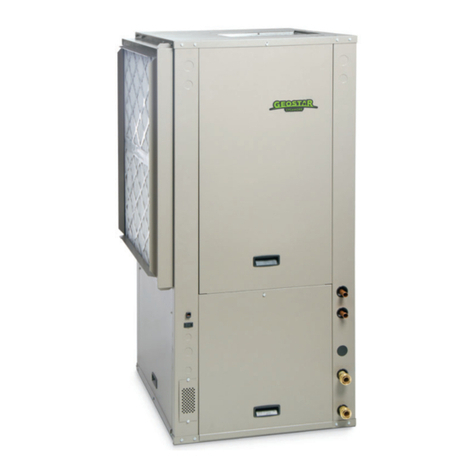
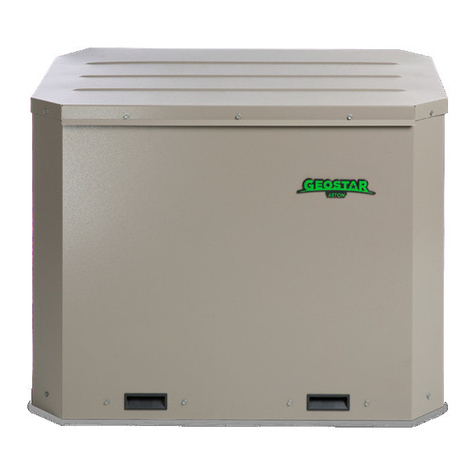
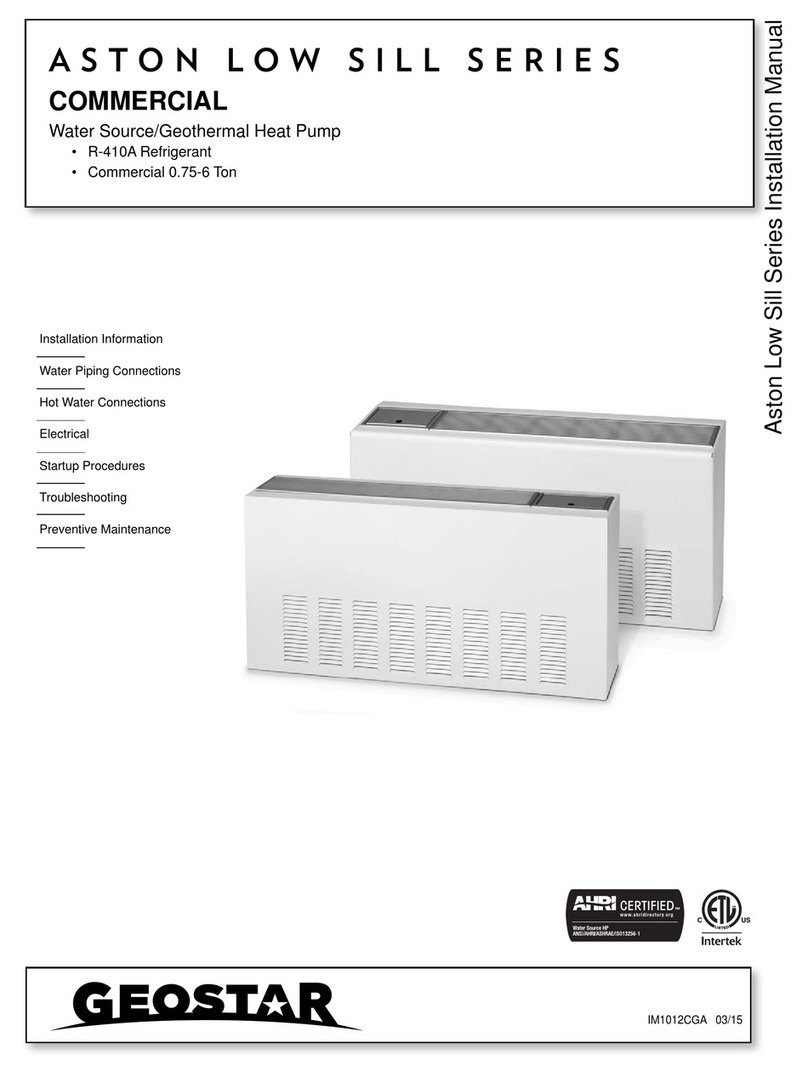
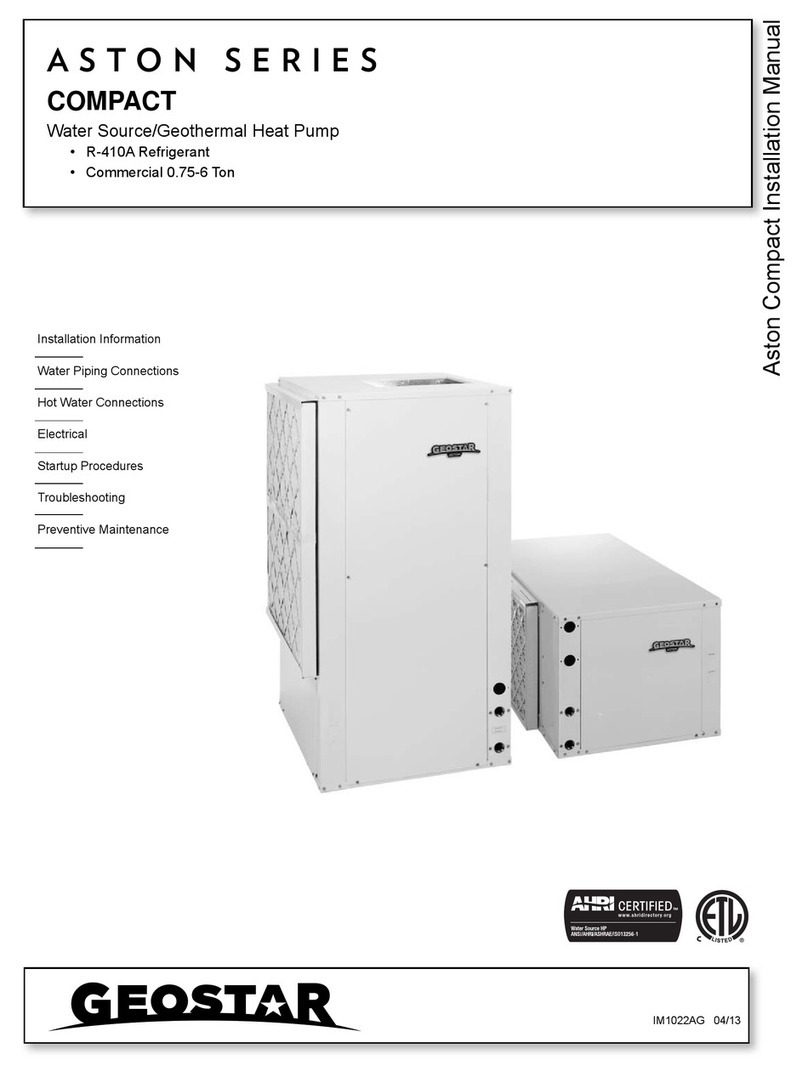
Geostar ASTON SERIES User manual

Aston Console Series Installation Manual
I
t
l
l
t
i
M
l
IM1010CGB 09/15
Installation Information
Water Piping Connections
Hot Water Connections
Electrical
Startup Procedures
Troubleshooting
Preventive Maintenance
COMMERCIAL
Water Source/Geothermal Heat Pump
• R-410A Refrigerant
• Commercial 0.75-1.5 Ton
ASTON CONSOLE SERIES


ASTON CONSOLE SERIES INSTALLATION MANUAL
Table of Contents
Model Nomenclature . . . . . . . . . . . . . . . . . . . . . . . . . . . . . . . . . . . . . . . . . . . . . . . . . . . . . . . . . . . . . . 4
General Installation Information . . . . . . . . . . . . . . . . . . . . . . . . . . . . . . . . . . . . . . . . . . . . . . . . . . . . . . 5
Dimensional Data. . . . . . . . . . . . . . . . . . . . . . . . . . . . . . . . . . . . . . . . . . . . . . . . . . . . . . . . . . . . . . .6-12
Installation Steps . . . . . . . . . . . . . . . . . . . . . . . . . . . . . . . . . . . . . . . . . . . . . . . . . . . . . . . . . . . . . .13-16
System Cleaning and Flushing. . . . . . . . . . . . . . . . . . . . . . . . . . . . . . . . . . . . . . . . . . . . . . . . . . . . . . 17
Open Loop Ground Water Systems . . . . . . . . . . . . . . . . . . . . . . . . . . . . . . . . . . . . . . . . . . . . . . . . . . 18
Electrical Connections . . . . . . . . . . . . . . . . . . . . . . . . . . . . . . . . . . . . . . . . . . . . . . . . . . . . . . . . . . . . 19
Electrical Data . . . . . . . . . . . . . . . . . . . . . . . . . . . . . . . . . . . . . . . . . . . . . . . . . . . . . . . . . . . . . . . . . . 20
Auxiliary Heat Ratings . . . . . . . . . . . . . . . . . . . . . . . . . . . . . . . . . . . . . . . . . . . . . . . . . . . . . . . . . . . . 21
Blower Performance. . . . . . . . . . . . . . . . . . . . . . . . . . . . . . . . . . . . . . . . . . . . . . . . . . . . . . . . . . . . . . 21
Wiring Schematics . . . . . . . . . . . . . . . . . . . . . . . . . . . . . . . . . . . . . . . . . . . . . . . . . . . . . . . . . . . . .22-27
Controls . . . . . . . . . . . . . . . . . . . . . . . . . . . . . . . . . . . . . . . . . . . . . . . . . . . . . . . . . . . . . . . . . . . . . . . 28
Startup Notes . . . . . . . . . . . . . . . . . . . . . . . . . . . . . . . . . . . . . . . . . . . . . . . . . . . . . . . . . . . . . . . . . . . 36
Startup Checklist/Unit Startup Steps . . . . . . . . . . . . . . . . . . . . . . . . . . . . . . . . . . . . . . . . . . . . . . . . . 37
Operating Parameters . . . . . . . . . . . . . . . . . . . . . . . . . . . . . . . . . . . . . . . . . . . . . . . . . . . . . . . . . . . . 38
Operating Limits . . . . . . . . . . . . . . . . . . . . . . . . . . . . . . . . . . . . . . . . . . . . . . . . . . . . . . . . . . . . . . . . . 38
Startup/Troubleshooting Form . . . . . . . . . . . . . . . . . . . . . . . . . . . . . . . . . . . . . . . . . . . . . . . . . . . . . . 39
Pressure Drop . . . . . . . . . . . . . . . . . . . . . . . . . . . . . . . . . . . . . . . . . . . . . . . . . . . . . . . . . . . . . . . . . . 40
Preventive Maintenance. . . . . . . . . . . . . . . . . . . . . . . . . . . . . . . . . . . . . . . . . . . . . . . . . . . . . . . . . . . 41
Replacement Procedures. . . . . . . . . . . . . . . . . . . . . . . . . . . . . . . . . . . . . . . . . . . . . . . . . . . . . . . . . . 41
Revision Guide. . . . . . . . . . . . . . . . . . . . . . . . . . . . . . . . . . . . . . . . . . . . . . . . . . . . . . . . . . . . . . . . . . 42

4
ASTON CONSOLE SERIES INSTALLATION MANUAL
Model Nomenclature
GC S
G
C
S
09 L 0 1 1 C
4-5 6 7 8 9 10
Model
GC –GC Series
Cabinet Configuration
C –Chassis Only
W –Chassis with Cabinet
S –Chassis Slope Top
E –Chassis with Extended
Slope Top
Unit Capacity
09, 12, 15, 18
Piping Option
L –Left
R –Right
Voltage
0 –208-230/60/1
2 –265/60/1
9 –115/60/1 (09 & 12)
Unit Control
1 –CCM
A –AuroraTM Base Control (ABC)
Vintage
* –Internal Factory Use Only
Non-Standard Option Details
SS –Standard Option
Air Coil/Insulation Option
5 –AlumiSealTM/Extended Range
6 –AlumiSealTM/Standard Range
7 –No Coating/Extended Range
8 –No Coating/Standard Range
Sound Kit
A –None
B –Blanket
Auxiliary Electric Heat
N –None
B –1.0kW (09-12)
C –2.0kW (09-12)
D –3.0kW (15-18)
MotorizedOutside Air Damper
(Field Installed)
N –None
M –Motorized Damper
Water Coil Option
C –Copper
N –CuproNickel
Thermostat Control
1 –Unit MountedT-Stat
2 –Remote Wall-MountedT-Stat
N
11
NOTES:
Chassis only available with left piping option.
31-2 N B 5 SS
C
S
e
r
C
onfi
g
a
ssis
O
a
ssis
a
ssis
S
a
ssis
w
p
e To
p
a
cit
y
15
,
18
p
tio
n
h
t
12 13 14 15-16 *
17
60
/
1
(
09
&
12
)
r
ie
g
u
O
w
Sl
w
p
8
e
u
On
w
l
o
i
t
e
s
uration
n
ly
ith
C
abine
t
op
e To
p
t
h Extende
d
Voltage Availability
Voltage Model
09 12 15 18
115/60/1 ••
208-230/60/1 ••••
265/60/1 ••••
1/20/14

5
ASTON CONSOLE SERIES INSTALLATION MANUAL
Safety Considerations
WARNING: Before performing service or
maintenance operations on a system, turn off main
power switches to the indoor unit. If applicable, turn
off the accessory heater power switch. Electrical
shock could cause personal injury.
Installing and servicing heating and air conditioning equipment can
be hazardous due to system pressure and electrical components.
Only trained and qualified service personnel should install, repair
or service heating and air conditioning equipment. Untrained
personnel can perform the basic maintenance functions of cleaning
coils and cleaning and replacing filters. All other operations should
be performed by trained service personnel. When working on
heating and air conditioning equipment, observe precautions in
the literature, tags and labels attached to the unit and other safety
precautions that may apply.
Follow all safety codes. Wear safety glasses and work gloves.
Use a quenching cloth for brazing operations and have a fire
extinguisher available.
Moving and Storage
Move units in the normal “up” orientation. Do not stack units. When
the equipment is received, all items should be carefully checked
against the bill of lading to be sure all crates and cartons have
been received. Examine units for shipping damage, removing the
units from the packaging if necessary. Units in question should also
be internally inspected. If any damage is noted, the carrier should
make the proper notation on the delivery receipt, acknowledging
the damage.
Water Piping
The proper water flow must be provided to each unit whenever the
unit operates. To assure proper flow, use pressure/temperature
ports to determine the flow rate. These ports should be located at
the supply and return water connections on the unit. The proper
flow rate cannot be accurately set without measuring the water
pressure drop through the refrigerant-to-water heat exchanger.
All source water connections on commercial units are fittings that
accept a male pipe thread (MPT). Insert the connectors by hand,
then tighten the fitting with a wrench to provide a leakproof joint.
When connecting to an open loop (groundwater) system, thread
any copper MPT fitting into the connector and tighten in the same
manner as described above.
Refrigerant Systems
To maintain sealed circuit integrity, do not install service gauges
unless unit opertion appears abnormal. Compare the change in
temperature on the air side as well as the water side to the Unit
Operating Parameters tables. If the unit’s performance is not
within the ranges listed, and the airflow and water flow are known
to be correct, gauges should then be installed and superheat and
subcooling numbers calculated. If superheat and subcooling are
outside recommended ranges, an adjustment to therefrigerant
charge may be necessary.
General Installation Information

6
ASTON CONSOLE SERIES INSTALLATION MANUAL
GCW09-18
Overall Cabinet
FlatTop
Configuration
AB C D E F GHI J
Width Depth Height Grille Lid Grille
Length Grille
Width
in. 45.0 10.8 25.7 9.2 35.0 6.1 2.3 44.1 10.3 4.3
cm. 114.3 27.3 65.2 23.4 88.9 15.6 5.8 112.0 26.0 10.9
in. 50.0 12.3 25.7 9.2 35.0 6.1 3.3 49.1 11.8 4.3
cm. 127.0 31.1 65.2 23.4 88.9 15.6 8.3 124.7 29.8 10.9
09-12
15-18
4
0
5
7
8
1
32
/
6
47:B3@0@/193B 47:B3@0@/193B
@756B@3BC@<
B=>
4@=<B
:34B@3BC@<
23B/7:0
BE7AB3FB3<232
B/00/19/<2
4=@B6C<B7:
B/00@3/9A=44
=<:G0@3/9=44
B/0A/;3A723/A
5@7::3:72/AA6=E<
23B/7:0
BE7AB3FB3<232B/0
0/19/<24=@B6C<B7:
B/00@3/9A=44
=<:G0@3/9=44
B/0A/;3A723/A
5@7::3:72/AA6=E<
0/
@3;=D3>:/AB71AB@7>
4@=;0@=93<B/0/<2
@3>:/13=<0@=93<
3253=4:35/AA6=E<
@3;=D3>:/AB71AB@7>
4@=;0@=93<B/0/<2
@3>:/13=<0@=93<
3253=4:35/AA6=E<
Dimensional Data - Flat Top Cabinet

7
ASTON CONSOLE SERIES INSTALLATION MANUAL
GCS09-18
Overall Cabinet
SlopeTop
Configuration
AB C D E F GHI J
Width Depth Height Grille Lid Grille
Length Grille
Width
in. 45.0 11.1 28.6 9.2 35.0 6.1 2.8 44.1 10.3 4.3
cm. 114.3 28.2 72.6 23.4 88.9 15.6 7.2 112.0 26.0 10.9
in. 50.0 12.6 29.1 9.2 35.0 6.1 2.5 49.1 11.8 4.3
cm. 127.0 32.0 73.9 23.4 88.9 15.6 6.4 124.7 29.8 10.9
09-12
15-18
@3;=D3>:/AB71AB@7>
4@=;0@=93<B/0/<2
@3>:/13=<0@=93<
3253=4:35/AA6=E<
67
8
1
4
3
/
2
5
0
@756B@3BC@<
B=>
4@=<B
:34B@3BC@<
23B/7:0
BE7AB3FB3<232B/0
0/19/<24=@B6C<B7:
B/00@3/9A=44
=<:G0@3/9=44
B/0A/;3A723/A
5@7::3:72/AA6=E<
23B/7:/
BE7AB3FB3<232B/0
0/19/<24=@B6C<B7:
B/00@3/9A=44
=<:G0@3/9=44
B/0A/;3A723/A
5@7::3:72/AA6=E<
@3;=D3>:/AB71AB@7>
4@=;0@=93<B/0/<2
@3>:/13=<0@=93<
3253=4:35/AA6=E<
0
/
47:B3@0@/193B
47:B3@0@/193B
Dimensional Data - Slope Top Cabinet

8
ASTON CONSOLE SERIES INSTALLATION MANUAL
GCE09-18
@3;=D3>:/AB71AB@7>
4@=;0@=93<B/0/<2
@3>:/13=<0@=93<
3253=4:35/AA6=E<
Overall Cabinet
Ext.SlopeTop
Configuration
AB C D E F GHI J
Width Depth Height Grille Lid Grille
Length Grille
Width
in. 50.0 12.6 29.1 9.2 35.0 6.1 2.4 49.1 12.0 4.3
cm. 127.0 32.0 73.9 23.4 88.9 15.6 6.1 124.7 30.5 10.9
in. 55.0 12.6 29.1 9.2 35.0 6.1 2.5 54.1 11.8 4.3
cm. 139.7 32.0 73.9 23.4 88.9 15.6 6.4 137.4 29.8 10.9
09-12
15-18
47:B3@0@/193B47:B3@0@/193B
/
2 3
1
67
8
4
0
5
/0
@756B@3BC@< B=>
4@=<B
:34B@3BC@<
23B/7:0
BE7AB3FB3<232B/0
0/19/<24=@B6C<B7:
B/00@3/9A=44
=<:G0@3/9=44
B/0A/;3A723/A
5@7::3:72/AA6=E<
23B/7:/
BE7AB3FB3<232B/0
0/19/<24=@B6C<B7:
B/00@3/9A=44
=<:G0@3/9=44
B/0A/;3A723/A
5@7::3:72/AA6=E<
@3;=D3>:/AB71AB@7>
4@=;0@=93<B/0/<2
@3>:/13=<0@=93<
3253=4:35/AA6=E<
Dimensional Data - Extended Slope Top Cabinet

9
ASTON CONSOLE SERIES INSTALLATION MANUAL
1=<B@=:>/<3:
@3;=D34=@/113AA
B=1=<B@=:0=F
2/;>3@=<=44AE7B16
1=;>@3AA=@
/113AA>/<3:
@3;=D324=@
1:/@7BG
0=B6A723A
3:31B@7163/B;=23
<=@;/:0=7:3@:3AA
AE7B16=>B7=</:
4/<=>B7=<AE7B16
=>B7=</:0/19>:/B3
@3?C7@324=@
2/;>3@7<AB/::/B7=<
=CBA723/7@
2/;>3@=>B7=<
473:27<AB/::32
:=ED=:B/53
B3@;7</:A
4F@3;=B3E/::
AB/B=>B7=<A=<:G
=>B7=</:
4CA32
<=<4CA32
27A1=<<31B
=>B7=</:
0/::D/:D3A
=>B7=</:
6=A397BA
1=<23<A/B3
2@/7<1=<<31B7=<
47:B3@
6/<2G0=F
Dimensional Data - Right Return Controls Detail

10
ASTON CONSOLE SERIES INSTALLATION MANUAL
BLOWER ACCESS PANEL
COMPRESSOR
ACCESS PANEL
37.88
(96.2) 28.5
(72.4)
1.5
(3.8)
1.5
(3.8)
4.37
(11.1)
9.38
(23.8)
FILTER
CONTROL PANEL
25.25
(64.1)
0.86
(2.2)
10.31
(26.2)
1.0
(2.5)
1.78
(4.5)
11.0
(27.9)
4.5
(11.4)
2.0
(5.1)
21.4
(54.4) 20.0
(50.8)
CONDENSATE
DRAIN CONNECTION
WATER OUT 1/2˝FPT
WATER IN 1/2˝FPT
OPTIONAL BACK PLATE
COMPRESSOR
ACCESS PANEL
43.37
(110.2)
28.0
(71.1)
9.25
(23.5) 13.9
(35.3)
25.65
(65.2)
19.83
(50.4)
1.64
(4.2)
12.03
(30.6)
0.66
(1.7)
2.75
(7.0)
5.5
(14.0) DAMPER OPENING
Models 09-12
BLOWER ACCESS PANEL
COMPRESSOR
ACCESS PANEL
42.88
(108.9) 34.0
(86.4)
1.5
(3.8)
1.5
(3.8)
4.32
(11.0)
8.88
(22.6)
FILTER
CONTROL PANEL
25.25
(64.1)
0.86
(2.2)
11.75
(29.8)
1.0
(2.5)
12.0
(30.5)
4.5
(11.4)
2.0
(5.1)
20.6
(52.3) 19.5
(49.5)
CONDENSATE
DRAIN CONNECTION
WATER OUT 1/2˝FPT
WATER IN 1/2˝FPT
OPTIONAL BACK PLATE
COMPRESSOR
ACCESS PANEL
48.25
(122.6)
33.0
(83.8)
11.78
(29.9) 13.9
(35.3)
25.80
(65.5)
20.0
(50.8)
1.62
(4.1)
12.18
(30.9)
0.83
(2.1)
2.75
(7.0)
5.4
(13.7) DAMPER OPENING
Models 15-18
Dimensional Data - Right Return Chassis
Data = inches (cm)

11
ASTON CONSOLE SERIES INSTALLATION MANUAL
:=ED=:B/53
B3@;7</:A
4F@3;=B3E/::
AB/B=>B7=<A=<:G
=>B7=</:
4CA32
<=<4CA32
27A1=<<31B
=>B7=</:
0/::D/:D3A
=>B7=</:
6=A397BA
1=<23<A/B3
2@/7<1=<<31B7=<
47:B3@
6/<2G0=F
=>B7=</:
3:31B@7163/B
=>B7=</:0/19>:/B3
@3?C7@324=@
2/;>3@7<AB/::/B7=<
=CBA723/7@
2/;>3@=>B7=<
473:27<AB/::32
1=<B@=:>/<3:
@3;=D34=@/113AA
B=1=<B@=:0=F
2/;>3@=<=44AE7B16
1=;>@3AA=@
/113AA>/<3:
@3;=D324=@
1:/@7BG
0=B6A723A
3:31B@7163/B;=23
<=@;/:0=7:3@:3AA
AE7B16=>B7=</:
4/<=>B7=<AE7B16
Dimensional Data - Left Return Controls Detail

12
ASTON CONSOLE SERIES INSTALLATION MANUAL
9.38
(23.8)
28.5
(72.4)
1.50
(3.8)
1.50
(3.8)
4.37
(11.1)
37.88
(96.2)
BLOWER ACCESS PANEL
COMPRESSOR
ACCESS PANEL
FILTER
CONTROL PANEL
1.00
(2.5)
10.31
(26.2)
4.5
(11.4)
0.86
(2.2)
2.0
(5.1)
25.25
(64.1) 21.4
(54.4) 20.0
(50.8)
1.78
(4.5)
11.0
(27.9)
CONDENSATE
DRAIN CONNECTION
WATER OUT 1/2˝FPT
WATER IN 1/2˝FPT
28.00
(71.1)
13.90
(35.3) 9.25
(23.5)
2.75
(7.0)
12.03
(30.5)
0.66
(1.7) 5.50
(14.0)
OPTIONAL BACK PLATE
COMPRESSOR
ACCESS PANEL
DAMPER OPENING
43.37
(110.2)
1.62
(4.1)
25.65
(65.1)
19.83
(50.4)
Models 09-12
8.88
(22.6)
34.0
(86.4)
1.50
(3.8)
1.50
(3.8)
4.32
(11.0)
42.88
(108.9)
BLOWER ACCESS PANEL
COMPRESSOR
ACCESS PANEL
FILTER
CONTROL PANEL
1.00
(2.5)
11.75
(26.2)
4.5
(11.4)
0.86
(2.2)
2.0
(5.1)
25.25
(64.1) 20.6
(52.3) 19.5
(49.5) 12.0
(30.5)
CONDENSATE
DRAIN CONNECTION
WATER OUT 1/2˝FPT
WATER IN 1/2˝FPT
33.0
(83.8)
13.90
(35.3) 11.78
(29.9)
2.75
(7.0)
12.18
(30.9)
0.83
(2.1) 5.50
(14.0)
OPTIONAL BACK PLATE
COMPRESSOR
ACCESS PANEL
DAMPER OPENING
48.25
(122.6)
1.62
(4.1)
25.80
(65.5)
20.0
(50.8)
Models 15-18
Dimensional Data - Left Return Chassis
Data = inches (cm)

13
ASTON CONSOLE SERIES INSTALLATION MANUAL
Installation Steps
Step 1: Unpack Equipment and Inspect for Damage
Step 2: Determine Equipment Location
• Choose level flooring surface (Correctable with shims. Do not pitch towards drain.)
• Location of wall support and fasteners required to secure chassis backplate.
• Easy access for both installation and service.
• Consider availability and ease of wiring, water piping and condensate drain.
• No obstructions to block airflow in front of the unit.
Step 3: Mark Unit Position
• Ensure that floor is level. If shims are required, make sure that the entire compressor compartment area is uniformly
shimmed and that the backplate mounting height is increased by the thickness of the shims used.
• Position backplate in desired equipment location. To further reduce the operating sound level of the unit, 1/8-inch thick
rubber matting may be placed under the chassis to eliminate vibration on hard flooring surfaces. (Make sure back plate
is level).
• Mark and cut floor or wall penetrations for electrical wiring, water and condensate piping.
Optional Electrical Disconnect and Motorized Outside Air Damper
• Mark and cut wall penetrations for field fabricated outside air duct sleeve.
• Align mounting holes with backplate and attach with screws supplied.
1=<A=:3
1/07<3B
1=<A=:3
16/AA7A
1=<23<A/B3
2@/7<:=1/B7=<
=>B7=</:6=A3A
0/::D/:D3A
=>B7=</:
>B>:C5A
=>B7=</:
E/B3@
=CB
E/B3@
7<
1=<A=:31/07<3B
0/19>:/B3
=>B7=</:
E/::>3<3B@/B7=<
4=@E/B3@1=<<31B7=<
4:==@>3<3B@/B7=<
4=@E/B3@1=<<31B7=<
4CA323:31B@71/:
27A1=<<31B=>B7=</:
;=B=@7H32
2/;>3@
=>B7=</:
;=B=@7H32
2/;>3@
=>3<7<5
Figure 1

14
ASTON CONSOLE SERIES INSTALLATION MANUAL
Installation Steps cont.
Step 4: Provide Water and Condensate Drain Connections
• Atwo-pipe reverse return piping configuration is recommended as it equalizes the piping circuit lengths and delivers
even water flow to each unit.A direct return piping configuration may be used, but it may be difficult to achieve and
maintain proper water flow to the units.
• An air vent must be installed in the water distribution system.
• The supply and return water piping should be run through the wall or floor penetration and terminate with a ball valve.
The piping material used must comply with all local codes.
• Refer to: System Cleaning and Flushing procedures.
Pipe Locations
Figure 2
1=<A=:3
1/07<3B
1=<A=:3
16/AA7A
1=<23<A/B3
2@/7<:=1/B7=<
E/B3@1=<<31B7=<A
B/@53B/@3/4=@
E/::>3<3B@/B7=<
4CA323:31B@71/:
27A1=<<31B=>B7=</:
#Þf&Þ/@3//>>=F Þ
4@=;3253=416/AA7A
Þ4@=;4@=<B3253
=41/07<3B
#Þ
&Þ
B/@53B/@3/4=@
4:==@>3<3B@/B7=<
1/07<3B3FB3<2A
B=B67A>=7<B
#Þf&Þ/@3//>>=F Þ
4@=;3253=416/AA7A
!Þ4@=;4:==@
"D/113AA=@G
3:31B@71/:
8C<1B7=<0=F

15
ASTON CONSOLE SERIES INSTALLATION MANUAL
Installation Steps cont.
Step 5: Provide Line Voltage Wiring
• Check unit data plate located on control side of chassis for ampacity and fuse size.
• Remove electrical knockouts from chassis backplate.
• Run line voltage wiring through knockout and secure wiring to backplate or disconnect.
Step 6: Chassis Installation
• Level and secure backplate to wall.
• Position the chassis against back plate. Drive (2) screws through holes in lip of backplate into top flange of chassis.
Step 7: Final Electrical Connection
• Install flexible electrical conduit between the backplate or electrical disconnect and the unit mounted junction box.
• Make final wiring connections in disconnect and junction box, taking care to replace all covers when done. Wiring must
conform to NEC and/or all local codes. Refer to Electrical Data.
NOTE: It is necessary to make final wiring connections prior to securing unit chassis to back plate on right-hand piping models
with electrical disconnect.
Step 8: Final Water Connection
• For ease of installation and sound attenuation, high pressure (recommended) flexible hoses with a swivel fitting should
be provided.Apply Teflon® tape or sealant compound to threaded hose fittings.
• Combination shut-off/balancing valves should be installed on both the supply and return water lines of the unit.
• Flow control valves should be installed on the water discharge line.
• It is recommended that P/T ports be installed on the supply and return water lines.
Step 9: Set Unit Controls
• Locate the “continuous fan/cycle fan” switch within the electrical compartment of the chassis and set to desired position.
(Remote wall thermostat units do not use this optional switch.)
• Optional Control Settings-
Remote Thermostat - Run low voltage wiring from unit to the desired thermostat location.
Mount and wire thermostat according to manufacturer’s recommendations.
Motorized Outside Air Damper - Locate the “damper on/damper off” damper switch within the electrical compartment of the chassis
and set to desired position.
Emergency Electrical Heat - Locate the “electric heat/normal/boilerless” control switch within the electrical compartment of the chassis
and set to desired position.
Step 10: Secure the Cabinet Cover
• Position and lower cabinet over unit chassis.Apply pressure to the front of the cabinet to ensure that the back lip of the
cabinet hooks over the tabs provided on the backplate.
• Secure cabinet to chassis with mounting screws provided.
Step 11: Perform Final Unit Check
• Measure the pressure drop across the water coil and monitor water or air temperatures in both heating and cooling
modes. The measured values should fall within the acceptable ranges shown in the Startup Performance table.

16
ASTON CONSOLE SERIES INSTALLATION MANUAL
Installation Steps cont.
1
Top view
Side view
Figure 3
2
Field Converting Console
Chassis is normally configured with controls on right end and piping on left end (see Figure 3 top view). In this position panel number 1
would be positioned against wall or back plate. Unit may also be turned 180° against wall or back plate. In this position controls will be
on left end and piping on right end panel number 2 would be positioned against wall or back plate. Chassis must be enclosed with an
approved cabinet enclosure.
1. Remove 4 screws from front kick panel on cabinet.
2. Remove cabinet from chassis by lifting and sliding cabinet
straight up.
3. Remove grille assembly from cabinet by removing 4 screws from
brackets located on the bottom of the grille and door assemblies.
4. Replace grille/door assemblies into cabinet repositioning pieces
1, 2, and 3 into the locations directly opposite the original positions.
Secure by replacing mounting brackets. (Note: Be sure that louvers
on the grille assembly are facing the proper direction when
replacing the grille section.)
5. Replace grille/frame assembly into cabinet, and secure by replacing
mounting brackets.
6. Replace cabinet by sliding it down over the top of the chassis.
7. Remove tab on leg that extends into return air opening. When the
grille side of the cabinet is flat against chassis there will be 4
holes that line up in the leg section. Only use 1 hole for alignment
for opposite side of grille. (Note: The tab can be removed by
twisting back and forth until it breaks off.)
8. Remove plastic strip from tab and replace on rough edge that the
tab was removed from.
9. Replace screws in font kick panel to secure cabinet to chassis.
10.Mount filter bracket in designated opening area. (Note: The filter
bracket will only fit in one direction if cabinet is installed properly.)
Figure 4
4
21
3
5
Depends on Cabinet Size

17
ASTON CONSOLE SERIES INSTALLATION MANUAL
System Cleaning and Flushing
Cleaning and Flushing
Prior to start up of any heat pump, the water circulating system must be cleaned and
flushed of all dirt and debris.
If the system is equipped with water shutoff valves, the supply and return
runouts must be connected together at each unit location (This will prevent the
introduction of dirt into the unit, see Figure 7). The system should be filled at
the water make-up connection with all air vents open. After filling, vents should
be closed.
The contractor should start the main circulator with the pressure reducing valve
makeup open. Vents should be checked in sequence to bleed off any trapped
air and to verify circulation through all components of the system.
As water circulates through the system, the contractor should check and repair
any leaks found in the piping system. Drain(s) at the lowest point(s) in the
system should be opened for initial flush and blowdown, making sure water
fill valves are set at the same rate. Check the pressure gauge at the pump suction and manually adjust the make-up water valve to hold
the same positive pressure both before and after opening the drain valves. Flushing should continue for at least two hours, or longer if
required, until drain water is clean and clear.
The supplemental heater and/or circulator pump, if used, should be shut off. All drains and vents should be opened to completely drain the
system. Short-circuited supply and return runouts should now be connected to the unit supply and return connections.
Refill the system with clean water. Test the system water for acidity and treat as required to leave the water slightly alkaline (pH 7.5 to 8.5).
The specified percentage of antifreeze may also be added at this time. Use commercial grade antifreeze designed for HVAC systems only.
Environol™ brand antifreeze is recommended..
Once the system has been filled with clean water and antifreeze (if used), precautions should be taken to protect the system from dirty
water conditions. Dirty water will result in system-wide degradation of performance, and solids may clog valves, strainers, flow regulators,
etc. Additionally, the heat exchanger may become clogged which reduces compressor service life and can cause premature unit failure.
In boiler/tower application, set the loop control panel set points to desired temperatures. Supply power to all motors and start the circulat-
ing pumps. After full flow has been established through all components including the heat rejector (regardless of season), air vented and
loop temperatures stabilized, each of the units will be ready for check, test and start up and for air and water balancing.
Ground Source Loop System Checkout
Once piping is completed between the unit pumping system and ground loop, final purging and charging of the loop is needed. A high
pressure pump is needed to achieve adequate flow velocity in the loop to purge air and dirt particles from the loop itself. Antifreeze solu-
tion is used in most areas to prevent freezing. Flush the system adequately to remove as much air as possible; then pressurize the loop to
a static pressure of 40-50 PSI (summer) or 50-75 PSI (winter). This is normally adequate for good system operation. Loop static pressure
may decrease soon after initial installation, due to pipe expansion and loop temperature change. Running the unit for at least 30 minutes
after the system has been completely purged of air will allow for the “break-in” period. It may be necessary to adjust static loop pressure
(by adding water) after the unit has run for the first time. Loop static pressure will also fluctuate with the seasons. Pressures will be higher
in the winter months than during the cooling season. This fluctuation is normal and should be considered when charging the system
initially.
Insure the pump provides adequate flow through the unit by checking pressure drop across the heat exchanger.
Usually 2.25-3.0 GPM of flow per ton of cooling capacity is recommended in earth loop applications.
Return Runout
Supply Runout
Mains
Rubber Hose
Runouts Initially
Connected Together
Figure 7: Flushing with Water
Shutoff Valve Equipped Systems

18
ASTON CONSOLE SERIES INSTALLATION MANUAL
Open Loop Ground Water Systems
Always maintain water pressure in the heat exchanger by placing water control valves at the outlet of the unit to prevent mineral
precipitation. Use a closed, bladder-type expansion tank to minimize mineral formation due to air exposure. Insure proper water flow
through the unit by checking pressure drop across the heat exchanger and comparing it to the figures in unit capacity data tables in the
specification catalog. 1.5-2 GPM of flow per ton of cooling capacity is recommended in open loop applications.
Discharge water from the unit is not contaminated in any manner and can be disposed of in various ways, depending on local codes,
i.e. recharge well, storm sewer, drain field, adjacent stream or pond, etc. Most local codes forbid the use of sanitary sewer for disposal.
Consult your local building and zoning departments to assure compliance in your area.
Note: For open loop/groundwater systems or systems that do not contain an antifreeze solution, set SW1-Switch #2 to the “WELL”
position (Refer to the Dip Switch Field Selection table). Slow opening/closing solenoid valves (type VM) are recommended to eliminate
water hammer.
Water Quality
In ground water situations where scaling could be heavy or where biological growth such as iron bacteria will be present, a closed loop
system is recommended. The heat exchanger coils in ground water systems may, over a period of time, lose heat exchange capabili-
ties due to a buildup of mineral deposits inside. These can be cleaned, but only by a qualified service mechanic, as special solutions and
pumping equipment are required. Desuperheater coils can likewise become scaled and possibly plugged. In areas with extremely hard
water, the owner should be informed that the heat exchanger may require occasional flushing.
Units with cupronickel heat exchangers are recommended for open loop applications due to the increased resistance to build-up and corro-
sion, along with reduced wear caused by acid cleaning.
Material Copper 90/10 Cupronickel 316 Stainless Steel
pH Acidity/Alkalinity 7 - 9 7 - 9 7 - 9
Scaling Calcium and
Magnesium Carbonate (Total Hardness)
less than 350 ppm (Total Hardness)
less than 350 ppm
Corrosion
Hydrogen Sulfide Less than 0.5 ppm (rotten egg
smell appears at 0.5 ppm) 10 - 50 ppm Less than 1 ppm
Sulfates Less than 125 ppm Less than 125 ppm Less than 200 ppm
Chlorine Less than 0.5 ppm Less than 0.5 ppm Less than 0.5 ppm
Chlorides Less than 20 ppm Less than 125 ppm Less than 300 ppm
Carbon Dioxide Less than 50 ppm 10 - 50 ppm 10 - 50 ppm
Ammonia Less than 2 ppm Less than 2 ppm Less than 20 ppm
Ammonia Chloride Less than 0.5 ppm Less than 0.5 ppm Less than 0.5 ppm
Ammonia Nitrate Less than 0.5 ppm Less than 0.5 ppm Less than 0.5 ppm
Ammonia Hydroxide Less than 0.5 ppm Less than 0.5 ppm Less than 0.5 ppm
Ammonia Sulfate Less than 0.5 ppm Less than 0.5 ppm Less than 0.5 ppm
Total Dissolved Solids (TDS) Less than 1000 ppm 1000 - 1500 ppm 1000 - 1500 ppm
LSI Index +0.5 to -0.5 +0.5 to -0.5 +0.5 to -0.5
Iron Fouling
(Biological Growth)
Iron, FE2+ (Ferrous)
Bacterial Iron Potential < 0.2 ppm < 0.2 ppm < 0.2 ppm
Iron Oxide Less than 1 ppm, above this level
deposition will occur Less than 1 ppm, above this level
deposition will occur
Erosion Suspended Solids Less than 10 ppm and filtered for
max. of 600 micron size Less than 10 ppm and filtered for
max. of 600 micron size
Threshold Velocity
(Fresh Water) < 6 ft/sec < 6 ft/sec < 6 ft/sec
NOTES: Grains = ppm divided by 17
mg/L is equivalent to ppm 2/22/12

19
ASTON CONSOLE SERIES INSTALLATION MANUAL
Electrical Connections
General
Be sure the available power is the same voltage and phase as that shown on the unit serial plate. Line and low voltage wiring must be
done in accordance with local codes or the National Electric Code, whichever is applicable.
208 Volt Operation
All Envision Series 208/230 units are factory wired for 230 volt operation. For 208 volt operation, the red and blue transformer wires must
be switched.
Microprocessor Remote Thermostat Wiring
TB
O
G
Y
C
R
L
S
X1
W1
Field
Connections Unit
Connections
24 VAC
COMMON
COMPRESSOR
REVERSING
VALVE
FAN
LOCKOUT
SIGNAL
SHUTDOWN
LOAD SHED
ELECTRIC HEAT
Requires common
connections or 24
VAC for activation
Red
Black
Yellow
Orange
Green
Brown
Blue
Pink
Electric
Heat Relay
Figure 5

20
ASTON CONSOLE SERIES INSTALLATION MANUAL
Electrical Data
ECM Motor
Model Rated
Voltage Voltage
Min/Max
Compressor Fan
Motor
FLA
Total
Unit
FLA
Min
Circ
Amp
Max
Fuse/
HACR
MCC RLA LRA
09
115/60/1 104/127 12.5 8.0 50.0 4.25 12.3 14.3 20
208-230/60/1 187/253 6.4 4.1 21.0 2.6 6.7 7.7 10/15
265/60/1 238/292 6.7 4.3 22.0 2.5 6.8 7.9 10/15
12
115/60/1 104/127 14.8 9.5 50.0 4.25 13.8 16.1 25
208-230/60/1 187/253 7.7 4.9 25.0 2.6 7.5 8.8 10/15
265/60/1 238/292 7.0 4.5 22.0 2.5 7.0 8.1 10/15
15 208-230/60/1 187/253 9.2 5.9 29.0 2.6 8.5 10.0 15
265/60/1 238/292 7.8 5.0 28.0 2.5 7.5 8.8 10/15
18 208-230/60/1 187/253 10.4 6.7 33.5 2.6 9.3 10.9 15
265/60/1 238/292 8.7 5.6 28.0 2.5 8.1 9.5 15
HACR circuit breaker in USA only 1/20/14
Other manuals for ASTON SERIES
5
Table of contents
Other Geostar Heat Pump manuals
Popular Heat Pump manuals by other brands

Technibel
Technibel PHR 6 Installation instruction

Carrier
Carrier 48XZ Guide manual

Swim & Fun
Swim & Fun PRO 1225 user manual

Johnson Controls Unitary Products
Johnson Controls Unitary Products PHE6 SERIES installation manual

Amana
Amana P68855-8C owner's manual

MICROWELL
MICROWELL HP 1000 GREEN Installation and user manual

Panasonic
Panasonic Aquarea WH-SXC09H3E5 quick guide

Carrier
Carrier 50TJQ004-007 Installation, Start-Up and Service Instructions

Panasonic
Panasonic WH-MDC06E3E5 Service manual

Gullberg & Jansson
Gullberg & Jansson Q12 Installation and instruction manual

Nortek
Nortek T4BE installation instructions

Daikin
Daikin CHYHBH05AA installation manual