Getinge 88-SERIES User manual

GETINGE 88-SERIES
USER MANUAL
502404300
SEV0647139-

<Doc_USR><Doc_502404300><Rel_A><Lang_GB>
Page 2 of 24
Contents
FOREWORD ____________________________________________3
SAFETY REGULATIONS _________________________________4
INTRODUCTION ________________________________________5
Intended use of the machine_________________________________ 5
Symbols on the machine ____________________________________ 5
Attention symbols __________________________________________ 5
General ___________________________________________________ 5
Control system_____________________________________________ 7
Door function ______________________________________________ 7
Dosing system _____________________________________________ 8
OPERATING INSTRUCTIONS_____________________________9
Machine without barcode scanner____________________________ 9
Machine with barcode scanner_______________________________ 10
Positioning the items _______________________________________ 12
Handling detergent _________________________________________ 12
Daily inspection ____________________________________________ 13
If necessary _______________________________________________ 14
Printer (Option)_____________________________________________ 15
PROCESS ______________________________________________17
Changing parameters _______________________________________ 17
Printing out a program for a machine with printer (option) _______ 17
FAULT INDICATIONS ____________________________________18
Handling alarms____________________________________________ 18
Alarms ____________________________________________________ 19
Fault codes in the machine __________________________________ 19
Detergents _____________________________________________21
Water quality - washer disinfectors_______________________22

Page 3 of 24
<Doc_USR><Doc_502404300><Rel_A><Lang_GB>
FOREWORD
This instruction manual is intended for users of the Getinge washer disinfector 88-5.
The instruction manual describes the design and operation of the machine and the main-
tenance for which the user is responsible. The purpose of the information in the manual
is to ensure safe operation and optimum efciency.
Before using the machine for the rst time, users must have read this instruction manual
and familiarized themselves with the operation of the machine and its safety instructions.
Read through the instruction manual before using the machine.
The information in this manual describes the machine as dispatched from Getinge.
There may be differences due to customization.
The machine is accompanied by the following documentation:
User manual (this book)
Installation manual
Technical manual
Spare parts list
Goods positioning instructions
The Goods positioning instructions supplied must be put up in a clearly visible position
at the time of installation.
Getinge reserves the right to change the specication and design without prior notice.
The information in this manual was up to date on the date of issue of the manual.
•
•
•
•
•
© Copyright
The content of this manual must not be copied, in
whole or in part, without the written consent of Getinge.

<Doc_USR><Doc_502404300><Rel_A><Lang_GB>
Page 4 of 24
SAFETY REGULATIONS
This machine has been designed with a number of built-in safety devices. To avoid in-
jury, it is highly important not to bypass or disable these safety devices. If the equipment
is used in a manner not specied by the manufacturer this can impair the safety equip-
ment on the machine.
The equipment must be used in accordance with the safety instructions be-
low. If in doubt, contact a representative of the reseller without delay.
Important
Read the instructions thoroughly before use.
The equipment must only be used by personnel who know about it and are trained
to use it. Personnel must also receive regular training on this equipment.
Take care when handling the chemical agent used in the machine.
Read the details on the container or contact the manufacturer:Read the details on the container or contact the manufacturer:
- if the agent comes into contact with the operator’s eyes or skin or if the vapors are
breathed in, etc.
- about storing the agent and disposing of empty containers.
Take care, because the machine uses hot water and possibly steam.
Installation and service work must be done by personnel trained in the use of
this machine.
Never bypass the door switch of the machine.
Leakage in the system, due to a worn door seal for example, must be dealt
with immediately.
The electric power must be cut off before the machine cabinet is opened. (The ma-
chine cabinet contains electrical components).
Make sure that there is always detergent in the bottles. This is important both for the
operation of the machine and for keeping the washing chamber free from staining.
The machine must be kept clean if it is to work properly.
Do not wash down or hose down the machine with water.
The machine must not be operated with cladding plates, roof and plinths removed.
Doing this puts at risk the safety and functioning of the machine.
Spare parts may only be obtained from Getinge EDC.
Product liability
Any modication or incorrect use of the equipment without the approval of Getinge Dis-
infection AB invalidates Getinge Disinfection AB’s product liability.
This product was manufactured by:
GETINGE DISINFECTION AB
Ljungadalsgatan 11, Box 1505
351 15 Växjö, Sweden
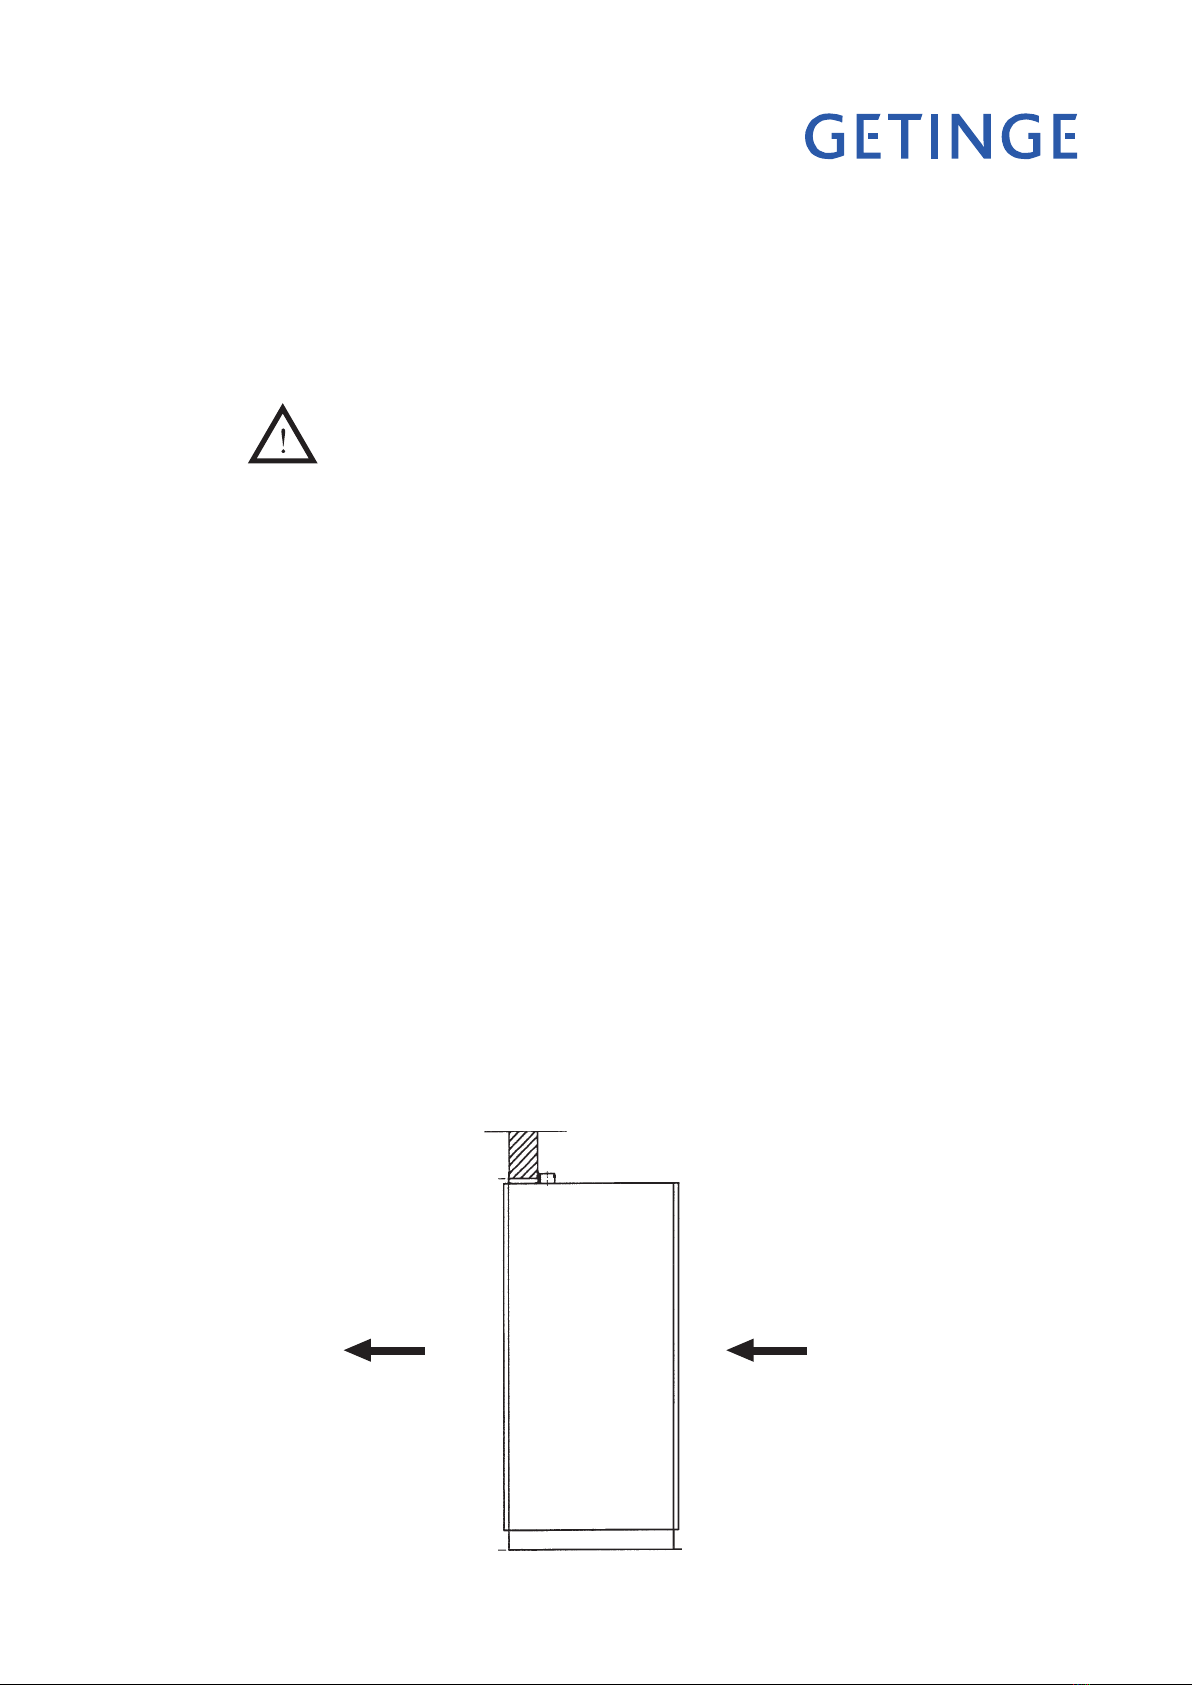
Isolator switch
The machine must be tted with a separate, lockable isolating device in the electric pow-
er supply. The isolating device must be easily accessible on a wall close to the machine.
The installation must conform to and be marked in accordance with local provisions.
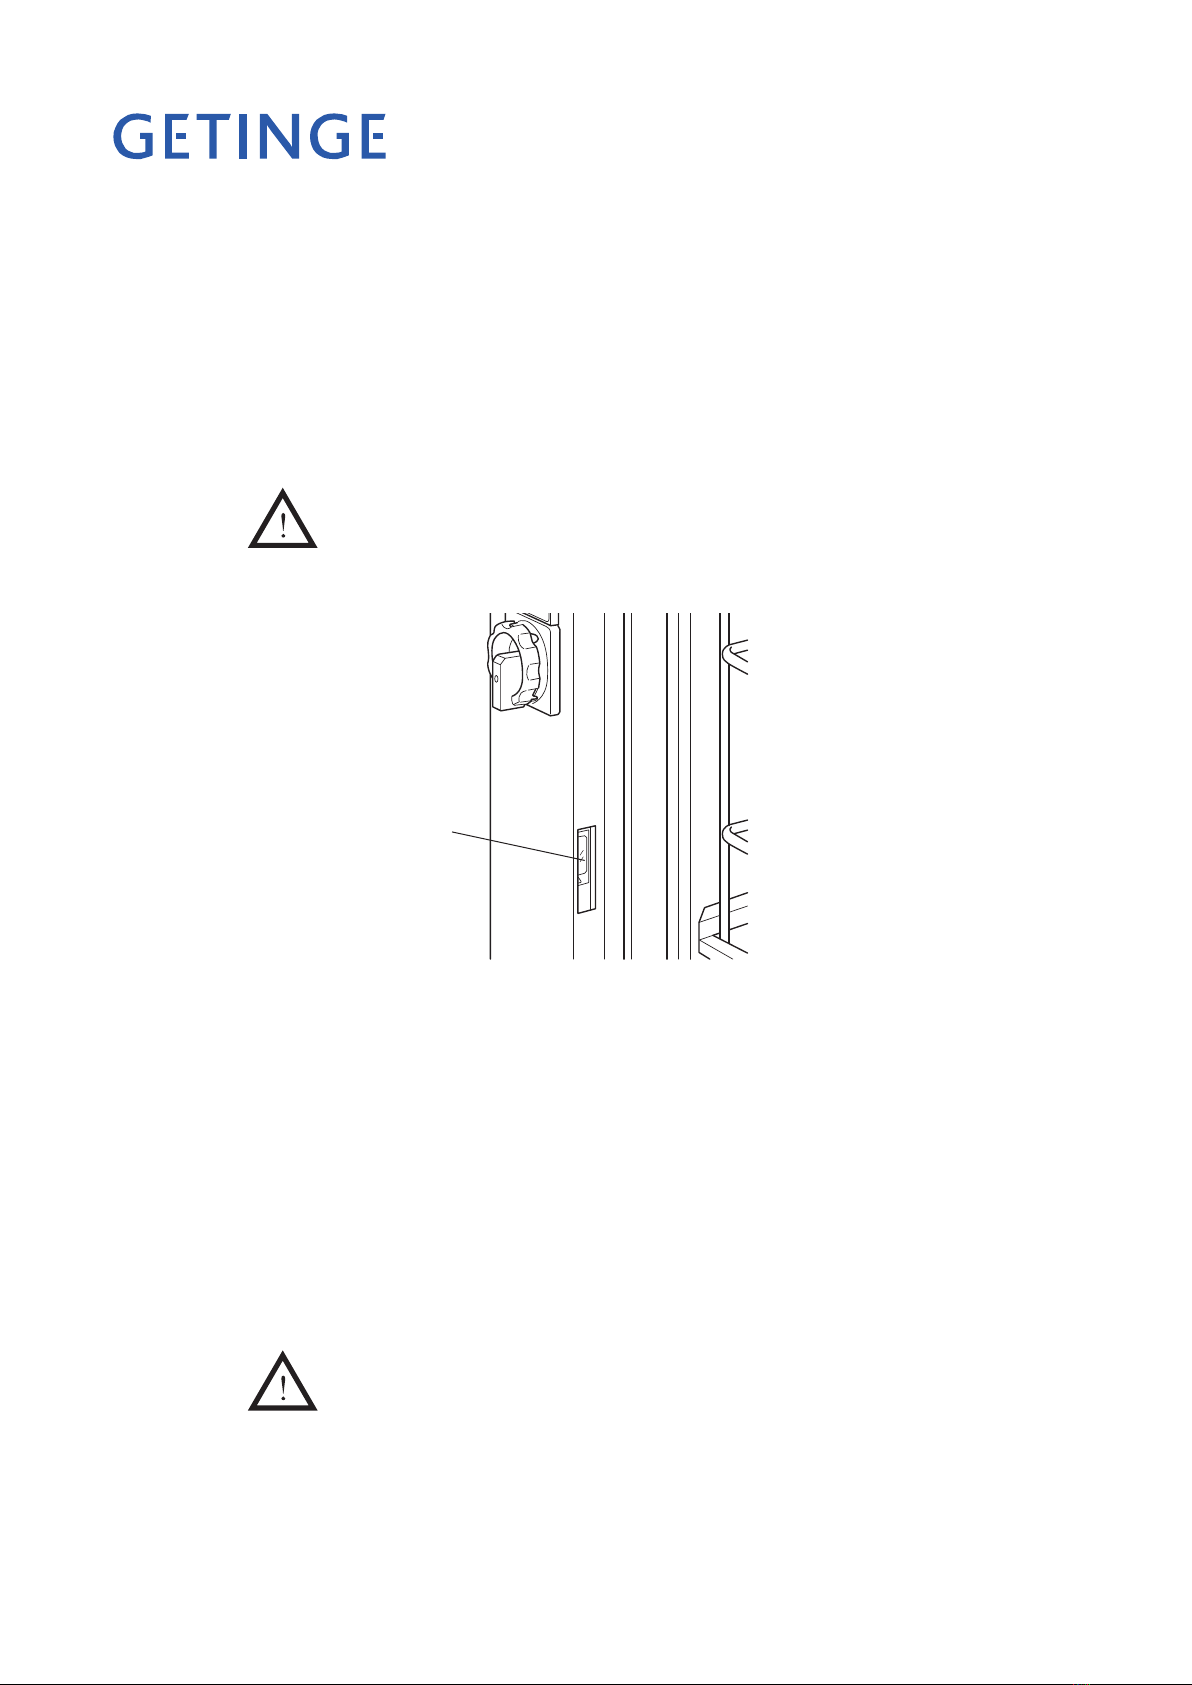
In an emergency
Switch off the main switch
Close stopcocks in the water and (where present) steam supply lines.
•
•
•
•
•
•
•
•
•
•
•
•
•
•
•

Page 5 of 24
<Doc_USR><Doc_502404300><Rel_A><Lang_GB>
INTRODUCTION
Intended use of the machine
Getinge S-88 series machines are washer disinfectors intended for cleaning, disinfection
and drying. Intended elds of application are surgical instruments (solid and tubular),
dishes, hand bowls, glass goods, suction asks, baby bottles, anaesthesia equipment and
OP shoes. Depending on program design.
Validation of goods according to intended use is done with Getinge Disinfection AB’s
standard loads.
An Installation Qualication, an Operating Qualication and a Performance
Qualication according to ISO 15883 must be carried out before putting the machine
into service.
Incorrect use can result in damage to objects and personal injuries
Symbols on the machine
Warning, see instruction manual.
Warning, hot surface.
Warning: electrically live parts.
Attention symbols
Some of the warnings, instructions and advice in this manual are so important that we use
the following special symbols to draw attention to them. The symbols used are as follows:
This symbol indicates a warning in the text of the manual. It warns of a hazard
that may lead to more or less severe injury and in certain cases mortal dan-
ger. It also highlights warnings to avoid damage to equipment.
General
The machine is a fully-automatic washer disinfector for cleaning and disinfecting goods
in hospitals, laboratories and the pharmaceutical industry.
The machine has two spray arms and three dockings and can be equipped with several
different accessories for different cleaning requirements.
These accessories are presented in a special accessories catalogue.
There are several possible ways of installing and equipping the machine depending on
its eld of application:
Heating by electricity or steam.
Connecting treated water
Extra dosing pumps which allow chemical disinfection of heat-sensitive goods, for instance.
Infeeder/outfeeder
Air Glide System (AGS)
Automatic program selection (basket indication)
Fixed scanner
Control panel
•
•
•
•
•
•
•
•

<Doc_USR><Doc_502404300><Rel_A><Lang_GB>
Page 6 of 24
Green lamp:
Program
complete
The machine is operated from the control panels, one to the left of the door on the soiled
side and one on the right of the door on the clean side. The picture below shows the
location of buttons and indicators on both panels.
V1363
Yellow lamp:
Program
running
Red lamp:
Fault code
indication
P01 OP-SHORT-D
47.0°C
Program
number
Before starting: Chosen program
While running: Program phase
(e.g. “Rinsing”)
Start button for wash program
Program
selection
buttons
Menu selection buttons
(see “Service instructions”)
Alarm reset button
Green lamp:
Program
complete
Yellow lamp:
Program
running
Red lamp:
Fault code
indication
Button:
Close door
J131
Panel, clean side
Panel, soiled side
J034

Page 7 of 24
<Doc_USR><Doc_502404300><Rel_A><Lang_GB>
Control system
The machine has an electronic controller which can hold up to 64 programs, 16 of which
can be started (activated). You can choose six of these programs with the program selec-
tion buttons. To choose the others, use the menu buttons; see under Operating instruc-
tions. The machine comes with a number of standard programs in the control system
(see the separate program sheet). Contact your reseller for customized programs.
Programming may only be done by authorized personnel.
Door function
The machine has double vertical sliding doors.
Both doors can be motorized for automatic opening and closing. The doors have effec-
tive crush protection. When it is activated, they reverse.
The doors of the machine have a system of interlocks to ensure that only one door can
be opened at a time. This means that the clean-side door must be closed and locked by
pressing the W button before the dirty-side door can be opened.
When you press V, the door is locked and a yellow lamp ashes for about 5 seconds.
If V is pressed again during this “cancel time”, the dirty-side door is unlocked and the
door can be opened manually or alternatively it opens automatically.
In standby mode, the door can be opened and closed with U by pressing the button for
10 seconds.
When V (on the soiled side) is pressed, the door is closed and locked, the yellow lamp
ashes and the program starts.
When the program is complete, a green lamp lights up on both sides and the clean-side door
opens automatically. When the door is fully open the green lamp goes out on both sides.
The clean-side door must be closed and locked by pressing the Wbutton before the
soiled-side door opens automatically.
V398
Soiled sideClean side

<Doc_USR><Doc_502404300><Rel_A><Lang_GB>
Page 8 of 24
Dosing system
In standard form, the machine has two dosing systems. One is for alkaline detergent and
one is for rinse-aid or acid detergent. The dosing amount can be set individually for each
program.
The machine cannot be started until detergent has been added. If the detergent holder is
empty, “DOS 1 LOW LEVEL”, for example, appears on the display.
A third and a fourth dosing system for heat-sensitive goods or instrument milk, for ex-
ample, can be installed.
Dosing pumps
Holders for
detergent/
rinse-aid
Empty con-
tainer alarm
V2024

Page 9 of 24
<Doc_USR><Doc_502404300><Rel_A><Lang_GB>
OPERATING INSTRUCTIONS
Machine without barcode scanner
Loading goods to be washed into the machine
Load the items to be washed on to the trolley and run the trolley into the machine.
Examples showing how to load the trolley are shown on the goods positioning sign
and in the loading handbook.
The trolley may be loaded with Max 75 kg.
Make sure that the washer arms can rotate freely without touching the goods.
Select the program.
Choose a program in one of the following ways:
- Press one of the program selection buttons 1-6
- Press S. The display now shows “CHOOSE PROGRAM”.
Press Sagain.
Choose a program from the list with Hand J.
Press S to conrm your choice.
You can see the machine programs on the separate program sheet.
Press V. A yellow lamp ashes for 5 seconds. During this time, the program can
be aborted by pressing Vagain.
A fine filter must be used when cleaning and disinfecting tubular instruments
with a passage smaller than 2 mm, to prevent particles getting stuck in the
instruments. Blocked or reduced water flow may result in cleaning and disin-
fection failing to take place.
If the program is cancelled after start, the cleaning result and disinfection will
be unsuccessful.
While a program is running
While the program is running, a yellow lamp at Mis lit and the program phase (e.g.
“Rinse”) and the current temperature are shown on the display. Press Sto see how
much time remains.
When the program is complete
When the program is complete, a green lamp lights up at Nand the clean-side
door opens automatically.
If the items are still hot after a program, handle them with care to avoid burns.
Empty the machine, close and lock the clean-side door by pressing W.
If the same program is to be used again, there is no need to select the program
again. Simply press Vonce.
Note!
The display switches to standby mode after 30 minutes and returns automatically when a
program is started or selected.
•
•
•
•
•
•
•
•
•

<Doc_USR><Doc_502404300><Rel_A><Lang_GB>
Page 10 of 24
Machine with barcode scanner
Every wash trolley has its own unique ve-digit number. The rst two digits indicate
which wash program is to be used; the third digit is for extra equipment and the last two
are the trolley’s ID.
Loading goods to be washed into the machine
Load the items to be washed on to the trolley and run the trolley halfway into the
machine. Examples showing how to load the trolley are shown on the goods posi-
tioning sign.
A fine filter must be used when cleaning and disinfecting tubular instru-
ments with a passage smaller than 2 mm, to prevent particles getting stuck
in the instruments. Blocked or reduced water flow may result in cleaning
and disinfection failing to take place.
•
Fixed scanner
Choosing a program
Scan the barcode of the trolley with the barcode scanner. For a machine with a xed
scanner, the trolley must be moved so that the barcode gets scanned. On the basis of
the barcode, the machine automatically chooses the correct wash program.This is
what to do if you want to use a different washing program from the scanned one:
- Press one of the program selection buttons 1-6
- Press S. The display now shows “CHOOSE PROGRAM”.
Press Sagain.
Choose a program from the list with Hand J.
Press S to conrm your choice.
Run the trolley into the machine.
Close and lock the door. The program then starts automatically.
If the program is cancelled after start, the cleaning result and disinfection will
fail to take place.
•
•
•
V1589

Page 11 of 24
<Doc_USR><Doc_502404300><Rel_A><Lang_GB>
While a program is running
While the program is running, a yellow lamp at Mis lit and the program phase (e.g.
“Rinse”) and the current temperature are shown on the display. Press Sto see how
much time remains.
When the program is complete
When the program is complete, a green lamp lights up at Nand the clean-side door
opens automatically.
If the items are still hot after a program, handle them with care to avoid burns.
Empty the machine, close and lock the clean-side door by pressing W.
•
•

<Doc_USR><Doc_502404300><Rel_A><Lang_GB>
Page 12 of 24
Positioning the items
Note:
All vessels must be carefully emptied before being loaded in the machine.
Use inserts and special inserts efciently and only for the goods and utensils to be washed.
Ensure that the water jets reach all surfaces of the goods. Surfaces that are covered
in some way will not be perfectly clean.
Do not block the washer arms.
Make sure that the strainers in the machine are clean and that the water can ow
through these. It is important to clean and check the strainers regularly.
Empty all vessels to be washed before positioning them in the machine.
Placer sharp and pointed utensils so that they can not cause injuries when loading
and unloading.
Make sure that utensils do not lie on top of each other and in a manner that pre-
vents the water from reaching all surfaces.
Place vessels with openings downwards in the inserts. It must be possible for the
water to ow freely in and out of the vessels.
Goods with domed bases are positioned at an incline so that water does not collect
on the domed surface.
Anodised aluminium and nickel plated instruments are not suitable for washing in
the washer disinfector.
Rigid endoscopes must be dismantled according to the manufacturer’s instructions
before washing.
Open all valves and remove covers and seals so that the ducts are properly rinsed to
produce the required cleaning result.
Optics and light cables must be approved for thermal disinfection by the manufacturer.
The goods must be distributed evenly over the surface.
Handling detergent
Empty out all residues of acids, especially hydrochloric acid, solvents and
chloride based solvents from the vessel before it is placed in the machine.
Pre-treatment with, e.g. detergent or disinfectant and some types of dirt can cause
increased lather. The lather can affect the washing and disinfection result.
Follow the manufacturer’s instructions carefully with regard to detergent and
special products. In order to avoid damage to material and chemical reactions
(e.g. oxy-hydrogen gas) the detergent must only be used for purposes prescribed by
the manufacturer.
Handle liquid agents (cleaning, rinse, disinfection and neutralizing agents) with
care. These agents usually consists of acids or lye. Do not add organic solvents
as this can bring about an explosion risk. Wear protective glasses and protective
gloves when handling agents. Always follow the manufacturer’s safety instructions
which regard to handling chemical agents.
Do not use detergent for household dishwashers.
Follow the detergent manufacturer’s dosage instructions. The cleaning effect can
vary between different detergents. If the cleaning result is not satisfactory, try an-
other quality detergent before contacting Getinge.
•
•
•
•
•
•
•
•
•
•
•
•
•
•
•
•
•
•
•

Page 13 of 24
<Doc_USR><Doc_502404300><Rel_A><Lang_GB>
Daily inspection
Check that no objects have fallen down into the bottom of the washing chamber.
Loose objects may cause blockages and seriously reduce the performance of the
washer disinfector.
Check that the spray arms can rotate freely. Check that the holes in the spray arms
are not blocked. Blocked spray holes may adversely affect the cleaning result.
Check that the goods to be cleaned are retained in the insert.
If the arms need cleaning, remove them by unscrewing the central nut. The arm
can then be lifted off and washed clean. Check that the arm can rotate freely when
re-installed.
Remove and clean the strainer in the bottom of the washing chamber. A dirty
coarse strainer may prevent water from circulating and create the conditions for the
growth of bacteria.
If this is required for cleaning, open the strainer by removing the spray arm. To do
this, slacken the locknut and move it sideways. Then, using the handles, turn the
counter-clockwise and lift it out.
•
•
•
•
•
•
Open the detergent containers and check that they contain detergent/rinse-aid.
Check that the wash trolley docks properly to the water connections.
Check the accessories of the machine visually with regard to their intended use and
function. For example, blocked ducts, worn and missing parts that might affect the
performance of the machine. Water must be able to ow freely through the ducts in
tubular instruments.
Check that the spring movement of the docking mechanisms moves easily. Press in
the docking mechanism and release it. It must return to its initial position.
Check the cleaning instructions of the goods manufacturer.
To achieve the intended level of performance and safety, distribute the load evenly
over the washing surface.
Check the cleaning result visually when the process is complete.
The spray arm journal must be checked daily and replaced every ve years.
Check the process valve for deposits and dirt in the diaphragm.
Check the drain valve for deposits and dirt in the diaphragm.
•
•
•
•
•
•
•
•
•
•
Spray arm
Coarse strainer
V2025b
Locknut

<Doc_USR><Doc_502404300><Rel_A><Lang_GB>
Page 14 of 24
If necessary
Spray arm
Clean the spray arms when necessary by unscrewing the central nut, lifting off the spray
arm and rinsing it until it is clean. Take off the plastic end pieces by pressing the metal
bar over the edge of the rinse arm and removing them. Using a washing brush, clean the
inside of the spray arm.
After cleaning, press the metal bar back into the groove in the plastic end piece.
Check that the arm can rotate freely when re-installed.
Washing chamber
Do not allow deposits to form in the wash chamber. Remove any deposits as follows:
Open the door and dispense 200 ml NEODISHER BU descaler (sold by
Dr. Weigert) into the washing chamber.
Close the door and run the descaling program.
NOTE: There must not be any items in the machine with this program. It is only used to
descale the machine and insert.
Process tank/Booster tank
If machine has not been used for some time (48 hours) the booster tank must be drained
and program number 16 run.
Make surethat the machine is isolated from the
electric power and that the water and steam
connections are shutoff. Before starting work.
To drain the booster tank, dismantle the front trim panels
on the soiled side. Drainage is then done via a drain valve
located on the soiled side of the tank. Make sure that the
tap is not open before unscrewing the plug. If a nipple
with G ¼ male thread is used, together with the
associated hose, the hose can be tted to the drain tap.
The tank can now be drained. The capacity of the tank is about 32 litres.
After draining, check that the drain tap is working properly. Seal the plug with PTFE
tape and ret it.
The outside
The front and side walls can be cleaned and disinfected with an alcohol-based clean-
ing agent, medical spirit or an ordinary cleaner. The control panel can be cleaned in the
same way. To remove stains, use ordinary stainless steel cleaner.
It is important to maintain a good level of hygiene around the machine.
•
•
V2026 V2027
J005
Plug Drain valves

Page 15 of 24
<Doc_USR><Doc_502404300><Rel_A><Lang_GB>
Printer (Option)
Replacing the paper roll
Open the front door of the printer.
Remove any paper residue.
Fold down the printing mechanism by pressing the latch marked PUSH (A).
•
•
•
Cut the end of the new roll square (B). (This makes it easier to thread the paper into
the printer mechanism.)
•
Insert the paper into the opening of the print mechanism and press the FEED (C) but-
ton on the printer. The paper is now automatically fed through the printer mechanism.
Fold away the printing mechanism and lock it with the latch (D).
•
•
Tear off the paper and close the front panel of the printer.
The printer is now ready to use again.
Never use the printer without paper and/or ink ribbon.
Do not pull on the printer feed when the printer is on.
•
•
A
B
D
C
V1972
V1973
V1973

<Doc_USR><Doc_502404300><Rel_A><Lang_GB>
Page 16 of 24
Ribbon cassette replacement
Open the front door of the printer.
Remove the ink ribbon by pressing gently on the left-hand side of the ribbon cassette.
•
•
Insert the new ribbon cassette. The printer is now ready to use again.
Never use the printer without paper and/or ink ribbon.
•
A
V1973

Page 17 of 24
<Doc_USR><Doc_502404300><Rel_A><Lang_GB>
PROCESS
Changing parameters
Normally the preset parameter settings of the installed programs are used, but in special
cases it may be necessary to adjust certain parameters for matching to a specic wash
process. Information about the parameters that can be changed and their limit values can
be found under heading “A- or P-parameters” in Chapter 4 of the service manual.
Printing out a program for a machine with printer (option)
An example of a program printout is shown below. In the example, program P02 OP-D,
programmed on menu selection button 2is used.
PH360-RINSE 2
00:14:46 55.5
----------------------------
PH440-Final rinse
00:16:03 53.5
00:19:53 80.1
DOS START
00:20:15 81.5
DOS.STOP
DOS AMOUNT 230ml
00:21:26 90.0
CONDUCTIVITY 2 uS/cm
00:21:27 90.1
DISINF START
00:22:27 92.3
DISINF STOP
00:22:45 91.7
----------------------------
PH900-DRYING
00:22:46 91.7
00:34:27 80.8
----------------------------
PH1000-ENDING
00:34:49 81.1
----------------------------
SIGNATURE: .........
PROGRAM:P2 OP-D
DATE:02/05/2006
PROCESS START:13:44:46
MACHINE NAME:88-5
MACHINE NO:2
CYCLE COUNTER:53
PARAMETER
WASH 1 DOS TEMP 35.0C
WASH 1 DOS 1 200
WASH 1 Temp. 60.0
WASH 1 time 00:03:00
FINAL R DOS TEMP 80.0
FINAL R DOS 3 00:00:21
DISINF TIME 00:01:00
DISINF TEMP 90.0
DRYING TEMP 90.0
DRYING TIME 00:18:00
SIGNALS
A107
TEMP INDEP. CHAMB
----------------------------
PROGTIME A107
----------------------------
PH1-START
00:00:00 30.8
00:00:40 30.7
----------------------------
PH220-PRE RINSE 1
00:01:10 31.0
----------------------------
PH25-WASHING
00:02:51 18.1
00:04:52 35.2
DOS START
00:05:53 39.9
DOS.STOP
DOS AMOUNT 202ml
00:09:17 60.0
00:10:17 60.8
00:11:17 61.9
00:12:17 61.5
----------------------------
PH330-RINSE 1
00:13:29 61.5
----------------------------

<Doc_USR><Doc_502404300><Rel_A><Lang_GB>
Page 18 of 24
V1363
FAULT INDICATIONS
Red lamp:
Alarm indication
P01 OP-SHORT-D
DOSE 1 LOW LEVEL
Handling alarm
or fault code
Handling alarms
Handling alarms appear on the display in plain text.
DOSE 1 LOW LEVEL
The machine cannot be started until the fault has been put right.
The following handling alarms can be displayed:
DOSE 1 LOW LEVEL Empty container alarm 1, if detergent 1 is finished, a handling alarm is generated.
The alarm is reset automatically when detergent is added.
DOSE 2 LOW LEVEL Empty container alarm 2, if detergent 2 is finished, a handling alarm is generated.
The alarm is reset automatically when detergent is added.
DOSE 3 LOW LEVEL Empty container alarm 3, if detergent 3 is finished, a handling alarm is generated.
The alarm is reset automatically when detergent is added.
DOSE 4 LOW LEVEL Empty container alarm 4, if detergent 4 is finished, a handling alarm is generated.
The alarm is reset automatically when detergent is added.
Note!
When the handling alarm is activated (appears on the display) there is always enough de-
tergent left for one run; in other words, if you have started a program it can run to the end.
Panel, soiled side
Red lamp:
Alarm indi-
cation
Handling alarm
or fault code
P01 OP-SHORT-D
DOSE 1 LOW LEVEL
Panel, clean side
J131

Page 19 of 24
<Doc_USR><Doc_502404300><Rel_A><Lang_GB>
Alarms
If the red lamp at O lights up, the process has been aborted because of a fault.
The display shows a fault code,
Acknowledging a fault code
Acknowledge the fault code as follows:
Note the fault code
Cancel the acoustic signal by pressing U. The machine remains locked but the
program has been stopped.
Correct the fault or call service personnel.
Press U. The display shows the password entry menu.
Enter the password (558387) using the arrow keys and press S. All liquid is
drained from the machine and the soiled-side door is unlocked*.
Open the door and remove the items.
The items in the machine are not clean and must be washed again from the
beginning with a new program.
If the items are still hot, handle them with care.
* If the drain pump is faulty, water cannot be drained from the machine and the fault cannot be put right
until the door has been opened. The soiled-side door is unlocked as soon as the password is confirmed.
Fault codes in the machine
Fault codes indicate that a serious fault has occurred in the machine or the washing proc-
ess. The fault must be put right by an authorized service technician.
•
•
•
•
•
•
A01
Fault code Description
A00 Power failure
A02 The process tank takes more than 2 minutes to ll with water.
A03 The booster tank takes more than 2 minutes to ll with water.
A04 The washing chamber takes more than 20 seconds to empty.
A05 Water leakage in the dryer.
A06 The soiled-side door does not lock within 10 seconds of program start or if
the door is opened while a program is running.
A07 The soiled-side door does not unlock within 10 seconds.
A08 The soiled-side door does not close within 20 seconds of program start or if
the door is opened while a program is running.
A09 The soiled-side door does not open within 20 seconds of the program ending.
A10 The clean-side door does not lock within 10 seconds of the program starting
or if the door is unlocked while a program is running.
A11 The clean-side door does not unlock within 10 seconds of the end of
a program.
A12 The clean-side door does not close within 20 seconds of program start or if
the door is opened while a program is running.
A13 The clean-side door does not open within 20 seconds of the end of a program.
A14 Not enough detergent 1 dosed

<Doc_USR><Doc_502404300><Rel_A><Lang_GB>
Page 20 of 24
A15 Not enough detergent 2 dosed
A16 Not enough detergent 3 dosed
A17 Not enough detergent 4 dosed
A18 High conductivity.
A19 Low pressure in drying unit.
A20 High pressure in drying unit.
A21 Low pressure from circulation pump.
A22 High pressure from circulation pump.
A23 Low temperature in drying unit.
A24 Faulty temp sensor in booster tank.
A25 Faulty temp sensor (controlling) in wash chamber.
A26 Faulty temp sensor (independent) in wash chamber.
A27 Faulty temp sensor in dryer unit.
A28 Faulty temp sensor in wash chamber. (Temperature too low because of a
heating fault).
A29 Faulty temp sensor in wash chamber. (Sensor fault)
A30 Faulty temp sensor in wash chamber. (Temperature too high because of a
heating fault).
A31 High temperature in drying unit.
A32 High temperature in booster tank.
A33 Low disinfection temperature.
A34 The drain tank takes more than 3 minutes to empty.
A35 The waste outlet valve of the process tank does not reach the open or closed
position.
A36 The waste outlet valve of the wash chamber does not reach the open or
closed position.
A37 The wash chamber tank takes more than 25 seconds to ll with water.
A38 Faulty temp sensor in booster tank. (Temperature too low because of a
heating fault.)
A39 External stop signal.
A41 Faulty circulation pressure sensor.
A42 Faulty pressure differential sensor in drying unit.
A45 Monitoring system: Disinfection time + 60 sec. See under “Fault codes in
independent monitoring system.”
A46 Monitoring system: Discrepancy between temperature sensors in the cham-
ber; see under Fault codes in independent monitoring system.”
A47 Monitoring system: High conductivity; see under “Fault codes in
independent monitoring system.”
A48 Monitoring system: Disinfection time + 60 sec. See under “Fault codes in
independent monitoring system.”
A49 Monitoring system: Too little detergent dosing (it takes more than 5 minu-
tes to reach sufcient volume), see under “Fault codes in independent
monitoring system.”
Fault code Description
Other manuals for 88-SERIES
2
This manual suits for next models
1
Table of contents
Other Getinge Washer manuals
Popular Washer manuals by other brands

Winterhalter
Winterhalter CTR Series Translation of the original operating instructions

Midea
Midea MLH52S7AGS User's manual & installation instructions

Haier
Haier XQBM15-D Use and care guide

Bosch
Bosch Vision 300 Series Operating, care and installation instructions

Bosch
Bosch Maxx 1000 instruction manual

Beko
Beko EWTV8836XS2D user manual