GEV LPH 011014 User manual

www.gev.de
Typ: LPH
#011014
M
o
d
e
r
n
s
t
e
L
E
D
-
T
e
c
h
n
i
k
v
o
n
G
E
V

A
1
Akku-Pack
2
148 mm
Din A 5
210 mm

B
Akku-Pack
Akku-Pack
2
C
Akku-Pack
D
MIN. MIN.
MAX.
MIN. MIN.
3

4
Solar-Edelstahl-Hausnummernleuchte
LPH 11014
Mit dem Kauf dieses Artikels haben Sie
sich für ein qualitativ hochwertiges GEV
Produkt entschieden. Bitte lesen Sie diese
Bedienungsanleitung sorgfältig durch, um ein
einwandfreies Funktionieren zu gewährleisten.
Bewahren Sie diese Anleitung sorgfältig
auf, um gegebenenfalls später nachlesen zu
können.
Bestimmungsgemäße Verwendung
Die Solar-Hausnummernleuchte ist
für den Außenbereich entwickelt
worden. Das im oberen Teil eingebaute
Solarmodul (Abb. A1) wandelt
auftreendes Sonnenlicht in elektrischen Strom
um. Diese gewonnene Energie wird in den
eingebauten Akkus gespeichert. Bei Dämmerung/
Dunkelheit schaltet sich die Leuchte automatisch
ein und bei Helligkeit wieder aus.
Sicherheitshinweise
Bei Schäden, die durch Nichtbeachtung
dieser Bedienungsanleitung verursacht
werden, erlischt der Garantieanspruch!
Für Folgeschäden übernehmen wir
keine Haftung!
Bei Sach- oder Personenschäden, die durch
unsachgemäßeHandhabungoderNichtbeachtung
der Sicherheitshinweise verursacht werden,
übernehmen wir keine Haftung. In solchen Fällen
erlischt jeder Garantieanspruch. Aus Sicherheits-
und Zulassungsgründen ist das eigenmächtige
Umbauen und/oder Verändern des Gerätes nicht
gestattet.
Wenn Sie sich bei Montage, Anschluss oder
Installation nicht sicher sind, bzw. Zweifel über
die Funktionsweise bestehen, so nehmen Sie
Montage/Anschluss/Installation nicht selber vor,
sondern wenden Sie sich an eine Fachkraft.
Erstmalige Verwendung/Akkus laden
Die Solar- Hausnummernleuchte darf nur mit
NiMh Akkus betrieben werden!
Verwenden Sie niemals herkömmliche
Batterien!
Vor der erstmaligen Verwendung oder nach einem
Tausch der Akkus müssen diese geladen werden!
Laden Sie die Akkus mit einem handelsüblichen
Ladegerät für NiMh Akkus vollständig auf. Die
Ladezeit ist abhängig von der Kapazität der
Akkus und dem Ladegerät.
Alternativ können die Akkus durch die
Solarzellen geladen werden, indem Sie die Solar-
Hausnummernleuchte draußen in die direkte
Sonne legen.
Lösen Sie die Befestigungsschraube (Abb. B2)
vom Vorderteil und nehmen es ab. Setzen Sie den
geladenen Akku-Pack ein. Vorderteil erst nach
Montage der Grundplatte wieder aufsetzen!
Besondere Beachtung bei Solarleuchten
Reduzierung der Leuchtdauer der LED:
Schattige Plätze verkürzen die Ladedauer der
Akkus.
Die Sonnenscheindauer ist im Winter geringer als
im Sommerhalbjahr.
Schmutz, Laub, Schnee auf den Solarzellen
reduzieren den Ladestrom.
Kalte Temperaturen vermindern die Leistung der
Akkus.
Montage
Lösen Sie die Befestigungsschraube (Abb. B2)
vom Vorderteil und nehmen es ab. Setzen Sie den
geladenen Akku-Pack ein. Vorderteil erst nach
Montage der Grundplatte wieder aufsetzen!
Die gewünschte Hausnummer vor der
Montage anbringen. Um eine lange Haftung
zu gewährleisten Untergrund vorher reinigen
(keine scharfen Reinigungsmittel verwenden).
Grundplatte mit den 3 beiliegenden Schrauben/
Dübeln montieren (Abb. B). Stecken Sie den
Stecker des Akku-Pack in die Buchse der
Solar-Hausnummernleuchte (Abb. C). Vorderteil
einhängen und mit der Schraube (Abb. B2)
befestigen.
Wartung und Entsorgung
Die Solar-Hausnummernleuchte ist für Sie bis
auf einen evtl. erforderlichen Akkuwechsel
weitestgehend wartungsfrei.
Die Verwendung von aggressiven
Reinigungsmitteln kann die Oberfläche
beschädigen und zu Beeinträchtigungen führen.
Entsorgen Sie das unbrauchbar gewordene
Produkt gemäß den geltenden gesetzlichen
Bestimmungen. Achten Sie darauf, dass das
Akku-Pack vorher entfernt wird.
Batterie- und Akkuhinweise
Altbatterien dürfen nicht mit dem
unsortierten Siedlungsabfall entsorgt
werden. Besitzer von Altbatterien sind
gesetzlich zur Rückgabe verpflichtet und können
diese unentgeltlich bei den Verkaufsstellen
zurückgeben. Batterien enthalten umwelt- und
gesundheitsschädliche Stoe und müssen daher
fachgerecht entsorgt werden.
Recycling-Hinweise
Dieses Gerät darf nicht mit dem
unsortierten Hausmüll entsorgt werden.
Besitzer von Altgeräten sind gesetzlich
dazu verpflichtet, dieses Gerät fachgerecht
zu entsorgen. Informationen erhalten Sie von Ihrer
Stadt- bzw. Gemeindeverwaltung.

5
Technische Daten
Leuchtmittel 1 weiße, wartungsfreie Leuchtdiode (LED)
Solar Modul Leistungsstarkes kristallines 1,4 W Solarmodul
Leuchtdauer max. 50 Stunden bei vollgeladenem Akku-Pack
Akku-Pack 1 x NiMh 3,6 V/1300 mAh
Gehäuse Edelstahl, gebürstet und lackiert
Abmessungen ca. B 240 x H 340 x T 40 mm
Fehleranalyse – Praktische Tipps
Störung Ursache Abhilfe
LED leuchtet nicht • Umgebung zu hell • Prüfen ob externe
Lichtquellen stören
(Straßenbeleuchtung etc.),
Position der Leuchte ändern.
LED leuchtet nicht • Akkus nicht geladen, defekt • Akkus überprüfen, austauschen
Schwache Lichtstärke • Akkus schwach • Akkus mit externem Ladegerät
aufladen/Akkus tauschen
Technische und optische Änderungen ohne Ankündigung vorbehalten.
GBFRITPL DE

By purchasing this item, you have chosen a
high-quality GEV product. Please read these
operating instructions carefully to ensure
correct operation. Keep these instructions in a
safe place so that you can refer back to them
if necessary.
Intended use
The solar-powered house number
light is designed for outdoor use. The
solar module built into the top section
(Fig. A1) converts sunlight into electricity.
The energy gained is stored in the in-built
rechargeable batteries. The lights automatically
switch on at dusk/when it gets dark, and o again
when it gets light.
Safety instructions
Under no circumstances does the
warranty cover damage resulting from
failure to observe these instructions.
Nor do we accept liability for any indirect
damage.
Similarly, we can accept no liability for any material
damage or bodily injury caused by mishandling
or failure to observe the safety instructions. In
these cases, no warranty claim may be made. In
addition, for safety and compliance reasons, you
are not authorised to dismantle or alter the device
in any way.
If in any doubt, rather than mounting, connecting
and installing the equipment yourself, contact a
qualified technician.
Using the device for the first time/
charging the batteries
Only operate the solar-powered house number
light with rechargeable NiMh batteries.
Never use standard batteries.
Charge the batteries before using the device
for the first time or after replacing the batteries.
Fully charge the batteries using a commercially
available battery recharger for NiMh rechargeable
batteries. Charging time depends on the capacity
of the batteries and the battery recharger.
Alternatively, the batteries can be charged by the
solar panels by placing the solar house number
light outside in direct sunlight.
Release the screw (Fig. B2) from the front part
and remove. Insert the fully charged battery pack.
Mount the base plate before replacing the front
part.
Special notice for solar-powered lights
Reduced LED light duration:
Shaded positions reduce the duration of charge
of the batteries.
There is less sunlight during the winter months
than in the summer.
Dirt, foliage or snow on the solar panels will
reduce the charging rate.
Cold temperatures reduce battery performance.
Installation
Release the screw (Fig. B2) from the front part
and remove. Insert the fully charged battery pack.
Mount the base plate before replacing the front
part.
Mount the required house number before
installing the device. To ensure long-term
adhesion, clean the surface before mounting
(do not use aggressive detergents). Mount the
base plate using the 3 screws/dowels provided
(Fig. B). Plug the battery pack plug into the solar-
powered house number light socket (Fig. C).
Attach the front part and tighten with the screw
(Fig. B2).
Maintenance and disposal
Except for possibly needing to replace the
batteries, the solar-powered house number light
is practically maintenance-free.
The use of aggressive detergents can damage the
surface and cause adverse eects.
Dispose of any products that have become
unusable in accordance with the applicable
statutory provisions. Make sure that you remove
the battery pack prior to disposal.
Battery and rechargeable battery
information
Used batteries must not be disposed of as
unsorted household waste. Used batteries
must be recycled and may be returned free-
of-charge to the place of sale. Batteries contain
substances which are harmful to the environment
and to human health and must therefore be
disposed of correctly.
Recycling instructions
This device may not be disposed of with
unsorted household waste. Owners of old
devices are required by law to dispose of this
device correctly. Contact your local town council
for further information.
6
Solar-powered stainless steel house number
light LPH 11014

7
Technical information
Illuminant 1 white maintenance-free LED
Solar module Powerful crystalline 1.4 W solar module
Light duration max. 50 hours when the batteries are fully charged
Battery pack 1 x NiMh 3.6 V/1300 mAh
Housing Stainless steel, brushed and painted
Measurements approx. W 240 x H 340 x D 40 mm
Troubleshooting – Practical advice
Fault Cause Solution
LED does not light up • Environment too bright • Check whether the external light
source is aecting the device
(stress lighting, etc.) and if
necessary change the position of
the lights
LED does not light up • Batteries not charged or faulty • Check the batteries and replace if
necessary
Low light intensity • Low battery power • Load the batteries with the
external battery recharger/replace
the batteries
Technical and design features may be subject to change.
GBFRITPL DE

8
En achetant cet article, vous avez choisi
un produit GEV de qualité supérieure. Pour
l'utiliser dans les meilleures conditions, nous
vous recommandons de lire attentivement ce
mode d'emploi. Conservez soigneusement
ce document en vue d'une éventuelle
consultation future.
Conformité d'utilisation
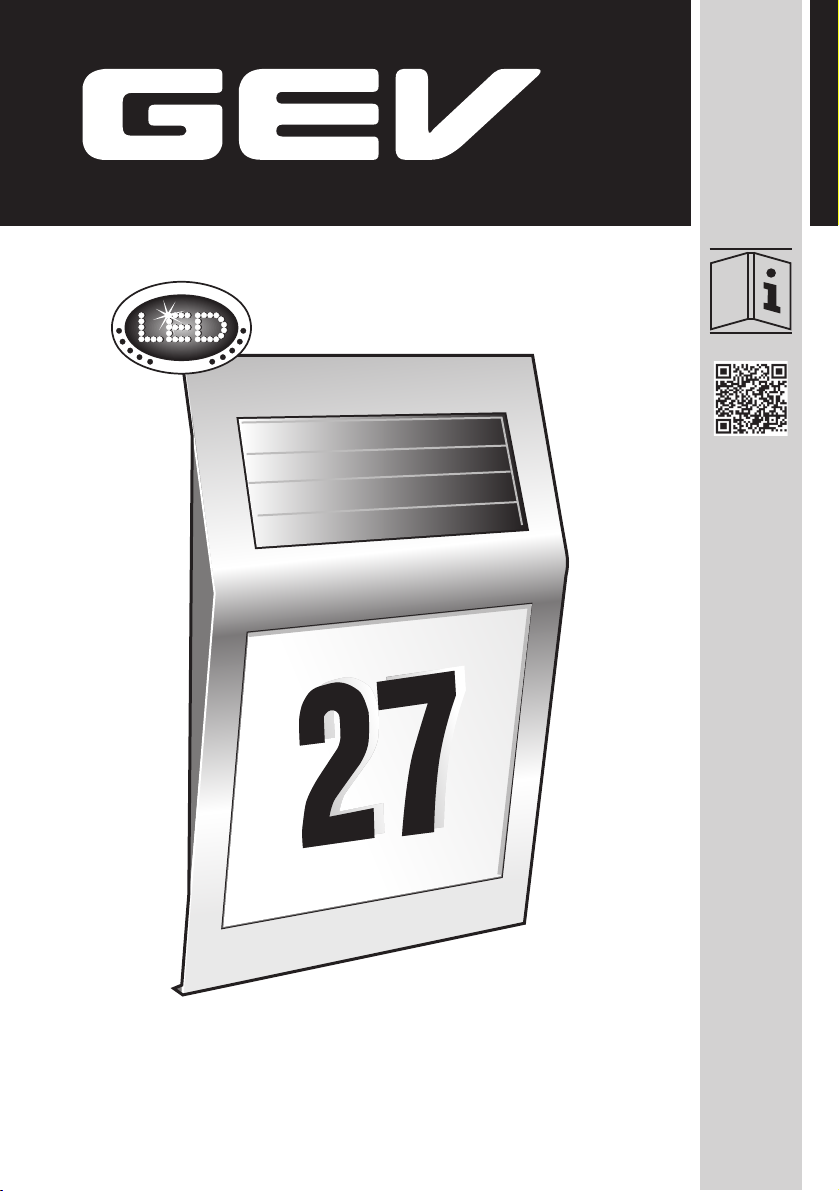
Cet éclairage de numéro de maison
solaire a été développé pour une
utilisation en extérieur. Le module
solaire situé dans la partie supérieure
du dispositif (fig. A1) transforme la lumière du
soleil en électricité. L'énergie produite est ensuite
stockée dans la batterie intégrée. Léclairage
s'allume automatiquement à la tombée de la nuit
et s'éteint à nouveau au lever du jour.
Consignes de sécurité
La garantie ne couvre en aucun cas les
dommages dus à un non-respect de
la présente notice. Nous déclinons par
ailleurs toute responsabilité quant aux
éventuels dommages indirects.
De même, nous ne pourrons être tenus pour
responsables des éventuels dommages
matériels ou blessures corporelles résultant de
manipulations inappropriées ou du non-respect
des consignes de sécurité. Dans de tels cas
de figure, tout recours en garantie sera exclu.
En outre, pour des raisons de sécurité et de
conformité, le démontage et la modification du
produit sont interdits.
Si vous avez des doutes quant au montage, au
raccordement ou à l'installation de ce produit,
adressez-vous à un spécialiste.
Première utilisation/Chargement de la
batterie
L'éclairage de numéro de maison solaire ne doit
être alimenté qu'au moyen de batteries NiMh.
N'utilisez jamais de piles classiques!
Avant la première utilisation de l'appareil et après
tout changement de batterie, cette dernière doit
être chargée. Chargez intégralement la batterie
au moyen d'un chargeur classique pour batteries
NiMh. Le temps de charge dépend du chargeur
ainsi que de la capacité de la batterie.
Vous pouvez également charger la batterie au
moyen des cellules photovoltaïques situées
sur l'éclairage de numéro de maison solaire en
plaçant celui-ci à un endroit bénéficiant d'un
ensoleillement direct.
Desserrez et ôtez la vis de fixation (fig. B2) de
la partie avant de l'appareil. Insérez la batterie
chargée. Ne replacez la partie avant qu'après
avoir fixé la plaque de montage!
Remarques concernant l'utilisation de
luminaires solaires
Diminution de l'autonomie des LED:
La batterie se recharge plus dicilement dans les
endroits ombragés.
En hiver, la durée d'ensoleillement est plus courte
qu'en été.
Le courant de charge est réduit lorsque les
cellules photovoltaïques sont recouvertes de
feuilles, de neige ou de saleté.
À basse température, l'ecacité de la batterie est
réduite.
Montage
Desserrez et ôtez la vis de fixation (fig. B2) de
la partie avant de l'appareil. Insérez la batterie
chargée. Ne replacez la partie avant qu'après
avoir fixé la plaque de montage!
Appliquez le numéro de maison souhaité avant
de procéder au montage. Pour une adhésion
optimale, nettoyez au préalable la surface de pose
(évitez les détergents abrasifs) Fixez la plaque
de montage à l'aide des 3 vis/chevilles fournies
(fig. B). Branchez la fiche de la batterie sur la
borne de l'éclairage de numéro de maison solaire
(fig. C). Accrochez la partie avant et fixez-la à
l'aide de la vis (fig. B2).
Entretien et mise au rebut
L'éclairage de numéro de maison solaire ne
requiert de votre part aucun entretien jusqu'à un
éventuel remplacement de la batterie.
L'utilisation de détergents abrasifs peut abîmer la
surface et entraîner des dommages.
Lorsque vous n'en avez plus l'utilisation, éliminez
le produit conformément aux dispositions légales
en vigueur. Veillez à en ôter préalablement la
batterie.
Remarques concernant les piles et les
batteries
Les piles usagées ne doivent en aucun cas
être jetées avec les ordures ménagères.
Leurs propriétaires ont en eet l’obligation
légale de les ramener à leur point de vente, où
elles seront reprises gratuitement. Les piles
contiennent des substances dangereuses pour
l’environnement et la santé et doivent être
recyclées selon la réglementation en vigueur.
Remarques concernant le recyclage
Cet appareil ne doit en aucun cas être
jeté avec les ordures ménagères. Les
propriétaires d'équipements électriques ou
électroniques usagés ont en eet l'obligation
légale de les déposer dans un centre de collecte
sélective. Informez-vous sur les possibilités de
recyclage auprès de votre municipalité.
Éclairage de numéro de maison solaire en
inox LPH 11014

9
Caractéristiques techniques
Source lumineuse 1 diode lumineuse (blanche) sans entretien
Module solaire module solaire cristallin performant 1,4W
Autonomie 50heures max. lorsque la batterie est pleine
Batterie 1 x NiMh 3,6V/1300mAh
Boîtier inox brossé et peint
Dimensions env. l 240 x h 340 x p 40 mm
Dysfonctionnements – Conseils pratiques
Problème Causes possibles Solution
La LED ne s'allume pas • L'éclairage ambiant est trop
important • Vérifiez qu'aucune source
lumineuse externe (lampadaire,
etc) ne soit à l'origine de
ces perturbations. Modifiez
éventuellement la position du
luminaire.
La LED ne s’allume pas • Les batteries sont
déchargées/
défectueuses
• Vérifiez/changez les batteries
Le dispositif émet une
faible intensité lumineuse • La batterie est faible • Chargez les batteries à l'aide d'un
chargeur externe/remplacez les
batteries
Des modifications techniques et esthétiques peuvent être apportées sans notification préalable.
GBFRITPL DE

Con l'acquisto di questo articolo si è scelto
un prodotto GEV di qualità superiore. Per
garantire un corretto funzionamento, leggere
le istruzioni per l'uso e conservarle con cura
per un'eventuale consultazione successiva.
Utilizzo conforme
La lampada solare per numero civico
è progettata per gli ambienti esterni. Il
modulo fotovoltaico integrato nella parte
superiore (Fig. A1) converte la luce
solare in corrente elettrica. L'energia ottenuta
viene immagazzinata nelle batterie integrate.
La lampada si accende automaticamente al
tramonto e si spegne all'alba.
Indicazioni di sicurezza
In caso di danni derivanti dalla mancata
osservanza delle istruzioni per l’uso, la
garanzia decade. Il produttore non si
assume alcuna responsabilità in merito
a tali danni.
Inoltre, il produttore non si assume alcuna
responsabilità in caso di danni a cose o persone
conseguenti a un utilizzo non corretto del
dispositivo o alla mancata osservanza delle
norme di sicurezza. Nei suddetti casi decade ogni
diritto di garanzia. Per motivi relativi a sicurezza
e certificazioni, non è consentito apportare
variazioni e/o modifiche arbitrarie al dispositivo.
Se non si è sicuri del corretto procedimento per
il montaggio, il collegamento e l’installazione o se
si hanno dubbi sulle modalità di funzionamento,
non eseguire da soli tali operazioni, ma adarsi a
uno specialista.
Primo utilizzo/caricamento delle batterie
La lampada solare per numero civico deve essere
utilizzata solamente con batterie NiMh.
Non utilizzare batterie tradizionali.
Le batteriev devono essere caricate
precedentemente al primo utilizzo e dopo essere
state sostituite. Per il caricamento, utilizzare un
normale caricabatterie per batterie NiMh. Il tempo
di ricarica dipende dalla capacità delle batterie e
del caricabatterie.
In alternativa, è possibile caricare le batterie
tramite le celle solari, esponendo la lampada
solare per numero civico alla luce diretta del sole.
Rimuovere la parte anteriore allentando la vite di
fissaggio (Fig. B2). Installare le batterie cariche.
Installare nuovamente la parte anteriore solo
dopo l'installazione della piastra di supporto.
Lampade solari, avvertenze speciali
Riduzione della durata di illuminazione del
LED:
I luoghi ombreggiati riducono la durata di carica
delle batterie.
In inverno il numero di ore di luce è minore rispetto
all'estate.
La corrente di carica può subire una riduzione in
caso sulle celle solari si accumulino sporco, foglie
o neve.
Le basse temperature provocano una diminuzione
delle prestazioni delle batterie.
Montaggio
Rimuovere la parte anteriore allentando la vite di
fissaggio (Fig. B2). Installare le batterie cariche.
Installare nuovamente la parte anteriore solo
dopo l'installazione della piastra di supporto.
Prima dell'installazione fissare il numero civico.
Per garantire una perfetta aderenza, pulire
la base (non utilizzare detergenti aggressivi).
Installare la piastra di supporto utilizzando le tre
viti e i tre tasselli in dotazione (Fig. B). Inserire la
spina delle batterie nella presa di alimentazione
della lampada solare per numero civico (Fig. C).
Agganciare la parte anteriore e fissarla con la vite
(Fig. B2).
Manutenzione e smaltimento
La lampada solare per numero civico non
necessita di manutenzione, fatta eccezione per
eventuali sostituzioni delle batterie.
L'utilizzo di detergenti aggressivi può danneggiare
la superficie della lampada.
Smaltire il prodotto in conformità con le norme
di legge. Prima dello smaltimento, rimuovere le
batterie.
Indicazioni su batteria e accumulatore
Le batterie usate non devono essere
smaltite come rifiuti urbani indierenziati.
Chi possiede batterie usate è tenuto per
legge a restituirle al punto vendita. Le batterie
contengono sostanze nocive per l'ambiente
e la salute e devono pertanto essere smaltite
conformemente alle normative in vigore.
Indicazioni per il riciclaggio
Questo dispositivo non deve essere smaltito
come rifiuto indierenziato. Chi possiede un
vecchio dispositivo è vincolato per legge
allo smaltimento conformemente alle normative
in vigore. Per ulteriori informazioni rivolgersi
all'amministrazione comunale.
10
Lampada solare in acciaio inox per numero
civico LPH 11014

11
Dati tecnici
Lampada 1 diodo luminoso (LED) bianco, non necessita di manutenzione
Modulo solare Modulo solare da 1,4 W cristallino ed eciente
Durata di illuminazione fino a 50 ore con batteria completamente carica
Batterie 1 x NiMh 3,6 V/1300 mAh
Alloggiamento Acciaio inossidabile spazzolato e laccato
Dimensioni ca. L 240 x A 340 x P 40 mm
Analisi dei problemi - Consigli pratici
Malfunzionamento Causa Soluzione
LED non illuminato • Ambiente troppo luminoso • Verificare l'eventuale presenza di
fonti di luce esterne (illuminazione
stradale, ecc.) e, se necessario,
modificare la posizione della
lampada.
LED non illuminato • Batterie non cariche, difettose • Verificare le batterie, sostituirle
Luminosità debole • Batterie deboli • Caricare le batterie con un
caricabatterie esterno/sostituire le
batterie
L’azienda si riserva il diritto di apportare modifiche tecniche ed estetiche senza preavviso.
GBFRITPL DE

Kupno niniejszego artykułu oznacza wybór
wysokiej jakości wyrobu marki GEV. Aby
zapewnić prawidłowe działanie wyrobu,
prosimy o uważne zapoznanie się z niniejszą
instrukcją obsługi. Instrukcję tę należy
starannie przechowywać do ewentualnego
późniejszego użytku.
Zastosowanie zgodne z przeznaczeniem
Solarne oświetlenie numeru posesji
zostało zaprojektowane do stosowania
nazewnątrz.Wbudowanywgórnejczęści
moduł solarny (rys. A1) przekształca
padające światło słoneczne na prąd elektryczny.
Tak uzyskana energia jest magazynowana we
wbudowanych akumulatorach. Oświetlenie
włącza się automatycznie o zmroku/w ciemności
i ponownie gaśnie, gdy jest widno.
Uwagi dotyczące bezpieczeństwa
W przypadku szkód spowodowanych
nieprzestrzeganiem niniejszej instrukcji
obsługi, gwarancja wygasa! Za szkody
wtórne nie przyjmujemy żadnej
odpowiedzialności!
Nie przyjmujemy odpowiedzialności w
przypadku szkód rzeczowych i obrażeń ciała
spowodowanych nieumiejętnym postępowaniem
lub niestosowaniem się do uwag związanych
z bezpieczeństwem. W takich przypadkach
wszelkie roszczenia gwarancyjne wygasają.
Z przyczyn związanych z bezpieczeństwem
i dopuszczeniami technicznymi, samowolne
przeróbki lub modyfikacje urządzenia są
niedozwolone.
Jeśli podczas montażu, podłączania lub
instalowania urządzenia nie masz pewności lub
masz wątpliwości co do sposobu funkcjonowania
zestawu, zleć montaż, podłączenie i
zainstalowanie specjaliście, zamiast wykonywać
je samodzielnie.
Użycie po raz pierwszy/ładowanie
akumulatorów
Solarne oświetlenie numeru posesji wolno
użytkować wyłącznie z akumulatorami NiMh!
W żadnym wypadku nie wolno stosować
zwykłych baterii!
Przed użyciem urządzenia po raz pierwszy lub
po wymianie akumulatorów konieczne jest ich
naładowanie! Naładuj akumulatory „do pełna”,
korzystając ze zwykłej ładowarki do akumulatorów
NiMh. Czas ładowania zależy od pojemności
akumulatorów i ładowarki.
Alternatywnie możesz naładować akumulatory
za pomocą ogniw słonecznych, wystawiając
oświetlenie numeru posesji na zewnątrz na
bezpośrednie działanie słońca.
Odkręć śrubę mocującą (rys. B2) przednią część
i zdejmij ją. Włóż naładowane akumulatory.
Przednią część można nasadzić z powrotem
dopiero po zamontowaniu płyty podstawy!
Szczególne zalecenia dotyczące
oświetlenia solarnego skrócenie czasu
świecenia diod LED:
Zacienione miejsca skracają czas, przez jaki są
ładowane akumulatory.
Słońce zimą świeci krócej, niż latem.
Brud, liście lub śnieg na ogniwach słonecznych
zmniejszają prąd ładowania.
Niskie temperatury zmniejszają wydajność
akumulatorów.
Montaż
Odkręć śrubę mocującą (rys. B2) przednią część
i zdejmij ją. Włóż naładowane akumulatory.
Przednią część można nasadzić z powrotem
dopiero po zamontowaniu płyty podstawy!
Przed montażem nanieś żądany numer posesji.
Aby zapewnić długotrwałą przyczepność,
wyczyść wcześniej podłoże (nie stosuj ostrych
środków czyszczących). Zamontuj płytę
podstawy za pomocą 3 dostarczonych w zestawie
wkrętów z kołkami (rys. B). Włóż wtyk zestawu
akumulatorów do gniazda solarnego oświetlenia
numeru posesji (rys. C). Zawieś przednią część i
zamocuj ją śrubą (rys. B2).
Konserwacja i utylizacja
Solarne oświetlenie numeru posesji jest
praktycznie bezobsługowe, z wyjątkiem
ewentualnej wymaganej wymiany akumulatorów.
Stosowanie agresywnych środków czyszczących
może uszkodzić powierzchnię i prowadzić do
nieprawidłowości w działaniu urządzenia.
Nieprzydatny produkt należy poddać utylizacji
zgodnie z obowiązującymi przepisami. Należy
pamiętać o wcześniejszym wyjęciu akumulatorów.
Uwagi dotyczące baterii i akumulatorów
Zużytych baterii nie wolno usuwać razem
z niesortowanymi odpadami komunalnymi.
Posiadacze zużytych baterii są ustawowo
zobowiązani do ich zwrotu i mogą dokonać
tego nieodpłatnie w punktach zakupu. Baterie
zawierają substancje szkodliwe dla środowiska
naturalnego i zdrowia, stąd muszą podlegać
specjalistycznej utylizacji.
Uwagi dotyczące recyklingu
Niniejszego urządzenia nie wolno usuwać
razem z niesortowanymi odpadami
domowymi. Posiadacze zużytego sprzętu
są ustawowo zobowiązani do zapewnienia
prawidłowej utylizacji urządzeń. Odpowiednie
informacje można uzyskać u odpowiednich władz
miejskich lub gminnych.
12
Solarne oświetlenie numeru posesji ze stali szlachetnej
LPH11014

13
Dane techniczne
Element oświetleniowy 1 biała, bezobsługowa dioda elektroluminescencyjna (LED)
Moduł solarny wydajny, krystaliczny moduł solarny 1,4W
Czas świecenia maks. 50godzin przy całkowicie naładowanym
zestawie akumulatorów
Zestaw akumulatorów 1 x NiMh 3,6V/1300mAh
Obudowa stal nierdzewna, szczotkowana i lakierowana
Wymiary ok. 240 x 340 x 40 mm (szer. x wys. x głęb.)
Analiza błędów — wskazówki praktyczne
Usterka Przyczyna Środki zaradcze
Dioda LED nie świeci • Zbyt jasne otoczenie • Sprawdź, czy nie przeszkadzają
zewnętrzne źródła światła (oświetlenie
uliczne itd.), w razie konieczności
przenieś oświetlenie w inne miejsce
Dioda LED nie świeci • Akumulatory nienaładowane
lub uszkodzone • Sprawdź i w razie potrzeby wymień
akumulatory
Słaba intensywność
światła • Wyczerpane akumulatory • Naładuj akumulatory za pomocą
zewnętrznej ładowarki lub wymień je
Zastrzega się możliwość wprowadzania zmian technicznych i wizualnych bez wcześniejszego
powiadomienia.
GBFRITPL DE

14

15

08/2014 UW
MA00130903
Max. 14 Ct./Min aus dem deutschen Festnetz.
Mobil max. 42 Ct./Min.
International calls may vary.
Gutkes GmbH
Rehkamp 13
30853 Langenhagen
Germany
www.gev.de
service@gev.de
Hotline: +49 (0)180/59 58 555
Table of contents
Languages:
Other GEV Lantern manuals
Popular Lantern manuals by other brands

Platinum Customer Care
Platinum Customer Care GX-2507-T Care and use instructions

WE-EF
WE-EF ETC310-FS Installation and maintenance instructions

Hoftronic
Hoftronic AMELIA 4409173 user manual

LED2WORK
LED2WORK TUBELED 40 II Series operating manual

Luminiser
Luminiser 70090048300005 instruction manual

kenall
kenall MILLENIUM AURACYL MLAS Series installation instructions

Travis Industries
Travis Industries Tempest manual

magic lite
magic lite PG 40W-aaK Series Installation

Duraflame
Duraflame 10ILH100-01 manual

BEGA
BEGA 33 882 Instructions for use

olympia electronics
olympia electronics GR-270 manual

Clevertronics
Clevertronics L10 LIFELIGHT PRO-SM Series ASSEMBLY, INSTALLATION & MAINTENANCE INSTRUCTIONS