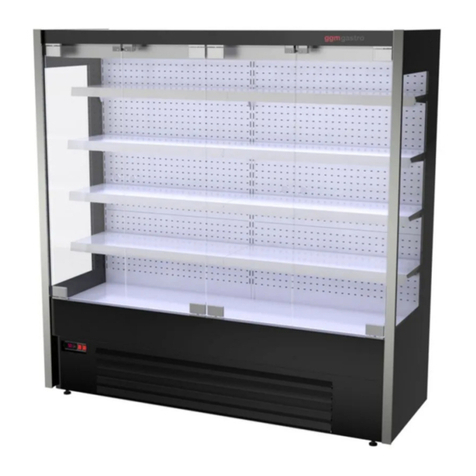
GGM gastro CAPRI User manual

Keep for the entire life of the product
REFRIGERATION CABINET
CAPRI
(with an undermount refrigerating unit)
medium temperature models:
Capri
0,7 SK slide
Capri
1,12 SK slide
OPERATING MANUAL
WARNING!
READ AND UNDERSTAND THIS MANUAL BEFORE
INSTALLATION AND THE FIRST USE OF THE DEVICE.
DEVICE’S SAFETY AND COMMERCIAL IMPACT HIGHLY
DEPEND ON FOLLOWING THE REQUIREMENTS IN THIS
DOCUMENT.

INTRODUCTION
This Operating Manual (hereinafter Manual or RE), that also includes certificate
data, applies to series of Capri refrigerated wall-sited undermount cabinets (hereinafter
referred to as cabinet or device). Data listed below provides information as well as
guidelines for consumers and maintenance specialists regarding:
−technical characteristics;
− manufacturer’s guarantees and certification;
− transportation and storage;
− installation, startup and operating the device (including maintenance and repairs),
disposal of the above mentioned cabinet.
WARNING: THE MANUFACTURER BEARS NO RESPONSIBILITY FOR ANY
KIND OF DAMAGE, CAUSED BY IMPROPER OR ERRONEOUS USE OF THE
CABINET, OR ANY OTHER ACTIONS THAT ARE NOT DIRECTLY SPECIFIED IN
THIS MANUAL.
1. GENERAL DATA
1. 1. Refrigeration cabinet is used for demonstration,short-time storage and selling
feed products, pre-cooled (frozen) to a temperature of effective volume is designed to
operate in trade and public catering enterprises.
1. 2. Refrigeration cabinet consists of the case and refrigerating unit, located in the
lower part of the cabinet.
The device is designed for storing the products in a temperature range, specified in
table 1 section 2 of this manual.
Basic technical specifications for the cabinets are provided in table 1 section 2 of
this manual.
1. 3. Climatic categories for the device according to GOST IEC 60335-2-89-2013:
‒ for devices with metal doors — 1 (tair=16С/80%), 2 (tair=22С/65%), 3 (tair=25С/
60%), 4 (tair=30С / 55%), 5 (tair=40С / 40%);
‒ for devices with glass doors — 1 (tair=16С/80%), 2 (tair=22С/65%), 3 (tair=25С/
60%), 4 (tair=30С / 55%).
The environment air humidity exceeding the sets parameters might cause condensed
water on the external device surface which does not constitute malfunction.
1. 4. The device meets the requirements for safety and environment protections,
listed in the following technical regulations, adopted by Customs Union:
1. 5. Average total service life of the device before reaching the limit state is at
least 12 years.
Limit state of a device is a state where frame deficiencies no longer allow to sustain
set temperature range on an acceptable level and economical losses caused by cost of the
repairs and idle time become comparable to the cost of a new device.
1. 6. The device can be transported by any types of transport, excluding air
transport, in a properly packed condition and meeting the transportation requirements,
standing for chosen type of transport. When transporting by means of an automobile
transport, the maximum allowed speed should not exceed 60 km/h (37m/h). Loading,
boarding, transportation, unloading should be executed carefully so as not to hit or push
the device. Packed device should be placed according to the markings on the label. Do
not tilt the package.

2
1. 7. Store the device in a storage facility or under a shed and in a shipping
container provided by the manufacturing company, with storage temperature above
minus 35°С and humidity level under 80%. Storage conditions group 4 according to
GOST 15150. Avoid exposure to direct sunlight. Storage cannot exceed 6 months.
1. 8. The results of commissioning operations should be reflected in Commissioning
sheet –Appendix B. Copies of the sheet are to be sent to the distributor (dealer) and the
manufacturer in five days to register the start of the warranty date. In case the consumer
fails to send the sheets, the distributor (dealer) and manufacturer will have no warranty
liabilities.
WARNING: INSTALLATION, COMMISSIONING, TECHNICAL MAINTENANCE
AND REPAIRS SHOULD BE PERFORMED BY SPECIALISTS TECHNICIANS FROM A
SPECIALISED ORGANIZATION (SERVICE PROVIDER) IN A STRICT COMPLIANCE
WITH STANDING LABOR SAFETY STANDARDS. DO NOT MAKE ANY
ALTERATIONS IN THE PRODUCT DESIGN.
WARNING! THE SIGN, SAYING "INFLAMMABLE"
MEANS THAT THE DEVICE CONTAINS
THE INFLAMMABLE REFRIGERANT R-290!
DO NOT ALLOW ANY DAMAGE TO THE REFRIGERATION CIRCUIT!
1. 9. The manual does not reflect some minor manufacturer-introduced
modifications in the device.

3
2. TECHNICAL SPECIFICATIONS
2. 1. Main technical specifications of the device are as specified in table 1.
Table 1
Parameter name
Parameter value
0,7SK slide
1,12SK slide
Inner volume, m3
0.64
1.04
Active volume, m3
0.60
0.98
Effective volume temperature with environment temperature 25°and
relative humidity level 60%, °C
from 0 to
plus 7
During the defrosting, the products, stored in the refrigerated volume may
have their temperature increase by (max °C)
3
Refrigerated shelf area, including the bottom area, m2
1.9
3
Energy consumption per day, max kW/h
4.8
6.5
Nominal amperage, A
2.2
3.15
Nominal watt, W
360
540
Inner volume lamp power, max W
21
21
Maximum nominal light box lamp power, W
(requires a separate order for installation)
−
−
Defrosting power
consumption, W
−
−
Defrosting power
for the heating systems, W
−
−
Current type
alternating one-phase
Nominal voltage, V
220
Nominal frequency, Hz
50
Adjusted sound power level, max dBA
59
Allowed (and equally spread) weight on a shelf, max kg
40
Dimensions, mm:
length
depths (without handles)
height
795
675
2030
1195
675
2030
Weight, max kg
115
145

4
3. PACKAGE CONTENTS
3. 1. Package contents are as per table 2.
Table 2.
Name
Quantity, pcs.
0,7SK slide
1,12SK slide
Cabinet
1
1
Operating manual
1
1
Rack-shelf 6.540.334
−
8
Rack-shelf 6.540.340
4
−
Shelf bracket 7.297.001
16
32
Handle 03-2-0024
2
2
Support 301319.008
4
6
Self-driving screw 4,2х14 sharp
6
6
4. PROOF OF ACCEPTANCE.
Refrigeration cabinet Capri__________________________________________,
with manufacturing № _____________________________, meets all
technical requirements of TY 28.25.13-002-07600499-2017 and is evaluated as suitable
for operation. The unit is packed with accordance with technical documentation.
The electric circuit diagram is rated for voltage of ~220V.
Release date ______________________________________________________
Compressor________________________ № _____________________________
Refrigerant brand and volume _________________________________________
Chief Quality Inspector ___________________ ______________________
(Signature) (Name of signatory)
Stamp

5
5. UNPACKING, ASSEMBLY AND PUTTING INTO
OPERATION
5. 1. Inside the premise put the device on wooden pallet and transport it with the fork
lift or lift cart with carrying capacity equal or higher than device's gross weight.
TO AVOID DAMAGING THE REFRIGERATING AND ELECTRICAL SYSTEMS
THE DEVICES HAS TO BE PLACES ON A WOODEN PALLET FOR IT TO BE
MOVED WITH A FORK LIFT!
5. 2. Carefully release the device out of the package, so as not to allow any
mechanical damage to any of its elements.
5. 3. Remove any parts, holding the doors in transportable position. Take all the
documents and additional parts and components from inside the package. Read and
understand the manual for the device. Inspect the contents for any damaged and missing
parts.
5. 4. Remove the device from the wooden pallet, unscrew the fastening bolts, screw
in the supports in their place. Devices with overhead refrigeration device, remove the nails
from the pallet, unscrew the 2 bolts, dismantle the fastening, install the self-driving screws
back and mount the cabinet leg into the support.
Regulate the support to put the device into a stable horizontal position, and angle it 3°
away from the customer to ensure zero-noise performance and correct condensate
accumulation, eliminate the possible skewness and yawns between the doors.
I m p o r t a n t –if the device was tilted by more than 15о, do not power on the
device for a day's time to avoid the oil from compressor crankcase spilling into suction
intake. This may result in device's failure.
5. 5. When placing the device, leave at least 100mm gap between the wall and
device's back wall. Do not install the device closer than 2 meters from heating units, under
direct sunlight, air drafts, caused by opening doors, windows or artificial climate (creating
air flows stronger than 0.2m/s) or in premises with humidity level violating the limits set
in article 1.3. of this manual! Failure to follow these recommendations may lower the
device's performance or cause a breakdown, not covered by warranty.
5. 6. To install the rack-shelves install the brackets into beam channels on necessary
height (4 brackets per rack-shelf). Install rack-shelves onto the brackets. Install the
handles.
5. 7. Panel and door covering, as well as shields are supplied covered in removable
protective film.
5. 8. Wash the inner and outer surfaces with neutral detergent, and with clean warm
water, then dry it with soft cloth.
5. 9. Check the following conditions before commissioning:
–integrity of the refrigerating system;
–melt-water (condensate) draining system.
5. 10. If the device was stored or transported in temperatures lower than
12оС, connect the device to the power grid after additional storage in the temperature
higher than +12оС for 12 hours minimum +12оС, the devices need to be kept in
temperature above +12оС for 12 hours minimum
I m p o r t a n t –do not connect a cold device to power grid. This may cause
compressor jam and put the device out of order.

6
6. GRID CONNECTION.
SAFETY MEASURES
6.1. The electric equipment meets the standing requirements for safety, set forth in
the technical regulations, adopted by Customs Union.
6.2. Supply voltage range should not deviate from minus 10% to plus 10% from its
nominal figure, provided in table 1 section 2 in this Manual. For permitted current
frequency swings refer to GOST 32144.
I m p o r t a n t: if power supply voltage swings exceed the allowed norms, it is
recommended to power the device with a voltage monitor or regulator. Failure to
follow these recommendations may result in a breakdown, not covered by warranty.
6.3. Device has a power cord with grounding contact, attached to the device through
Y-method.
6.4. Connect the device to the power grid (pic. 1) via automatic electromagnetic
protection shutoff and differential switch (GFI). Choose the automatic shutoff with the
nearest trip setting value, the amperage for a differential trigger should be higher should
be higher than the amperage for automatic trigger, nominal shutting differential amperage
is 30mA
WARNING: CONNECT THE DEVICE TO THE OUTLETS WITH THE
GROUNDING CONTACTS, CONNECTED TO GRID GROUNDING CIRCUIT.
Pic. 1 Connection diagram.
DO NOT USE THE DEVICE WITH INCORRECT OR NO GROUNDING, WITH NO
AUTOMATIC SHUTOFF AND CIRCUIT BREAKER, FAULTY OR REMOVED
CONTROL EQUIPMENT, INSUFFICIENT WIRING INSULATION, OPENED OR
REMOVED SHIELDING, OR HAS THE DETAILS WITH SHARP EDGES OR DAMAGED
DETAILS. DO NOT CONNECT THE DEVICE VIA EXTENSION CORD.
WARNING! AFTER TURNING THE POWER OFF, WAIT FOR 5 MINUTES
BEFORE POWERING THE DEVICE AGAIN.
7. OPERATION AND MAINTENANCE MANUAL
7. 1. Following the operating rules and requirements set forth in this manual will
increase the life and safety of the device.
7. 2. After checking technical specifications and electrical safety of the device,
connect it to the power grid, following the rules above. Compressor with start in a few
seconds. After the temperature in the refrigerated enclosure has reached the set
parameter, the compressor will start working in cycles.

7
1 2
Pic. 2 Control panel
Controller (1) serves to automatically maintain set temperature level in the
refrigerated enclosure and control the evaporator defrosting process. Manufacturers
setting provide the optimal performance of the device. Changing the controller settings
must be conducted by qualified technical personnel of the service provider, and in
accordance with the controller manual.
The switch (2) controls lighting inside the cabinet.
I m p o r t a n t
If your region has frequent power outages, the disruptions in controller
performance may lead to ice build-up on the evaporator. To prevent the wrong
temperature conditions, disconnect the device from the power grid (pulling the cord out
of the outlet socket) to let the evaporator defrost. In case of frequent power outages,
ask the service provider technician to change the settings so that new cycle started with
defrosting.
7. 3. Basic circuit diagram is shown in Appendix B.
7. 4. 4. Before filing the effective volume with products, power up the device, and
wait for the temperature inside the volume to reach the set parameter.
7. 5. Load the device with products, pre-cooled (frozen) to the temperature of the
effective volume. Spread them equally, leaving no empty spaces. Do not overload the
shelves.
Conditions for normal air circulation:
–leave at least a 10mm gap between the products;
–leave at least a 10mm gap between the products and the side walls in the cabinet.
The gap between the products and the back wall cannot be smaller than 25mm;
–the loading height should me 25mm less than the distance between the 2 adjacent
rack-shelf;
–the gap between the products and the air outlets should be at least 50mm;
–do not obstruct the air path and do not put paper, plastic film or any other air-proof
material.
Failure to follow these rules inhibits air circulation, lowers operation characteristics
of the device which might spoil the food items.
DO NOT STORE EXPLOSIVE ITEMS, SUCH AS AEROSOL SPRAYS WITH
INFLAMMABLE LIQUIDS.
AVOID STEPPING ONTO THE DEVICE TO PREVENT ITS DEFORMATION OR
OVERTURNING. THIS MAY ALSO CAUSE INJURIES.
I m p o r t a n t
1. Compressor works in cycles and turns upon reaching set temperature. Upon
the temperature rising by 2-3оС, it will turn on again. Different sport in the effective
volume may differ depending on the distance from the air cooler. Controller shown the
average temperature in the effective volume.

8
2. Violating the recommendations, set forth in article 1.3 of this Manual might
lead to the glass doors fogging, which does not constitute a malfunction.
3. Frequent door opening may lead to temperature increase in the effective
volume. When loading the device, equipped with two doors, do not open both slide-
doors at the same time, load the items through one door at the time, try to minimize the
time the doors are opened.
7. 6. Operating device can only be done by enterprise employees, medically
examined, instructed on safety measures, skilled in operating the device in accordance
with this Manual.
7. 7. Personnel in the facility, where the device is places, must perform the
following maintenance, not requiring special tools and dismantling:
–observing the temperature in the refrigerated enclosure;
–inspecting the state of the device, the correct loading, melt-water draining
system;
–to clean (wash) the inner surfaces and removable parts after disconnecting the
device from the power grid (wall outlet), wish a neutral detergent, then clean warm water
and dry it with soft cloth. Then re-attach the removable parts and leave the device with
the slide-doors opened so that the device could dry. Periodicity —at least once every two
weeks;
–to clean (wash) the outer surfaces and removable parts after disconnecting the
device from the power grid (wall outlet), wish a neutral detergent, then clean warm water
and dry it with soft cloth. Periodicity —at least once a week.
Upon noticing any abnormal performance, or if the inside temperature rises above
acceptable limits, disconnect the device from the power source (wall outlet), remove the
stored items to prevent their spoilage, and call for a technical specialist.
7. 8. To maintain a stable and reliable performance, service provider must conduct
a monthly maintenance.
A maintenance manager is appointed by the head of the enterprise.
7. 9. Maintenance procedures include the following processes:
a) visually inspect the device for its technical condition and completeness;
b) check the grounding, it's components and connections, check the contact
resistance between the grounding clamp and accessible metallic parts in the cabinet,
which should not exceed 0,1 Ohm;
c) check the lighting;
d) check automatic defrosting system performance in the evaporator and
condensate draining system.
e) clean the condenser from dust and dirt;
f) check the integrity of the refrigeration system;
g) make sure that the leak current is below 3,5mA.
When performing procedures a, b, e, f and g, disconnect the device from the power
grid (wall outlet).
Completing the maintenance procedures should be reflected in table 3, section 9 of
this Manual.
If the power cable is damaged, or lighting equipment falls out of order, call for a
specialist technician from the service provider.
7. 10. The list of possible malfunctions and means to eliminate them are set forth in
table 4, section 10.

9
8. DISPOSAL.
8. 1. After the expiration of the terms of service, the device should be taken out of
service and the one of the following decisions should be made: disposal, repairing,
checking the condition and calculating a new term of service.
8. 2. The device should be disposed of in accordance with the local and
environmental law. Before moving the equipment to a waste disposal site, fully drain the
refrigerant and oil. Burning the thermal isolation (polyurethane foam) is expressly
prohibited, suck materials are to be buried on a special waste site at least 2 meters deep.
8. 3. DO NOT RELEASE THE REFRIGERANT IN THE ENVIRONMENT
DURING THE OPERATING, REPAIRING AND DISPOSING OF THE DEVICE.
8. 4. DUMPING THE OIL INTO THE GROUND, WATER OR HOLDING POND
ETC IS FORBIDDEN.

10
9. MAINTENANCE RECORD.
WARNING: INSTALLATION, COMMISSIONING, TECHNICAL MAINTENANCE
AND REPAIRS SHOULD BE PERFORMED BY SPECIALIST TECHNICIANS FROM A
SPECIALISED ORGANIZATION (SERVICE PROVIDER) IN A STRICT COMPLIANCE
WITH STANDING LABOR SAFETY STANDARDS. DO NOT MAKE ANY ALTERATIONS IN
THE PRODUCT DESIGN.
WARNING! THE SIGN, SAYING "INFLAMMABLE"
MEANS THAT THE DEVICE CONTAINS
THE INFLAMMABLE REFRIGERANT R-290!
DO NOT ALLOW ANY DAMAGE TO THE REFRIGERATION CIRCUIT!
Table 3.
Date
Type of maintenance
Position, name and signature
Performed by
Accepted by

11
10. LIST OF POSSIBLE MALFUNCTIONS AND FIXES.
Table 4.
Defect name, external and other
signs
Probable reason
How to fix
1. Device is connected to the
power grid but is not working.
1.1. The controller display is
dark.
No power in the power
socket.
Check the voltage in the power
socket.
No contact between the
power socket and the plug.
Enable a contact between the plug
and the power socket.
Controller is switched off.
Switch on the controller.
1.2. Error message on the
controller display.
Weakened connection
between the controller and the
sensor.
Enable a stable connection.
Controller sensor is out of
order.
Replace the sensor.
1.3. Chaotic symbols and lines
on the controller display.
Controller is out of order.
Replace the controller.
2. Compressor does not start.
2.1. No power on compressor
terminal block:
Break in electrical circuit.
Check the feed circuit and fix the
connection.
2.2. The device works when
positively closing contacts on
the magnetic starter.
Magnetic starter coil has
burned.
Replace the magnetic starter.
Control-circuit interruption
Fix the control-circuit interruption.
2.3. Bridges are installed on
startup protection relay but the
compressor keeps working.
Startup protection relay is
malfunctioning.
Replace the startup protection relay.
2.4. Automatic circuit cutout
triggers. Megohmmeter shows
short-circuit between
compressor engine phases.
Compressor engine shorting.
Replace the compressor.
2.5. Automatic circuit cutout
triggers. Megohmmeter shows
short-circuit between fan phases.
Electric fan engine shorting.
Check the fan engine cable
condition. If there is no shorting in
the cable, replace the fan engine.
3. Startup protection relay
triggers after 10-15 seconds after
switching on.
3.1. Starting condenser is
breached.
Replace the condenser.
3.2. Megohmmeter shows
winding short-circuit on
compressor frame.
Electric engine winding short
circuits to frame.
Test the equipment for continuity. If
the compressor is damaged, replace
it.
3.3. Megohmmeter shows short-
circuit between starting and
operating winding when
connector blocks are removed.
Interwinding short circuit in
the electric compressor
engine.
Disassemble terminal block and test
the output for continuity to discover
any shorting. If the compressor is
damaged, replace it.
3.4. Condenser fan is on,
compressor is off.
Compressor engine winding
is broken.
Measure engine winding output
resistance. If the winding is
interrupted, replace the compressor.

12
3.5. Fan is on, compressor is off.
Compressor stator feed-through
receives normal voltage.
Compressor engine humming.
Compressor jams.
Replace the compressor.
4. Compressor shuts down after
a short while
4.1. Compressor thermal
protection triggers
Condenser fan engine does
not work
Check the contacts. Replace the
condenser fan engine.
Compressor interfin space
clogged up.
Clean the condenser.
Weak fan blades tightening
on the shaft.
Tighten the fan blades.
The condenser entrance is
hot.
The air at the condenser entrance
should not be warmer than the
environment temperature air by
more than 2С.
The air cannot access the
condenser.
Allow the air access to the
condenser.
Noncondensable gases (air) in
the system.
Install a manometer on the liquid
line. If condensing pressure is
increased (condensing pressure
should be equal to that of the
incoming air plus 10-12K), refill the
system with the refrigerant.
The volume of the refrigerant
is higher than normal.
Remove excess refrigerant.
4.2. Compressor thermal
protection triggers, increased
power consumption, lower
winding resistance.
Compressor engine turn-to-
turn short circuit.
Replace the compressor.
4.3. Controller settings have
failed.
Reconfigure controller as per
settings table.
5. Increased temperature in the
refrigerated enclosure,
compressor is working.
5.1. Evaporator fully freezes-up.
Large frost deposit in the
evaporator. Automatic
defrosting system is
malfunctioning.
Check the contacts, defrost heaters
(if installed), controller and its setup.
Replace defective nodes.
The device is loaded with
warm products.
Defrost the evaporator. Load the
device with pre-cooled (frozen)
products.
No space between the loaded
products and the enclosure.
Make space between the loaded
products and the enclosure.
Air cooler fan does not work
(if installed).
Check the contacts. If the fan engine
is faulty, replace it.
5.2. Evaporator partially freezes-
up, the temperature inside the
device rises.
Dehydrating filter is partially
clogged up. Dehydrating filter
frame is overcooled.
Replace the dehydrating filter.
Partial refrigerant leak from
the system
Locate and fix the leak spot and pour
additional refrigerant into the system
to restore a normal level.
5.3. Evaporator does not freeze
up, the compressor works non-
stop.
No refrigerant in the system.
Locate and fix the leak spot. Drain
the system. Refill the device with the
required amount of refrigerant.

13
Freezing moisture in the
throttling device. After
switching off the throttling
device for 3-4 hours and then
switching on, or heating the
throttling device at the
evaporator entrance, the
systems works as intended.
After switching compressor,
the refrigerant babbles in the
spot where capillary tube
enters the evaporator.
Dehydrate the system with the
technological dehydrating filter.
Vacuum the refrigerating system
before refilling it. If this does not
solve the problem, replace the
compressor.
Capillary tube clogged up.
After switching off the
compressor, the refrigerant
does not babble at the
evaporator entrance. Thermal
cutout switches off the
compressor.
Replace the dehydrating filter, cut
off 50mm of the capillary tube on
the dehydration filter side. Is this
does not fix the defect, replace the
capillary tube.
Dehydrating filter is fully
clogged up. Increased power
consumption. The condenser
is cold.
Replace the dehydrating filter.
6. The compressor works almost
non-stop; duty cycle factor is
above 0,95.
The doors are being opened
for a prolonged period of
time.
Instruct the service personnel.
Doors yawn.
Make sure there are no yawns
between the door seal and the
doorframe.
7. Increased noise level and
rattling.
The device is in unstable
position.
Calibrate the device's position.
Pipelines touch the frame and
each other.
Distance the pipelines, carefully
bending them in the touch area.
The fan electric engine makes
noise while working.
Calibrate the fan blades.
8. Touching metal parts causes a
tingling sensation.
Faulty grounding circuit.
Immediately disconnect the device
from the power grid. Check the
grounding circuit.
9. Increased power consumption.
The device is loaded
incorrectly.
Load the device as per manual
requirements.
The air cannot access the
condenser.
Allow the air access to the
condenser.
10. The illuminating lamp is off.
Break in electrical circuit for
lighting.
Check the feed circuit and fix the
connection.
The driver (power source) for
LED illumination has burned
out.
Replace the driver (power source).
LED bulb has burned out.
Replace the LED bulb.

14
11. Smell inside the device's
interior volume.
Lack of regular or thorough
cleaning inside the interior
volume.
The device is kept turned off
for prolonged periods of
times.
Storing spoiled products.
Carefully wash the interior volume
of the device.
Enable ventilation for 3-4 hours.
11. MANUFACTURER WARRANTY.
11. 1. Warranty period is 12 months from the date of selling the device, but not
longer than 18 months from the manufacturing day.
11. 2. During the warranty period, service providers will perform all diagnostics and
replacing defective components.
11. 3. Warranty is valid during the maintenance. Warranty liabilities do not include
maintenance during the warranty period. Maintenance is a paid service, provided by the
service provider.
11. 4. During the stage of testing and commissioning, the Buyer shall sign a
technical service agreement with the service provider.
11. 5. Warranty liabilities are valid with the following documents:
–Device manual;
–Commissioning sheet;
–Technical service agreement with the service provider.
Both Buyer and the service provider representative shall sign the sheets and verify
with the stamps.
11. 6. Warranty liabilities become null in the following cases:
−device operation violates the requirements in the Manual;
–components and joins have sustained damage during improper transportation,
loading-unloading operation, storing, testing and commissioning and operation;
–device has sustained damage caused by incorrect connection, setup, abnormal
operation or in conditions that were not specified by manufacturer;
–damage is caused by abnormal voltage fluctuations;
–damage is caused by fire, lightning strike, flood or other natural calamities;
–altered product design or accessories, or unauthorized repairs;
–device has sustained mechanical damage or has traces of chemicals;
–device was operated in violation with article 1.3 of this Manual.
11. 7. The following details are not covered by warranty: plastic and rubber parts,
sealants, gaskets, price tag holders, light sources, expendable materials.
11. 8. If the device was delivered to buyer not on manufacturer's transport, no claims
on quality and missing components will be accepted.
11. 9. Manufacturer does not give any warranty on compatibility between acquired
equipment and the Buyer's equipment. Manufacturer will not be obligated to accept back
the effective unit, if it is for any reason unfit for the Buyer.
11. 10. If the qualified personnel from the manufacturing facility or other
organization, authorized to perform maintenance, discover that malfunctioning was
caused by the Buyer's actions, the Buyer will take on the responsibility to reimburse all

15
expenses, incurred by providing the qualified personnel. The responsibility to present the
evidence of guilt lies on the Buyer.
11. 11. In case of the Buyer's neglect to observe the above-mentioned articles, the
manufacturer will have the right to immediately interrupt the warranty without further
notice.
11. 12. This warranty does not infringe upon the consumer's right, granted by
legislation. The manufacturer will bear no responsibility for the sold goods after the
warranty date expiration.

16
APPENDIX A
Sectional view of the cabinet
0,7SK slide; 1,12SK slide
1. Effective volume. 2. Engine compartment. 3. Air cooler (evaporator). 4.
Compressor and condenser. 5 Controller. 6. Diode lamp. 7. Frame. 8. Door. 9. Rack-
shelf. 10. Machine section shield. 11. Lighting box.

17
APPENDIX B
Medium temperature refrigeration cabinet
0,7SK slide; 1,12SK slide
Basic circuit diagram.
А1 –compressor and condenser; А2–controller; EL1,EL2, EL3*,EL4* –LED
lamp; М–evaporator fan; RK1 –temperature sensor; SA –lighting switch; U1 –power
source for LED lamps; XP –power cord with a plug.
* Installing the setup for lighting the light box is available.
Table of contents
Other GGM gastro Refrigerator manuals