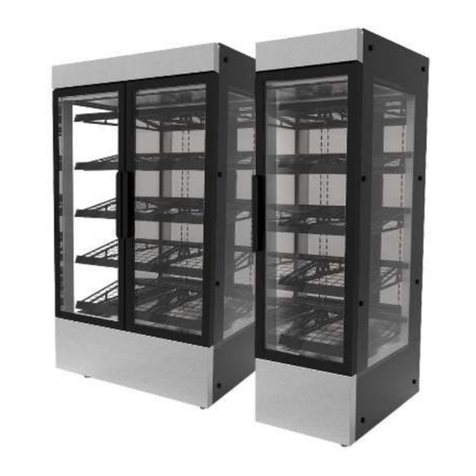
Giani GCETW39AL-1 User manual

InstructionManual
Model Reference: GCETW39AL-1
IM-GCETW39AL-1110613
Heated Airer
with 2 Folding Wings

Contents
Introduction ............................................................
Safety Instructions .................................................
Directions for use ....................................................
Directions for use Continued/Storage ..................
Troubleshooting ......................................................
Recycling .................................................................
Electrical Connections ............................................
Technical Specifications ........................................
Disposal Information ..............................................
Introduction
Thank you for buying the Giani Heated Clothes Airer.
With over 9m of drying space and quick heat up time, the airer is ready to start drying your
laundry in minutes.
To get the best from your Giani Heated Clothes Airer, please take a few moments to read
these instructions, and keep them in a safe place for future reference.
Safety Instructions
• Please read all instructions before using the Giani Heated Clothes Airer.
• Make sure your electricity supply matches the voltage shown on the appliance.
• The Heated Clothes Airer is for household use only. It is not suitable for commercial use,
or for use outdoors. It must be used for its intended purpose.
• To protect against electric shock, do not immerse the appliance, power cord or plug in
water or any other liquid.
• The appliance must be placed on a level, dry surface at least 1.5 metres away from heat
or water sources.
• Never pull or carry the Heated Clothes Airer by its cord. Do not allow the power cord to
touch hot surfaces or sharp edges. Do not let it trail over the edges where it may be
pulled by children or tripped over.
• Always switch off and unplug the Heated Clothes Airer after use leaving it to cool down
completely before storing it away. Do not wind the power cord around the Heated Clothes
Airer.
• The appliance is not intended for use by children or infirm people unless they have been
adequately supervised by a responsible person to ensure they can use it safely. Children
should be supervised to ensure they do not play with the appliance.
• Please do not use the appliance if it has been dropped or damaged in any way. Check the
power cord regularly for signs of damage. Never attempt to repair the appliance or replace
the cord yourself as this may lead to severe injury or electric shock.
01
page 01
page 01
page 02
page 03
page 04
page 04
page 04
page 05
page 05

02
Directions for Use
1. Remove the Heated Clothes Airer from all packaging.
2. Unattach the mains power cable from its packaging position by cutting the holding
plastic clip with a pair of scissors. Take care NOT to cut the mains cord or damage the
frame whilst cutting the clip.
3. Remove the wire twist clip on the mains cable.
4. Before first use, the folding leg frame has to be attached to the main airer frame.
a. Lay main airer frame on its back on a suitable flat surface.
(floor/carpet preferably) FIG 1.
b. Ensure that the 2x leg clips on the outer 2 main frame bars are both slid to
the same end. FIG 2. Then slide the two inner leg clips to the opposite end of
the main frame. FIG 3.
c. Position the folding legs over all 4 leg clips and clip into place by pushing
down on the leg frame around the clip. Be careful not to force the leg frame
too hard into the clip causing damage to the main frame. Ensure that all 4 leg
leg clips are fully clipped on to the leg frame. FIG 4.
d. The leg frame will now be able to slide along the main frame in either the open
or closed position.
e. For maximum safety/stability of the airer, please always ensure that the leg
frame is fully opened to the widest possible position at either end of the main
frame.
FIG 1
FIG 3
FIG 2
FIG 4

03
Directions for Use Continued
f. Finally once assembled, the airer wings can be opened outwards to the operating
position or folded away for storage.
Operation:
1. Once the airer has been assembled and positioned in your desired operating location
plug the airer into the mains power socket.
2. Press the red power switch on the main airer to the (-) position. The pilot light will
illuminate red. FIG 5.
3. After approximately 2 minutes the Heated Clothes Airer will warm all 8x top rails of the
main frame to its optimum operating temperature.
4. CAUTION - The top 8 rails of the main frame will become warm during use.
DO NOT TOUCH OR HOLD THESE RAILS FOR MORE THAN A FEW SECONDS TO
AVOID BURNS.
5. The unit is now ready for you to place clothes on the rack for airing.
6. When placing clothes on the rack, always place clothes on the centre bars first leaving
the wings until last. DO NOT place wet clothes directly from the washing machine onto
the airer. Clothes must be part dried before placing on the airer.
7. When the airer is not required for use, switch off by again pressing the red mains
button to the “O” position. Always unplug the airer from the mains power supply when
not in use.
8. Please note that the bottom rail on each side wing DOES NOT heat up.
Storage:
1. Ensure the airer is unplugged from the mains at all times when not in use. Allow the
airer to fully cool down before folding away for storage.
2. Stand the airer upright on the end opposite to the power cable joint and on/off switch on
the main frame. Slide the folding legs against the main frame so that the legs fold flat for
storage. FIG 6.
FIG 5 FIG 6

04
Recycling your electricals
Troubleshooting
Problem - the Heated Clothes Airer is not heating up.
Solution - check the Heated Clothes Airer is plugged in and the on/off switch is illuminated.
Along with many other high street retailers, Giani has joined a scheme whereby customers
can take their unwanted electricals to recycling points set up around the country. Visit
www.recycle-more.co.uk to find your nearest recycling point.
Electrical Connections
This appliance must be earthed
This appliance is fitted with a fused three pin plug to BS1363 which is suitable for use in
all homes fitted with sockets to current specifications. If the fitted plug is not suitable for
your socket outlets, it should be cut off and carefully disposed of. To avoid an electric
shock, do not insert the discarded plug into a socket.
Fitting a new plug
If for any reason you need to fit a new plug, the flexible mains lead must be connected as
shown here. The wires in the mains lead fitted to this appliance are coloured in
accordance with the following code:
If the colours of the wires in the mains lead of this appliance do not correspond with the
coloured markings identifying the terminals in your plug, proceed as follows. The wire
which is coloured green and yellow MUST be connected to the terminal which is marked
with the letter E (Earth) or coloured green. The wire which is coloured blue MUST be
connected to the terminal which is marked with the letter N (Neutral) or coloured black.
The wire which is coloured brown MUST be connected to the terminal which is marked
with the letter L (Live) or coloured red.
Before refitting the plug cover, check that there are no cut or stray strands of wire inside
the plug. Use a 13 amp BS1362 fuse. Only BSI or ASTA approved fuses should be used.
If you are at all unsure which plug or fuse to use, always refer to a qualified electrician.
Note: After replacing or changing a fuse on a moulded plug which has a fuse cover, the
cover must be refitted to the plug; the appliance must not be used without a fuse cover. If
lost, replacement fuse covers can be obtained from an electrical shop. This appliance
complies with the following EEC Directives: 73/23 EEC (Low Voltage Directive) and 89/336
EEC (EMC Directive).
13 amp FUSE
Earth (green/yellow)
3 amp fuse
Live (brown)
Neutral (blue)
Connect BLUE to Neutral (N)
Connect GREEN & YELLOW to Earth (E)
Connect BROWN to Live (L)
13 amp fuse to be used
05
Technical Specifications:
Power consumption: 120W
Operating voltage: 230V
Disposal Information
Do not dispose of this item in normal household waste. Used electrical appliances and
electronic equipment must be disposed of separately. Please contact your local waste
disposal authority for details of local arrangements.
THIS APPLIANCE IS EARTHED
IF THE SUPPLY CABLE OR CORD IS DAMAGED DO NOT USE
IF IN DOUBT CONTACT A QUALIFIED ELECTRICIAN
FOR DOMESTIC USE ONLY


Table of contents