Gira 5217 00 User manual

General safety instructions
This product contains button cells. Swallow-
ing button cells may cause severe internal
burns within two hours. This can be fatal.
Do not swallow batteries. Risk of burns
from hazardous materials. Immediately
seek medical attention if batteries have
been swallowed or inserted into any part
of the body.
Danger of acid burns from bursting or
leaking batteries.
Keep new and used batteries away from chil-
dren.
These instructions are part of the product
and must remain with the end customer.
Product features
The wireless hand-held transmitter can be
used to set the security area to "Internally or
Externally armed" or to disarm the area. In
addition, irrespective of the status of the
security area, the panic alarm can be
manually triggered with the wireless hand-
held transmitter in an emergency (e. g.
aggression).
Included in delivery
1 x wireless hand-held transmitter incl.
battery
1 x operating instructions
2 x stickers with Hardware ID
Ensure the package contents are complete
and undamaged. Please see “Warranty” in
case of any defects.
Observe the commissioning order
Commissioning order for the security
system Alarm Connect:
1. Mount the alarm control unit and put it
into commission (battery and 230 V
connection).
2. Configure the project in the GPA and
transfer it to the alarm control unit
memory.
3. Install all other devices, put into
commission (insert batteries, etc.) and
check the wireless connection to the
alarm control unit.
4. After successful verification, set the
alarm control unit to operation mode.
Failure to observe the commissioning
sequence will render commissioning of the
safety system unsuccessful.
Required accessories
• Alarm control unit Connect
(item no. 5201 00)
Device description
Commissioning the hand-held
transmitter
After commissioning via GPA, each new
wireless hand-held transmitter must be
manually linked to the alarm control
panel Connect.
1. Put the alarm control unit Connect in
configuration mode (remove housing
cover). The tamper alarm is triggered.
2. Briefly press the pairing button: The
status LED will flash red and the pairing
mode will be activated for 15 min. After
15 min, the pairing mode will
automatically end and the status LED
will glow a steady green.
3. Within the 15 min, on the wireless hand-
held transmitter, press and hold the keys
& for approx. 3 s. The LED status
first flashes red and then briefly lights up
green. The alarm control unit Connect
has successfully transmitted its
hardware ID to the wireless hand-held
transmitter. The wireless hand-held
transmitter is ready to operate.
Sticker with Hardware ID
The device comes with two stickers with
the Hardware ID. You can use one of the
two stickers for your site map and simply
scan the Hardware ID with an appropriate
scanner during configuration in GPA.
1“Disarm”
2 “Externally arm”
3 “Internally arm”
4 For panic alarm only
5 Battery compartment, rear side
(including cover and screw)
6StatusLED
Conditions for device
commissioning
The project must first be successfully
commissioned in GPA (see
"Commissioning order").
Gira Project Assistant (GPA)
The security system Alarm Connect is
configured via GPA. The following settings
are made in GPA for the wireless hand-held
transmitter:
• Assign device ID.
•Enterdevicename.
• Put the project into commission.
6
2
4
1
3
5
4. Put the alarm control unit Connect into
operating mode (housing cover closed)
and confirm the tamper alarm on the
wireless operating unit.
Operating the wireless hand-held
transmitter
Activate "Externally armed"
Press the button for approx. 3 s, then
release. The status LED first flashes red and
then green. Then the button flashes red
briefly: the security area is switched to
"Externally armed".
Activate "Internally armed"
Hold down the button (approx. 3 s). The
status LED (1) first flashes red and then
green. Then the button flashes red
briefly: the security area is switched to
"Internally armed".
Disarm
Hold down the button (approx. 3 s). The
status LED first flashes red and then green.
Then the button flashes red briefly: the
security area is switched to "disarmed".
Manually trigger panic alarm
Keep the & buttons pressed
(approx. 3 s). The status LED first flashes
red and then green: the alarm is tripped, and
all appropriately parametrised devices for-
ward the alarm signal.
The following message is shown in the
display of the wireless operating unit:
Reset wireless hand-held transmitter
Hold down the & buttons
(approx. 7 s) until the status LED flickers
red/green.
The wireless hand-held transmitter is now
reset and is now in the default delivery
state.
Deactivate panic alarm
The panic alarm can only be deactivated at
the wireless operating unit by entering the
user PIN!
Ongoing panic alarm
Deactivate alarm by
PIN entry
10863924 43/18
Wireless hand-held transmitter
5217 00
Operating instructions
en
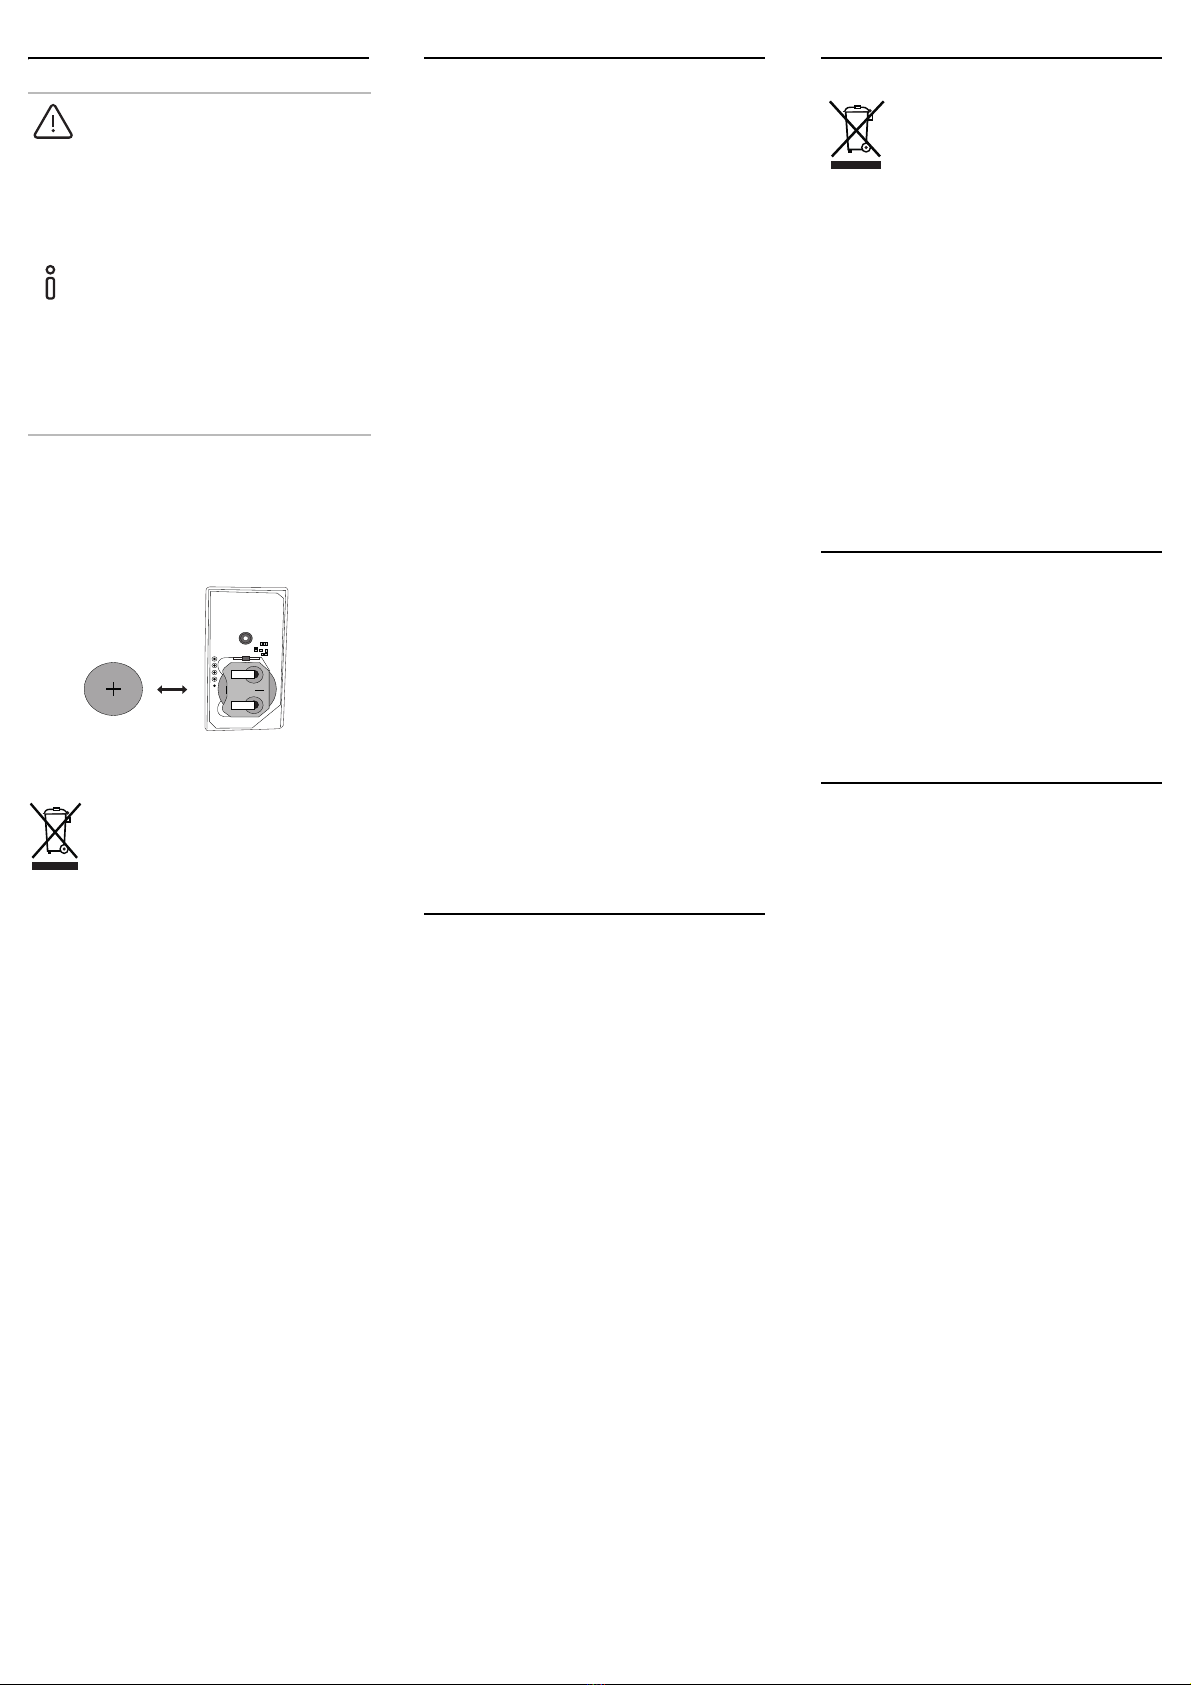
Replacing the battery
1. Loosen the rear screw and remove the
cover from the battery compartment. The
tamper alarm will not be activated!
2. Pull the battery out to the left and replace
it with a new battery of the same type
(see technical data). Observe polarity!.
3. Put the cover back on the battery com-
partment and screw it tight.
WARNING
Explosion hazard in case of improper
handling of batteries.
Do not throw batteries into the fire, and do
not recharge batteries, as this may result in
a risk of explosion.
Replacing the battery
Replace the battery as soon as the "low
battery" display appears in the display of the
wireless operating unit.
Always change an empty battery for a new
one of the same type (see “Technical
data”).
Remove empty batteries
immediately and dispose of them in
an environmentally-friendly way. Do
not dispose of batteries with
household waste. Local authorities
provide information about
environmentally-sound disposal.
The end consumer is legally
required to return used batteries in
accordance with legislative
requirements.
CR2032
Technical data
Conformity
Gira Giersiepen GmbH & Co. KG hereby
declares that the wireless system type item
no. 5271 00 conforms to Directive
2014/53/EU. The complete item number can
be found on the device. The complete text of
the EU Declaration of Conformity can be
found either in the download area (gira.de/
Konformitaet), or directly via the online
catalogue at the product (katalog.gira.de).
Power supply: Type C (internal
batteries)
Battery
Capacity: DC 3 V
Type: Lithium (CR2032)
Power consumption
Stand-by mode: 0.6 μA
Transmitting mode: 40 mA
"Low battery" level at: 2.1 V
Wireless
Frequency band: 868.0 - 868.6 MHz
868.7 - 869.2 MHz
Range: 100 m (free field)
Device – general
Optical display: Status LED
Ambient temperature:
-10°C to +55°C
Storage temperature: -35°C to +70°C
Humidity: 93 %
Security class: 2
Environmental class: II
Compliant with: EN 50131
EN 301489-1
EN 301489-3
EN 61000-6-3
EN 50130-4
EN 300220-1
EN 300220-2
EN 62368-1
EN 50130-5
EN 50131-1
EN 50131-3
EN 50131-6
EN 50131-5-3
Certification body: Telefication B.V.
Dimensions(HxWxD): 20x35x5mm
Disposal
Warranty
The warranty is provided in accordance with
statutory requirements via the retailer.
Please submit or send faulty devices
postage paid and with an error description
to your sales representative (retailer /
installation company / electrical contractor).
The salesperson will forward the devices to
the Gira Service Centre.
Gira
Gira
Giersiepen GmbH & Co KG
Electrical installation
systems
P.O. Box 1220
42461 Radevormwald
Phone: +49 2195 602 - 0
Fax: +49 2195 602 - 191
www.gira.de
The Gira wireless hand-held trans-
mitter is an electric or electronic
device in the sense of EU Directive
2011/65/EU.
High-quality materials and
components were used in
developing and manufacturing the
device. These materials and
components can be reused and
recycled. Please consult the
regulations governing the separate
collection of electric/electronic
waste applicable for your country.
These devices may not be
disposed of with household waste.
The correct disposal of waste can
prevent possible negative
consequences to the environment
and humans.
Other Gira Transmitter manuals


