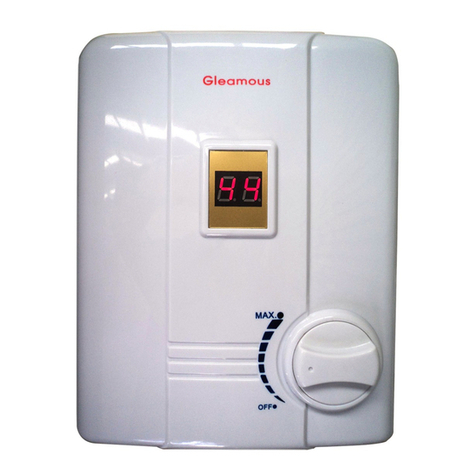
Gleamous DSL-30N User manual

Instant Hot Water Heater
For proper operation and maintenance please
Read the instruction manual before installation.
www.gleamoushotwater.com.au
Instruction Manual
DSL - 30N
Storage Boiling Water Heater

1
!
I. Safety Guidance for user
II. Precautions
Thank you for choosing the DSL 30N boiling hot water unit.
To enjoy the service of this unit, please read this manual
carefully and follow the instruction.
1.The unit shall only be installed and maintained by an authorized service provider or a qualified
electrician. We urge you to read all of the instructions thoroughly before installation or operation.
The manufacturer will not be liable for any damages caused by faulty installation..
2.Warning: The unit must be properly earthed.
3.Before switching the power on, make sure that all plumbing pipes are connected, the unit is filled
with water and water flows from the outlet.
4.If the power supply cable is damaged it must be replaced by an authorized electrical contractor.
5.The heater unit is designed to be installed for indoor use only and should never be installed in an
exposed area.
6.The unit should not be installed in a place subject to freezing.
7.This heater is not intended to be operated by children, or mentally impaired personnel, unless under
adult supervision and guidance.
8.The outlet water temperature is delivered at up to 95℃, avoid contact with hot water to prevent
scalding.
9.This boiling water heater is not intended for any other use than to provide boiling water 24hrs a day.
10.Children are not allowed to play with the water unit.
1.This hot water unit should be installed on a separate circuit 35amp 240V~, 50Hz power supply.
2.The water heater should be properly earthed.
3.After installation, it is important to fill the unit with water before switch the power on, so as to
prevent it from dry-burning and damage.
4.The power switch for the heater should be installed in a dry place.
5.Damaged power cables should be replaced by qualified electrical contractor or service provider.
6.If the unit is to be left unattended for an extended period of time in a cold region, draining the
water tank is recommended to avoid freezing.
7.In the event of a fault from the heater, contact your authorized service provider.
8.An earth leakage switch with a 30mAmp circuit-breaker is required to install at the main
switchboard.
9.Only use tap supplied with the unit for delivery of boiling water.
10.Switch off the power to the water heater when you are not using water heater for long time.
11.For sterilization, at least 90% of the stored water is heated to for at least one single period of
not less than 32 min in each 7 day period.
60℃

2
III. Part Designation and Installation Diagram
1. Co ver
2. Di splay Screen
3. In let Pipe
4. Outl et Pipe
5. Wa ter Discharge
6. Wa ter Flow Regulate Va lve
7. Ho t Water Outlet
56
2
1
开/关
出水温度
状态显示
开关
11 5 m m
Concrete or Brick Wall
6mm x 4 0 m m A nchor Bol t
Hoo k
Hol e f o r h ook
Hoo k
Bac k c o v er
fastening screws
Cable inlet
Fig.1
43
7
Installing procedures
Method to fill the hot water unit tank: Open the inlet tap till outlet has constant water flow.
1.The electric water heater should be installed on wall, vertical, outlet & inlet connectors facing
down. First determine the installation position of the heater required and then make two holes
in the wall reference to the mounting holes as shown in Fig. I . Securely anchor bolts with nuts.
Make sure it is fully fastened before attaching the product to the hook.
2.Connect the unit to the main water pipe and inlet should be installed to a Non-Return Isolating
Valve (tap) which controls water flow.
3.The unit shall not be turned on until the unit is filled with water, and checked for leaks.
4.During the heating cycle, water will drip from the spout due to the thermal expansion, which is
normal. Tightening the inlet tap will not stop this and may damage the tap.
5. when connecting hoses to cold and hot water inlets of the water unit.DO NOT USE TEFLON TAPE

3
开/关
出水温度
状态显示
开关
3
开/关
LE D Di sp lay type control pane l
1
2
6
45
1.O n /O ff
2.T e mp era tu r e s ett in g
3.P o we r se tt i ng
4.Setting temperature
5.W a te r fl ow i nd ica to r
6.O u tl et w at e r t emp er a tu re
LED display type
LED
Cold wate r i n l e t
Hot water o u t l e t Fig.2
The Installation shall comply with AS/NZS 3500.4
1)Switch on the unit, the buzzer sounds once the unit is in standby mode.
2)Press the ON/ OFF button, the screen will light and the unit starts heating; press the button once
again to stop heating.
3)Press Temperature Setting button to set heating temperature from 35℃ to 95℃ Press the button
each time, the temperature will increase in 5℃. When in setting state, the LED screen will flash
the temperature setting for 3 seconds. After setting the temperature, it will show the temperature
of the water in the tank.
4)Press “Power Setting” button to choose the heating power for the heater. The user can choose
different heating power according to requirement.
5)Malfunction code of water heater:
“E1” means electric current leakage has occurred.
“E2” means the temperature sensor of outlet water is open/ and has short circuited.
6)When the water in the tank has reached its set temperature, the unit will stop heating and it will
go into warm mode.
7)The unit has memory function. Press “ON/OFF” button when using next time, the unit will
revert to last working temperature.

4
IV. Specifications
Rated
Pressure
L
N
E
PCB JK1 JK2
H1 H2
DSL-30N 240V~ 3KW 25/32 Amps 5L
Mode l
Number
Rated
Voltage
Rated
Power
Reco mmended
Breaker
Rated
Capacity
0KPa
V. Schematic Wiring Diagram
Thermal p rotecor
Inducti on coil
Schematic Wiring Diagram
Dimension
441*250*162mm
VI. Maintenance
1.Clean the water heater with a soft cloth. Never wipe it with detergent.
2.The entire water heater, electric connections and water connections should be
inspected by qualified service personnel at least once every two years.
3.Elimination of residual water in the water tank:
a.Isolate power to the water unit.
b.Turn water off at the inlet.
c.Remove the inlet Regulator Valve and drain water out.

5
No water o utput
Low flow r ate
No hot
wate r output
Low wa ter
temp erature
Trip ping
Check the w ate r suppl y for f ail ure.
Check tha t all v alves are op ene d.
Check the h eat ing pipes fo r dam age.
Check the c irc uit breake r for
operation.
Check tha t the u nit is conne cte d to
power sup ply .
Check tha t the f use is blown .
Check tha t the t emperatu re se tting
is low.
Check tha t wat er is inadeq uat ely
heated af ter u sage.
Short cir cui t
Inspect ion
Contact t he se rvice d epa rtm ent
for repai r.
Set the req uir ed temp era tur e.
Wait for pr ehe ating .
Switch of f the p ower suppl y and
contact t he se rvice d epa rtm ent.
VII. Troubleshooting
Inspect ion
Pow er indica tor
not l ight
Scr een no disp lay
VIII. Packing List
High-pressure
conn ecting pipe 1
(optional)
Inst ruction manual 1
Hook 1
Anch or bolt 2
Elec tric water heater 1
开/关
出水温度
状态显示
开关
Trouble Inspection Solution

6
Gleamous Australia - 2 YEAR WARRANTY*
We warrant parts for Two (2) years Domestic use and One (1) year for commercial use
from date of purchase, Gleamous (model GL5 / DSL / DSK) be free from defects in
material and workmanship under normal use and service. The obligation of Gleamous
Australia under this warranty is limited to repairing or exchanging any part of the water
heater which proves defective within the specified period and which our examination
shall disclose to our satisfaction to be defective.
Warranty details outlined:
The above warranties shall not apply to such water heater or part there of which in our
opinion has been subject to accident, alteration or any thermostat having fixed
temperature altered, abuse, misuse, has suffered any damage by flood, fire or act of
God or if any repairs have been made or attempted to be made by any person/s not
approved by us. The warranty shall not extend to any loss suffered by or resulting from
the non- operation of the water heater or part thereof.
We will not incur any obligation or liability whatsoever under warranties for any damage
or harm which may arise directly or indirectly as a result of the water heater being
installed by others than a registered qualified plumber or being connected to a water or
power supply not in accordance with the regulation of the relevant electric, water and
health authorities.
The following items are specifically excluded from normal terms or warranty:
Damage as a result of transportation, removal or storage.
Damage due to connection to incorrect water supply.
Damage or faulty operation due to foreign matter in the water supply.
Damage or faulty operation due to the corrosive elements in the water supply.
Notwithstanding anything contained herein, the electric water heater shall continue to
be subject to any implied warranty provided by the trade practices Act 1974, if and to
the extent that the said Act is applicable and prevents the exclusions, restrictions or
modification of that warranty.
This warranty will apply Australia / New Zealand wide for parts only provided the water
heater or part is forwarded carriage paid both ways at owners risk to Gleamous
Australia.
Service costs by others are not covered by the warranty and are at the user's expense.
In the event of any claim being made under the warranty, it is the original purchaser's
responsibility to provide evidence of purchase and date of purchase.
A nominal service charge may be made should the appliance be found to be in a normal
working condition.
Gleamous Australia Pty Ltd
ABN: 150 2087 45
P.O Box 611 Round Corner NSW 2158 Phone: 1300 550 490 Fax: 02 9627 1995
Email: Info@gleamoushotwater.com.au Web: www.gleamoushotwater.com.au

www.gleamoushotwater.com.au
Table of contents
Other Gleamous Water Heater manuals
Popular Water Heater manuals by other brands

Webasto
Webasto Thermo Top E installation instructions

THERMEx
THERMEx SYSTEM Series operating manual

Chronomite
Chronomite INSTANT-FLOW SR Series Get started

Amtrol
Amtrol EXTROL EX Series Installation & operation instructions

A.O. Smith
A.O. Smith BTH 120-250(A) Installation & operating instructions

Morco
Morco EUP11 User, installation, and maintenance manual

Honeywell
Honeywell WV4262B installation instructions

Gabarron
Gabarron GTV Installation, setup, maintenance

Burnham
Burnham 40A Installation, operating and service instructions

AQUAH
AQUAH AQE-12 Installation and instruction manual

State Water Heaters
State Water Heaters Gas Specification sheet

HTP
HTP Everlast Elevate ELV055C2X055N use and care manual