manuals.online logo
Brands
  1. Home
  2. •
  3. Brands
  4. •
  5. Global
  6. •
  7. Sewing Machine
  8. •
  9. Global WF 9995-H Parts list manual

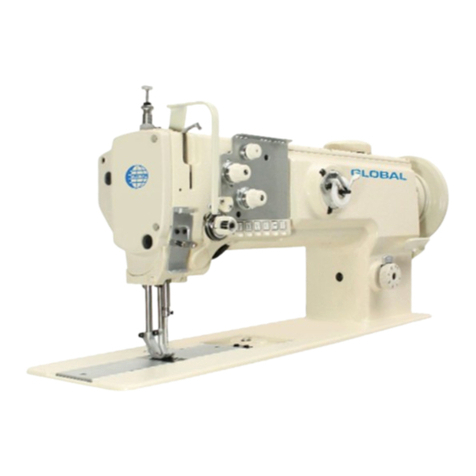
Global WF 9995-H Parts list manual

GLOBAL
WF 9995-H
Instruction & parts manual
www
.globalsew.com
[email protected]
From the library of Superior Sewing Machine & Supply LLC - www.supsew.com
CONTENT
Operation Instruction
l.M~in technical specifications
•········································································································
2.0peration
preparation
•·················································································································
3.lllSlalling
tl1e
motor
•····················································································································
4.Con-necting
tl1e
clutch lever
to
tl1e
pedal
•·································
·••·••·•••••·•••••••••••••••••••••••••••••••••••••••••••••• 1
5
.l11Stalling
belt
guard ••··•··•··•··•··•··
•·····
•··•··•··•··
•·····
•··
••••••
•········
·····•···
·••·••
•••
·••
·••
••• •••
••••••
•··•··•··
••••••
•••••
2
6.l11Stalling
tl1e
bobbin
winder•·············!·····························································································
2
7.Lubrication•···
············•·••
.
•·············································································································
2
8.
Trial
run
•···································································································································
3
9.Hook
oil
amount
adjustment
10.0il
pump
supply adjustment
.........................................................................................................
3
•.•••••.•••••••••••••••••••••••.••••••••.••••••.•••••••.••.•••••••••••••••••••••••••••••.••.••••••••••••• 3
l l
.l11Stalling
tl1e
needle
••••
•••
••••••
··•
.•••••
·•·
•••
•••
••• •••
··•
•••
•••
·•.•
•·•
··•··•
·••
•·•
•••
·••
··•··•··•
·••
··•
••••••
•••
•••
•••
••••••
·••
••••••
·•
4
12.
Coordination
among
needle, thread
and
sewing 1naterials
·······················"····
.....................................
4
13.
Threading
tl1e
needle thread ••··
•••
•••
•••
•••
•••
•·•
•·•
•••
•••
••• •••
·••
•••
•·•
··•·
·•
•·•
··•
·••
·
••
•••
•••
•·•
•·••·•
···
·••
•••
••••••
•••
•
•••••
••
4
14.Winding
adjustment•····················································································································
5
15.Se,tting the stitch length
and
controlling the reverse sewing
.....................................................................
6
16.Setting the position
of
presser bar ••••••••••••••••·•••••••••••••••••·•••••••••·••••··•·••·••••••••••••••••••••••••••••••••·••••••••••
6
17
.Adjusting
tl1e
pressure
of
presser foot
•···············
·•••••••••••••••••··•··•·••··••·•·••••••••••••·••·••••••••••••••••••••••••••• 6
18.Adjusting
tl1e
thread tension
•···································································································:
••••
7
19.Adjusting the thread take~up
spring································································································
.7
20.Adjusting the tension
of
needle thread
and
bobbin thread •••••••
..............................................................
8
21.Timing adjustment between the needle and the rotating
hook
...............................................................
9
22.lllStalling and removing rotating
l1ook
•·························································································
10
23
.II1Stalling
feed
dog
•······
•··•··•··•
•·
•··
•••
••••••
•••
••••••
•··•··•··•··•··
·••
·••
•·•
•••
·••·••
·••
·
·•
··•·
•·
·
•·
·
•·
•••
••• •••
•
•·
•••
•••
·••
•••
•·
10
24.Feed dog horizontal adjustn1ent
•··································································································
11
25.Stitch
lengtl1
error adjustment
•·····································································································
11
26.Feed timing adjustn1ent
•··············································································································
12
27.Adjusting
tl1e
tension releasing
111ecl1anisn1
•······················································································
13
28.Upper feed adjustn1ent
•··············································································································
14
29.Adjusting presser foot alternate lift
n1echanisn1
.................................................................................
14
30.Adjusting the lift
amount
of
presser foot with walking presser foot
........................................
••••••••••••••
15
31.Adjusting the clearance between presser foot and walking presser foot
...................................................
15
32.Periodical clea.ning
•··············································································································
15-16
Par
i
ts
Catalogue
I.Arm and
bed•··••
.
!•
.
•······•······························!··········································································
17-18
2.Arm shaft vertical
shaft
Needle bar
and
thread
take-up
..................
;
.............
....
.
..
...
........................
19~
20
3.Feed dog lift and thread looping
•····························································································
21-22
4.Feed adjustn1ent
•···························
•···············································
··•···••••··
·•••••
··••••·••••••••·••••
23-
24
5
.Presser foot ·••·····•··•·····•··•··
•••
•··
•••
•••••••••
•••
•
••
•••
•••
•••
•••
•••
•••
•
••
•••
·••
••• •••
··•
•·•
•
·•
·••
•••
·
·•
·••
·
••
•••
·
·••••
•
••
•••••
25-
26
6.Upper feed
•··•····················································································································
27-28
7
.Oi¼pump ·
•·················································································
··•··••·•·••••••·•••••••••••••••••••·••·•
29-
30
8.Oi~\reservoir
anP,
accessories
•··································································································
31-
32
From the library of Superior Sewing Machine & Supply LLC - www.supsew.com
1.
Main techanical specifications
Application: heavy duty with thick thread
Max sewing speed: 1800 spm
Stitch length: 0~8mm
Presser foot lift: 6.5mm by hand 13mm
by
knee
Max sewing capacity: 8mm
Alternate presser foot lift volume: 3.3~5.5mm
Timing feed length: not less that 8mm
Needle:
DPx
17
25#:
Hook:
A1,1to
-lubricating big rotating hook
Lubrication: Auto lubrication
Motor power: 0
.3
7kw
3.Installing the motor(Fig.
l)
Align machine balance wheel belt groove(A)
with motor pulley belt groove (B) by moving the
motor(C)leftward or rightward.Be sure the belt is
not touch with table.
2.Preparation
(I) Cleaning machine
Clean
off
the grease and dusts on the Surface
of
ma-
chine with gasoline
and
soft cloth.
(2) Inspection
Before use a thorough inspection should be done
upon
the machine.
Turn
balance wheel slowly
to
see
ifthere
is
any
obstacle, collision and uneven resistance
between
parts.
If
there
is
, adjustment should be done before
operation.
4.
Connecting the clutch lever to the pedal (Fig.
2)
a.
The optimum tilt angle
of
pedal with floor is
approx
15
degree.
b.
Adjust the clutch
of
the motor so that clutch
lever (C) and draw bar (B) run in line
as
Fig.
6,
the
machine would have stable motion and long using.
c. The machine balance wheel should rotate
conter clockwise for normal sewing when view
from opposite side
of
the balance wheel. The motor
rotates in the same direction. The
rotati011
can be
reversed by reversing
(turn
over 180 deg.) the plug
of
the motor.
d. Adjust the tension
of
V-belt F by moving
the motor vertically. The proper tension
of
V-belt
is a slack
of
10~12mm when the belt
is
depressed
(at the belt pan) by finger.
-1-
From the library of Superior Sewing Machine & Supply LLC - www.supsew.com
5.
Installing belt guard(Fig 3)
The belt guard should be installed for safety.
6.Installing the bobbin winder(Fig.4)
Align pulley (B)
of
the bobbin winder with the
outside
of
the belt,and there should be a proper
clearness between them,so that pulley (B) can be
contacted with the belt when stop latch thumb le-
ver
(A) is depressed, thereby the · belt drives prlley
(B) while the machine running, the bobbin winder
should be parallel with belt slit (E)
of
the bable,
then fasten with two wood screw(D).
I
7.
Lubrication(Fig 5)
a.
Oil
amount
Oil amount must be oiled aeeording
to
· the
mark
of
drip pan. Mark (A)
is
the highest sihiation,
Mark (B)
is
the lowest situation, Note that oil
amount couldn't be lower than mark(B) , otherwise
all parts
of
machine will appear heat and dead
point for not gaining oil.
b.
Oiling
In lubruation, HA-8 sewmg machine oil or
HJ-7 machine oil must. be used. Before running, the
machine must be oiled at the mark (A):
c. Changing
Tum
off
the screw plugs (C), clean up the dirty
oil and the dust
of
drip pan, then fasten the screw
plugs (C), add fresh oil
- 2 -
From the library of Superior Sewing Machine & Supply LLC - www.supsew.com
18.Trial
run
(Fig
6)
When
the machine left
out
of
operation
for a
quite long time
and
used again, remove the red rub-
ber
plug
on
top
of
the machine head, oil it thor-
oughly, then lift the presser foot
and
run
at
a low
speed ·
of
1000
~ 1500 spm, observe the sparkling
condition through oil window
(C),
as the
lubrication
is
weU,keep the running test
at
the low
speed
about
30 minutes, then increase the speed
gradually,after
month's
running to perfect its per-
formance, then increase
up
to proper sewing speed_
-I
From the library of Superior Sewing Machine & Supply LLC - www.supsew.com
9.Rotating hook oil
amount
adjustment (Fig
7)
·
The hook oil amount can be adjusted by
Screw (A).
Turn
it clockwise
("
+"
)
to
increase
amount; counter-clockwise ("-
")
to decrease. The
oil amount
is
adjusted in the range
of
five
turns
of
Screw (A): Tightning for more; Loosening for
less
.
IO.Oil
pump
supply adjustment (Fig 8)
Generally no adjustment
is
for oil pump.
When the machine
is
running
at
a low speed, ob-
serve the oil ·
scr~en.
If
no .
oil splashing, close the
clearance.
-4-
1
Adjusting plate
0.5-
1.
0
By
-
pass
oil
hol
e
From the library of Superior Sewing Machine & Supply LLC - www.supsew.com
11.Installing the needle(Fig 9)
Turn
the balance wheel to lift the needle bar to
its highest point, loosen needle set screw!, making
the needle groove turn to the left side
of
an
opera-
tor,fully insert the needle shank
up
to the
bottom
of
needle socket,then tighten needle set screw!.
Note: Fig.
12
(b) insufficient insertion
Fig.12
(C)
Wrong direction
of
groove
Long gro
ov
e
lef
tw
ard
X
b
C::::::::::::::
> 9
. I
I
a
X
C
12.Coordinationambng the needle, the thr~a4 and the material (Fig
10)
The needle thread
is
left-twisted, the bobbin
thread.
is
left
or
right-twisted. Holding the thread,
twist it with right hand in the direction
of
arrow
.shown in Fig
10,
if
it
is
tight,
it
is
left-twisted, con-
trarily, it
is
right-twisted.
The Needle
is
.DPx
17
25#~~24#
;fie
needle number must be fitted for the
materials. Sewing too heavy the weight
of
materials, the
needel would be breaking and skipping stitch and
tI{read
breaking for its too thin;
if
the needle is too thick, it
would damage the clothes for its large needel hole.
Therefor, the selection
of
needle and thread must be fit-
ted to the materials.
13.Threading the needle thread (Fig
11)
When thre~ding the needle thread,raise the needle bar to
i'ts
highest position, lead the thread from the spool and
pass it in the order instructed.
(!)Lead the.thread
Q.own
through the three-eye thread guide
CD
on
the top.
- 5 -
From the library of Superior Sewing Machine & Supply LLC - www.supsew.com
(2) Pass down thru the left hole
of
thread
re-
tainer
®,
then
down
thru the lower hole
of
thread
retainer®.
(3) Pass do.wn thru between the two tension
disc @
(
4)
Pass
up
thru
the
hook
of
thread take-up
spring ® .thru thread regulator
®,
thru thread
guide®
and up
thru
the hole
of
thread
take-up
le
-
ver
(J)_
(5)
Down
thru thread guide
@,
®, and needle
bar thread guide
@,
,then pass the thread from the
left
thru
the eye
of
needle
0,
draw out the thread
approx 100mm from the needle eye.
When
drawing the bobbin thread, hold the tip
of
the needle thread
by
hand,
turn
the balance
wheel to lower.the needle
bar
and then to lift it to
its highest position .Pull the needle thread and then
the bobbin thread
is
·
drawn
up.put the tips
of
the
needle
and
bob
,bin1 thread toward front under the
presser foot.
14.Winding
adjustment (Fig
12)
The wound
bobbin
thread should be neat and
tight
.If
not, adjust the thread tension by turning
tension stud
thumb
nut
of
the bobbin winder ten-
sion bracket
(A).If
the wound bobbin
is
not neat,
tension bracket (C)can be moved to
be
adjusted
:
w1:ien
adjusting, loosen screw(B) first, then move
the bracket leftward
or
rightward if the thread
is
.
wound to one side as shown in Fig.15(6),move the
tension bracket rightward,while if the thread
is
wound to one st~e as shown in Fig.15(C), move the
tension bracket leftward until the thread
is
wound
neatly as shown in Fig.15(a),tighten screw(B).
Note:Nylon
or
polyester thread should
be
wound with light tension.otherwise bobbin (D)
might be
broke1+
or
deformed.
Don't
overfill the bobbin ,because it make its
thread loosening down from the bobbin.The
optimum capacity
of
thread will
fill
about
80%
of
bobbin outside diameter,and this can
be
adjusted
by stop latch
sere~
(E). a c ·
-6
_ -
From the library of Superior Sewing Machine & Supply LLC - www.supsew.com
IS.Setting the stitch length and controlling the reverse sewing (Fig
13)
Stitch length
can
be set by turning stitch
length regulating dial (A). The figures
on
the stitch
length regulation dial plate (B) ind~icate the stitch
length.
Reverse sewing
can
be obtained when feed
re-
verse lever (C)
is
depressed and forward sewing can
be restored automatically when feed reverse lever
(C)
is
released.
16.Thread
take-up
oiling (Fig
14)
Thread
take-up
section adopts woolen thread
oiling. after long time
of
use, its function lost, so
re-
place with a new one.
(D
Open
the face plate, remove the pressure
screw, lock nut
and
presser bar.
'.ID
Renove Hinge(A)
and
Lever(B).
@
Draw
out
Oil Wick(C).
@:,
Loosen the wick
fix
screw
on
the
arm
top
,
and take
out
Set Plate(D).
@)
Replace with a new one.
®
Installing
is
in
a reverse sequence.
17
.Adjusting the pressure
of
presser foot (Fig
15}
Pressure
on
presser foot
is
to be adjusted in
accordance with materials to be sewn. Loosen lock
nut (A).
If
heavy materials to be sewn,
turn
pres-
sure regulating
thumb
screw clockwise as
shown
Fig.20 (a) to increase the pressure. While light mate- .
rials to be sewn,
turn
the pressure regulating
thumb
screw counter clockwise as
shown
in Fig.20 (b) to
decrease the pressure
on
presser foot,
then
tighten
lock nut (A).
The pressul'e
of
presser foot
is
proper
as
the
sewing materials
can
be
fed
normally.
Q
• •
a
--
-.7
b
From the library of Superior Sewing Machine & Supply LLC - www.supsew.com
18..Adjusting the thread tension (Fig
16,
17)
...
In
general, t~e thread tension
is
to
be
adjusted
in accordance wi.
th
materials thread and others.
'i
~
In practice, the thread tension
is
adjusted
ac-
cording to the stitches resulted to get the normal
stitches.
When adjusting the bobbin thread tension,
turn bobbin case tension spring screw (A) clock-
wise
for more tension
or
turn
the screw counter
clockwise for less tension.
It
is
a
common
practice to check the bobbin
thread tension.
In
case
of
polyester thread
so=,
hold the end
of
the thread.
If
the bobbin case falls
down slowly, the proper tension
is
obtained.
The needle thread tension should be ad-
justed with referance to the bobbin thread ten-
sion. The needle thread tension can be adjusted by
changing tension
of
the thread
take-up
spring,
sew-
ing
range
of
the thread
takt-up
spring, tension
of
tension disc,
and
the position
of
thread guide.
19.Adjusting the thread
take-up
spring (Fig
18,
}9)
The normal sewing range
of
thread
take-up
spring
is
5~
8mm.
Fb_r
·sewing light weight materials
(sho~·t
~titch):
weaken the spring tension and widen the sewing range ofspripg, while for sewing heavy weight materials,.strengthen
the spring tension
and
shorten the sewing range
of
spring.
1)
Adjusting the thread
take-up
spring tension (Fig.18) /
Loosen tension stud set screw (A),
turn
ten-
sion stud (B) clockwise to make the spring get
more tension,
or
turn
the tension stud counter
clockwise to make the spring get
less
tension. After
adjustment, Be ,sure
te
tight tension stud set screw
(A).
i
The
method
of
adjustment:
Loose set
s.crew
(A) first, then to
turn
tension
stud
(B)
counter clockwise to release the tension
of
thread
take-up
sprini
(C)
to zero, and to
turn
ten-
sion stud (B)clockwi,r until spring
(C)
just comes
into contact
with
the
stop
slot
on
the thread
take-up
spring regula.tor, then to further
turn
ten-
sion stud (B) counter:-clockwise by 1/ 2 turn.
Af
-
'
ter adjustmept, tjghtep tension stud set screw (A).
-8
From the library of Superior Sewing Machine & Supply LLC - www.supsew.com

2) Adjusting the sewmg range
of
thread
take-up
spring (Fig.
19)
Loosen set screw (B),turn tension complete
(C) clockwise to inerease the sewing range
or
turn
tension complete (C) counter clockwise to decrease
the sewing range.
Before delivery,the thread take-
up
spring
is
properly adjusted,Readjustment
is
needed only in
the_case
of
sewing special materials
or
with special
thread. L
.--------
....
A
,----------19
,.
20.Adjusting the tension
of
needle thread &'bobbin thread(Fig 20,
2L
22)
·
The
position
of
the thread guide affects sewing
quality,
so
it must be adjusted according to the ma-
terials to be s~wn.
Leftward Center Rightward
,
Thread guide
position
~(
@)
~
)
~§
5)
Material Heavy Medium Light
Fig.20 shows the various type
of
stitch forms.
Nor:mal stitch form should
be
as
shown
in
Fig.20(a).When
aboormal
stitches
occur
with
puck-
,
e ring
or
thread
breakage, the tension
of
~le
thread
and
bobbin
thread must
be
adjusted
accordingly.
(a)
The
needle thread tension
is
too
strong
or
· the
bobbin
thl"C1ad
tension
is
too
weak.
turn
the
ten-
sion regulating
thumb
nut
counter
clockwi.,e
to
make
the
needle
thread
get lq.s
temion
or
tignten
the
bobbin
case tension regulating screw with small
plastic
screw
dri~r
to
make
the
bobbin
thread
get
inore tension( Fig.21).
~~~~~~~~~
- .
,):i
·'b
:d
e
·. ' l
From the library of Superior Sewing Machine & Supply LLC - www.supsew.com
(b) The needle thread tension
is
too weak
or
the bobbin thread
is
too strong , turn the tension
regulating thumb nut clockwise to make the needle
thread get more tension
or
turn the bobbin case ten-
sion regulating screw counter clockwise with small
plastic screw driver to make the bobbin thread get
less
tension (Fig.22)
(c) Other abrormal stitches as shown
in
Fig.20
(d).(e),adjustment can be made which reference to
, the above methods.
21.Timing between the needle and the rotating hook (Fig 23, 24, 25, 26)
1Adjusting the position
of
needle bar
Turn
the balance wheel to locate the needle
bar
(C)
at
its lowest position, remove the rubber
plug in the face plate (A), then loosen the needle
bar
(C)
connecting stud clamping screw
(B)
and
move the needle
bar
(C)
vertically to locate the tim-
ing position (The timing position
of
the needle bar
is
: when the needle
bar
at
its lowest position, the
center
of
needle eye
(D)
coincide with inside sur-
face (E)
of
bobbin case holder as shown
in
. I
Fig.24).Tighten clamping screw
(B),
plug the rub-
,·
ber plug.
-
,JO-
From the library of Superior Sewing Machine & Supply LLC - www.supsew.com
2 Adjusting rotating hook poiriJ timing with
needle.
The motive relation between rotating hook
and needle affects the sewing quality.Standard tim-
ing relation
is
:turn the balance wheel to locate
needle
bar
to its lowest position,
and
lift back
2.5mm the rotating hook point (D) should be coin-
·cides with needle center line (C),and hook point
(D)
is
1.2mm above the upper edge
(E)of<
,needle
eye.
When adjusting the rotating hook point tim-
ing also to note the clearance between notch
bot
-
tom
of
needle
(D)
and
hook point (C)
of
approx
0.05mm must be maintained.(Fig 26)
22.Removing and installing the rotating hook (Fig
27)
Lift the needle bar to its highest position,
re-
move the
throat
plate, take
down
the needle
and
the bobbin case. loosen rotating hook bobbin case
holder position bracket screw (C)and take
down
po-
sition bracket(A), then loosen set screws (D)
of
ro-
tating
hook
to keep hook freely, turning
around
its
\
axis,
turn
the balance wheel first to raise the feed
·
bar
to its highest position,
at
this time, take
<low~
the rotating hook slowly while turning it to keep
_away
from
the feed dog
su,port.
Installing the
ro-
tating
hook
can
be done in reverse sequence.
The
projecting flange
of
the position bracket
(A) should be engaged in the notch (B)
of
the bob-
bin case holder,
and
maintain a clearance
of
0.5~
0.7mm between projecting flar.ge
top
and
the bot-
tom
of
notch while installing.
123.Installing feed dog (Fig 28, 29)
When
feed
amount
is
at
the max. the front end
:
of
feed
dog
(A)
is
near the front
of
throat
plate
slot, the gauge between the two
is
1.5mm This
is
the
standard
position
of
feed dog.
-
11
-
.-------~A
.
From the library of Superior Sewing Machine & Supply LLC - www.supsew.com
To
adjust the position
of
feed dog, move feed
doy
to the
front
end
of
throat
plate. Loosen Screw
A (See Fig 29b), move feed
dog
support
B in the di-
rection
shown
by
arrow
(Fig. 29a) to adjust. After
adjustment tighten Screw (A).
24.Feed dog horizontal Adjustment (Fig 30)
Feed dog
is
0.8~
I.2mm above the surface
of
tln·
oat
plate horizontally.
When
sewing condition requires tilting, adjust
like this:
loosen Screw (A)
Press against the slot
of
eccentric shaft with a
screwdriver to
turn
eccentric shaft l
ef
t a
nd
right.
Tighten Screw (A).
The
front
of
feed
dog
is
higher, which can pre-
vent perckering and no skipping.
The
front
of
it
is
lower, which can prevent
maferial sliding
and
no breakage
of
bobbin thread.
25.StitchAength error adjustment (Fig 31)
Loosen Screw (A),
and
turn
stitch Ieng.th ad-
justing
cam
(B).
Turn
clockwiace: forward sewing, stitch length
enlarged; reverse sewing, stitch. length shorten.
Turn counfer-clockwiace: forward sewing,
stitch length shorten; reverse sewing, stitch length
enlarged.
-
12
-;--
Eccent~ic shaft
marl<
position
0
Horizontal
Above
Under
29
Feed
dog
ti:ttr:N,c,
Standard
~
The
front
up
to
the
max
~ .
The
front down to the m
----
-.---
-
-------
-------
From the library of Superior Sewing Machine & Supply LLC - www.supsew.com
26.Feed
timing
adjusting (Fig 32, 33, 34)
I Staridard position·
Turn
balance wheel to lower Feed dog (A) till
it
is
horizontal with the surface
(B)
of
thrat
plate,
at
the moment, the tip
of
needle
(C)
shonld be hori-
zontal with the surfaces
of
throat
plate and feed
dog.
Adjustment can be done by adjjusting the posi-
tion
of
feed cam and feed dog lift cam.
2 Installing feed dog lift cam (See Fig 33)
Open
the back side cover,turn .balance wheel
by left hand counter-clockwise, take Screw
A
as
for the standard, the center
of
Screw
B
is
slighthy a
little lower
than
the center
of
Screw
A.
3 Installing feed cam (See Fig 34)
Continously turn balance wheel, take Screw
(B)
as
for standard, the center
of
Screw
(C)
is
slight-
ly
a little higher
than
the center
of
Screw (B).
-
13
-
B @
From the library of Superior Sewing Machine & Supply LLC - www.supsew.com
27.Adjusting the tension releasing mechanism (Fig.35)
The temion
discs should
be
pushed
apart
to
open
when the presser foot
is
lifted. But the open
timing
of
the tension discs can
be
adjusted as
fol
-
.
:::----
r-----
~-
-
-~
--
I
,--
--- .. - .
,-,
· I .·
........-Right
·1-1· · /~;;,., ·
I:,.....-
. .. .
-:;:;-
··
,,,, .
,
/~
--
1
Le
'".&
._:;:?'
_.,.
' \.:.?
_/or?
I
1.
·.
1/
.
,,,,
.
.lows: Remove face plate and the rubber plug
at
rear side
of
arm
and
loosen screw (A)
of
the knee
lifting lever (kJt), then the tension releasing cam
can
re
moved leftward
or
rightward when the cam
is
moved
rightward, it
is
later to open, otherwise
it
.is
earlier to open.
A
,-··
/
28.Upper
feed
adjustment
(Fig 36)
During the sewing, the center gauge (L)
be-
tween the walking foot sliding block and its shaft
can
be
adjusted according
to_
the differences
of
the
friction coefficients
of
materials and the sewing pro-
cess.
Method: Increase L
--the
upper feed
amount
enlarged
reduce L
-the
upper
feed
amount
shorten
For
special sewing requirements, for example,
the upper layer
of
material needs more
amount
than
the lower layer does, in this case, adjustment
can
be done in the range
of
above theory for opera-
tion.
29.Aqjusting presser foot
alternate
lift mechanism (Fig 37)
During the sewing, the alternate lift
amount
.
can
be adjusted accoding to the nature
of
material.
In
general sewing, the
amount
of
walking foot
is
5.5mm,
and
the presser foot lift
amount
is
3.5mm.
Method: loosen the screw
A.
turn
presser foot
front crank upward to increase the
amount
of
walk-
ing foot; turn it downward to reduce the presser
foot amount. the range
of
adjusting
amount
is
not
too
large. After adjutmnent, tighten the screw.
\_
_
}_,,,,
..
--
-----
-o
From the library of Superior Sewing Machine & Supply LLC - www.supsew.com
30.Adjusting the lift
amount
of
presser foot together with walking foot (Fig 38)
The lift amount
of
walking presser foot togeth-
er with presser foot can also be adjusted slightly.
When adjusting, loosen screw (A) adjust its center
distance B between the screw (A) and the presser
foot lift shaft. The lift amount
is
increased as to
shorten the center distance
B,
and the lift
amount
is
decreased as to widen the center distance
B.
After
adjustment, tighten the nut again.
m
31.Adjusting the clearance between presser foot
and
walking foot (Fig 39)
In
sewing operation, for preventing the walk-
ing foot from striking
on
presser foot a proper
clearance C
of
approx. 1.5mm should
be
main-
tained between them. When the clearance
is
too
small
or
too big, necessary to adjust, loosen rear
crank screw and
turn
the rock shaft, then the walk-
ing foot moves near the needle bar. When adjust,
be sure to note the fixed number
of
the clearance
C.
32.Periodical cleaning (Fig 40,
4L
42)
Clean the feed dog, the rotating hook, the bob-
bin case, the oil pump, filter screen and the like
perodically according to customer's usage.
Under
-
15
-
From the library of Superior Sewing Machine & Supply LLC - www.supsew.com
1
Cleaning
the feed
dog
Remov
e the
throat
plate, clean
off
all
Lhe
dust
and
lint
on
the slit
of
the feed
dog
(A), the inslalling
the
throat
plate.
2
Cleaning
the rotating
hook
Clean
off
all the
dust
around
the
rotating
hook
(A),
and
clean the
bobbin
case with soft cloth.
3
Cleaning
the oil
pump
filter screen
Take
off
the
oil filter, clean
off
the
dust
of
filter
screen (A) with gasoline.
-
16
-
From the library of Superior Sewing Machine & Supply LLC - www.supsew.com
Other Global Sewing Machine manuals

Global WF995AUT User manual

Global

Global WF995AUT User manual

Global LP 9974-C User manual

Global

Global LP 9974-C User manual

Global WF976 Parts list manual

Global

Global WF976 Parts list manual

Global WF 955 AUT Parts list manual

Global

Global WF 955 AUT Parts list manual

Global BH-9982 User manual

Global

Global BH-9982 User manual

Global UP 1515 VF-AUT Parts list manual

Global

Global UP 1515 VF-AUT Parts list manual

Global OV 114 User manual

Global

Global OV 114 User manual

Global WF904 User manual

Global

Global WF904 User manual

Global WF 975-LH Parts list manual

Global

Global WF 975-LH Parts list manual

Global WF3955DD Series Product guide

Global

Global WF3955DD Series Product guide

Global WF 1516 AUT User manual

Global

Global WF 1516 AUT User manual

Global LP 2881 Series User manual

Global

Global LP 2881 Series User manual

Global 390 D User manual

Global

Global 390 D User manual

Global WF 926-SNB Parts list manual

Global

Global WF 926-SNB Parts list manual

Global WF 9221-76 User manual

Global

Global WF 9221-76 User manual

Global BH 1000 Quick start guide

Global

Global BH 1000 Quick start guide

Global BH 1000 Quick start guide

Global

Global BH 1000 Quick start guide

Global BH 1793 Parts list manual

Global

Global BH 1793 Parts list manual

Global ZZ 1366-3S-76-P Parts list manual

Global

Global ZZ 1366-3S-76-P Parts list manual

Global SM 7774 Instruction Manual

Global

Global SM 7774 Instruction Manual

Global BM-9280 User manual

Global

Global BM-9280 User manual

Global WF 9205 Guide

Global

Global WF 9205 Guide

Global LP 8971-I-NP-AUT User manual

Global

Global LP 8971-I-NP-AUT User manual

Global 350 AUT SERIES Parts list manual

Global

Global 350 AUT SERIES Parts list manual

Popular Sewing Machine manuals by other brands

JUKI PLC-2760NV instruction manual

JUKI

JUKI PLC-2760NV instruction manual

White 503 instruction manual

White

White 503 instruction manual

Mitsubishi Electric LU2-4410-B1T-CS instruction manual

Mitsubishi Electric

Mitsubishi Electric LU2-4410-B1T-CS instruction manual

Duerkopp Adler 550-8-2 parts list

Duerkopp Adler

Duerkopp Adler 550-8-2 parts list

Singer 245-4 parts list

Singer

Singer 245-4 parts list

HIGHLEAD GC20698-5 Instruction manual parts catalog

HIGHLEAD

HIGHLEAD GC20698-5 Instruction manual parts catalog

Baby Lock Elizabeth BL200A Quick reference guide

Baby Lock

Baby Lock Elizabeth BL200A Quick reference guide

JUKI MO-4s instruction manual

JUKI

JUKI MO-4s instruction manual

Singer 221-1 instructions

Singer

Singer 221-1 instructions

Baby Lock PRO BL8800 Service manual

Baby Lock

Baby Lock PRO BL8800 Service manual

A-S-S BASS 2020 Working instructions

A-S-S

A-S-S BASS 2020 Working instructions

Singer 188U31 Service manual

Singer

Singer 188U31 Service manual

Happy HCH Instruction book

Happy

Happy HCH Instruction book

Hikari H99S instruction manual

Hikari

Hikari H99S instruction manual

Singer TINY TAYLOR TT700 instruction manual

Singer

Singer TINY TAYLOR TT700 instruction manual

Baby Lock Flourish BLMFO Quick reference guide

Baby Lock

Baby Lock Flourish BLMFO Quick reference guide

Michley MINI ELECTRIC SEWING MACHINE Operation manual

Michley

Michley MINI ELECTRIC SEWING MACHINE Operation manual

Adler 67 Directions for use

Adler

Adler 67 Directions for use

manuals.online logo
manuals.online logoBrands
  • About & Mission
  • Contact us
  • Privacy Policy
  • Terms and Conditions

Copyright 2025 Manuals.Online. All Rights Reserved.