5
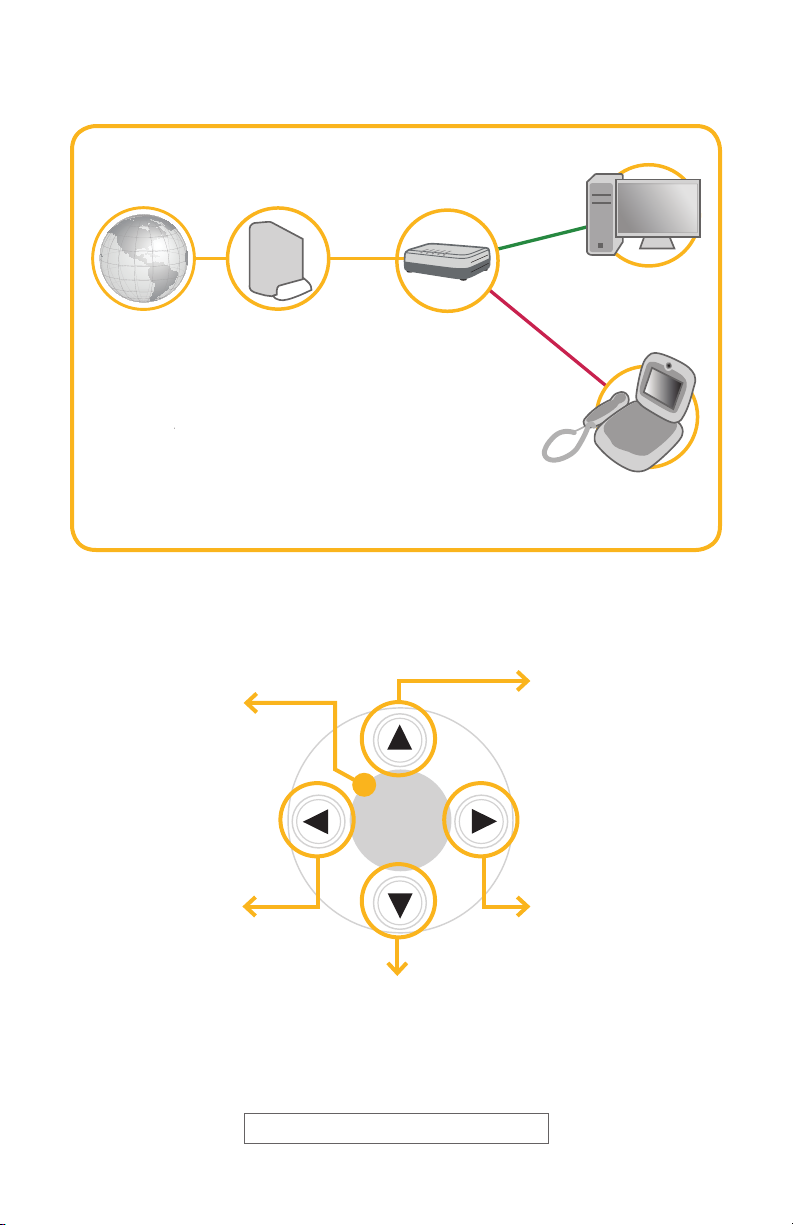
Installation Guide (Without a Router):
1. Using the CAT-5 network cable included with theVideoPhone, connect the left most WAN port on the back of the
VideoPhone (the one with the red stripe next to it) into your DSL or Cable modem. This should be a small box that your
Internet Provider gave you.
2. Connect the VideoPhone to a wall outlet for power. This should start up the phone. Wait a couple minutes for the phone to
turn on.
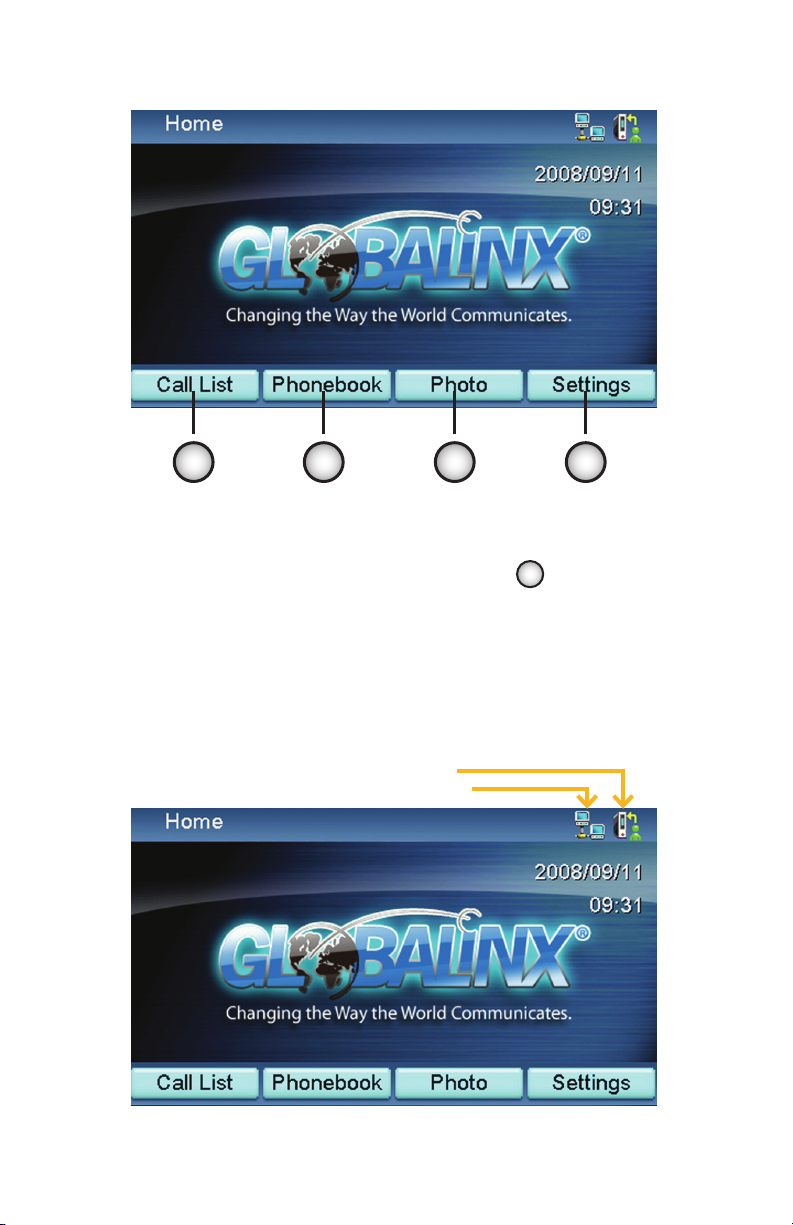
3. A checklist will appear; if everything is working you will be taken to a GLOBALINX® screen. Congratulations! You can now
make and receive calls!
4. If the phone doesn’t work right away, you can try doing a power cycle of your network. Do this by turning all of your
equipment off and on, starting with the modem, and finally the VideoPhone.
***Please note: The first time the phone is connected, it may say “Account Registration Failed” one or more times before it works.
The phone should restart itself and try again. This is normal, and should only happen the very first time the phone is connected.
Installation Guide (With a Router):
1. Using the CAT-5 network cable included with theVideoPhone, connect the left mostWAN port on the back of the
VideoPhone (the one with the red stripe next to it) into your router. Most routers have around four ports on them; any
of these ports should work.
2. Connect the VideoPhone to a wall outlet for power. This should start up the phone. Wait a couple minutes for the phone
to turn on.
3. A checklist will appear; if everything is working you will be taken to a GLOBALINX® screen. Congratulations! You can now
make and receive calls!
4. If the phone doesn’t work right away, you can try doing a power cycle of your network. Do this by turning all of your
equipment off and on, starting with the modem, then your router, and finally the VideoPhone.
***Please note: The first time the phone is connected, it may say “Account Registration Failed” one or more times before it works.
The phone should restart itself and try again. This is normal, and should only happen the very first time the phone is connected.
Routers can cause problems withVideoPhone registration because their job is to keep certain types of traffic from getting into the
network. If your router is blocking the types of traffic the VideoPhone uses, the registration might continue to fail. In this case, try
connecting the phone directly to the modem.
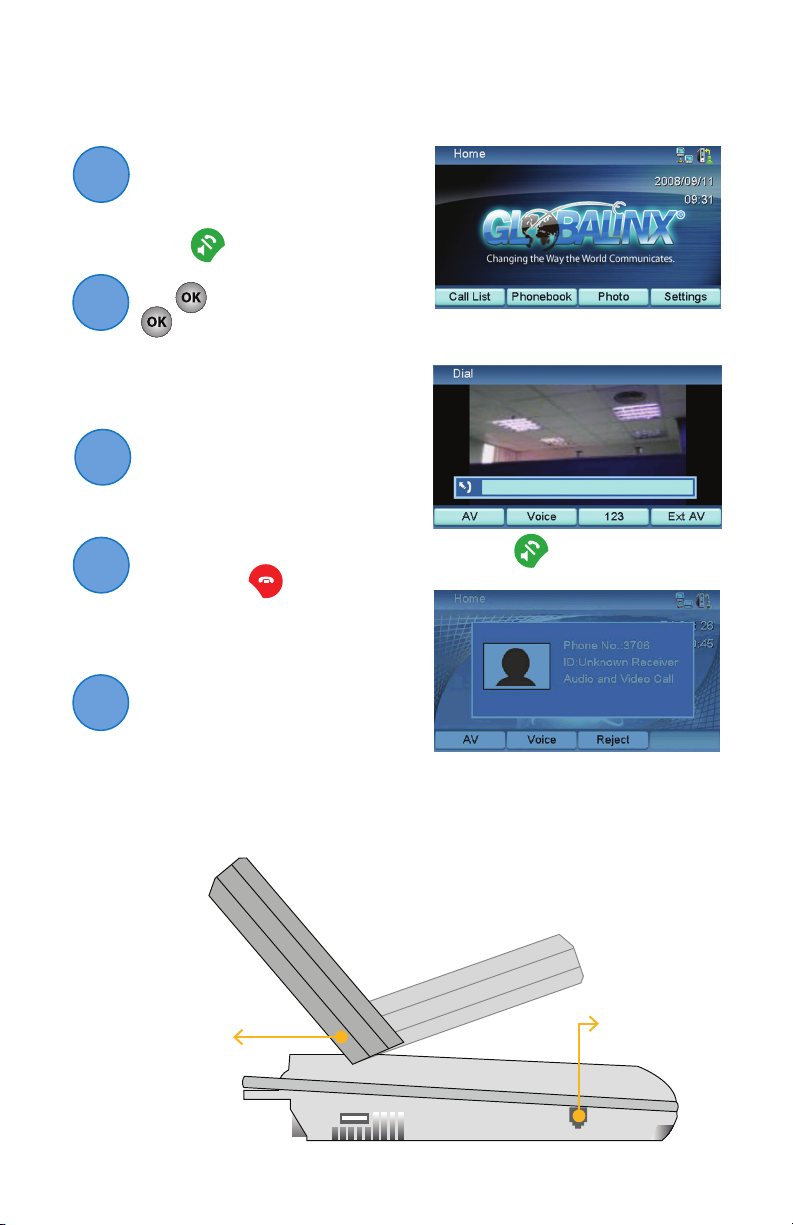
Standard Phone Connection (RJ-11):
Your GLOBALINX®VideoPhone now has the ability to work with other analog telephones around your home, allowing you to
have one phone number for all yourVoIP needs! You can use this feature by connecting a standard analog telephone to the back
of theVideoPhone. When a call comes in to theVideoPhone’s phone number, you can answer it from this additional telephone,
and likewise make calls from it as well. By using a cordless system with multiple handsets, you can have multiple phones
throughout your home, all sharing this same number!
A few things to note about this new functionality:
• CallerIDinformationwillnotbesenttotheanalogphoneattachedtotheVideoPhone;howeveritwillstillappearon
theVideoPhone’s screen
• FaxmachinesdonotworkthroughtheVideoPhoneatthistime
• Whenthephoneisinuse,theVideoPhone’sscreenwillstilldisplayinformationaboutthecall,includingthenumber
dialed and the time the call has been connected.
Additional Troubleshooting:
• Thephoneison,butthescreenisblack:
•Tryrestartingthephonebyremovingthepowercord,andthenpluggingitbackin
•MakesuretheA/Vcordisnotpluggedintothebackofthephone(thereshouldonlybeanetworkcableandthe
power cord unless you are using an externalTV or camera, or additional phones)
• Audio/videoqualityispoor:
•Digitalphonecalls,andvideocallsespecially,requireanexcellent,consistentInternetconnectiontoworkwell.
Any quality issues are usually a result of the network being slow or unreliable. It is important to note a network
connection can work very well with a computer or other devices, but not with a digital phone service such as
GLOBALINX®.Youcanrunaspeedtestathttp://www.GLOBALINX®speedtest.comwhichwillevaluateyour
connection based on many factors critical toVoIP.
5