ECO Spot 2500 User Manual
Copyright © 2012 Globus New Media LLC Page 1
ECO Spot™ 2500 User Manual
Thank you for choosing an ECO Spot™ 2500 Profile Spot. The
projector part is based on a modified ETC Source Four® and
most of the available standard Source Four equipment, such as
rotators, changers, etc. can be utilized. 575W Discharge lamp
technology paired with an ultra-efficient optical system makes
it brighter, more versatile and compact than any classic 2500W
gobo projector. Please read this manual before installing or
operating it. Follow the safety precautions listed below and observe all warnings.
This document covers the special functionality of the ES-2500, for general/detailed
info on other functions, please refer to the ETC Source Four User manual.
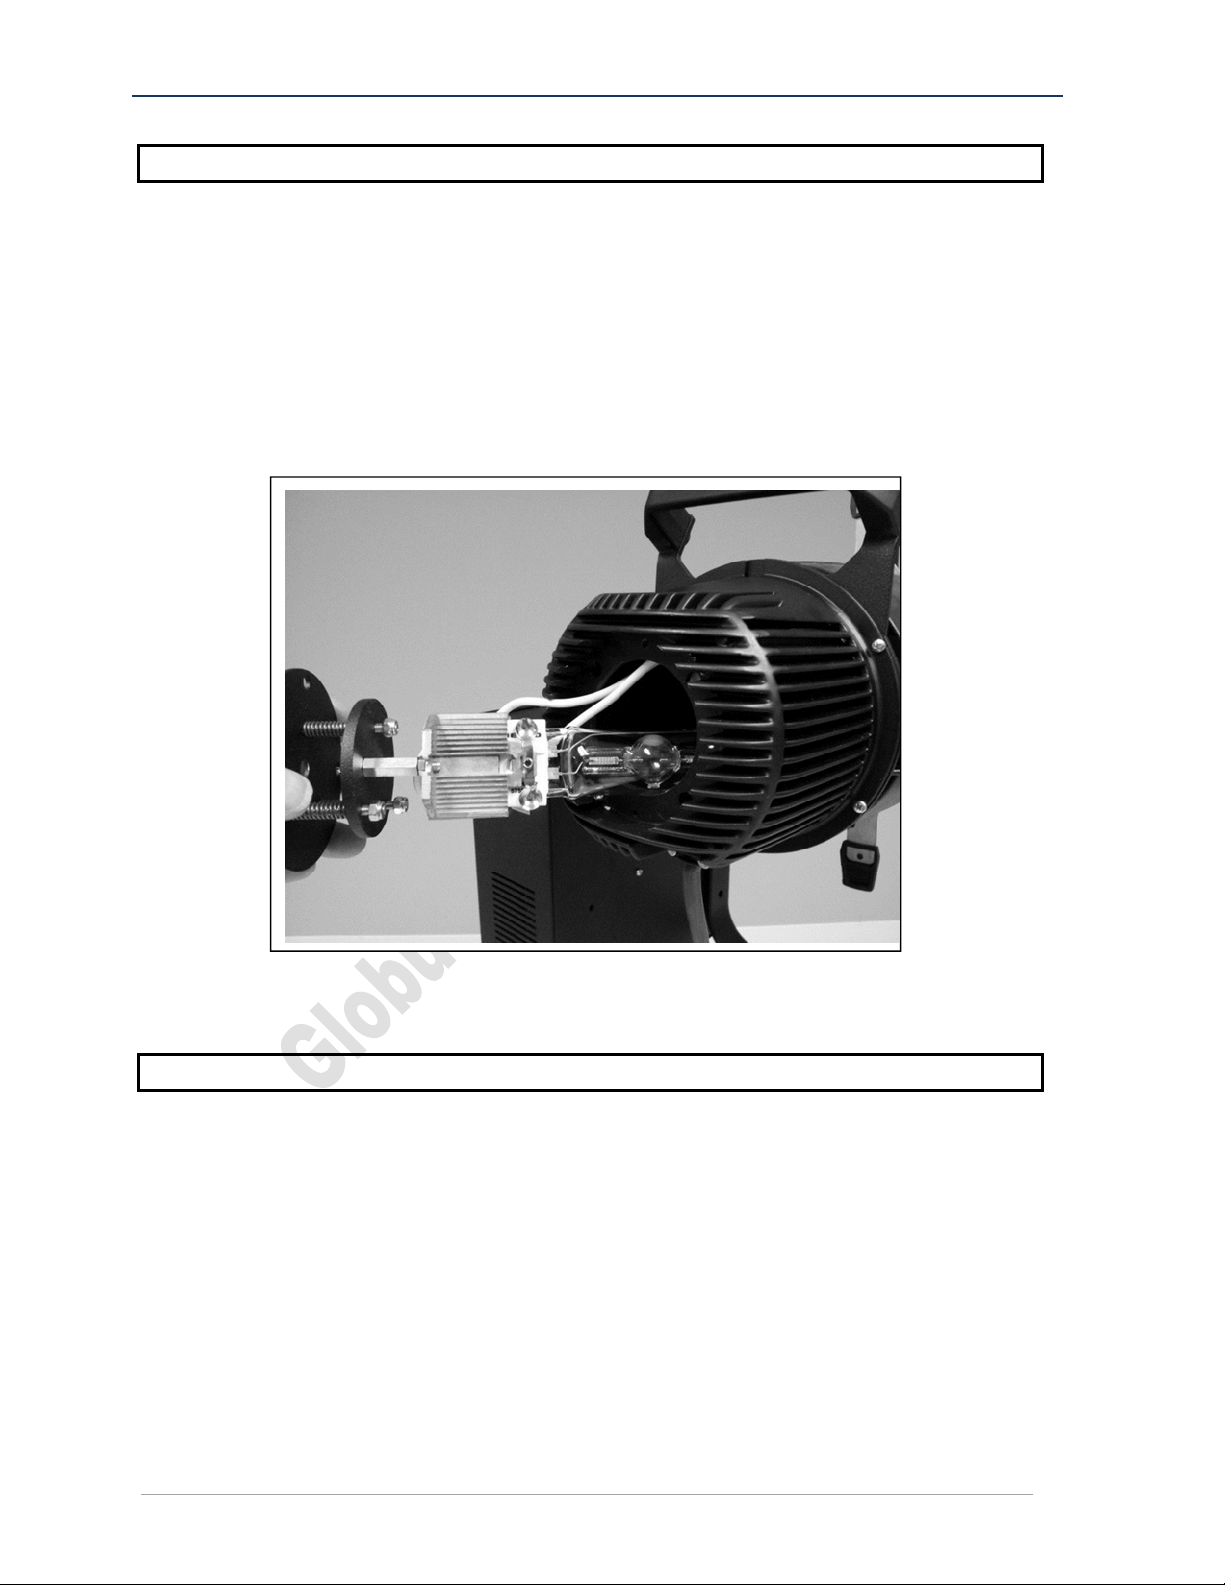
DO NOT OPERATE THE LAMP HEAD WITH THE LAMP EXPOSED. EVEN SHORT AND
INDIRECT EXPOSURE CAN CAUSE SERIOUS EYE AND SKIN INJURY.
Package Contents
Projector housing based on a modified Source Four fixture.
Electronic ballast system with lamp head and power cord.
Optional accessories depending on product configuration
Safety Information
FOR PROFESSIONAL USE ONLY
NEVER OPERATE THE UNIT WITH THE LIGHT BULB EXPOSED; IT CAN CAUSE
BLINDNESS OR SERIOUS EYE INJURY.
ONLY OPERATE THE FIXTURE FULLY ASSEMBLED
MAKE SURE THE FIXTURE IS UNPLUGGED BEFORE CHANGING THE LAMP
Do not look directly into the lamp, it may result in eye damage.
This product is for not for household use, it presents risks of severe injury or death
due to fire and burn hazards, electric shock, lamp explosion and falls.
This fixture should be installed and operated only by qualified personnel with
experience in lighting equipment and general electrical experience.
Always disconnect the unit from power and allow cooling down for 20 minutes
before servicing.
Minimum distance to flammable materials = 6 ft. (2 m).
Minimum distance to illuminated surfaces = 9 ft. (3 m).
Don’t touch the hot surface during operation, use gloves if necessary.
Always ground (earth) the fixture electrically.