go-e Charger HOMEfix Installation guide

EN Version 3.0
INSTALLATION AND
OPERATING GUIDE
11/22 kW
go-eChargergo-eCharger
HOMEfixHOMEfix

33
1. Table of contents1. Table of contents
1. Table of contents/symbols .....................................................3
2. Sustainable charging..............................................................4
3. Before installation and commissioning/download ..............5
4. Safety regulations/notes.........................................................6
5. Product overview ....................................................................9
6. Scope of delivery...................................................................10
7. Technical data........................................................................11
8. Installation .............................................................................14
9. Commissioning/charging .....................................................18
10. LED status display/troubleshooting....................................20
11. Reset card/RFID chip/Fine wire fuse ...................................24
12. App .........................................................................................26
13. Warranty and exclusions......................................................31
14. CE Declaration of Conformity ..............................................32
15. Contact and support .............................................................33
power 2 changepower 2 change Hint for a more ecological or economical use of the product.
Warning of a hazardous situation that may result in damage
to health, fatal injuries or damage to property if the safety re-
gulations are not followed.
Note regarding the adaptation of the product or product func-
tions to individual needs.
The activity may only be carried out by a qualied electrician.
Important symbolsImportant symbols

5544
Thank you for your purchase decisionThank you for your purchase decision
With the go-eCharger HOMEx you have chosen an extremely compact and
versatile charging station for electric vehicles. Smart and intelligent solutions
that make charging electric cars even more convenient are already integrated
in the go-eCharger HOMEx.
Compared to the classic wall charging station, the go-eCharger HOMEx can
be installed more quickly by an electrician and easily connected to an existing
junction box where applicable.
The go-eCharger was developed and tested by electric car drivers for electric
car drivers. To ensure that it remains up-to-date in the future, we are cons-
tantly developing the rmware and adapting the app to the state of the art. So
let us surprise you with future functions.
Sustainable chargingSustainable charging
Drivers of electric vehicles are very consciously opting for this type of mobility.
Electric drives are quiet and do not emit any environmentally harmful gases.
But electric vehicles also need energy, which has to be generated. If we use
the available energy carefully, we will not need to expand fossil fuel power
plants or nuclear power plants for electric mobility.
An important contribution we can all make is to use surplus energy. So if pos-
sible, do not charge your car when you come home after work, as this is the
time when the electricity grid is at its peak anyway. In order to save energy
and thus also to charge in an environmentally conscious way, you should, if
possible, postpone your charging with the go-eCharger „Scheduler“ function
to the midday or the early morning hours, as there is a surplus of electricity in
the grids at this time.
An even more interesting option could be an electricity supply contract
with our partner aWATTar (currently only available in Germany and Aus-
tria), where you can benet from the highly uctuating electricity prices
at the electricity price exchange by purchasing electricity when it is
cheapest. The technology for this is already built into each of our char-
ging boxes. For more information, please visit our page at aWATTar:
www.awattar.com/services/goe
We wish you lots of fun with your go-eCharger and enough electricity at all
times.
Your go-e team
2. Sustainable charging2. Sustainable charging 3. Before installation and commissioning3. Before installation and commissioning
Note before installation and commissioningNote before installation and commissioning
Observe all safety regulations and instructions in this manual!
Download the data sheet: www.go-e.co/downloads
Read the manual and the data sheet carefully and keep them for future refe-
rence. The documents are intended to help you:
•To use the product safely and properly
•Increase the durability and reliability
•To avoid damage to the device or property
•To prevent a threat to life and limb
Registration informationRegistration information
Depending on the country, the requirements of the authorities and electri-
city grid operators have to be observed, such as a registration or approval
requirement for charging stations, or the limitation of single-phase charging.
Please contact your electricity grid operator to nd out whether the go-eChar-
ger is subject to registration or approval and whether other restrictions must
be observed.

7766
4. Safety regulations/notes4. Safety regulations/notes
General safety regulationsGeneral safety regulations
The go-eCharger may only be used for charging battery electric vehicles (BEV) and plug-in hyb-
rids (PHEV) with the adapters and cables intended for this purpose.
Disregarding the safety regulations can have serious consequences. go-e GmbH declines any
liability for damage caused by disregarding the operating instructions, safety regulations or war-
nings on the unit.
High voltage - danger to life! Never use the go-eCharger if the housing is damaged or open.
In case of unusual heat development, do not touch the go-eCharger or the charging cable and
stop the charging process as soon as possible. If the plastic is discoloured or deformed, contact
customer support.
Never cover the go-eCharger during charging. Heat build-up can lead to re.
Persons wearing electronic implants should keep at least 60 cm away from the go-eCharger due
to electromagnetic elds.
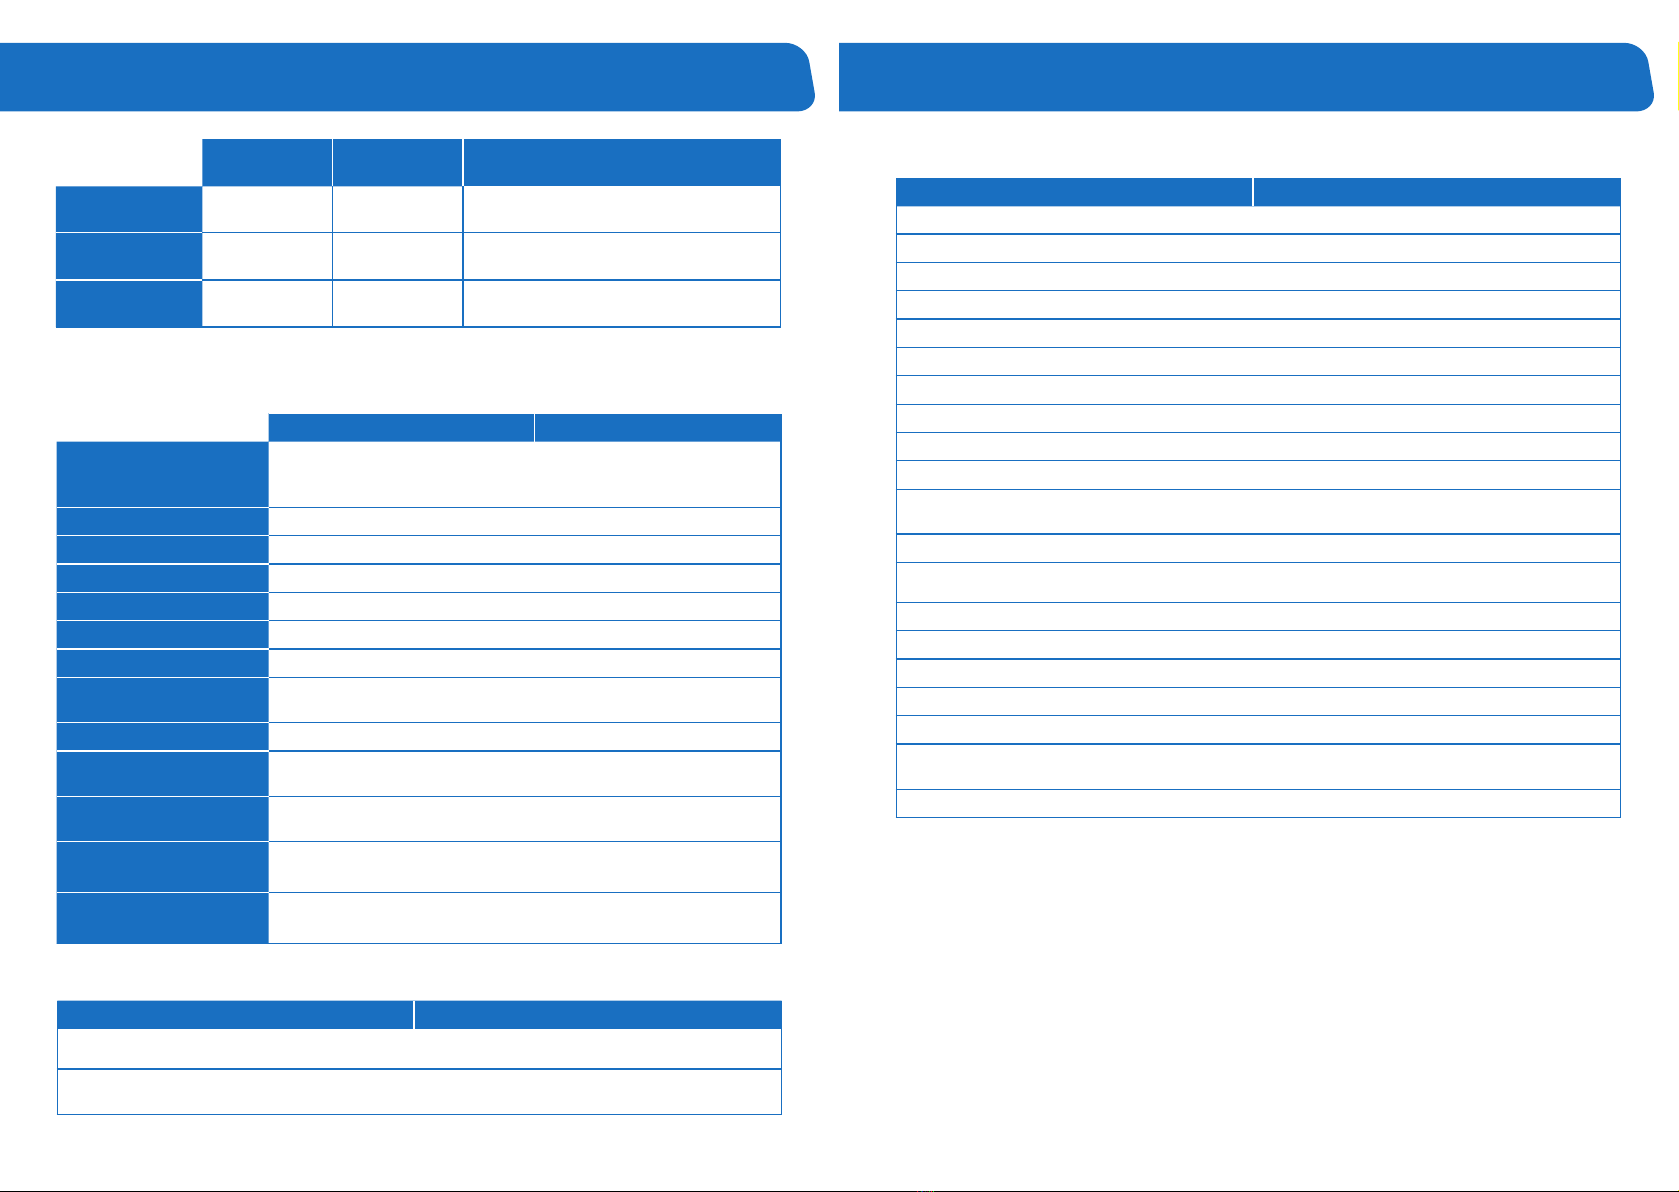
The go-eCharger HOME+ has the communication interfaces WiFi 802.11b/g/n 2.4GHz and
RFID. WiFi is operated on a frequency of 2.4Ghz, channels 1-13 with the frequency band 2412-
2472Mhz. The maximum transmission power of the WiFi is 20dBm. RFID is operated on a fre-
quency of 13.56MHz with a maximum radiated power of 60dBμA/m at 10m.
Electrical protective measures, installation, operationElectrical protective measures, installation, operation
Any information regarding electrical installation is intended exclusively for a qualied electrician
whose training allows all electrical work to be carried out in accordance with the applicable na-
tional regulations.
Before carrying out electrical connection work, you need to de-energise the circuit.
Installation must be carried out in accordance with local, regional and national regulations.
Observe the permissible ambient conditions from the data sheet.
A location without direct sunlight is recommended.
The Charger is only suitable for charging gassing vehicle traction batteries in well-ventilated
rooms.
The unit must not be operated indoors if there is an increased danger from ammonia gases.
The Charger should not be operated in the immediate vicinity of ammable or explosive substan-
ces, running water or heat-emitting equipment.
The go-eCharger must be mounted vertically in the wall bracket on a at wall.
Never use the charger lying down, as rainwater could penetrate via the type 2 socket.
Make sure that the power connection leading to the go-eCharger is properly installed and un-
4. Safety regulations/notes4. Safety regulations/notes
damaged.
The go-eCharger is equipped with a built-in RCD protection module with direct current detection
(30 mA AC and 6 mA DC). Therefore, only a type A RCD must be installed on the building side,
unless local regulations deviate from this. Independently of this, a miniature circuit breaker must
be installed upstream of each charger.
The go-eCharger may only be operated at fully functional protective devices. Connection cables
must be suciently dimensioned.
An electric shock can be fatal. Do not reach into sockets and plug systems by hand or with
technical aids.
The go-eCharger has a safety function called „ ground check“, which prevents charging in TT/
TN power grids (common in most European countries) if the power connection is not grounded.
This function is activated by default. It may only be deactivated via the go-eCharger app if you
are sure that the power grid does not have an earth connection (IT grid, e.g. in many regions of
Norway) so that charging can also take place here. The go-eCharger visualises a deactivated „
ground check“ by 4 red LEDs (3, 6, 9, 12 o‘clock).
Connection, plugConnection, plug
Do not use go-eCharger if any cable attached to or plugged into the unit is damaged.
Never use wet or dirty plugs in connection with the go-eCharger.
Never pull plugs out of the connector by the cable!
Opening, conversions, repair, maintenanceOpening, conversions, repair, maintenance
Any modication or repair of the hardware or software of a go-eCharger may only be carried out
by specialist personnel of go-e GmbH.The attachment of a CEE plug to the connection cable is
completely prohibited.
For safety reasons, the disassembly of an allegedly defective, permanently installed go-e pro-
duct may only be carried out by a qualied electrician. Before dismantling an allegedly defective
product, always contact go-e‘s technical customer support and wait for its decision on the further
procedure for handling the service case.
Removing and damaging warning notices attached to the go-eCharger or opening the device
will result in the loss of any liability by go-e GmbH. The warranty also expires in the event of any
modication or opening of a go-e product.
The go-eCharger is maintenance-free.
The device may be cleaned with a damp cloth. Do not use cleaning agents or solvents. Do not
clean the device with a high-pressure cleaner or under running water.
DisposalDisposal
According to directive 2012/19/EU (WEEE directive), electrical devices must not be disposed
of in household waste after the end of use. Take the product in accordance with national legal
requirements to a collection point specially set up for waste electrical equipment. Also dispose of

9988
4. Safety regulations/notes4. Safety regulations/notes
the product packaging properly so that it can be recycled.
Registration/approval obligation, legal informationRegistration/approval obligation, legal information
Depending on the country, the requirements of the authorities and electricity grid operators must
be observed, such as the obligation to register or obtain approval for ev charging stations or
the limitation of single-phase charging. Contact your grid operator/electricity provider to nd out
whether the go-eCharger requires registration or approval (e.g. in Germany) and whether other
limitations must be observed.
The copyright for these operating instructions is owned by go-e GmbH.
All texts and illustrations correspond to the technical status at the time of writing. go-e GmbH
reserves the right to make unannounced changes. The content of the operating instructions does
not justify any claims against the manufacturer. Pictures are for illustration purposes and may
dier from the actual product.
5. Product overview5. Product overview
Connection cable
direct connection to a junction box possible
RFID chip
Release of charging processes (can be activated via app)
Reset card
Required for using the app and for resetting the charger to
factory settings
Housing
Impact-resistant and UV-resistant high-performance plastic
RFID reader
Release of charging processes with RFID chips or cards
(can be activated via app)
Button
Change of charging strength (5 levels - adjustable via app)
LED ring
Display of charging strength (1 LED = 1 ampere)
and charging status
Rating plate
With serial number of the charger
Fine wire fuse
Protects the unit electronics in case of incorrectly con-
nected supply line
Sealed screw
Opening leads to loss of warranty
Type 2 socket
Anschluss für Typ 2 Stecker des Ladekabels
(mit Wetterschutz)
Back

11111010
HOMEx 11 kW HOMEx 22 kW
Dimensions Approx. 15 x 25 x 9 cm
Weight 1.95 kg 2.47 kg
Connection cable
2 m, 5 x 2.5 mm²
for permanent connection
(type H07BQ-F)
2 m, 5 x 6 mm²
for permanent connection
(type H07BQ-F)
Connection Single-phase or three-phase
Rated voltage 230 V (single-phase) / 400 V (three-phase)
Mains frequency 50 Hz
Power grid types TT / TN / IT
Standby power 1.9 W (LEDs switched o) to 4.2 W (LEDs bright)
RFID 13.56 MHz
WiFi 802.11b/g/n 2.4GHz / frequency band 2412-2472Mhz
HOMEx 11 kW HOMEx 22 kW
Maximum charging power 11 kW
(16 A, 3-phase)
22 kW
(32 A, 3-phase)
Ampere and status display Readable via LED ring and app
Adjusting charging power
By button and app
Via charging current in steps
of 1 ampere between
6 A and 16 A
Via charging current in steps
of 1 ampere between
6 A and 32 A
Product specicationsProduct specications
Charging capacityCharging capacity
Permissible ambient conditionsPermissible ambient conditions
HOMEx 11 kW HOMEx 22 kW
Installation site Indoors and outdoors,
without direct sunlight
Operating temperature -25 °C to +40 °C
Storage temperature -40 °C to +85 °C
Average temperature in
24 hours Below 35 °C
Altitude Maximum 2,000 m above sea level
Relative humidity Not more than 95 % (non-condensing)
Impact resistance IK10
6. Scope of delivery6. Scope of delivery
11 or 22 kW charging box
with 2 metres connection cable
Wall bracket
Mounting material
5x Dowel 8 x 40 mm
4x Screws for wall bracket 4.5 x 50 mm
1x Screw for U-piece 4 x 50 mm
1x U-piece (optional anti-theft device)
Spare fine wire fuse
• Type 2 cable (up to 22 kW) 2.5 m | 5 m | 7.5 m
• Type 2 cable holder
• Type 2 to Type 1 cable 7.4 kW 5 m
• RFID chips, pack of 10
•go-eCharger wall bracket
• Fine wire fuses, pack of 10
RFID chip
Reset card
4x 1x5x 1x
Optional accessories
7. Technical data7. Technical data

13131212
HOMEx
11 kW
HOMEx
22 kW Remark
Single-phase
charging car¹
1.4 kW
to 3.7 kW
1.4 kW
to 7.4 kW
Country-specic limitations
need to be observed
Two-phase
charging car¹
2.8 kW
to 7.4 kW
2.8 kW
to 14.8 kW
Two-phase connection of the charger
is not possible
Three-phase
charging car¹
4.2 kW
to 11 kW
4.2 kW
to 22 kW
go-eCharger switches through the po-
wer that is available at the connection
¹Charging power depending on the number of phases of the car‘s onboard charger
Connection to vehicleConnection to vehicle
go-eCharger app and connectivitygo-eCharger app and connectivity
Safety functionsSafety functions
HOMEx 11 kW HOMEx 22 kW
Type 2 socket (acc. to IEC 62196-2) with mechanical locking device
(own type 2 cable required, available as accessory)
Vehicles with type 1 can be charged with adapter cable type 2 to type 1
(available as accessories)
HOMEx 11 kW HOMEx 22 kW
RCD protection module
with DC current detec-
tion
30 mA AC, 6 mA DC
Protection class I
Pollution degree II
Anti-theft device Charging cable locking device
RFID access control One learned RFID chip included
Input voltage Phase and voltage testing
Switching functions Testing of the switching functions
Ground check For TT, TN grids
(deactivatable ground check for IT grid - Norway mode)
Current sensor 3-phase
Fine wire fuse To protect the internal electronics
(triggers if the supply line is connected incorrectly)
IP54 Protected against dirt and water, suitable for permanent out-
door operation (IP 44 when charging cable is plugged)
go-e network operator
API
For authorised access by the electricity grid operator to the
go-eCharger for grid-serving power control
Modbus TCP e.g. for grid-serving power control by the electricity grid opera-
tor (from rmware version 0.40)
HOMEx 11 kW HOMEx 22 kW
Local (WiFi hotspot) or worlwide* (WiFi) controlling and monitoring
Adjustment/check of the charge (voltage, current, power, energy)
Adjusting the current level in 1 ampere steps
Start/stop function
Management of RFID chips/cards (up to 10 users per charger)
Scheduler
Electricity meter (total kWh and total amount per RFID chip)
kWh limit mode
Access control (RFID/App)
Cable unlock functions
Electricity price exchange connection (aWATTar mode) with intelligent charging manage-
ment*/**
Static load balancing*
Photovoltaic connection via open API interface
(programming required)
LED adjustment
Management of the charging levels via button on the charging station
Updateable for later functions (Smart home, etc.)
Automatic unlocking of the charging cable in the event of a power failure***
1-/3-phase switching via app - even during the charging process***
Synchronisation of charging processes with the cloud and display of the past charging
processes***
Documented public API interfaces: HTTP , MQTT, Modbus TCP
*WiFi connection of the charger required
**Separate electricity supply contract with partner aWATTar required, currently only available in Austria and Germany
***from go-eCharger serial numbers with CM-03- (hardware version V3)
7. Technical data7. Technical data 7. Technical data7. Technical data

15151414
8. Installation8. Installation 8. Installation8. Installation
4. Hook the go-eCharger into the wall bracket.
Optional: If required, attach the supplied U-piece
directly above the charger, making it impossible to
remove the device from the wall bracket. In addi-
tion, a padlock (not included in the scope of delive-
ry) can be attached.
1. Mount the go-eCharger approx. 1.00 to 1.45 me-
ters above the ground, depending on your perso-
nal feeling of well-being.
Place the wall bracket in the desired mounting
position. Use a spirit level to align it straight. Mark
the four drill holes with a pencil by using the wall
bracket as a template.
4x
1 m - 1,45 m
2. Drill holes at the four marked positions.
4x
3. Attach the wall bracket with four screws and do-
wels each. Drive the dowels into the wall with a
hammer.
Make sure that the surface is not warped. The
device may not be attached if the wall bracket is
distorted. Compensate possible unevenness of
the wall with spacers (not included in the scope of
delivery).
4x
Benötigte WerkzeugeBenötigte Werkzeuge
aPencil bSpirit level cMeasuring tape dDrilling machine
eScrewdriver fHammer g Cutter knife hSide cutter
i Dowel 8 x 40 mm j Screws for wall bracket 4.5 x 50 mm
kScrew for U-piece 4 x 50 mm
lU-piece (optional anti-theft device) mWall bracket
Beiliegendes BefestigungsmaterialBeiliegendes Befestigungsmaterial
abcdef
jk l mi 5x 4x 1x
g h

17171616
8. Installation8. Installation
5. The go-eCharger is equipped with an integrated
RCD protection module with direct current detec-
tion (30 mA AC, 6 mA DC).
Only a type A RCD is required on the building side,
unless local regulations deviate from this. In ad-
dition, a miniature circuit breaker must be installed
upstream.
Miniature circuit breakers with characteristic B or
C for 16 or 32 amperes are permissible:
•3- or 4-pole for three-phase connection
• 2-pole for single-phase connection
9. Installation9. Installation
6. The go-eCharger HOMEx may be connected
single-phase and three-phase. If necessary, lay an
additional supply line. When selecting the cable
cross-section, observe the simultaneity factor and
the type of installation. We recommend the follo-
wing cable cross-sections, but the electrician has
to decide according to local conditions:
HOMEx 11 kW HOMEx 22 kW
as surface-
mounted at least 2.5 mm² at least 6 mm²
in wall at least 4 mm² at least 6-10 mm²
in insulation at least 10 mm² at least 10 mm²
The connection cable of the go-eCharger HOME-
x may also be shortened. Connection via a junc-
tion box is possible.
7. When installing several devices, connect the
phases of the rst, second and third charger to
the domestic circuit in rotation according to the
adjacent illustration to ensure even load distribution
when charging single-phase vehicles.
Activate static load balancing via the go-eCharger
app (WiFi required).

19191818
9. Commissioning/charging9. Commissioning/charging 9. Commissioning/charging9. Commissioning/charging
5. Stop chargingStop charging
The charging process is completed when the LEDs
light up green.
If you want to stop charging prematurely, use the
„cable release“ function of your vehicle or the large
round button of the go-eCharger app (tab „Char-
ging“).
The cable remains locked in the type 2 socket in
the standard setting after the charging process
has ended (adjustable via the app) until it is remo-
ved from the vehicle (theft protection).
If the power supply is interrupted, the charging ca-
ble remains locked in the charging box for reasons
of theft protection. To unlock it, it is necessary to
re-energise the charging station. In the case of
chargers with hardware version 3, the cable can
also be unlocked automatically after a power fai-
lure, provided the function has been activated in
advance via the „Cable unlock“ setting in the app.
However, it is then no longer theft-protected in the
event of a power failure.
3. Starting the charging processStarting the charging process
Connect the go-eCharger and the vehicle by using
a type 2 charging cable (or if the car has a type one
socket by using a type 2 to type 1 adapter cable).
Make sure that the type 2 plug is inserted as far as
possible into the type 2 socket of the charger.
The Charger is ready for charging and is waiting
for the car to release it. The LEDs light up yellow in
the number of the preset charging current.
4. ChargingCharging
After the car has enabled charging, the LEDs rot-
ate clockwise around the type 2 socket during the
charging process.
The number of „tails“ corresponds to the number
of connected phases (or, in the case of chargers
with serial number CM-03- / hardware version V3,
the number of phases set in the app):
• 1 rotating tail = 1-phase charging (230 V)
• 3 rotating tails = 3-phase charging (400 V)
The speed of rotation and length of the tails indica-
te the amount of charging current.
2. Ready to chargeReady to charge
The go-eCharger is ready for operation. The num-
ber of blue LEDs corresponds to the set charging
current.
Five predened charging levels can be selected
via the button.
You can adjust the charging levels individually in
the go-eCharger app („Current levels“). It does not
matter whether the go-eCharger is connected sin-
gle-phase or three-phase.
1 LED = 1 A
HOME+ 11 kW = 6 A - 16 A
HOME+ 22 kW = 6 A - 32 A
1. Start of the chargerStart of the charger
The go-eCharger performs a self-test during initial
start-up or after a restart, during which the LEDs
light up in rainbow colours.

21212020
The go-eCharger displays the charging status via
dierent colours and positions of the LEDs. In ad-
dition, it executes a whole series of safety queries
to check the used power source for possible er-
rors. For this reason, the go-eCharger may display
an error and refuse to charge, especially with un-
known power sources.
The device visualises the cause of the error by
certain colours and positions of the LEDs. You can
also nd the error message within the „Status“ in-
formation of the app. (The following colour codes
correspond to the factory setting).
Ground check deactivatedGround check deactivated
4 LEDs light up red (3, 6, 9 and 12 o‘clock).
The go-eCharger has the safety function „ ground
check“, which prevents the charging process in
TT/TN power grids (common in most European
countries) in case of insucient grounding of the
power connection. This function is enabled by de-
fault and can be disabled via the go-eCharger app.
However, the „ Ground check“ should only be di-
sabled if you are sure that the electricity grid has
no grounding (IT grid, e.g. in many regions of
Norway), so that charging can also be carried out
here. If you are not sure, you must leave the set-
ting in the app at „Enabled“!
WaitingWaiting
The LEDs ash blue in the number of preset
charging power.
The go-eCharger waits with the charging process
due to a preset scheduler or for the receipt of che-
ap electricity
Activation requiredActivation required
The LEDs light up blue and two white LEDs
move from the top and bottom to the centre.
The „Access control“/“Charging mode“ is not set
to „Open“. Use a learned RFID chip or the app to
activate the charging process.
Vehicle is not recognisedVehicle is not recognised
The LEDs light up blue in the standby mode.
However, the charging process does not start.
Check the charging cable and the tight t of the
plugs.
RFID chip detectedRFID chip detected
5 LEDs light up green.
The go-eCharger has recognised an RFID chip
authorised for charging and releases the charge.
Unknown RFID chipUnknown RFID chip
5 LEDs light up red.
An unknown RFID chip was used. Use a learned
RFID chip to activate charging.
Internal errorInternal error
The LEDs ash red.
The go-eCharger has detected a general com-
munication error. Check the error code in the go-
eCharger app.
Grounding faultGrounding fault
The LEDs ash red at the top and glow green/
yellow statically at the bottom.
Check whether the supply line to the go-eCharger
is properly grounded.
10. LED status display/troubleshooting10. LED status display/troubleshooting10. LED status display/troubleshooting10. LED status display/troubleshooting

23232222
10. LED status display/troubleshooting10. LED status display/troubleshooting 10. LED status display/troubleshooting10. LED status display/troubleshooting
Firmware updateFirmware update
The LEDs ash pink and turn yellow with in-
creasing progress of the update.
A rmware update was started via the go-eChar-
ger app. This may take a few minutes. Do not dis-
connect the charger from the power supply during
this time.
Firmware update successfulFirmware update successful
The LEDs light up alternately green and pink.
The rmware update has been successfully com-
pleted.
Firmware update failedFirmware update failed
The LEDs light up alternately red and pink.
The rmware update could not be completed suc-
cessfully.Please try again.
Connection cable/fuse defectiveConnection cable/fuse defective
The LEDs do not light up despite a power con-
nection.
Check the overload protection of the connection
and the ne wire fuse on the back of the go-eChar-
ger. If this is defective, the power connection is
probably not installed properly.
Start of the charger does not endStart of the charger does not end
The LEDs light up permanently in rainbow co-
lours.
If the charger does not leave this mode, the WiFi
signal may be disturbed. Please remove possible
sources of interference (e.g. devices with a WiFi
mesh network).
Fault current detectedFault current detected
The LEDs ash red at the top and light up pink
at the bottom.
The Charger has detected a DC fault current >= 6
mA or AC fault current >= 30 mA. To acknowledge
the fault, press „Reboot“ in the app or disconnect
the Charger from the power supply for a short time.
If necessary, the charging current can be reduced,
but also check the connection used. (The charging
system in your vehicle may also be defective).
Increased temperatureIncreased temperature
The LEDs light up yellow at the bottom and
ash red atthe top.
The temperature in the go-eCharger is increased.
Therefore, the charging current is automatically
reduced.
Phase errorPhase error
The LEDs light up blue at the bottom and ash
red at the top.
Check whether the phase/s of the go-eCharger are
connected properly. It is possible that only 2 pha-
ses are connected. If no function occurs, contact
the go-e Support.
Error unlocking or lockingError unlocking or locking
The LEDs briey light up red at the top and yel-
low at the bottom.
The charging cable could not be unlocked or lo-
cked properly. The unit tries to repeat the process
every ve seconds. The type 2 plug may not be
inserted completely. Try to insert it into the type 2
socket as far as possible.

25252424
11. Reset card/RFID chip/Fine wire fuse11. Reset card/RFID chip/Fine wire fuse 11. Reset card/RFID chip/Fine wire fuse11. Reset card/RFID chip/Fine wire fuse
Fine wire fuseFine wire fuse
If the supply line is connected incorrectly, the ne-
wire fuse of the go-eCharger will trip in order to
protect the electronics of the unit.
In this case, you need to unscrew the fuse cap
(circular with the inscription „Fuse“) on the back of
the charger with a screwdriver, remove the melted
fuse, insert a replacement fuse and then reattach
the cap. The ne wire fuse is also allowed to be
changed by the user of the appliance himself.
Disconnect the charger from the power supply
beforehand. Only use original go-e ne wire fuses
(one included in the scope of delivery).
Reset to factory settings
You can also use the reset card to reset the
go-eCharger to factory settings:
•Hold the reset card in front of the chargers RFID reader
• All LEDs light up red briey to conrm
The stored RFID chips and assigned consumption
data are not deleted during this process.
go-eCharger reset cardgo-eCharger reset card
On the back of the reset card you will find important
access data which you need to set up the app
control of the charger:
•“Serial number“: Serial number of the go-eCharger
•“Hotspot SSID“: WiFi hotspot name of the charger
•“Hotspot key“: WiFi hotspot password of the device
• “QR-Code“: Automatically connection to the hotspot
RFID chipRFID chip
Protection against unauthorised charging
If you install the go-eCharger outdoors, you can
protect the device against use by unauthorised
persons by means of an RFID chip. In the settings
of the go-eCharger app, „Authentication required“
or „RFID/App required“ needs to be selected for
this.
The delivered RFID chip is already learned.
To authenticate a person authorised for charging,
the chip needs to be held in front of the RFID
reader before each charging process. Alternatively,
authentication can be done by tapping the round
button of the tab „Charging“ of the go-eCharger
app.
Ideally, leave the reset card at a secure location
where you can quickly access it in case you need
it.
Consumption overview for several users
Furthermore, additional user accounts can be
created with additional RFID chips (available
as accessories). This is useful if several people
share the unit and the charged current should be
displayed separately for each user in the app.
Additional RFID chips can be learned via the app
(„Settings“/“RFID chips“). Simply select one of the
free slots and follow the instructions in the app.
The chips can be renamed individually in the app.
Any RFID chip/card that transmits on a frequency
of 13.56 MHz (e.g. also many credit cards) can be
learned.

27272626
12. App - connection setup12. App - connection setup 12. App - connection setup12. App - connection setup
The go-eCharger can also be used without an app.
Download the go-eCharger app if you want to
change basic settings, use comfort functions, read
the internal electricity meter or control the charger
remotely.
The go-eCharger app is available for download
on the platforms listed opposite, depending on the
operating system of your mobile device.
3.
6.
Set up connection via hotspotSet up connection via hotspot
1. Some smartphones require deactivating mo-
bile data and terminating active WiFi connec-
tions.
2. Either scan the QR code of the reset card
(an external app may be required for this) or
manually search for the charger‘s network (di-
splayed as go-e-xxxxxx) in the settings of your
mobile device to connect to the charger‘s hot-
spot. If you connect manually, you need to en-
ter the password that you will nd on the reset
card under „Hotspot key“.
3. Now launch the go-eCharger app.
4. If the „Charging“ page is already displayed,
you can already operate the charger locally via
the app. Otherwise, you need to select your
go-eCharger in the app beforehand.
Set up connection via WiFiSet up connection via WiFi
For remote control of the charger and for some
comfort functions, a WiFi connection of the char-
ger is essential.
1. To connect to the WiFi network, you have to
establish an active hotspot connection to the
Charger (as described above).
2. Then tap the blue „+“ icon in the app.
3. On the following screen, select „Initial setup
for new go-eCharger“. As soon as the hotspot
connection has been detected, tap on „Next“.
On the next screen, the connection to WiFi
needs to be activated.
4. Enter the name of your WiFi („SSID“) or se-
lect your WiFi (if displayed). You also need to
enter the „password“ of this WiFi network. As
soon as the connection has been established,
a „Next“ button appears, which you have to
tap. Follow the subsequent instructions of the
app until the „Done“ button appears. Tap this
button.
5. Check whether the connection to the go-e
Cloud is allowed under „Advanced settings“
(in the „Internet“ tab of the go-eCharger app).
6. Disconnect from the Charger‘s hotspot. Ac-
tivate your mobile data or connect to a WiFi
network. Tap the „+“ icon in the go-e Charger
app again. Select „Add an already set up go-
eCharger“. Now enter the serial number and
the password you assigned yourself (alternati-
vely, if available on the reset card, the „Cloud
token“). The Charger can then be controlled
remotely via mobile data or WiFi.

29292828
a
b
c
d
e
12. App - charging12. App - charging 12. App - settings12. App - settings
You can adjust the basic and comfort settings of
the charger via the „Settings“ tab of the app. You
are provided with help notes in the app for the set-
ting options, which is why you will only nd basic
information below.
Current levelsCurrent levels
When delivered, the blue button of the go-eChar-
ger is predened with 5 amperage levels for selec-
ting the charging current. You can switch between
the levels step by step by pressing the button. You
are able to adjust the current intensity of the ve
levels to your personal needs via the „Current le-
vels“ setting option of the go-eCharger app.
With lower amperages, you charge more sustaina-
bly, which can have a positive eect on the stability
of the power grid. With high amperages, you char-
ge the battery faster.
The „Charging“ tab of the go-eCharger app gives
you direct access to the most important functions
for starting, stopping and monitoring charging pro-
cesses.
Do you have several go-eChargers? Tap the pictu-
re of the Charger or its name to go to the selection
page with the list of available devices. Select the
Charger you want to operate.
Tap the blue „+“ icon at the top right to connect a
new or existing go-eCharger to the app.
Use the 3 tabs to switch between the screens „
Power“, „Details“ and „Data“.
The tab „Power“ shows the current charging power
in the large circle (if charging is in progress). You
can start and stop the charging process by tap-
ping this circle. In this case, you are charging in
standard charging mode, which does not take into
account the aWATTar electricity exchange price,
for example.
Use the 3 round icons below to access the settings
for „Mode“, „ Current“ and „aWATTar / Planned
charge“ (depending on hardware version).
You are also able to change the charging current
during the charging process via the „Current“ icon,
even in steps of 1 ampere using the slider.
Under the headings „Status“, „Energy“ and „Infor-
mation“ you will nd further details regarding the
charging process.
If you tap on the link „Energy per user“, a list with
the charged electricity quantities of all learned
RFID chips is displayed. You can also download
the charging history or meter readings here.
Use the 3 tabs to switch between the screens „
Charging“, „Settings“ and „Internet“.
kWh LimitkWh Limit
The „kWh Limit“ function is practical if you do not
want to fully charge the battery because, for exam-
ple, you live on a mountain and want to recuperate
when driving downhill. Set in the „kWh Limit“ menu
how much energy should be charged until the next
trip.
aWATTaraWATTar
As an electricity customer of our partner aWATTar,
you can congure the Charger to charge your car
at the lowest electricity exchange prices. A cloud
connection ( WiFi) is required for this function.
The latest prices are transmitted automatically to
the Charger and displayed in the „Data“ tab of the
„Charging“ page (note: aWATTar is currently only
available in Germany and Austria). Information re-
garding the electricity tari can be found at: www.
awattar.com/services/goe
a
b
c
d
e

31313030
The statutory warranty regulations apply. The warranty period is 2 years from receipt of the
goods.
In the event of a warranty claim, the customer has to inform go-e GmbH immediately in writing to
complain about the defect. In the event of a justied notice of defect, go-e is obliged to improve
or replace the goods as soon as possible or to arrange this. In the (justied) case of the return
of the defective product to go-e, go-e will bear the costs incurred. If, in the event of a warranty
claim, it becomes apparent that the device needs to be replaced, the customer waives owner-
ship of the previous device from the date of return shipment and the new device simultaneously
becomes the property of the buyer. This transfer of ownership also applies if, as a gesture of
goodwill, a device is replaced outside the warranty period at reduced conditions. If a defect that
is justiably notied within the warranty period concerns a permanently installed charging station,
go-e GmbH will send the customer a replacement box and will pay a total of up to 70 euros of
the electrician’s costs incurred in uninstalling the defective charging station and installing the
replacement unit. In any case, evidence in the form of an invoice has to be provided. For safety
reasons, the disassembly of an allegedly defective, permanently installed go-e product may only
be carried out by a qualied electrician. Before dismantling the product, always contact go-e’s
technical customer support and wait for its decision on the further procedure for handling the
service case. Repairs may only be carried out by the manufacturer go-e. For repairs not carried
out by go-e, there shall be no claim to reimbursement of costs under the warranty.
In case of incorrect use / mounting and resulting damage of the product by the buyer or other
technical defects caused by the buyer the legal warranty expires. In this case the buyer bears
the shipping costs. This applies especially if the product is not operated with a special original
adapter manufactured by go-e GmbH or is used for other purposes than those specied by the
manufacturer.
The warranty also expires in the event of any modication or opening of a go-e product.
go-e GmbH shall make every reasonable eort to provide the operation of all free digital sup-
plementary services in accordance with the representations in the operating instructions of the
products, including but not limited to app and cloud functions. go-e does not, however, guarantee
that these will always function error-free, fully available and without interruption. go-e GmbH
does not provide any warranty or assurance for these digital additional functions, but will ende-
avour to provide a workaround or update to rectify errors or eliminate faults free of charge within
a reasonable period of time following an error/fault report by the customer. The customer’s report
can be made by telephone during go-e business hours, by e-mail to o[email protected] or by using
the contact form on the go-e website. go-e shall be entitled to apply restrictions for the elimina-
tion of errors/malfunctions and/or workarounds, as well as to postpone the elimination of errors/
malfunctions until the release of an update. In order to full this obligation, go-e GmbH is entitled
to suspend the digital supplementary services due to planned or unplanned maintenance work,
which is why go-e does not guarantee that the digital services will be available without restriction
at any given time.
Load balancingLoad balancing
If you operate several go-eChargers at one power
connection, you should use the „load balancing“
(static) function so that the building power connec-
tion is not overloaded. A cloud connection (WiFi)
is required for this function. If the cloud connec-
tion is temporarily interrupted, the go-eCharger will
continue charging with reduced charging current in
fallback mode, provided a charging current value
greater than 0 A has been entered for this purpose.
12. App - settings12. App - settings 13. Warranty and exclusions13. Warranty and exclusions
SchedulerScheduler
The „Scheduler“ option allows you to postpone
the charging process to a time when electricity is
available in abundance (often at night). In this way,
you act in a particularly sustainable way, as you do
not increase the load peaks that are common at
the end of the working day and take electricity that
could otherwise not be used sensibly. In this way,
you ensure grid stability.
After activating the scheduler, you can dene
when the go-eCharger may charge or not charge.
For weekdays, Saturday and Sunday, 2 time peri-
ods can be dened separately.
Cable unlock functionsCable unlock functions
The default setting under „Cable unlock“ is that the
charging cable should remain locked in the char-
ger after the charging process until it is released at
the vehicle (theft protection).
Alternatively, you can lock the cable permanently.
This is useful if you rarely take it with you in the car
and the go-eCharger has been installed outdoors.
The function serves as a permanent protection
against theft of the cable.
Furthermore, you can have the cable automati-
cally unlocked after the charging process. This is
convenient if you share the charging station with
several people and want to allow them to use the
charger at the end of your charging session.

33333232
Do you still have questions about the go-eCharger?Do you still have questions about the go-eCharger?
You can nd helpful answers concerning the most frequently asked questions
in our FAQ:
www.go-e.co/faq-charger/?lang=en
Do you need help regarding a technical problem?Do you need help regarding a technical problem?
You will receive rst aid under the following link:
www.go-e.co/troubleshooting/?lang=en
If you cannot nd an answer to your question in this guide, on our website or
in the app, please feel free to contact us:
go-e GmbH
Satellitenstraße 1
AT 9560 Feldkirchen
Mail: of[email protected]
Tel: +43 4276 6240010
www.go-e.co
Deviating declaration of conformity for go-eChargers with serial numbers CC1- or CM-02- available at www.go-e.co/downloads
15. Contact and support15. Contact and support14. CE Declaration of Conformity14. CE Declaration of Conformity

Other manuals for Charger HOMEfix
4
This manual suits for next models
1
Table of contents
Other go-e Automobile Accessories manuals
Popular Automobile Accessories manuals by other brands

Axxess
Axxess OESWC-8113-RF installation instructions

Dakota Digital
Dakota Digital VHX-69C-CAC Installation

Thule
Thule SPRINT XT 528001 Installation instructions manual

Happy Orange
Happy Orange USB-C quick start guide

Safe Fleet
Safe Fleet PRIME DESIGN URX 001-E Assembly instructions

Thule
Thule TracRac SR manual