3
OASIS 976XXXX.XX0(#) & OASIS ELITE 976XXXX.XX0(#) SERVICE INSTRUCTIONS
Lateral arms under spring tension are
dangerous. Use extreme care. If not
controlled the arms will extend quickly. Keep
hands and clothing clear of awning arms, as
personal injury may result.
2. Tie down arms with safety straps to prevent
arms from springing forward during lead rail
replacement. Fig. 4
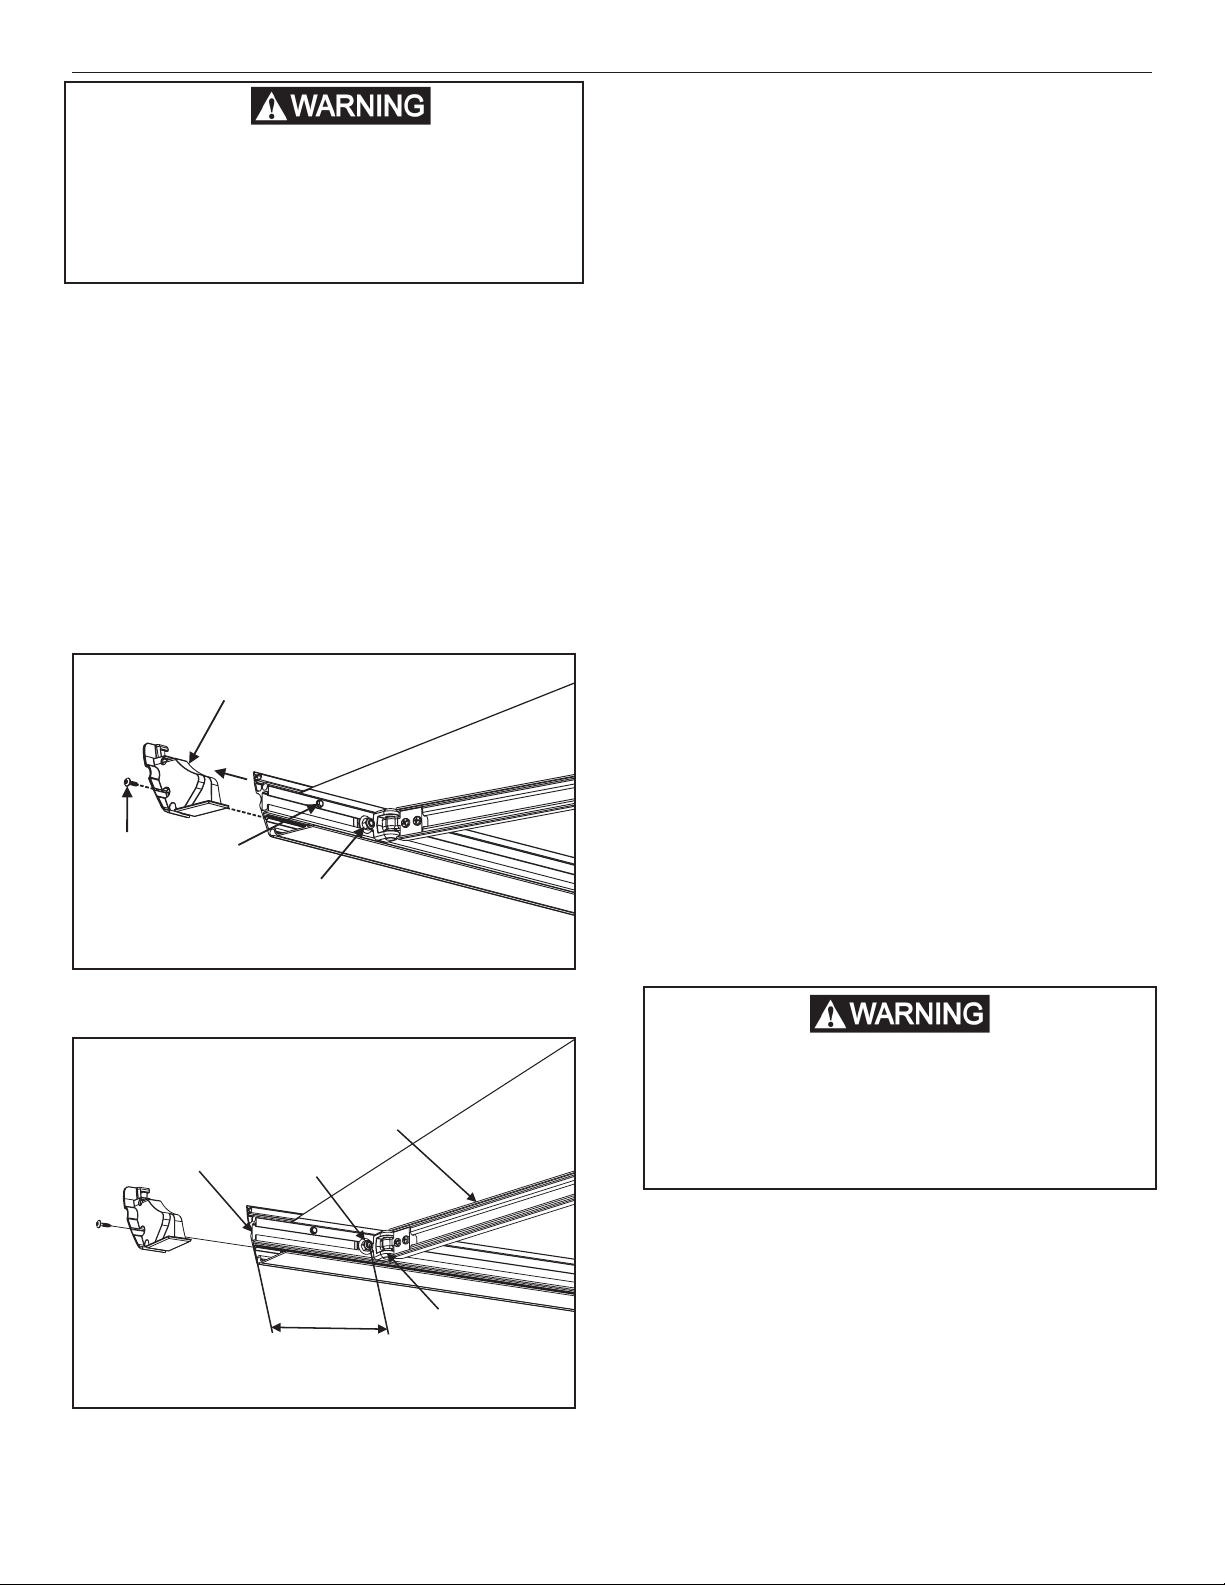
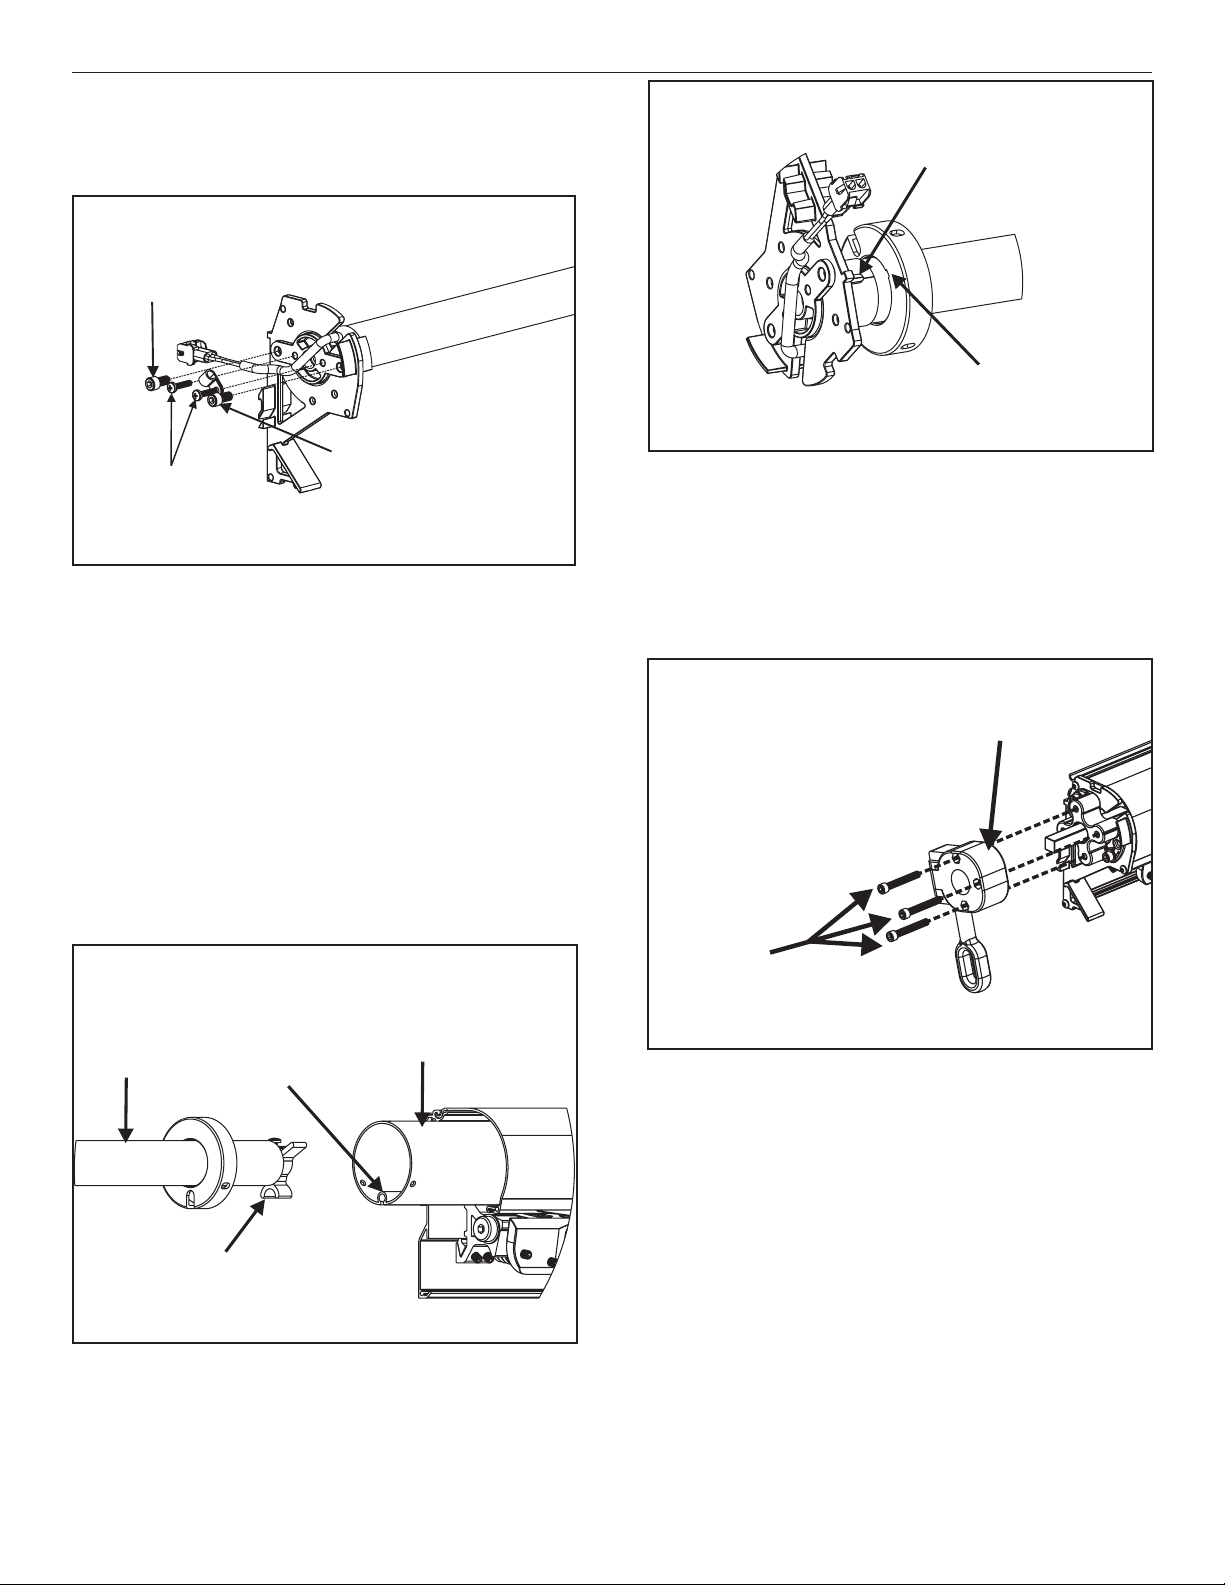
3. Use a square bit drive to remove the caps from
both ends of the lead rail, Save to reinstall on
the new lead rail. Fig. 2.
4. Remove the TEK screw that holds the fabric in
the lead rail. Fig. 2.
5. The next steps require two persons. Loosen the
hex nuts holding the wrist brackets to the lead
rail. Once loose, one person slides the lead rail
off the arms and fabric, while the other holds the
arms and fabric tight. Fig. 2 and 3.
FIG. 2
TEK
Screw Hex Nut
Lead Rail
Square
Drive Screw
Hex Nut
Distance
Arm
Wrist
Bracket
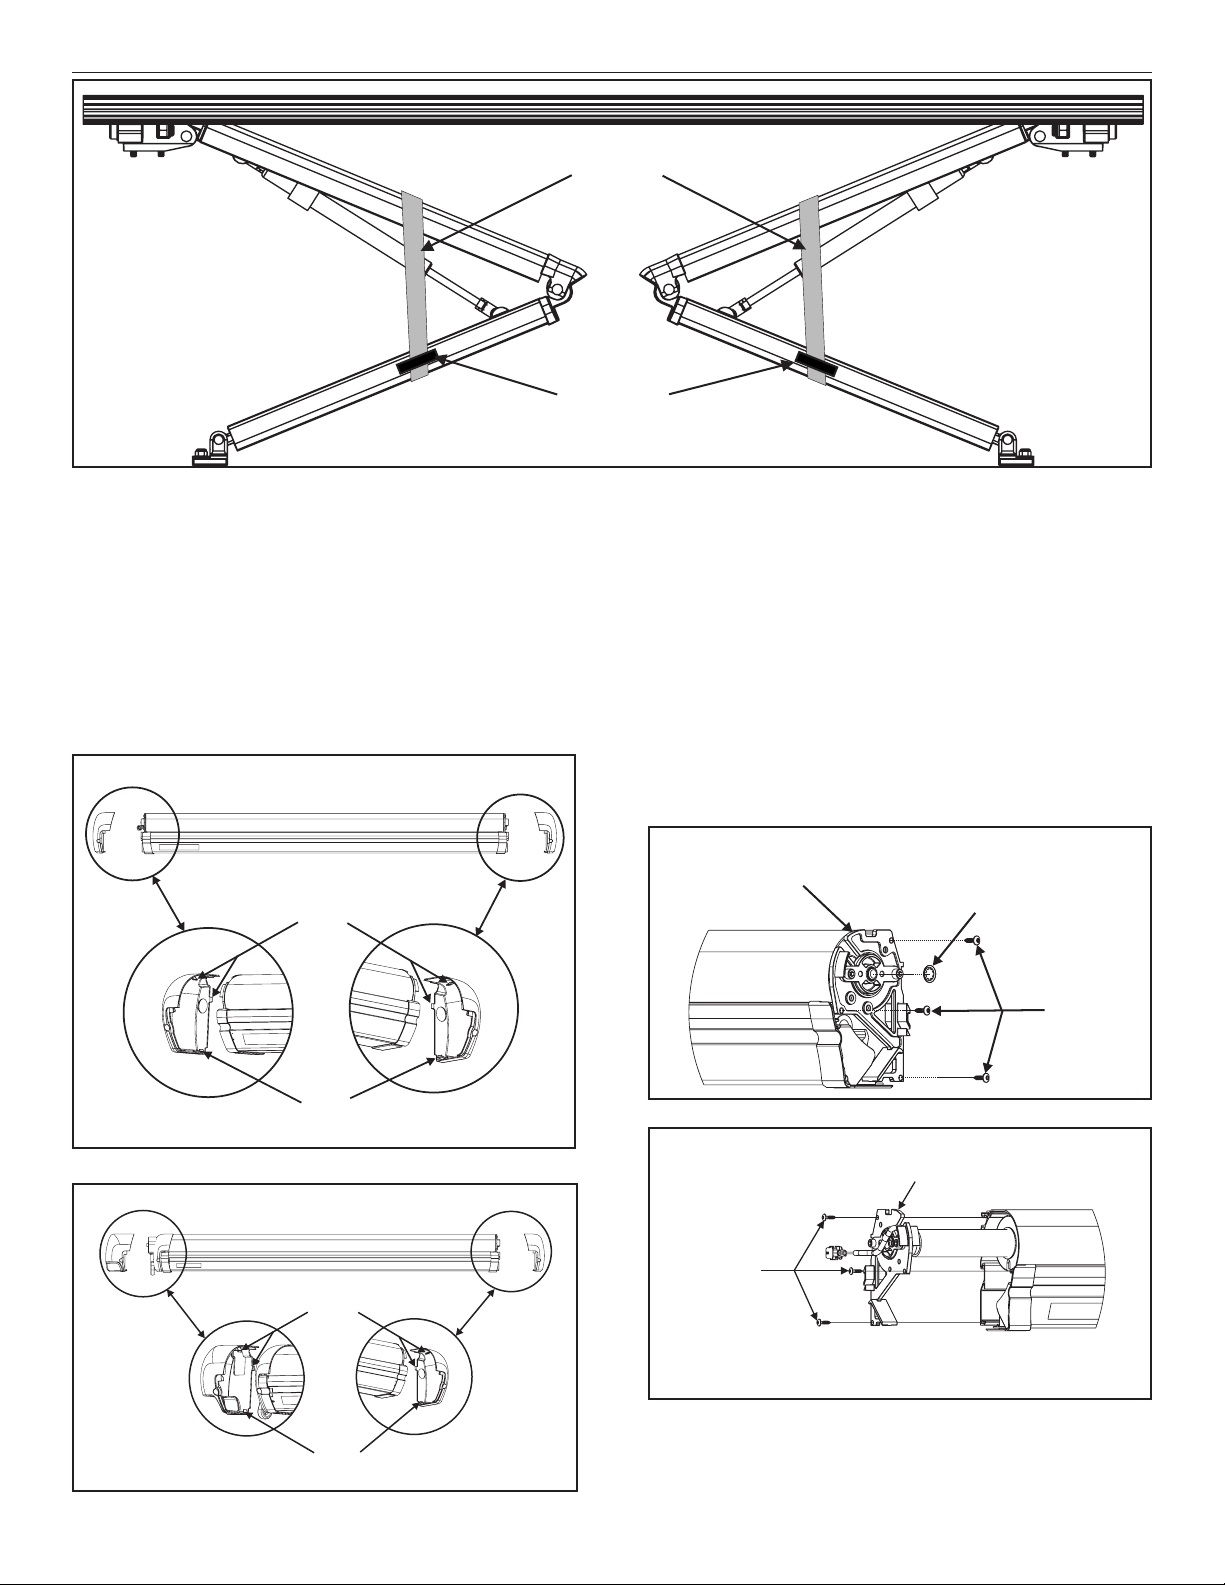
6. Replace the lead rail in reverse of steps 4 and 5.
7. When the fabric and lateral arms are in place
check alignment of the lead rail as follows:
a. Location of arm wrist from the end of the
lead rail: For an 48 inch awning, adjust
arms 4 - 5/8 inches from the end of the lead
rail. For a 56 inch awning, position arms 5
- 1/2 inches from the end of the lead rail.
Measure the distance from the end of lead
rail to the hex nut center. Fig. 3.
b. Extend the fabric completely. Retract awning
while checking for alignment. If awning is
out of alignment. Loosen arm wrist and
slightly shift position until awning alignment
is achieved.
8. Replace TEK screw removed in step 4 and the
end caps removed in step 3.
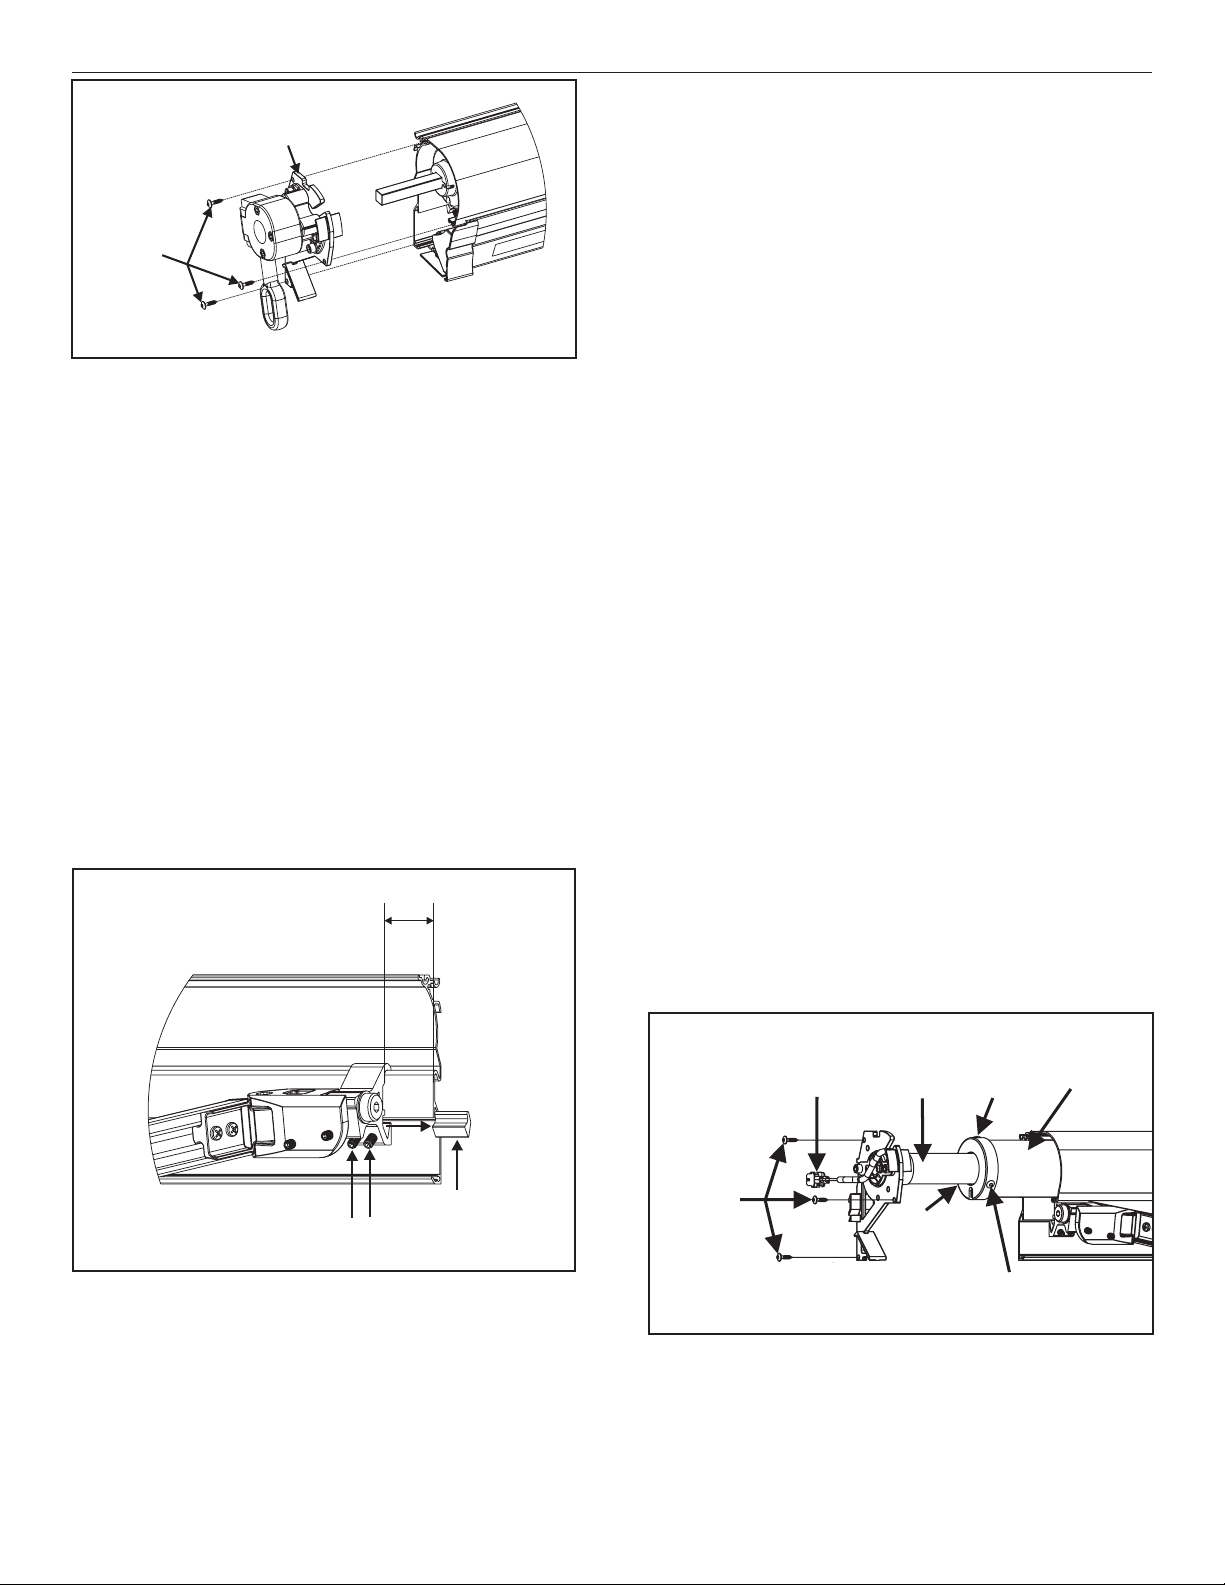
B. Lateral Arm Replacement
1. Open the awning.
a. For model series 976 awnings, using the
manual crank, turn the roller tube clockwise.
To extend the canopy 1 foot from coach.
See Fig. 1.
b. For model series 975 awings, using the
switch , extend the canopy 1 foot from
coach.
2. Tie down arms with safety straps to prevent
arms from springing forward during lateral arm
replacement. Fig. 4.
3. Secure each lateral arm to prevent from extend-
ing rapidly.
Note: A strap, rope, belt or nylon banding making a 8
inch loop can be slipped over the end of the lateral arm
elbow until it is snug. Place a piece of tape across the
loop material to prevent it from sliding off the lateral arm.
See Fig. 4.
Lateral arms under spring tension are
dangerous. Use extreme care. If not
controlled the arms will extend quickly. Keep
hands and clothing clear of awning arms, as
personal injury may result.
FIG. 3
Lead Rail
End Cap