14 15
FAQsBESOIN D’AIDE?
REMARQUES
Si vous avez besoin d’aide pour configurer ou utiliser votre Haven10 et
YetiPRO4000, consultez notre page de contact à www.goalzero.com/contact
ou appelez le 1888794-6250.
Étiquettes des disjoncteurs de gauche à droite:
Q: Quelle station d’alimentation portable Yeti recommandez-vous d’utiliser avec
leHaven10?
R: Le Haven10 est compatible uniquement avec la station d’alimentation Yeti PRO4000
et la batterie d’expansion Tank PRO4000.
Q: Combien de temps le système Haven10 peut-il faire fonctionner mon réfrigérateur?
R: Tout comme l’estimation des durées de fonctionnement des Yetis elles-mêmes,
lesdurées de fonctionnement du système Haven10 dépendent de ce que vous alimentez
(lumières ou réfrigérateur) et de la station d’alimentation portable Yeti que vous utilisez.
La quantité d’énergie consommée par un réfrigérateur dépend entièrement de la marque
et du modèle, ainsi que d’autres facteurs, comme la fréquence à laquelle vous l’ouvrez
et le fermez, et le degré de remplissage. Par exemple, un réfrigérateur consommant en
moyenne 55W fonctionnerait pendant environ 72heures à partir d’une Yeti PRO4000
(4000Wh/55=72,72). Pour plus d’informations sur les durées de fonctionnement et
d’autres exemples, consultez le guide d’utilisation de la station d’alimentation portable
Yetide Goal Zero.
Q: Est-ce que je peux emmener le Yeti PRO4000 à l’extérieur?
R: Facile, il suffit de débrancher la Yeti et de l’emmener là où vous en avez besoin.
A
C
E
G
I
B
D
F
H
J
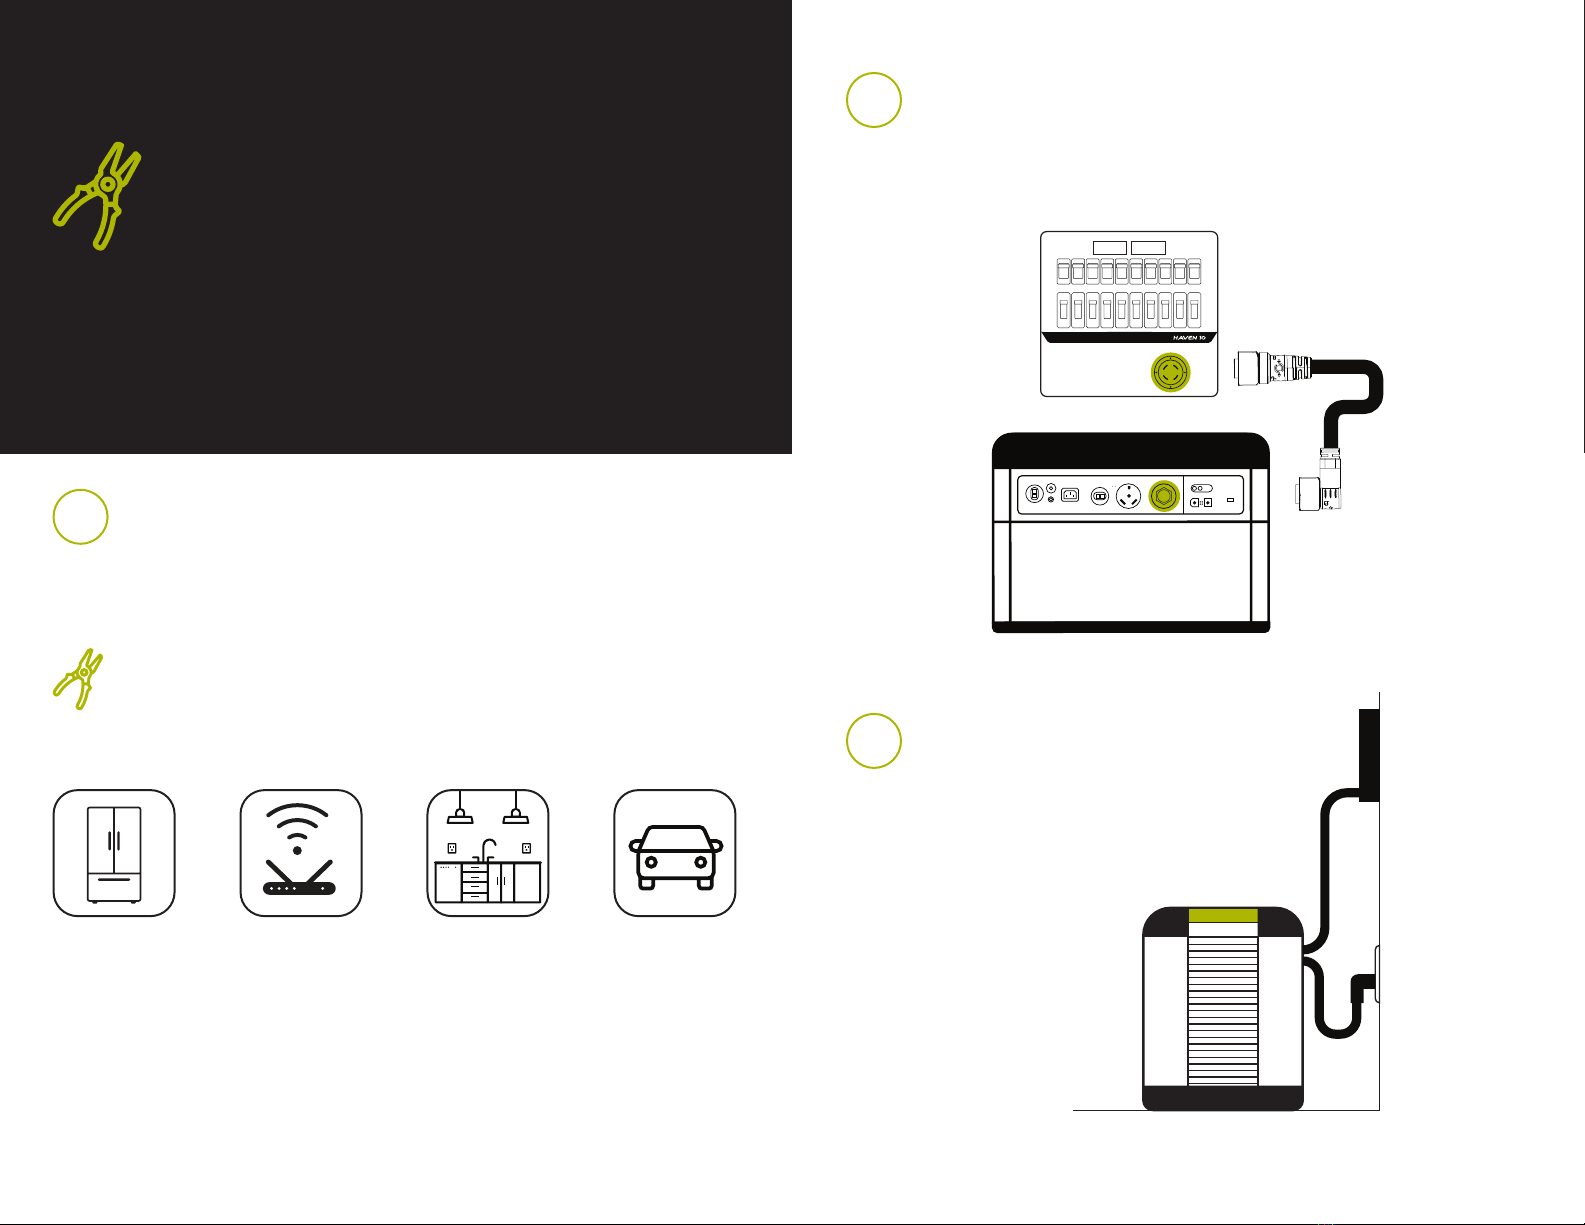
Câble de passage 3600W
Câble d’alimentation + mâle de 2,3m (8pi)
Ce câble remplace le cordon électrique fourni avec la Yeti PRO.
Veuillez conserver le cordon électrique en cas de besoin ultérieur.
• Le câble permet une commutation automatique de l’alimentation en moins de
10millisecondes (jusqu’à 3600W). Lorsque le réseau électrique s’arrête, les circuits
connectés au Haven10 basculent sur l’alimentation de la Yeti PRO. Pour profiter de
cette fonction, assurez-vous que la Yeti PRO4000 est connectée au commutateur
detransfert manuel Haven10 et que les circuits sont réglés sur " YETI ".
• Cela vous permet de charger la Yeti PRO4000 tout en transmettant simultanément
lecourant à vos circuits.
• Capacité de transfert jusqu’à 3600W lorsque la Yeti PRO est complètement chargée.
(120 V seulement)
• Si la Yeti PRO4000 est chargée à 1800W, elle peut continuer à transmettre
1800Wsupplémentaires