When using your photographic equipment, basic safety precautions should
always be followed, including the following:
1. Read and understand all instructions before using.
2. Close supervision is necessary when any appliance is used by or near children.
Do not leave appliance unattended while in use.
3. Care must be taken as burns can occur from touching hot parts.
4. The appliance switch is provided with the symbols 0 indicating off and 1
indicating on. The symbols and may be used for this purpose.
5. Do not operate appliance with a damaged cord or if the appliance has been
dropped or damaged – until it has been examined by a qualified serviceman.
6. Position the cord so that it will not be tripped over, pulled, or contact hot
surfaces.
7. If an extension cord is necessary, a cord with a current rating at least equal to
that of the appliance should be used. Cords rated for less amperage than the
appliance may overheat.
8. Always unplug appliance from electrical outlet before cleaning and servicing and
when not in use. Never yank cord to pull plug from outlet. Grasp plug and pull to
disconnect.
9. Let appliance cool completely before putting away. Loop cord loosely around
appliance when storing.
10. To reduce the risk of electric shock, do not immerse this appliance in water or
other liquids.
11. To reduce the risk of electric shock, do not disassemble this appliance, but take
it to a qualified serviceman when service or repair work is required. Incorrect
reassembly can cause electric shock when the appliance is used subsequently.
12. The use of an accessory attachment not recommended by the manufacturer
may cause a risk of fire, electric shock, or injury to persons.
13. Connect this appliance to a grounded outlet.
14. Disconnect this unit from its source of supply before replacing the projection
lamp.
15. This appliance has a polarized plug (one blade is wider than the other). To
reduce the risk of electric shock, this plug is intended to fit in a polarized outlet
only one way. If the plug does not fit fully in the outlet, reverse the plug. If it still
does not fit, contact a qualified electrician. Do not modify the plug in any way.
IMPORTANT SAFETY INSTRUCTIONS
SAVE THESE INSTRUCTIONS
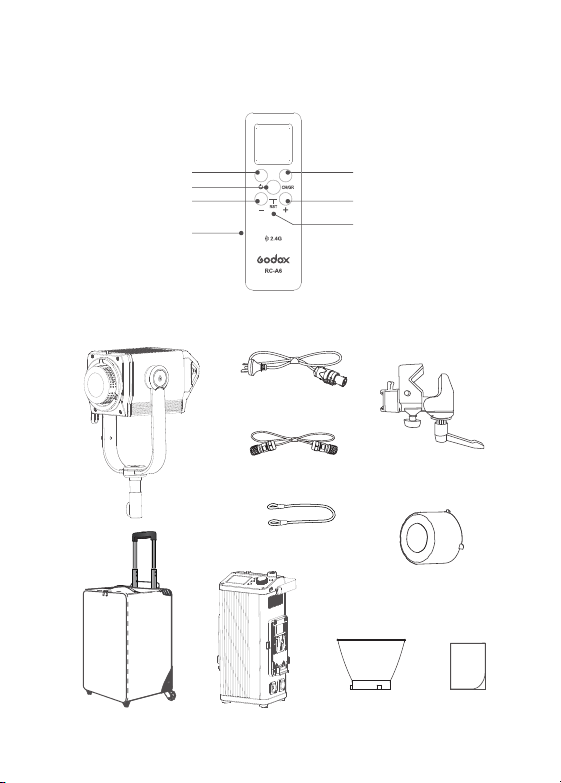
Thank you for purchasing!
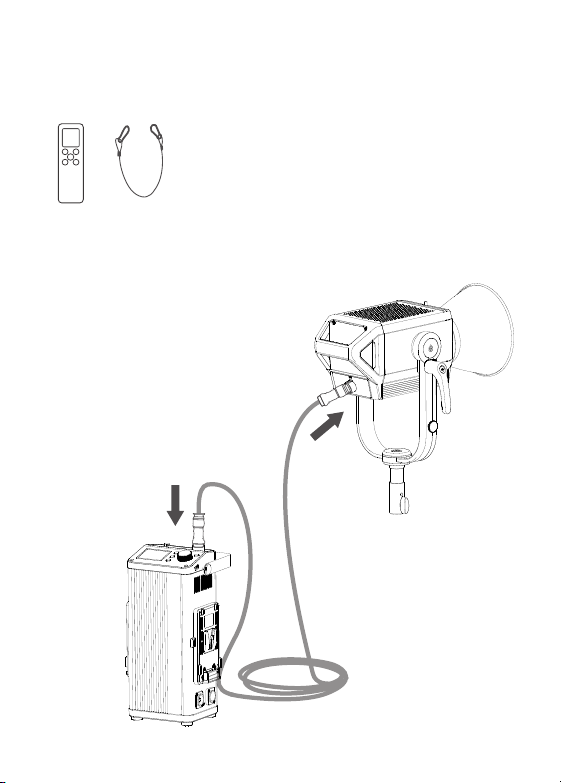
Godox M600D is a LED Light product with superior performance. It has a separation design of light
body and controller, high power, thousand-bit brightness adjustment and various dimming curves
functions, quite suitable for large photo studios, broadcast studios, Outdoors or large-scale field
scenes.
Features:
• 600W input power to create bright light output.
• Brightness adjustment is accurate to 0.1%, controlling the brightness in subtle scenes.
• 4 dimming curves: linear, S-curve, exponential, and logarithmic.
• Bowens mount is perfectly compatible with more optical accessories.
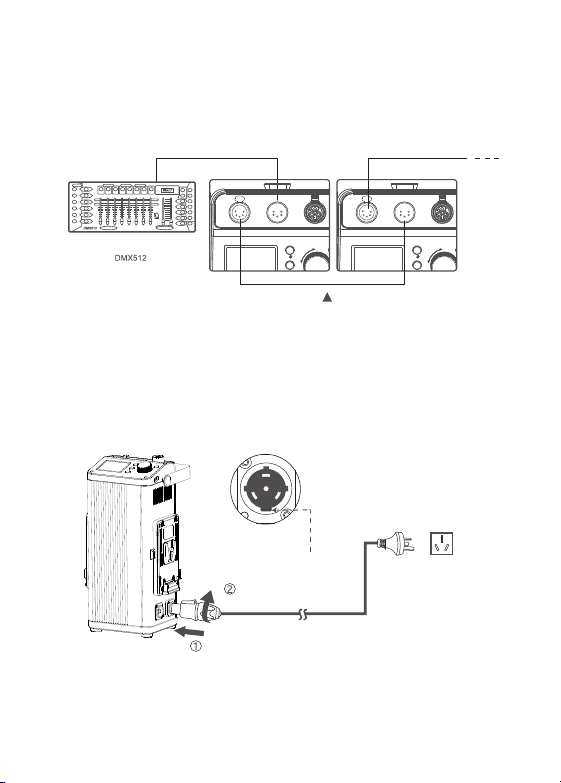
• Various professional control methods: Bluetooth control/DMX512 remote control/2.4G wireless
control.
• Super high color rendering index: CRI: ≥96, TLCI: ≥97
• 12 simulated scenes light effects: flash, lightning, TV, broken bulb, etc.
• Two power supply methods: AC power supply (110V~220V)and V-mount battery
power supply (14.8V or 26V).
• The side with yellow battery removal button supports unilateral power supply.
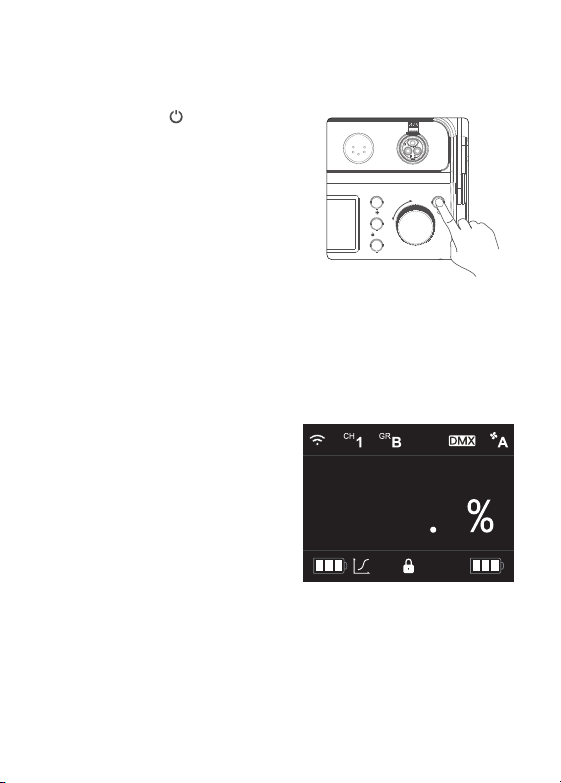
• 2.4 inches TFT panel,4 buttons, 1 knob, clear UI interface.
Always keep this product dry. Do not use in rain or in damp conditions.
Do not disassemble. Should repairs become necessary, this product must be sent to an
authorized maintenance center.
Keep out of reach of children.
As this product do not have waterproof function, please take measures of waterproof in
rainy or damp environment.
Do not leave or store the product if the ambient temperature reads over 40°C.
Do not use the product in the presence of flammable gases, chemicals and other similar
materials.
CAUTION: Hot parts!When the product is always on and flickering,please do not touch the
high temperature part of the LED head.
When replacing product accessories,please turn off the LED light and perform a cold cut.
The light source contained in this luminaire shall only be replaced by the manufacturer or
his service agent or a similar qualified person.
The lamp shall be changed if it has become damaged or thermally deformed.
The luminaire is intended for professional use only.
Foreword
Warning
- 21 - - 22 -