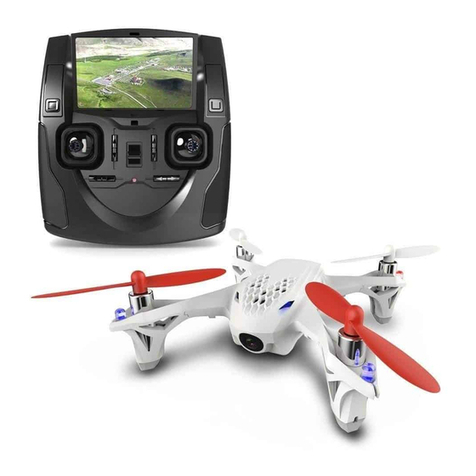
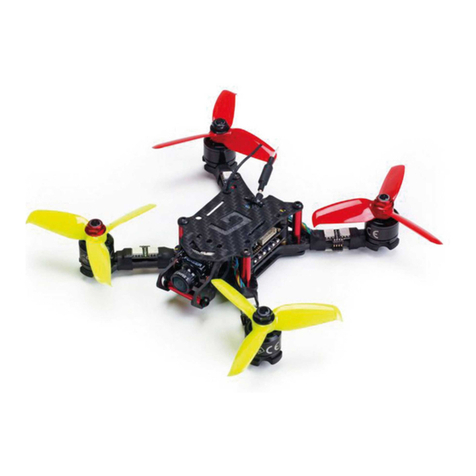
GRAUPNER Alpha 110 Q User manual

Manual
EN
Quadrocpter
S5012.RFH (Copter)
S5012.RTF (Copter with transmitter)
S5012.FPV (Copter with camera)
Part 1
Alpha 110 Q

2 / 28 S5012_Alpha_110_jh_V1
TEST VERSION, DO NOT USE FOR PRINTING

3 / 28
S5012_Alpha_110_jh_V1
TEST VERSION, DO NOT USE FOR PRINTING
Index
Introduction..........................................................................4
Service Centre .....................................................................4
Intended use .......................................................................5
Copter Alpha 110Q .............................................................5
Transmitter MZ-8 (only by S5012.RTF) ................................5
Package content .................................................................6
Technical data......................................................................6
Symbols explication ............................................................7
Safety notes .........................................................................7
Charging copter's battery.................................................11
Transmitter power supply.................................................11
Transmitter description (only by version S 5012.RTF)....12
Control elements on the transmitter...................................12
Mode setting ......................................................................13
Preparation before use .....................................................14
Receiver’s binding .............................................................14
Range test..........................................................................14
Factory reset......................................................................15
Example flight control MODE 1........................................16
Auto-flip function...............................................................17
Camera function by version S 5012.FPV .........................17
Installing the propellers ....................................................18
First flight ...........................................................................19
Receiver setting (only possible in connection with HoTT
transmitter with display) ...................................................19
Special function channel 6 ................................................19
Receiver's base settings...................................................20
Axis assignment ................................................................22
Roll and Nick setting .........................................................23
Multicopter Yaw settings ..................................................24
Transmitter's firmware update.........................................25
Declaration of conformity.................................................25
EXAMPLE........................................................................................ 25
S3056 Speed controller Ultra Control 20A .................................... 25
Notes on environmental protection .................................26
Care and maintenance......................................................26
Warranty .............................................................................26

4 / 28 S5012_Alpha_110_jh_V1
TEST VERSION, DO NOT USE FOR PRINTING
Introduction
Thank you very much for purchasing a Graupner Quadrocopter
Alpha 110. This Alpha 110 Quadrocopter is extremely versatile. This
manual is valid for all speed controllers listed on the cover sheet.
Read this manual carefully to achieve the best results with your
Alpha 110 Quadrocopter and first of all to safely control your mod-
els. If you experience any trouble during operation, take the
instructions to help or ask your dealer or Graupner Service Cen-
tre.
Due to technical changes, the information may be changed in
this manual without prior notice. Be always updated by check-
ing periodically on our website, www.graupner.de to be always
uptodate with the products and firmwares.
This product complies with national and European legal require-
ments.
To maintain this condition and to ensure safe operation, you must
read and follow this user manual and the safety notes before using
the product!
Note
This manual is part of that product. It contains important information
concerning operation and handling. Keep these instructions for future
reference and give it to third person in case you gave the product.
Service Centre
Graupner Central Service
Graupner/SJ GmbH
Henriettenstrasse 96
D-73230 Kirchheim / Teck
Email: service@graupner.de
Servicehotline
(+49) (0)7021/722-130
Monday - Thursday
9:15 am - 5:00 pm
Friday
9:15 am - 1:00 pm
Graupner USA
OPENHHBBY LLC
3245 University Ave
Suite 1520
San Diego, CA 92104
Website: www.graupnerusa.com
Phone: +1 855-572-4746
Email:[email protected]
Graupner in Internet For the service centers outside Germany please refer to our web
site www.graupner.de

5 / 28
S5012_Alpha_110_jh_V1
TEST VERSION, DO NOT USE FOR PRINTING
Intended use
Copter Alpha 110Q
The Alpha 110 Quadrocopter is a remote controlled Quadrocopter.
Other components are required to complete the functionality of
the Alpha 110 Quadrocopter. (See section required accessories).
Punctual technical information about the components of this kit
can be found in the Technical data section.
The 110D Quadrocopter is designed exclusively to be used as a
battery-powered, radio controlled model, any other use is not
allowed. For any improper use no warranty or liability is accepted.
Read through this entire manual before you attempt to assem-
ble or use or use the Alpha 110 Quadrocopter.
Graupner/SJ constantly works on the development of all prod-
ucts; we reserve the right to change the item, its technology and
equipment.
Target group
The Alpha 110 Quadrocopter is not a toy. It is not suitable for chil-
dren under 14 years. The assembly and operation of the Alpha
110 Quadrocopter must be performed by experienced modellers.
If you do not have sufficient knowledge about dealing with
radio-controlled models, please contact an experienced mod-
eller or a model club.
Transmitter MZ-8 (only by S5012.RTF)
This remote-control system may only be used for the purpose
specified by the manufacturer for operation of remote control
models without passengers. Any other type of use is impermis-
sible and may damage the system and cause significant prop-
erty damage and/or personal injury. No warranty or liability is
therefore offered for any improper use not covered by these pro-
visions.
Read through this entire manual before you attempt to install or
use the transmitter.
Graupner/SJ constantly works on the development of all prod-
ucts; we reserve the right to change the item, its technology and
equipment.
Target group
The product is not a toy. It is not suitable for children under 14
years. The operation of the mz-8 HoTT transmitter must be per-
formed by experienced modelers. If you do not have sufficient
knowledge about dealing with radio-controlled models, please
contact an experienced modeler or a model club.

6 / 28
TEST VERSION, DO NOT USE FOR PRINTING
Package content
S5012.RFH
Alpha 110 Quadrocopter
Propellers
Battery, battery charger
Manual
S5012.RTF
Alpha 110 Quadrocopter
Propellers
Battery, battery charger
S1008 MZ-8 HoTT transmitter
Manual
S5012.FPV
Alpha 110 Quadrocopter with camera and video transmitter
Propellers
Battery, battery charger
Manual
Technical Data

7 / 28
S5012_Alpha_110_jh_V1
TEST VERSION, DO NOT USE FOR PRINTING
Symbols explication
!
Always observe the information indicated by this warning sign.
Particularly those which are additionally marked with the CAU-
TION or WARNING. The signal word WARNING indicates the poten-
tial for serious injury, the signal word CAUTION indicates possibil-
ity of lighter injuries.
The signal word Note indicates potential malfunctions.
Attention indicates potential damages to objects.
Safety notes
This safety notes are intended to protect you and other people.
They are also used for safe handling the product. Therefore
please read this section very carefully before using the product!
Do not carelessly leave the packaging material lying around,
since it might become a dangerous toy for children.
Persons, including children, with reduced physical, sensory or
mental capabilities, or lack of experience or knowledge, or not
capable to assemble and use safely the Alpha 110 Quadrocopter
must not use the Alpha 110 Quadrocopter without supervision or
instruction by a responsible person.
Operation and use of radio-controlled models needs to be
learned! If you have never operated a model of this type before,
start carefully and make yourself familiar with the model's reac-
tions to the remote control commands. Proceed responsibly.
First, always perform a range and function test on the ground
(to do so, hold your model tight), before you use your model.
Repeat the test with running motor and with short throttle bursts.
Before you start using the remote control model, you have to
check the further relevant laws and regulations. These laws you
must obey in every case. Pay attention to the possibly different
laws of the countries.
The insurance is mandatory for all kinds of model operation. If
you already have one, so please inform yourself if the operation
of the respective model is covered by your insurance. If this is
not the case, conclude a special liability insurance policy for
models. We recommend to provide the Alpha 110 Quadrocopter
with a label, where are indicated the name, address, tel. n.,
E-mail and Insurance N. So that the copter can be clearly
assigned in the event of a crash.
Due to safety and licensing reasons (CE), any unauthorized
reconstruction and/or modification of the product is prohibited.
Only use the components and spare parts that we recommend.
Always use matching, original Graupner plug-in connections of
the same design and material.
Inform yourself before flying your
model on which maximum
altitude you can fly in the uncon-
trolled airspace over the starting
position and do not exceed it.
8 / 28 S5012_Alpha_110_jh_V1
TEST VERSION, DO NOT USE FOR PRINTING
Make sure that all of the plug-in connections are tight. When dis-
connecting the plug-in connections, do not pull the cables.
Protect the Copter from dust, dirt, moisture and other foreign
parts. It must be protected from vibration as well as excessive
heat or cold. The models may only be operated remotely in nor-
mal outside temperatures such as from -10°C to +55°C.
Only operate all your HoTT components using the current soft-
ware version.
If you have questions which cannot be answered by the operat-
ing manual, please contact us (contact information see page 3)
or another expert in the field.
WARNING
Safety notes during the use
Also while programming, make sure that a connected electric
motor cannot accidentally start. Injury risk by the turning propel-
lers! Always remove the propellers when programming. Pro-
gram always the motors stop switch on the transmitter. (See
transmitter manual)
Avoid shock and pressure. Check the Alpha 110 Quadrocopter
regularly for damages to the housings and cables, specially after
model crashes. Damaged or wet electronic components, even
if re-dried, should no longer be used!
Never touch the turning propellers, this can cause serious injury.
The propellers must be mounted securely, thrown parts can
cause serious injury.
Keep long hair, loose clothing such as scarves, loose shirts or
similar well away from the danger zone of the revolving propel-
ler, they may be withdrawn by the propeller, flying debris can
cause serious injury.
Observe the safety notes of the required components.
Safety notes for battery
CAUTION
LiPo batteries are not a toy. Persons, including children, with
reduced physical, sensory or mental capabilities, or lack of
experience or knowledge, or not capable to use safely the
battery must not use the battery without supervision or
instruction by a responsible person.
Any alterations to the battery, charger or charging cables
can cause serious injury. Risk of fire and explosions! Risk of
burns!
Do not use any damaged battery or charger, risk of short-cir-
cuit and fire!
!
!

9 / 28
S5012_Alpha_110_jh_V1
TEST VERSION, DO NOT USE FOR PRINTING
Storage
LiPo batteries should be stored with a voltage of about 3,8V per
cell. If the cell voltage falls below 3 V, then the battery must be
necessarily charged. Deep discharge and storage in discharge
status (cell voltage < 3V) make the battery useless. For transport
and storage the LiPo batteries must be placed in a safety case
e.g. No. 8371.
Safe use of the battery charger
WARNING
Persons, including children, with reduced physical, sensory
or mental capabilities, or lack of experience or knowledge,
or not capable to use safely the charger must not use the
charger without supervision or instruction by a responsible
person.
The battery charger should be connected only to power
sources which voltage complies with the indications on the
label! See technical data. Risk of fire!
The connection socket for the battery is polarized, Never use
force while inserting the connector . It must plug easily.
Short-circuit and fire risk!
The battery charger can be used only in dry spaces.
The charger should always be supervised during charge and
it should be used only in rooms fitted with a smoke detector.
A damaged charger or power cord must not be used until
they are repaired by the manufacturer, his customer service
or a suitably qualified person. Electric shock risk!
The charger is only suitable for LiPo batteries, it cannot
charge other types of batteries (e.g. Nixx, LiFe, Pb). If you
connect other type of batteries to the charger, both battery
and charger can be damaged, risk of fire and explosions!
A wet charger, even if re-dried, should no longer be used.
Risk of electric shock!
Due to safety and licensing reasons (CE), any unauthorized
reconstruction and/or modification of the product is prohib-
ited. Risk of electric shock!
Protect the charger from dust, dirt, moisture and other for-
eign parts. It must be protected from vibration as well as
excessive heat or cold.
Do not cover the charger during charge, the ventilation slots
must be free. Risk of fire!
!

10 / 28 S5012_Alpha_110_jh_V1
TEST VERSION, DO NOT USE FOR PRINTING
The charger and the battery to be charged must be placed
on a non-combustible, heat-resistant and non-conducting
surface during operation. Do not use the charger near easily
flammable materials.
Always disconnect the charger from the power supply when
it is not in use.
Note:
After you perceive your model, check if all components are
inside the package and eventual damages.
Remove the battery from the model when transporting or when
not in use.
During transport protect the model and the transmitter from
damages.
Care:
Clean the Copter, the battery and the charger only with the suit-
able cleaners. Good is a spirit-free cloth. Never use chemical
cleaners, solvents, petrol, alcohol or similar.
P

11 / 28
S5012_Alpha_110_jh_V1
TEST VERSION, DO NOT USE FOR PRINTING
Charging copter's battery
Plug the USB connector of the included charger to a suitable 5
V port.
1. The LED on the charger will light green.
2. Plug the battery connector to the charger charging port.
3. The LED will turn from green (stand by mode) to red (charge
mode).
When the charge process has finished, the LED lights on green
again. Then is the battery fully charged.
4. Unplug first the battery connector from the battery charger
and then the USB cable from the power supply.
Transmitter power supply
The mz-8 HoTT transmitter is normally delivered with three alka-
line batteries.
The transmitter battery voltage is monitored by a status LED
during operation.
If the voltage drops below 3,2 V, an acoustic alarm will sound
and the red status LED starts to blink quickly. Now at the latest,
stop operation and change the transmitter batteries!
Inserting the transmitter batteries
To insert the transmitter batteries remove the battery case cover
on the back side of the transmitter. Insert the included batteries
in the holder paying attention to the correct polarity (see figure)
Removing the transmitter batteries
If the transmitter is not going to be used for a long time, the bat-
teries should be removed from the device to avoid damages to
the transmitter due to electrolyte leaks.

12 / 28 S5012_Alpha_110_jh_V1
TEST VERSION, DO NOT USE FOR PRINTING
Transmitter description (only by version S5012.RTF)
Control elements on the transmitter
Front side
1 Motor-off switch
2 LED, yellow (indicates motor-off active)
3 LED, red (indicates camera recording)
4 LED, green (if off indicates: Attitude mode, if on: Rate mode)
5 LED, red (indicates status and binding)
6 Switch for Attitude and Rate mode
7 Right control stick
8 Trim
9 Button for photographs (only by Alpha 150Q)
10 Button for video recording (only by Alpha 150Q)
11 On/off switch
12 Switch for LED lights and binding
13 Switch for Attitude and Rate mode
14 Trim
15 Left control stick
mz-8
POWER
SPEED SNAP
LED RECORD
1 2 3 4 5 6
7
8
9
10
11
12
13
14
15

13 / 28
S5012_Alpha_110_jh_V1
TEST VERSION, DO NOT USE FOR PRINTING
Back side
16 Case screws
17 DATA socket
18 Battery case
19 Fixture points for attachment holder
Mode setting
The transmitter MZ-8 HoTT is normally delivered in mode 1,
throttle on the right, or in mode 2, left throttle. This configuration
can be changed through a software.
You can find the software as free download on the mz-8 HoTT
item page on www.graupner.de.
If you have the mode 1 version, you can change your transmit-
ter into mode 3 through the software.
If you have the mode 2 version, you can change your transmit-
ter into mode 4 through the software.
»MODE 2« (left thr.)»MODE 1« (right thr.)
Nick forward
Nick backward
Yaw left
Yaw right
Motor full thr.
Motor idle
Roll left
Roll right
Motor full thr.
Motor idle
Yaw left
Yaw right
Nick forward
Nick backward
Roll left
Roll right
S + -
19 16 17 16
16
18
1616
16

14 / 28 S5012_Alpha_110_jh_V1
TEST VERSION, DO NOT USE FOR PRINTING
Preparation before use
The following components are required to use the model: Trans-
mitter HoTT (MZ-8 / MX-12 / MZ-12 or higher) MZ-8 included
by S5012.RTF.
For the version S5012.FPV will be required a video goggle or an
FPV monitor to fly in FPV.
Receiver
The transmitter is already completely set to work properly with
the Alpha 110 Quadrocopter. To program some parameters, refer
to the section "Receiver settings".
Installing the battery in the copter
Fix the battery in the battery case. Place the battery so that the
Alpha 110 Quadrocopter’s center of gravity is in the middle.
Receiver’s binding
The included receiver is already bound to the MZ-8 transmitter
in the version S 5012.RTF. In the other versions without included
transmitter, you can bind the copter receiver with your favorite
HoTT transmitter. Thereto read the manual of your HoTT trans-
mitter. The copter receiver is already in binding mode as soon
as it is switched on. Then siply start the binding process in the
transmitter.
Binding with the MZ-8 transmitter
If you want to bind the copter with the MZ-8 transmitter push
the "LED" button on the transmitter when the copter is switched
on.
If the binding process was successful the status LEDs will light
red on the transmitter and green on the copter.
Range test
The integrated range test reduces the transmitter output so that
you can perform a function test at a distance between 5 and
about 10 m.
Perform the range test for the Graupner-HoTT system according
to the following instructions. It is useful to have an assistant to
help you with the range test.
Switch on the transmitter and the copter then wait until the green
LED on the copter lights. You are now able to monitor control
movements.

15 / 28
S5012_Alpha_110_jh_V1
TEST VERSION, DO NOT USE FOR PRINTING
Place the model on a flat surface (cement, mowed lawn or
ground) so that the receiver antennas are at least 15 cm above
the ground. It may therefore be necessary to place a support
underneath the model during the test.
Hold the transmitter at hip level at a slight distance from your
body.
You can start the range test process by pushing simultaneously
the "SPEED + SNAP" buttons.
The red status LED on the transmitter will start to blink quickly
and a signal tone is emitted twice each two seconds.
After the 90 second range test, the transmitter switches back to
full output, and the signal tone stops.
You can stop the range test in every moment by pushing the
POWER button.
During the 90 seconds, walk away from the model and move
the sticks. If you detect an interruption in the link within a range
of about 5 - 10m at any time, attempt to reproduce it.
Move further away from the model until it does not respond per-
fectly. Move further away from the model until it does not respond
perfectly.
At this location, wait for the remainder of the test period with the
still operable model. The model should still react to control com-
mands once the range test is finished. If this is not 100% the
case, do not use the system and contact our Service depart-
ment.
Perform a range test before each flight, and simulate all control
movements that could occur during the flight. In order to guar-
antee a safe model operation, the range must always be at least
5 - 10m on the ground.
Attention!
Never start a range test on the transmitterduring normal model
operation!
Factory reset
If it was necessary to erase all the values saved in the copter,
you can make a factory reset. Therefor proceed as follows:
Attention! all model memories will be deleted!
Push all the trims to the inside and then switch the transmitter
on. In this way all the saved values will be deleted.

16 / 28 S5012_Alpha_110_jh_V1
TEST VERSION, DO NOT USE FOR PRINTING
Example flight control MODE 1
Climb - Sink
Turn on its own axis
Roll to the right and left
mz-8
POWER
SPEED SNAP
LED RECORD
mz-8
POWER
SPEED SNAP
LED RECORD
mz-8
POWER
SPEED SNAP
LED RECORD
Climb - Sink
Climb - Sink
Climb - Sink
Climb - Sink
Climb - Sink
Climb - Sink

17 / 28
S5012_Alpha_110_jh_V1
TEST VERSION, DO NOT USE FOR PRINTING
Forward and backward
Auto-flip function
The copter can autonomously perform a roll by pushing a but-
ton if, while flying it in Attitude mode, you push the neutralizing
control stick (the opposite to the throttle stick), a quick acoustic
signal is emitted for 5 seconds. If during these 5 seconds you
move the nick or roll control more than 50%, the Quadrocopter
performs autonomously a 360° turn (Flip) in the direction of the
control that you moved. The copter cannot always come back
to its prior position, eventually you may have to correct its posi-
tion after the roll.
Camera function by version S 5012.FPV
Through the installed camera and the video transmitter is emit-
ted a video signal. The transmission starts as soon as you con-
nect the copter battery. Scan the transmission signal of the cop-
ter in your video goggles or video monitor.
SPEED
If you push the "SPEED" button you can switch between video
transmission channels during the flight.
The "SNAP" and "RECORD" buttons are functionally only in the
model Alpha 150Q, because this model is equipped for video
recording on an SD memory card.
mz-8
POWER
SPEED SNAP
LED RECORD

18 / 28 S5012_Alpha_110_jh_V1
TEST VERSION, DO NOT USE FOR PRINTING
Installing the propellers
CAUTION
Risk of injury through rotating propellers by motors start.Always
unplug the connector to the battery before working on the pro-
pellers.
Install the propellers as shown in the picture below. Pay atten-
tion to install the proper propeller to each motor. The propeller
rotation sense is written on the propeller (R/L)! The image rep-
resents the copter seen from the top.
white, R+L (front 1+2) / red, R+L (back 3+4)
1 = Clockwise motor 2 = Counter-clockwise motor
propeller (.L) propeller (.R)
4 = Counter-clockwise motor 3 = Clockwise motor
propeller (.R) propeller (.L)
!
2
1
43

19 / 28
S5012_Alpha_110_jh_V1
TEST VERSION, DO NOT USE FOR PRINTING
First flight
Choose a free area for your first flight. Select first always the Atti-
tude mode because so the copter is easier to control and the
throttle course is different in Rate mode. Take firstly confidence
with the flight attitude of the Alpha 110Q. Proceed carefully and
responsibly.
Initialization of the gyro
Once the model has been switched on, the gyro immediately
becomes active but still needs to be initialized. To initialize the
gyro, keep your model still when you switch it on. The calibra-
tion process can only be performed when the receiver is abso-
lutely still. After 3 seconds in still position you will hear beeps
emitted by all motors. The signal tone can vary depending on
the esc model. These "wiggles" signal that initialization has been
successful and that calibration is complete. Always wait until the
calibration process has finished before starting to fly the model.
The motors will not start until the calibration is complete.
CAUTION
If the copter is used for long time (>1min) in Acro 3D mode the
receiver can loose its position information and the copter can
move itself out of control. Before switching back to Attitude
mode, hover the copter for 30 s or land it in Rate mode, so that
the receiver can reset the position.
Receiver setting (only possible in connection with HoTT transmitter with display)
Special function channel 6
The auto-flip function allows you to flip your copter in a very easy
way. It is essential that you control in Attitude mode (function not
allowed in Rate mode).
The auto-flip function must be controlled by channel 6. For this
program a 2-way switch (e. g. SW1) in the transmitter control
menu on channel 6 with the following values:
Auto-flip function on = Channel 6 > 110%
Auto-flip function off = Channel 6 < 110%
Activate the switch and within 5 sec move the nick or roll stick
to more than 50% of its course, then the copter makes auton-
omously a flip in the selected direction. After the flip it is possible
to have some little position movements (<10°).
Initialization by switching on
!

20 / 28 S5012_Alpha_110_jh_V1
TEST VERSION, DO NOT USE FOR PRINTING
Receiver's base settings
Type
Quadro x, Quadro +, Tri L, Tri R
Here it must always be selected the setting Quadro X.
Channel connections to the receiver for the different copter
types.
Connect the speed controllers of the motors to the receiver fol-
lowing the proper scheme (see next page "Connection scheme
of different copter types").
In case of tricopter use only digital servos for servo 4.
Motor direction seen from the top of the copter!
MODE
ESC settings for the learning of the controller the receiver K1 sig-
nal will be passed directly to the controller.
Normal is set for ‘normal‘ multicopter (without reverse rotation).
Acro 3D setting for multicopter whose speed controllers are
equipped with reverse rotation. (Acro flight mode)
Note:
For safety reason the Type and Mode changes take effect after
switching off and on (only for this parameter).
CAUTION
Risk of injury by rotating propellers when motors are running.
The motors can start while switching from Attitude to Rate
mode. Hold the throttle stick in central position when you switch.
Install the propellers only as very last operation before flight.
Start and land always in Attitude mode. Note that in Rate mode
the throttle curve has different reaction. (See sketch on the right)
Example: If the throttle stick is down when you turn in rate mode,
the motors run at once fully backward.
Step 2
Basic settings
!
Other manuals for Alpha 110 Q
1
This manual suits for next models
3
Table of contents
Other GRAUPNER Quadcopter manuals

GRAUPNER
GRAUPNER Alpha 150Q User manual

GRAUPNER
GRAUPNER HoTT Hornet 250 User manual

GRAUPNER
GRAUPNER Alpha 150Q User manual

GRAUPNER
GRAUPNER Alpha 300 Q User manual

GRAUPNER
GRAUPNER Race copter alpha 250 Q User manual

GRAUPNER
GRAUPNER Alpha 110 Q User manual

GRAUPNER
GRAUPNER Alpha 300 Q User manual

GRAUPNER
GRAUPNER Hott Alpha 250Q User manual