GREAT PLAINS Super Kybolt User manual

WARRANTY
Great Planes Model Manufacturing Co. guarantees this kit to befreefromdefectsinboth
materialand workmanshipat thedateofpurchase.Thiswarrantydoesnot coverany
component parts damaged by use or modification. Innocase shall Great Planes' liability
exceed the original cost of the purchased kit. Further, Great Planes reserves the right to
change or modify this warrantywithoutnotice.
Inthat Great Planes has no controlover the final assembly or material used forfinal
assembly, no liability shall beassumed nor accepted forany damage resulting fromthe use by
the user of the finaluser-assembled product. Bythe act of using the user-assembled product
theuseraccepts allresultingliability.
Ifthe buyer isnotprepared to accept the liabilityassociated with theuseofthis
product, heisadvised to immediatelyreturn this kit innew and unusedcondition to the
place of purchase.
READTHROUGH THIS INSTRUCTION
BOOK FIRST.ITCONTAINS IMPORTANT
INSTRUCTIONSANDWARNINGS
CONCERNINGTHE ASSEMBLYAND
USEOF THIS MODEL.
P.O.BOX 788URBANA, ILLINOIS61801 (217) 398-8970
ENTIRE CONTENTS © Copyright 1992,HOBBICO,INC.
SKY6P03V1.1

TABLE OF CONTENTS
INTRODUCTION..........................................3
PRECAUTIONS............................................ 3
OTHER ITEMS REQUIRED.......................... 4
SUPPLIES AND TOOLS NEEDED ...............4
DECISIONS YOU MUST MAKE NOW..........5
ABBREVIATIONS
.........................................
5
TAIL FEATHERS..........................................7
BUILD THE FINAND RUDDER.................... 7
BUILD THE STABILIZER AND ELEVATORS. 8
TEMPORARILY INSTALL HINGES .............10
FUSELAGE ASSEMBLY..............................11
PREPAREFUSE SIDES...............................11
ASSEMBLE FUSELAGE.............................. 16
DRILL ENGINE MOUNT...............................16
FITFUEL TANK AND
FUELPROOF TANK COMPARTMENT......... 16
INSTALL TAIL PUSHRODS.......................... 18
SOLDERING HINTS.....................................19
ASSEMBLE THE CABANES........................ 20
SETTING THETOP WING INCIDENCE ......21
SOLDERING THE CABANE
WIRES TOGETHER.....................................22
INSTALL TOP SHEETING............................23
ATTACH THE TAIL SURFACES
TO THE FUSELAGE
....................................
26
WING
...........................................................
28
SPARS......................................................... 28
BUILD THE BOTTOM WING .......................29
BUILD THE TOP WING................................31
JOIN THE TWO TOP WING HALVES ..........33
INSTALL THE TOP WING SHEETING .........37
FINISHTHE TOPWING...............................42
BUILD THE INTERPLANE STRUTS ............ 44
JOIN AND SHEET THE BOTTOM WING ....46
FINISHTHE BOTTOM WING.......................49
FINISH AND ATTACH THE WING................55
FINAL ASSEMBLY......................................57
BUILD THE BOTTOMWING FAIRING......... 57
INSTALL THE LANDING GEAR
...................
58
ASSEMBLETHECOWL..............................59
PREPARE THE CANOPY
............................
62
INSTALL THE CONTROL HORNS............... 62
MAKE THE TOP WING LOCK...................... 63
BALANCE THE AIRPLANE LATERALLY...... 63
FINAL SANDING..........................................64
COVERING.................................................. 64
GLUE THE AILERON HINGES....................64
GLUE ELEVATOR AND RUDDER HINGES. 64
GLUE CANOPY INPLACE ..........................64
ASSEMBLE WHEEL PANTS........................65
STRENGTHEN AND FUEL PROOF ............66
WING SEATING........................................... 67
FINAL HOOK-UPS.......................................67
CONTROL THROWS....................................68
BALANCE YOUR MODEL............................68
FINAL CHECKS...........................................68
PRE-FLIGHT................................................69
CHARGE THE BATTERIES.......................... 69
FIND A SAFE PLACE TO FLY......................69
GROUND CHECK THE MODEL
..................
69
RANGE CHECK YOUR RADIO.................... 70
ENGINE SAFETY PRECAUTIONS
..............
70
AMA SAFETY CODE...................................70
FLYING........................................................71
2-VIEW DRAWING.......................................72
Metric Conversion Chart
Inchesx 25.4= mm(conversion factor)
1/64"= .4mm
1/32"= .8mm
1/16" = 1.6mm
3/32" = 2.4mm
1/8"= 3.2 mm
5/32" = 4 mm
3/16" = 4.8mm
1/4"= 6.4 mm
3/8" = 9.5 mm
1/2"= 12.7mm
5/8"= 15.9mm
3/4" = 19mm
1"= 25.4mm
2"
=
50.8
mm
3"= 76.2 mm
6" = 152.4mm
12" = 304.8mm
15"
=
381 mm
18"= 457.2mm
21" = 533.4mm
24" = 609.6 mm
30" = 762 mm
36" = 914.4mm
-2-

WARNING! THISISNOTA TOY!
THIS ISNOTA BEGINNER'S AIRPLANE!
This R/C kitand the model you willbuildisnot a toy!Itiscapable of serious bodily harm and
property damage ITISYOUR RESPONSIBILITY AND YOURS ALONE — to build this kit correctly, to
properly install allR/C components andflyinggear (engine, tank, pushrods, etc)and to test the model
and flyit only with experienced, competent help, using common sense and inaccordance with allsafety
standards asset down inthe Academy of Model Aeronautics Safety Code Itissuggested that you join
the AMAand become properlyinsuredbeforeyouattemptto flythismodel IFYOU AREJUST
STARTING R/C MODELING, CONSULT YOUR LOCAL HOBBY SHOPOR WRITE TO THE ACADEMY
OF MODEL AERONAUTICS TOFINDAN EXPERIENCED INSTRUCTORINYOUR AREA.
Academy of Model Aeronautics
1810 Samuel Morse Dr.
Reston,VA22090 (703)435-0750
INTRODUCTION
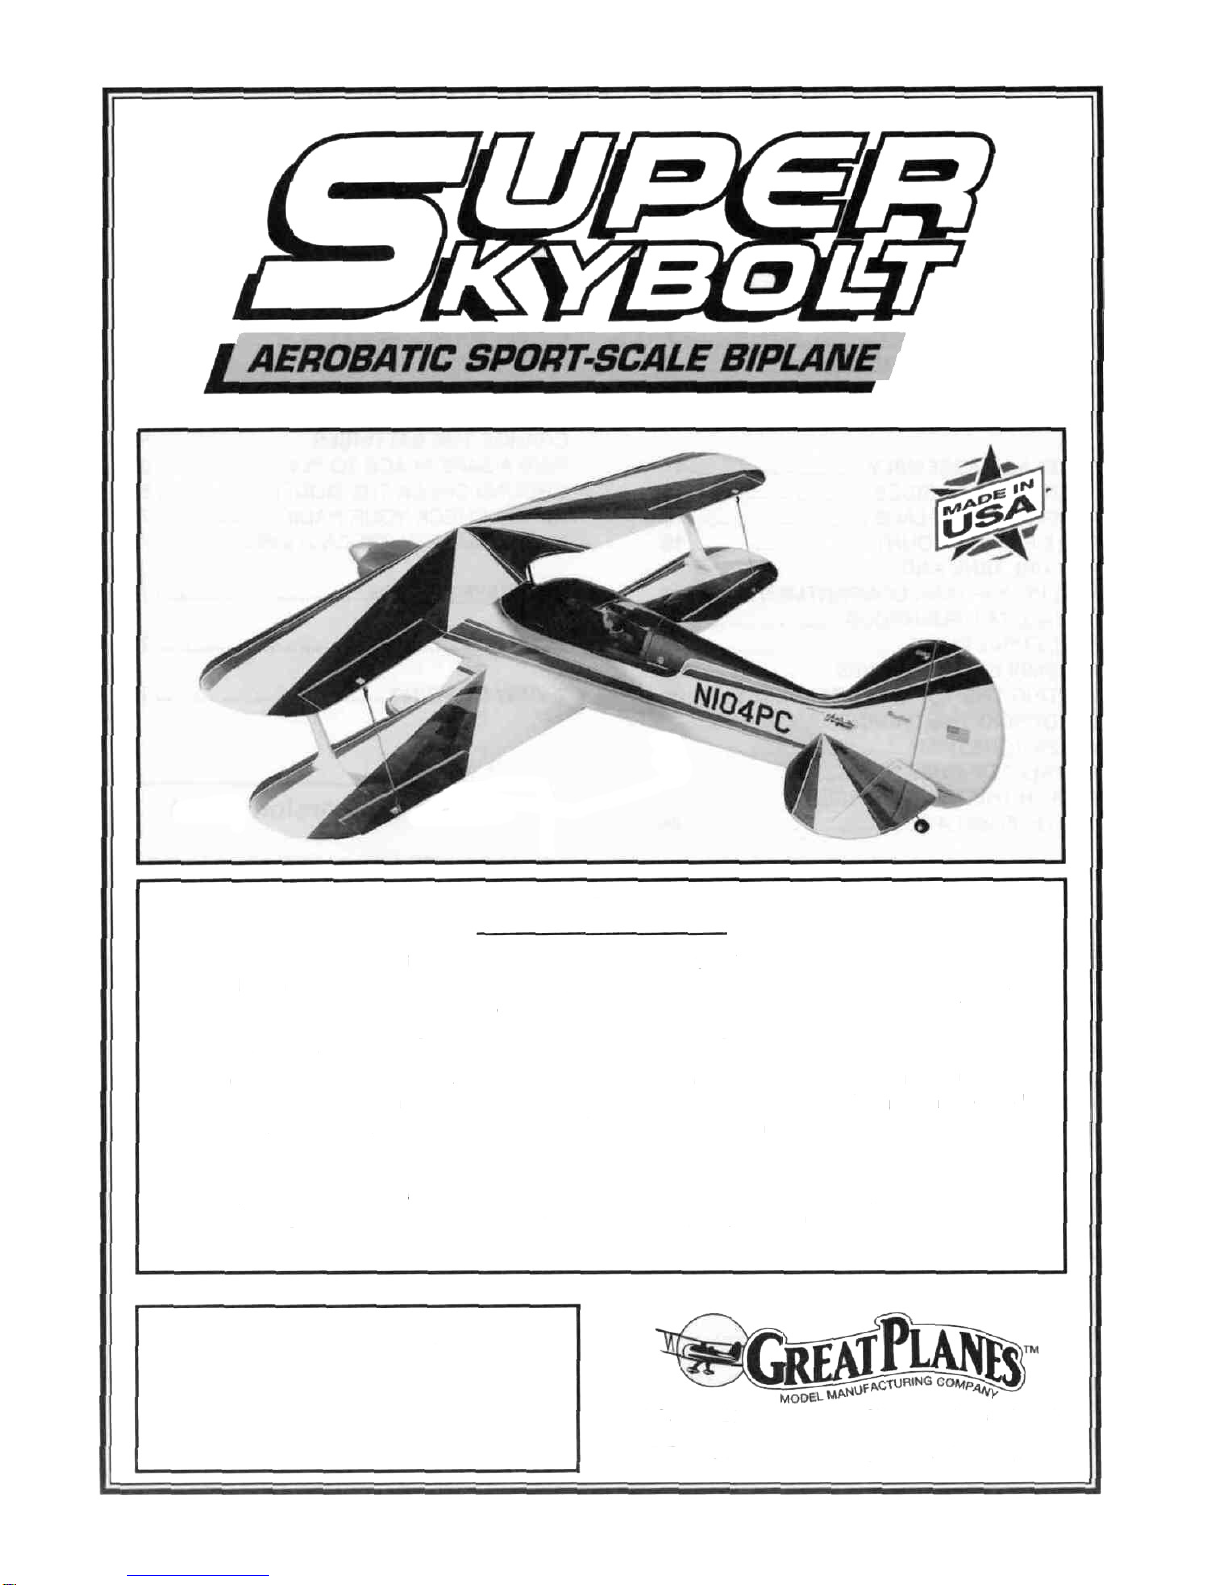
Congratulationsandthankyoufor
purchasing the Great Planes SUPER SKYBOLT'
The skyboltincorporatesseveralnew design
features never beforefound ina biplane kit The
revolutionarywingattachmentsystemmakes it
incredibly easy toassemble and disassemble at
the field using only a screwdriverItalso features
several new constructiontechniques that make it
the easiest and straightest building biplane ever!
The Great Planes Super Skybolt is a high
performance biplane that ismodeled after the full
size Skybolt Itnot only looks beautiful,but it is
also thesmoothestand most predictable flying
biplane we have ever flownHowever, this isnot
abeginner's airplane! While the Super Skybolt
is not difficulttobuild and fliesgreat,we must
discourageyoufromselectingthiskit as your
firstR/C airplane Itis highly maneuverable, and
lacks theself-recoverycharacteristicsof a good
basictrainersuchastheGreatPlanesPT
Series airplanes On the other hand, ifyouare
confidentwithyourflyingskilland can safely
handleaileronairplanessuchastheGreat
Planes Ultra-Sport Series or Big Stick Series,
the Super Skybolt isan excellent choice Ifyou
currentlyflyan aileronairplane,but youare
unsureabout yourabilitytohandle theSuper
Skybolt, we recommend that you buildand flya
low-wing sport plane first.
Please inspect allparts carefully before
starting to build!Ifany parts are missing,
broken or defective, or ifyou have any
questions about building or flyingthis
airplane,pleasecallusat (217) 367-2069
and we'llbe gladtohelp. If youare
callingfor replacement parts, pleaselook
up thepartnumbersandthekit
identification number (stamped on the
endof the carton) and have them ready
when calling.
PRECAUTIONS
1You must build the plane according to the
plans and instructions. Do not alter or modify
the model, as doing so may result inan unsafeor
unflyablemodel Ina fewcasestheplans and
instructions may differslightly fromthe photos In
thoseinstancesyoushouldassumetheplans
and writteninstructionsarecorrectAlso,you
may notice a slight differenceinlength between
longer parts and the plans This isnormal and is
caused by the plans expanding and shrinking with
the changing moisturecontent inthe air Donot
modify the parts to fitthe plan
2You musttake time to buildstraight, true and
strongIMPORTANT- Glueshouldneverbe
substitutedfora good-fittingjointTake a little
extratime toget a good fittingjointand glue it
properlyItwillbe stronger,neater,and much
lighter than a bad joint heldtogether with a glob
of glue!
3-

3You must use a proper R/C radio that isinfirst
class condition and meets the currentAMAand FCC
requirements and the requirements of your local flying
club,thecorrectsizedengineand correct
components (fueltank, wheels, etc.).
4You mustproperlyinstallallR/Candother
components so that the model operates properly on
the ground and inthe air.
5.You must test the operation of the model before the
firstandeachsuccessiveflighttoinsurethatall
equipment is operating,and youmust make certain
that the model has remained structurally sound.
6You must fly the model onlywith thecompetent
help of a wellexperiencedR/C pilot if youare not
already an experienced and knowledgeable R/C pilot
atthis time.
Note: We, as the kit manufacturer, provide
you with a top quality kit and great
instructions, but ultimately the quality and
flyability of your finished model depends on
how you build it; therefore, we cannot in any
way guarantee the performance of your
completedmodel, andnorepresentationsare
expressed or implied as to the performance
or safety of your completed model.
Remember: Take your timeand follow directions
to end upwith a well-built model that isstraight
and true.
OTHER ITEMS REQUIRED
DFour-channel radio with 4 or 5 servos
DPropellers (Top Flite® Power Point™ recommended
-see engine instructions for recommended sizes)
D2-1/2"(63 5mm)Spinner
D14oz Fuel Tank
DIron-on Covering Material (TopFlite MonoKote®
recommended)
DFuelproof Paint forwheel pants and cowl
NOTE Top Flite has paint available that matches
Super MonoKote, andisavailable inconvenient
spray cans
DSilicone Fuel Tubing
D1/16" (1 5mm) thick Wing Seating Tape
DLatexFoamRubberPadding(Hobbico®1/4"
recommended )
DPlasticPilot: Williams Bros. #185 Sport 2-1/2"
Scale
D2-3/4" (70mm) Main Wheels
D1-1/4"(32mm)TailWheel
D22 Hinges*
D2 - Servoextensions(each24"long)req. for
ailerons on both wings
D3/32"(2 5mm)WheelCollars - 2 required fortail
wheel
D#64 RubberBands
*NOTE: There are many types of good hinges on the
market, and everyone has their personal preferences;
therefore, hinges have not been included in this kit.
The current favorite of many modelers is the
laminated hinge that permits hinge slotting with a
hobby knife, and gluing with thin CA adhesive.
-4
SUPPLIES ANDTOOLS NEEDED
D2 oz Thin CA Adhesive
D2 oz Medium or Thick CA Adhesive
D2 5 oz 15-Minute Epoxy
DHand or Electric Drill
DDrill Bits 1/16, 3/32", 5/32", 3/16", 1/4", & 19/64"
DSealing Iron (Hobbico or Top Flite recommended)
DHeat Gun (Hobbico or Top Flite recommended)
DRazor Saw
DHobby Knife, #11Blades
DPliers
DScrew Drivers
DT-Pins
DStraightedge
DMaskingand/orStrappingTape (Requiredfor
construction)
DSandpaper (coarse, medium, fine grit)*
DT-Bar Sanding Block (or similar)
DWaxed Paper
DLightweightBalsa Filler ( Hobbico HobbyLite™
recommended)
DPetroleum Jelly (Vaseline)
DIsopropyI Rubbing Alcohol(70%)
DSpray Adhesive (optional) (3M "77")
DDremel Moto Tool or similar (optional)
*NOTE: On our workbench, we have four 11" T-Bar
sanders, equipped with #50,#80, #700 and #150-grit
We also keep some #320-
grit wet-or-dry sandpaper handy for finish sanding
before covering.

DECISIONS YOU MUST MAKE NOW
ENGINEAND MOUNT
The recommendedenginefortheSUPER
SKYBOLT isa 61* - 90 cubic inch (10 - 15cc)
displacement 2-cycle or a 90 - 1 20 cubic inch
(15-20cc)displacement4-cycleThe
instructionsandplansshowan OS Max
61(10cc)SF and an OS Max1 20 (20cc)
Surpassbeing installedItyouareusing an
engineotherthanoneofthese,be sureto
doublecheck all measurements before gluing or
cutting things that have to dowith the engine.
*NOTE: Performance may bemarginal ifa non-
Schnuerle-ported.60 cu.in. 2-Cycleengine
isused
This kitincludes a new Great Planesadjustable
.40- .70engine mount (EM4070) that fitsmost
40 - 61(2-Cycle)engines and 40 - 70 (4-cycle)
engines Ifthe supplied mount does not fityour
engine,it may be necessarytopurchasea
different mount (check with your hobbydealer).
POSSIBLE RADIO
INSTALLATIONS
The Super Skybolt can utilize either one
or twoaileron servosWe recommend that you
use twoaileron servos and build the top wing
withaileronsThis is the most maneuverable
configurationand you can always reduce the
controlthrowstoachievethesensitivityyou
desireWhenusingtwoaileronservos,the
servos are mounted inthe bottom wing, directly
in frontoftheaileronsandcontrolslopis
virtuallyeliminatedIf youprefertouse only
one aileronservo,we suggest that youdo not
put ailerons on the top wingdue to the inherent
top aileronsloppiness The plans show both
methods of construction.
COMMON ABBREVIATIONS USED
INTHIS BOOK AND ONTHE
PLANS:
GETREADY TO BUILD
Elev= Elevator
Fuse= Fuselage
LE= Leading Edge(front)
LG= LandingGear
Ply= Plywood
Stab= Stabilizer
TE = Trailing Edge(rear)
"= Inches
Tri= Triangle
TYPES OFWOOD
D1 Unrollthe plansheets andrerollthem inside
outto helpthem lieflat.
D2 Remove allparts fromthe box Asyou do,
determine the name of each partbycomparing it
with the plan and the parts listatthe back of this
book. Using a felttippen, writethe partname or
size on each piece to avoid confusionlater Use
thedie-cutpartpatternsshownon page 6 to
identify the die-cut parts and mark them before
punching out Save allleftover pieces. Ifany of
the die-cut parts are difficult to punch out, do not
forcethem' Instead, firstcut around the parts with
ahobby knife Afterpunching out the die-cut parts,
use your T-Bar or sanding blockto lightly sand the
edges to remove any die-cutting irregularities.
BALSA BASSWOOD
PLYWOOD
D3 As you identify andmark the parts, separate
them into groups, such as fuse (fuselage), wing,
finandstab (stabilizer), and hardware.
-5-

-6-
DIE-CUT PATTERNS

TAIL FEATHERS
BUILD THE FINAND RUDDER
D1.Tapethe fuselage sideview portion of the
plan downontoyourflatworksurfaceTape a
piece ofwaxedpaper overthefinand rudder
portion of the plan.D5 Using the plan as a guide, cut 3 pieces of
1/16" x 3" balsa froma 1/16" x 3" x 24" balsa
sheet(SKY6S06)toformthefinsheeting as
shownin thephotoGlue thesetogetherand
quickly wipe off any excess glue with a papertowel
before itcures Sand both sides smooth and then
cutand sand the correct angle into the bottom of
the sheeting so you don't have to cut itafter it's
installed on the fin Make sheeting forboth sides of
the
fin.
HINT:Use new, sharp sandpaper when sanding
wood with glue joints initThe sharper grit will cut
through the glue much easier and produce better
results than worn out sandpaper
D2 Working over the plan,cut andassemble the
fin andrudder framework using the die-cut 3/16"
balsafinandrudderparts(SKY6S01and
SKY6S02) and the 3/16" x 3/4" x 24" balsa sticks
(SKY6S05)as shown inthe photo Sort through
the 3/16" x 3/4" x 24" balsa sticksand pick the
hardest twoUse the hardest one later forthe
stab trailing edge and use the next hardest one
here for the fintrailing edge Pinthe parts inplace
overtheplanas youassemblethem,but be
careful you don't glue the rudder to the fin
D6 Glue the sheetingto one side ofthefin.
Notice that the grain runs vertical on the fin.
Keep the finflat while attaching the sheeting After
the side sheeting isinstalled, trim itflush with the
leadingand trailing edges of the finNOTE: Donot
cutthroughthesheetingandintothe
framework. Always cut into the work surface'
D3.Cut the fin and rudder "ribs" from the 3/16" x
1/4" x 24" balsasticks (SKY6S04).Gluethese in
placewith CA.
D4. Sand bothsidesofthefinand rudder
smooth with a fine grit sandingblock.
D7 Gluethe other sidesheeting inplaceBesure
the fin iskeptflat untilthe glue cures Trim andsand
the sheetingflushwiththeleading and trailing
edgesoftheframeworkCarveand sandthe
leadingedgeto a nicerounded shape asshown on
theplans,butkeepthetrailingedgesquare.
-7-

D8.Draw a centerline allaround the edges of the
rudder. Sand the rudder to a taper as shown on
the fuselagetopview.Theframeworkshould
end up approximately3/32"thickat thetrailing
edge. Refer to the centerline you drew to keep the
rudder symmetrical.
D12. Cut two4" long pieces of 1/16"x 1-3/8"
balsa sheeting fromthe 1/16" x 1-3/8" x 24" hard
balsa sheeting(SKY6S07).Glue thesetoboth
sidesof the rudder next to the sheeting on R6.
D9.Using the plan asa guide, cut a 1/16" x 3" x
24" balsa sheet(SKY6S06)in half toformthe
rudder sheetingas shownin thephoto.Glue
these together andsand both sides smooth. Make
sheeting forboth sides of the rudder. Cut one end
of the sheeting perpendicular to a long edge.D13.Usea sanding block with medium (150) grit
sandpapertosandbothsidesoftherudder
smooth. Carve and sand the rudder trailing edge to
anice rounded shape and the leading edge to a
"V" shape asshown on the plan.
D10.Glue the sheeting to one side of the rudder
so theperpendicular edge overlapsonto R6
approximately 1/8". The rest of R6 isnot sheeted
until later. Keep the rudder flat while attaching the
sheeting. Afterthe sheeting isinstalled, trim itflush
with the outside edges of the framework.
D11.Glue the other sidesheeting inplaceso that
ittoo only overlaps approximately 1/8"onto R6. Be
sure the rudder iskept flatuntil the glue cures.
Trimandsand the sheeting flush with the leading
andtrailing edges of the framework.
BUILD THE STABILIZER AND
ELEVATORS
D1.Tapethe fuselage topview portion of the
plandown onto your flatwork surface, and cover
the stabilizer portion of the fuselage top view with
waxpaper.
D2.Assemble the stab and elevator framework
over the plan,using the die-cut 3/16" balsa stab
-8-

parts (SKY6S02 and SKY6S03) andthe 3/16" x
3/4"x 24"balsasticks(SKY6S05)Use the
hardest 3/16" x 3/4" stick forthe stab trailing edge
Pin thepartsin placeovertheplanasyou
assemblethembut be carefulnot toglue the
elevator to the stab
D7 Glue the other side sheeting inplace Be
sure the stab iskept flatuntil the glue cures Trim
and sand the sheeting flush with the leading and
trailingedgesoftheframeworkNOTE:It is
essential to get a strong and complete bond
betweenthestabsheetingandthestab
framework, especially inthe center, therefore,
we recommend using 30minute epoxy when you
apply the lastpiece of sheeting Spread the epoxy
evenlybut sparinglyon the structure,to avoid
excess weight
D3 Cut the stab and elevator"ribs"fromthe
3/16"x 1/4" x 24" balsa sticks (SKY6S04) Glue
these inplace with CA.
D4 Use a sanding blockwith medium (150) grit
sandpaper to sand the edges and both sides of
the stab and elevatorsmoothCarefullydraw a
centerline all around the edges of the stab and
elevatorThiswillmakeit easiertomaintain
symmetry when sanding later.
D8 Carve andsand the leadingedge to a nice
rounded shape as shown on the plans, butkeep
the trailing edge and the tips square
D5 Glue two 1/16" x 3" x 24" balsa sheets
(SKY6S06) together(edge to edge) to formone
piece of stab sheeting Sand or trimthe edge of
the sheetsbeforegluingto obtaina goodjoint
between the two, without any gaps Afterthe glue
iscured, sand both sides of thesheetingwitha
finegritsandingblock Make sheetingforboth
sides of the stab.
D9 Usinga sandingblockandcoarse (80-grit)
sandpaper, sand both sides of the elevators to a
taper (see crosssectionon plans) The trailing
edgeshould endupapproximately 3/32" wide
D6 Thoroughly glue the sheeting to one side of
the stab Keep the stab flatwhileattachingthe
sheeting Afterthe sheeting isinstalled, trim itflush
with theedgesof the stab.
D10Cut four 1/16" x 2-5/8" x 24" balsa sheets
(SKY6S08) inhalfto formeight 12" long pieces
Glue these 12sheets together to formfour 5-1/4"
wide sheetsCut one end of each sheet so itis
perpendicular to the long edges Sand both sides
of these sheets smooth.
-9

TEMPORARILY INSTALL HINGES
D1 Using the plan as a guide, mark the hinge
locationson the stab,elevators,finand rudder
Designate one side of the stabas beingthe top and
oneelevator as being"right"andthe other as"left".
D11Glue one 5-1/4" sheet to each elevator at
the angle shown on the plans and inthe photo so it
overlaps onto S-6 approximately 1/8" Cut a corner
off the unused end of the sheet, and glue itat the
front tip of the elevator Trim the sheetingflush with
the edges of each elevator.
D12Glue the remaining sheeting inplace on the
other side of each elevator so that ittoo overlaps
onlyapproximately1/8" ontoS-6Be surethe
elevator iskept flat until the glue cures Trim and
sandthesheetingflushwiththeedgesof
the framework
CAUTION!!!: You must useextreme care
whencuttinghinge slotswitha hobby
knife,toavoidcuttingyourself!If the
balsa part breaks while you are pushing
on the knife, the blade could go into your
handbeforeyouknowit!A good
precaution isto wear leather gloves while
performing the following steps.
D13Cut four4" long pieces of 1/16" x 1-3/8"
balsa sheetingfromwhatis leftofthe1/16"x
1-3/8"x 24" hard balsa sheeting (SKY6S07) Glue
these to both sides of each elevator, next to the
sheeting that stops atS-6
D14 Sand the leading edge of the elevators to a
"V-shape" as shown on the plan Round off the
tips and the trailing edge, but keep the inside edge
(markedwith anarrow) square
D2 Cut thehinge slotson thecenterlinesyou
drew earlierOur recommendedhinge slotting
method isdescribed below.
ABegin by carefully cutting a very shallow slitat
the hinge location The firstcut isto establish
yourcut in the right place, so concentrateon
staying on the line and don't cut too deeply.
BMake three or four more cuts inthe same line,
going slightly deepereach time. As you make
theseadditional cuts,workon going straight
intothewoodContinuethisprocesswhile
"wiggling"theknifehandleforwardand
backwarduntilthebladehas reachedthe
proper depth forthe hinge
C.Trial fitthe hinge into the slot Ifthe hinge is
difficult to push in, re-insert the knife and move
it back andforthin theslota fewtimesto
enlargethe slot Donotgluethe hingesyet.
10

D3 Refer to the plansand mark the location of
the tailgear (WBNT128) on the rudder Drill a 7/64"
holein therudder(theholeis drilledslightly
oversizeto allow forpositioning, and to create a
hard epoxysleeve" around the wire)Then groove
the rudder leading edge to accept the tailgear wire
andthe nylon bearing Mark the location of nylon
bearing on the finandcut a slot forit.
FUSELAGE
ASSEMBLY
PREPARE FUSE SIDES
DD 1 Workingoverthefuselageside view
covered with waxedpaper, trialfita die-cut1/8"
balsa top front fuse side (SKY6F01), and bottom
frontfuseside (SKY6F02)together,sanding
slightly ifnecessary fora good fitMake sure they
lineupwith theplans,andgluethem together
HINT:Using a hobby knife, sharpen the inside of
one end of a 1/8" diameter tube, and use itto cut
the groove inthe leading edge of the rudder (and
ailerons ifapplicable)
D4. Trial fitall thesepartstogetherusing the
hinges Sand theaerodynamic balance" part of
the elevatorstoget themtomatch up withthe
stab Donotgluethe hingesuntil after covering
the surfaces.
DD 2 Trial fita die-cut 1/8 balsa top aft fuse
side(SKY6F03) and a die-cut 1/8" balsa bottom
aftfuseside (SKY6F04)togetherSand them
slightly ifnecessaryto achieve a good fit,and
gluethem together.
DD 3 Test fitthe aftfusesidehalf in place
behindthefrontfusesidehalfSand thetwo
halves ifneeded to get them to fittogether tightly
andmatch upwith the plans Glue them together
withCA Then sand both sides smoothwitha
sandingblock
DD 4 Working over the fuselage side view still
covered with waxed paper,trial fit adie-cut 1/8"balsa
top front fuse doubler (SKY6F05),and bottom
front fuse doubler (SKY6F06) together, sanding
slightlyif necessary for a good fitMakesure they
lineupwith the plans,andgluethem together.
11

DD 5.Trialfit a die-cut 1/8"balsa top aft fuse
doubler(SKY6F07)and a die-cut1/8"balsa
bottom aftfusedoubler (SKY6F08)together.
Sand them slightly ifnecessary to achieve a good
fit,andglue them together.
ASSEMBLE THEFUSELAGE
DD 6.Test fitthe aft fusedoubler half inplace
behind the frontfusedoubler half.Sand the two
halves if needed to get them to fittogether tightly
and match upwith the plans. Glue them together
withCA,andsandbothsidesofthedoubler
smooth with a sanding block.
DD 7.Positionthedoubler on top of thefuse
side and align their bottom and frontedges. Glue
the doubler to the fuseside by applying thin CA
aroundalledgesof thedoubler,includingthe
lightning holes. Use plenty of thin CA to allowitto
wick into the joints as far aspossible.
D1.Trial fitthe die-cut 1/8" ply formersF3,F4
and F5(SKY6F10and SKY6F12)tomake sure
they fitinto the appropriate slots in both fuselage
sides. Ifthere isany excessglue inany of the fuse
doubler slots, clean itout with a hobby knife.Ifitis
necessaryto trimany of the formers,be sure to
trim both sides of the formersthe same amount to
keep them symmetrical.
D2. Assemble formersF3, F4and F5between
the twofusesides and use masking tape to pull
the fusesides together. Make sure all the tabs are
seated intheir notches, and adda drop or two of
thin CA to the top notches of each former. Useonly
as much glue asrequired to tack things together.
We will come back and securely glue everything in
afew steps.
DD 8.Inspect allglue jointsforgaps and add
thickCA ifnecessary to strengthen the joints.
D9.Repeat the above steps to make another
fuseside and doubler. When gluing the doubler
to the fuse side, make sure you assemble a
RIGHT and a LEFTset ofsides!
D10. Placethetwoassembledfusesides
together. Sand the edges as necessary to make
the two sides identical. Alsosand the sides of
eachassembly smooth with a fine sanding block.
D3. Fit the die-cut1/8" ply belly former(BF)
(SKY6F12) into its notches to make sure it seats
allthe way into the notches.Pull thefusesides
togetherand gluethebellyformerintoplace.
Masking tape can be used tohold the fuselage
together while the glue cures.
12

D4. Slide two die-cut 1/32"plyboltblockbraces
(SKY6W06) onto both the 1/4" ply front and rear
wing boltblocks (SKY6F20 andSKY6F21). Notice
that the slant on the braces isat the front of the
rearblock andthe rear of the front block to clear
thewingsaddle.The photo clearly illustrates this.
D7. Slide the 1/32" plybraces out against the
fuse sides and securely glue them inplace with
thick CA or epoxy.
D5.Gluedie-cut 1/8"plyformer LG2 (SKY6F10)
toonesideofthedie-cut1/8"plyformerF2
(SKY6F12)withthickCA.The bottomofthe
interlocking tabs on both formersshould line upas
shown inthe photo.
D8.Glue the die-cut 1/8" balsa aft fuse bottom
(SKY6F09) in place with thin CA. The afttip of the
bottom should becentered on the fuselage sides
and glued inplace. The bottom willautomatically
keep the aftportion of the fuselagestraight.Go
over all the glue jointsat formersF3, F4 and F5
and securelyglue the fusesides to the formers
with thin andthen thickCA.
D6.Position former F2into place and applyCA
near the top notches. Carefully slide both wing bolt
blocksinto theirrespectiveslots.Pull thefuse
sides together atthe bottom of the formerand use
strapping tape tohold them tightlyagainst the
former.Make sure thebolt blocks are seated in
their notches, and apply thin CA around the blocks
andtheformer notches.
D9.Usethick CA or epoxy to glue the die-cut 1/8"
ply formersF1A and F1B (SKY6F15) together to
form the firewall. NOTE: The embossed centerlines
must beshowing on F1A. The interlocking tabs on
both formersshould line up.. . butformer F1B is
slightly larger than F1A, so just center iton F1A.
Wipe off any excess gluebefore itcures.
13

D10F1A has fourlines embossed on itThe two
short lines are the actual horizontalcenter of the
formerThe twocrossing lines are offset to the left
(as viewed fromthe pilot's seat) of the horizontal
centertoautomaticallyput thespinnerin the
center of the cowl when right thrust isbuilt into the
plane The crossinglinesarewhattheengine
mount should be centered on since this plane is
builtwith2 degreesof rightthrustCenterthe
engine mount on theselinesas shownon the
plan,and marktheboltlocationsthroughthe
mount Drill 5/32" holes atthe bolt locations
NOTE: This kit includes the new Great Planes
EM4070 Adjustable Engine Mount. To properly
position the mount, just slide the mounting
beams together and center the beams over the
embossed lines when marking the mounting
holes. There are "tick" marks on the side of the
mount to help you position it vertically.
6-32 BlindNut
6-32X 2-1/2"MachineScrew
D12Press the four6-32 blind nuts (NUTS003)
into the firewallfromthe back and tap them into
placewitha hammerTemporarilyattachthe
engine mount to the firewall with the 6-32 x 2-1/2"
machine screws (SCRW071) to make sure the
holes are inthe correct position Adjust the holes if
necessary, and glue the blindnuts inplace.
D13.Wet the outside of the fuselage sides from
F2forwardwith water to help itbend around the
formers Test fitthe die-cut 1/8"ply fuel tank floor
(SKY6F14),die-cut1/8"plyformerLG-1
(SKY6F10) and the firewall into place inthe front
of the fuselage Notice that the fueltank floorhelps
set the right thrust and appears to becut crooked
until you get everythingassembled The firewall
should touch the front edge of the fuse side notch
on the left fuseside and the back edge of the
notchon the right fuseside.
D11.If youareusinga fourcycleor other
engine/mountcombinationthat does not require
four 9mm engine spacers but will use 6-32 blind
nuts, you will need to install the 1/8" x 2-3/4" x 2-
3/4"plywoodback plate(SKY6F31)on F1B.
Center itover the 5/32" holes and glue itinplace.
Drill 5/32" holes through the back plate using the
holes you drilled earlier as guides NOTE Ifyou
are using another engine mounting system, such
as vibrationisolationtypemounts, youmay not
need the back plate The photos show a typical
.60-size glass filled mount being used.
The easiest wayto assemble theseparts isas
follows
DA Snap the back of the fueltank floor into
itsnotches
NOTE:The tank floorwhen inposition correctly,
shouldcause the firewall to slantto the RIGHT.
14

DB Tack glue the tab on the top of LG1intothe
fuel tank floor.
D14Snap the die-cut 1/8" ply cockpit bottom
(SKY6F11) inplace by inserting the rear tab into
F3and carefullyslidingthefronttab down into
place inF2Glue the cockpit bottom to the fuse
sidesandtheformers.
DC Tack glue the firewallonto the frontof the
fuel tank floor
Note: The engine mount shown in the
following photos may not be the mount
supplied in this kit.
D15 Glue the requirednumber of9mm (3/8")
engine mount spacers (SKY6F27)togetheras
showninthenextphotoYoucanlayyour
engine/mountcombinationovertheplans and
determine where the engine should beplaced on
the mount and how many spacers should beused
We have determinedthatthe followingengines
usuallyrequire
DD Pullthefusesidestogetherand use
strappingtapetoholdeverythingtogether
Securely glue everything inplace with either epoxy
or CA Ifyou are going to use CA, you can tape
everything firstand thoroughly saturate the joints
with thin CA Then apply a generous beadof thick
CA around each joint
The OS 61SFrequires 3 spacers
The OS 91 Surpass requires 1 spacer
TheOS1.20Surpassrequires nospacers
DE Includedyou willfind a pieceof 1/4"balsa
triangle foryou to install on the back of the firewall
Itshould bepressed into the corners formed bythe
fuse sidesandthe firewall.
D16Center the engine mount on the face of the
spacersand mark wheretodrillthemounting
holes Drill 3/16"holes straight throughall the
spacers you glued together(a drillpress will be
helpful forthis,ifyou have access to one)
15-

D17.Mount your engine to your mount following
the manufacturer's recommendations. Refer to the
plans to make sure you get the engine positioned
farenough forward.The distance fromthe frontof
the firewallto the frontof the engine thrust plate
shouldbe approximately6-1/16"fora spinner
withoutoverhang.Removetheengine.The
following instructions explain how to work with the
mount supplied.
and the required number of spacers.Glue the
spacers to the firewalland screw your engine to
the mount. Ifthe 2-1/2" screwsprotrude into the
fueltank compartment, cut them off flush with the
blindnuts.
DRILL ENGINE MOUNT
(GreatPlanesEM4070 orsimilarglass-filled mounts)
D1.Hold the engine pointing straight ahead on
the mount (in the approximate location shown on
the plans) and mark the mounting hole locations
on the mount. Atthe marked locations, accurately
drill7/64"(or#36)holes.NOTE: If youhave
access to a drill press, use itfordrilling these holes
to insure that they are drilled vertically.
FITFUEL TANK AND FUELPROOF
TANK COMPARTMENT
D2. Now youmay use one ofthefollowing
methods to attach your engine to the mount:
#6 X 3/4" Sheet Metal Screw
Method1: Screwthe#6 x 3/4"sheetmetal
screws(providedin the kit)throughtheengine
mounting flangeand into themount. When first
installing these screws, put a drop of oilinto each
screw hole.
Method 2: Cut threadsinto the holes youjust
drilled using a 6-32 tap and tap wrench. Ifyou use
this method, you'll have to supply your own bolts
(6-32 x 1" socket head cap screws) forattaching
the engine to the mount.
D3.Attach the engine mount to the firewallusing
the 6-32 x 2-1/2" machine screws (SCRW071)
D1.Cut a pieceof 1/4"thicklatexfoam (notincluded)
intoa 3"x 6"rectangle.Glueitto the plytankfloor to
helpkeepthefueltankfromvibratingexcessively.
D2.Assemble your 14 oz. fuel tank according to
the tank and engine manufacturer'sinstructions.
HINT:Toavoid kinking the tubes when bending,
use K&S Tubing Bending Springs. We routed
the fuel andvent tubes asshown inthe photo. This
helps keep the fueltubing from getting kinked.
-16-

possible.Makesure you willstillbeableto install
and workon theservolinkages.Theseservo
positions are not critical, but will help you balance
the plane withoutusing extraweight. The die-cut
1/8" ply servo tray(SKY6W10) is designed to fitin
the doubler lightening hole formost installations,
but willhave to becut down inwidth to fittowards
the rear of the plane. Itcan beglued justbelow
the lightening hole whenitneeds to be installed
farther forward as shown inthe photo. Check your
servos to make sure they will fitinto the tray and
are not held offthe trayby the cockpit bottom.
Securely glue the tray inplace.
D3. Install the fueltankusing four#64 rubber
bands(notincluded)as shownin thephoto.
Determine wherethe fueland vent tubes should
pass throughthe firewalltomatch up withyour
particular engine. Drill a 1/4" hole foreach tube to
pass throughthefirewall.The largerholes will
allow youtoseal around thetubeswithsilicone
bathtub sealer. Install the fueltubing, but besure
to leave a couple extrainches forgood measure.
Mark on the frontof the firewallwhich tube isfuel
andwhich isthe vent.
D5. Determine the location where the throttle
pushrod(notincluded)willpassthroughF1.
Normally, a solid wire pushrod willworkfineforthe
throttlepushrod. Drilla 3/16"hole (orwhatever
sizeyouneed)in thefirewallforthethrottle
pushrod guide tube. Cut the outer guide tube to
length and roughen theoutside of the tube with
medium gritsandpaper. Slide the tube into place
andglue itwith thin and then thick CA. Refer to the
plansto get anideaof how to route the pushrod.
D4. Determinewhereyourservosshouldbe
mounted. Ifyou are using a lighter engine (.61 -
.752-cycle) the servos should go asfarforwardas
practical.Ifyou are using a heavy engine (1.20
4-cycle)theservosshould go as farback as
D6.Locate the 1/4" x 2-3/4"x 3"ply landing
gear plate(SKY6F30)and testfitit in place
betweenLG-1andLG-2.NOTE:Thegrain
should run from LG-1 to LG-2. Enlarge the slots
ifnecessary to get the plate to fit.When satisfied
with the fit,securely epoxy the plateinplace.
17-

D7. Cutthe3/16"x 2"x 18" balsasheet
(SKY6F24)in halfand gluethetwo9" pieces
togetherto forma 4" wide bottom nose sheet.
Center the 4" wide sheet overthe bottom of the
fuselage nose and glue itto formersF2and LG1
first. Itshould extend 1/16" behind F2andthe rest
should extend forwardof the firewall. Use a piece
of strapping tape to hold itinplace while the glue
cures. Wet the outside surface of the nose bottom
and allow itto soak infor5 minutes or so to helpit
bend easier. Apply a generous bead of thick CA to
the bottom edge ofthefirewall.Then bend the
sheeting into place and hold itwith another strip of
strapping tape. Apply thin CA and then another
bead ofthickCAaroundeachformerbefore
removing the tape. This gluing process makes very
strongjointsbecause the thinCA soaks inand
holds the woodtogether and the thick CA forms
fillets for extra strength.
D9. Cut the 1/4" x 1-3/4"x 18" balsa bottom
nose corner (SKY6F25) sheet inhalf to make two
9" long pieces. Glue these pieces inplace on each
sideof the nose asshown inthe photo.
D10.Use your razor plane and a sandingblockto
rough carvethe cornerstoshape.Referto the
crosssectionson thefuselageplan duringthis
step. Cut the fuselage bottom and the corners off
even with the frontedge of the fuse sides andthe
wing saddle.
D8.Remove the strapping tape and use a razor
planeand a sanding block to shape the edges of
the bottom and the fuse sides to match the bevel
of the formers.
INSTALL TAIL PUSHRODS
18-
D1.Install the elevator, rudder and throttle servos
usingthescrews thatcame with theservos. Screw

the plan Thesewillmake the"Y" part of the
elevatorpushrod. Lay the two12" wireson the
planso they are lined upwith the ones drawn Lay
the forwardpushrod wireon top of the two12"
rods and tack glue the three together with a drop
of CA Wrap the pushrod junction with the silver
wrapping wire(WIREST15)provided inthe kit
and securelysolderthethreepushrodwires
together A good solder jointisnecessary here, so
follow the hints given below.
Nylon Clevis
anylonclevis(NYLON17)about1/2"onto one of
the 34" threaded wires (WIRES17) Hook upthe
clevis to the elevator servo and, with the servo arm
inits neutralposition,use a finetippermanent
marker to accurately mark wherethe pushrod wire
goes through formers F3andF4.
SOLDERINGHINTS
ARoughentheareatobe solderedwithfine
sandpaper Then thoroughly clean the items to
besoldered with alcohol or degreasing solvent.
B.Apply a small dabof soldering flux.
CHeatthe metal with a soldering gun oriron, and
apply the solder to the metal, not the iron The
metal must get hot enough to melt the solder,
andthe solder mustfreely flow intothejoint.
D.Do not move thepartsuntil thesolderhas
cooled
E.Clean off the excess fluxwith alcohol orsolvent
andtest thejoint for strength.
D2 Laythe 34"wire down over the fuselage top
view andline upthe marks you madewith the F3
and F4formerson the plan Cut the 34" wire off
wheretheplansshowit ending,tomakethe
forward partof the elevator pushrod Cut four1/4"
long yellow pushrod spacers fromthe 6-1/2" long
inner pushrod piece (PLTB004)Slidethese
spacers onto the pushrod wire and position them
near the threadedend until afterthe soldering
operation.
D3 Bendtwo 12" pushrod wires (WIRES16) 1"
from the unthreaded end totheangleshown on
D4 Cuta pieceofpushrodoutertube
(PLTB002) 10" long and scuffthe outside of the
tube with sandpaper Slide the 1/4" inner spacers
near the middle of the elevator pushrod wire and
space themabout 2" apart Removethenylon
clevis fromthe servo end of the elevator pushrod
and slide the 10" long outer tube onto the pushrod.
Install the pushrod inthe fuselage byinserting the
servo end through formerF4and sliding itforward
until the "Y" will slip down into the fuselage Then
back the pushrodout thetop set of exitslots.
Screw the nylon clevis back onto the servo end of
the pushrod andhookituptheservo arm.
19-

D5 Cut a scrap piece of balsa to fitabout 2" in
frontof thepushrod"Y"junctionand glue it in
place This willbea pushrod brace and both the
elevatorand rudder pushrod outer tubes willbe
glued to itGlue the elevator pushrod guide tube to
the top of the brace so the end of the guide tube is
approximately1-1/2"away fromthe solder joint
Operate the servo horn byhand to make sure all
theinnerspacersstayinsidetheguidetube
throughouttheelevatoroperationrange Make
another balsa brace to go near the servo end of
the guidetubes andglueitinplace.
ASSEMBLETHE CABANES
D1 Punch out the die-cut 1/8"ply cabane wire
holders (SKY6F13) and glue an "L" side to one of
the center pieces Glue an "R" side to the other
center piece Notice that the "L" (left)sides are 1/8"
longer than the right side.Thisisto allow for the
engineright thrust.
D2.Use a hobby knife to chamfer the frontend of
each 5/32" OD x 3/4" brass tube (BRST021) If
you have a hand drill with a relativelyslow speed,
you can chuck the tube inthe drill to do this Vary
the angle of the knife bladeduring this process to
obtain a nice rounded chamfer.
D6 The rudderpushrod guide tube should be
installednow Cutit tofitfromthelowerright
pushrod exitto the frontpushrod brace Scuff the
outer surface of the tube with sandpaper Allow the
tube to extend past the pushrod exita few inches
and securelyglue it inplace Aftertheglue has
cured, cut the tube off flush with the fuselage side.
UseHobbyLite filler to fillaround the rudder pushrod
cut-out You can also fillthe other rudder cut-out on
the leftfuselage side When the fillerisdry, sand it
andthe pushrod flush with the fuse side.
D7 Ifyou would liketo installanextra pushrod
tube inwhich to route the receiver antenna, now is
agoodtimetodo itJustdrillholeswhere
necessary andsecurely glueitinplace.
D3 Locatethe1/8" frontand rearleftside
cabane wires (WBNT177 and WBNT179) These
are going to slide into the 5/32" OD brass tubes so
their ends need to be smoothlychamfered Use
some very fine (600 grit) sandpaperto smooth out
-20
Table of contents
Other GREAT PLAINS Toy manuals