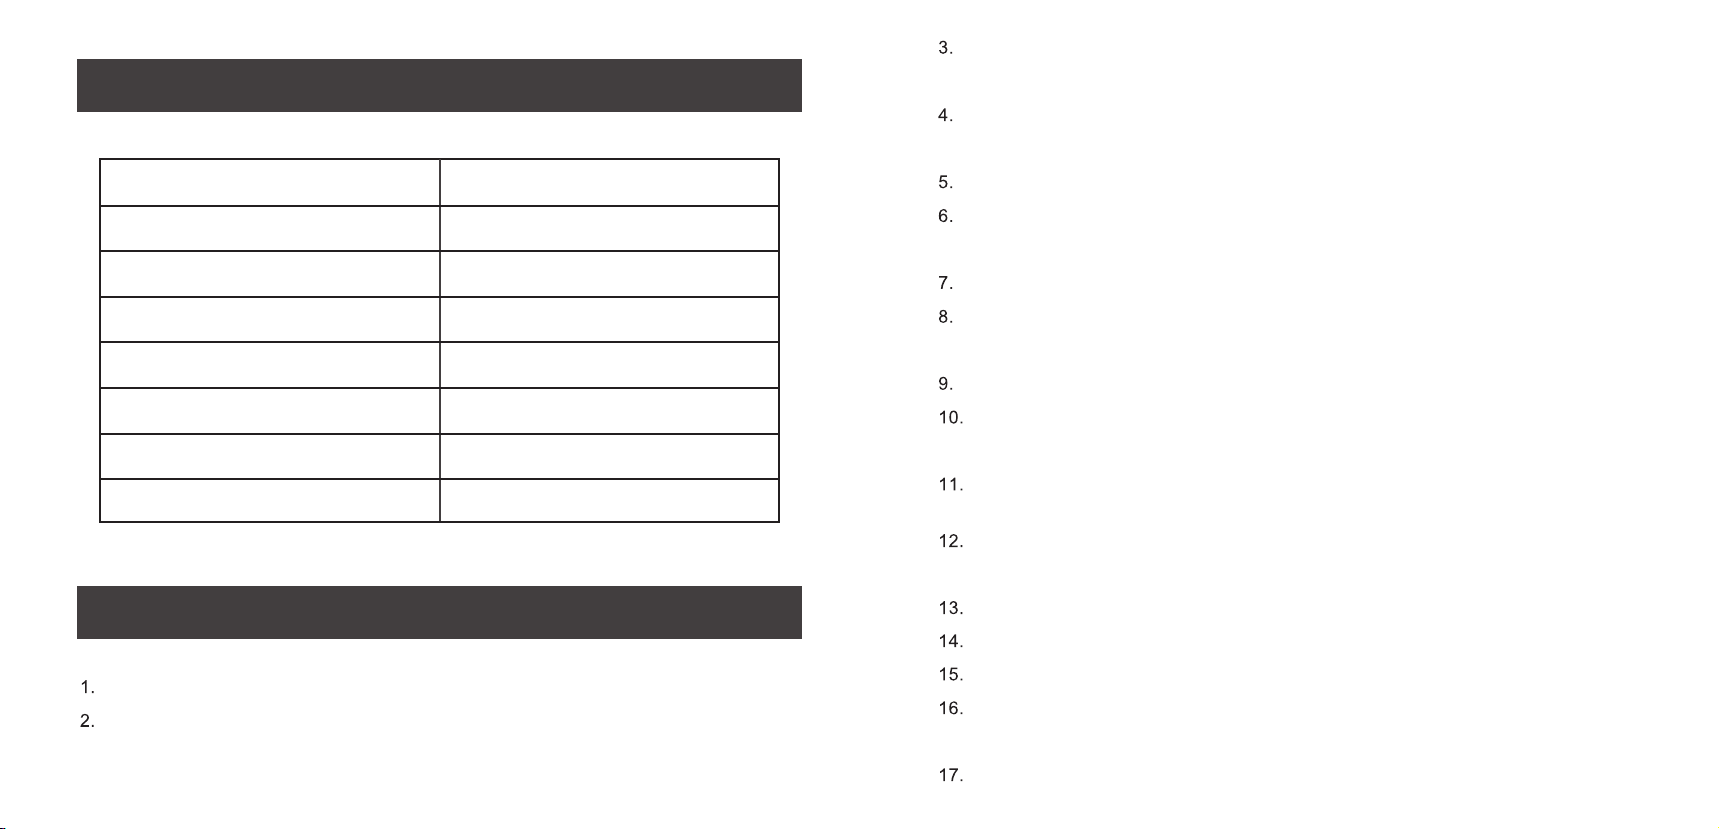
GREENFROM CG9406B-UL User manual

Automatic Conical
Burr Coffee Grinder
User Manual
1 YEAR WARRANTY
1. Bean Hopper Lid
2. Bean Hopper
4. Spoon
5. Operation Panel
6. Grinding Chamber Lid
7. Grinding Chamber
3. Brush
-------------------
-------------
------------
-------------- ----
-------
-------
-----
-------
-------
--------
--------------
PRODUCT DECOMPOSITION

SPECIFICATION
Model
Rated Voltage
Rated Frequency
Rated Power
Bean Hopper Capacity
Grinding Chamber Capacity
Net Weight
Dimensions
CG9406B-UL
120V~
60Hz
200W
8.46oz
4.58oz
4.5 pounds
7.87 x 4.72 x 11.81inch
SAFETY INSTRUCTION
When the cable, socket, or other electric parts are broken, please stop using
this product.
While the product is connected with the socket, please do not put hands,
spoon,clip,chopsticks and so on into the bean hopper.
It is prohibited to disassemble, fix, improved the product without instruction.
Please leave this product far away from children and make sure not to play
with the appliance.
Once you stop working or fall into the water, please unplug it immediately.
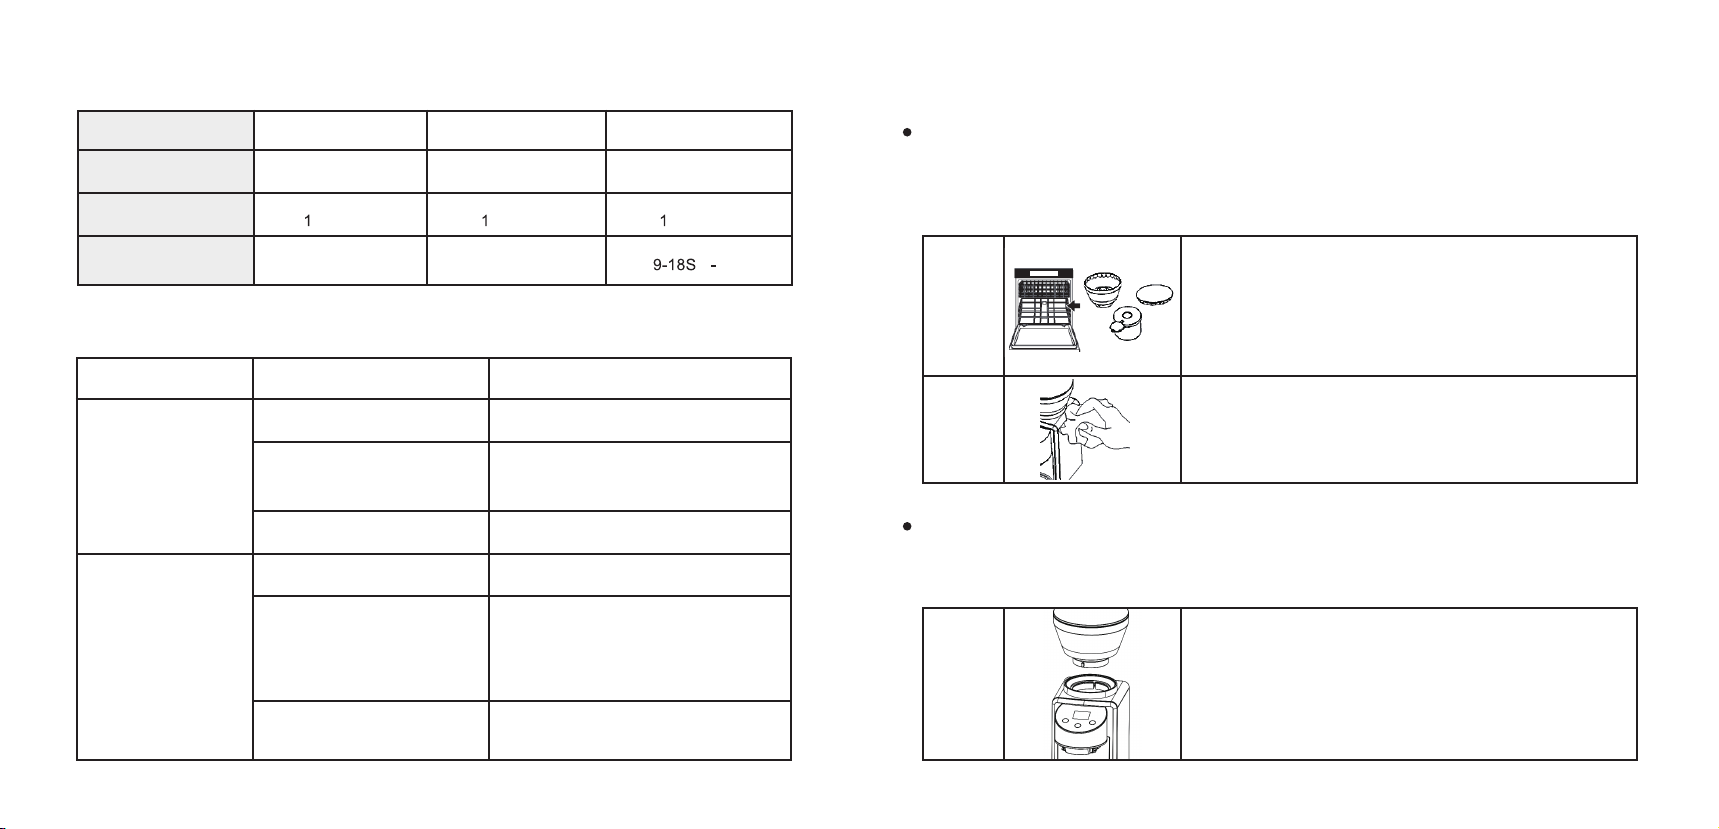
Please clean the product carefully before using. Make sure there is no dust
or solid stuff except the coffee bean.
It is prohibited to pull in/ pull off the socket with wet hands.
After each usage, please turn off the coffee bean grinder. Before remove the
parts, make sure the power is totally off.
Please do not immerse the coffee bean grinder, power cord and plug into
liquid.
If there is unusual sound, unusual smell, excessive heat, smoke, please turn
off the grinder and pull off the socket.
It is prohibited to leave weight or the grinder on the cable or socket.
It is prohibited to shake or fall the grinder.
Please pull the cable gently when using the grinder.
It is strictly forbidden totouch the bean hopper when the product is running.
If you have long hair, make sure not tofall into the bean hopper.
Keep this product away from open flames and heat sources.
Please readythis manual carefully before using the product.
Please make sure the product connects with the right voltage as the rating
labelshown. And the pin is connected perfectly.

USING INSTRUCTION
1. Before using for the first time, please clean all the parts and accessories carefully.
(Kindly check page “CARE AND CLEANING” for more details)
2. Placing the grinder on the table vertically.
3. Assembling
1
2
3Open the lid, add the beans and cover the lid.
(Maximum capacity: 240g)
Rotate the Bean Hopper clockwise to lock it, and then the grind
size can be adjusted.
Install the Bean Hopper into the correct position of the appliance.
Make the positioning ribs at the Bean Hopper align with the
grooves at the main body. The Bean Hopper can be removed
when the icon at the Bean Hopper aligns with the icon .
WARNING: Do not operate this appliance for longer than 3 minutes at atime as this can
cause overheating. Please allow the appliance to cool down 30 minutes if it works over 3 minutes.
SETTING AND OPERATION
1
2
Plug in a power outlet.
Rotate the Bean Hopper to select the grind size
from 1(Fine) to 35 (Coarse).
Touch “+” or “-” on the operation panel selects the number of
cups or shots. Tap the "on/off" tostart / pause grinding.
French Press: -12Cups
Drip Coffee Maker: -12Cups
Espresso Machine: -2Cups
Coarse
Fine
4
5
Rotate the Bean Hopper clockwise to get finer ground;
Rotate the Bean Hopper counterclockwise to get more coarse
coffee ground.
Remove the sealing cover and place the chamber into correct
position.

GRINDING AND SETTING
Brew Type
Ground Size
Cup Selection
Maximum
Grinding Time
French Press
Coarse
-12 Cups
55S(12Cup)
Drip Coffee Maker
Medium
-12 Cups
55S(12Cup)
Espresso
Fine
-2 Cups
(1 2Cup)
TROUBLESHOOTING
Problem
Grinder does
notwork
Grinder stops
mid-cycle
Possible Cause Solution
Plug power
Gently remove and re-install
bean hopper or chamber ensuring
it is seated properly.
Fill hopper with fresh coffee beans
Unplug power cord and remove hopper.
Clean grounds chute with brush.
Unplug power cord and remove hopper.
Inspect hopper, clean the burrs.
Remove any foreign objects.
Refer to Care and Cleaning section.
Grinder not plugged in
Bean hopper or chamber
not attached properly
Grinder overheated
No beans in hopper
Foreign item trapped in burrs
Grounds chute is clogged
Clean The Grinder
Warning: Before cleaning, please make sure the grinder is unplug.
To avoid damage, do not immerse the main body, grinding burr or power cord in water or put it in
the dishwasher.
1
2
The Bean Hopper, Bean Hopper Lid, Grinding Chamber,
Grinding Chamber Lid, brush and spoon can be cleaned with
warm soapy water, then rinse with clean water and dry thoroughly.
Also you can clean them with the dishwasher.
Wipe the main body of Coffee Grinder with a soft
and damp cloth and dry it with a soft dry cloth.
CARE AND CLEANING
Cleaning The Burrs
Warning: It is recommended toclean out the coffee bean hopper after every few uses for
keeping best grinding effect and best performance.
1Empty the Bean Hopper.
Remove the lid and the Bean Hopper.

2
3
4
5
Remove the upper burr.
Clean the upper burr with the cleaning brush
Clean the lower burr with the cleaning brush to
remove coffee residue.
Install the upper burr in correct position.
Upper Burr
Lower Burr
DISPOSAL
This product should not be disposed of with other household wastes.
To prevent possible harm tothe environment or human health from uncontrolled waste disposal, it
should be recycled responsibly.
WARRANTY
One-year limited warranty
This product is warranted to be free from defects in material or workmanship for a period of one
year from the original purchase date. This product warranty is extended only tothe original
consumer purchaser of the product and is not transferable.
Please contact our Customer Service for instructions on the repair and/or replacement of the
appliance if acovered defect occurs within the one year warranty period.
Please contact for warranty:
Email: greenfromservice@outlook.com
Table of contents