greenhouse sensation Solargrow User manual

www.greenhousesensation.co.uk Phone: 0845 602 3774 Never too much and never too little
solargrow
Instructions
V19-150211
If you require any further assistance with your Greenhouse Sensation Hydrogrow p ease
fee free to contact us by:
Te ephone: 0845 602 3774 Fax: 0845 602 3775
FREEPOST greenhouse sensation
info@greenhousesensation.co.uk
www.greenhousesensation.co.uk
2Water & nutrients pumped
from the reservoir
to feed the plants
3Any excess drains through
the pebbles back into
the reservoir
1Solar panel triggers the pump
Never too much and never too little
solargrow

Thank you for choosing a
Greenhouse Sensation Solargrow.
At Greenhouse Sensation we are committed to making it rea y easy for everyone to
grow fabu ous p ants – anywhere.
Our Solargrow makes it easy to raise stronger, healthier plants that produce more flowers or
fruit more quickly because your plants are provided with the right amount of everything they
need, when they need it. ever too much and never too little.
This booklet is designed to give you all the information and guidance you will need to set-up
your Solargrow and raise great plants. If we’ve missed anything though do let us know. And
of course do call or email us if you have any questions at all – that’s what our plantsmen are
here for!
If things are going really well please send us your photos and we will put them on our website
and send you a voucher to say thank you.
Good luck with your growing season.
Never too much and never too little
solargrow
1
Spare Parts
Nutrients & Medium
Reservoir
Planter
Solar panel
Delivery system, ribbed tube and emptying tube
GS310
GS311
GS312
GS313
Clay Pebbles 6L bag
Capillary Cubes
utrient A & B x 1
Acid Test Kit
pH Down 125ml
3ml Pipette
Measuring Beaker
utrient A & B x 2
Acid Test Kit
pH Down 125ml
3ml Pipette
Measuring Beaker
utrient A & B x 1
utrient A & B x 2
utrient A & B x 1
Acid Test Kit
utrient A & B x 1
pH Down 125ml
3ml Pipette
GS314
GS316
GS001
GS002
GS003
GS004
GS005
GS006
Never too much and never too little
solargrow
Order Code Part
Part
Order Code Part

2
9
Component page
eservoir
Holiday Watering kit hole
Overflow
min and max level
indicator ledges
Solar Panel
Indicator light
A + B nutrient
and beaker Delivery System
pH down, pH
Test Kit and
Pipette
Capillary Cubes
& Clay Pebbles
Planter
Access flap
Emptying tube
Ribbed tube
Pump
Extension tube
If the test shows blue with no trace of green or yellow.
1. Adjust down by adding 1ml of the pH down using the pipette provided.
2. Leave for 1 hour then retest the pH.
epeat this pH test every two days for a week and then once per week
Testing and adjusting pH
The pH of the nutrient and water mix should be between 6.2 and 7.2.
To check the pH of the water and nutrient solution in the Solargrow reservoir use the
Greenhouse Sensation pH test kit supplied.
1. Take a 2ml sample of the solution in the small test tube supplied.
2. Add 2 drops of reagent to the test tube.
3. Shake the test tube gently and compare the colour with the test card to determine the pH.
4. You need a pH between 6.2 and 7.2. If the test is green the pH is fine.
End of the season
Storing your so ar pane
At the end of the season store your solar panel in a cool, dry place with some light.
Important: Do not place it in a box.
Storing your pump
Clean the pump (see page 9)
Disconnect your pump from the solar panel and store the pump submerged in clean soft water
or rainwater, or in a dry and frost free place.
For further advice contact us on:
0845 602 3774
Top Tip:
Mix your pH down with a little warm water first. This helps it combine with the
Solargrow nutrient solution.

8
3
eak
W
Weak
W
Weak
urce
e
sourc
s
s
sourc
s
r
ower
o
r
o
o
of power
p
o
H
H
H
H
H
High
H
H
H
e
ce
e
e
e
ource
o
e
s
s
s
s
s
s ce
of power
o
po
of p
p
ower
o
of p
ower
g
of power
g
er
e
ce of pow
c
rc
c
rc
c
rc
ce of pow
c
r
ou
u
u
ou
u
ou
u
o
ou
A
A
ru
r o
NN
EE
NENE NWNW
SESE SWSW
WW
SS
Solargrow
If you are using a ‘Ho iday Watering Kit’ p ease use those
instructions first.
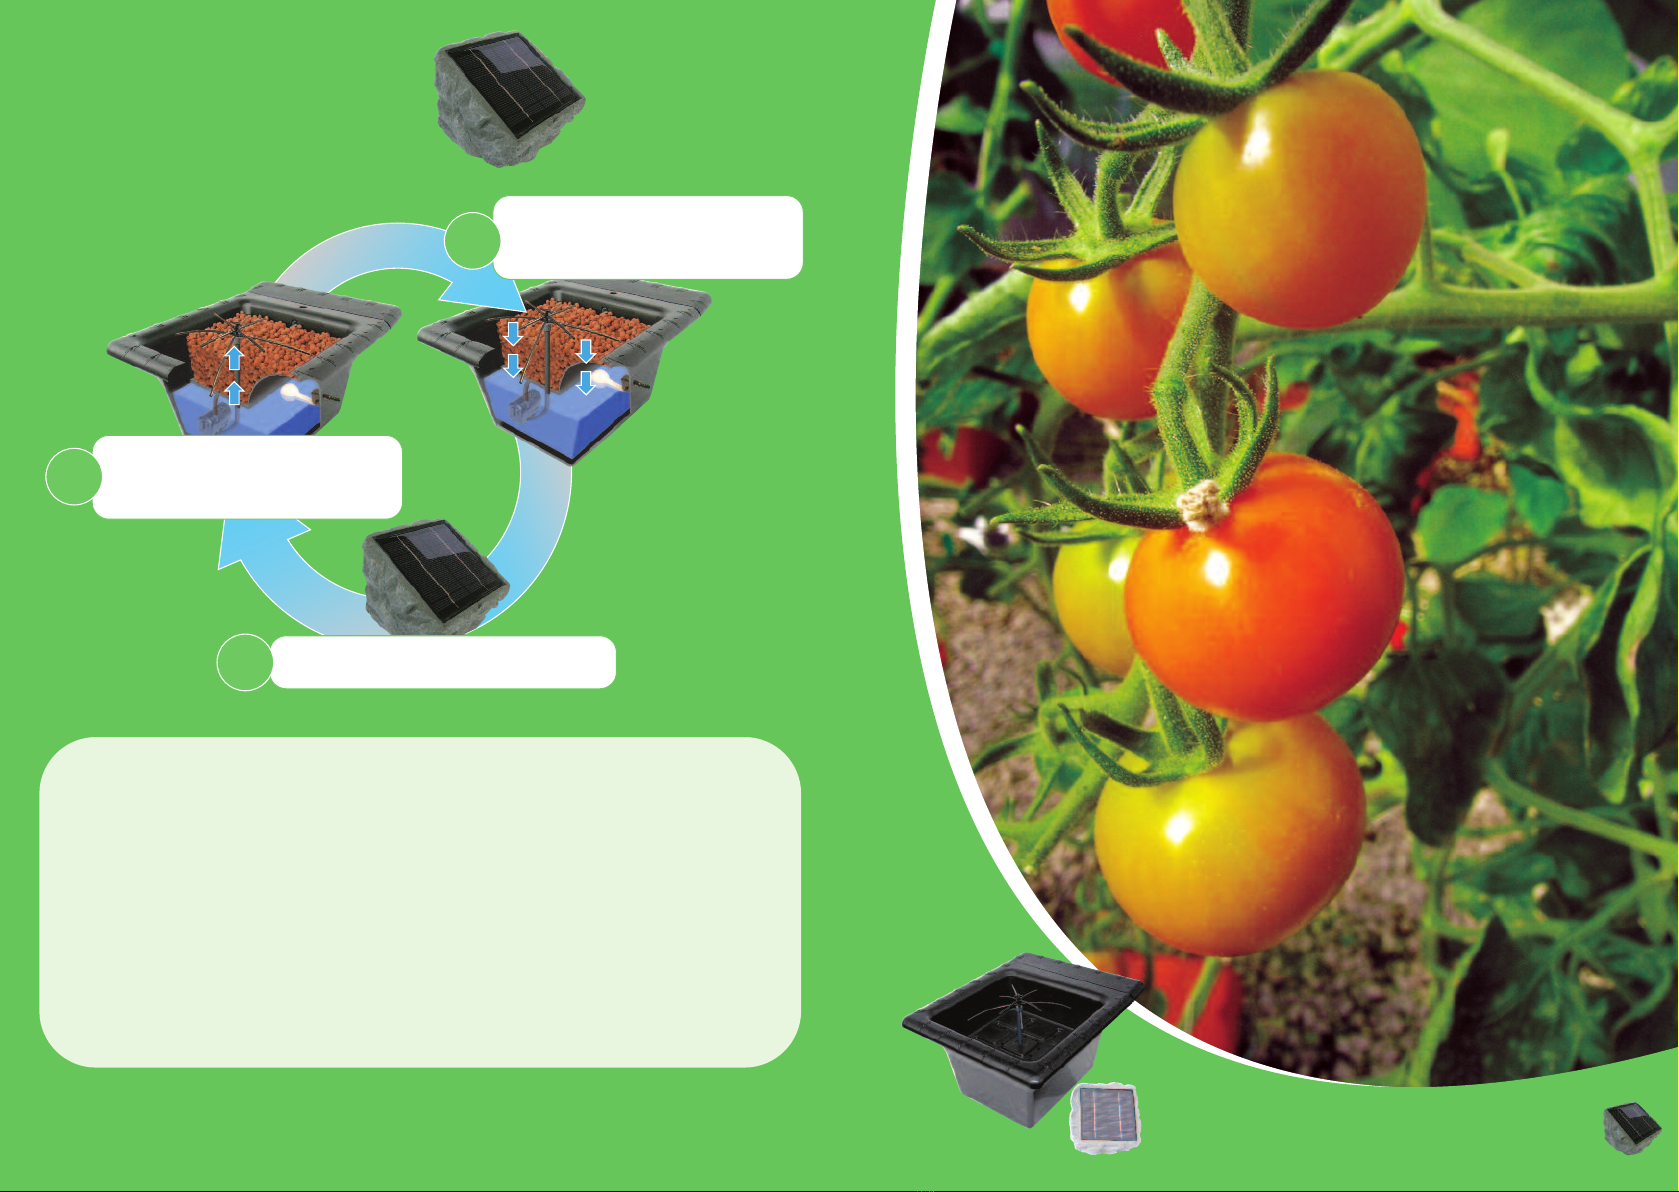
Your Solargrow harnesses the Sun’s energy to
power a pump which provides your plants with
regular feeding and watering.
Positioning Your Solar Panel
1. For quick cropping plants and fast growing
plants (e.g. tomatoes, chillies, cucumbers) –
position solar panel to face between South East
and South West
2. For slow growing plants (e.g. palms, ginger,
bananas) – position solar panel to face
between orth West and orth East
Understanding the Indicator
Light
This light indicates whether the solar panel is
charged and whether the pump is currently
running.
1. Light ‘On’ steady for 1-2 minutes – the
pump is running.
2. Flashes once every ten seconds – fully
charged and water and nutrients will be
pumped to your plants’ roots for 2 – 4 minutes
in every hour.
3. Double flash every ten seconds – charge is low and water and nutrient will be pumped to
your plant roots at a reduced rate until the battery has received enough light to recharge it.
4. o flash - battery is too low to run the pump (see charging you solar panel Page 4).
Cleaning your pump
We recommend that you clean your pump after each reservoir change. This is especially
important in hardwater areas.
1. Use the pipette to measure approximately 5ml of pH down for softwater areas or 10ml for
hardwater areas.
2. Add to 1 litre of water in a plastic container or bucket.
3. Put the pump in this solution and run for about 2 minutes by
pressing the red button on the solar panel.
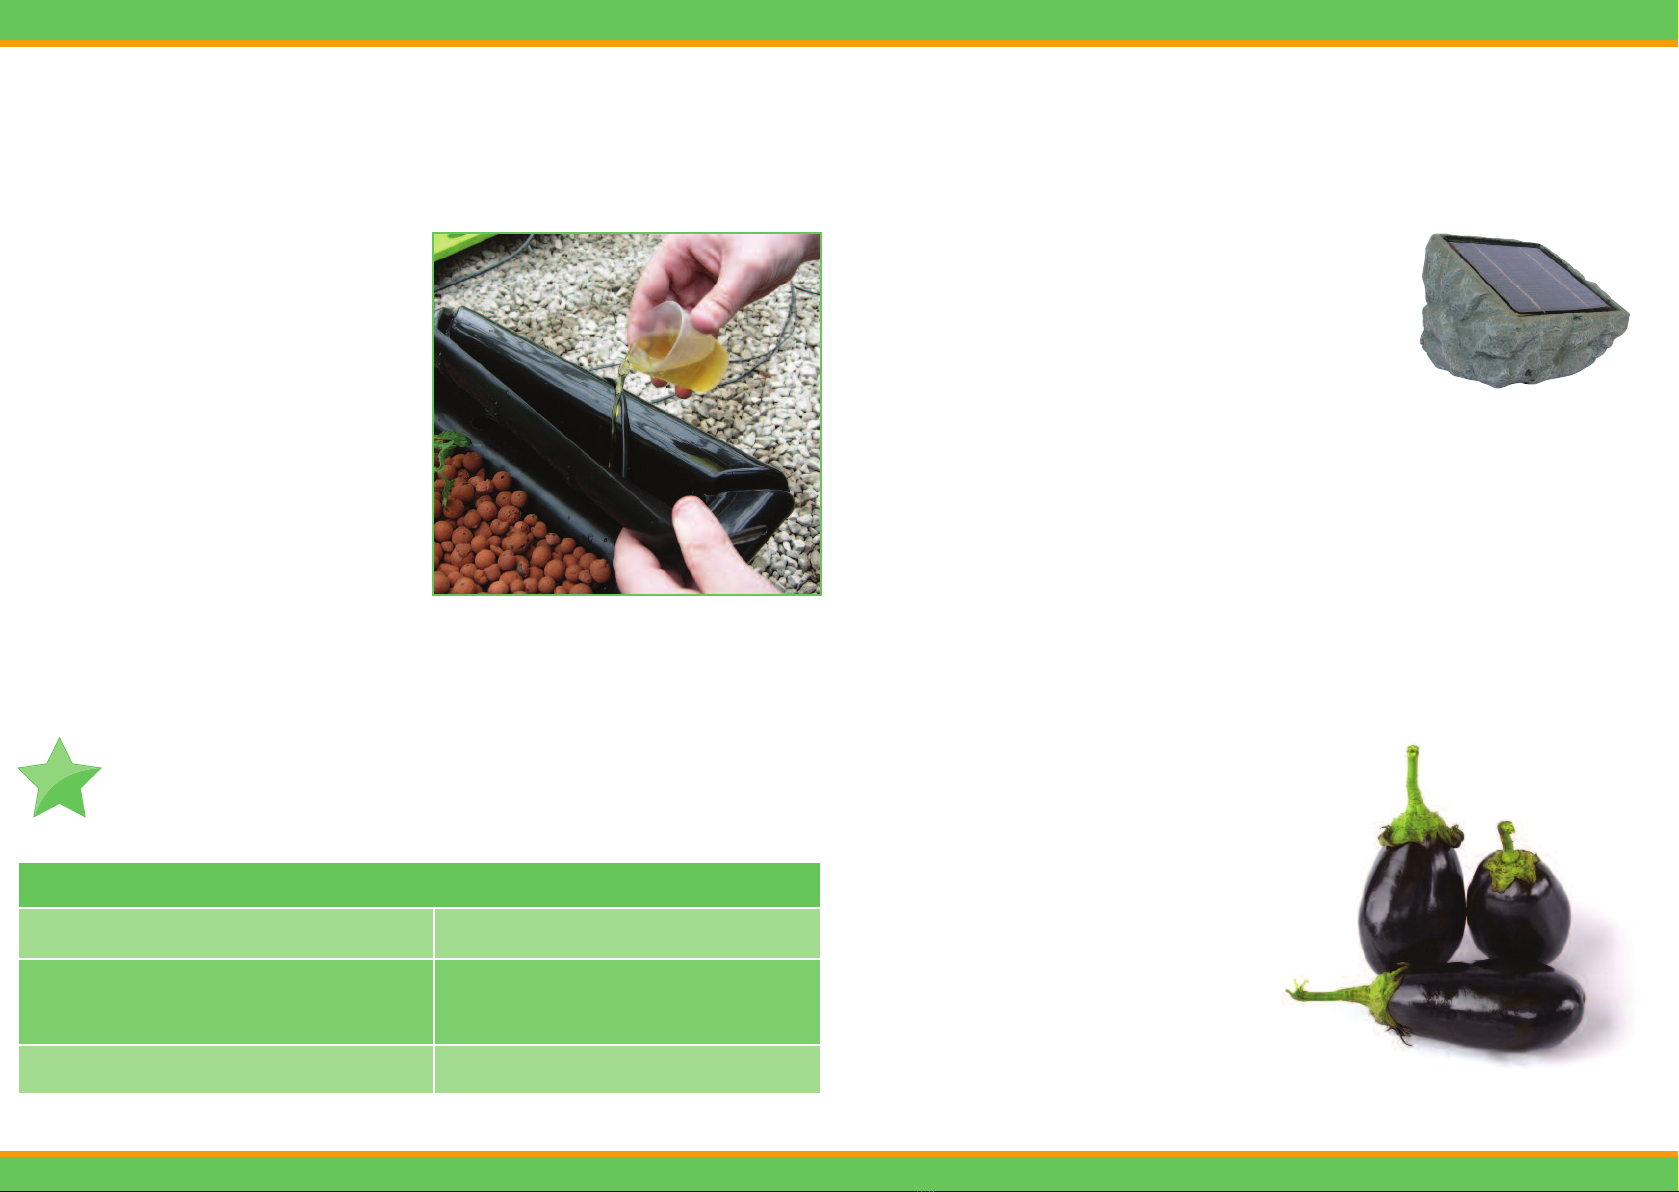
1. Place a watering can or bowl next to your Solargrow. Reach for the
emptying tube inside the reservoir and remove the kink lock
Fit the small extension tube onto the emptying tube and lead it into
your watering can or bowl.
O
Fit a standard half inch garden hose to the end of the emptying tube,
ensuring that the garden hose is not higher than the reservoir at any
point. Run the pump by pushing the red button on the solar panel twice so that it is ‘on’. Repeat
if reservoir does not empty on first pump run.
You do not need to drain the reservoir dry.
When you have finished, remove the short extension tube, re-kink the emptying tube, refit the
kink lock and place the emptying tube back inside the reservoir.
Refill the reservoir using the Empty Reservoir utrient Dose instructions (see page 8).
2. Test the pH in the reservoir and adjust it if necessary (see page 10).
eservoir changes
Perform this Reservoir Change every 4 weeks to flush our impurities and rebalance the nutrients.
Top Tip:
Store diluted pH down in an old bottle for future use but label it clearly.
Top Tip:
The used nutrient solution can be used on your garden plants.

Charging your Solar Panel
When you first use your Solar Panel each season or when your battery has run low, you will need to
charge it up.
1. Make sure it is turned ‘off.’ If it is ‘on’ press the button on the
back panel to turn ‘off’. Place it in a sunny position for a day.
May charge faster outdoors.
2. The next day, select ‘on’.
3. The ‘on’ indicator should show for two minutes.
4. If the light gives a double flash every 10 seconds, turn off
and continue to charge.
4
If you find that the solar panel is not charging you may need to move your panel to a sunnier
position or to face a more Southerly direction.
Check that the sun is not obscured by buildings or trees.
In very poor weather with little light your solar panel will not recharge so quickly after each
‘feed’ but your plants will also need less feeding so this is nothing to worry about.
Warning
Your solar panel uses the latest technology to
protect against moisture contamination but it
must not be submerged in water. User tamper
invalidates our guarantee.
7
7
Adding nutrient
1. Add 70ml of nutrient A and 70ml of nutrient
B to 16L of water in reservoir.
2. Test the pH (see page 10)
ToppingUp
3. fill your Solargrow reservoir to the top
triangular ledge as often as necessary. ever
allow the water and nutrient mix to fall below
the bottom triangular ledge. Top-up using 7ml
of nutrient A and 7ml of nutrient B mixed with 1
litre of water.
Ensure that you eave the so ar pane switched on.
Preparing nutrients for use
Nutrient dose summary
For empty eservoir 70ml of A and 70ml of B in 16 litres of water
For Toppingup your eservoir 7ml of A and 7ml of B per 1 litre of water (70ml of A
and 70ml of B diluted in a
10 litre watering can)
For Holiday Watering Kit 7ml of A and 7ml of B per 1 litre of water
Containers A and B already contain nutrient powders. To use them in the Solargrow add
lukewarm water to each container up to the level shown on the label. Shake thoroughly to
ensure the powders are fully dissolved before use.
Top Tip:
If you are not using the Holiday Watering kit system it is a good idea to dedicate a
watering can to your Solargrow to avoid wasting the nutrient solution that you do
not use when topping up.

5
1. Push the pointed
end of the grey delivery
tube through the centre
hole in the bottom of
the planter.
2. Connect the
delivery tube ‘T’ onto
the pump
7. Fill the reservoir to
the top triangular
ledge inside the
reservoir. This will take
16 litres.
8. Connect the pump
to the solar panel.
Screw the plastic
connection collar onto
the solar panel.
3. Push the free end
of the ribbed tube
onto the grey delivery
tube, below the planter
4. Place the pump on
the base of the
reservoir and rest the
emptying tube inside
the reservoir at end
with the level indicators.
5. Place the planter
on top of the reservoir.
6. Decide where to
place your solar panel.
(Please see page 3 for
advice).
9. Turn the solar panel
on by pressing the red
button. The red light
will come on for 2
minutes and the water
will flow through the
Solargrow.
Assembly instructions
If you are using a ‘Ho iday Watering Kit’ p ease use those instructions first. 1.Pour approximately
half of the capillary
cubes into the planter.
Level them out and
use a watering can to
thoroughly wet them.
Any excess water will just
flow into the reservoir.
2. Carefully remove
your plant from its pot
and place on top of
the capillary cubes. If
necessary add more
capillary cubes to raise
the plant so the top of
the compost is just
below the top of the
planter.
4. Fill the planter with
clay pebbles.
5. Start the pump by
pressing the red
button on the solar
panel and ease the
delivery tube up so
that you can just see
the water coming up
from the delivery tube.
3. Add the rest of
your plants.
Planting out
6
Table of contents
Other greenhouse sensation Lawn And Garden Equipment manuals

greenhouse sensation
greenhouse sensation Solar Quadgrow User manual

greenhouse sensation
greenhouse sensation Hydropod Propagator Quick guide

greenhouse sensation
greenhouse sensation Vivigrow salad kit Quick guide

greenhouse sensation
greenhouse sensation Hydropod 20 User manual

greenhouse sensation
greenhouse sensation GeoPod Heated User manual

greenhouse sensation
greenhouse sensation click&drip P00GS48A User manual