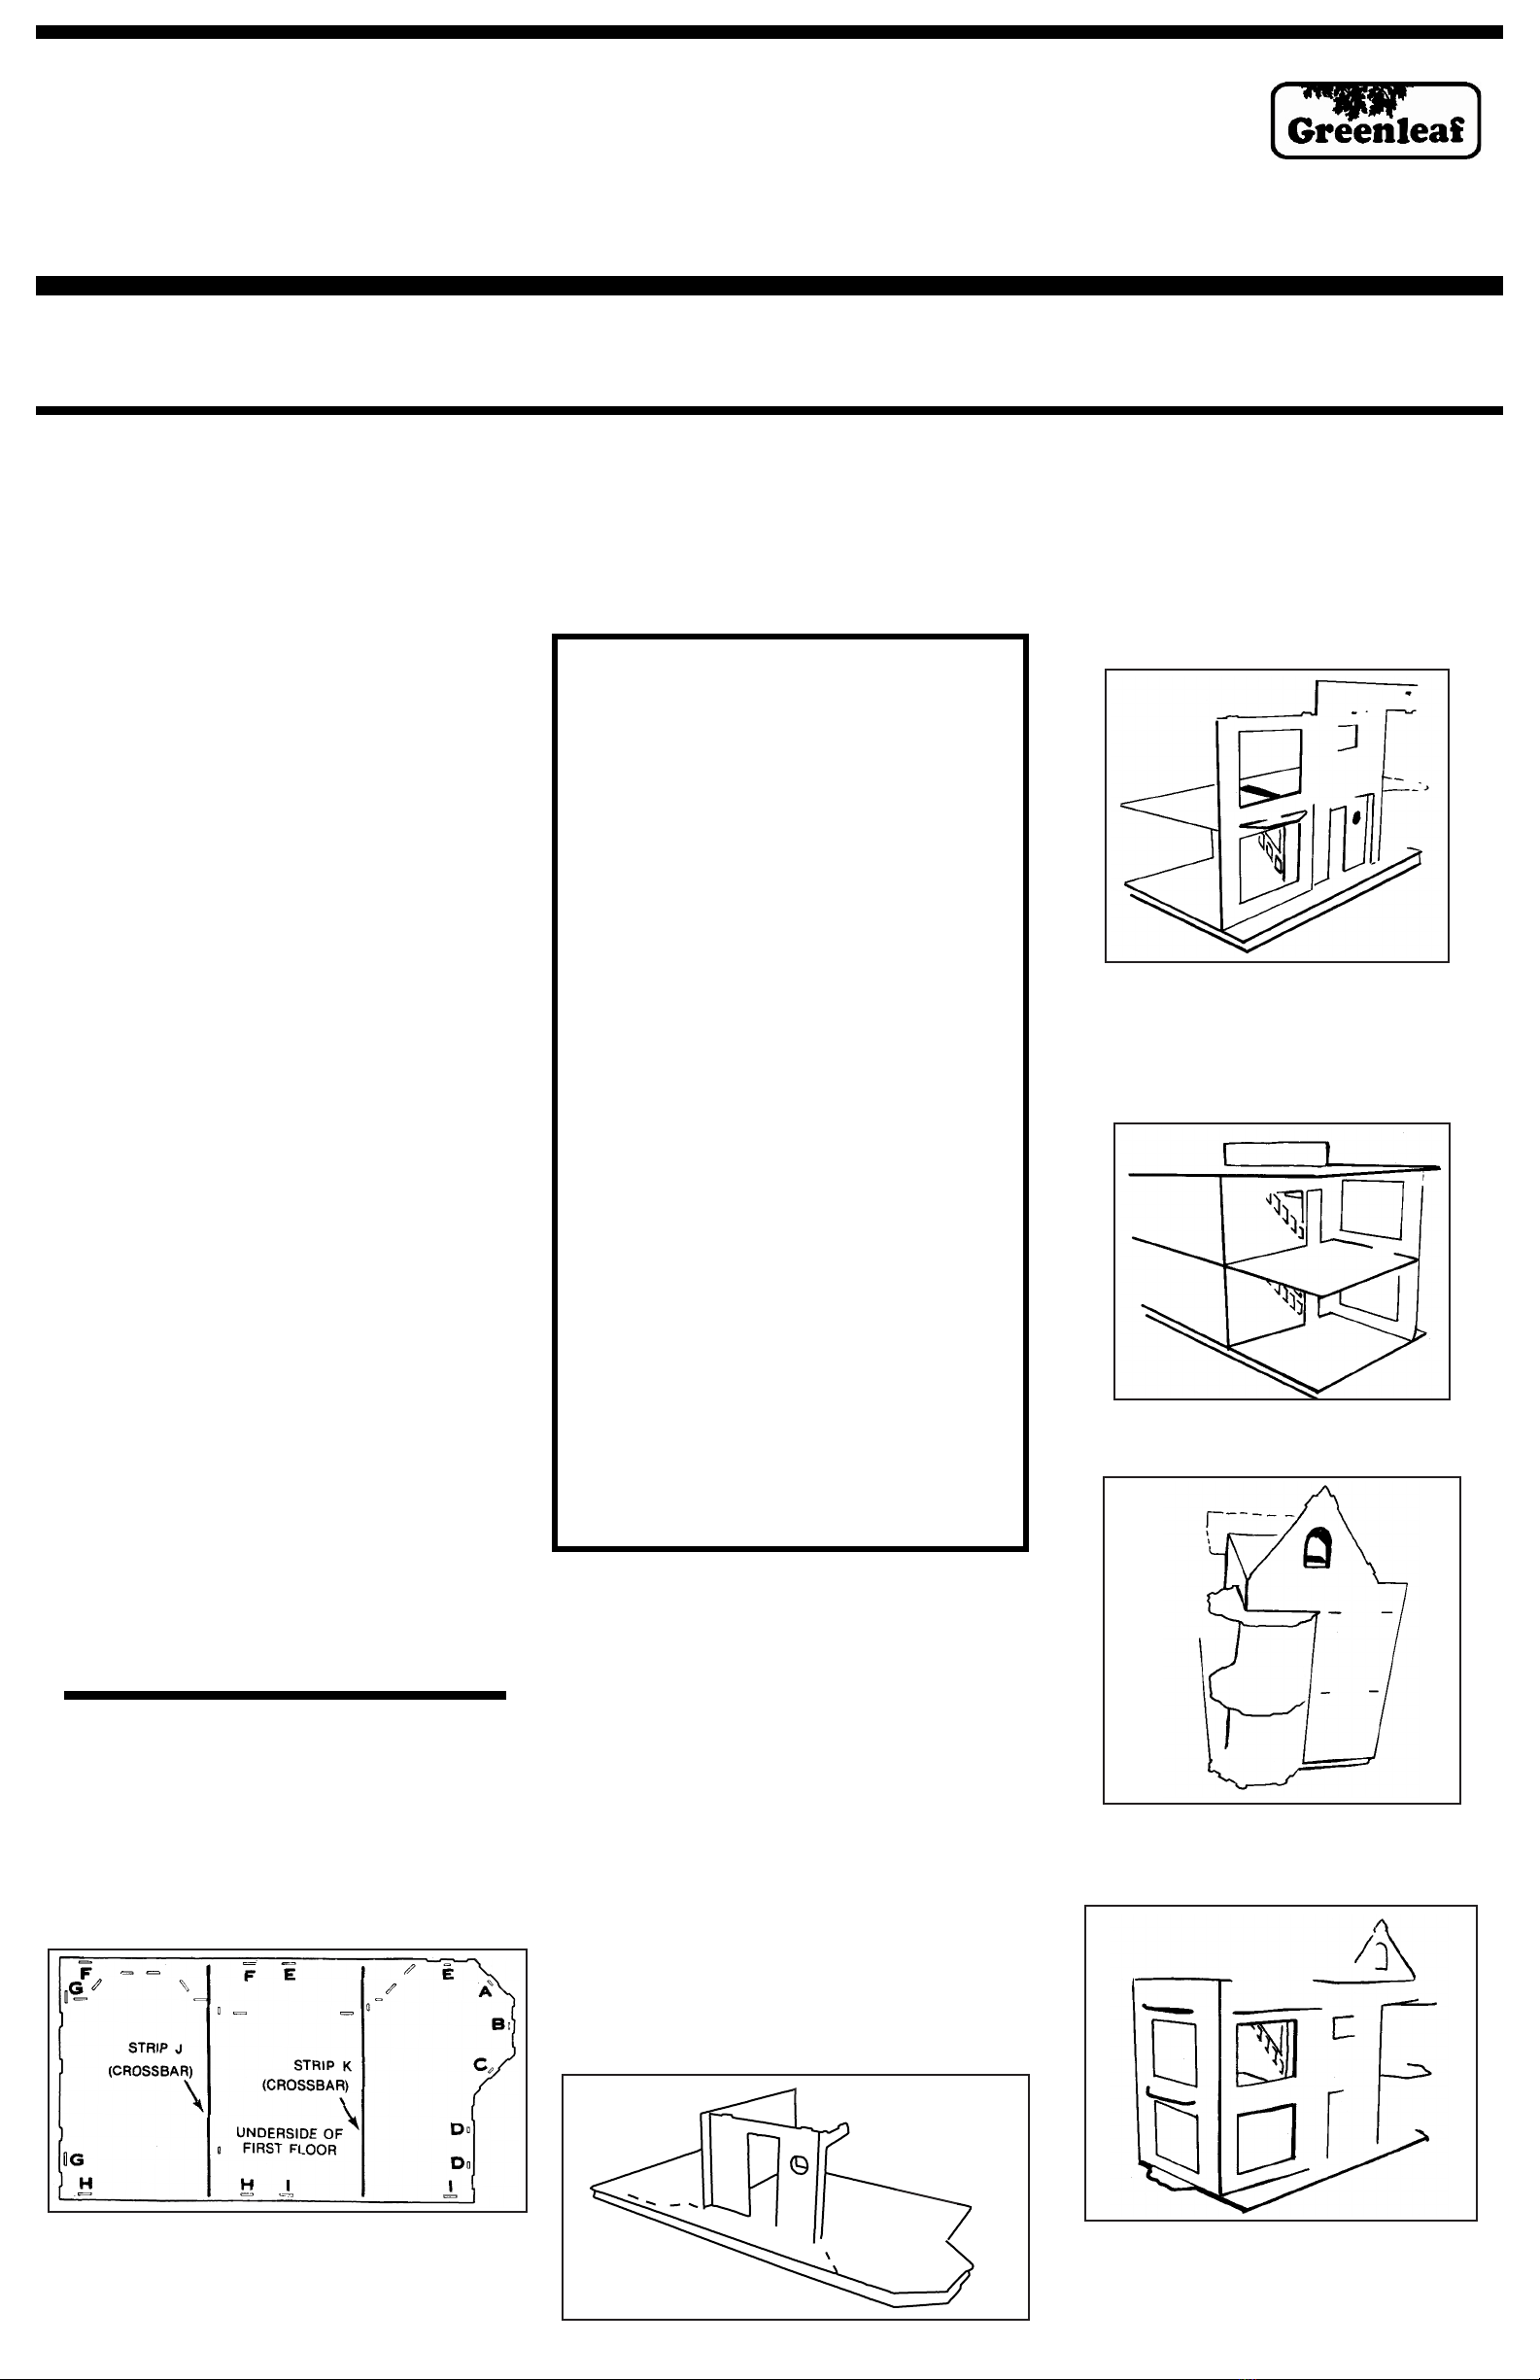
H. TOWER ROOF
1. Remove one TOWER BRACE from Sheet 15. Place this
in the front corner of the house, above the TOWER and
just under the ROOF, lining up tabs and slots. Glue it in
place as It curves around the comer of the house.
2. Remove two TOWER BRACES from Sheet 13 and place
above other TOWER BRACE. One goes into the slot on
ROOF B and the other into the slot on the RIGHT SIDE.
Glue in place.
3. Remove and prepare five TOWER ROOF pieces from
Sheet 13. Turn face down and lin e up as illustrated. Tape
them together on the rough unfinished.
4. Flip TOWER ROOF assembly over right side up. Set in
place on top of TOWER, hooking the far left section
under ROOF B. Remove and apply glue to top edges of
TOWER and edges of TOWER BRACES. Place
TOWER ROOF assembly back in position, making it
flush with the HOUSE FRONT, touching the top edges
of TOWER and TOWER BRACES, and hooking it under
ROOF B.
I. HIP ROOF PREPARATION
1. Place the house assembly on Its back with front side up.
2. CAREFULLY remove and prepare the FRONT TUDOR
ASSEMBLY and TRIM STRIPS 1, 2 and 3 from Sheet
14.
3. With the smooth side up. slide the FRONT TUDOR
ASSEMBLY (bending slightly to hook under BAY
WINDOW and TOWER SECTIONS) up into position
right up under the ROOF.
4. Looking at the LEFT SIDE of the house, draw an
imaginary line from the bottom of the window openings
onto the outside wall. This line is where TRIM STRIPS
1 and 2 should be placed directly under, as illustrated.
Glue TRIM STRIPS in place.
5. Glue TRIM STRIP 3 in the corresponding line run-ing
along the HOUSE FRONT, just to the left of the front
BAY WINDOW on the second floor.
J. HIP ROOF
1. Remove and prepare HIP ROOF SIDE, HIP ROOF
FRONT and HIP ROOF SUPPORT from Sheet 13.
2. Apply glue to bottom edges of TRIM STRIPS 1 and
2 on LEFT SIDE of hour. Slide the HIP ROOF SIDE up
against 1 and 2 at glue line, and rest in place on bay
window section. Run a line of glue attaching it to bay
section.
3. Following diagram, apply glue along edges "a" and “b"
of HIP ROOF SUPPORT. Edge "a" lines up against left
rear edge of house and edge “b" fits under the rear edge
of the HIP ROOF SIDE.
4. Apply a line of glue to the bottom edge of TRIM STRIP
3 and FRONT TUDOR ASSEMBLY.
5. Line up HIP ROOF FRONT and press up against glue
line, resting in place against BAY WINDOW and left
edge of TOWER.
6. Glue HIP ROOF FRONT to BAY WINDOW, TOWER
and then to edge of HIP ROOF SIDE where they meet
at front left corner of the house.
K. TUDOR TRIM
1. Remove, label on back, and prepare all TUDOR TRIM
(except two strips 23 and one strip 24) from Sheets 14
and 16.
2. Remove, label on back, and prepare all
GINGERBREAD TRIM pieces 1 - 14 from Sheet 17.
3. Following the diagrams, glue all TUDOR TRIM in place.
In some places, it is glued flat against the house. On the
BAY WINDOWS and TOWER, the vertical TUDOR
TRIM strips straddle the joint where two sections meet.
4. On the second floor BAY WINDOWS, the tips of the
TUDOR TRIM strips 13 may have to be sanded slightly
on an angle where they meet the HIP ROOF for
precision fit.
5. Glue all GINGERBREAD TRIM in place as shown on
trim diagram.
6. Remove and prepare two GABLE TRIM pieces from
Sheet 19 and glue just under ROOF in peaks of FRONT
and RIGHT SIDE GABLES.
See diagram for Gingerbread and
Tudor trim on large schematic
diagram sheet.
L. BALCONY
1. Remove and prepare BALCONY FLOOR from Sheet 4,
Insert tabs into slots on FRONT GABLE and glue in
place.
2. Remove and prepare four BALCONY BRACKETS from
Sheet 19 and glue two in place on front BAY WINDOW
section (as Illustrated In trim diagram) so they support
the BALCONY FLOOR from TUDOR TRIM strips 13.
The other two BALCONY BRACKETS are glued to the
HOUSE FRONT (see diagram) so they support the
balcony room overhang.
3. Remove and prepare three BALCONY RAILINGS and
three HAND RAILS from Sheet 19 Save four cut outs
from the RAILINGS for use as SHUTTERS later on
4. Apply glue to the FRONT edge of the BALCONY
FLOOR and glue FRONT BALCONY RAILING in
place so it covers the front edge of BALCONY FLOOR.
Do the same with SIDE BALCONY RAILINGS.
5. Glue all three HAND RAILS together at mitered edges
(make sure the smooth side of wood Is facing up on all).
Then apply glue to top of BALCONY RAILINGS and
position HAND RAILS in place on top.
6. Remove and prepare two TRIM strips 23 and one TRIM
strip 24 from Sheet 14. Glue the 23's to each side of the
French Door opening at BALCONY and strip 24 to the
top of opening (see TRIM DIAGRAM).
7. Remove and prepare four FRENCH DOOR FRAMES from
Sheet 19, and the corresponding two window panes from
the smaller window sheet.
8. Sandwich and glue one window pane between each two
FRENCH DOOR FRAMES. Glue or hinge FRENCH
DOORS in place.
M. FRONT DOOR
1. Locate and prepare FRONT DOOR BACKING which was
removed from Sheet 4 in section B. step 2 and FRONT
DOOR PANEL, removed from Sheet 8 in section B. step
9.
2. Make sure decorative areas are punched out from each.
Remove door window from smallest window sheet.
Sandwich and glue the window between the DOOR
PANEL and BACKING.
3. Remove and prepare the FRONT DOOR INTERIOR and
EXTERIOR TRIM from Sheet 19 Glue in place inside and
outside door opening on RECESSED FRONT.
4. Glue or hinge the FRONT DOOR in place.
5. Remove and prepare OCTAGON WINDOW INTERIOR
and EXTERIOR TRIM pieces from Sheet 19. Remove
octagon window pane from smallest window sheet.
6. Glue OCTAGON INTERIOR TRIM in place on inside of
opening near door, then glue window to outside of house,
and finish by gluing OCTAGON EXTERIOR TRIM over
window.
N. SMALL FRONT WINDOW
1. Remove and prepare SMALL WINDOW INTERIOR and
EXTERIOR TRIM from Sheet 19. Remove small double
window pane from the smallest window sheet. This
window is the one which is on the HOUSE FRONT in the
center of TUDOR ASSEMBLY.
2. Glue INTERIOR TRIM in place on inside. Apply glue to
edge outside window opening on exterior. Place window
in position and then glue EXTERIOR TRIM over window to
secure in place.
3. Prepare the four cut-outs saved from the BALCONY
RAILING. Glue two to each side of window as
SHUTTERS.
O. ATTIC WINDOW
1. Remove and prepare ATTIC WINDOW EXTERIOR and
INTERIOR trim from Sheet 19 for arched window on
RIGHT SIDE of house Remove remaining window from
smallest window sheet.
2. Glue INTERIOR TRIM, WINDOW PANE and EXTERIOR
TRIM in place as done with the SMALL FRONT WINDOW.
P. WINDOWS
1. Remove and prepare all EXTERIOR WINDOW TRIM from
Sheets 18c and d. These sheets are identical to Sheets
18a and b, and the exterior trim corresponds exactly with
the interior trim on these sheets Refer to the Schematic
Diagram for placement.
2. Remove all window panes from window sheets Glue
window panes to exterior of appropriate window openings
and cover with EXTERIOR WINDOW TRIM glued in place.
see what's new and find accessories to go with your dollhouse... visit us at shop.greenleafdollhouses.com