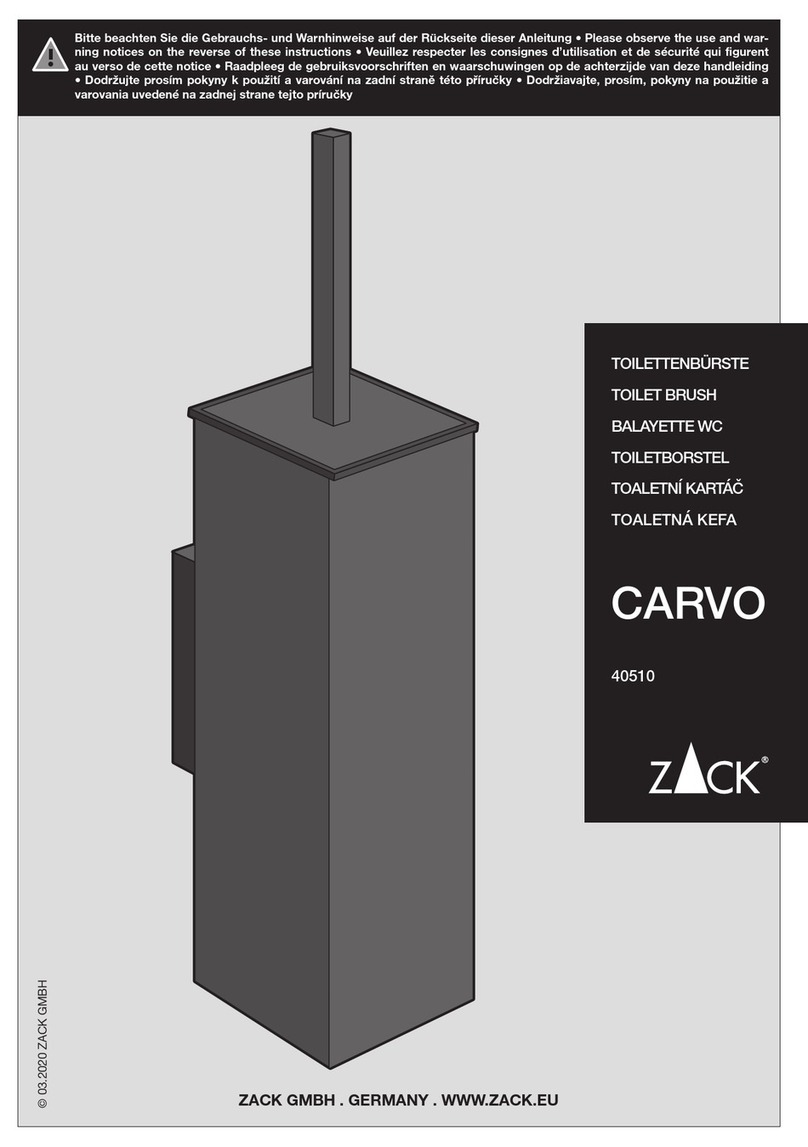
Greentouch 2014ATH-113 Assembly instructions

SINGLE ROBE HOOK
TOWEL RING
SINGLE-POST TOILET PAPER HOLDER
Model#
20200-0304
20200-037001
20200-038204
20200-0504
20200-057001
20200-058204
Model# of GreenTouch
2014ATH-113
2014ATH-122
2014ATH-123
2014ATR-113
2014ATR-122
2014ATR-123
20200-2004
20200-207001
20200-208204
2014ATP-113
2014ATP-122
2014ATP-123
INSTALLATION AND CARE GUIDE
1
Questions, problems, missing parts? Before returning to your retailer, call our customer service department
at 704-461-3893, 9 a.m. - 5 p.m., EST, Monday - Friday. You could also contact us at [email protected].
Español p. 7

2
Table of Contents
Safety Information
Please read and understand this entire manual before
attempting to assemble, operate, or install the product.
Safety Information....................................2
Planning Installation
..............................3
Tools Required
.......................................3
Hardware Included.................................3
Pre-Installation.........................................3
Package Contents ..................................4
Installation
................................................5
Care and Cleaning.....................................6
Service
Parts
.............................................6

3
Pre-Installation
PLANNING INSTALLATION
Before beginning installation of these products, ensure all parts are present. Compare parts with the Package
Contents and Hardware Included lists. If any part is missing or damaged, do not attempt to install the products.
TOOLS REQUIRED
Safety
goggles
Phillips
screwdriver
Flathead
screwdriver
HARDWARE INCLUDED
NOTE: Hardware not shown to actual size.
Part Description Quantity
AA 2
Level Tape measure
Electric drill
Pencil
1
2
BB
CC
Wood screw
Mounting bracket
Plastic anchor
DD Set screw 1
BB CC DD
AA

4
Pre-Installation (continued)
PACKAGE CONTENTS
Part Description Quantity
A1
1
1
B
C
Single robe hook
Towel ring
Single-post toilet paper holder
A
B
C

5
Installation
1 Marking the mounting location 2 Installing the mounting brackets
Drill 1/4 in. holes in the previously marked
locations.
□
3 Installing the product
Place the post over the mounting
bracket (BB) and secure it with the set
screw (DD), as shown.
□
NOTE: When mounting the products to a wood wall, fasten
the mounting brackets (BB) to the wall using the wood
screws (AA). There will be no need for drilling or plastic
anchors (CC).
□
Fasten the mounting bracket (BB) to the wall with
the wood screws (AA).
□
□Repeat this step as needed for each bath
accessory.
□
□
□
□
Remove the set screw (DD) from the base of the
product post.
Place the product in the desired mounting
location, using a level to position it accordingly,
and use a pencil to lightly mark the outline of the
post(s).
Center the mounting bracket (BB) within the
marked post location(s), and mark where the
screw holes will be drilled.
Repeat this step as needed for each bath
accessory.
□Repeat this step for the remaining
bath accessories.
AA
CC
AA
BB
BB
or tile.
DD
21mm
BB
DD
BB
6
Service Parts
Care and Cleaning
□
□
□Do not use abrasive cleaners when cleaning these bath accessories.
For replacement parts, call our customer service department at 704-461-3893, 9 a.m. - 5 p.m., EST, Monday - Friday.
Part Description Part Number
Mounting hardware
(screw, bracket, and
plastic anchor)
Set screw
1
2
RP80061
RP50078
2
1
2
1
2
1

ARO PARA TOALLA
PORTARROLLOS SENCILLO DE PAPEL HIGIÉNICO
GANCHO SENCILLO PARA BATA
Modelo núm.
GUÍA DE USO Y MANTENIMIENTO
20200-0304
20200-037001
20200-038204
20200-0504
20200-057001
20200-058204
20200-2004
20200-207001
20200-208204
Modelo número de GreenTouch
7
¿Preguntas, problemas, piezas faltantes? Antes de volver a la tienda, llame a nuestro Departamento de
Servicio al Cliente al 704-461-3893, de lunes a viernes de 9 a.m. a 5 p.m., hora estándar del Este.
2014ATH-113
2014ATH-122
2014ATH-123
2014ATR-113
2014ATR-122
2014ATR-123
2014ATP-113
2014ATP-122
2014ATP-123

8
Tabla de Contenido
Información de Seguridad
Lee y comprende este manual completo antes de
intentar ensamblar, operar o instalar el producto.
Información de Seguridad
...................... 8
.............. 9
Herramientas Necesarias
..................... 9
Herrajes Incluidos
................................. 9
Pre-instalación......................................... 9
Contenido del Paquete...........................10
Instalación
................................................11
Cuidado y Limpieza
..................................12
Piezas de Repuesto ..................................12

9
Pre-instalación
PLANIFICACIÓN DE LA INSTALACIÓN
Antes de comenzar la instalación de este producto, asegúrate de que no falta ninguna pieza. Compara las piezas con
la lista de Contenido del Paquete y Herrajes Incluidos. Si falta alguna pieza o está dañada, no intentes instalar el
producto.
HERRAMIENTAS NECESARIAS
Destornillador de
cabeza plana
HERRAJES INCLUIDOS
Pieza Descripción Cantidad
AA 2
Nivel Cinta métrica
Taladro eléctrico
Lápiz
1
2
BB
CC
Tornillo para madera
Soporte de montaje
Anclaje plástico
DD 1
Gafas de
seguridad
Destornillador
Phillips
NOTA: No se muestra el tamaño real de los herrajes.
BB CC DD
AA

10
Pre-instalación (continuación)
CONTENIDO DEL PAQUETE
Pieza Descripción Cantidad
A1
1
1
B
C
Aro para toalla
Portarrollos sencillo
Gancho sencillo para
de papel higiénico
bata
A
B
C

11
Instalación
1 Cómo marcar el lugar de montaje 2 Cómo instalar los soportes de
montaje
marcados anteriormente.
□
3 Cómo instalar el producto
Coloca el poste sobre el soporte de montaje (BB)
se muestra.
□
NOTA:
Cuando instales los productos en una pared de
tornillos para madera (AA). No habrá necesidad de taladrar
o de colocar anclajes de plástico (CC).
Empuja los anclajes de plástico (CC) hasta
insertarlos a ras en el drywall o losa.
□
Fija el soporte de montaje (BB) a la pared con los
tornillos para madera (AA).
□
□Repite este paso las veces que sea necesario para
cada accesorio de baño.
□
□
□
□
poste del producto.
Coloca el producto en el lugar de montaje
deseado usando un nivel para posicionarlo
adecuadamente y usa un lápiz para marcar
ligeramente el contorno en el poste.
Centra el soporte de montaje (BB) dentro del
lugar señalado en el poste y marca donde se
Repite este paso las veces que sea necesario
para cada accesorio de baño.
□Repite este paso para los accesarios de baño
restantes.
AA
CC
AA
BB
BB
21mm
BB
DD
DD
BB

12
Piezas de Repuesto
Cuidado y Limpieza
□
□
□
Para preservar el acabado del accesorio de baño, usa cera no abrasiva.
Al usar limpiadores no abrasivos, enjuaga de inmediato tras concluir la limpieza del accesorio de baño.
No uses limpiadores abrasivos al limpiar este accesorio de baño.
RP80061
RP50078
Pieza Descripción Número de Pieza
Herrajes de montaje
(tornillo, soporte, y
anclaje de plástico)
1
2
Para obtener piezas de repuesto, llame a nuestro Departamento de Servicio al Cliente al 704-461-3893, de lunes a
viernes de 9 a.m. a 5 p.m., hora estándar del Este. También puede ponerse en contacto con nosotros en
2
1
2
1
2
1
This manual suits for next models
17
Table of contents
Languages: