SEVERIN LB 7220 User manual

2
3
4
5
6
7
8
9
10
11
1
12
13
14

Dear Customer,
Before using the appliance, the user should
read the following instructions carefully.
Connection to the mains supply
The appliance should only be connected to
an earthed socket installed in accordance
with the regulations. This product complies
with all binding CE labelling directives.
Familiarisation
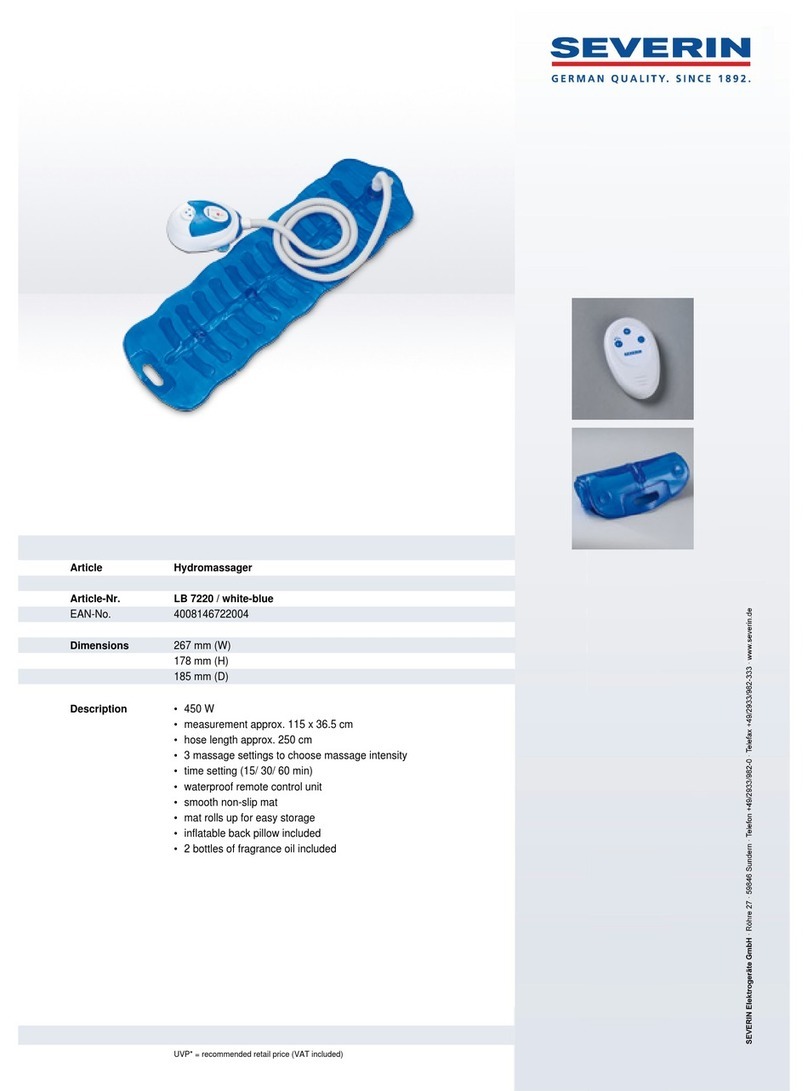
1. Air-mat hose connection point
2. Flexible hose
3. Soft air-mat
4. On/off button
5. Timer button
6. Remote control
7. Bubble intensity adjustment button
8. Handle
9. Timer indicator lights
10. Main indicator light
11. Power cord
12. Bubble intensity indicator lights
13. Housing
14. Main unit hose connection point
Important safety instructions
●Choose a wall socket well outside the
safety limits shown in diagram I.
●If the appliance is used in different
locations rather than in a fixed
installation, the following should be
noted:
-Do not place the main unit above the
bath during use.
-In compliance with VDE safety
directive 0100, the appliance - if
installed in a bath or shower room -
must be mounted outside the safety
zones as shown in diagram I. A lateral
distance of 60 cm from the bath-tub
must be maintained at all times. (We
recommend a minimum distance of 1
meter.)
-The appliance must be placed in such a
way that it cannot accidentally be
pushed or fall into the bath.
●In the case of wall mounting, please
observe the following:
-In compliance with VDE safety
directive 0100, the appliance must be
mounted outside the safety zones as
shown in diagram I.
-Always ensure a minimum distance of
30 cm from the floor.
●The appliance must be operated using an
earth-leakage circuit-breaker (RCD)
with a rated tripping current not
exceeding 30mA (IF < 30mA).
●Before the appliance is used, the main
body including the power cord as well as
any attachment fitted should be checked
thoroughly for any defects. Should the
appliance, for instance, have been
dropped onto a hard surface, it must no
longer be used: even invisible damage
may have adverse effects on the
operational safety of the appliance.
●The air-mat is designed for use in normal
bath-tubs only. Do not use the mat in
inflatable tubs or on beds or similar
objects.
●To ensure optimum results as well as
operational safety, the air-mat vents
should be regularly checked and cleaned.
●Do not, under any circumstances, use
foaming bath additives.
●In order to prevent damage to the
housing, do not position the appliance on
or near hot surfaces or open flames such
as hot-plates or gas flames.
●Always use the handle to carry the
appliance.
●Always ensure that the appliance is
positioned clear of any obstructions. Do
not cover the appliance as it gives off
heat during operation.
●Do not touch the appliance, its power
cord or plug with wet hands.
●Always switch off and remove the plug
from the wall socket
-when fitting, changing or removing
5
Bubble bath air-mat

attachments,
-after use,
-in case of any malfunction, and
-during cleaning.
●When removing the plug from the wall
socket, never pull on the power cord;
always grip the plug itself.
●Children are not aware of the dangers
that may occur when operating electrical
appliances. Therefore keep such
appliances away from children.
●No responsibility will be accepted if
damage results from improper use, or if
these instructions are not complied with.
●This appliance is intended for domestic
use only and is not designed for medical
or commercial applications.
●In order to comply with safety
regulations and to avoid hazards, repairs
of electrical appliances must be carried
out by qualified personnel, including the
replacement of the power cord. If repairs
are needed, please send the appliance to
one of our customer service departments.
The addresses can be found in the
appendix to this manual.
Before using for the first time
Remove the appliance from its packaging
and ensure that any packaging materials are
completely cleared away.
Wall mounting
The appliance can be wall-mounted or
placed on the floor. For wall mounting,
proceed as follows:
-
We recommend mounting the appliance
at a minimum distance of 1 m from the
bath itself. To prevent the possibility of
anyone using the bath coming into
contact with the main unit, it should be
mounted at a minimum height of 1.8 m.
Ensure at all times that the appliance is
placed in such a way that it cannot
accidentally fall into the bath, sink or
toilet bowl.
-
The appliance must be connected to a
wall socket located well outside the safety
limits shown in diagram I.
-
The template provided will help to mark
the correct distance between the holes to
be drilled on the wall.
-
Drill two 7 mm holes to a depth of 28
mm. Before drilling, ensure that the wall
section chosen is free of any internal
pipes, electrical cables etc.
-
Push the plugs provided fully into the
drilled holes. Insert the screws leaving
approx. 7 mm protruding.
-
Position the keyhole openings on the
appliance (hose connection facing down)
over the screw heads and push it slightly
down. If necessary, the screws may have
to be adjusted for positive mounting.
Remote control
The water-proof remote control has 3
function buttons. To ensure best results, it
should be pointed towards the appliance.
The On/off button switches the
appliance on and off.
This button serves to adjust the bubble
intensity.
The timer button is used for activating
the timer and adjusting its settings.
Display / Indicator lights
The display features three areas with
indicator lights.
The indicator lights on the left show the
currently selected bubble intensity.
The light in the middle section is the
main indicator light.
The indicator lights on the right show
the current timer setting.
Timer
The timer allows you to set the time after
which the appliance automatically switches
off. 15, 30 or 60 minutes can be selected.
6

Operation
-
Place the air-mat in the bath and press
the suction discs against the bottom of
the tub.
-
Connect the end of the flexible hose
marked with an arrow symbol to the
connection point on the main unit and
turn clockwise to lock. Ensure that the
arrow and lock symbols are correctly
aligned.
-
Fit the other end of the hose into the
connection point on the air-mat.
-
Insert the plug into a suitable wall socket
well outside the safety limits shown in
diagram I.
-
Fill the bath-tub with water. Do not,
under any circumstances, use foaming
bath additives.
-
Lie down in the bath.
-
Use the remote control to turn the main
unit on and select the desired bubble
intensity. You may also use the timer
function to pre-programme the unit to
switch off automatically after a certain
period of time.
The display on the main unit shows the
current settings.
-
Switch off the appliance after use and
remove the plug from the wall socket.
General cleaning and care
●Before cleaning the appliance, ensure it is
disconnected from the power supply and
has cooled down completely.
●To avoid the risk of electric shock, do not
clean the appliance with water and do
not immerse it in water.
-
The housing may be cleaned with a dry
or slightly damp lint-free cloth.
-
Disconnect the flexible hose from both
the main unit and the mat. Rinse the mat
with clean water before taking it out of
the bath-tub. The mat and hose should
be hung up to dry afterwards.
Battery (remote control)
-
A noticeable power decrease in the
remote control indicates that the battery
needs replacing.
To insert or replace the battery, use a
coin or similar object to open the battery
compartment underneath the unit. When
inserting the battery, always observe the
correct polarity. The symbol (+) must
face upwards.
-
Use one 3 V lithium battery type CR
2032.
-
During extended periods of non-use,
always remove the battery from its
compartment.
-
Remember to protect the environment.
Never dispose of old batteries in
domestic garbage. Old batteries must be
disposed of through the proper local
special garbage collection points.
DisposalDo not dispose of old or defective
appliances in domestic garbage; this
should only be done through public
collection points.
Guarantee
This product is guaranteed against defects in
materials and workmanship for a period of
two years from the date of purchase. Under
this guarantee the manufacturer undertakes
to repair or replace any parts found to be
defective, providing the product is returned
to one of our authorised service centres. This
guarantee is only valid if the appliance has
been used in accordance with the
instructions, and provided that it has not
been modified, repaired or interfered with
by any unauthorised person, or damaged
through misuse.
This guarantee naturally does not cover
wear and tear, nor breakables such as glass
and ceramic items, bulbs etc. If the product
fails to operate and needs to be returned,
pack it carefully, enclosing your name and
address and the reason for return. If within
the guarantee period, please also provide the
guarantee card and proof of purchase.
7
Other SEVERIN Bathroom Aid manuals
Popular Bathroom Aid manuals by other brands

WENKO
WENKO 16827100 Assembly instructions

Summer
Summer 11014 instruction manual

NRS Healthcare
NRS Healthcare Seahorse Operating and assembly instruction

Direct Healthcare Group
Direct Healthcare Group Lidino LI2641.000 Series manual

Maximex
Maximex 81681500-m Instructions for use

Drive Medical
Drive Medical RTLKT12224W manual