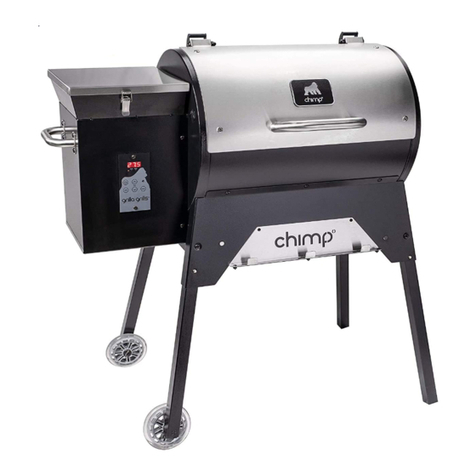
Grilla Grills Alpha Connect User manual

save this manual for future use
safety precautions
safety notice: for outdoor use only!
warning: electric shock can kill or result in serious injury. precautions should always be
followed to reduce the risk of fire, electric shock, and injury.
alpha connect
operation manual

4
our story
True story: Two men on a fishing trip, chowin’
down at camp on a plate of ribs. One looks over
at the grill (he’s the industrial designer) and says,
“Why do all those grills look the same, big ole
barrel but in half?” The other, a metalsmith by
trade, answers, “Because we haven’t built one.”
That’s when the lightbulb went off. Why not
design and build a smoker-grill that stands apart,
literally, from the crowd? Hundreds of design
hours later, the Grilla was born.
Fast forward a few successful years: same two
guys, same idea. Only this time, bring a rock-
solid, proven smoker-grill to the market using the
same streamlined business model that delivers
savings to the consumer. Design the grill to
efficiently feed you and your friends or the entire
neighborhood. Make it easy to use and good
looking. Hundreds of design hours later, the
Chimp was born.
Just like a silverback is the proven and respected
leader in a family of mountain gorillas, so too is
the Chimp the patriarch of the Grilla family of
smoker-grills. No confusing Chimp with any of
these flimsy me-too grills. Been there, dont that.
All Grilla products, including pellets, sauces and
accessories, are available direct to the hungry
consumer. No fat in this business model, just
pure value meal after delicious meal. Not bad for
two fishing buddies. Enjoy!
alpha connect |operation manual

5
table of contents
Introduction
ourstory..........................................
welcome .........................................
operation
download..........................................
onboarding.......................................
setup&seasoning...................................
Theboard.........................................
basicoperation..................................
adjustingyourgrill...............................
pausefeature...................................
temperaturealarm.................................
versioninformation..................................
grillandaccountdeletion.............................
factory reset and additional support. . . . . . . . . . . . . . . . . . . .
4
6-7
8
8-11
12
13
14-15
16-22
23-24
25
26
27
28
please note: failure to follow this operational manual in its entirety will void all warranties.
alpha connect |operation manual
6
welcome
Congrats on either your WiFi compatible grill
purchase OR your Alpha Connect controller
upgrade! Follow the steps below to setup your
account, connect your grill, adjust settings,
troubleshoot and more. As always, thanks for
your purchase! Now go smoke something...
preferably food related...on our grill.
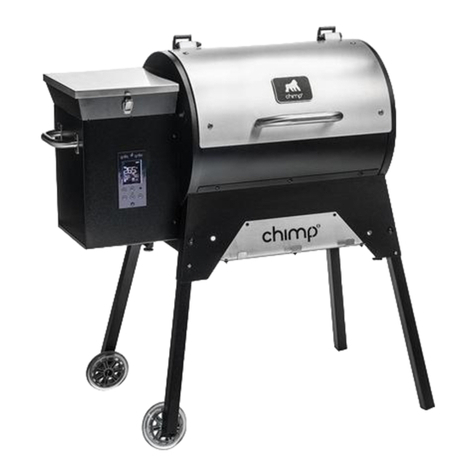
If you have purchased this controller as
an upgrade for your current grill, you will
need to first install it on your grill. NOTE:
You will have to remove and replace the current
board. There is a possibility you may have to
drill a larger hole to allow your RTD to fit through
the housing shelf on the side of the barrel for a
Silverbac.
alpha connect |operation manual
7
welcome
alpha connect |operation manual

8
1. download
First download the app by scanning the QR code below, or search “Grilla Grills” in the iTunes App Store
or on Google Play.
alpha connect |operation manual
2. onboarding
2.1 | Account Creation
To create your Grilla Grills account, open the Grilla Grills application and fill out the account information.
Once finished, you will need to confirm your email account. Just open the email we sent to the address
you’ve provided, click the blue “Verify Email” link, and you are all set!
*Be sure to remember your password as the next time you use the app you will have to type in your credentials, after that the
app will remember you.
1. download / 2. onboarding

9
alpha connect |operation manual
2. onboarding
your email

10 alpha connect |operation manual
cont.
2.2 | choose
Now let’s select your grill. The instructions may vary depending on which one you have. The WiFi
enabled versions of each pellet grill will need a WiFi connection, and a bluetooth enabled smartphone or
tablet.
The Kong, Primate and non-WiFi enabled pellet grill options do not communicate with the application.
2. onboarding

11
alpha connect |operation manual
2.3 | connect
Important:
Your will need to connect the grill to your WiFi (be sure to use the same WiFi connect as your device). If
your router is a dual band router and your device is connected to the 5Ghz signal it will not work. Switch
to the 2.4Ghz signal to connect.
After following the steps in FIG 2, you should see “OK” displayed on your grill. Your grill is now paired to
your phone.
Finally give your grill a name and set its location to avoid confustion with your other Grilla Grills.
fig 2
Press power for 3 seconds. Press power for 3 seconds.
2. onboarding

12 alpha connect |operation manual
*This is mainly for first time users. Customers that have upgraded from our PRO/ALPHA to WiFi controller can skip this
section because at this point you are probably a “seasoned” veteran.
3.1 | Before you grill
When you set up your grill for the first time some steps need to be taken to clean and prime it for
cooking. We recommend cleaning all removable internal components with soap and water to start.
Next, we’ll prime the grill.
To prime your grill, add pellets to your hopper, turn your grill on and wait until you see the pellets
dropping into the burn pot. If you hear them dropping in, turn off the grill and RETURN YOUR
CLEANED INTERNAL COMPONENTS TO THEIR SET POSITION. Turn your grill back on, set the grill to
450°F, and wait at least 45 minutes for the grill to finish it’s initial burn-in. Reference FIG 3.
Once complete, you’re ready to cook!
3. set up & seasoning
fig 3
3. set up & seasoning

13
alpha connect |operation manual
4. The board
Now that setup is complete, let’s learn the new control board. Below, in FIG 4, is a diagram of what
each function and button does on the Alpha Connect WiFi Controller.
Read the additional information on how to set and change these functions on the next few pages.
4. the board
fig 4
bluetooth & wifi signal
pause indicator
This will light up when the pause
button is pressed.
main readout
This will display:
1. Actual Grill Temp
2. Time & Adjustments
3. Any Error
grill set temperature
cooking mode
Toggle between PID & PRO modes.
Grill Adjustments
AU - Auger Trim
RT - RTD
MP - Meat Probe
Select button
Use this to cycle through grill settings. Up & Down Arrows
Power button
grill state
Igniting - Loading & lighting the pellets
Stable - Regulating the fire
Runnning - Normal operations
error indicator
This will turn on and an error will be
displayed below.
meat probe temp
cooking timer
Displays a countdown timer to your
cook.
Meat Probe input
Plug in connection for meat
thermometers.
main readout unit
Top - Time in minutes
Middle - Percentage
Bottom - Temp in °C & °F
Pause Button
This feature puts the grill into a
paused state for a set time.

14
5.1 | turn on your grill
Press the top leftmost button highlighted in FIG 5. The display should light up and show default
temperature of 250°F on PID mode (or any previously saved settings) and should be in the ignition state.
Reference FIG 5.
*To power off, hold for 3 seconds.
*Be sure the grill is in a safe location and free of anything flammable near or on the grill.
alpha connect |operation manual
5.2 | set your desired temperature
By default your grill is set to 250°F (120°C) on startup. To change this simply hold/press the up or down
arrows until you reach the temperature you desire. Reference FIG 6.
5. basic operation
5.3 | wait
Ignition - Your grill will start to feed the burn pot pellets and the igniter will heat the pellets up to
ignition point. This state will last about 4-8 minutes. At this point you will see heavy smoke that will
diminish once the fire starts.
*Recommended to leave grill lid open during this state, closing when cleared.
Stable - During this time, your grill is loading more pellets and running off a set time interval to establish
a stable fire. This time is crucial so aviod unnecessarily opening the grill. This may last up to 14 minutes.
Running - Once the grill reaches this state, it’s stable and running. The controller is getting temperature
5. basic operation

15
alpha connect |operation manual
fig 5 on the grill from the app
fig 6 on the grill from the app
Adjust temp with the circular dial.
or
Use the directional arrows.
5. basic operation

16 alpha connect |operation manual
6.2 | cook modes
PID Mode is a “smart” temperature control mode. It regulates temperature based on feedback the
controller receives from your grill. It will constantly monitor and improve the efficiency and temperature
stability as you cook. PID Mode does sacrifice a bit of the smoke flavor in order to achieve more
accurate temperature control.
PRO Mode works based on time intervals that have been tested for years. This mode allows for the best
temperature swing for producing smoke. It may be slightly less accurate than PID mode, but the flavor
will more than make up for that. Reference FIG 8.
6. adjusting your grill
6.1 | timer feature
Your grill has many features and settings that can be tweaked to get the best experience for you. On the
control board, you can access most of these by holding down the select button. Via the app, they are
spread around in convenient places. Follow along with the next few pages to learn a bit more.
Control Board - Cycle through settings by holding select for 3 seconds. Press select repeatedly to
navigate through each setting. Use the directional arrows to set and adjust. Once you are done, press &
hold select to exit.
Mobile App - Many settings are adjusted through the gear at the top right of your screen. You may
need to scroll down to view all settings. Be sure to save your changes once complete. Additional
settings like the time and probe are located along the gray quick access banner. Reference FIG 7.
6. adjusting your grill

17
alpha connect |operation manual
fig 7 on the grill from the app
fig 8 on the grill from the app
Hold Select for 3 seconds. Toggle between modes. Hold Select to exit.
6. adjusting your grill

18 alpha connect |operation manual
6.3 | timer features
A timer feature has been added so you can keep track of your cooks. You can either set a cooking timer
with the grill or through the Grilla Grills app. Reference FIG 9.
cont.
from the app
on the grill
Hold Select for 3
seconds, then keep
pressing it until you
see the timer display
blinking.
fig 9
There are two ways to set a
timer on your app.
One is the main dashboard
you see on the left.
The other is from the top
menu bar after clicking on the
gear.
Use the direction
arrows to set your
hours.
Press & hold Select
to exit and save your
timer.
Pressing Select
again brings you to
the minutes column.
Repeat the last step
to adjust minutes.
6. adjusting your grill

19
alpha connect |operation manual
6. adjusting your grill
6.4 | trim settings
AU (Auger): Based on both external & internal factors, your grill may not be running as hot or as cool
as you would like.
For instance, in places like Florida on a hot day, to get the lower temps like 180°F you may need to
adjust you Auger to a lower percentage. Opposite if you live in Canada during the middle of a blizzard
and for whatever reason you are cooking, you may need to crank your minimum feed rate up to
compensate for frigid temps.
Out of the box our grills have a set feed rate:
• Grilla: 15% default, can be varied from 8-25%
• Silverbac: 12% default, can be varied from 4-20%
• Chimp: 9% default, can be varied from 4-20%
Change your set feed rate by referencing FIG 10.
from the app
on the grill Hold Select for 3 seconds,
then keep pressing it until
you see Settings AU display
blinking.
fig 10
To change the Auger Offset,
navigate to the settings page
via the gear on the top right of
the main dashboard.
Scroll down until you see
Auger Min Feed. Be sure
to save your changes
afterwards.
Set to desired offset using
directional arrows. You can
adjust by 1% increments.
Press & hold Select to exit and
save setting.

20 alpha connect |operation manual
6. adjusting your grill
6.4 | trim settings
RT (RTD): To adjust for any RTD variances or discrepancies via 3rd party temperature units, an
adjustment can be made. Our controller has a +/- 15% offset to dial your actual grill temperature in very
precisely.
Out of the box our grills have a set RTD Offset of 0%. Adjustments can be made -15% to 15% in both
directions.
Change your set RTD Offset by referencing FIG 11.
from the app
cont.
fig 11
To change the RTD
Offset, navigate to the
settings page via the
gear on the top right of
the main dashboard.
Scroll down until you see
RTD Offset and adjust
there. Be sure to save
your changes afterwards.
on the grill
Hold Select for 3 seconds, then
keep pressing it until you see
Settings RT display blinking.
Set to desired offset using
directional arrows. You can
adjust by 1% increments.
Press & hold Select to exit and
save setting.
*Reference Temp Chart below.
°fsilverbac grilla Chimp
default: - 12 - - 15 - - 12 -
- 0°F + 20 + 22 + 20
0 - 45°f16 - 20 19 - 21 18 - 20
46 - 75°f12 - 16 15 - 18 14 - 17
75°f8 - 12 10 - 14 11 - 13
+ 100°f4 - 8 6 - 9 7 - 10
temp chart

21
Alpha connect |operation manual
6. adjusting your grill
6.4 | trim settings
MP (Meat Probe): Just like RTD’s, meat probes can act the same way. To compensate for any
discrepancies based on 3rd party temperature units, an adjustment can be made. Our controller has a
+/- 15% offset to dail your meat probe temperatures very precisely.
Out of the box our grills have a set Probe Offset of 0%. Adjustments can be made -15% to 15% in both
directions.
Change your set Probe Offset by referencing FIG 12.
on the grill
Hold Select for 3
seconds, then keep
pressing it until you
see Settings MP
display blinking.
fig 12
from the app
To change the Probe Offset,
navigate to the settings page via
the gear on the top right of the
main dashboard.
Scroll down until you see
Probe Offset and adjust there.
Be sure to save your changes
afterwards.
Set to desired offset
using directional
arrows. You can
adjust by 1%
increments.
Press & hold Select to
exit and save setting.

22
6. adjusting your grill
6.5 | temperature units
By default the temperature is set to °Fahrenheit. You can switch to °Celsius by following these steps.
Reference FIG 13.
from the app
on the grill
Hold Select for 3
seconds, then keep
pressing it until you
see temperature unit
display blinking.
cont.
fig 13
To change the default unit,
navigate to the settings page
via the gear on the top right of
the main dashboard.
Scroll down until you see the
°F and °C, toggle and adjust
there. Be sure to save your
changes afterwards.
Set to °F or °C using
the directional arrows. Press & hold Select to
exit and save setting.
alpha connect |operation manual
Table of contents
Other Grilla Grills Grill manuals